Builder Introduction
The following sections describe the Builder and its features.
What is the Builder?
The Builder is a visual no-code platform that empowers you to build processes or make changes and iterations to your processes without relying on developers. By using the Builder, you will have all the tools in one place for building custom processes without writing a single line of code.
The process created with the Builder will allow your end-users to easily fill out, sign, and send important information from any device such as: desktop, MAC, or Mobile Phones, and send it back to you.
Builder Main Capabilities
The main capabilities of the builder are:
- Create, send, and monitor processes from a single platform - the builder platform provides all the tools you will need to transform any manual form into a process and create personalized experiences for your customers.
- Customization and white-label - each process is customized according to the templates EasySend designs for you, using the colors, fonts, and logo of your brand.
- Flexibility - the Builder enables you to build processes with custom roles, permissions, validations, and conditions to fit any scenario and workflow, no matter how complex it may be.
- Multiple Persona Workflows and Auto Reminders - you can create complex workflows with multiple personas for different steps of a process. For example, a process can start with an Agent filling in the information and, only once he is done with his step, the workflow continue to the customer and then to her spouse or guardian. Automatic reminders can be set for each step of the process.
- Customer guidance throughout the journey - to assist customers better, processes contain automatic notifications and validations that guide your customers to fill out fields correctly. Another assistance option available in the Builder is Co-browsing, a real-time customer assistance tool that allows your agents to support customers remotely to complete the journey.
- Analytics and Optimization - optimize every step of your process with analytics, get an overview of how all your processes are performing, and filter the view by device, browser, source, and other filters. Analyze how many links were sent, opened, and completed to optimize and improve the performance of your processes.
- Integration - automate your workflow by integrating the process with any third-party app or CRM such as Salesforce or Twilio.
Builder Navigation Bar
(See Figure 1)
After clicking your customer name, The Process Manager screen appears automatically (see the Process Manager section). The Builder navigation bar appears (1) on the left side of the screen.
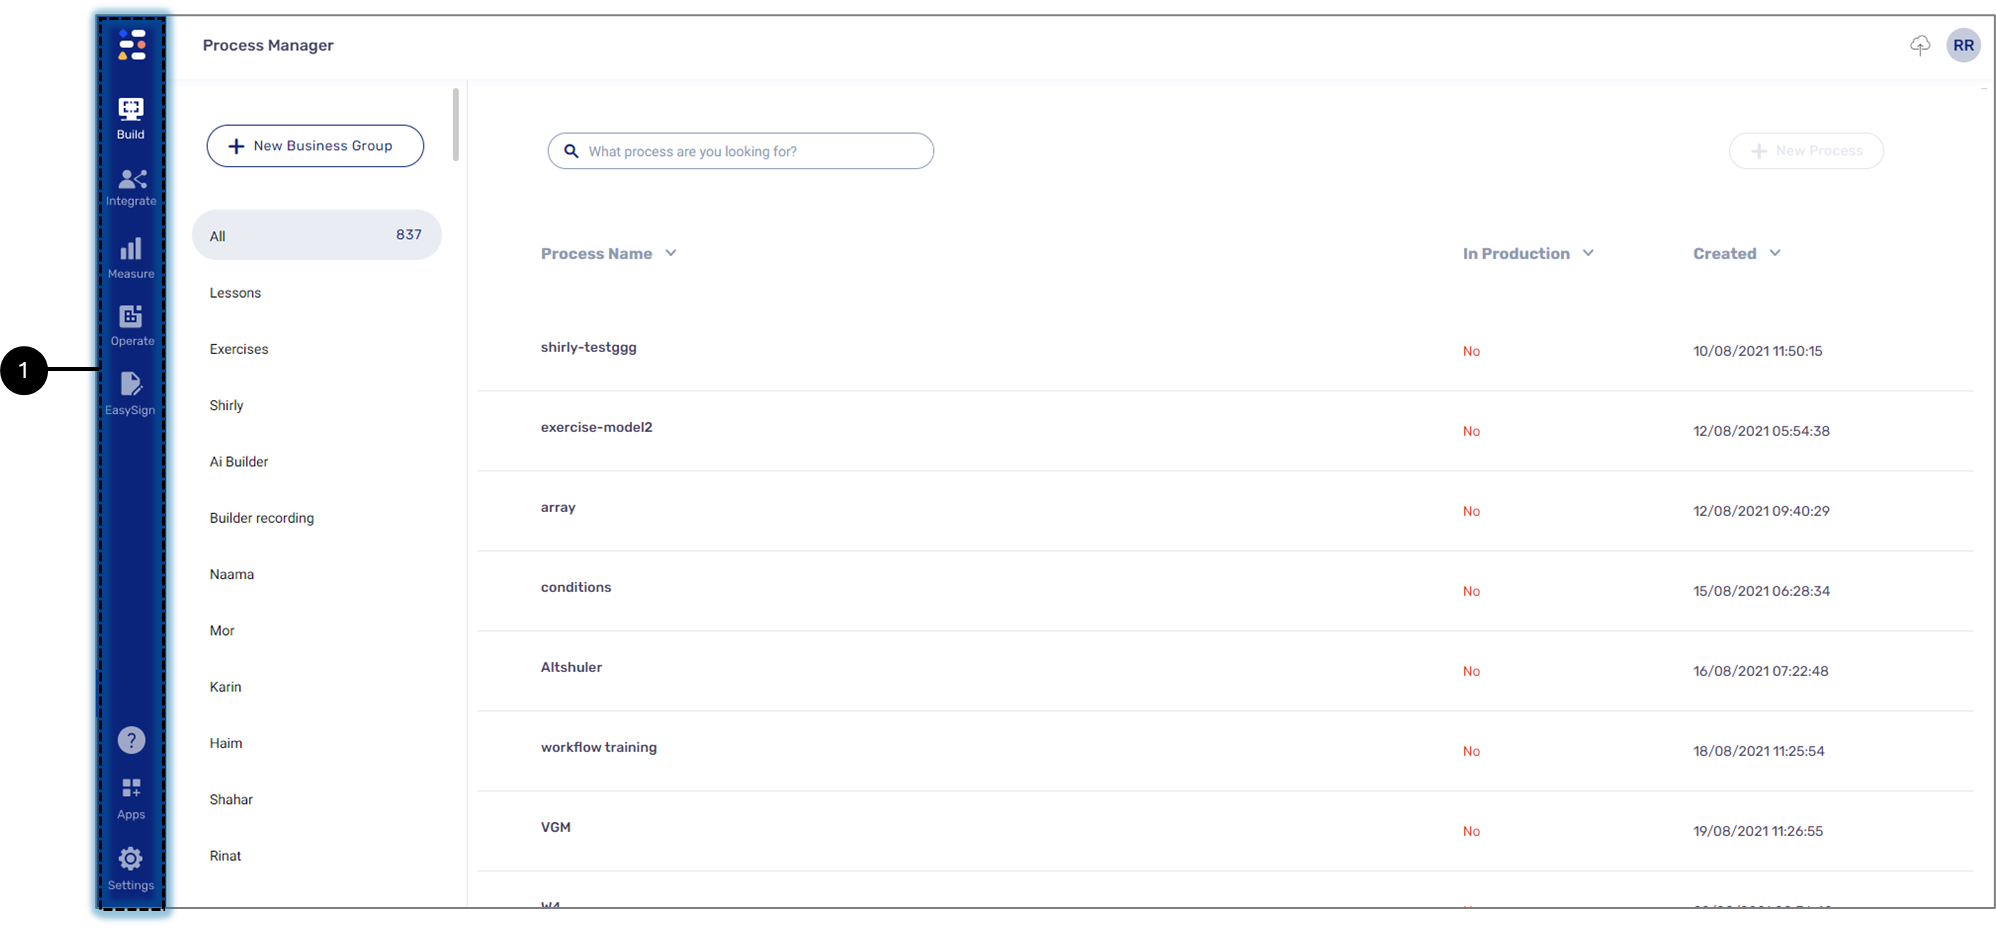
Figure 1: Builder Navigation Bar on the Process Manager Screen
Builder Navigation Bar Overview
Figure 2 and Table 1 describe the structure of the Builder navigation bar.

Figure 2: Builder Navigation Bar
Table 1: Builder Navigation Bar
Number | Icon | Name | Description |
1 |
| Build | Displays options for building a digital process NOTE For additional information, see the Builder Navigation Bar - Build Tab section |
2 |
| Integrate | Displays options for performing integrations and for using transaction logs NOTE For additional information, see the Builder Navigation Bar - Integrate Tab section |
3 |
| Measure | Displays options for analyzing the performance of your digital processes with built-in dashboards, custom dashboards, and reports NOTE For additional information, see the Builder Navigation Bar - Measure Tab section |
4 |
| Operate | Displays options for sending digital processes links to multiple end-users, for tracking the progress of your digital processes, and for viewing detailed reports NOTE For additional information, see the Builder Navigation Bar - Operate Tab section |
| 5 |  | EasySign | Displays the EasySign portal NOTE
|
| 6 |  | Resource Center | The Resource Center contains the following options:
|
7 |  | Apps | Displays EasySend's Marketplace |
8 |
| Settings |
NOTE
|


Builder Navigation Bar - Build Tab
Figure 3 and Table 2 describe the options under the Build tab.

Figure 3: Build Tab Options
Table 2: Build Tab Options
Number | Name | Description |
1 | Process Manager | Enables to create or edit business groups and processes NOTE For additional information, see the Process Manager section |
2 | Themes | Enables to create custom design templates to match the look and feel of your brand, for example: colors, fonts, and logo NOTE For additional information, see the Themes Overview article |
3 | Journey Sender Creation | Enables agents to send any process to a customer with pre-fill data NOTE For additional information, see the Journey Sender article |
4 | Validations | Enables to create and view validations NOTE For additional information, see the Validations article |
5 | Output Manager | Enables to create email header and footer templates NOTE For additional information, see the Workflow Manager Overview article |
6 | One Time Password | Enables to create a one time password authentication NOTE For additional information, see the One-Time Password article |
Builder Navigation Bar - Integrate Tab
Figure 4 and Table 3 describe the options under the Integrate tab.

Figure 4: Integrate Bar Options
Table 3: Integrate Bar Options
Number | Name | Description |
1 | Services | Enables to integrate your digital processes with different third-party apps and REST API services NOTE For additional information about integrations, see the Integrations articles |
2 | Transaction logs | Enables to view, manage, and troubleshoot transactions NOTE For additional information about the Transaction log, see the Transaction logs article |
3 | Webhooks | Enables to initiate a simple or a custom service Webhooks NOTE For additional information about Webhooks, see the Webhooks article |
| 4 | Marketplace | Displays EasySend's Marketplace |
Builder Navigation Bar - Measure Tab
Figure 5 and Table 4 describe the options under the Integrate tab.

Figure 5: Measure Tab Options
Table 4: Measure Tab Options
Number | Name | Description |
1 | EasySend Analytics |
NOTE For additional information, see the EasySend Analytics articles |
2 | Overview Reports | Enables to create and search analytics reports NOTE For additional information, see the Analytics and Reports article |
Builder Navigation Bar - Operate Tab
Figure 6 and Table 5 describe the options under the Integrate tab.
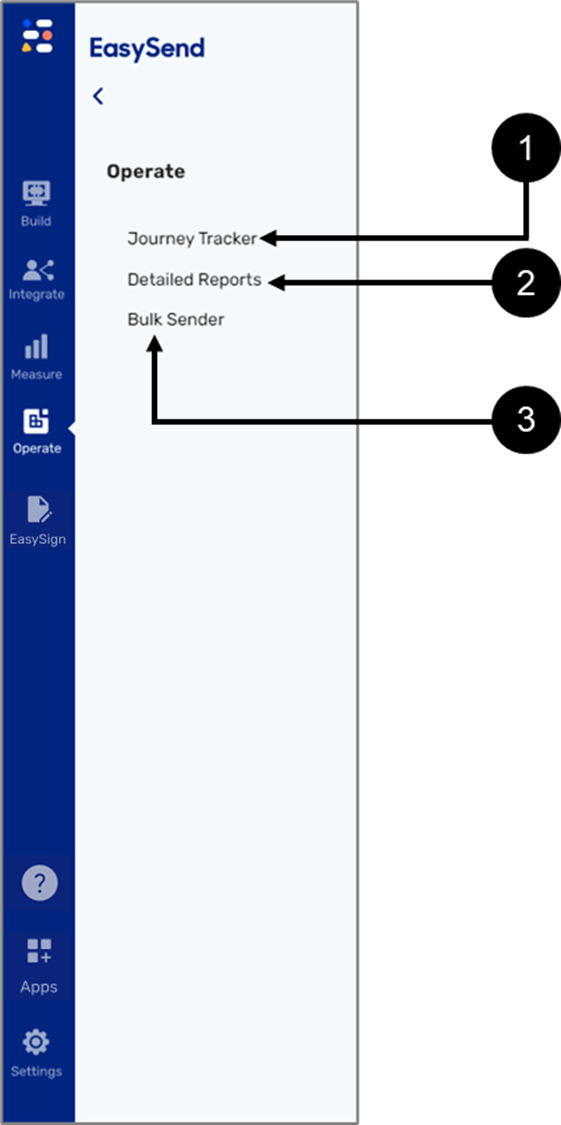
Figure 6: Operate Tab Options
Table 5: Operate Tab Options
Number | Name | Description |
1 | Journey Tracker | Enables to track the progress of a process such as:
|
2 | Detailed Reports | Enables to create and view standard and customized periodic tracking reports for business results and operations analysis |
| 3 | Bulk Sender | Enables to send processes links to multiple customers through email or SMS |
Process Manager
The following sections describe the structure of the Process Manager screen and how to create new business groups and processes.
Process Manager Main Screen Structure
Figure 7 and Table 6 describe the structure of the main screen of the Process Manager.
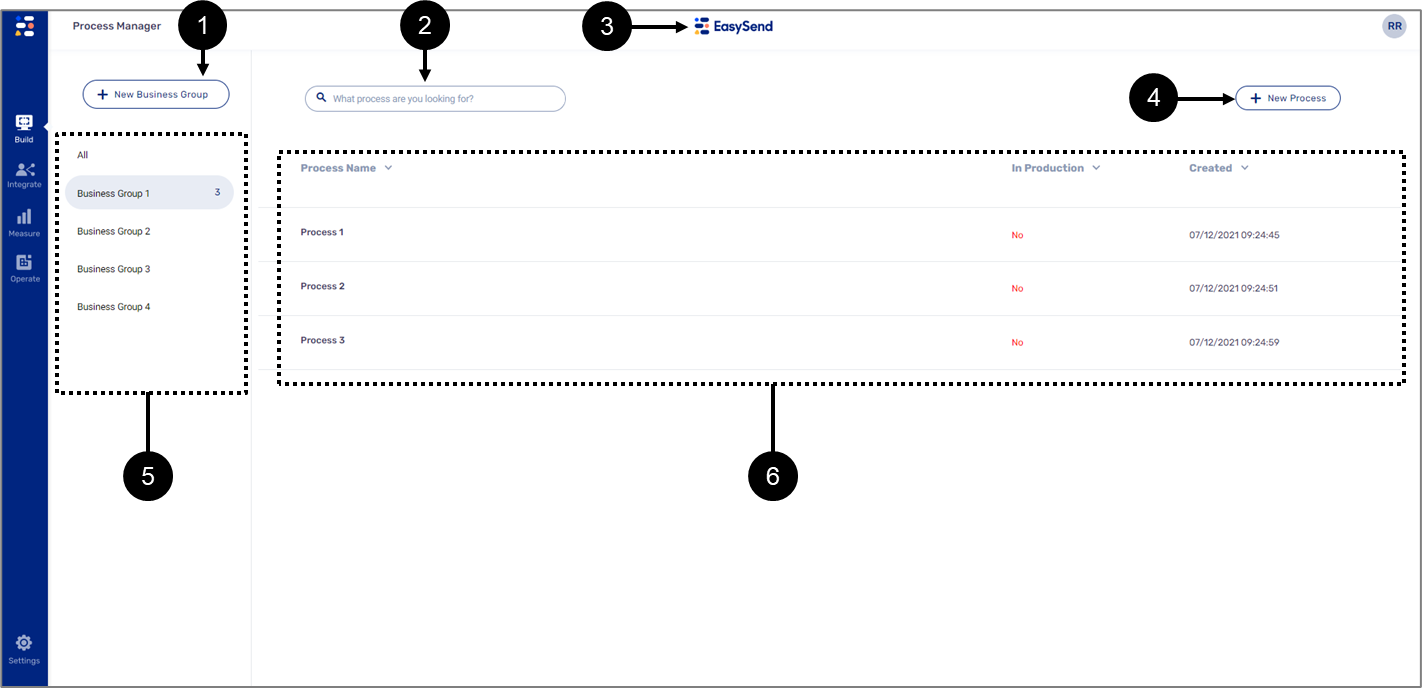
Figure 7: Process Manager Main Screen
Table 6: Process Manager Main Screen
Number | Name | Description |
1 | + New Business Group | Enables to add a new business group NOTE
|
| 2 | Search Bar | Enables to search for processes |
3 | Logo | Displays the logo of the customer |
| 4 | + New Process | Enables to add a new process NOTE To add a new process, see the Add a New process section |
| 5 | List of Business Groups | Displays a list of available business groups and how many processes each business group contains |
| 6 | List of processes | Displays a list of processes with the following information:
|
Process Additional Options
(See Figure 8)
Hovering above a process displays a delete icon (1) and an additional actions icon (2) that enables to perform the following (3):
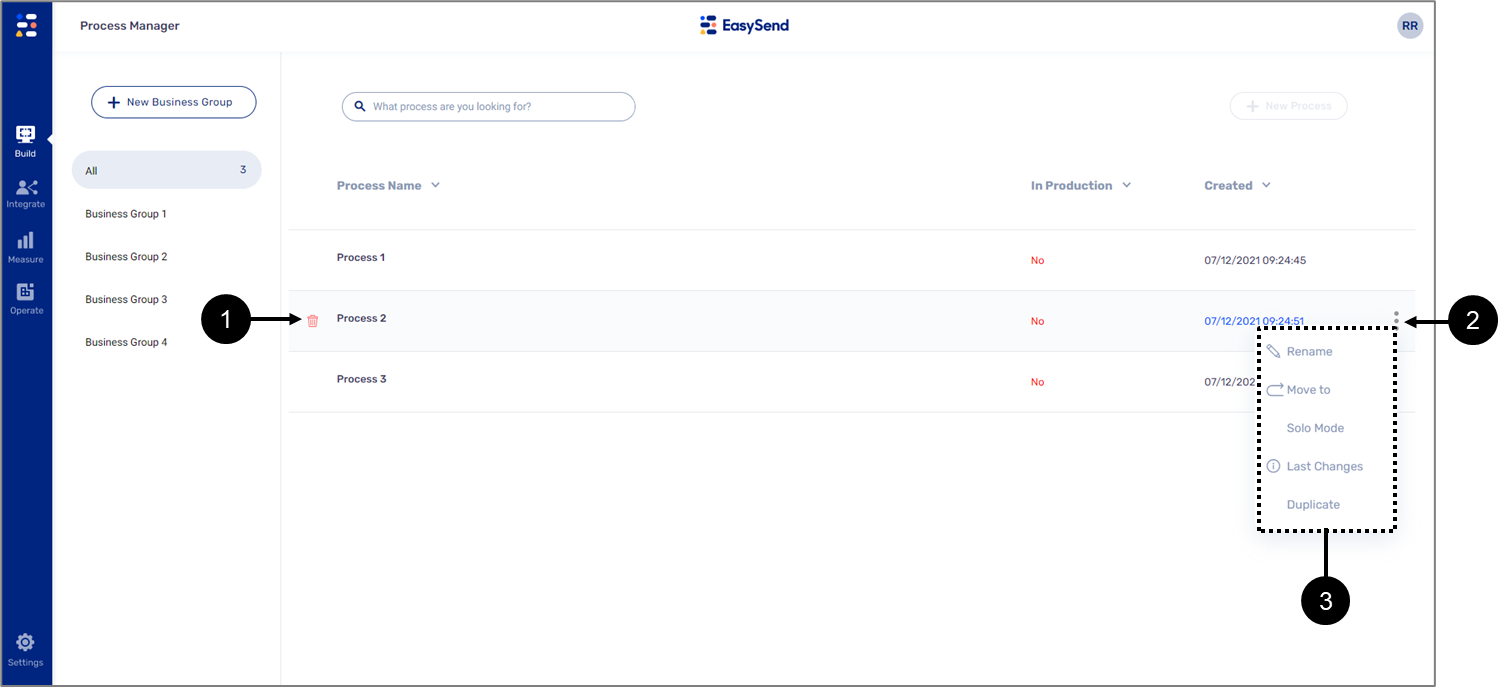
Figure 8: Process Additional Options
- Rename the process
- Move it to a different business group
- Work on the process in Solo Mode - without multiple editors
- Display information about process items that were last modified such as: Forms, Webflows, and Model
- Duplicate the process
Add a New Business Group
(See Figure 9 to Figure 11)
To add a new business group, perform the following steps:
- On the Process Manager screen (1), click the +New Business Group button (2).

Figure 9: + New Business Group Button
Result:
The Business Group window appears:
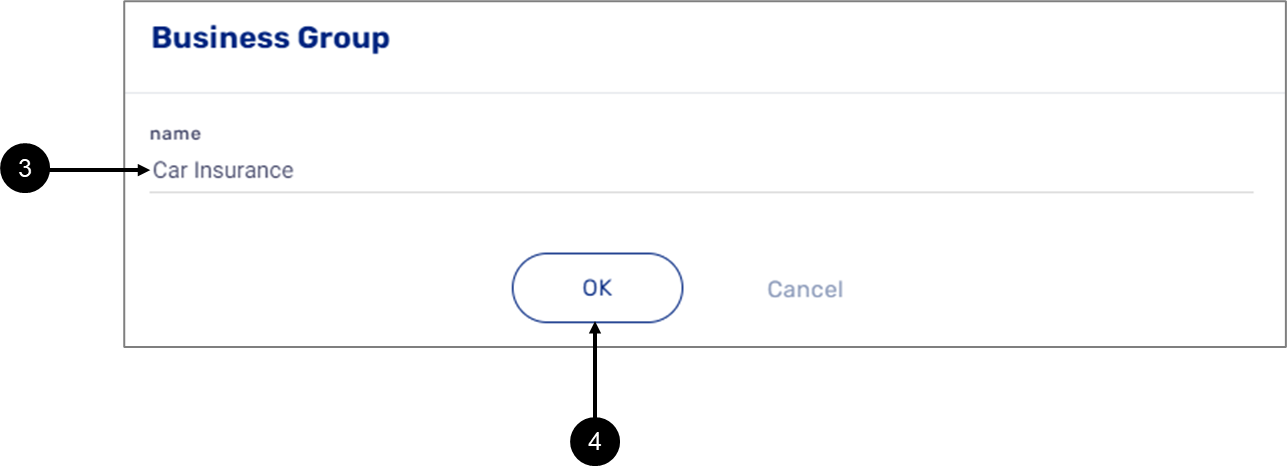
Figure 10: Business Group Window
- Enter the name (3) of the new business group.
- Click the OK button (4).
Result:
The new business group is added (5):
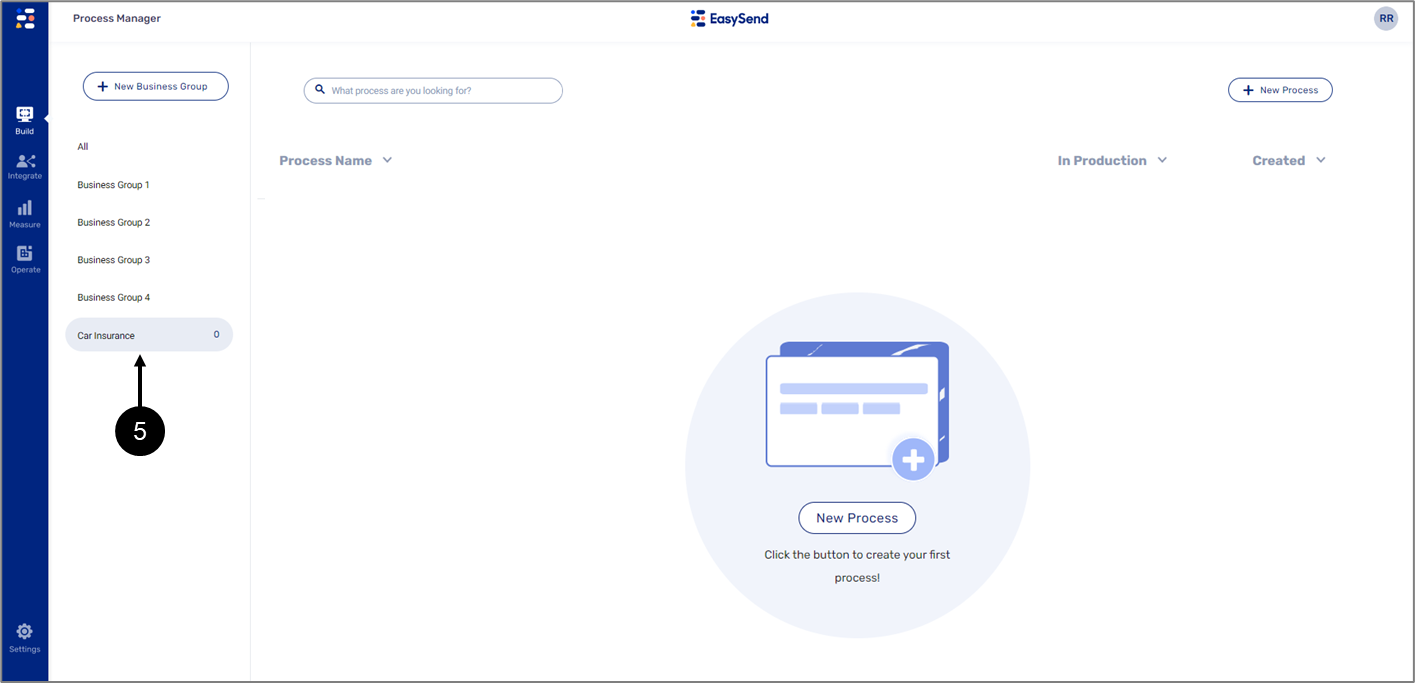
Figure 11: New Business Group
Deleting and Renaming a Business Group
(See Figure 12)
To rename or delete a business group, right-click it and select the desired option (1):

Figure 12: Rename/Delete a Business Group
Add a New Process
(See Figure 13 to Figure 16)
To add a new process, perform the following steps:
- Click the desired business group from the list (1).
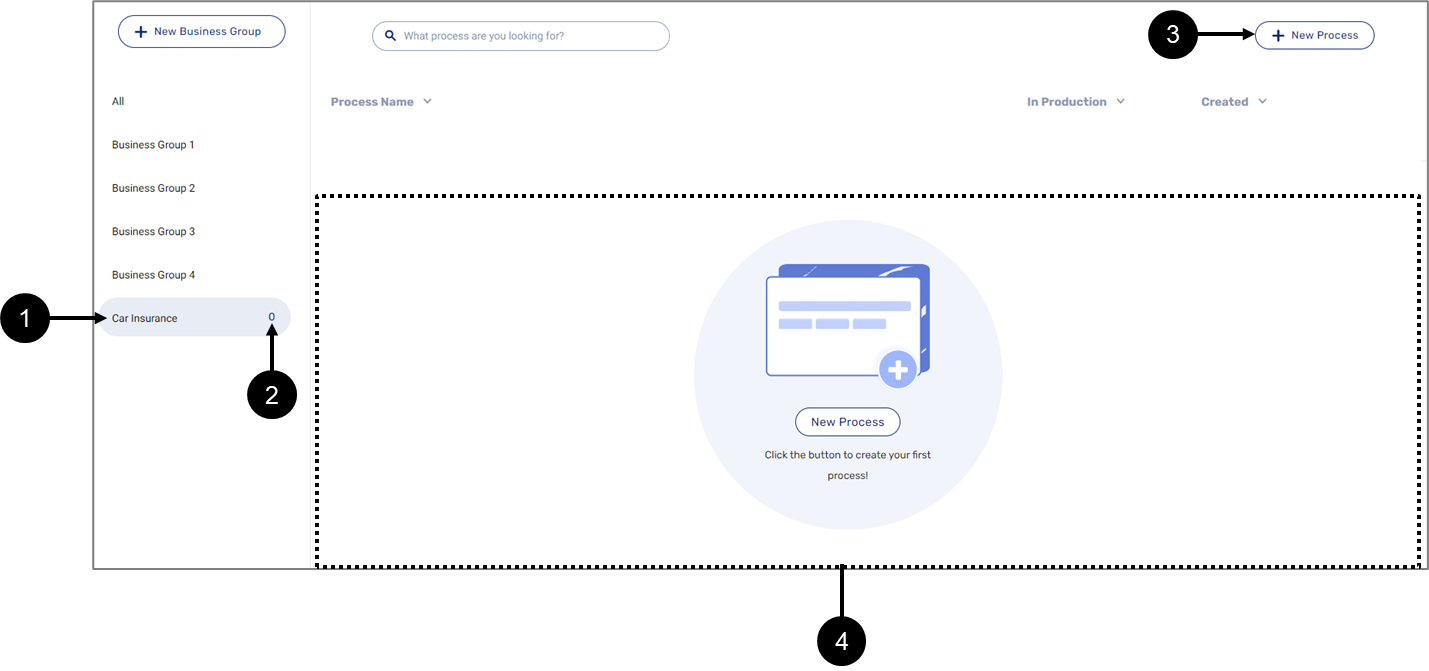
- Figure 13: Selected Business Group
Result:
- The number of processes the business group has appears (2).
- The + New Process (3) becomes enabled.
- A request to add the first process appears (4).
If the business group already has previous processes, once a business group is selected, its processes will be displayed in a list instead of the request to add a new process.
- Click the + New Process (3 or 4).
Result:
The Create a Process window appears:
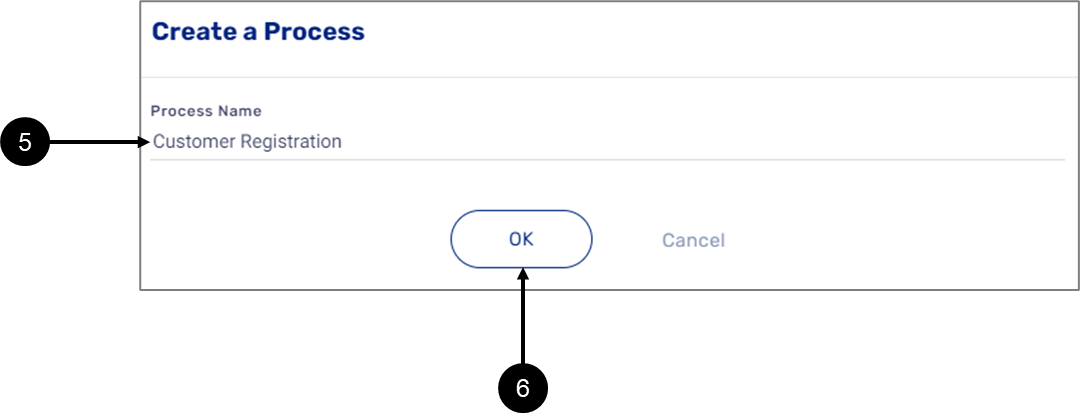
Figure 14: Create a process Window
- Enter the name (5) of the new process.
- Click the OK button (6).
Result:
The Webflow main screen appears automatically:
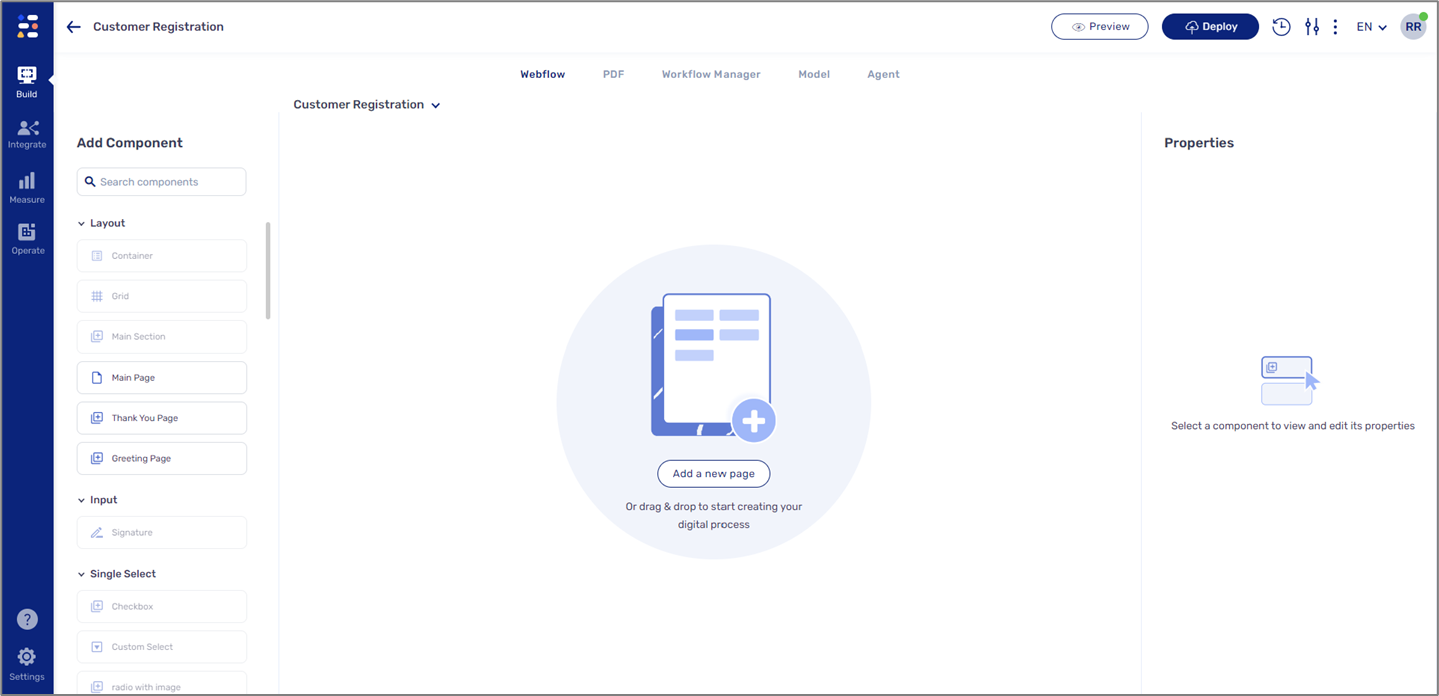
Figure 15: Webflow Main Screen
- Navigate back to the Process Manager screen and view that:
- The process is added (7).
- The number of processes in a business group is updated (8).
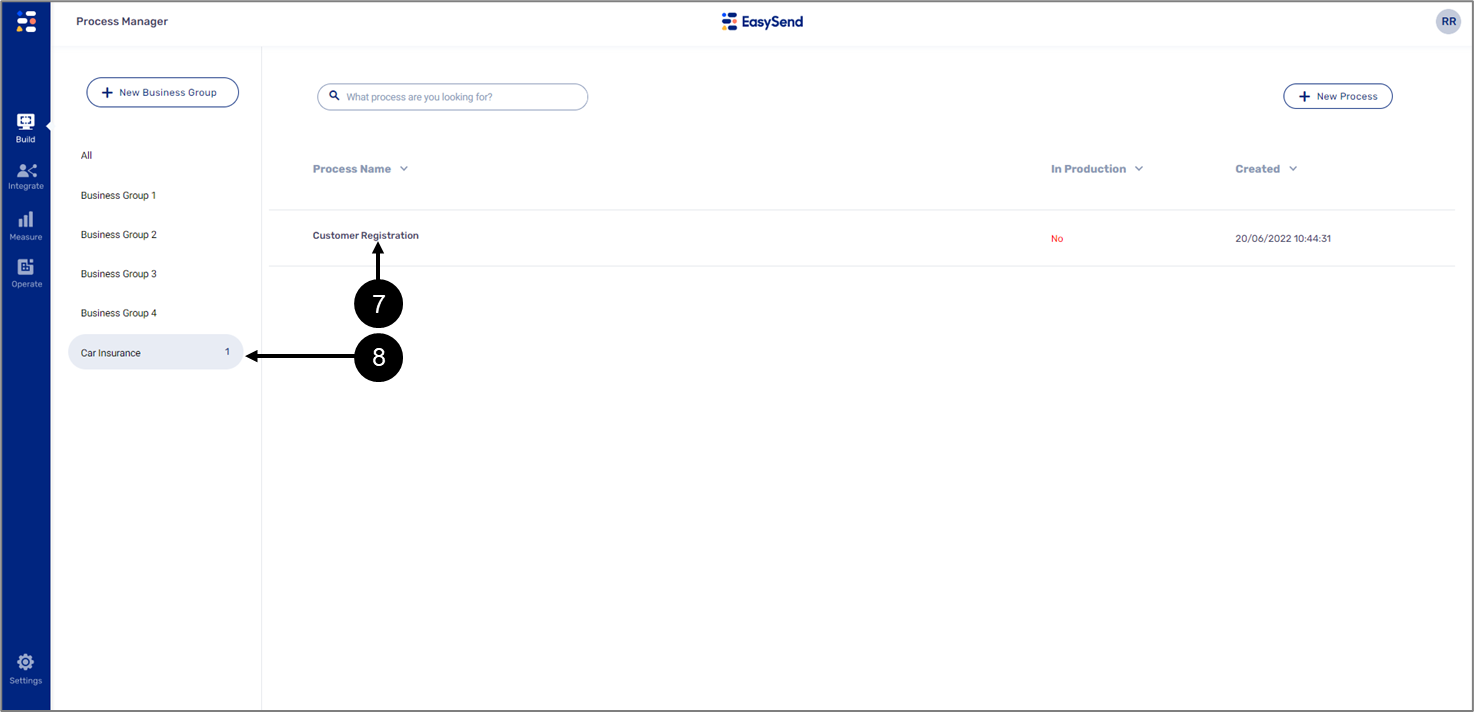
Figure 16: New process