Adding components and configuring Properties
Follow the instructions to edit your Webflow.
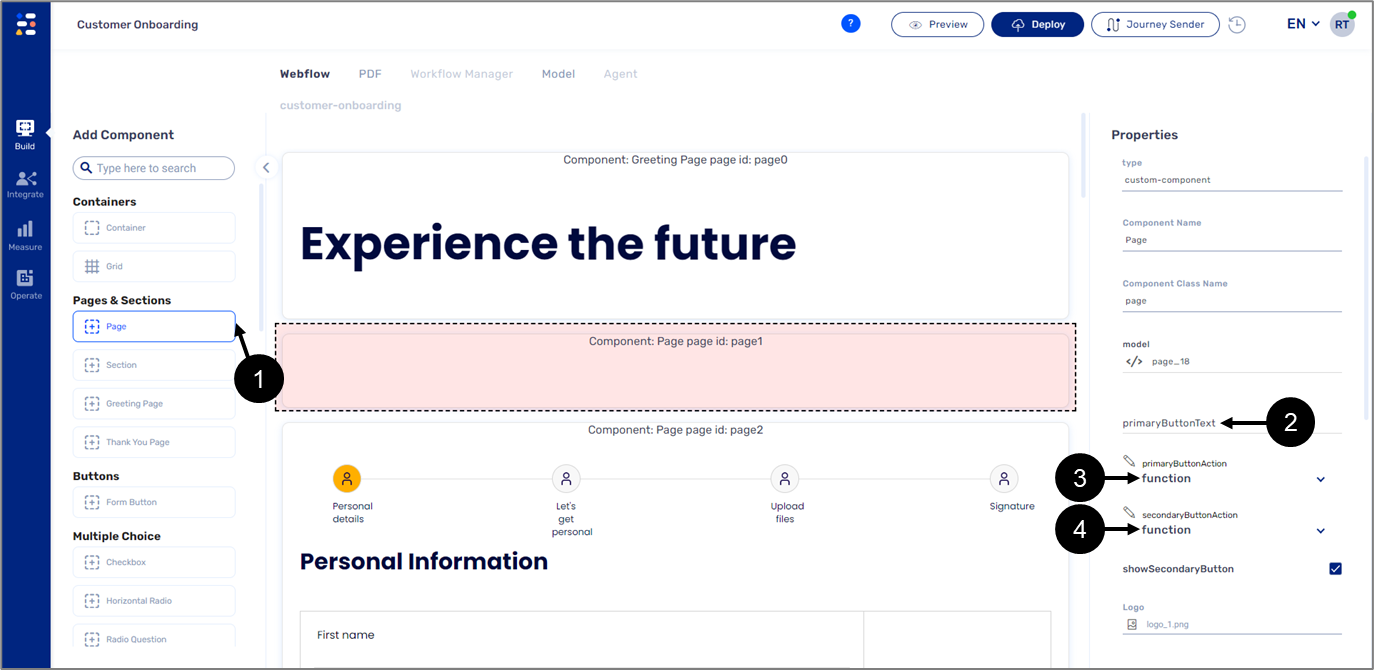
Adding and configuring a Page
To add a Page and configure its properties, perform the following steps:
- Drag and drop a Page component (1) under the Greeting Page.
- Delete the primaryButtonText (2) and type "Continue".
- Set the primaryButtonAction function (3) to Next.
- Set the secondaryButtonAction function (4) to Prev.
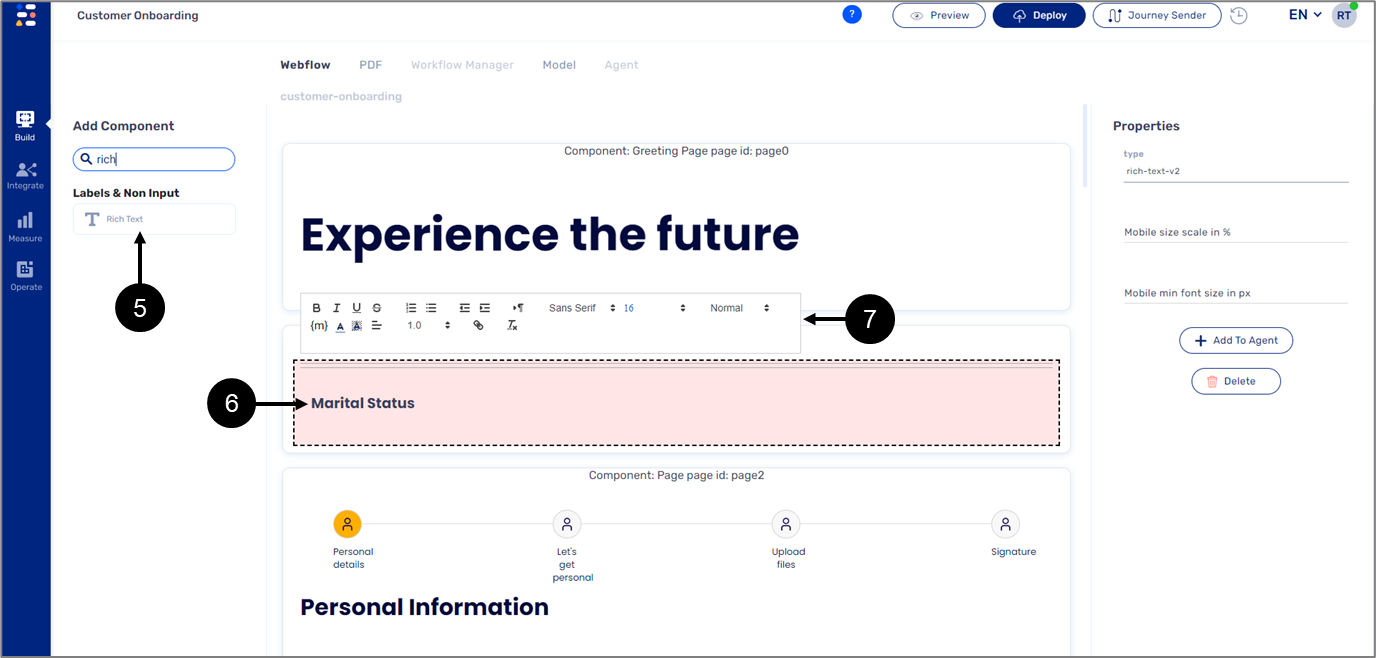
Adding and Styling rich Text
To add a Rich Text and style it, perform the following steps:
- Drag and drop a Rich Text component (5) onto the Page.
- Write the following text: "Marital Status" (6).
- Style the text (7).
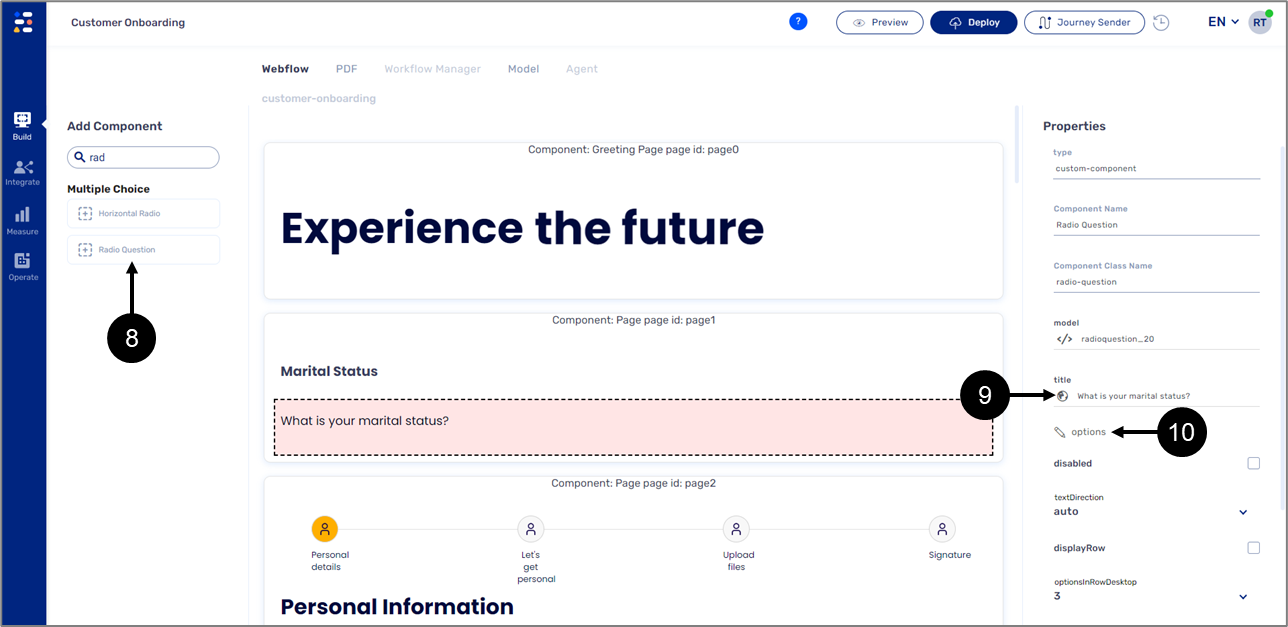
Adding and configuring a Radio Question
To add a Radio Question and configure it, perform the following steps:
- Drag and drop a Radio Question component (8) onto the Page under the Rich Text.
- Write the title (9): "What is your marital Status?"
- Click options (10).
- Write the Text and Value - "Single" (11).
- Click the + Add New button (12).
- Write the Text and Value - "Married" (13).
- Click the + Add New button (12).
- Write the Text and Value - "Divorced" (14).
- Click the + Add New button (12).
- Write the Text and Value - "Widowed" (15).
- Click the OK button (16).

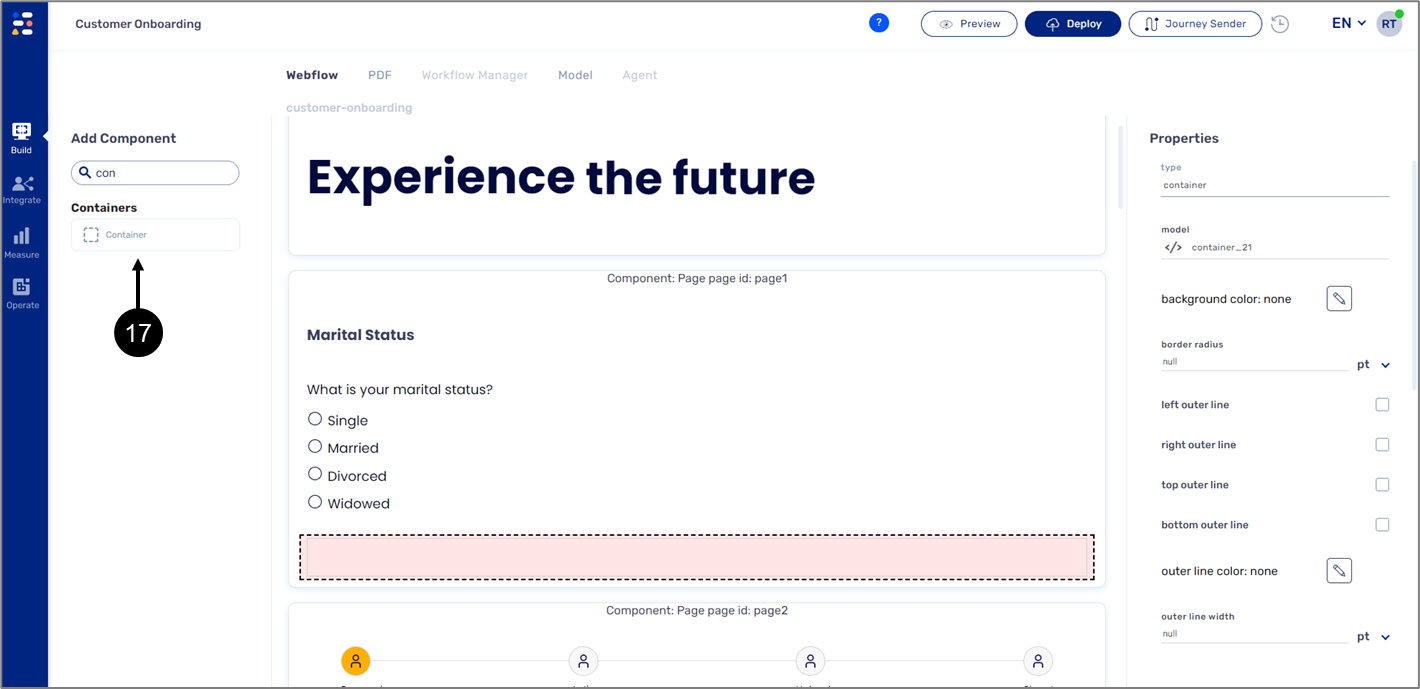
Adding a Container , Grid, and Configuring Properties
To add a Container, a Grid and configure its properties, perform the following steps:
- Drag and drop a Container component (17) onto the Page under the Radio Question.
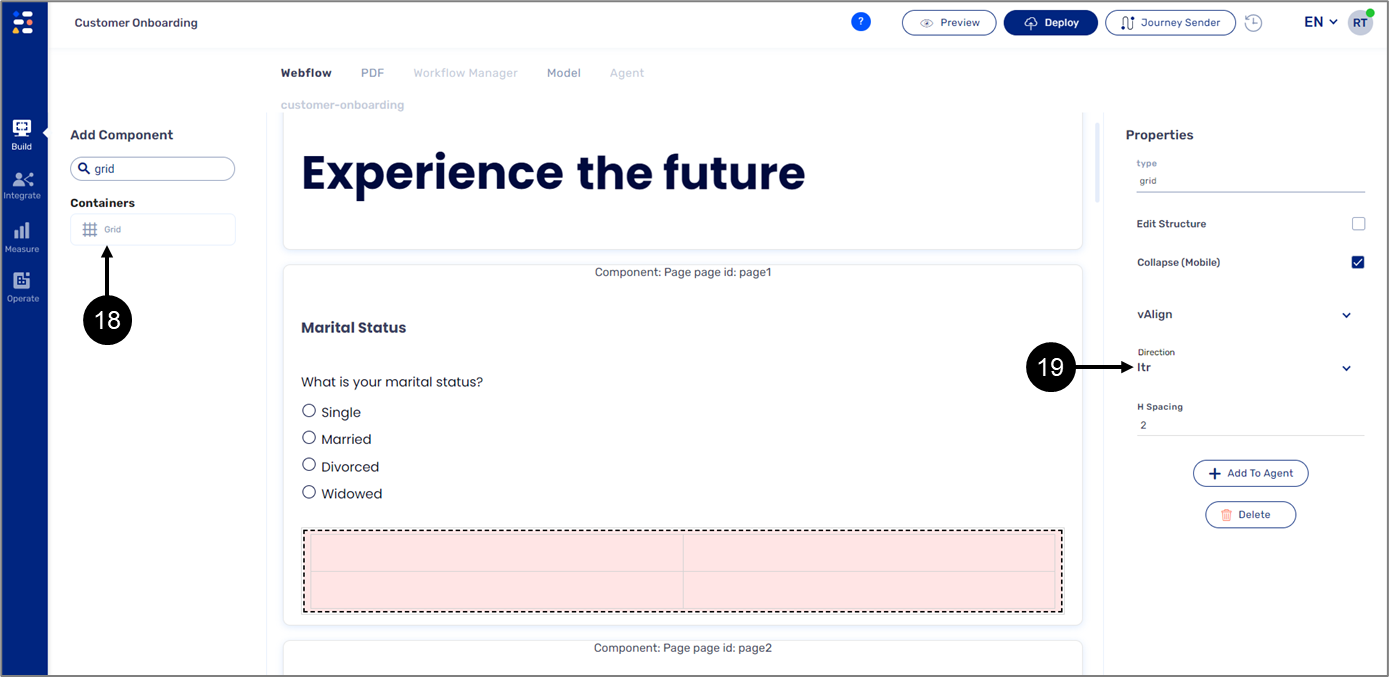
- Drag and drop a Grid component (18) onto the Container.
- Set the Direction of the Grid to ltr (19).
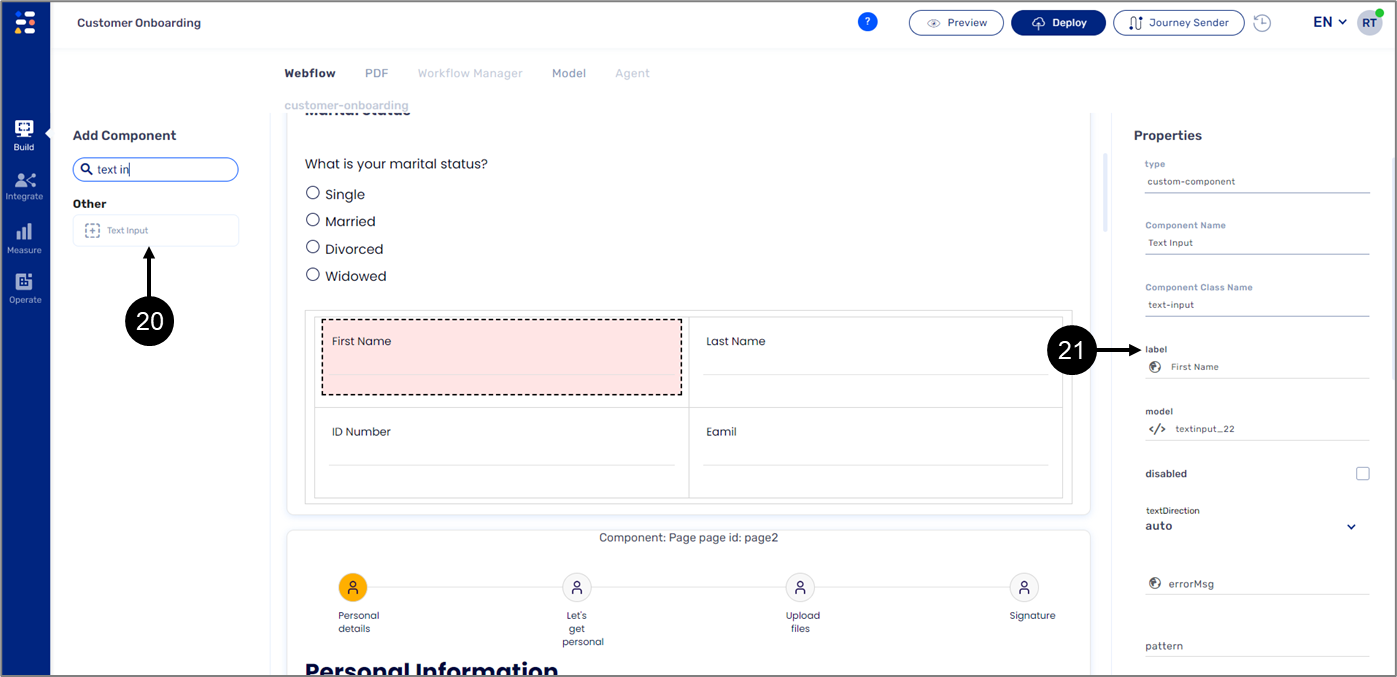
Adding Text Inputs and Write their Label
To add a Text Inputs components and write their label, perform the following steps:
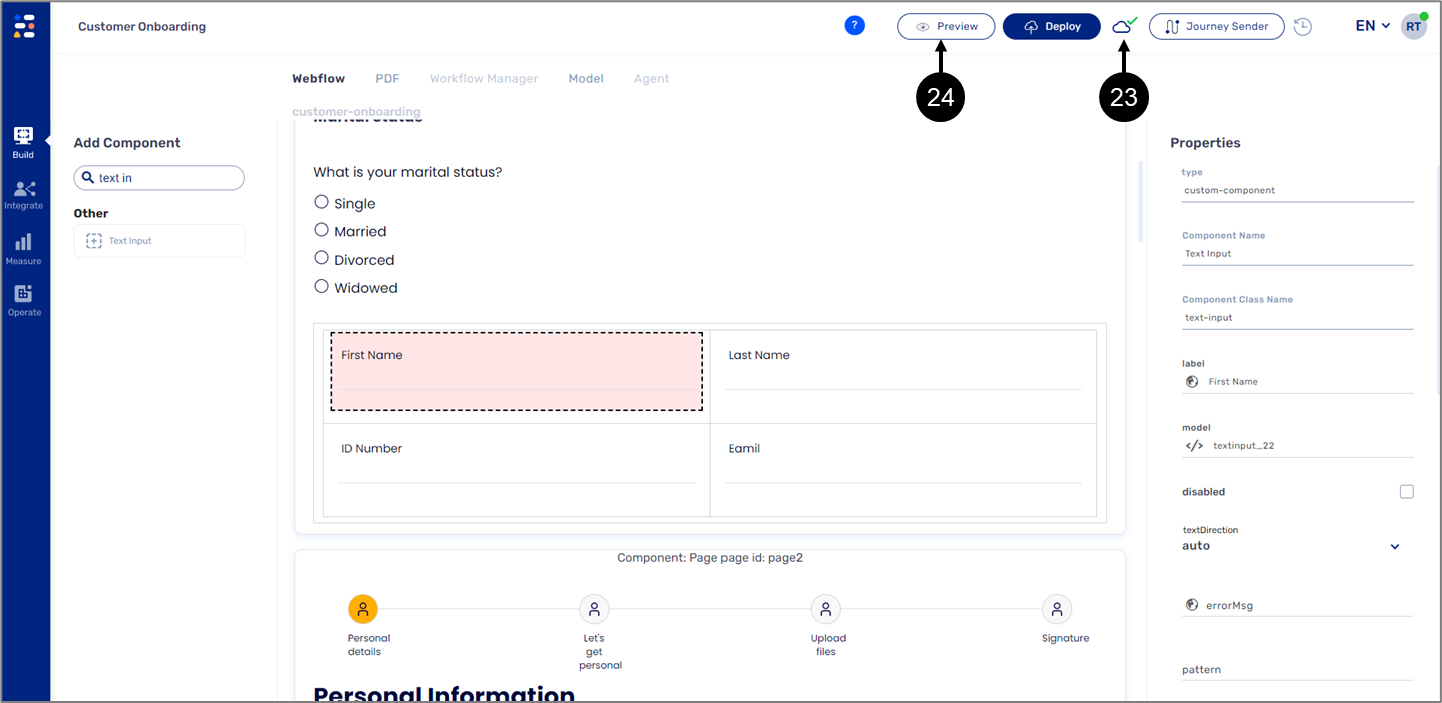
- Drag and drop four Text Input components (20) onto the Grid.
- Write their label (21):
- "First Name"
- "Last Name"
- "ID Number"
- "Email"
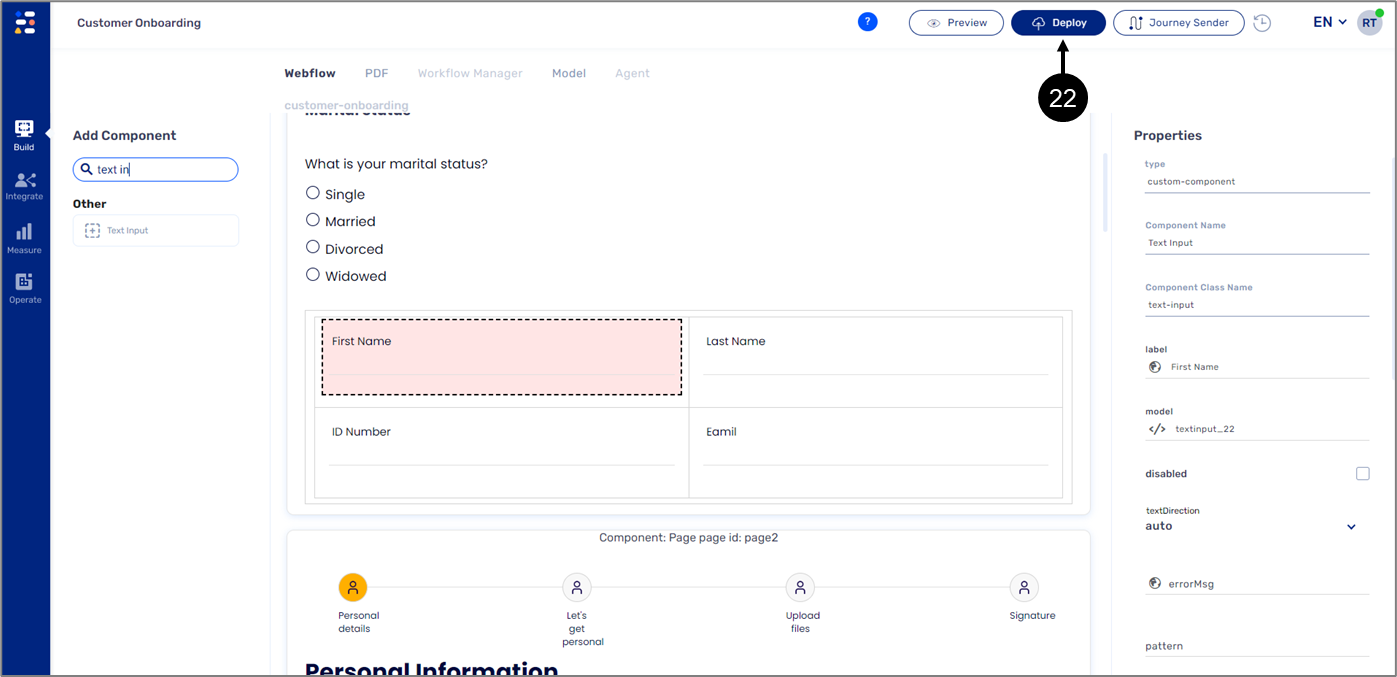
Deploy and Preview
To deploy and preview the digital process, perform the following steps:
- Click the Deploy Button (22).
- Wait for the Deployment process to finish (23).
- Click the Preview button (24).