Article Overview
The following article describes the Journey Tracker feature. It explains what the Journey Tracker is used for and how to use it.
What is the Journey Tracker?
The Journey Tracker feature enables you to track your live processes and view the status of their different stages. The information the Journey Tracker displays is saved for 30 days maximum.
Navigate to the Journey Tracker Screen
(See Figure 1 and Figure 2)
To navigate to the Journey Tracker screen, perform the following steps:
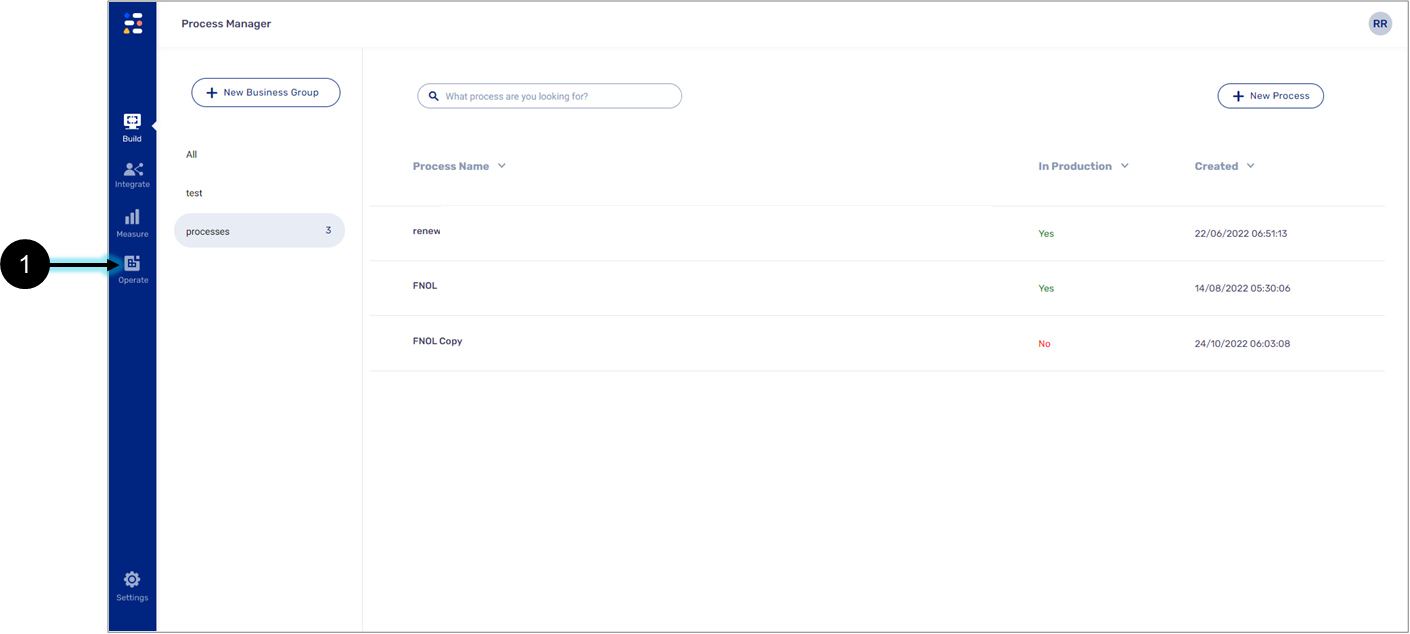
Figure 1: Operate Tab
- Click the Operate tab (1).
Result:
The Operate tab options appear:
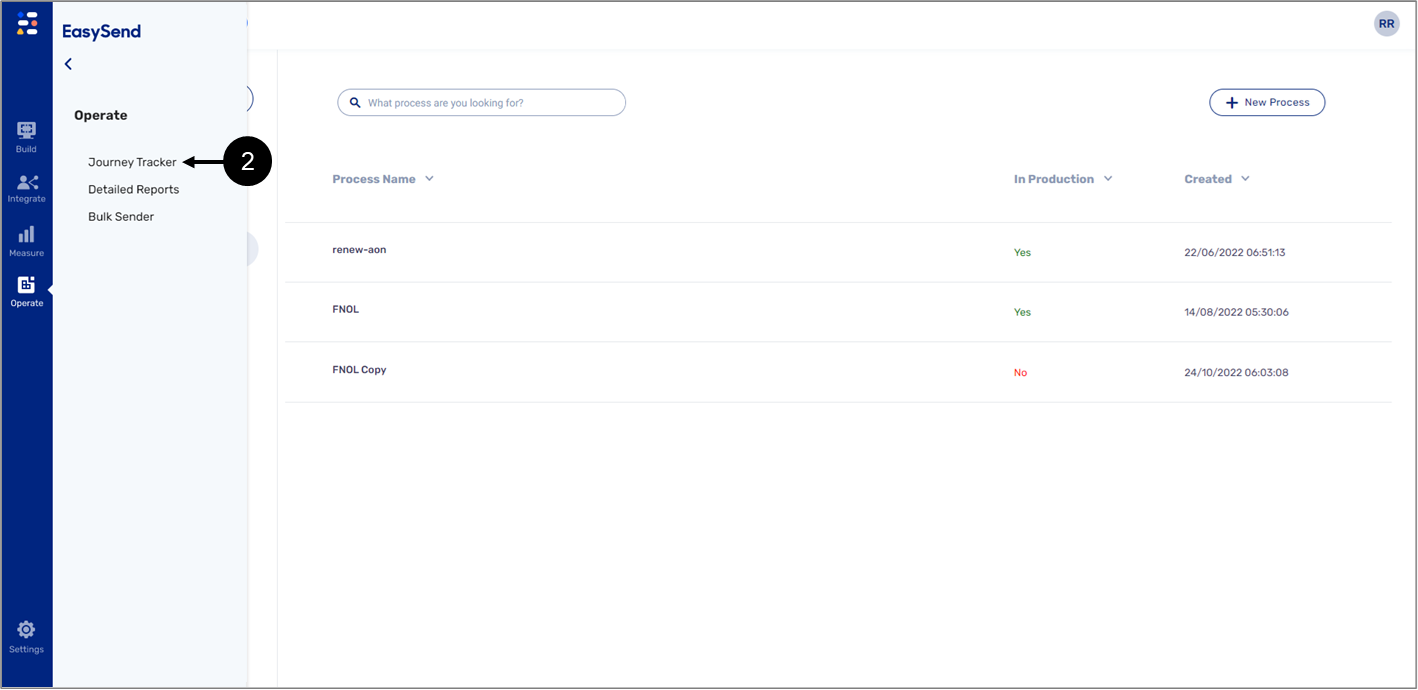
Figure 2: Journey Tracker Option
- Click the Journey Tracker option (2).
Journey Tracker Main Screen
Figure 3 and Table 1 describe the structure of the Journey Tracker screen.
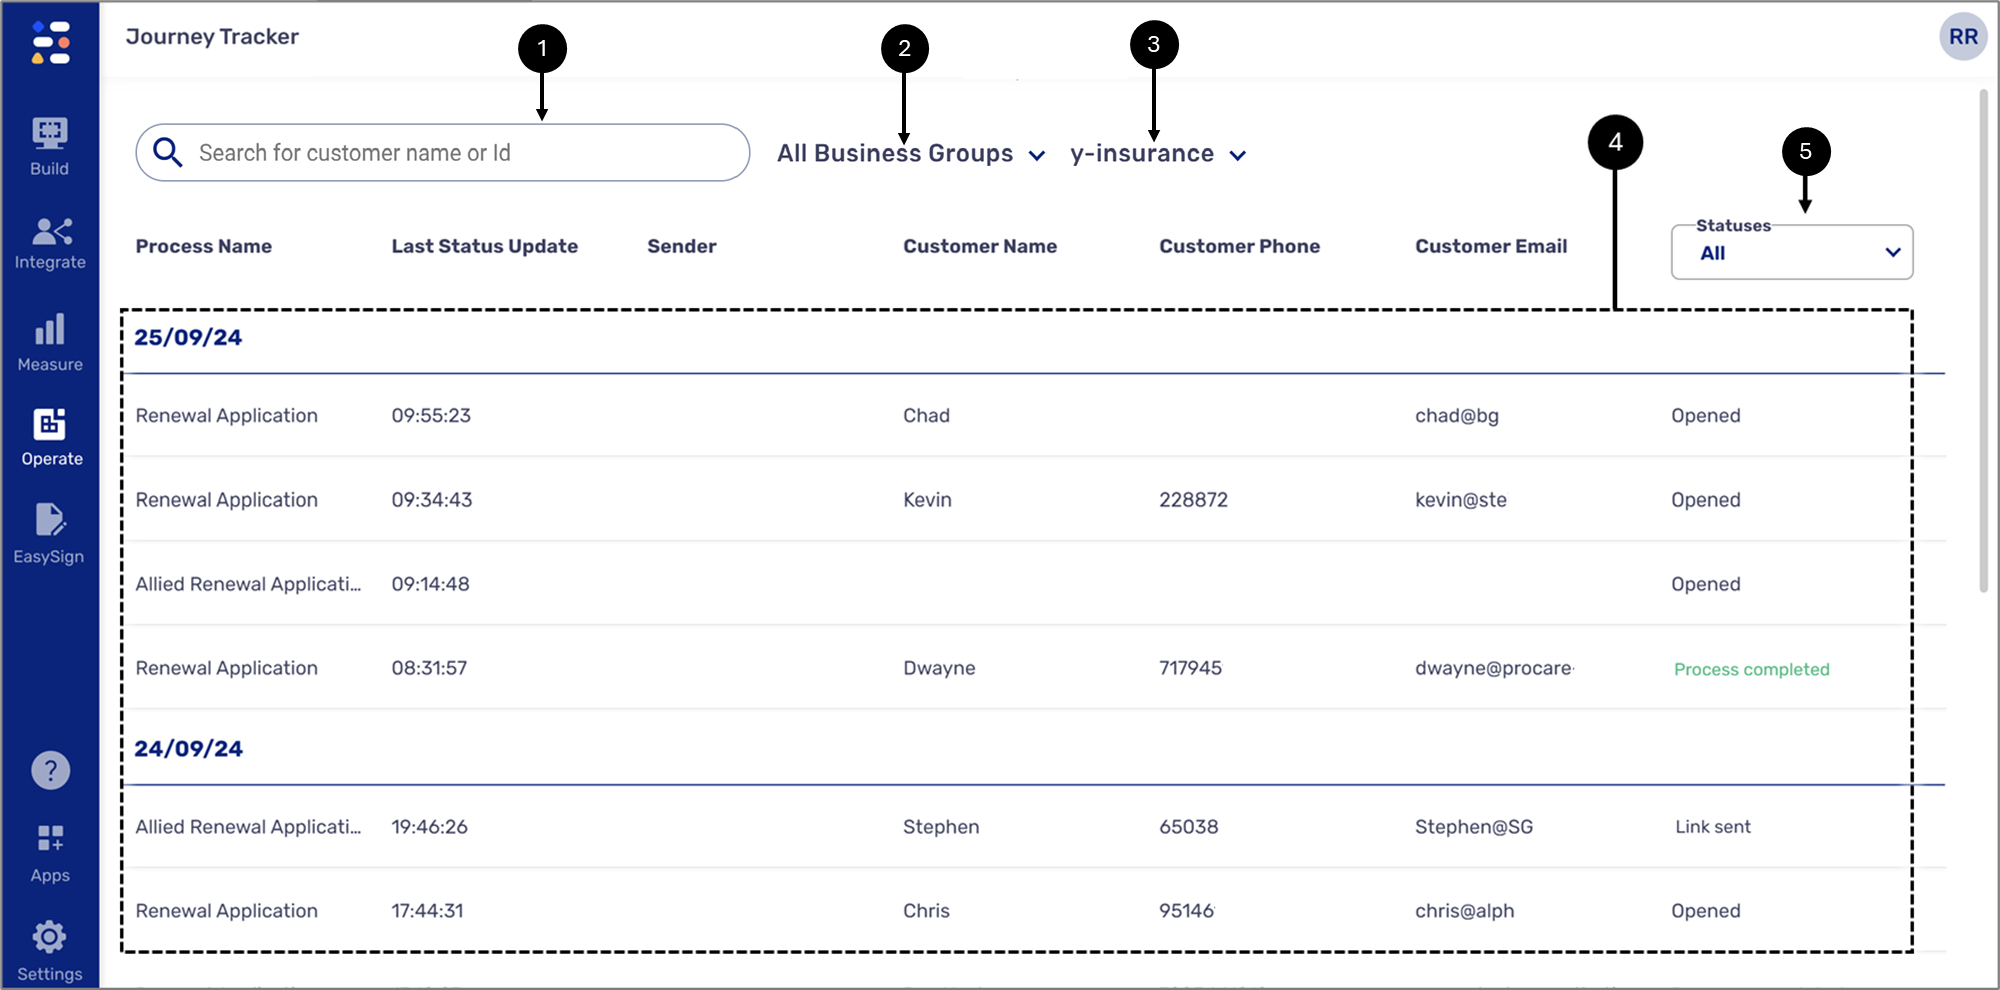
Figure 3: Journey Tracker Main Screen
Table 1: Journey Tracker Main Screen
Number | Name | Description |
1 | Search Bar | Enables to search the tracking list |
2 | Business Groups Dropdown | Enables to filter the tracking list by selecting a specific business group NOTE All the business groups are selected by default |
| 3 | Environment Selection | Enables to select the environment (DEV/PROD) from which processes will be tracked |
| 4 | Tracking List | Displays a list of tracked processes and enables to perform different actions |
| 5 | Status Filter | Enables to filter the tracking list according to different statuses |
Tracking List
(See Figure 4)
The tracking list displays a list of tracked processes according to selected business groups and a selected environment. Each tracked process displays the following information:
- Process Name
- Last Status Update
- Sender - the name of the sender
- Customer Name
- Customer Phone
- Customer Email
- Status - the current status of the process:
- Link-Sent - a link of the process was sent to a recipient
- Opened - the link was clicked and opened by the recipient
- Completed-Step - a recipient completed one of the process's steps
- Completed (Process Completed) - the entire process was completed
- Cancelled - the link of the process was canceled and is no longer accessible
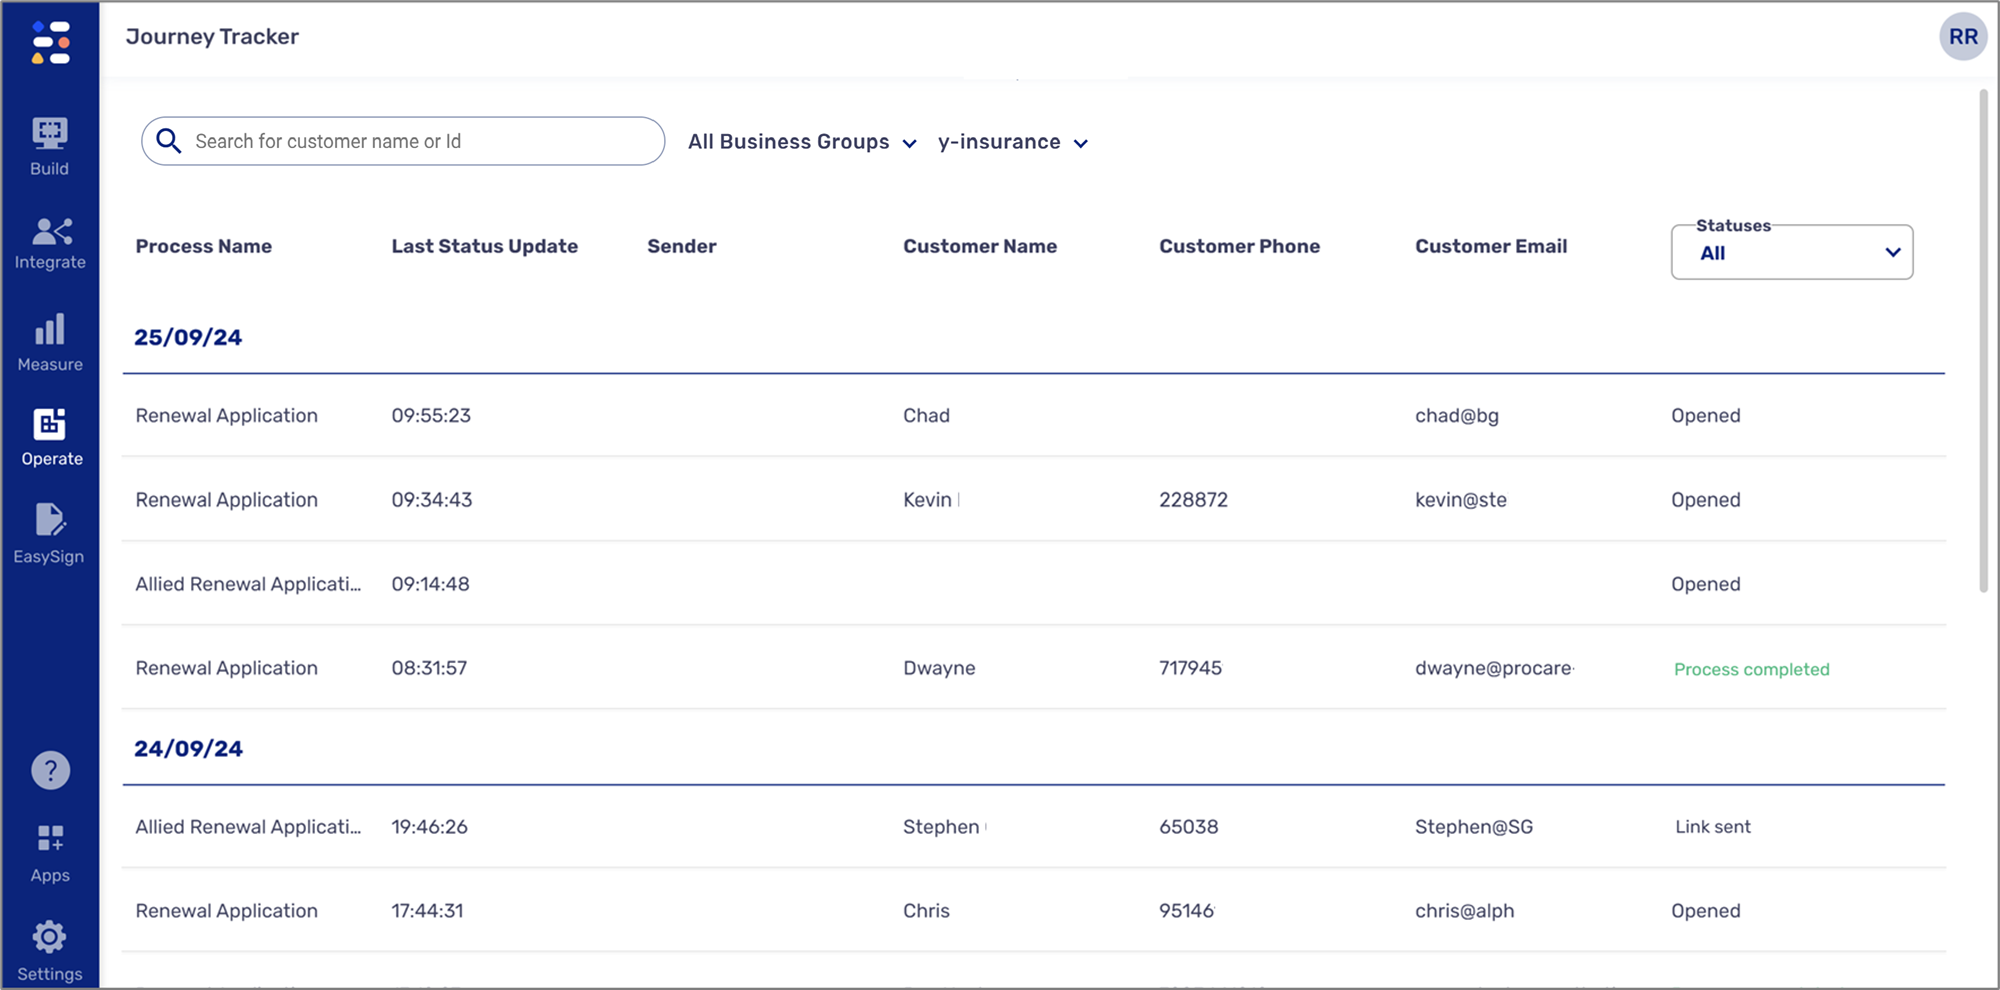
Figure 4: Tracking List
 button loads and displays additional processes for tracking, up to the last 30 days.
Detailed Tracking Information and Actions
(See Figure 5 and Figure 6)
When clicking a process from the list, detailed tracking information appears:
- Master RID (1) - a unique identifier of an EasySend transaction.
- Transaction Events (2):
- The date the event was created
- The time the event was created
- Event type - the transaction's status
- Customer name
- Customer role
- RID - a unique identifier of a transaction's step. The RID is nested under the Master RID. A transaction can be divided into steps, such as when using the Workflow Manager. Each step will receive its own unique RID as part of its URL, for example: player-demo.easysend.app/customer/onboarding/page0/0?lang=en&rid=qDzVpy_U7gY.
- Phone
An Opened status can appear multiple times due to process refreshing or when re-clicking a link.
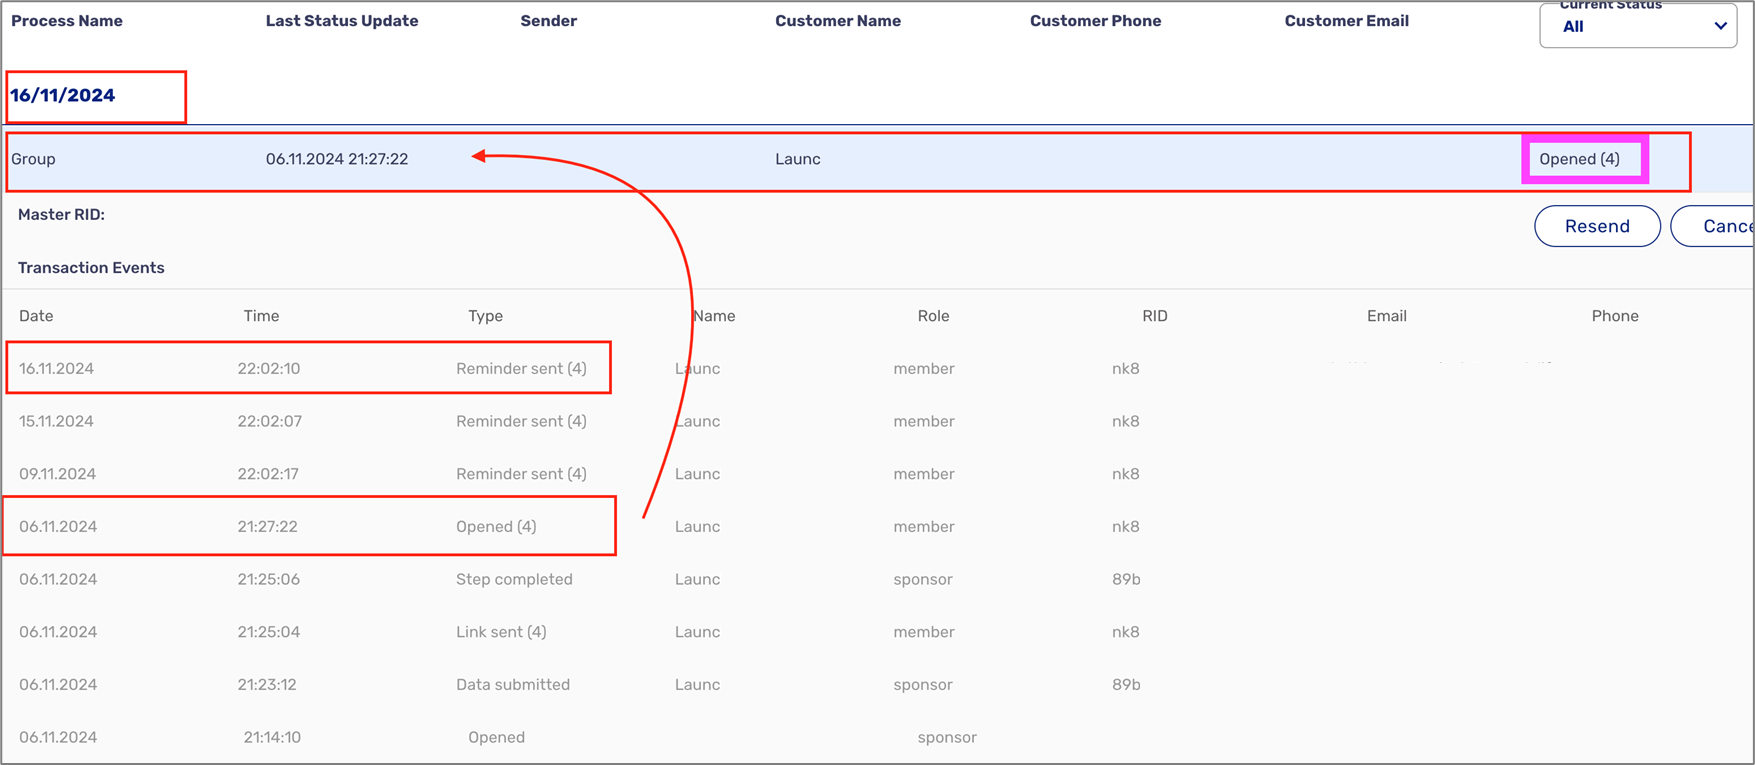
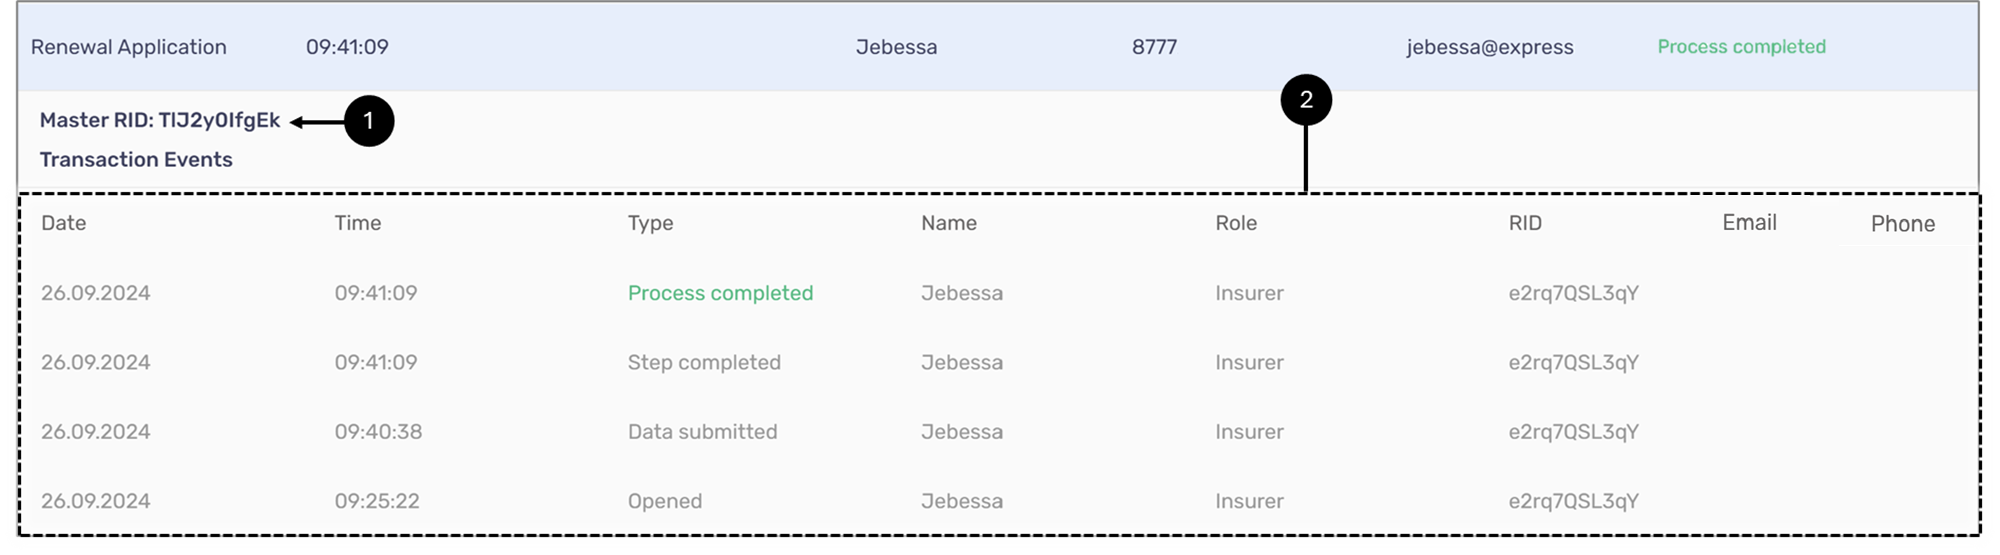
Figure 5: Detailed Tracking Information
While the status of a process is not Completed (Process Completed) or Cancelled, you can perform two actions:
- Cancel the link of the process (and update its status to Cancelled).
- Resend the link of the process (and update its status to Link-Sent).

Figure 6: Additional Actions
Fields Tagging
(See Figure 7 and Figure 8)
Some fields on the Journey Tracker such as customer name, email, and phone will be empty by default unless metadata tagging is performed.
To perform the tagging:
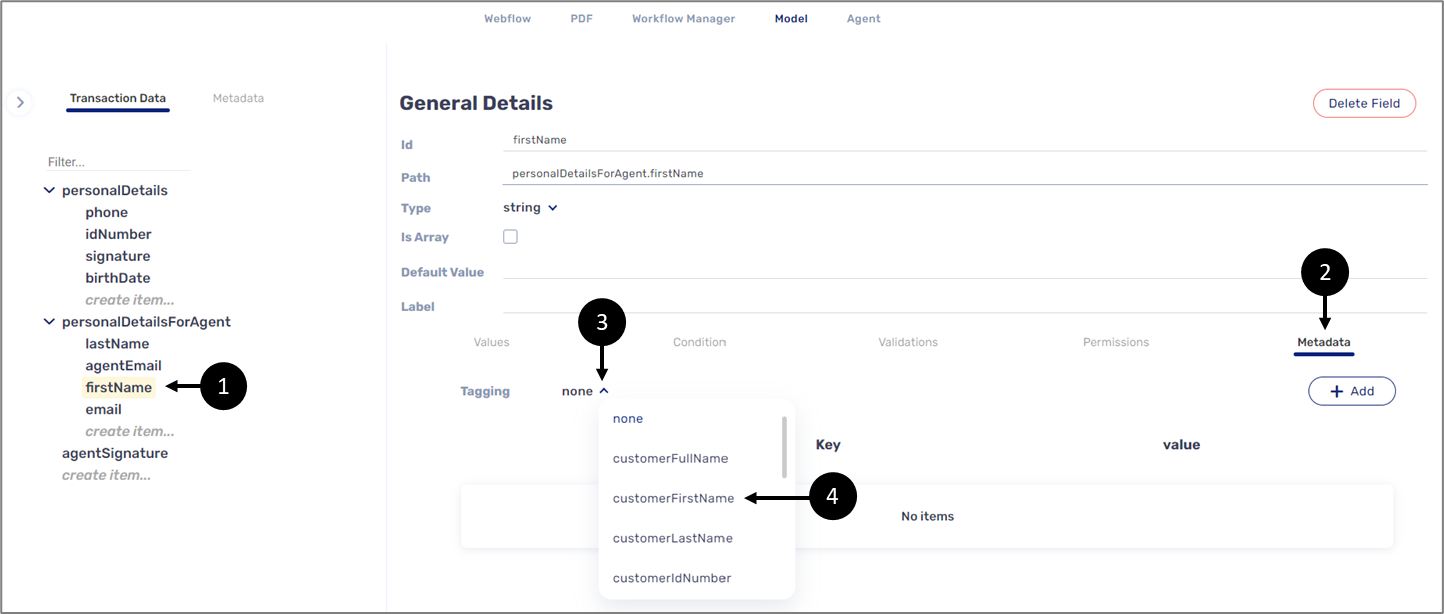
Figure 7: Tagging 1 of 2
- Access the Model screen of the digital process.
- Click the relevant data item, for example firstName (1).
- Click Metadate (2).
- Click the Tagging dropdown (3).
- Click customerFirstName (4).
Result:
The data item is tagged:
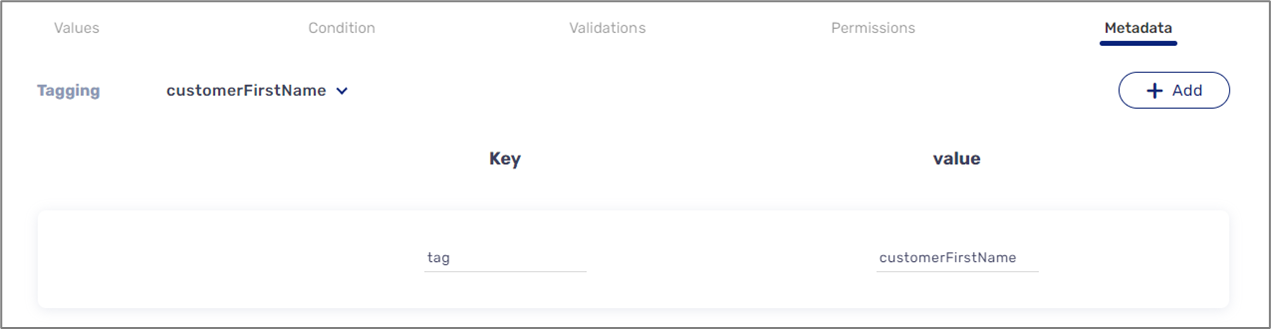
Figure 8: Tagging 2 of 2