Article Overview
The following article describes the Bulk Sender feature. It explains what the Bulk Sender is used for and how to use it.
What is the Bulk Sender?
The Bulk Sender feature enables you to upload a list of recipients and send them a link of the same digital process at once as a batch. Each link will be personalized with pre-filled data according to the Model data items of the process.
Navigate to the Bulk Sender Screen
(See Figure 1 and Figure 2)
To navigate to the Bulk Sender screen, perform the following steps:
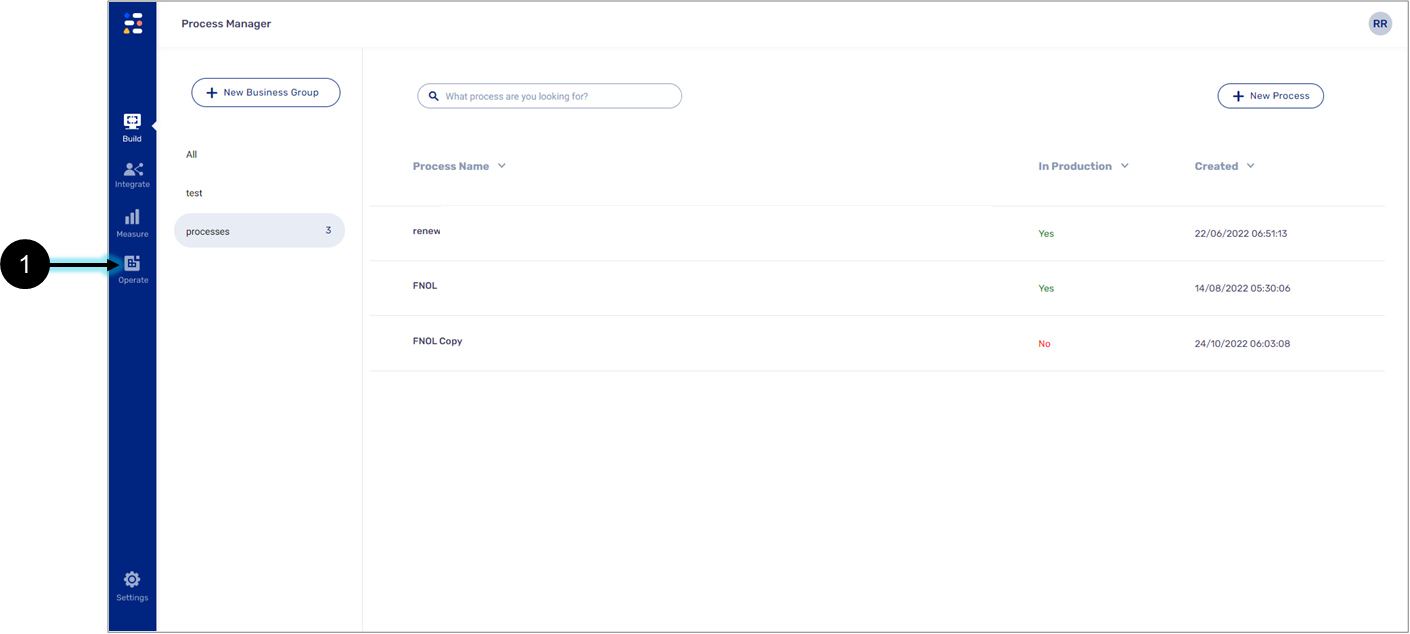
Figure 1: Operate Tab
- Click the Operate tab (1).
Result:
The Operate tab options appear:
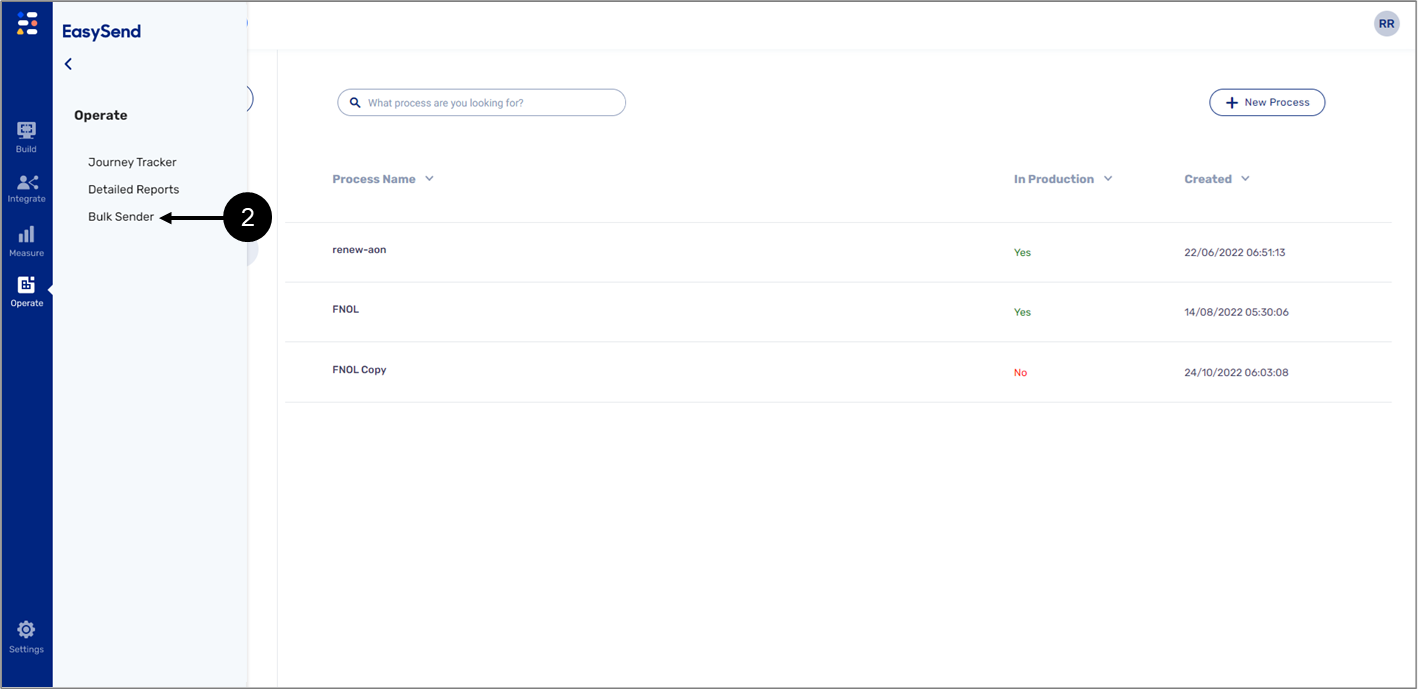
Figure 2: Bulk Sender Option
- Click the Bulk Sender option (2).
Bulk Sender Main Screen
Figure 3 and Table 1 describe the structure of the Bulk Sender screen.
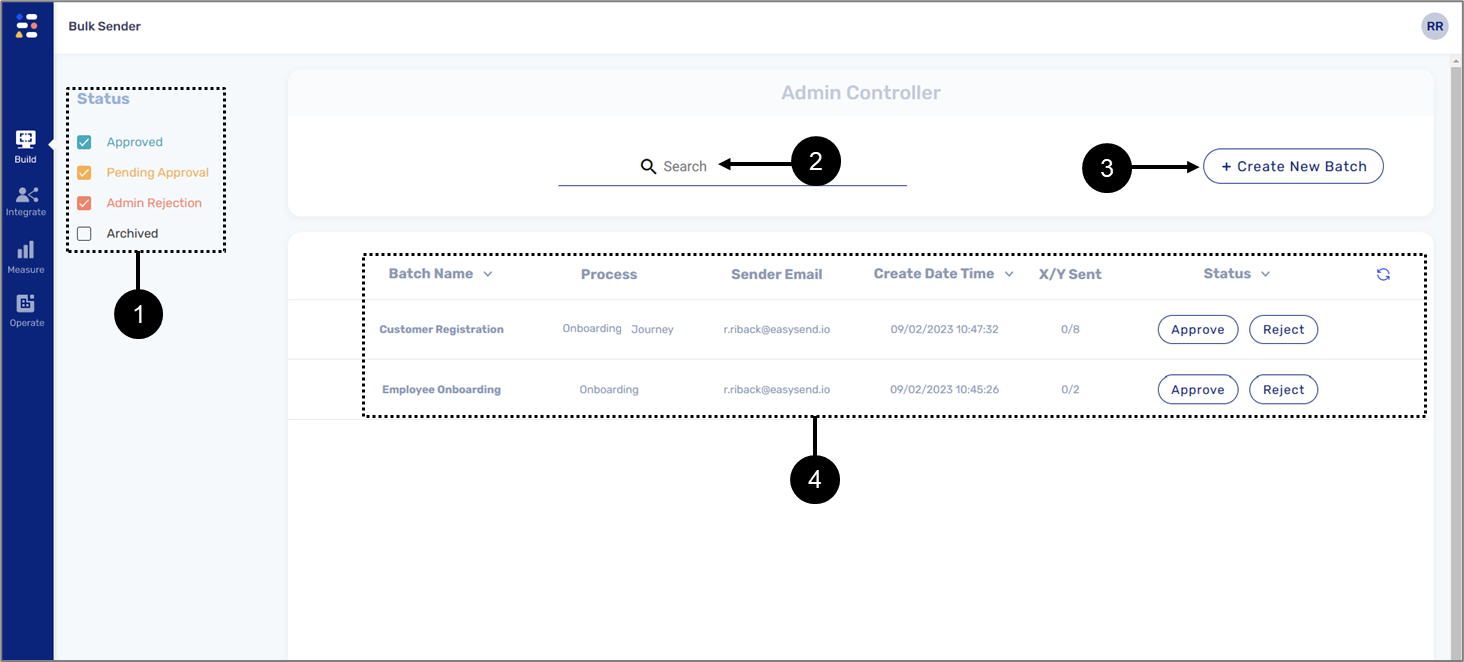
Figure 3: Bulk Sender Screen
Table 1: Bulk Sender Screen
Number | Name | Description |
1 | Status | Enables to filter the batches list according to a status:
NOTE Approved, Pending Approval, and Admin Rejection are checked by default |
2 | Search | Enables to search batches according to their name |
3 | Create New Batch | Enables to create a new batch NOTE For additional information about creating a new batch, see the Creating a New Batch section |
| 4 | Batches | Displays a list of batches NOTE For additional information about batches, see the Batches List section |
Batches List
(See Figure 4)
The batches list displays a list of batches with the following information:
- Batch Name.
- The name of the digital process.
- Sender Email- the name of the platform user that created the batch.
- The date and time the batch was created.
- X/Y Sent - how many recipients exist (Y) and how many links were sent (X).
 .
.- The status of the batch:
- Approved
- Rejected
- Archived
- Pending Approval

Figure 4: Batches List
Creating a New Batch and Sending Links
(See Figure 5 to Figure 15)
A batch is created to send multiple links of a digital process to receipts. Each link will contain personalized pre-filled data according to the Model data items of the process. To create a new batch and send links perform the following steps:
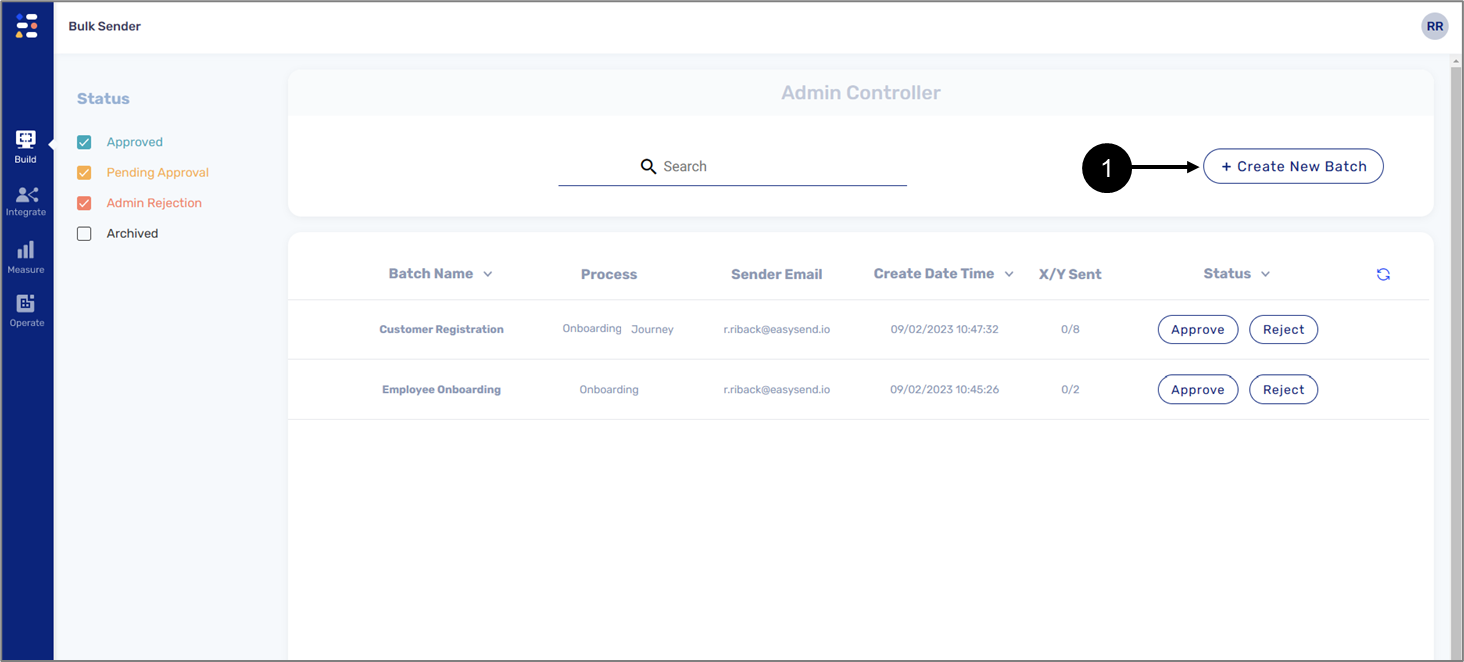
Figure 5: + Create New Batch Button
- Click the + Create New Batch button (1).
Result:
The New Batch window appears:
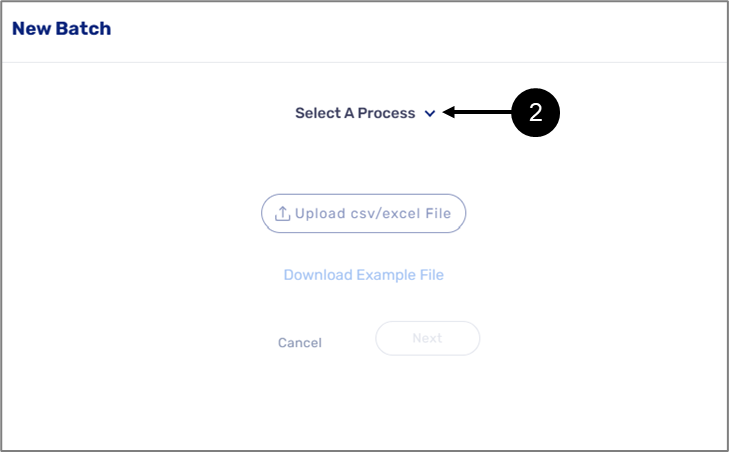
Figure 6: New Batch Window
- Click the Select A Process dropdown (2).
Result:
A list of digital processes appears:

Figure 7: List of Processes
- Select a process from the list (3).
Result:
A file is created:
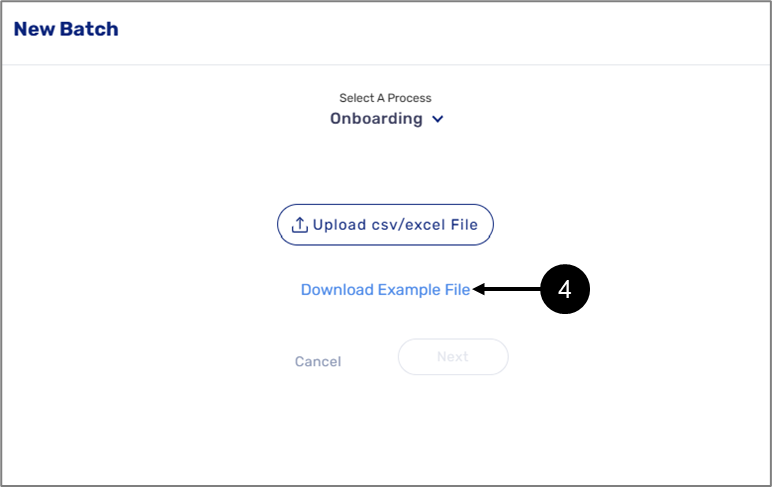
Figure 8: Download Example File
- Click the Download Example File option (4).
Result:
The file is downloaded.
- Open the file and fill out the information according to the displayed columns, save when done.
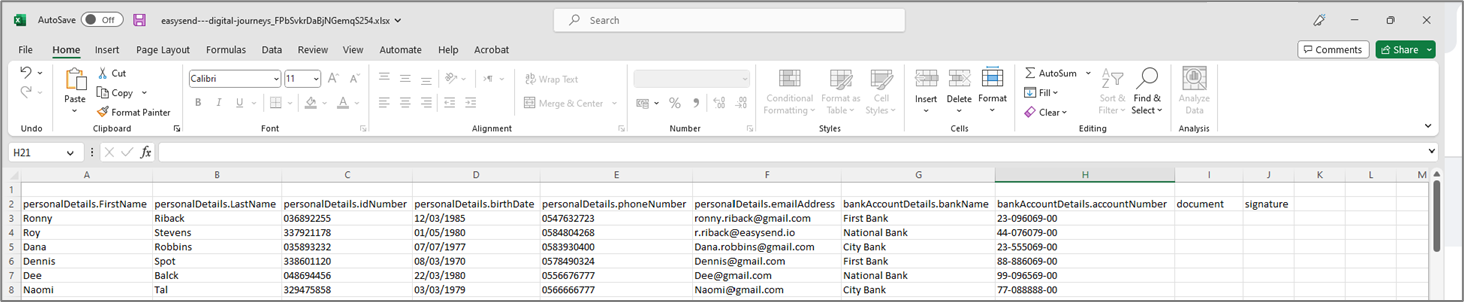
Figure 9: File
- The columns of the file are the process's Model data items.
- It is not mandatory to fill out all the columns but according to the process's workflow, at least one communication channel (email or phone number) must be provided per recipient.
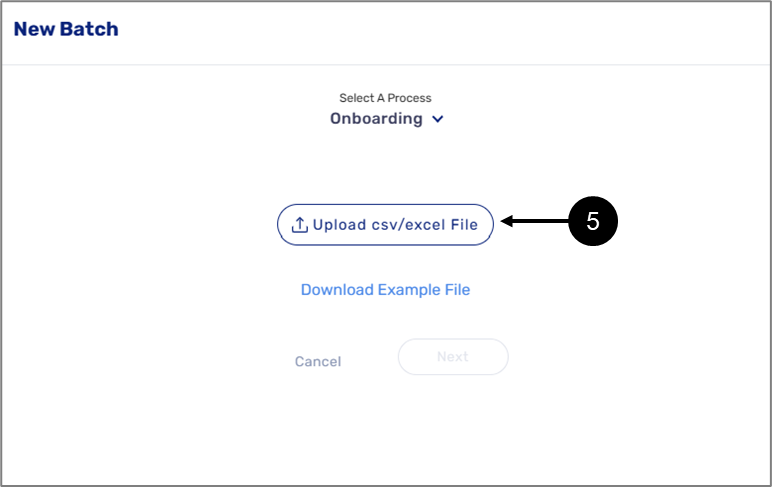
Figure 10: Upload csv/excel File Button
- Click the Upload csv/excel File button (5) and upload the file you edited.
Result:
The file is uploaded (6) and the Next button (7) becomes enabled:
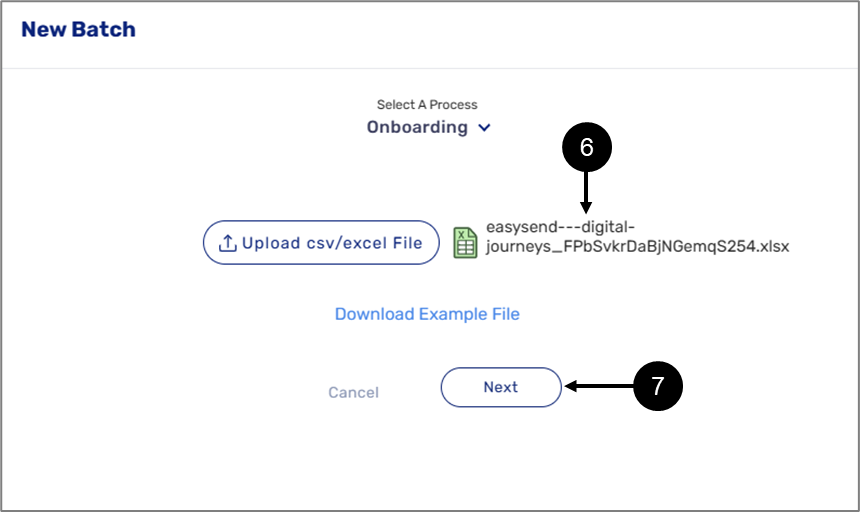
Figure 11: Uploaded File
- It is possible to rename the file before uploading.
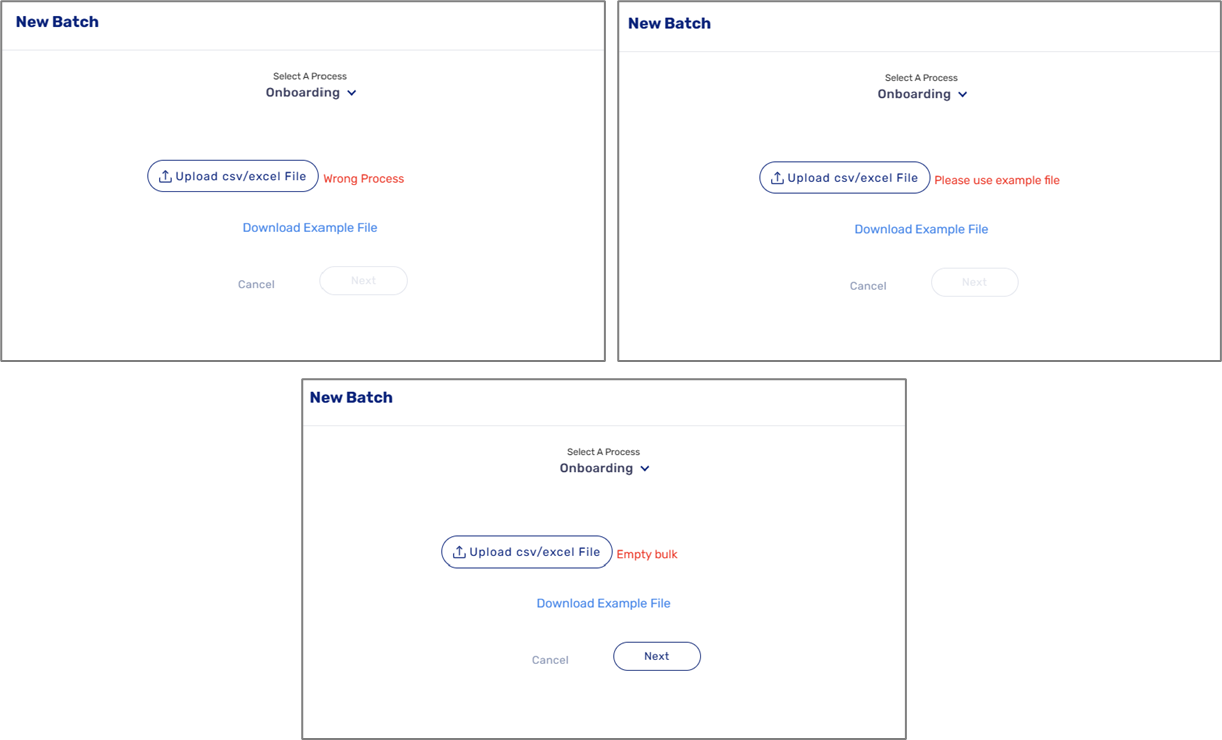
- If the uploaded file belongs to a different process, not a CSV or an Excel file, or empty, an appropriate error message will appear:
- Click the Next button (7).
Result:
The Batch Name appears:
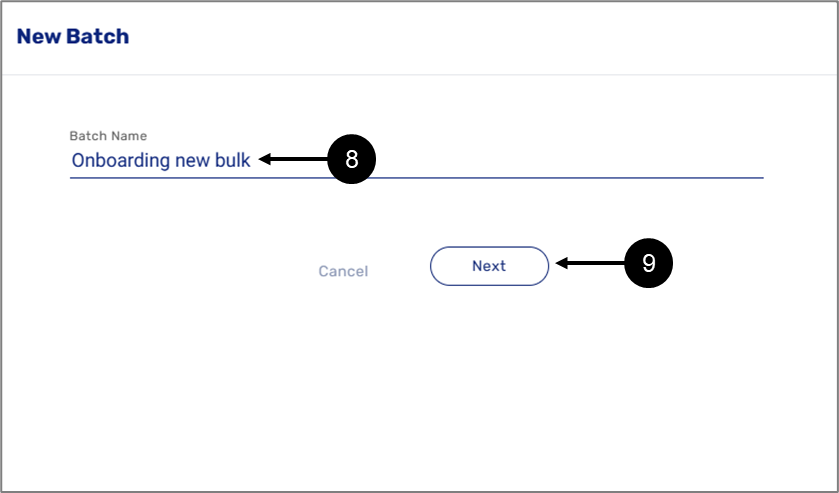
Figure 12: Batch Name
- Update the Batch Name (8) if necessary.
- Click the Next button (9).
Result:
The batch is added to the batches list:
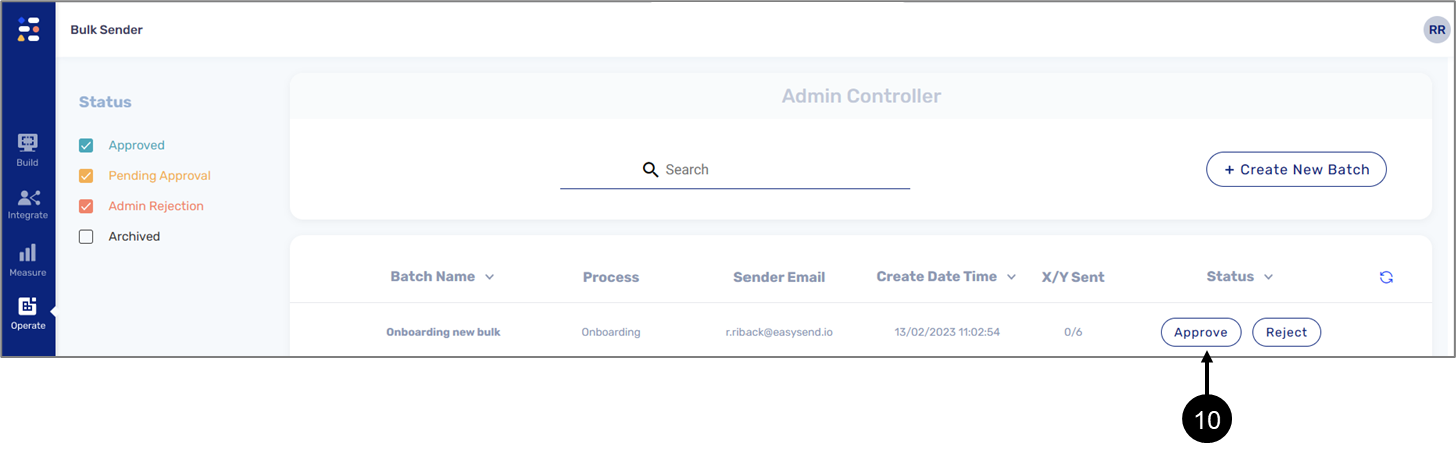
Figure 13: Added Batch
- Click the Approve button (10).
Result:
The status of the batch is updated to Approved (11) and the links are sent.
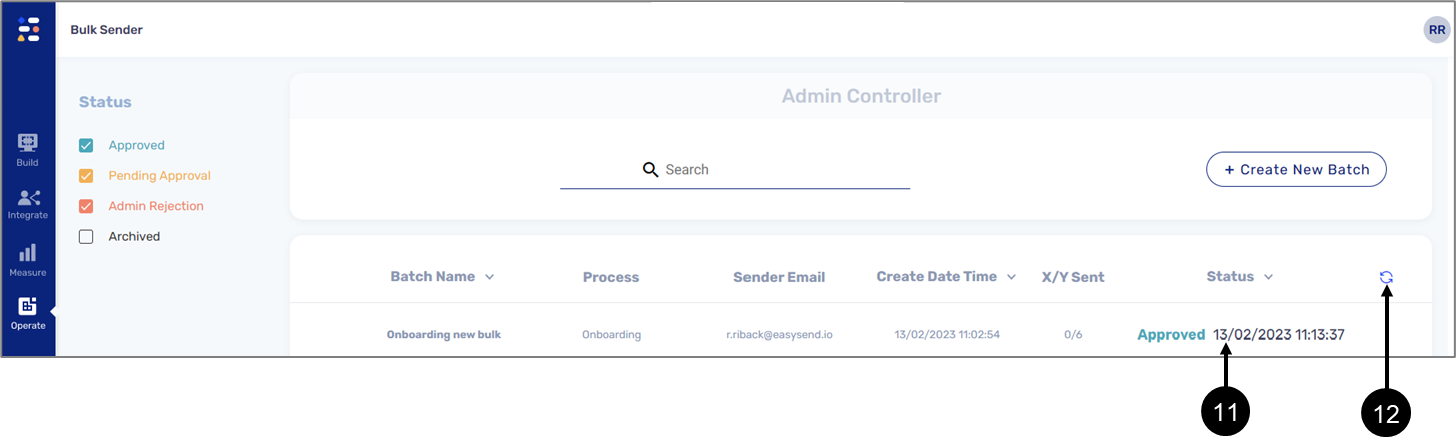
Figure 14: Approved Batch
- Click the refresh icon (12)
Result:
The X/Y Sent field of the batch displays the number of sent links (13):
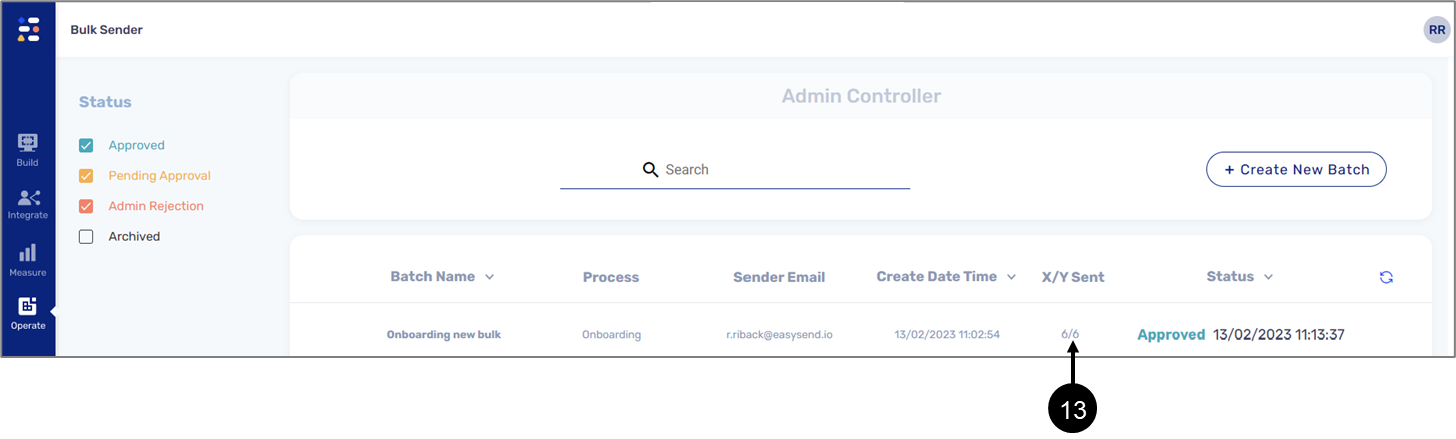
Figure 15: Updated X/Y Sent Field
Batches - Additional Actions
(See Figure 16 and Figure 17)
When hovering above a batch 3 dots appear. Clicking the dots display three additional actions (1):
- Reject - to change the status of the batch to rejected. The status change will affect only links that were not sent yet.
- Archive - to archive the batch.
- Download - to download the CSV/Excel file.
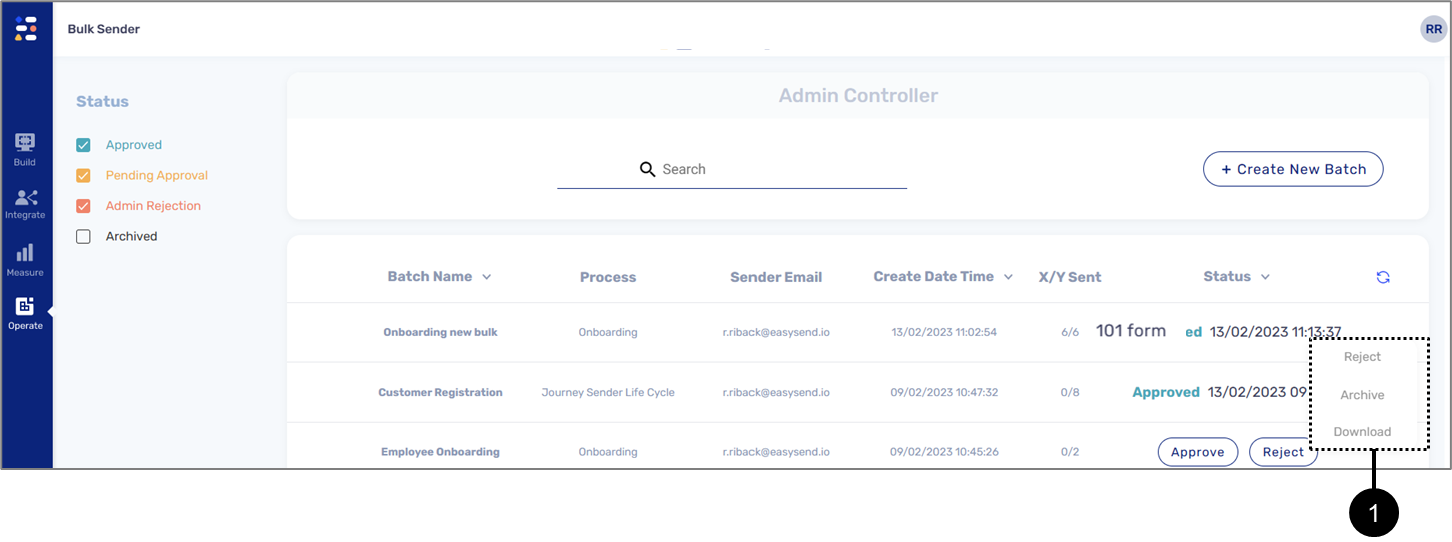
Figure 16: Additional Actions
When the file is downloaded after the batch links were sent it will contain a column displaying the sending status for each recipient:
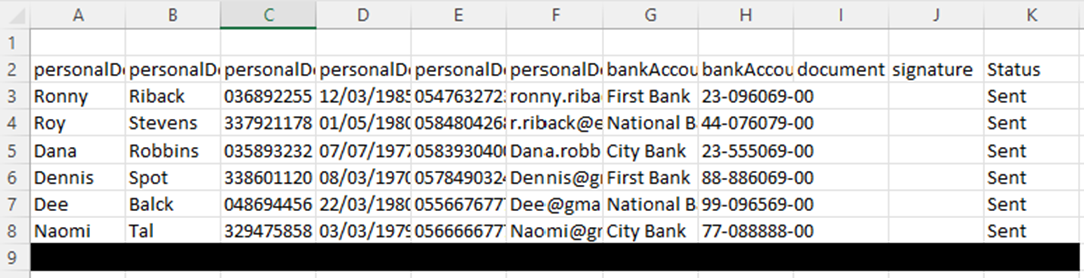
Figure 17: Downloaded File After Sending
Troubleshooting
Table 2 describes malfunctions that may occur when trying to create a new batch. The table also describes the reason/s for the malfunctions and provides possible solutions.
Table 2: Troubleshooting
Number | Malfunction | Reason/s | Solution/s |
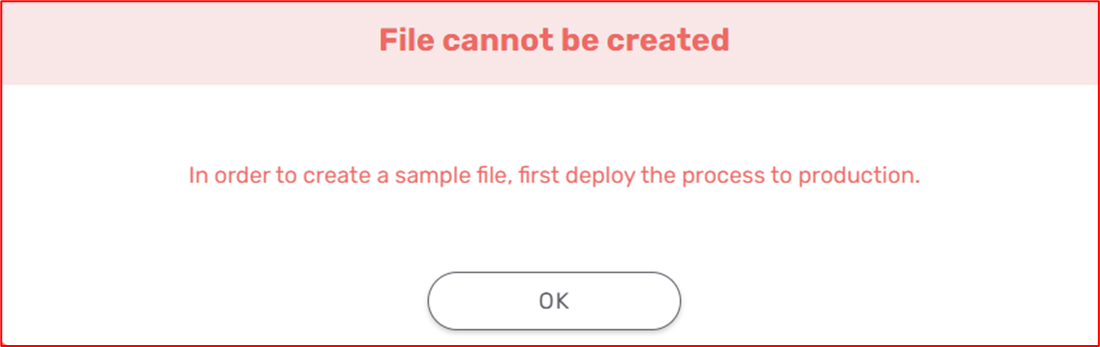
1 | Cannot select a process from the list | The process was not deployed to a production environment yet | Deploy the process to a production environment |
2 | The Download Example File option is active but when clicking it the file is not downloaded | Browser settings that prevent the file from being downloaded | Please contact our support team |
3 | The downloaded file cannot be uploaded |
| Follow the instructions described in the Creating a New Batch section |
4 | Links/some links are not sent after clicking the refresh icon |
|
|
5 | Missing batches from the batches list | The batches list is filtered according to statues | Adjust the status filtering of the batches list (for additional information see the bulk Sender Main Screen section) |
Use Case Example - Annually Filled Employees Form
The following sections describe a Bulk Sender use case.
Description
Each year a company sends its employees a digital process to verify their personal details and to update about any made changes. To save time the company sends the digital process link in bulk, using the Bulk Sender.
Digital Process Overview
(See Figure 18 to Figure 21)
The digital process's Webflow contains all the components needed for the employee to fill out the information. The components are connected to Model Data items.
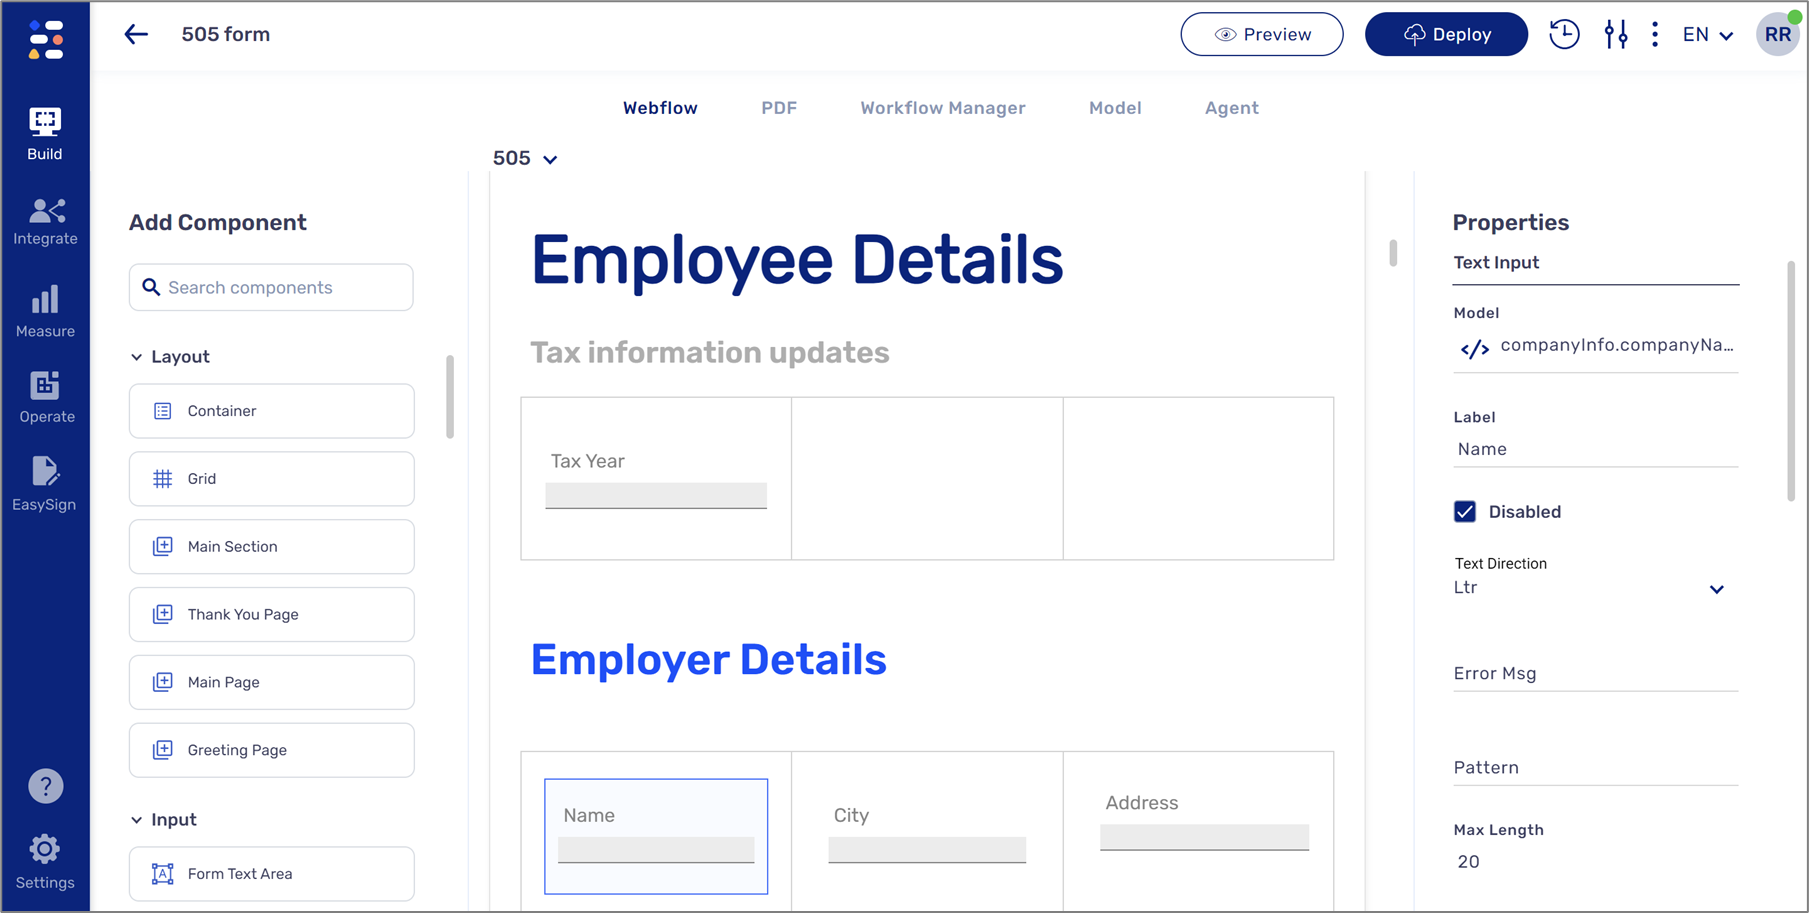
Figure 18: Webflow
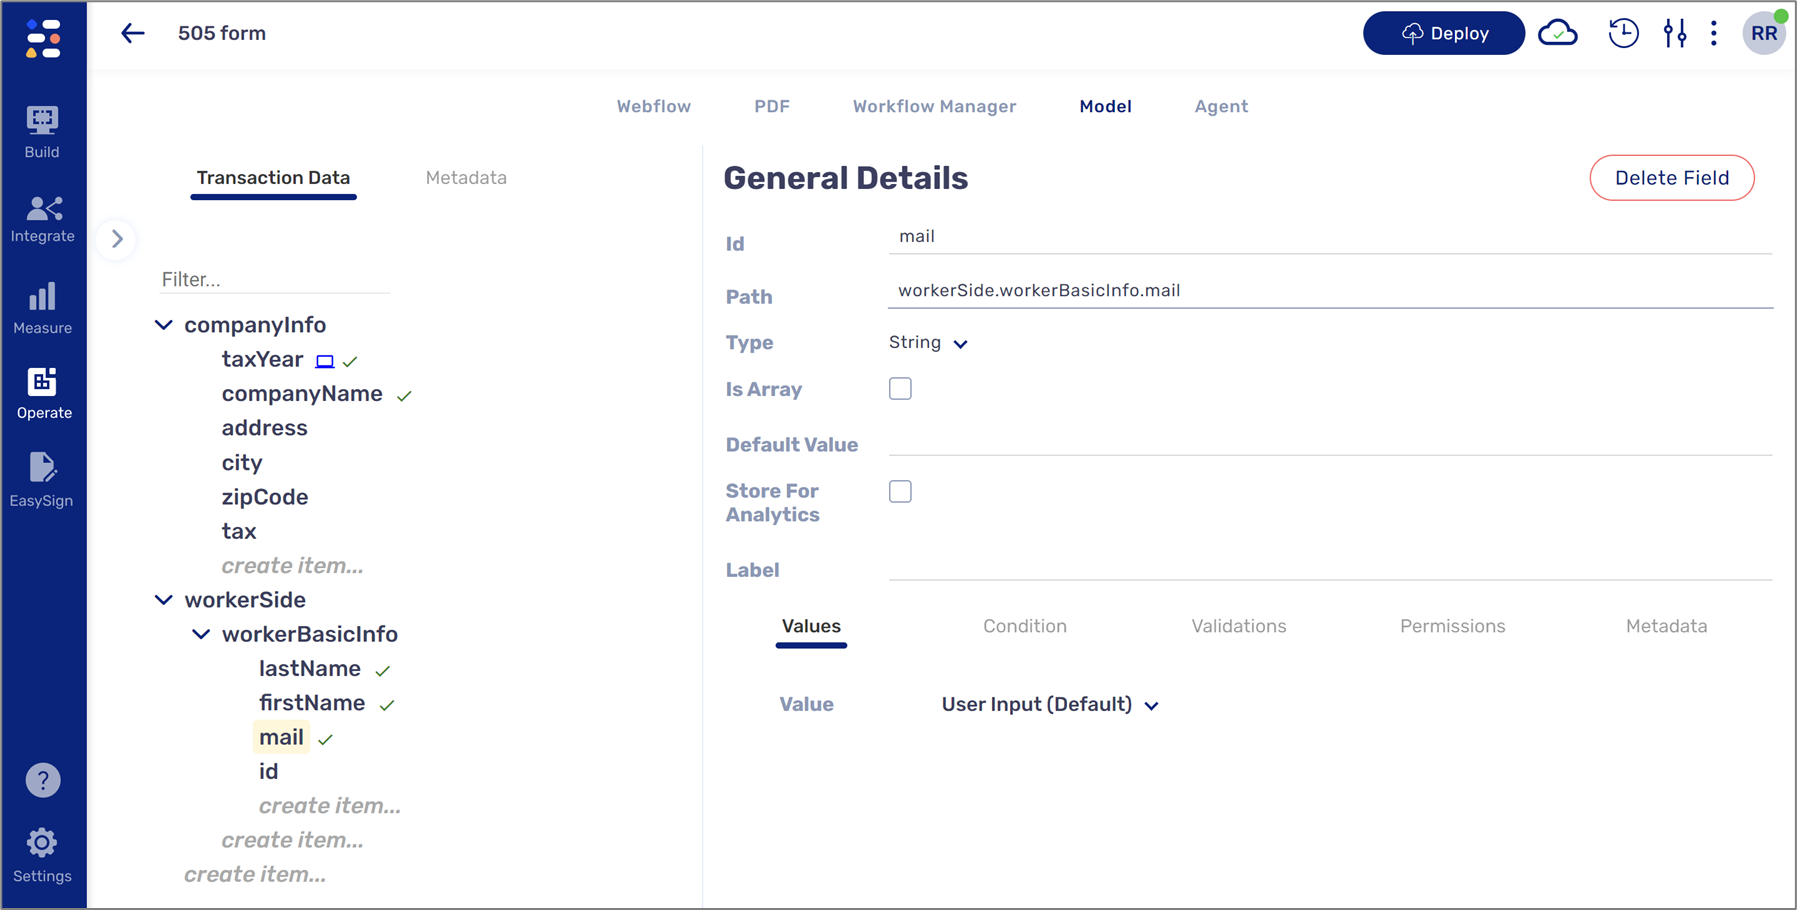
Figure 19: Model
The workflow Manager contains a step with an email communication channel for the Start Phase.
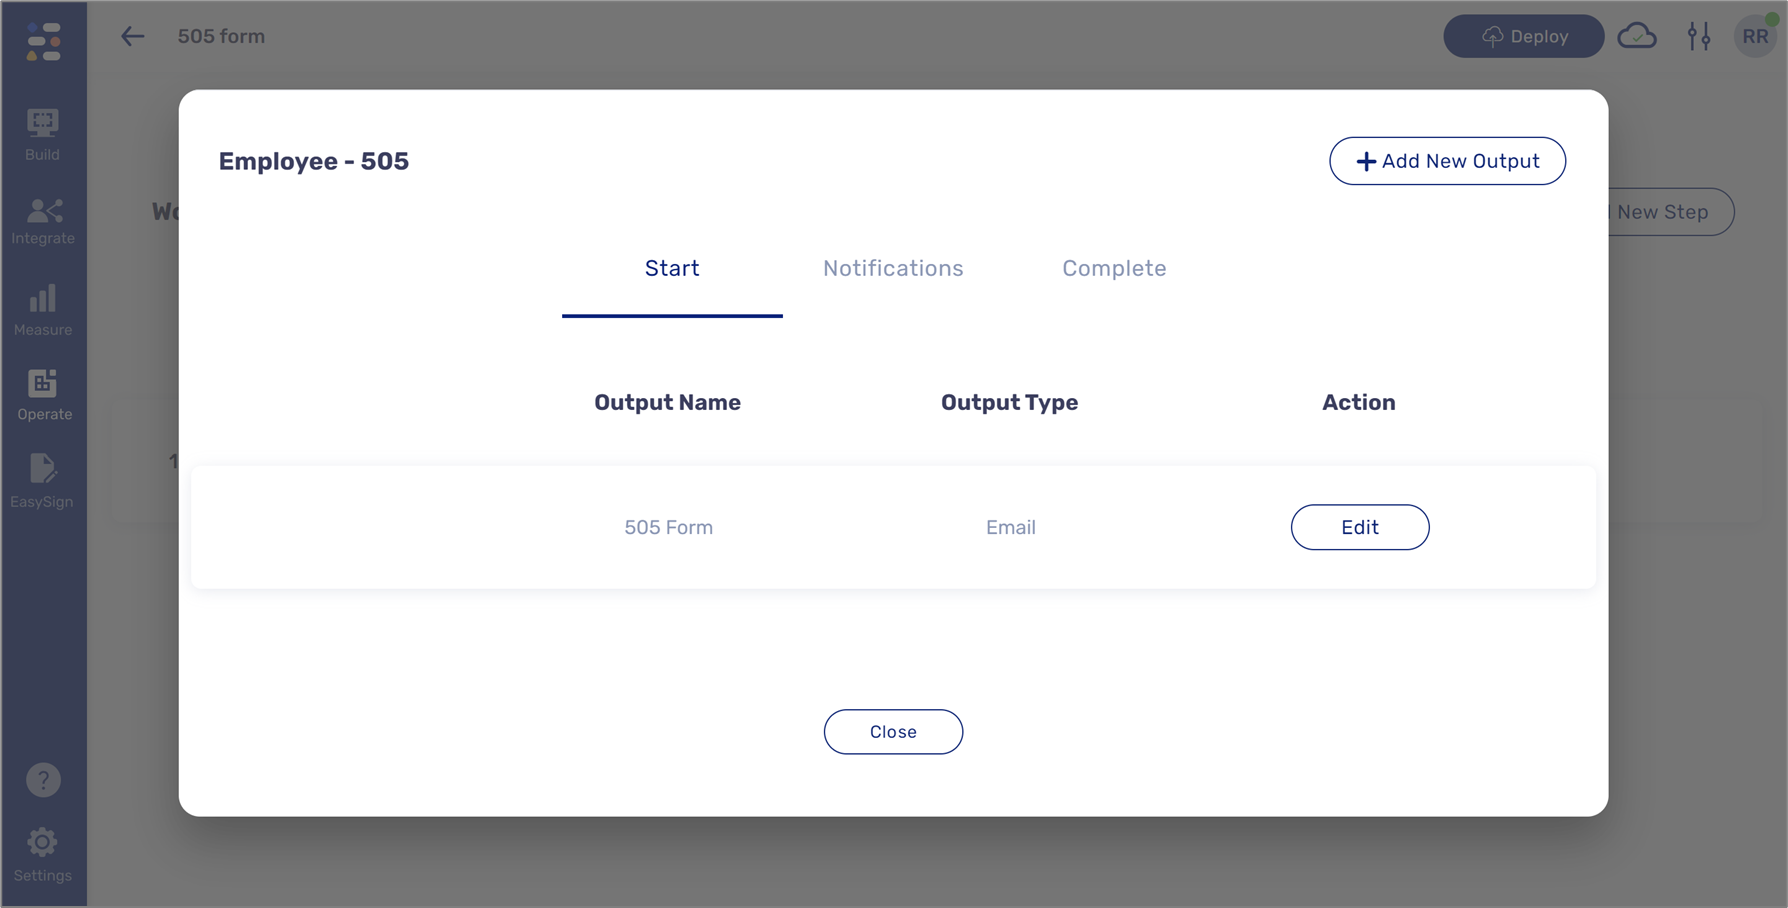
Figure 20: Workflow Manager - Email for Phase Start
The email itself contains a varaible (1) for the email address of the recipient. The content of the email contains two additional variables:
- The name of the employee (2).
- The link to the digital process (3).
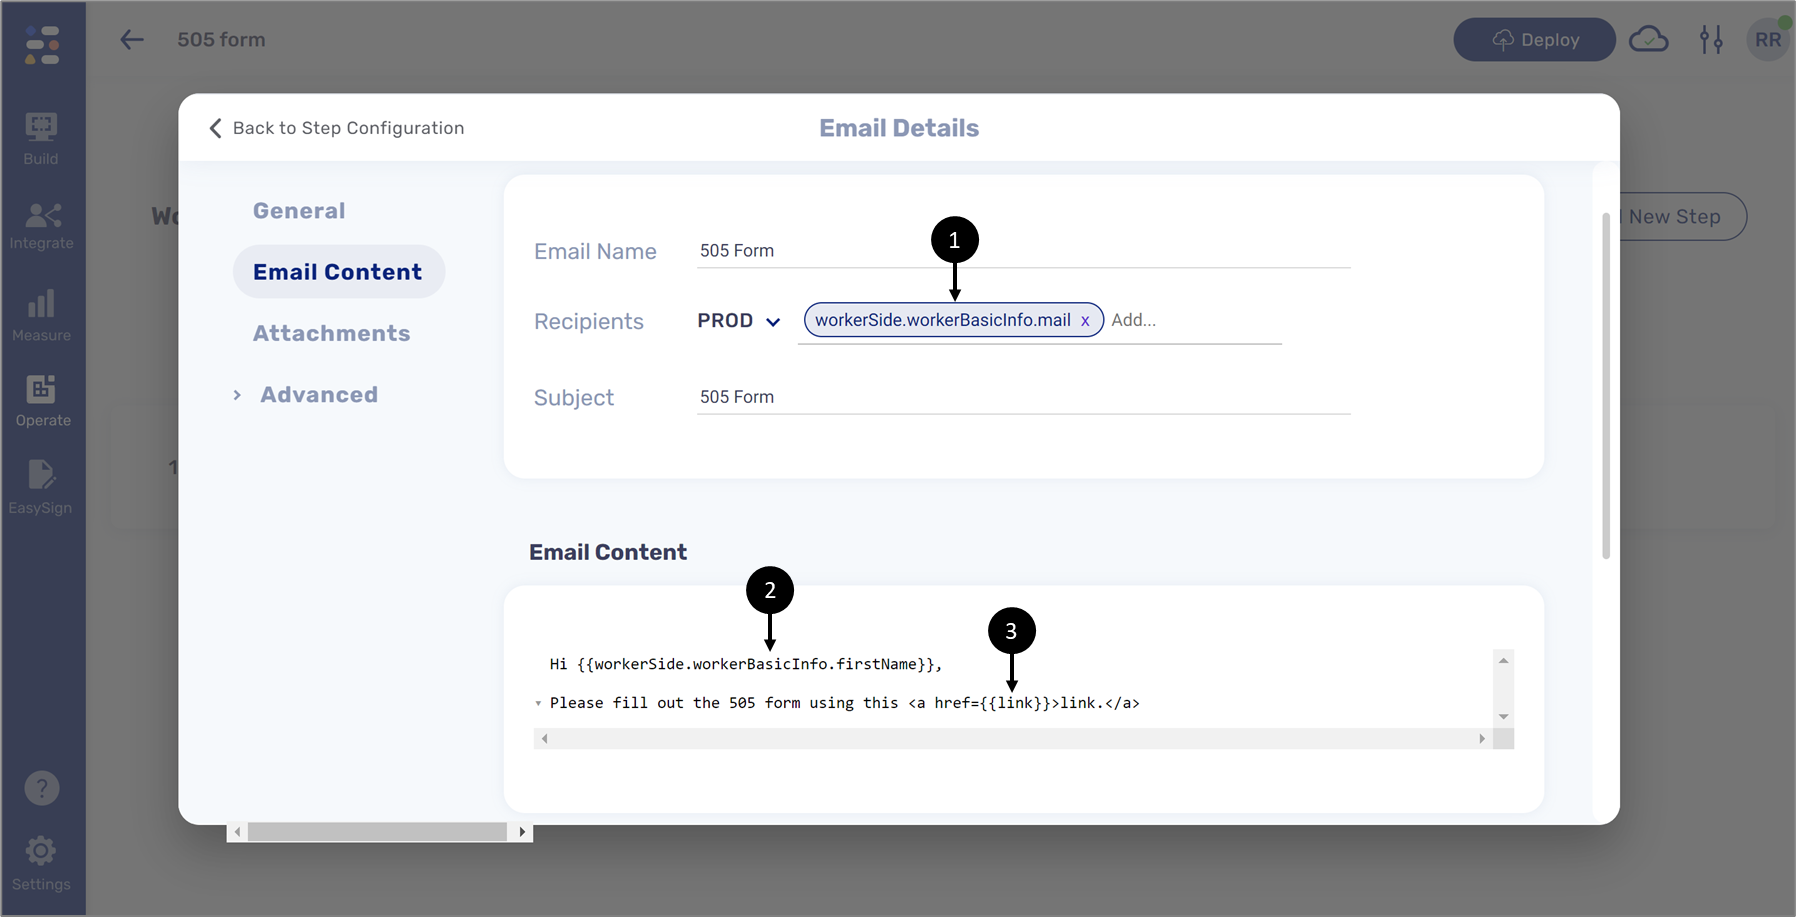
Figure 21: Email and Variables
Using the Bulk Sender
We will use the Bulk Sender and:
- Create a new batch for the 505 form digital process in the Bulk Sender.
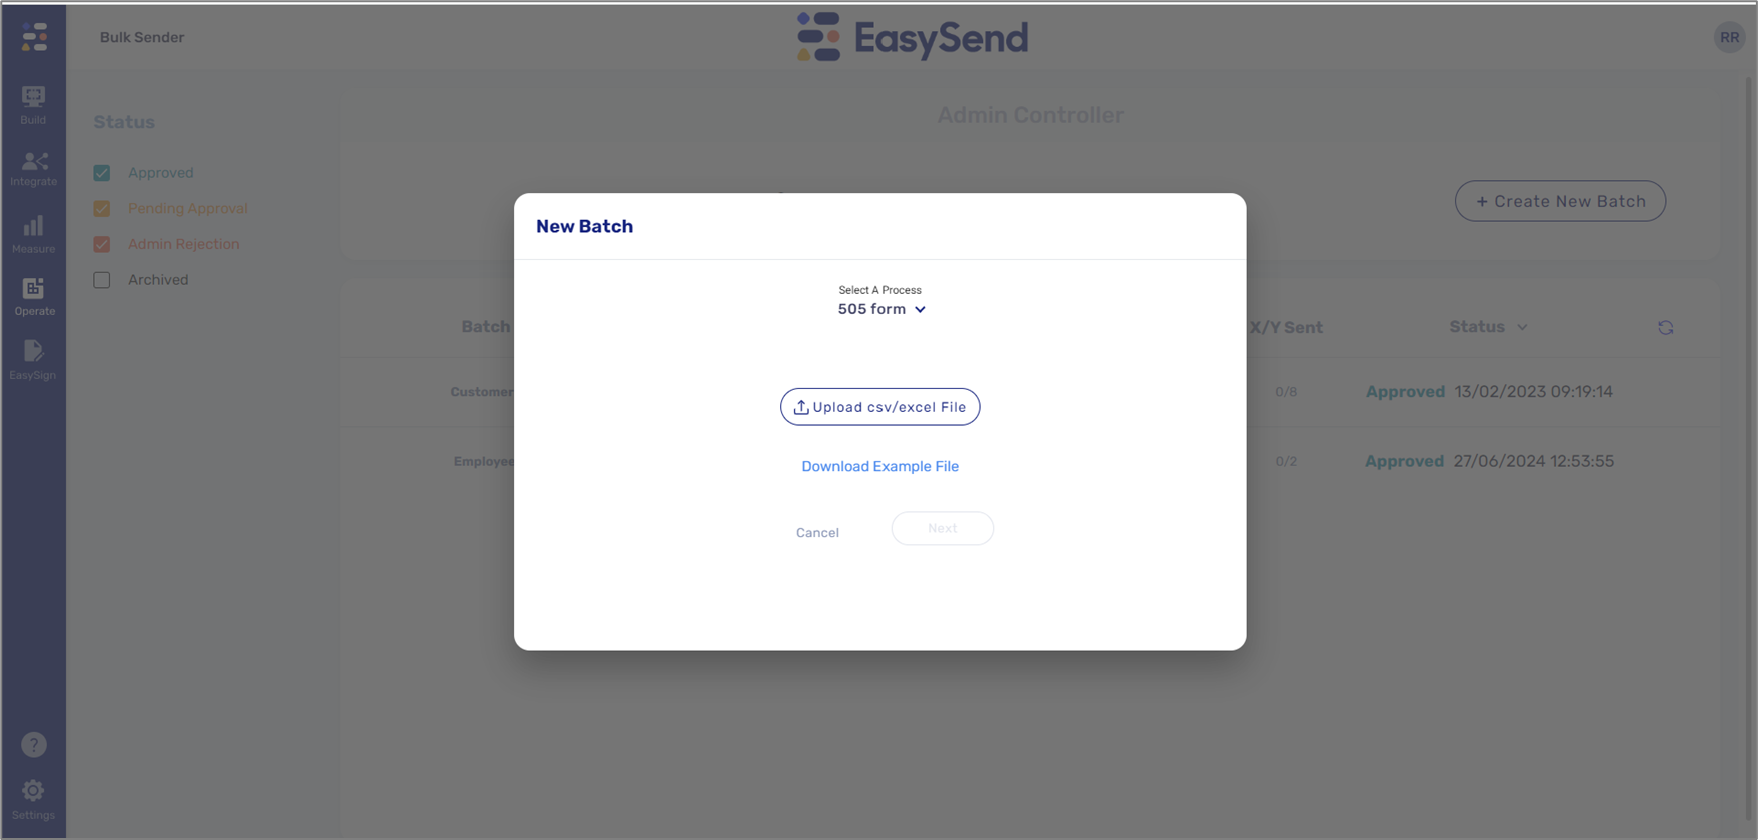
Figure 22: New Batch
- Download the example file and fill it out with employee information.
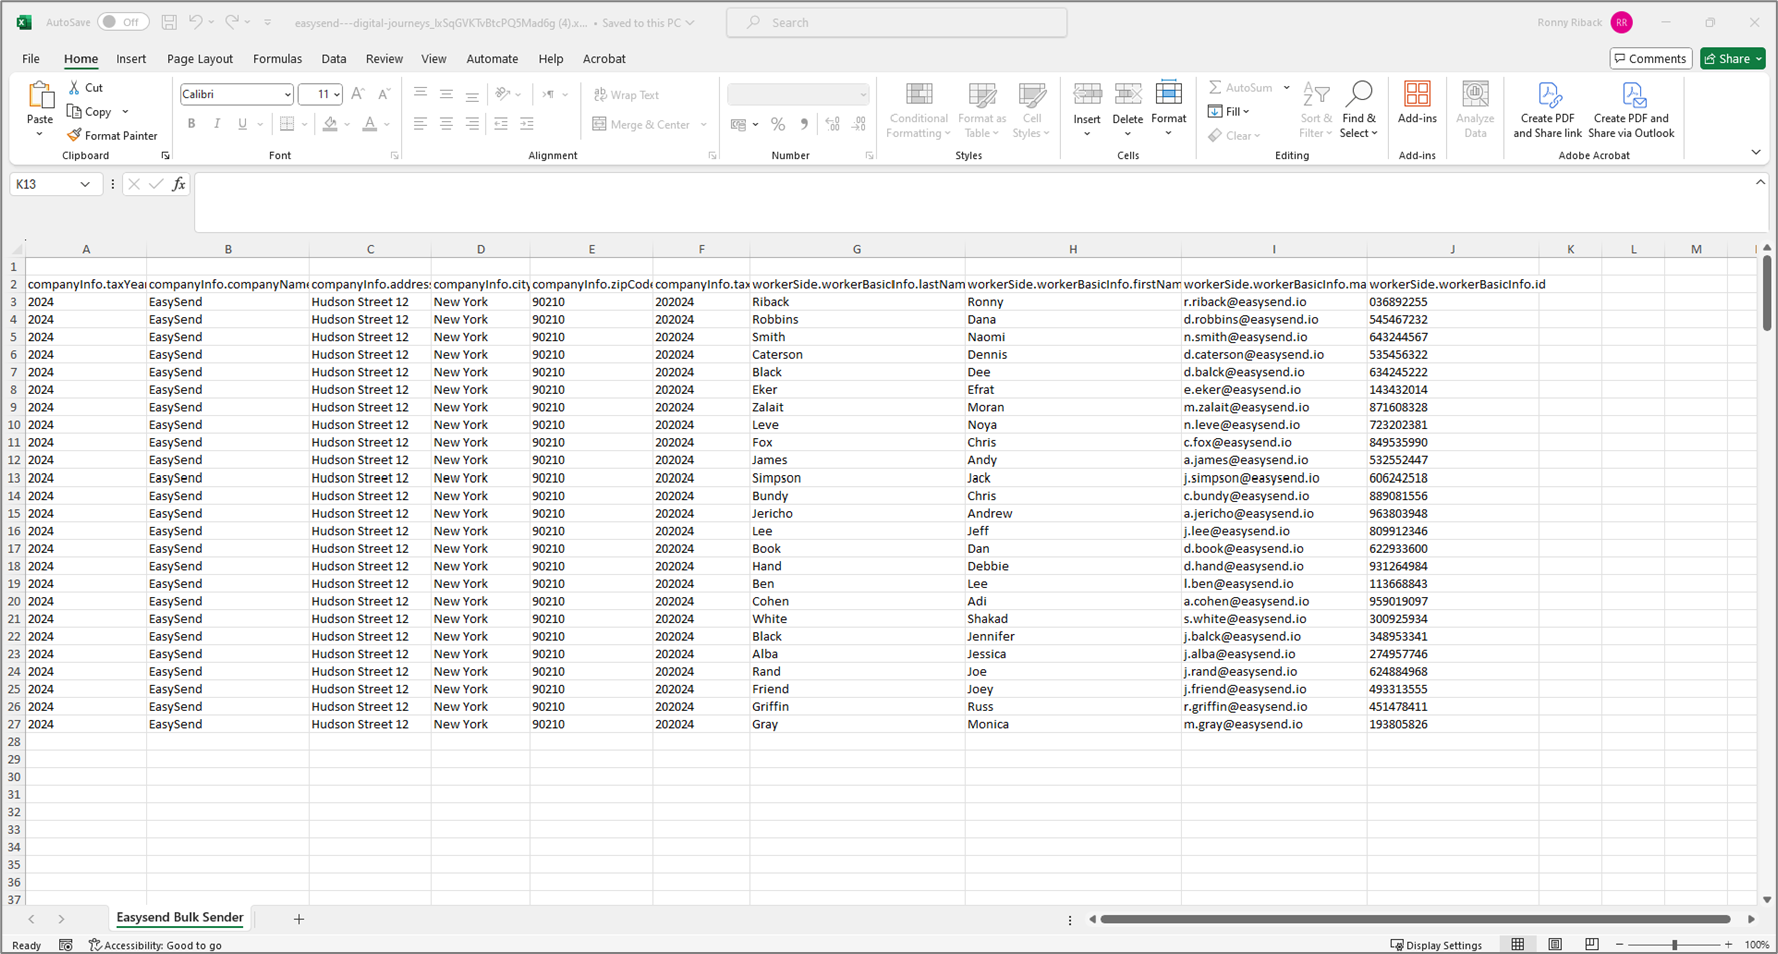
Figure 23: Example File
- Upload the File.
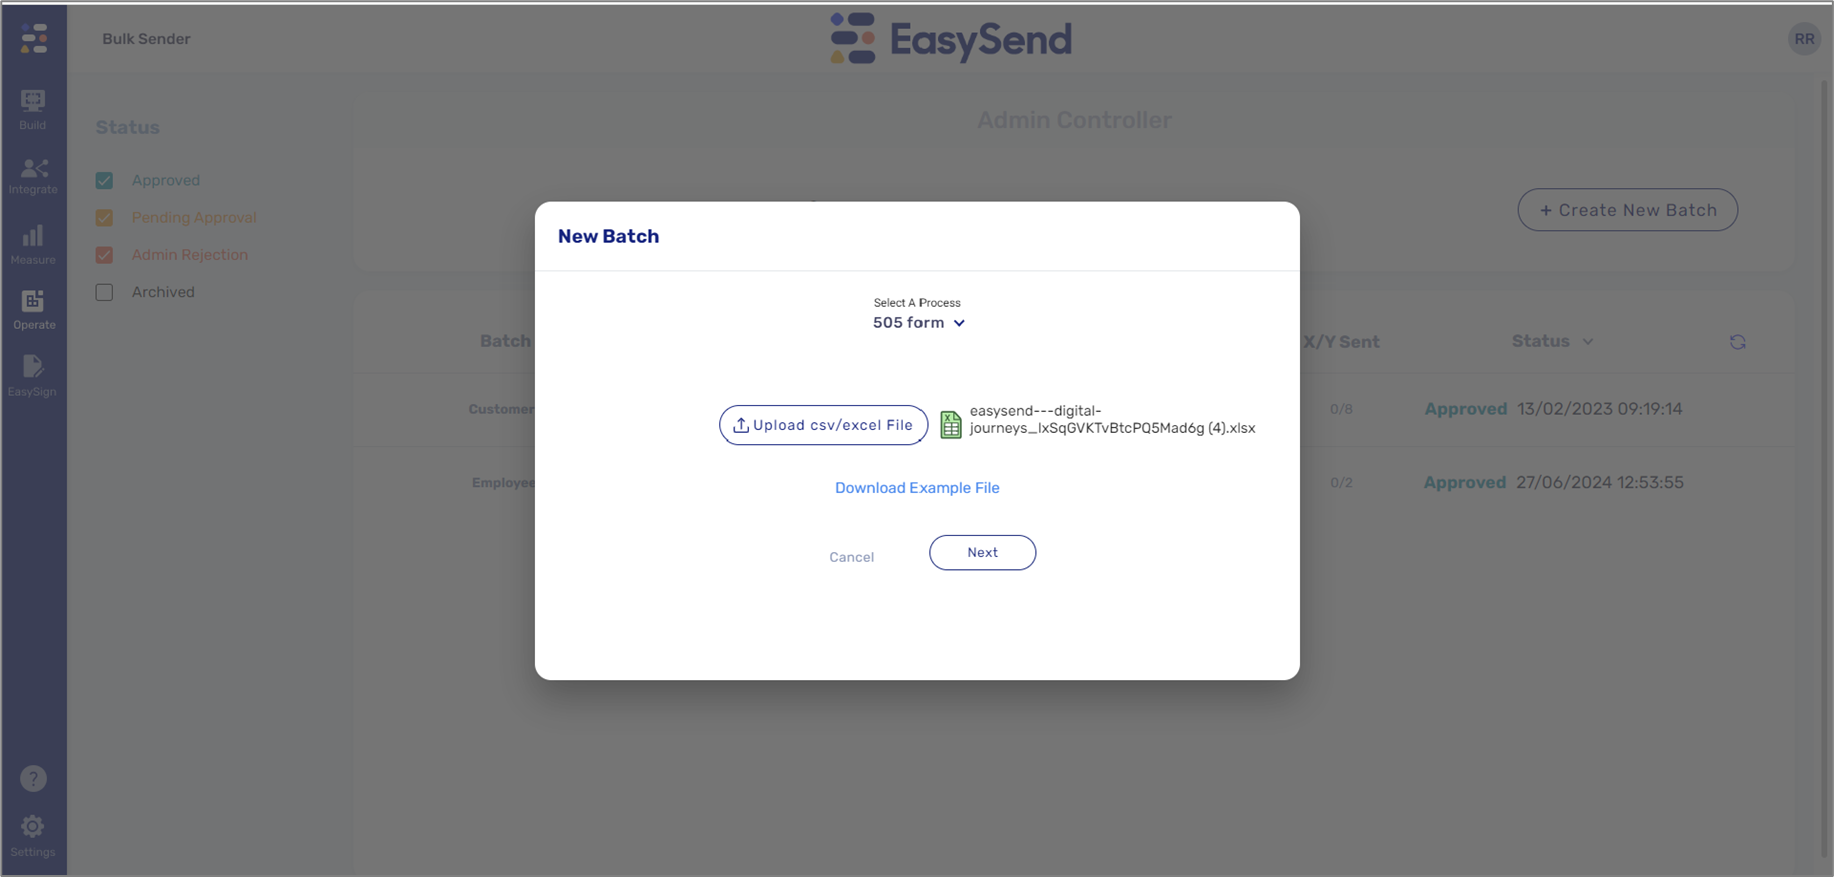
Figure 24: Uploaded Example File
- Approve the batch (1) and send the links.
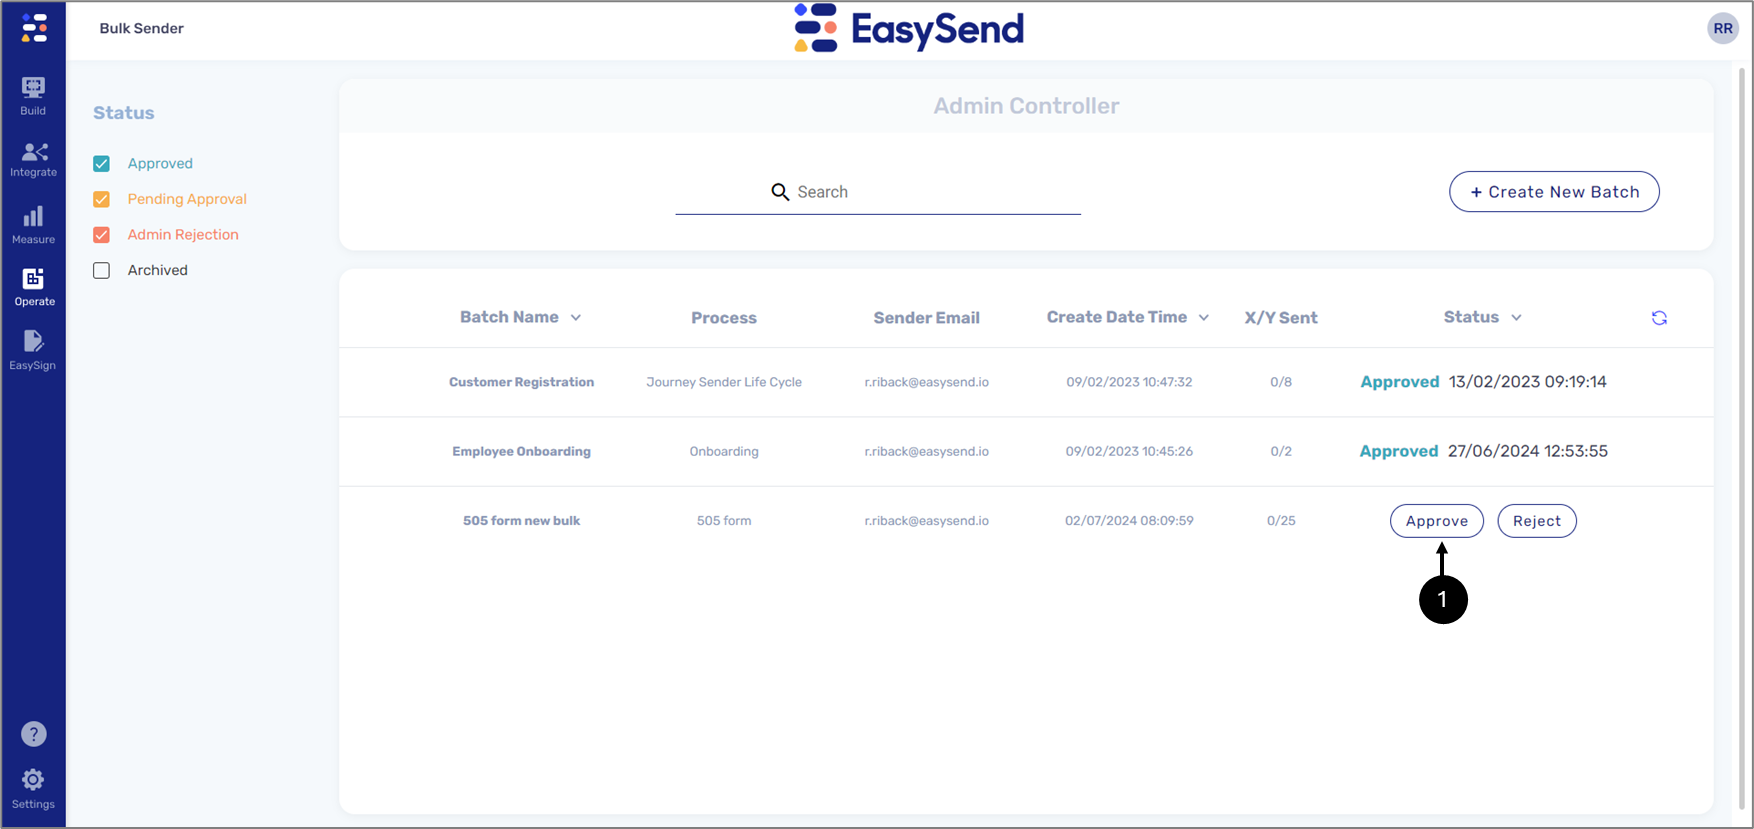
Figure 25: Approve the Batch