Article Overview
The following article describes the steps to initiate an EasySend journey from monday.
Step 1: Building the Process
- Drag and drop all the required components.
- Build the business logic (conditions and validations).
Step 2: Integrate your monday Environment with the Process
- Verify your EasySend monday app is configured as described in the EasySend App Configuration article.
- Connect your monday resources as described in the Connecting Your monday Resources article.
- Add all the required monday columns as described in the monday Columns article.
- Deploy the journey.
Step 3: Map the Journey Steps Using the Workflow
(See Figure 1 and Figure 2)
- Add all the building blocks and connect them, for example:
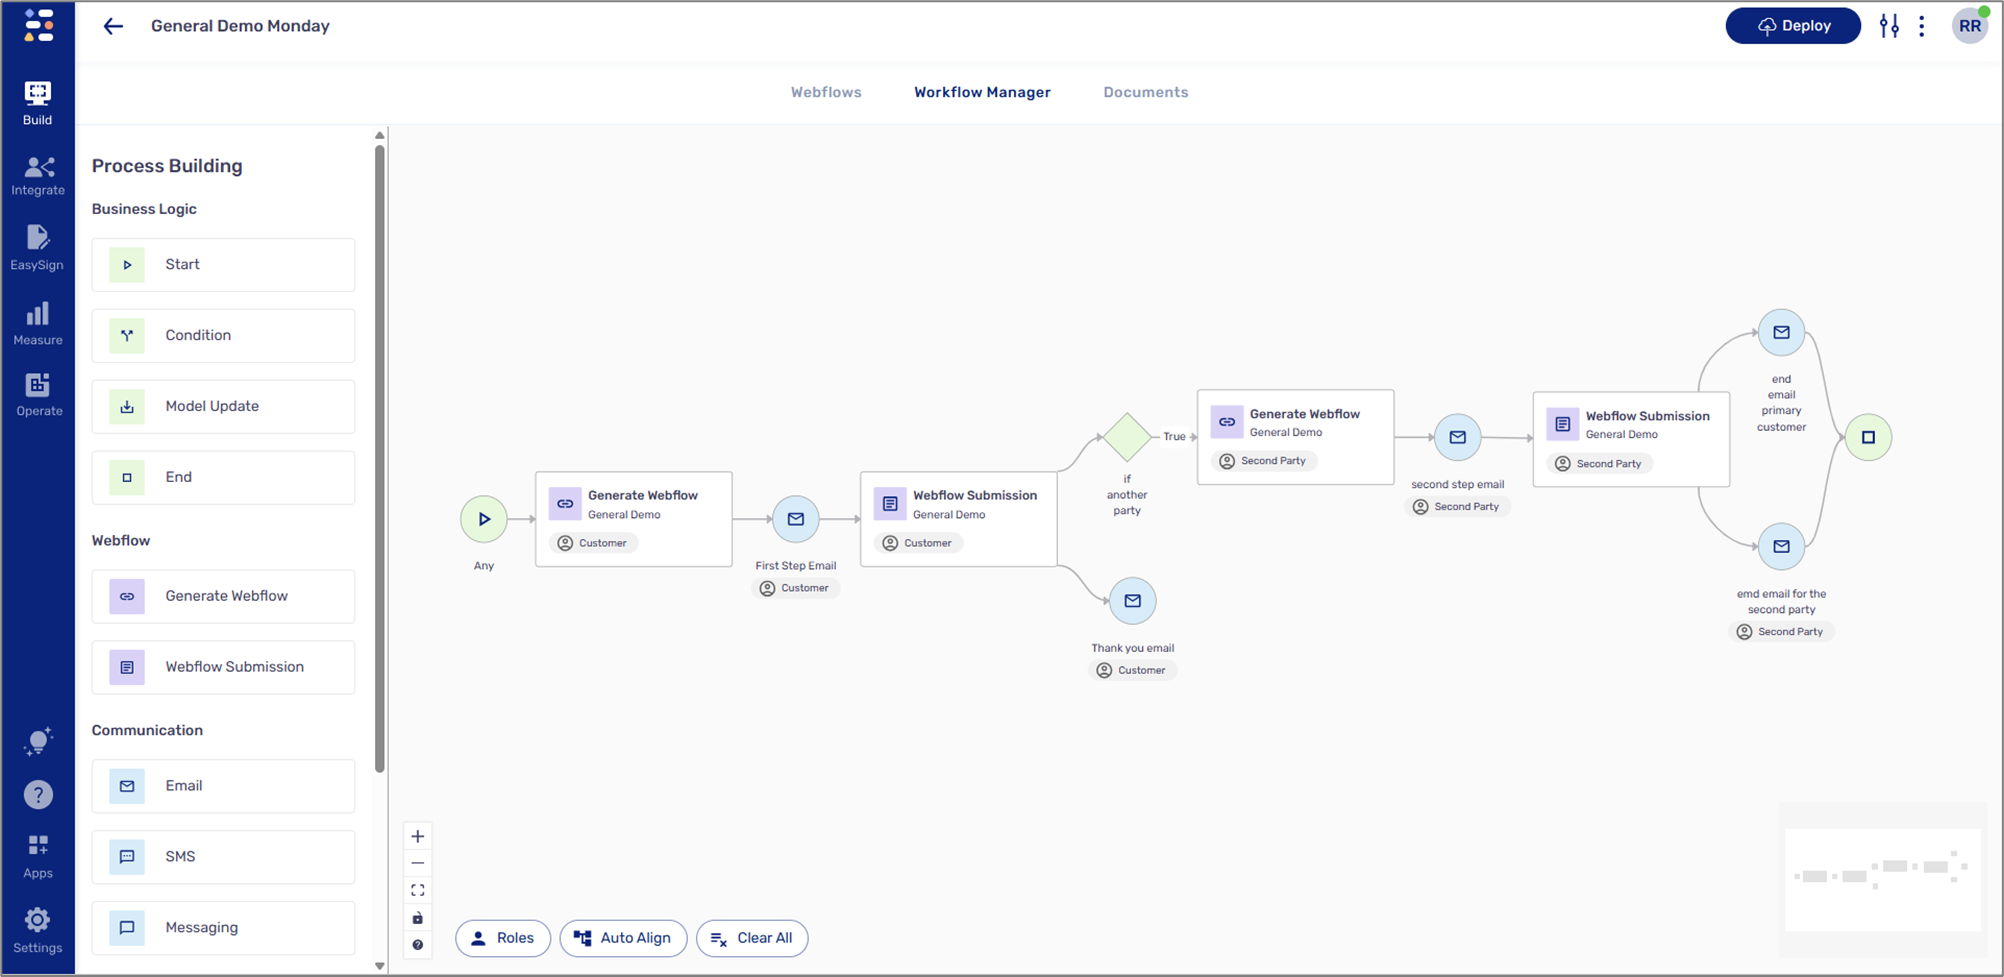
Figure 2: Building Blocks
- Configure the Communication building block, Email or SMS (the one connected between the Generate Webflow building block and the Webflow Submission building block):
- Add the following recipeint - metadata.monday.triggerEmail or metadata.monday.triggerPhone.
- Add the journey's link to the Message Body.
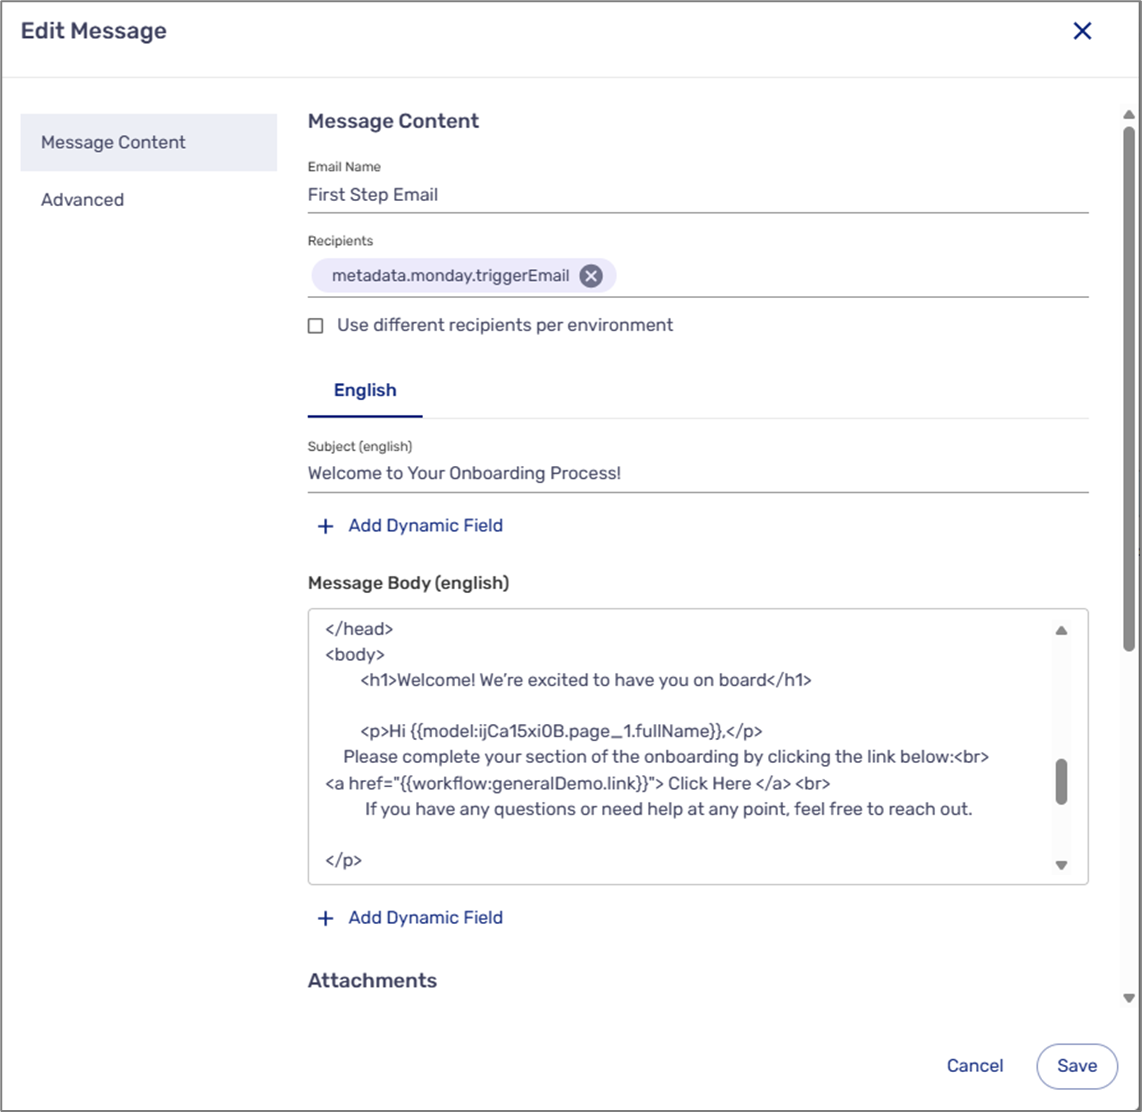
Figure 2: Edit Message Example
Step 4: Initiate the Journey from monday
(See Figure 3 to Figure 5)
To initiate a journey from monday, perform the following steps:
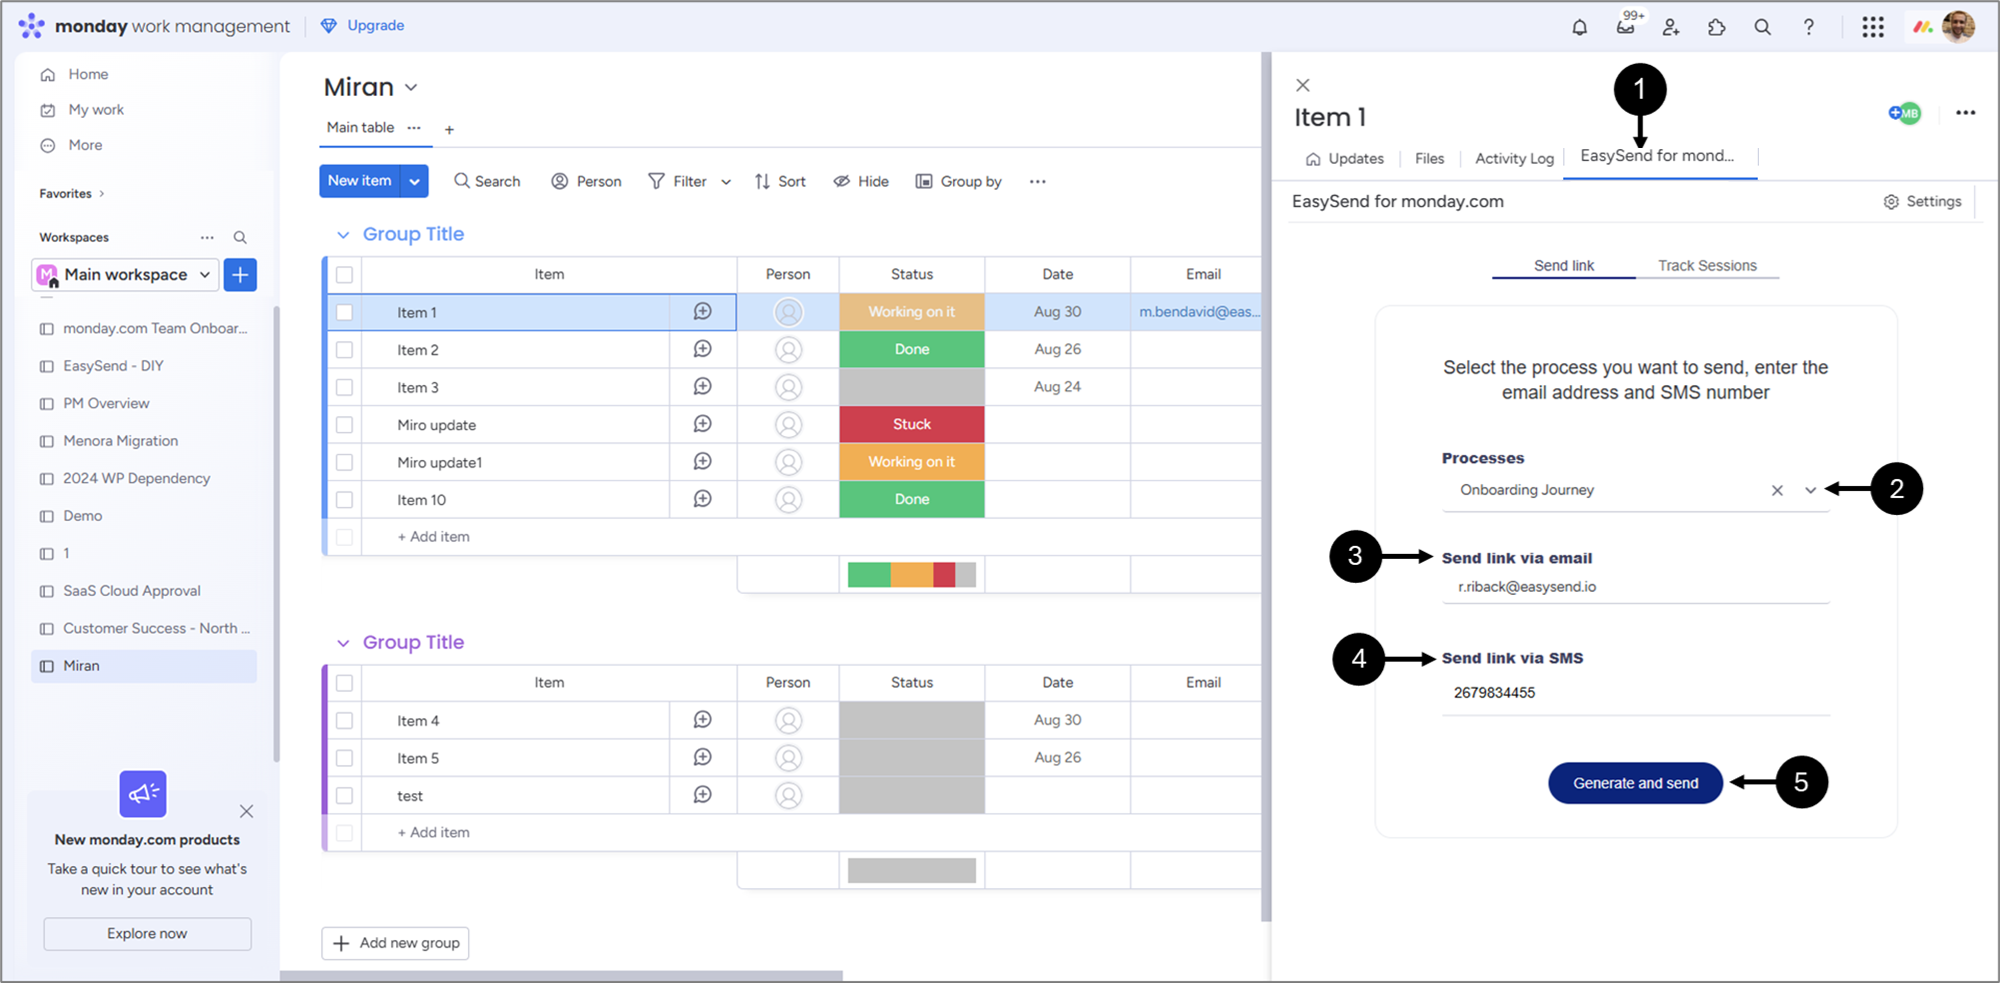
Figure 3: Initiate Journey from monday
- Access your resources (source, workspace, board) and click an item.
- Click the EasySend for monday.com view (1).
- Click the dropdown and select the desired journey (2).
- Enter an email (3).
- If needed, enter a phone number (4).
- Email and/or SMS must be configured on the EasySend side as part of the workflow. For additional information, click here.
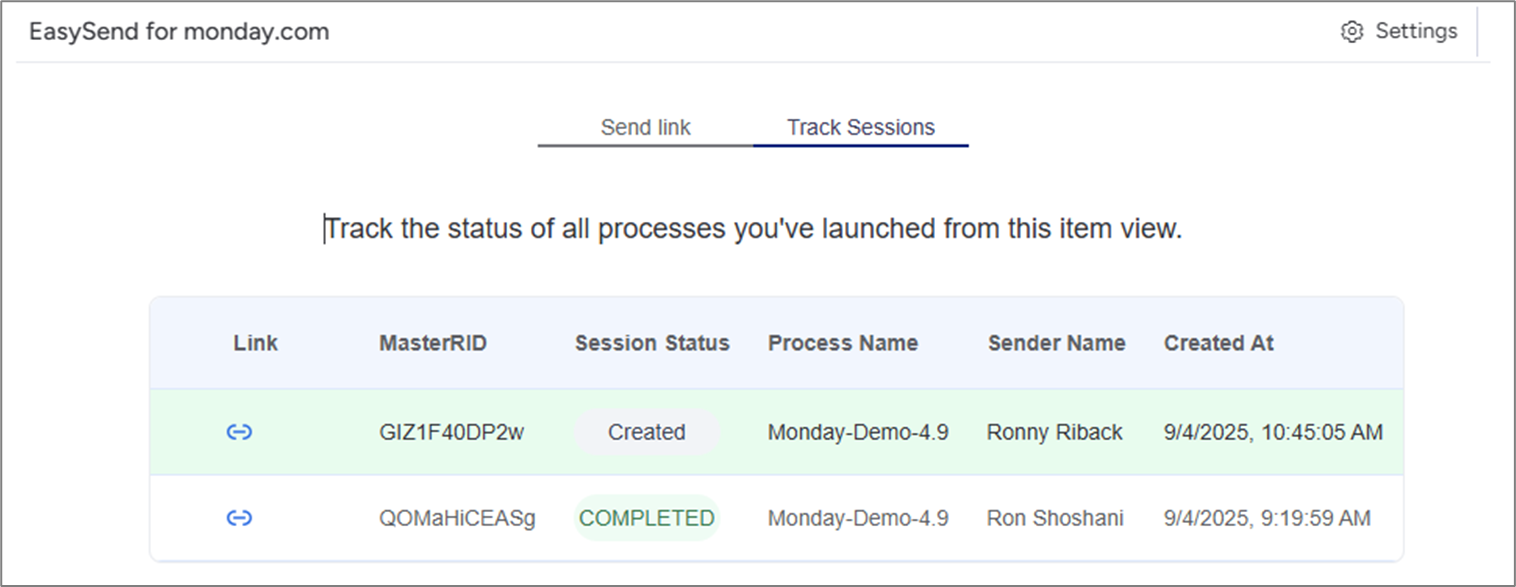
- It is not mandatory to add an email or phone number. After clicking Generate and send, you will automatically be redirected to the Track Sessions tab, where you can copy and use the journey link (highlighted in green). Read the Tracking EasySend Sessions article for additional information.
- Click Generate and send (5).
Result:
The following message appears:
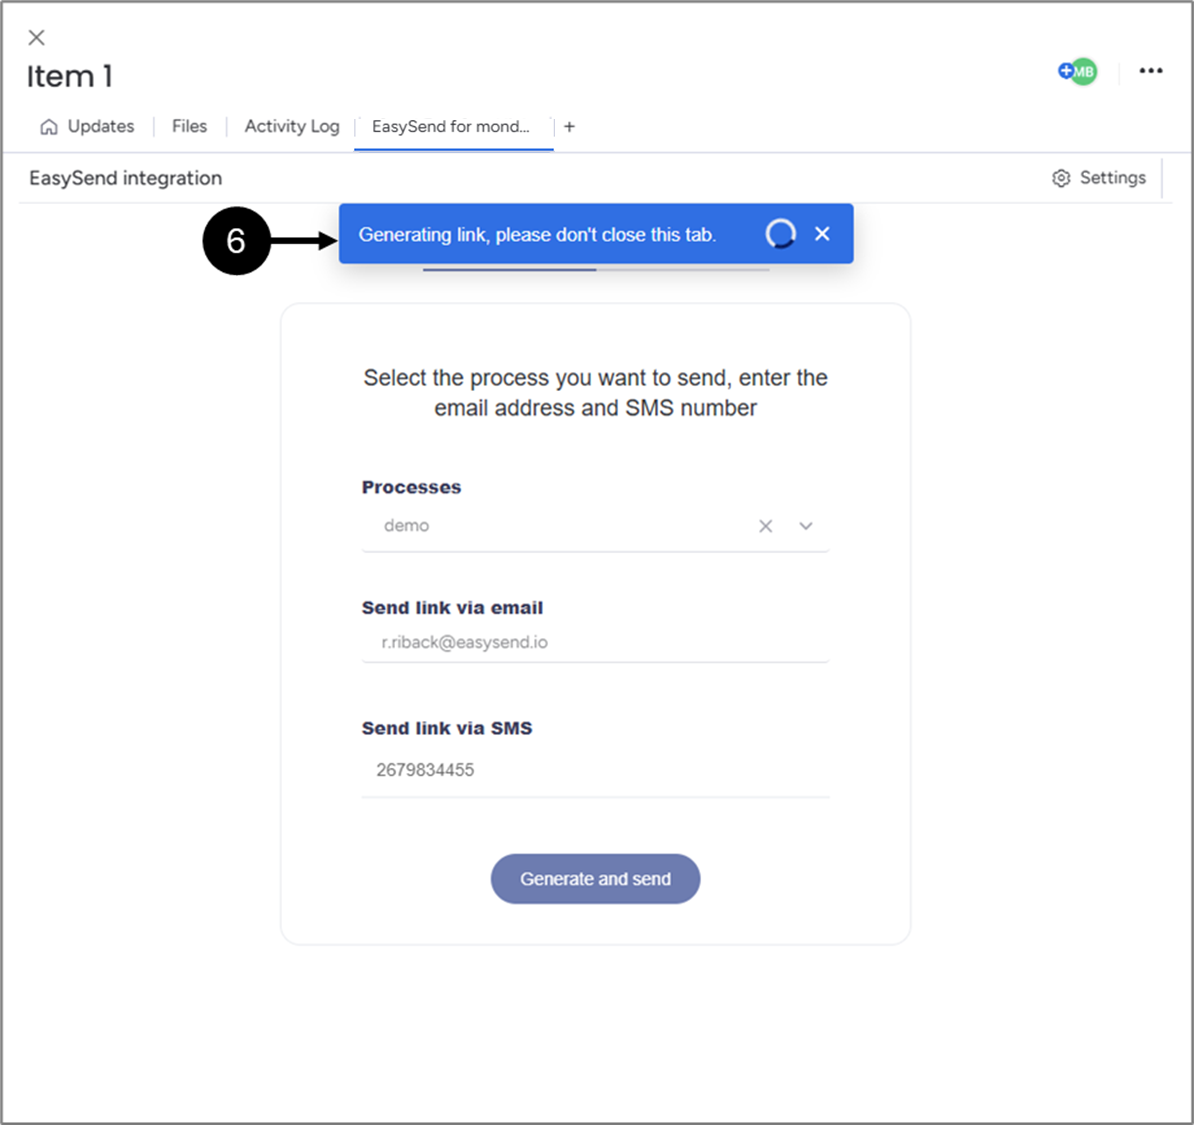
Figure 4: Generating Link
- Wait for the process to finish.
Result:
The following message appears (7):
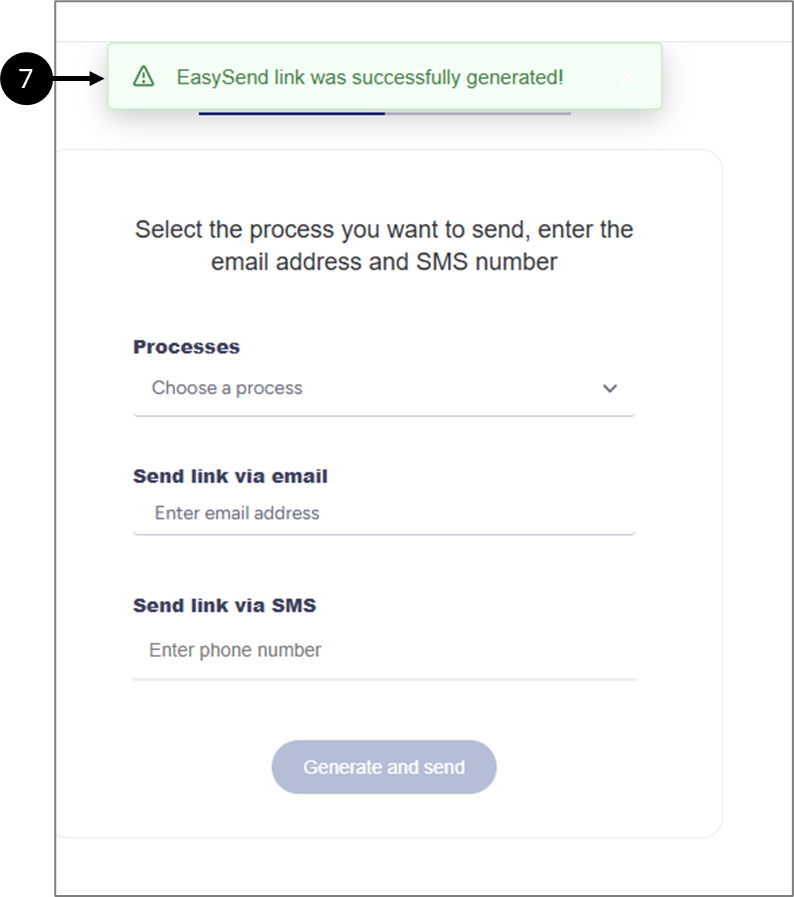
Figure 5: Success Message
Step 5: Interact with the Journey
(See Figure 6 to Figure 8)
After clicking the link to access the process, it can appear with prefilled data from monday, for example:

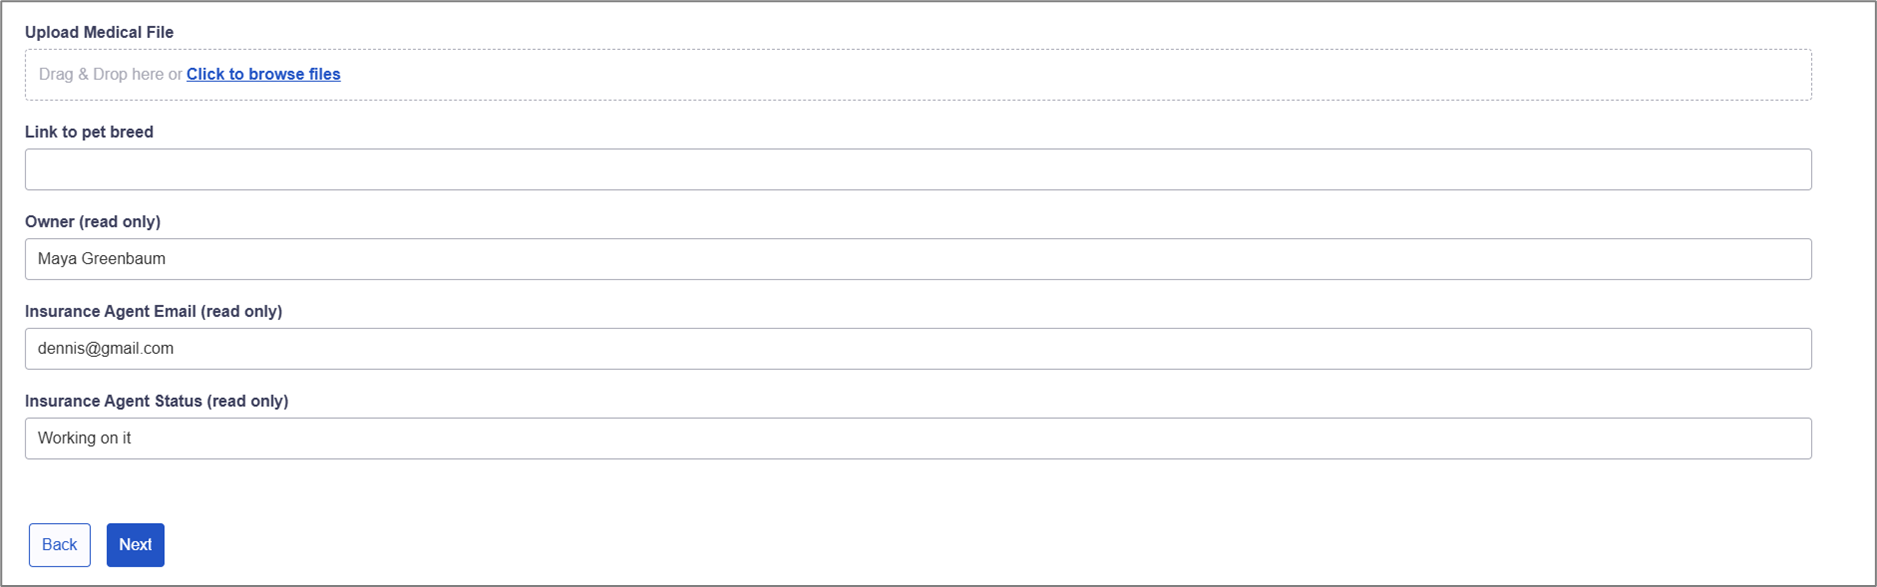
Figure 6: Journey with Prefilled Data Example
As users navigate the journey before submission, the monday board will update with new input information. For example:
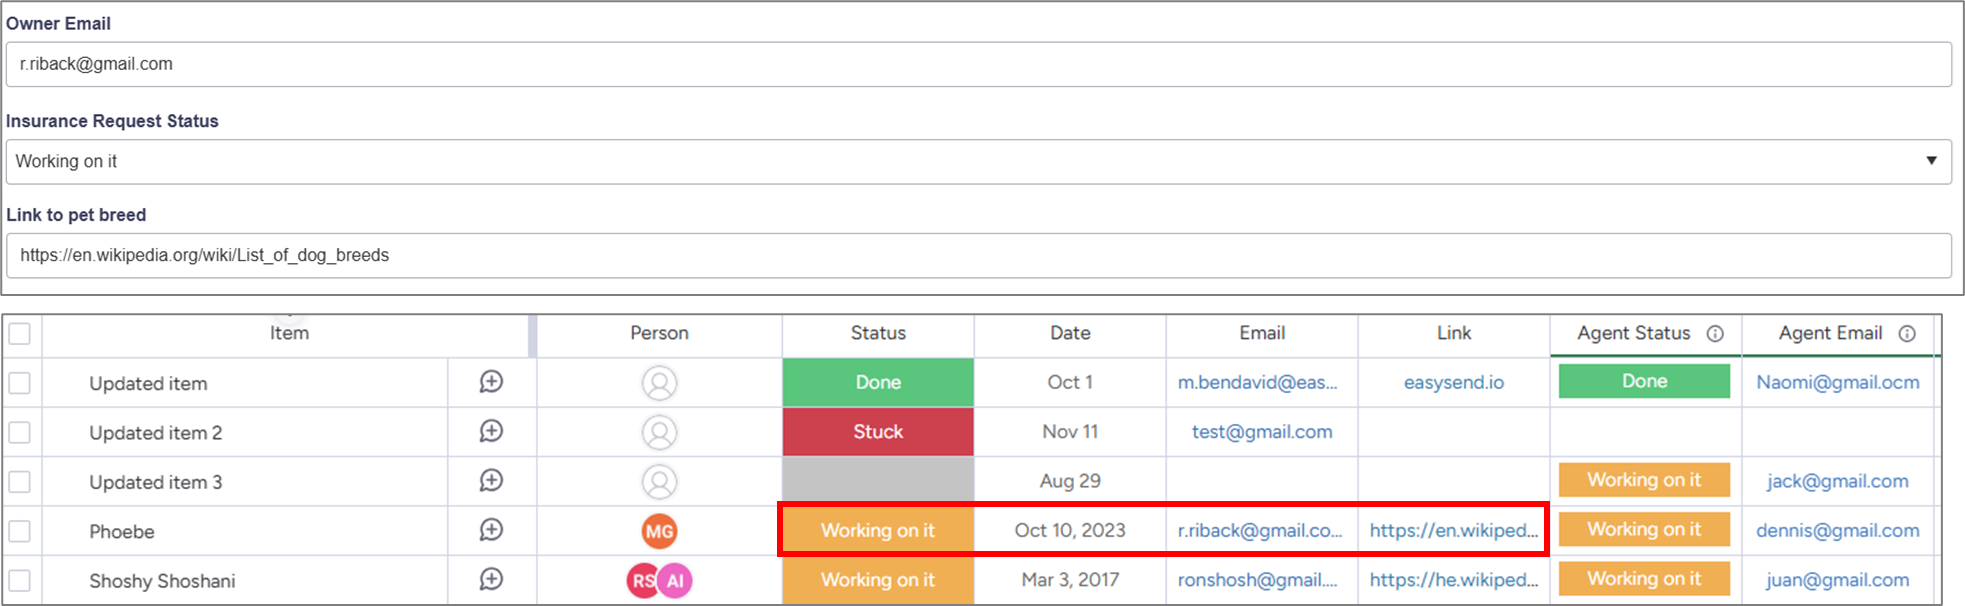
Figure 7: Live Updated monday Board
Files, however, will only appear after submission, for example:
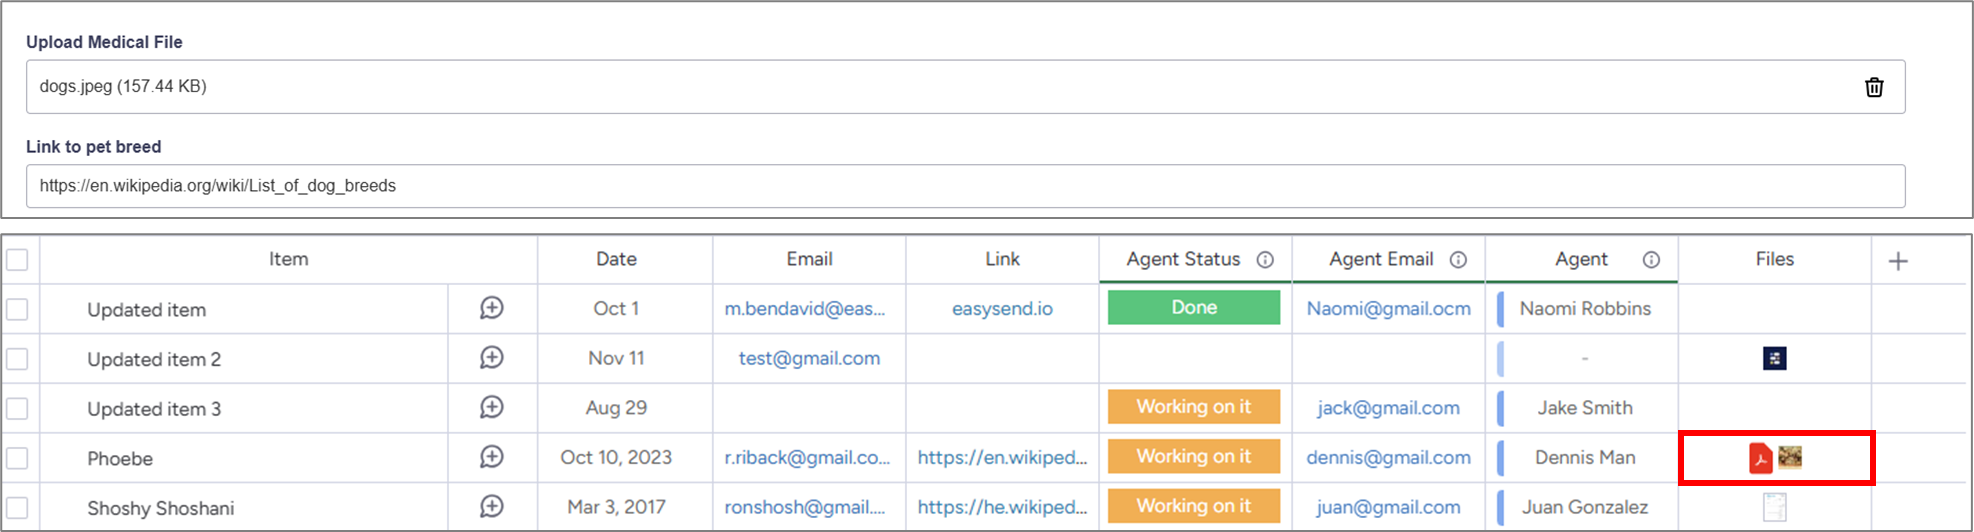
Figure 8: File Added After Submission
- Allowed file types {".jpeg", ".jpg", ".pdf", ".docx", ".xlsx", ".gif", ".mp4", ".csv", ".svg", ".txt", ".ai"}
- Size <500MB