Article Overview
The following article describes how to use the EasySend Dynamic Document Editor.
EasySend Dynamic Document Editor
(See Figure 1 to Figure 3)
The EasySend Dynamic Document Editor section includes:
- Data items created in the Webflow - their type and structure are identical to the ones defined there (1).
- Fixed Metadata items (2).
- A list of items (3) is displayed when you select one of the two options.
- You can also search (4) for a specific item, or Filter (5) by item type:
- Object
- String
- Boolean
- File
- Signature
The Reload Model (6) lets you reload the list of data and Metadata items. It is used to load changes applied to the Webflow. The Insert Field button (7) becomes enabled once an item is selected. Clicking it will insert the selected item into the Word document. The Save button (8) operates like Word's save button.
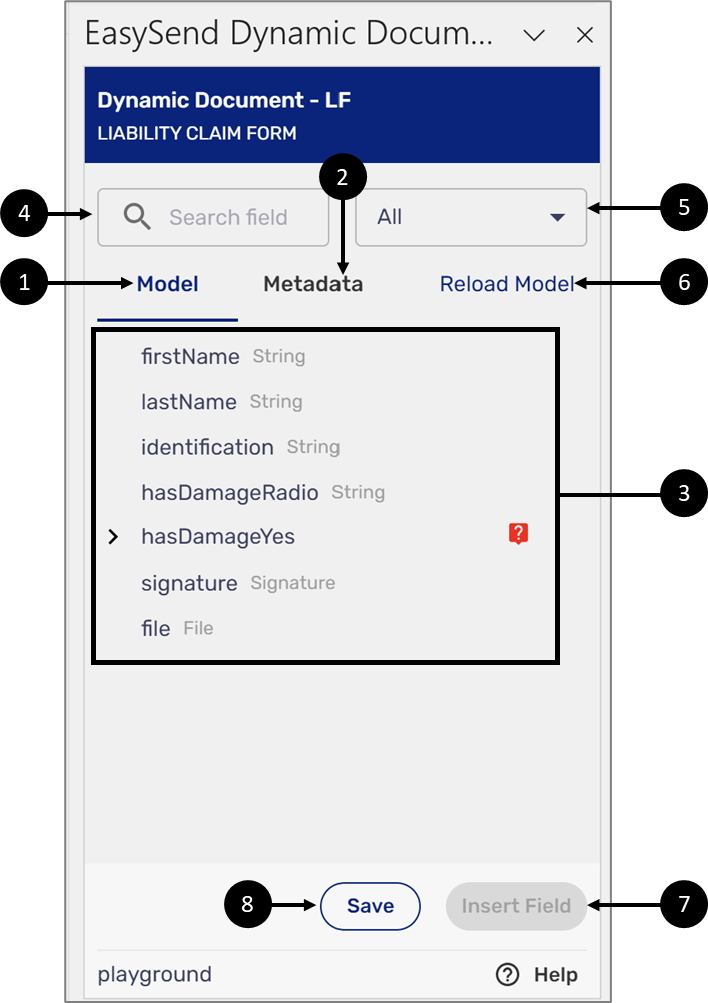
Figure 1: EasySend Document Generation Editor
After inserting an item into the document and clicking it, two additional options appear:
- Remove (9) - deletes the inserted item.
- Change (10) - replaces the inserted item. For additional information, see the Replacing Items section.
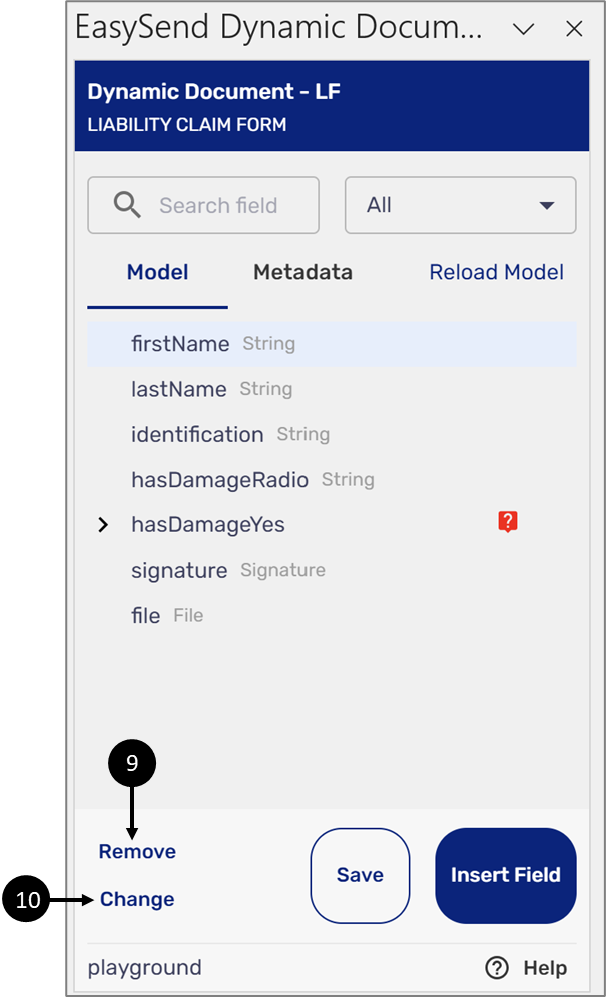
Figure 3: Additional Options - Remove and Change
Inserting Items Into a Dynamic Document
The following sections describe how to insert items into a dynamic document.
Inserting Data Items
(See Figure 4 to Figure 6)
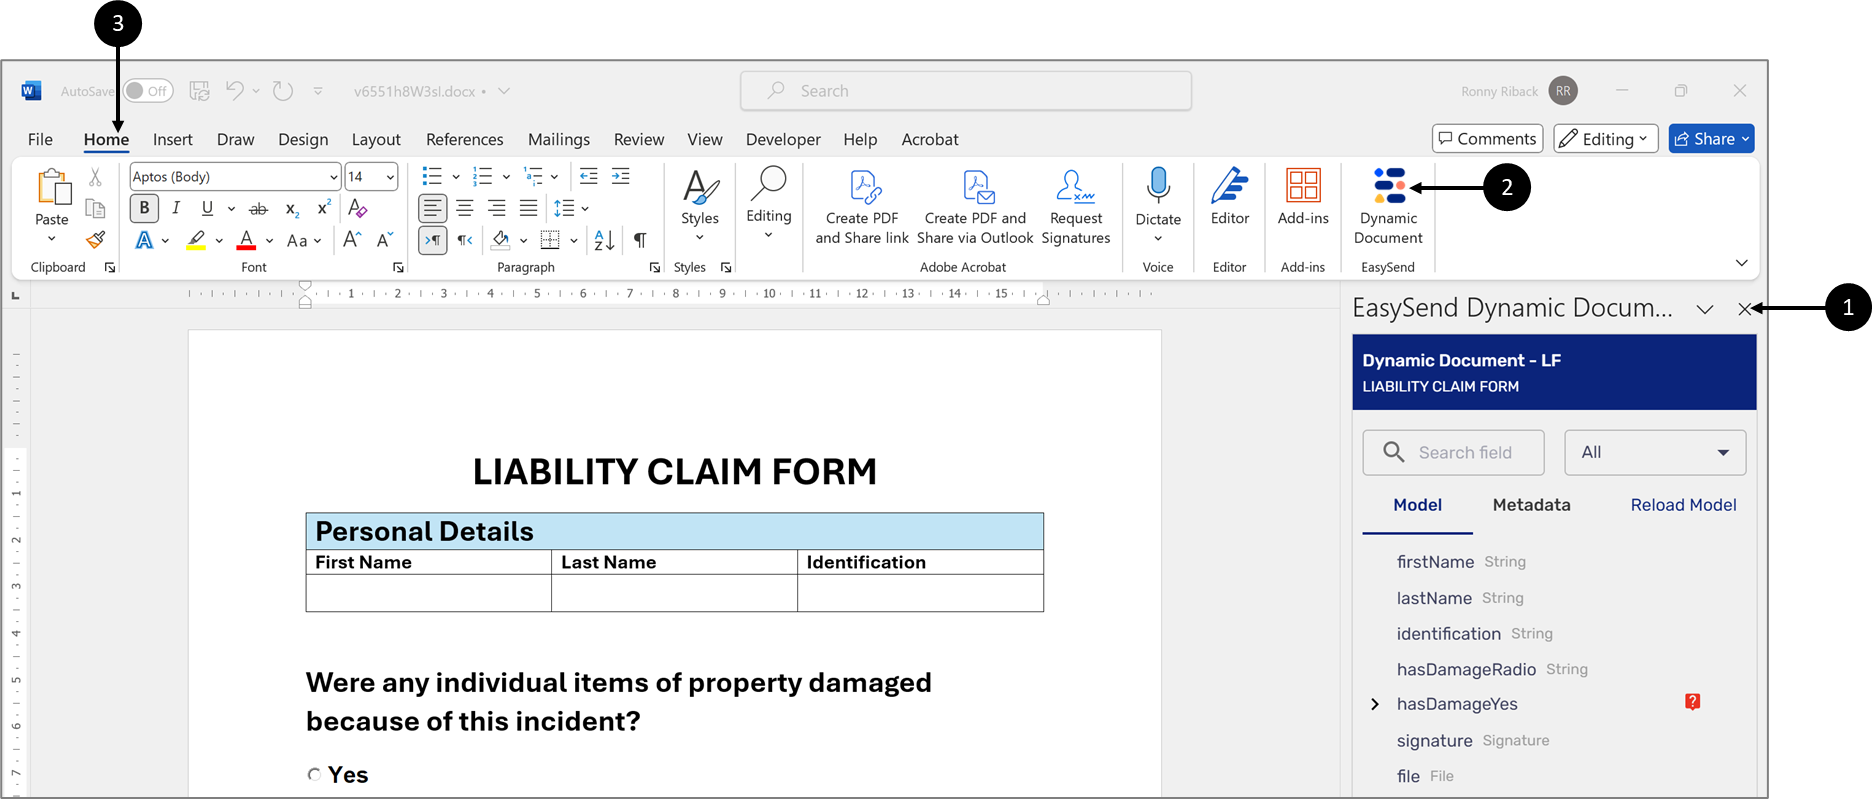
To insert data items, perform the following steps:

Figure 4: Inserting an Item
- Click the desired location (1) on the dynamic document to insert the item.
- Click the desired item from the list (2).
- Click the Insert Field button (3).
Result:
The item is inserted into the dynamic document (4):
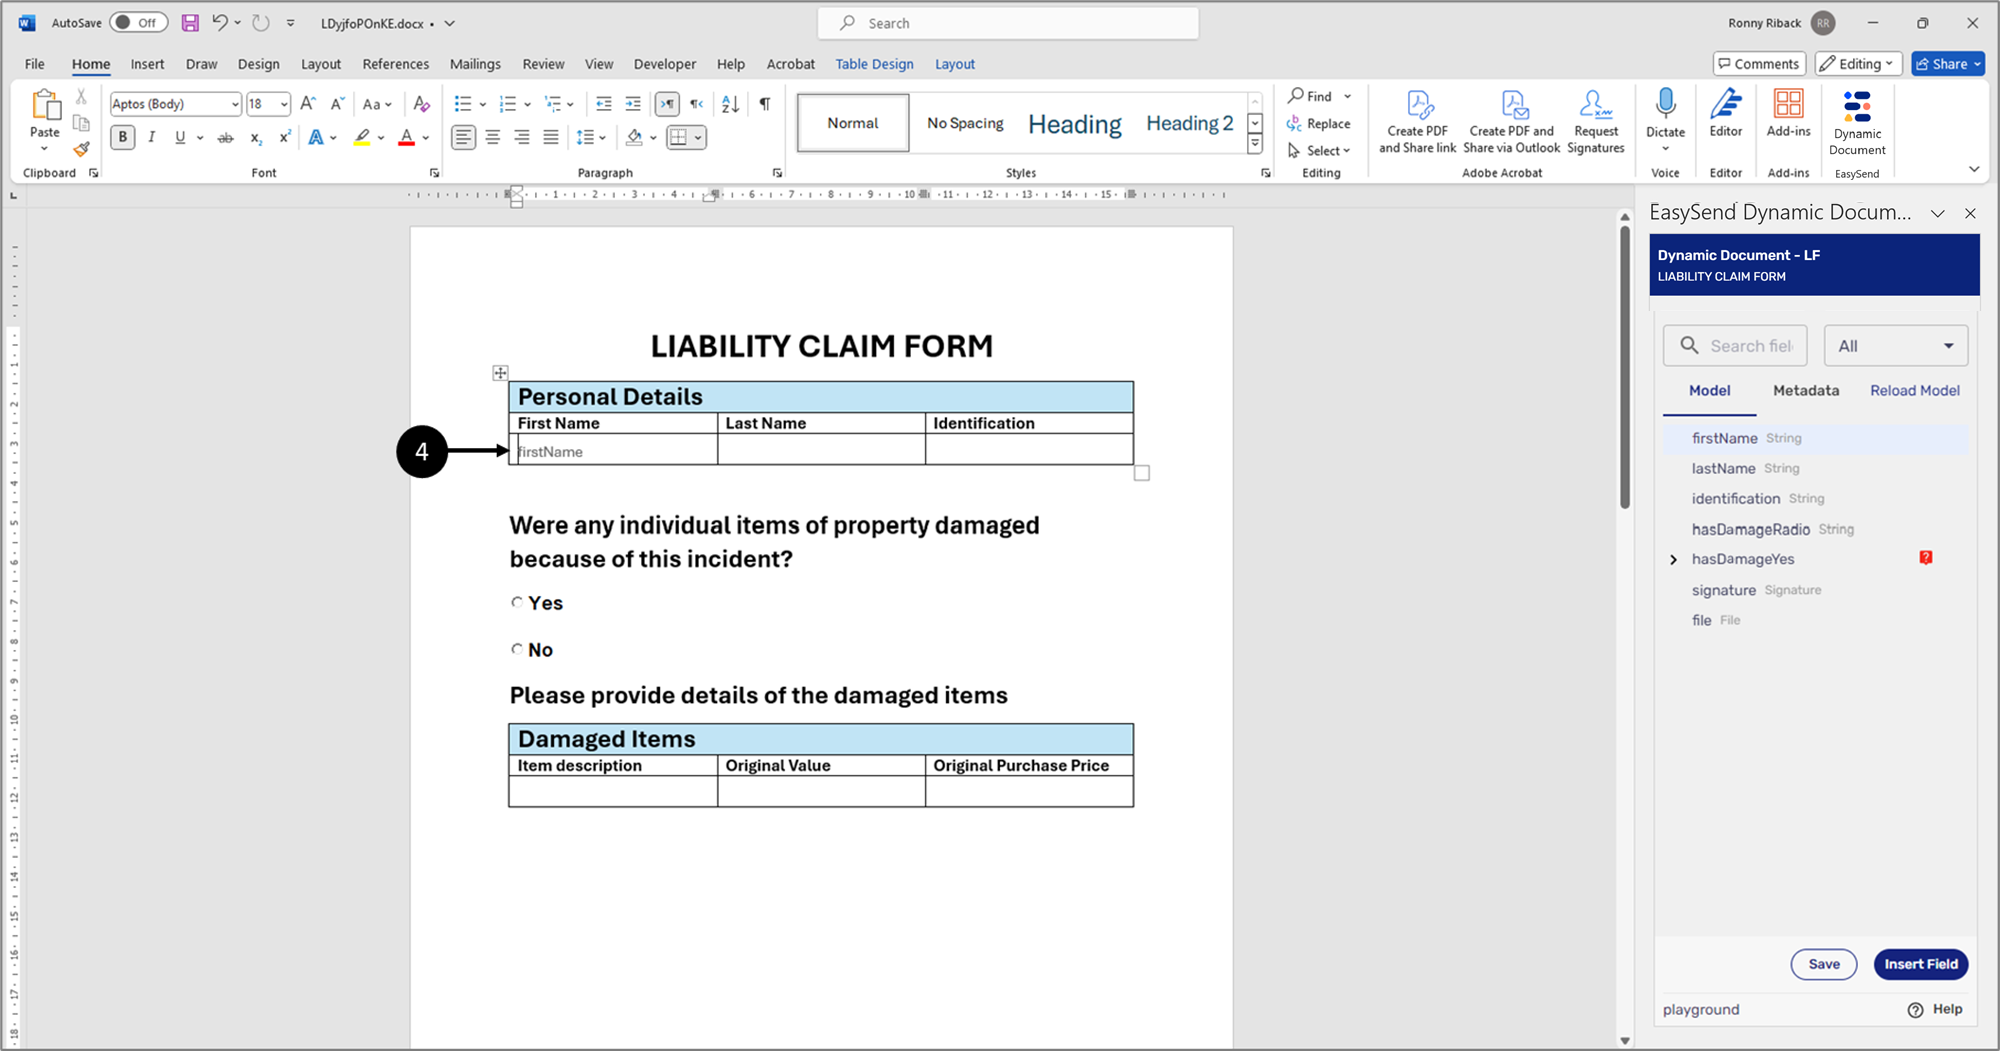
Figure 5: Inserted Item
- Repeat steps 1 to 3 until you are done, for example:
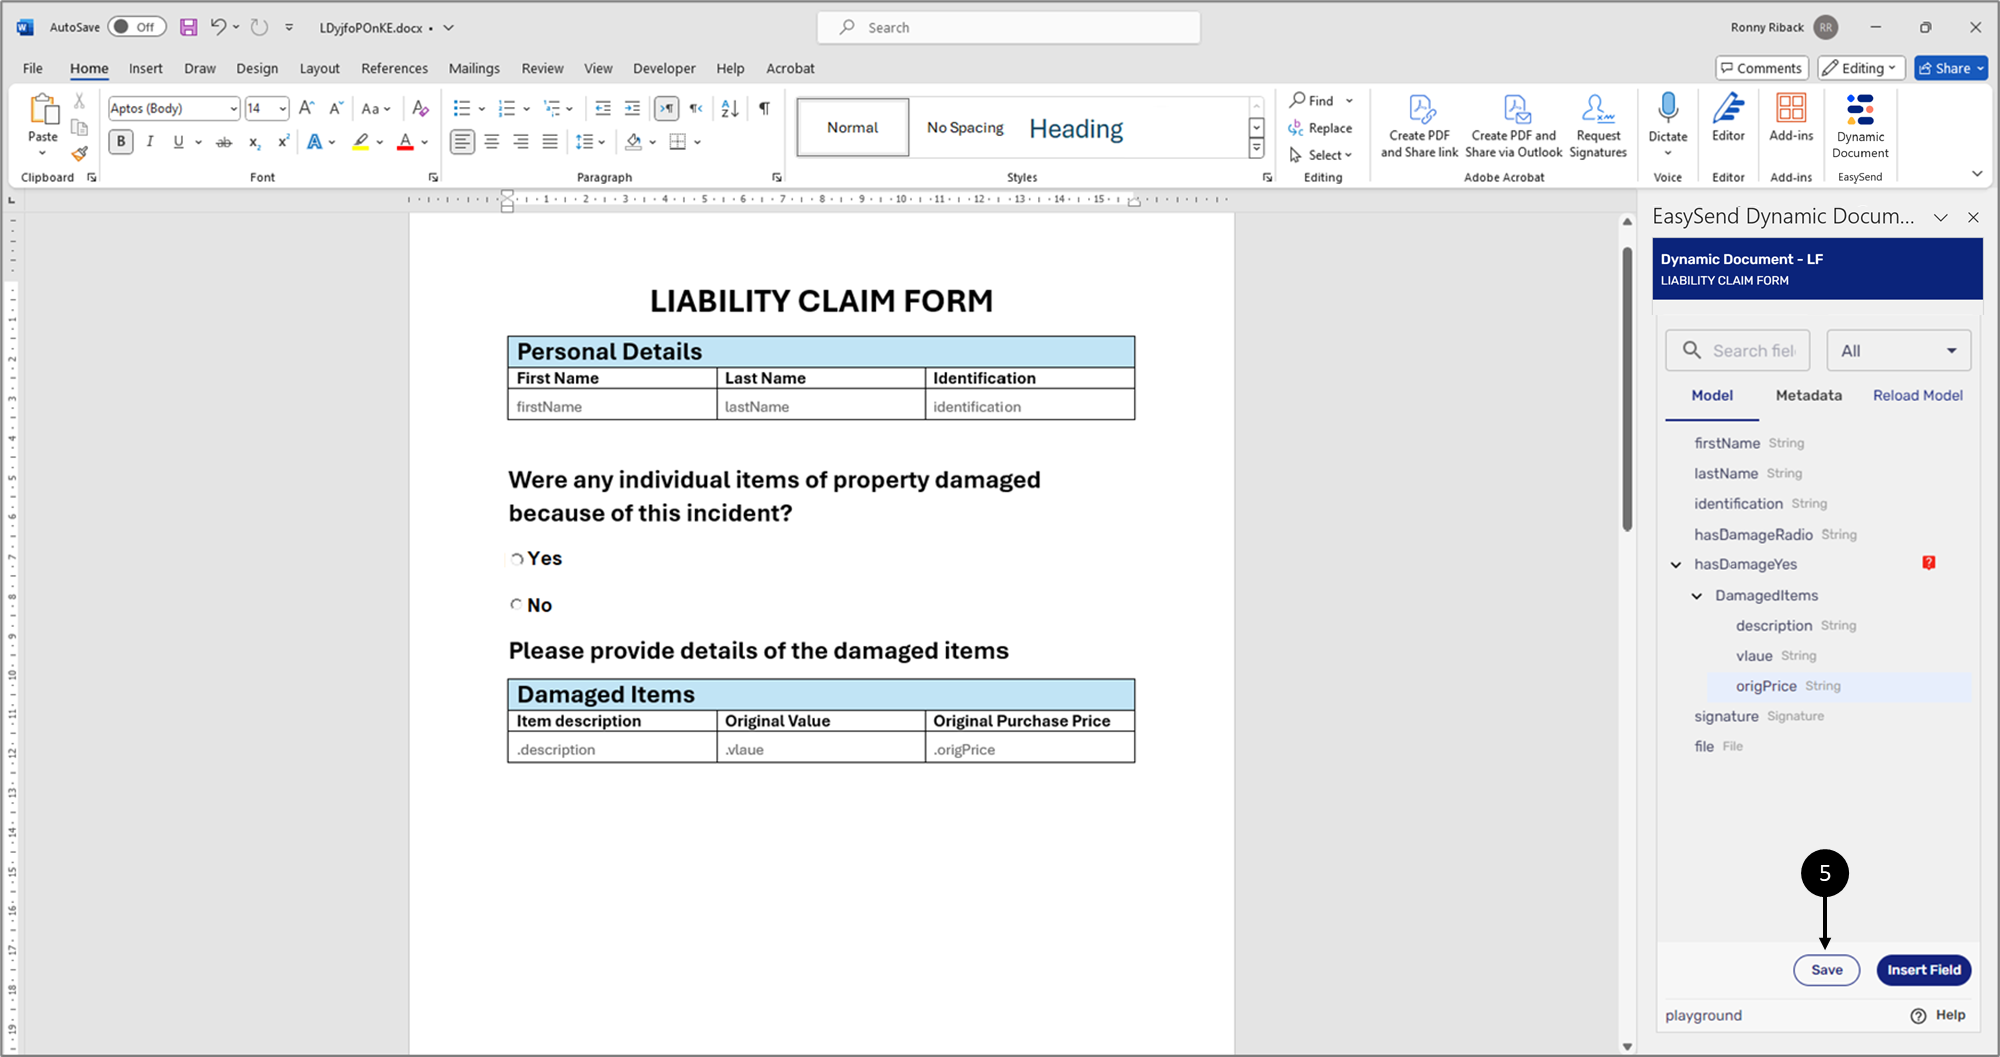
Figure 6: Added Data Items
- Click the Save button (5) when you are done.
Inserting Metadata Items
(See Figure 7)
Metadata items are fixed items that will appear in each journey. They are divided into different categories:
- device
- file
- global
- transaction
- user
- workflow
- salesforce
- dataverse
Metadata items are added just like data items, but the Metadata tab (1) must be clicked first.
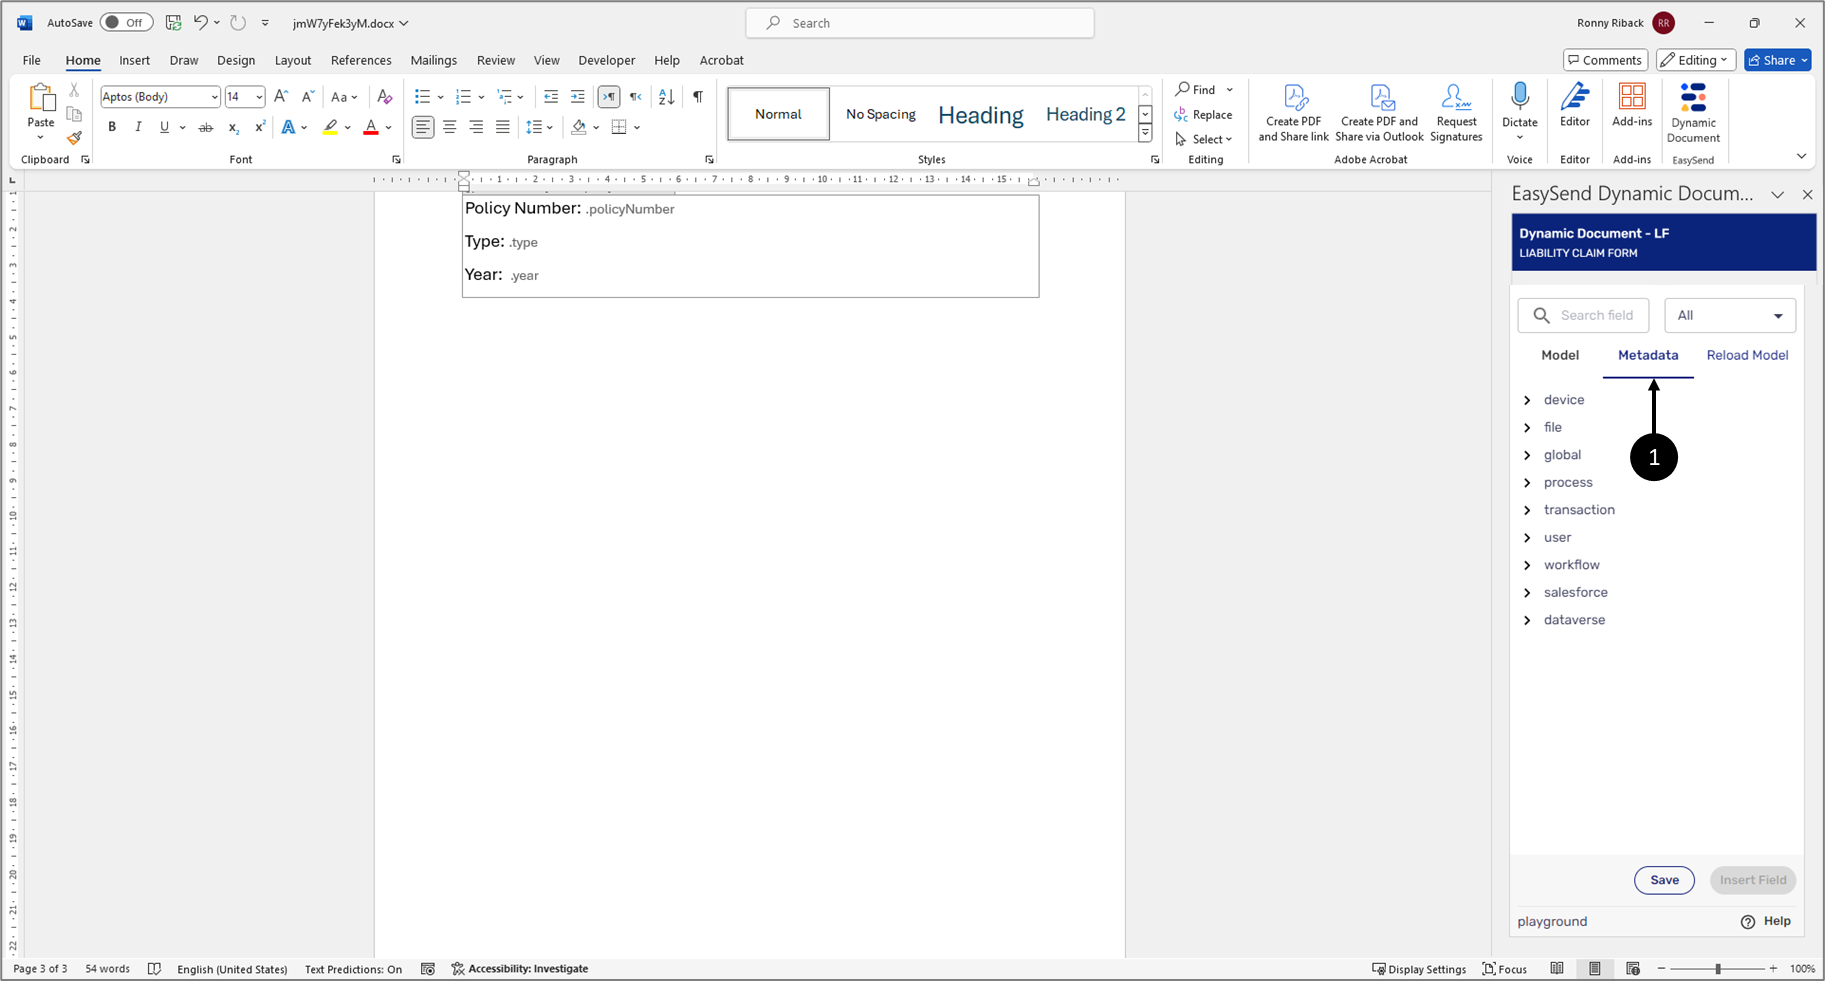
Figure 7: Metadata Items
Adding Metadata Items - Use Case Example
(See Figure 8 to Figure 11)
A dynamic document needs to display the current time in the Header of its first page and the RID of the journey's transaction in the Footer of its first page. To do so, perform the following steps:
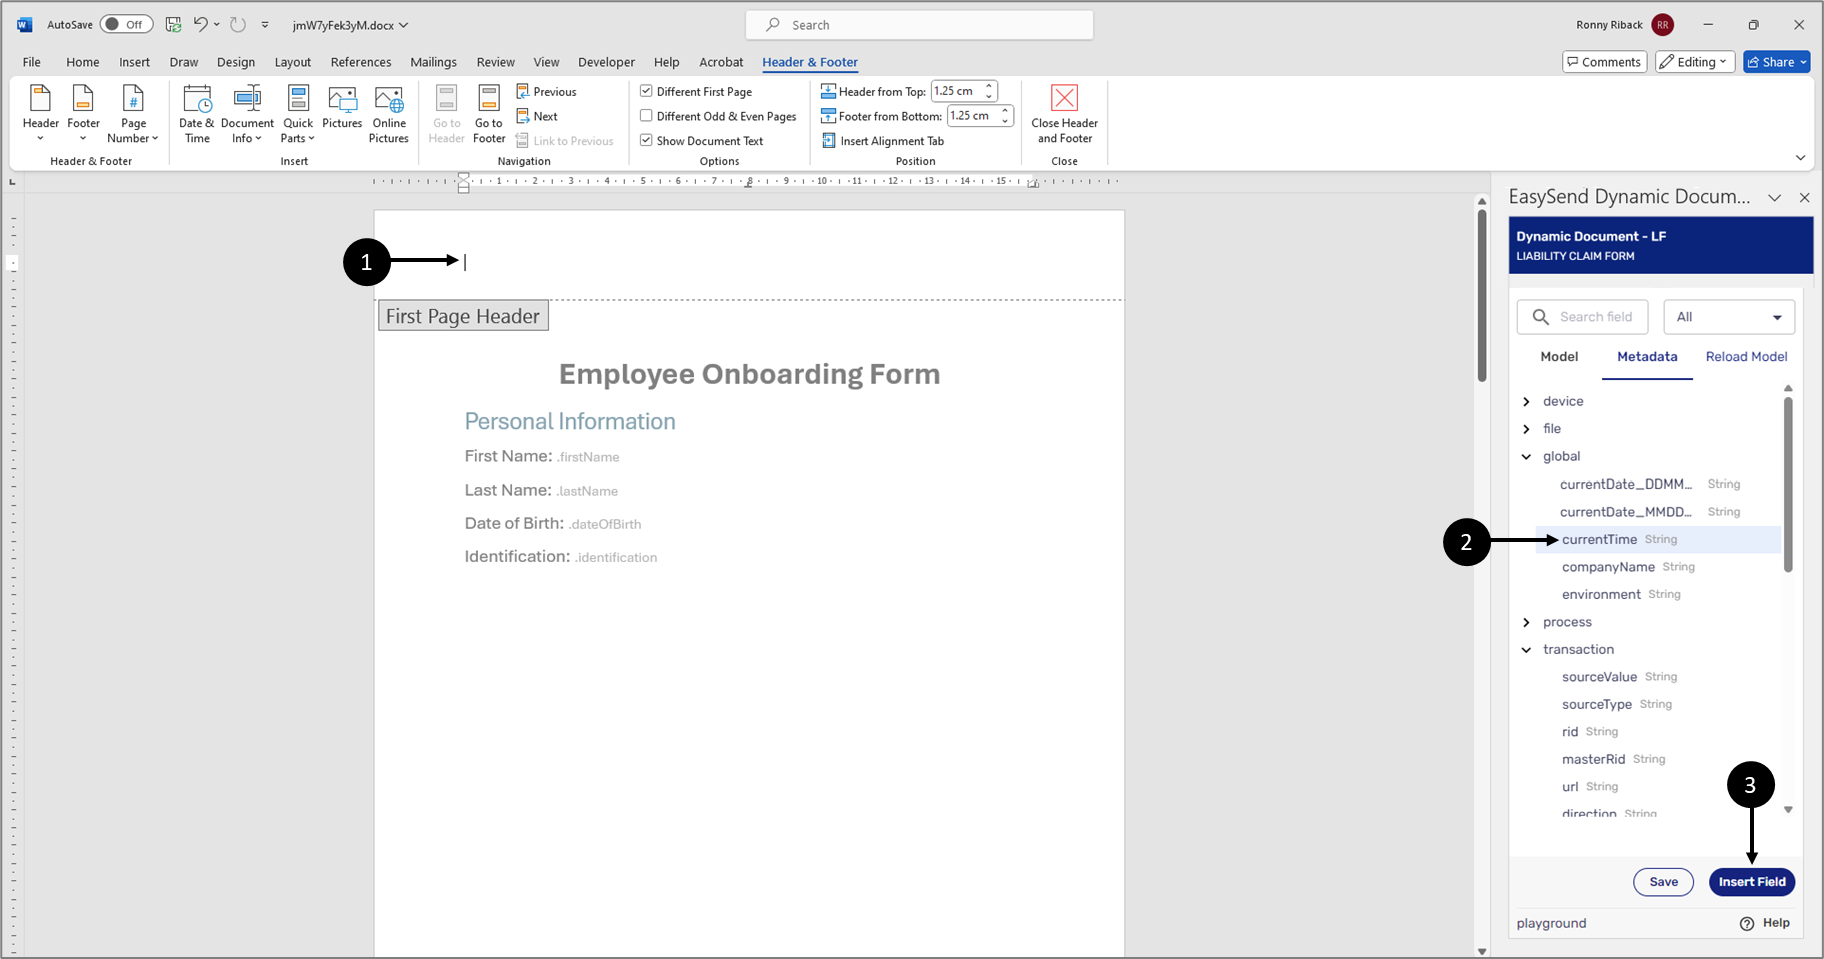
Figure 8: Inserting Metadata Items 1 of 4
- Display the Header and the Footer of the dynamic document.
- Ensure that the first page is different than the other pages.
- Click the desired location in the Header (1).
- locate and click the current time Metadata item (2).
- Click the Insert Field button (3).
Result:
The Metadate item is inserted into the Header of the dynamic document (4):
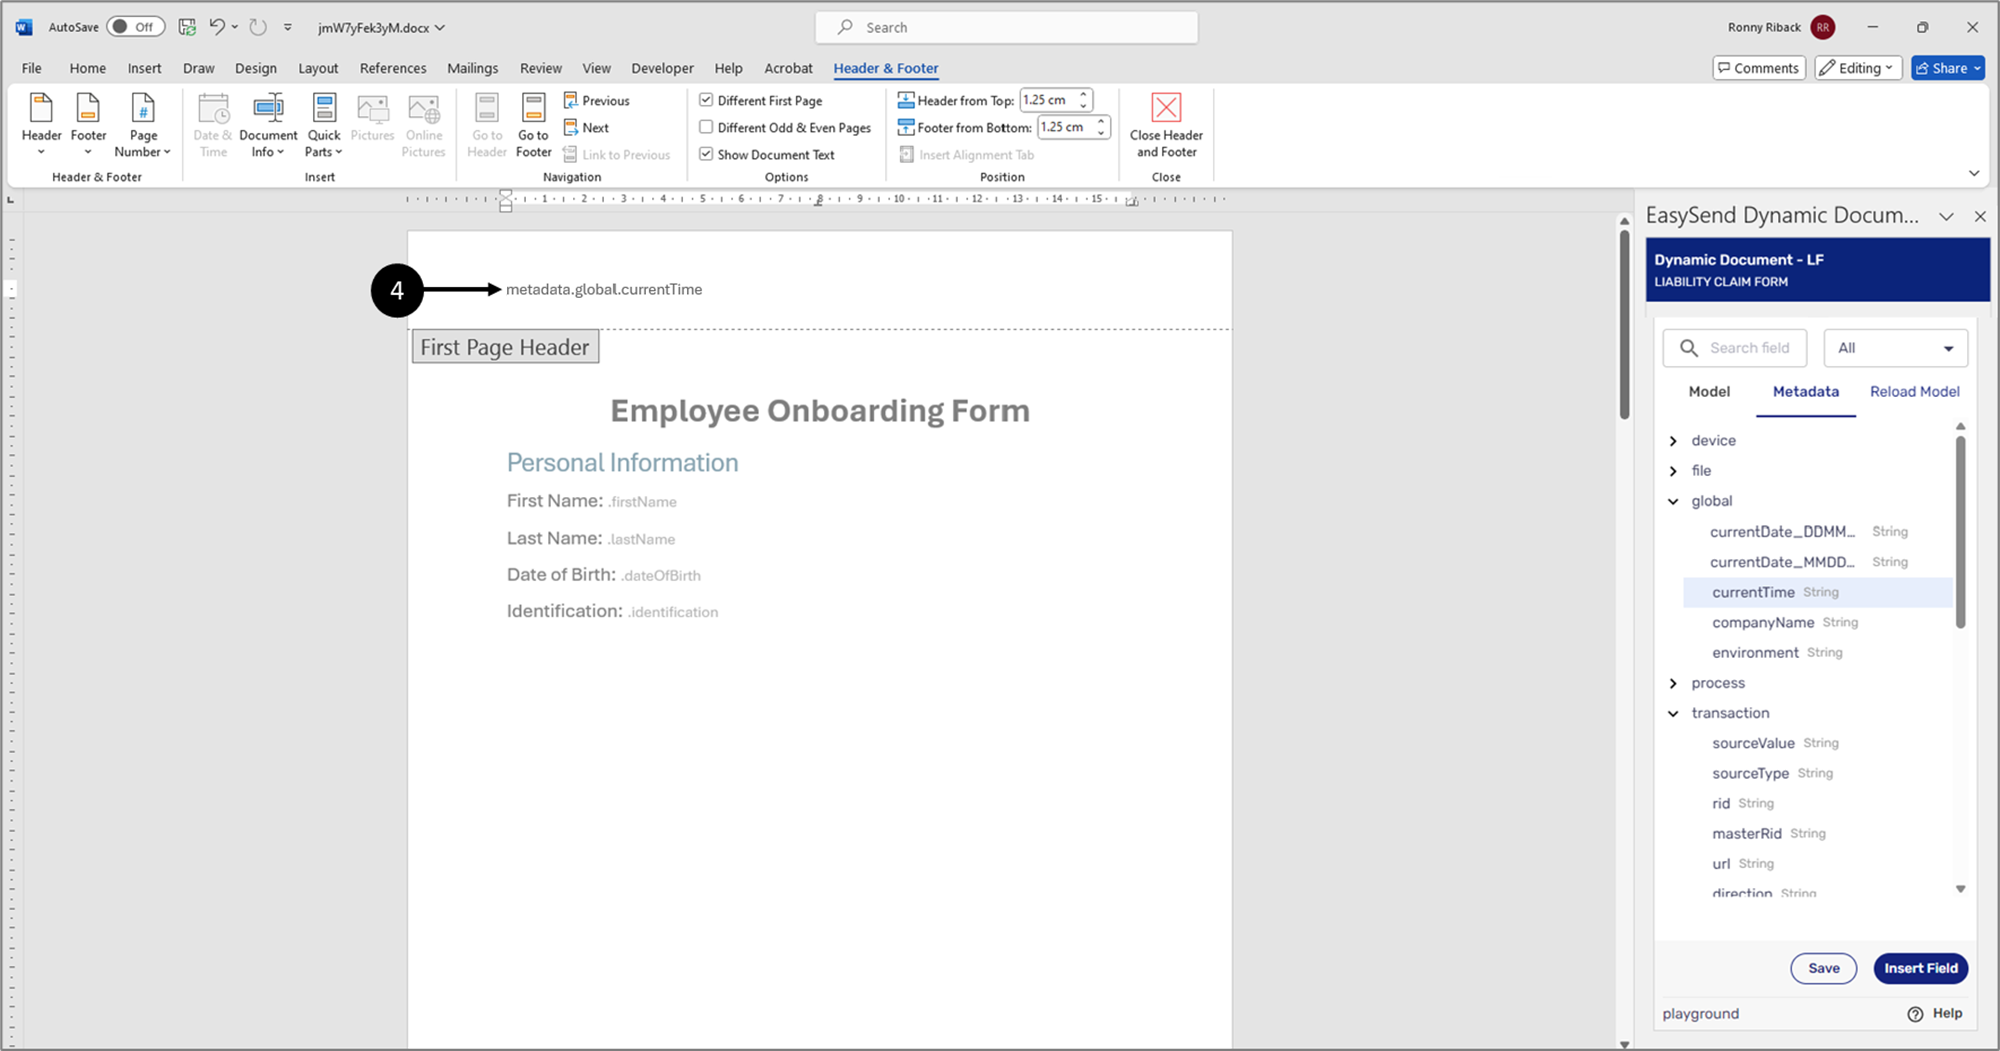
Figure 9: Inserting Metadata Items 2 of 4
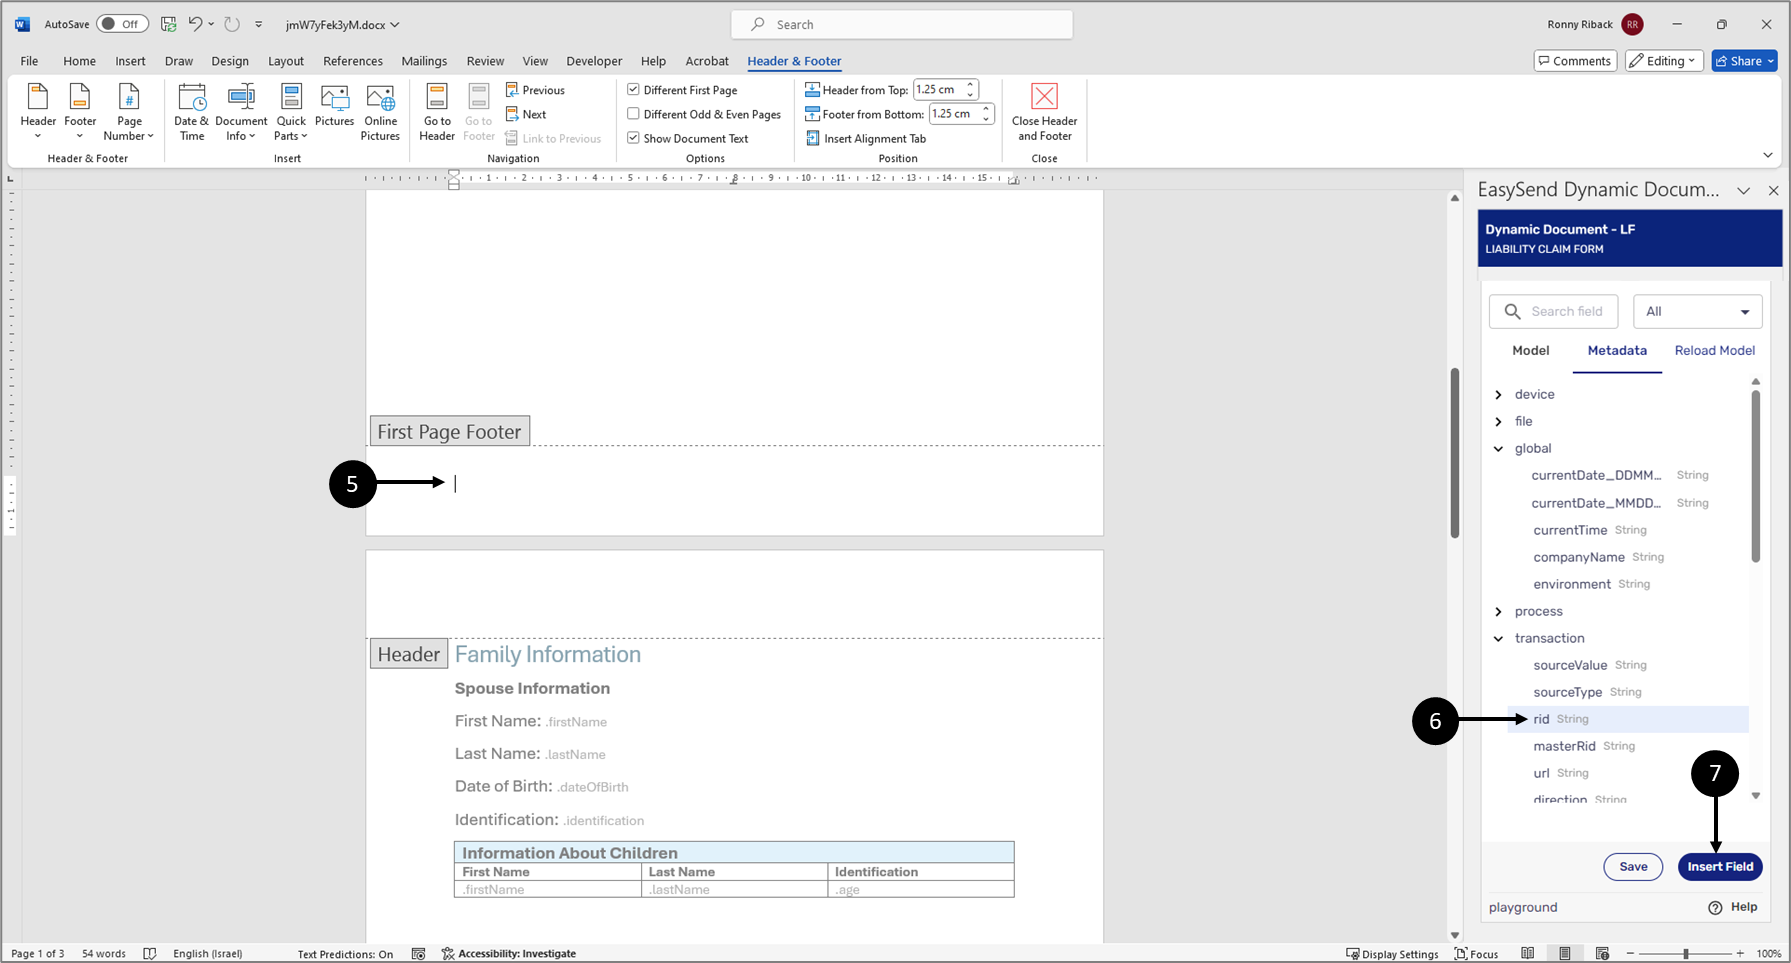 Figure 10: Inserting Metadata Items 3 of 4
- Click the desired location in the Footer (5).
- locate and click the rid Metadata item (6).
- Click the Insert Field button (7).
Result:
The Metadate item is inserted into the Footer of the dynamic document (8):
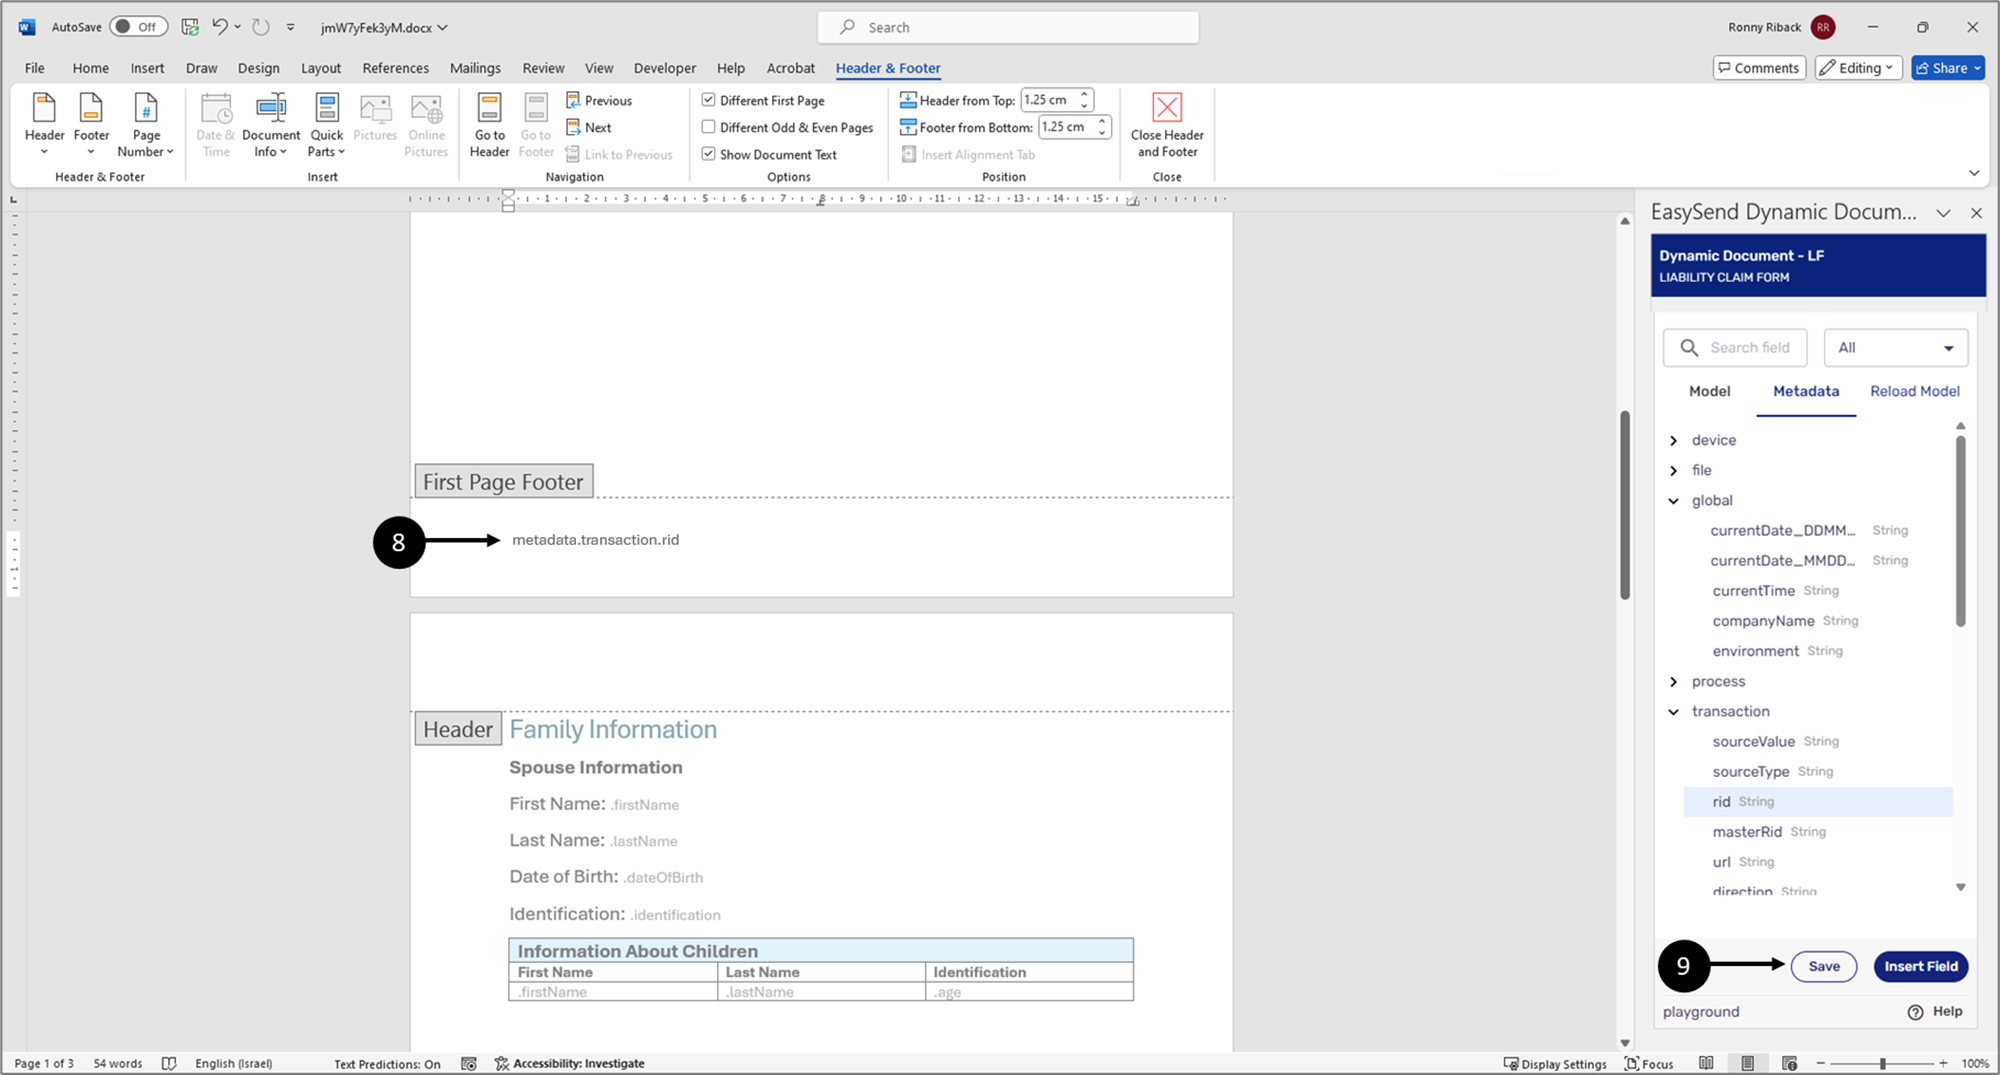
Figure 11: Inserting Metadata Items 4 of 4
- Click the Save button (9).
Nesting Dynamic Document Elements Inside Object-Type Items
(See Figure 12 to Figure 16)
Dynamic document elements such as text, images, and tables can be nested inside object-type items. For example, the following section in the document contains text fields for inputting policy information (1). The items to insert into the document are nested inside two object-type items:
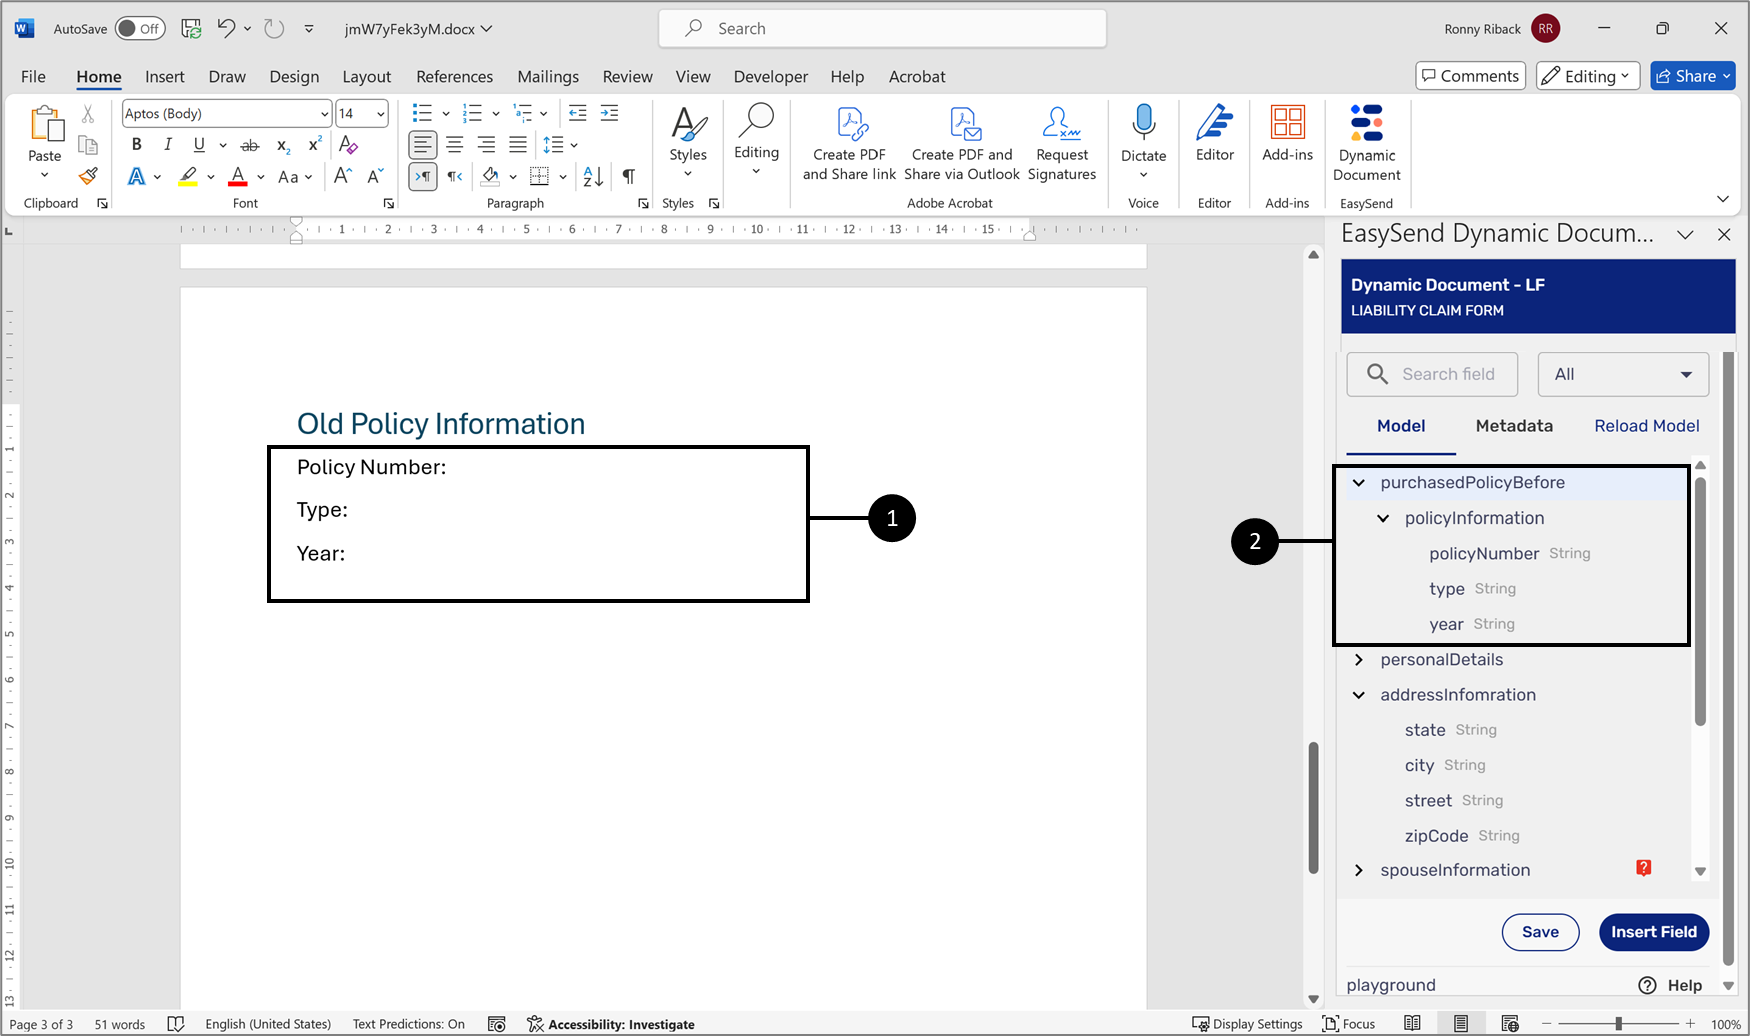
Figure 12: Dynamic Document Text Fields
When inserting the items as described in the Inserting Items Into a Dynamic Document section, they are written with their full path (3):
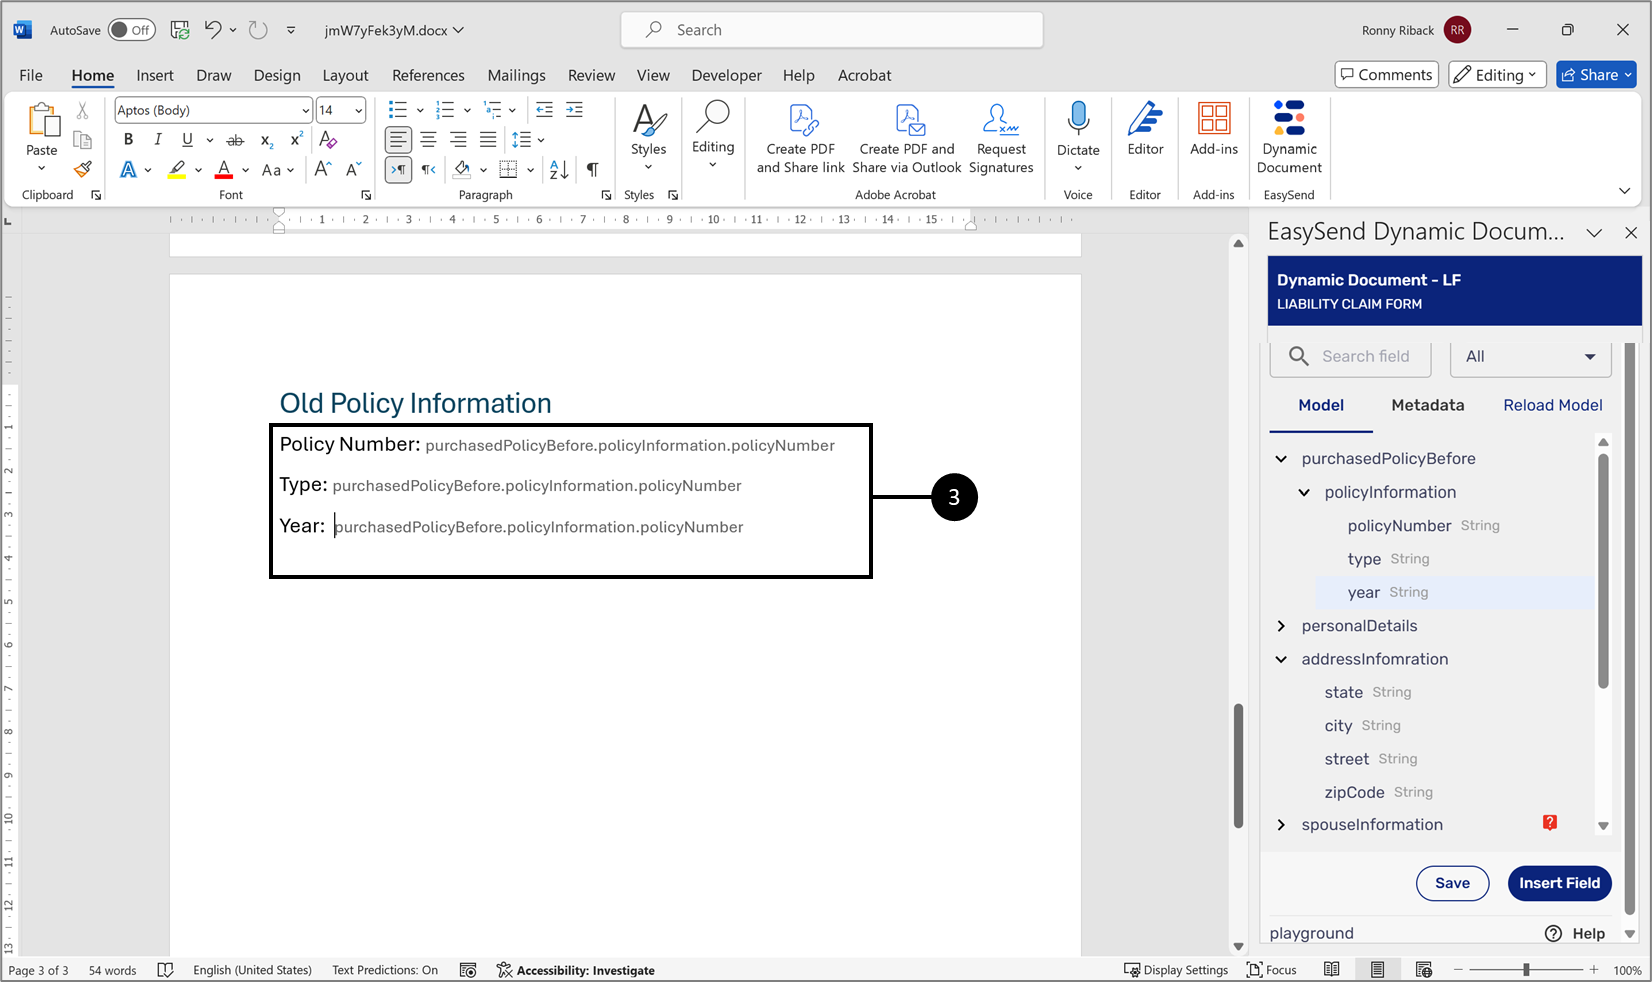
Figure 13: Inserted Items with Full Path
To keep the dynamic document more readable, neat, and organized it is recommended to nest the relevant elements, in this case the text fields, inside an object-type item so that the inserted items can be written with their relative path:
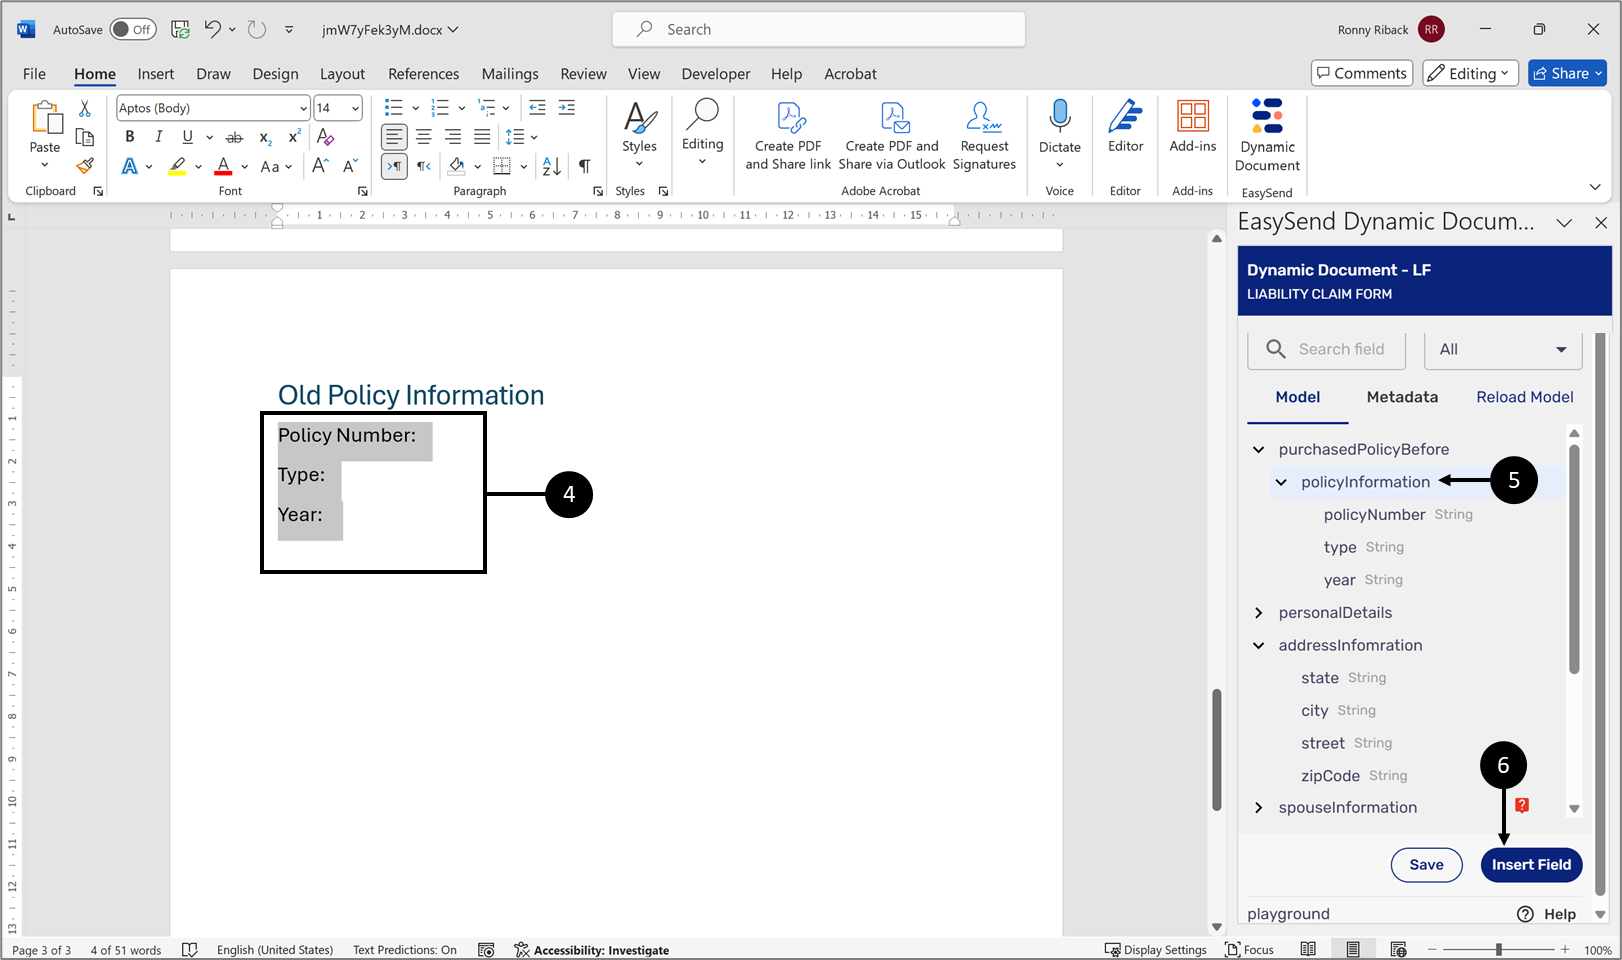
Figure 14: Nesting
- Mark all the relevant elements (4).
- Click the relevant object type item (5).
- Click the Insert Field button (6).
Result:
The text fields are nested inside the object-type item (7):
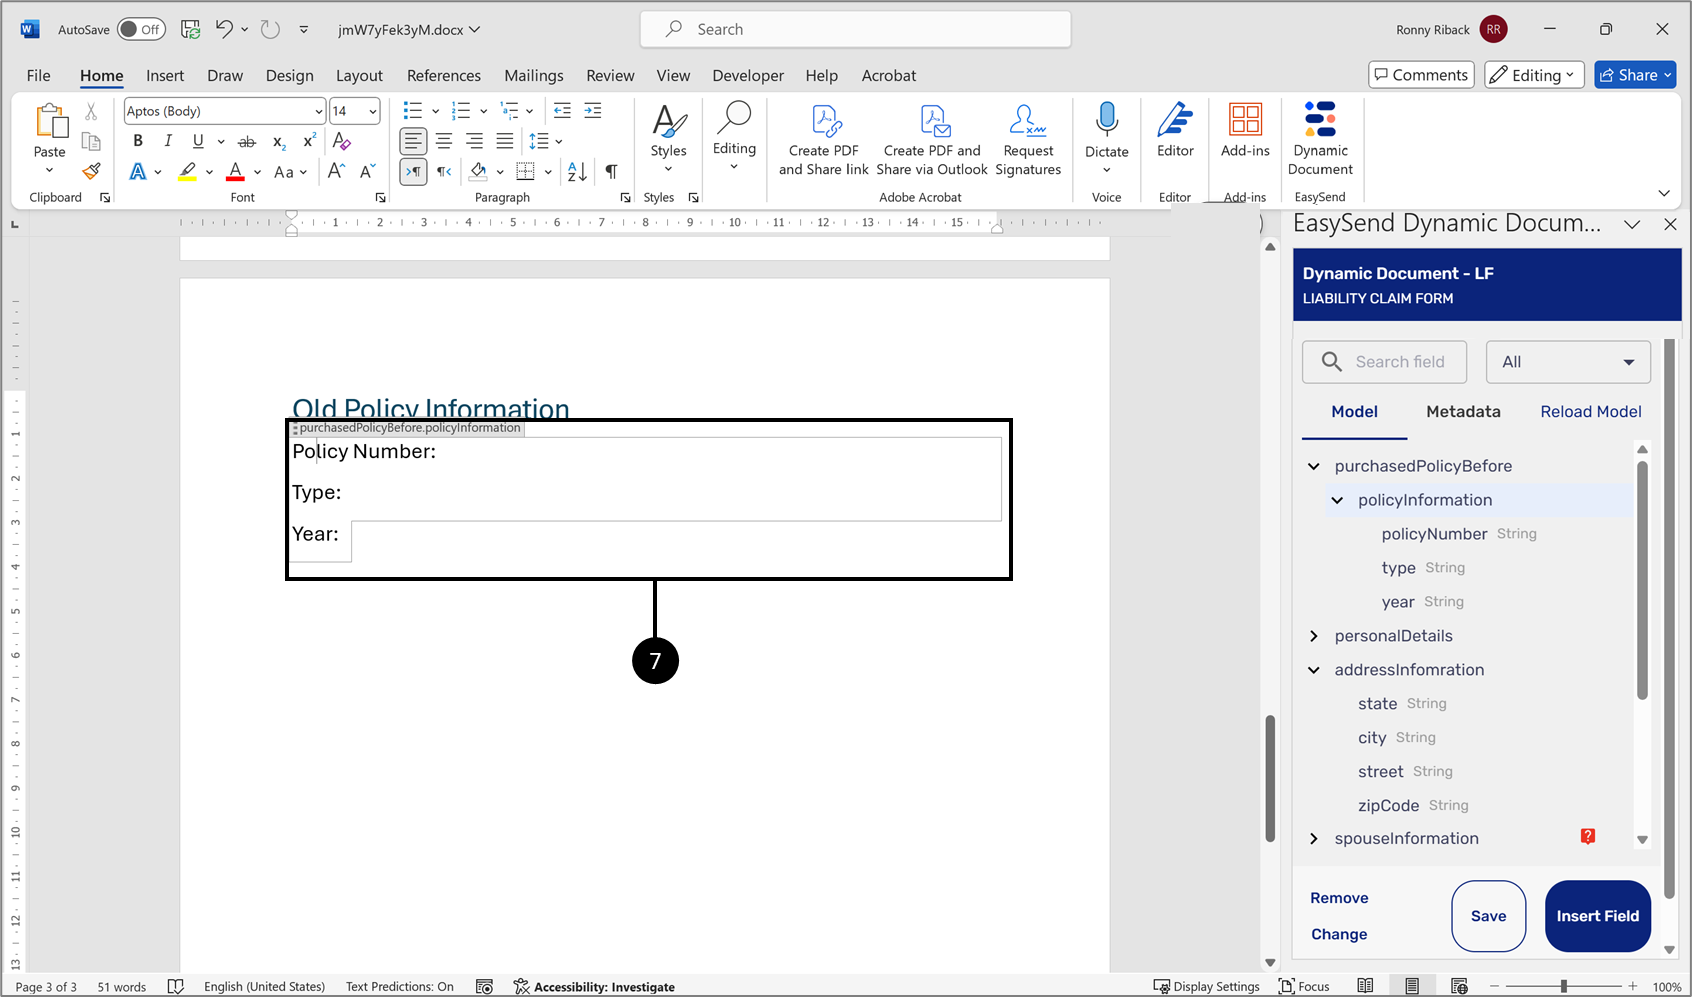
Figure 15: Nested Text Fields
Now, when inserting the items, they will be written with their relative path (8):

Figure 16: Relative Path
Replacing Items
(See Figure 17 and Figure 18)
To replace items, perform the following steps:
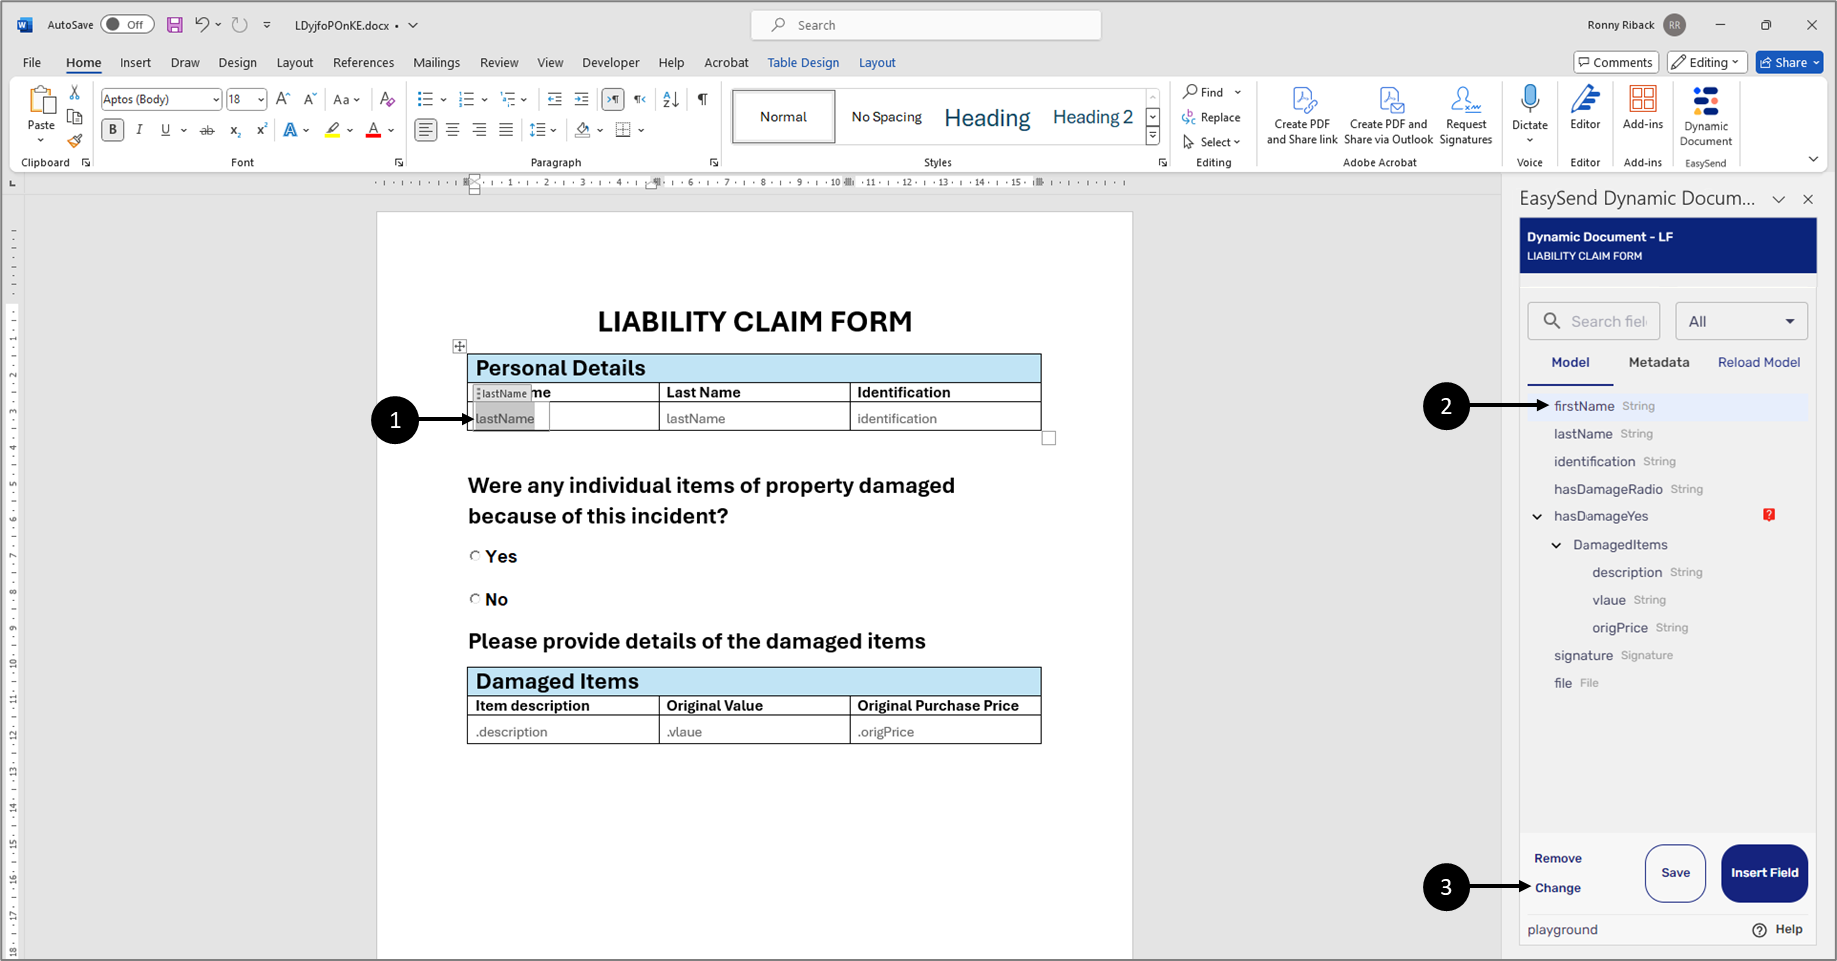
Figure 17: Change Button
- Click the desired inserted item (1).
- Click the desired item from the list (2).
- Click the Change button (3).
Result:
The items are replaced (4):
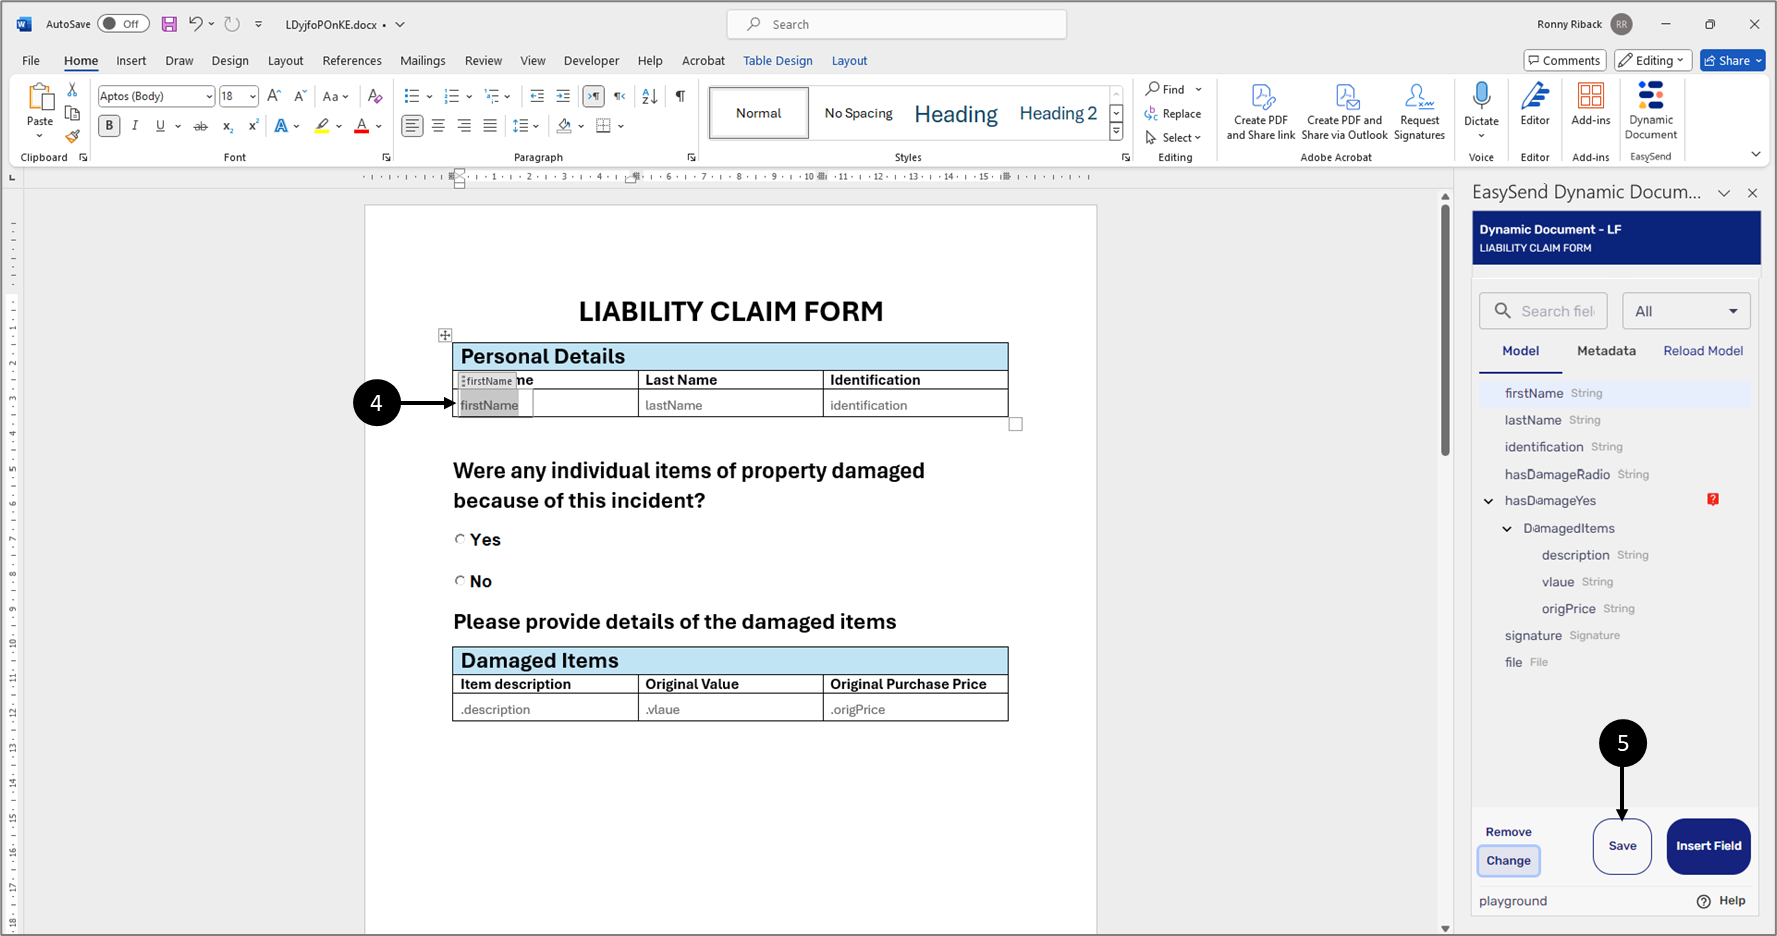
Figure 18: Replaced Item
- Click the Save button (5).
Working With Arrays
(See Figure 19 to Figure 24)
An array item (1) will appear in the Dynamic Document Editor as an Array-type item (2).
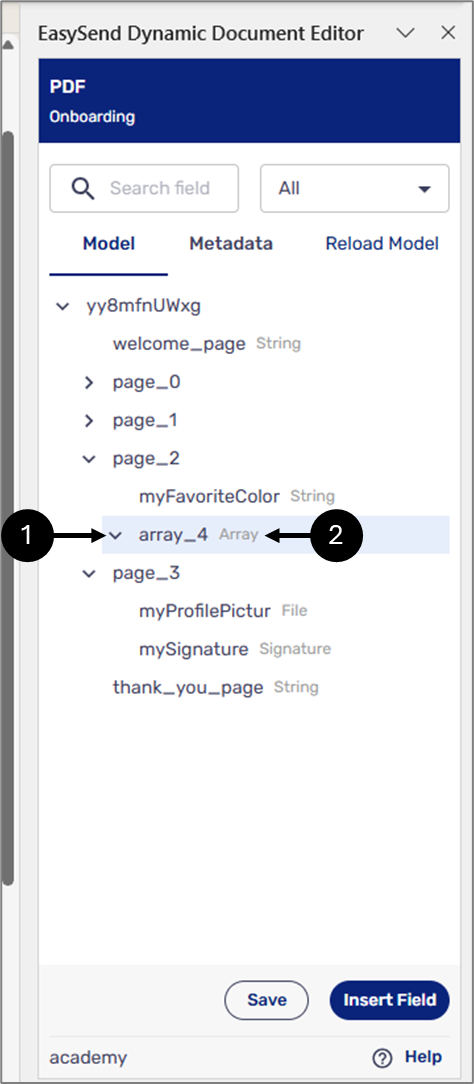
Figure 19: Array and Array-Type
Array items will be inserted into their appropriate fields on the dynamic document. For example, the following table (3) in the dynamic document displays information about damaged items. The table has to be dynamic because the end-user can input multiple items.
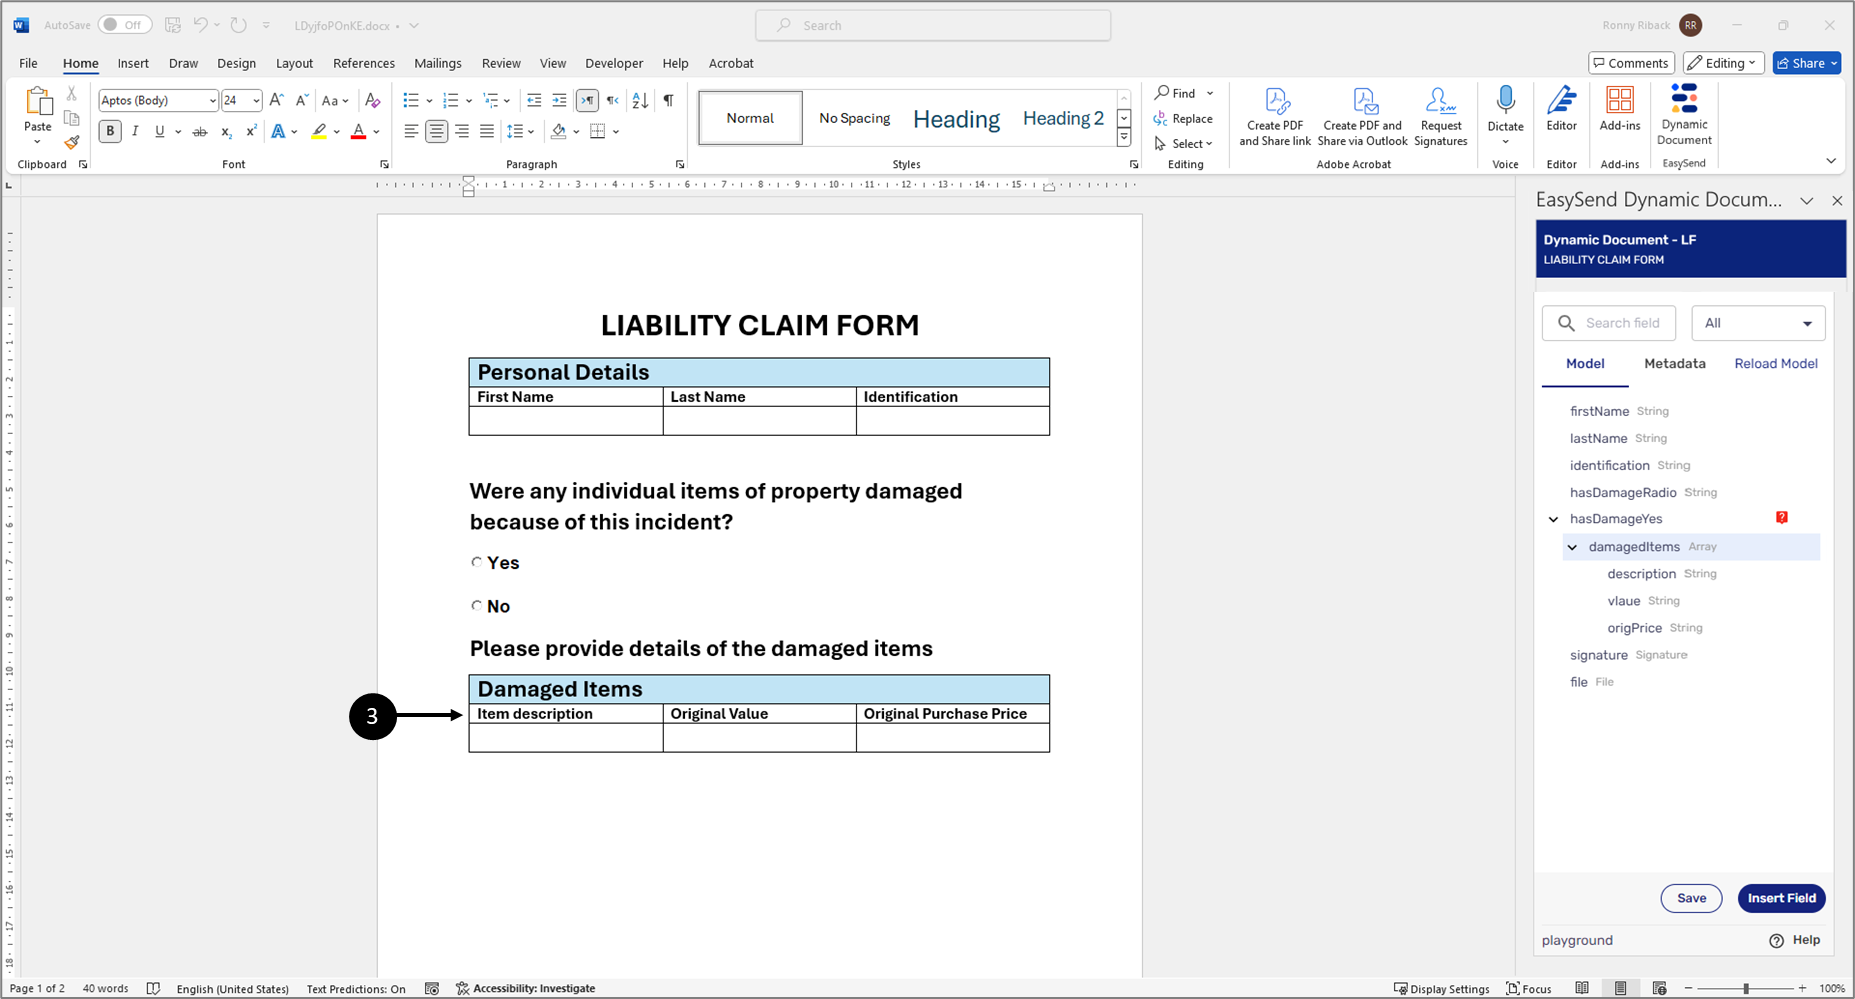
Figure 20: Damaged Items Table
To convert the table to a dynamic table, perform the following steps:

Figure 21: Connecting Table Row
- Select the row of the table (4).
- Click the array-type item that contains the rest of the array items (5).
- Click the Insert Field button (6).
Result:
The row is nested within the array-type item (7):

Figure 22: Nested Within Array-Type Item
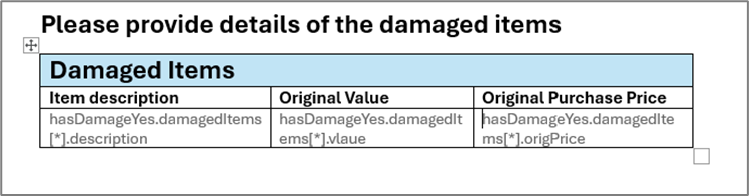
- Insert the array items into their appropriate locations, for example:

Figure 23: Inserted Array Items
When the document is viewed as a preview before submitting the journey, the table will be updated according to the number of items the end-user filled out, for example:
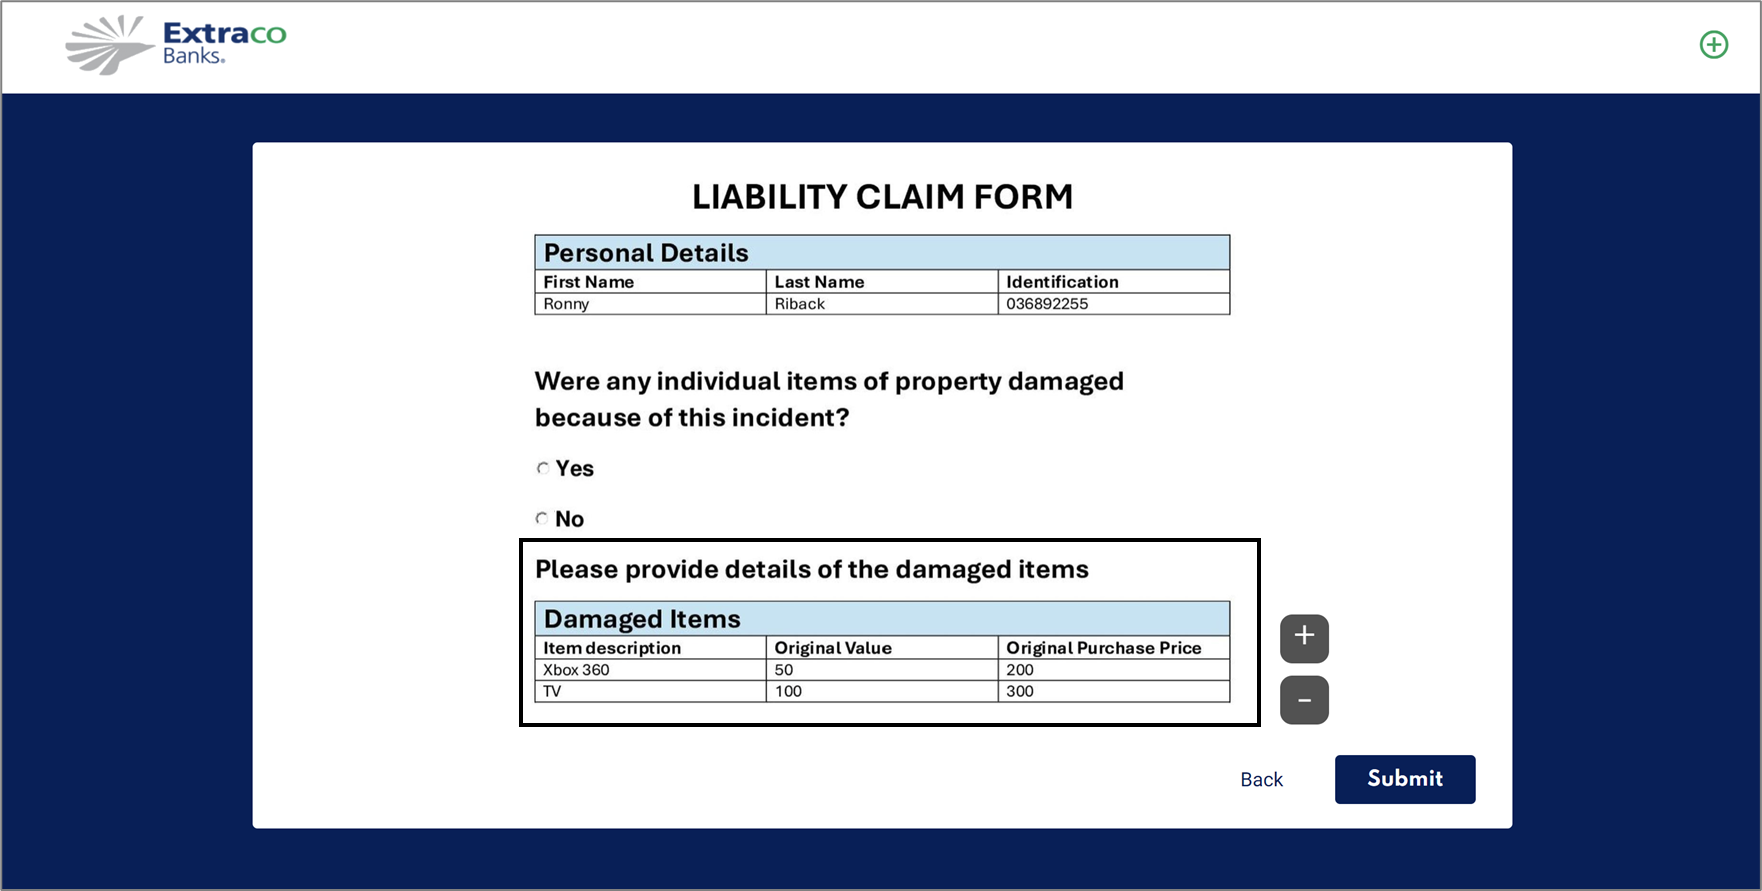
Figure 24: Displayed Array