Article Overview
The following article describes EasySend's support center. It provides information about its structure and how to open a new ticket.
How to Access the Support Center
(See Figure 1 and Figure 2)
To access the support center you can use the following options:
- Enter the URL - https://support.easysend.io/
- On our Builder platform, click Create New Ticket
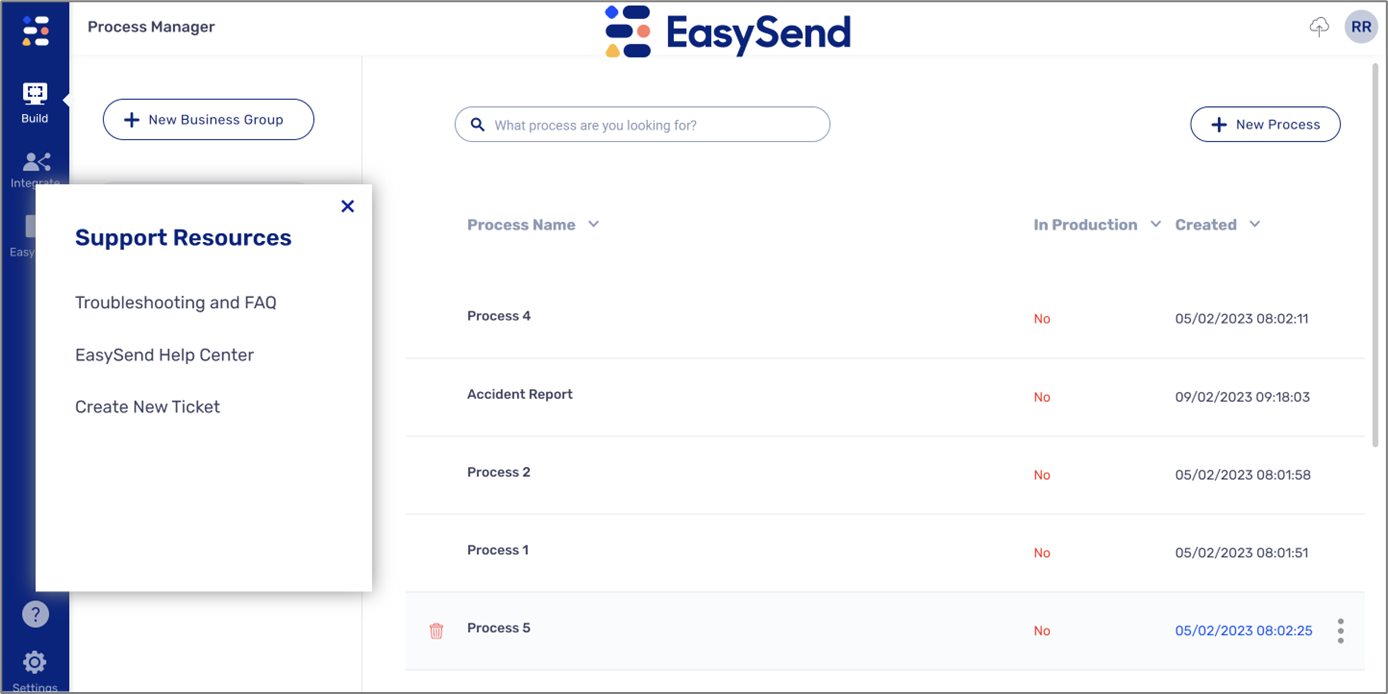
Figure 1: Create New Ticket
- On our knowledge base click Contact support
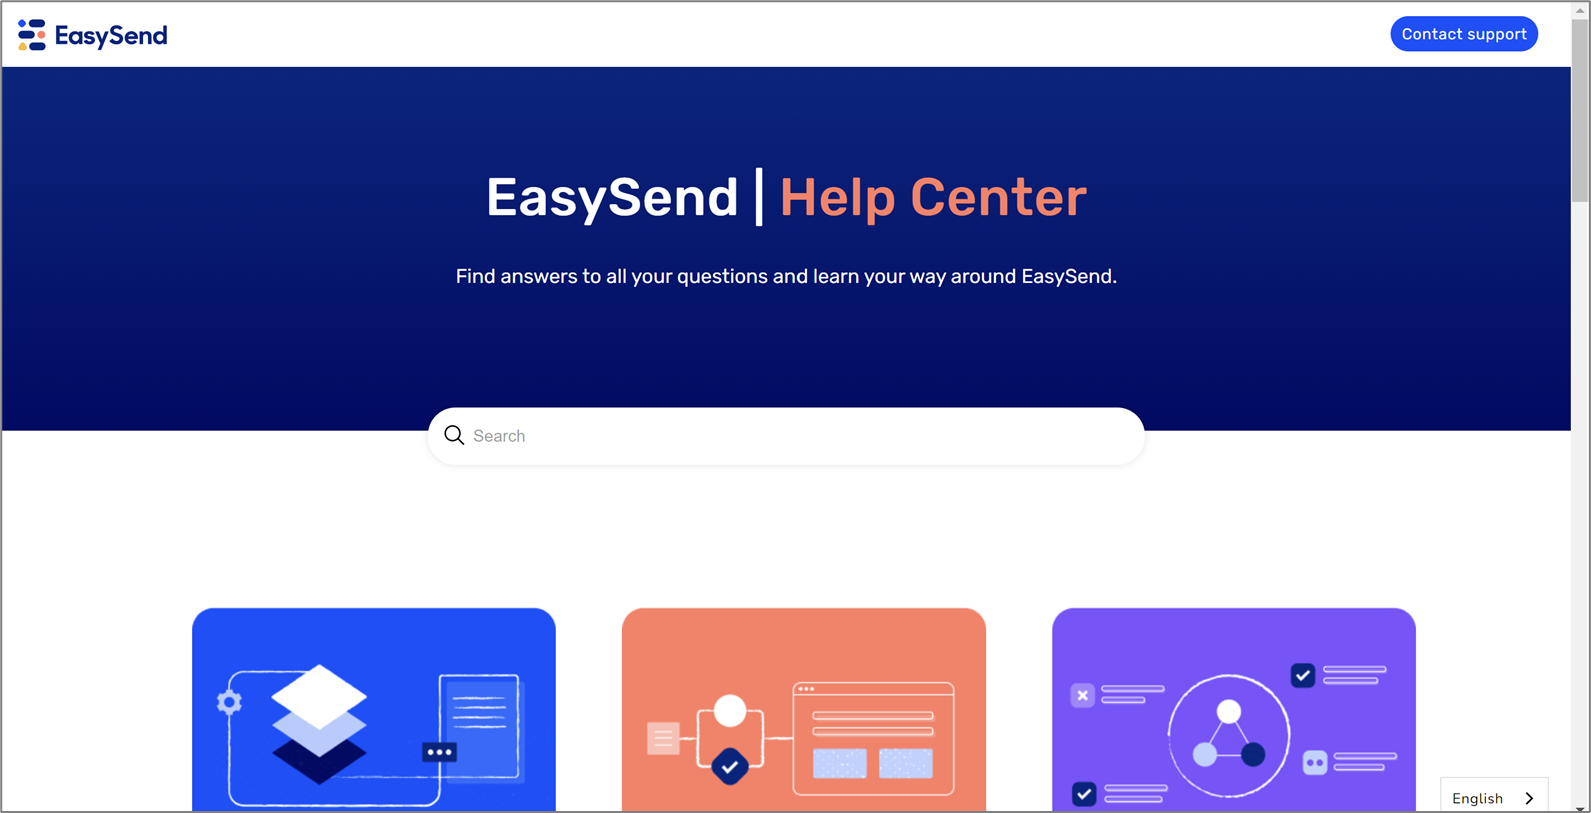
Figure 2: Contact Support
EasySend's Support Center
(See Figure 3)
EasySend's support center enables you to perform different actions such as:
- Opening a ticket for support (1)
- Search our knowledge base articles for answers (2)
- Connect to our EasySend community on Discord (3)
- Explore and join our online academy (4)
- Access our knowledge base (5)
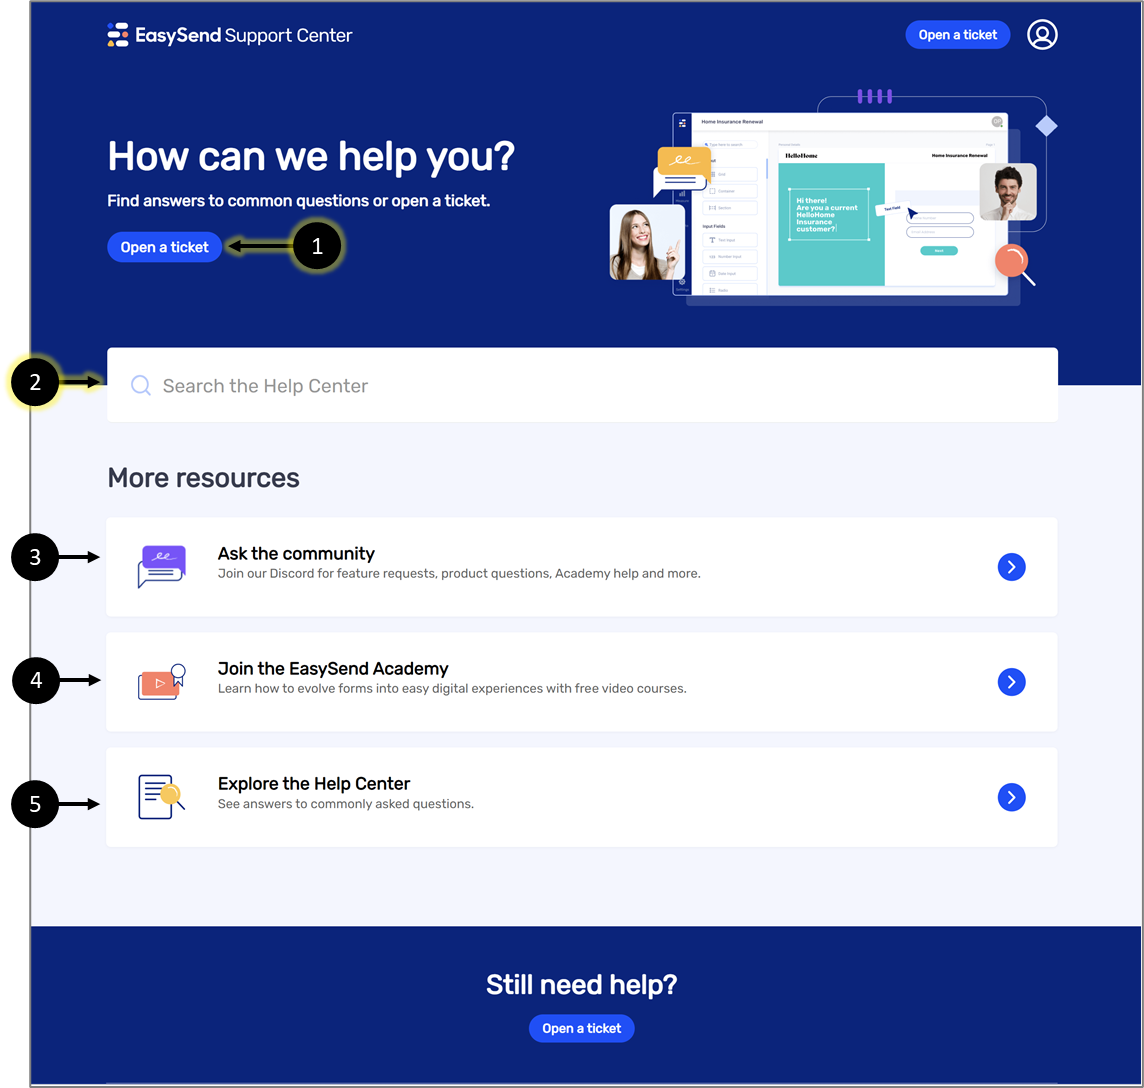
Figure 3: EasySend's Support Center
Opening a new Ticket
(See Figure 4 to Figure 13)
To open a new ticket, first click sign in (1).
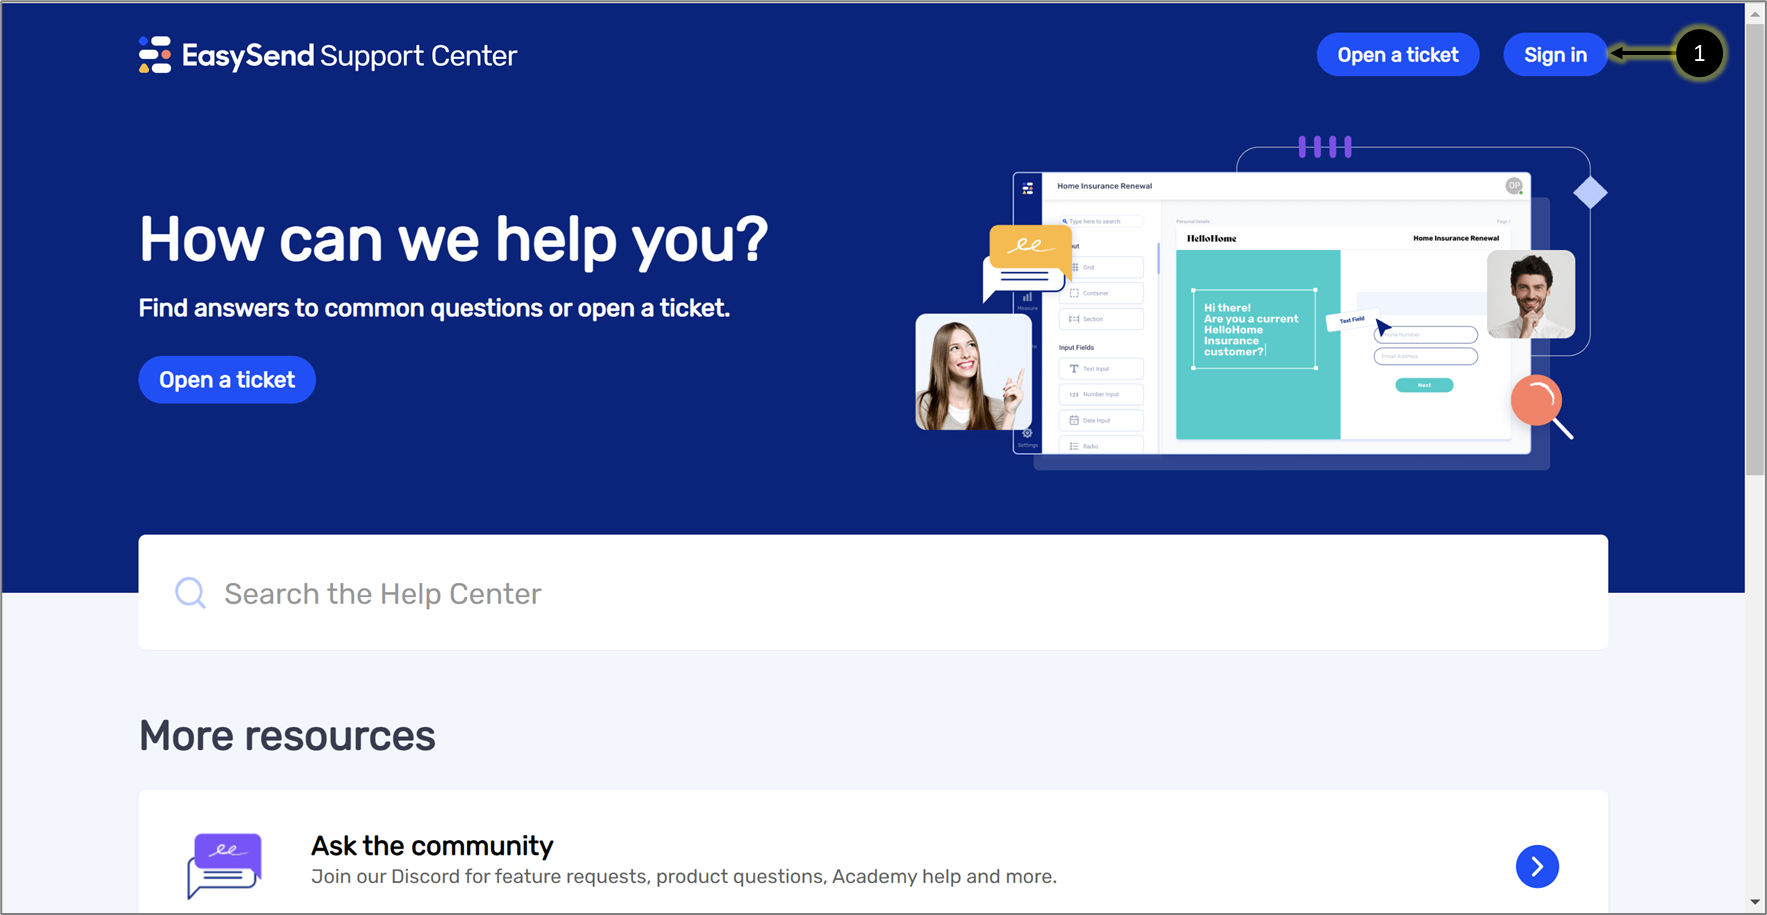
Figure 4: Sign in Button
When the sign-in screen appears, enter your details:
- Email (2)
- Password (3)
and click the Sign in button (4).
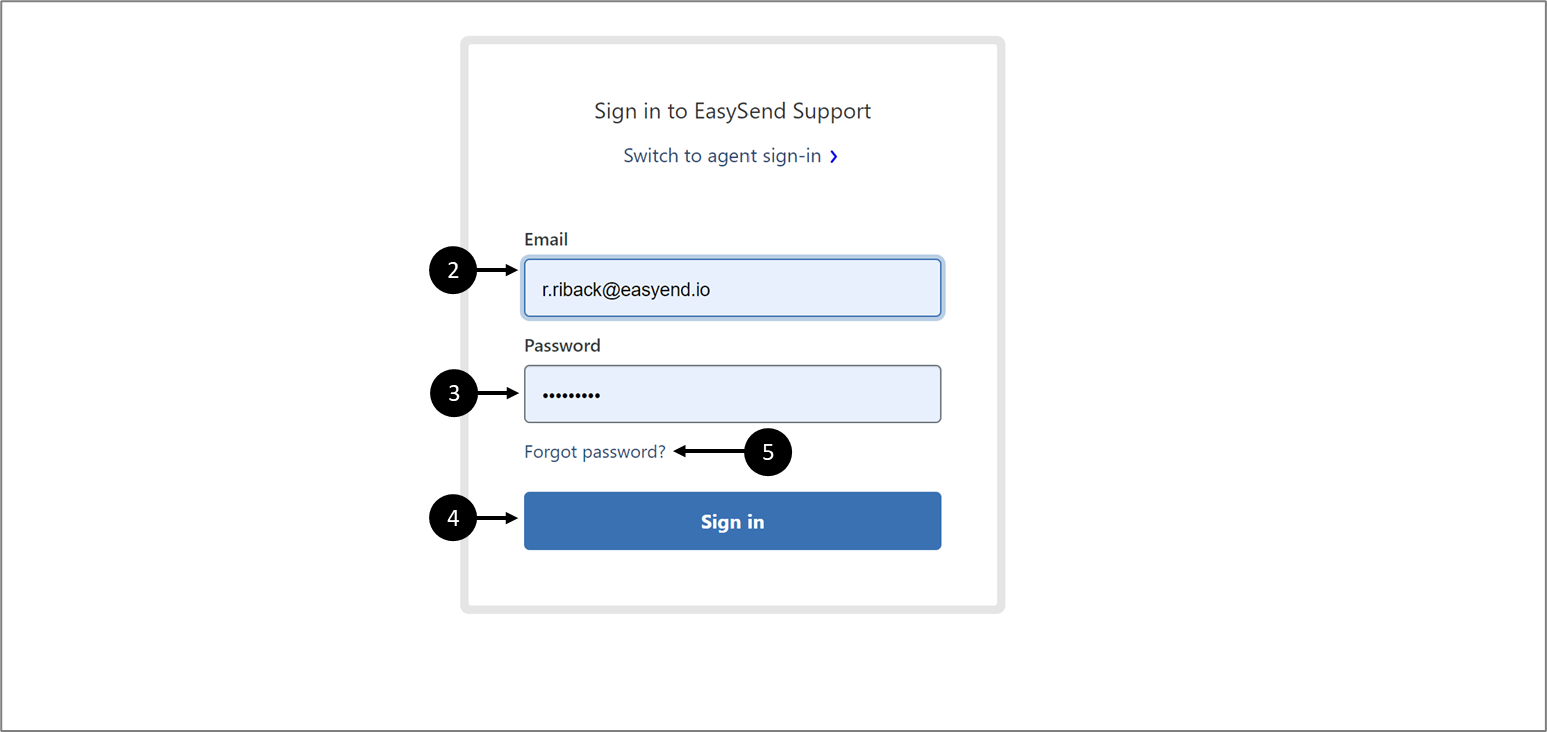
Figure 5: Sign in Button
If this is your first sign-in, click the Forgot password? option (5). When the screen appears enter your Email (6) and click the Submit button (7).
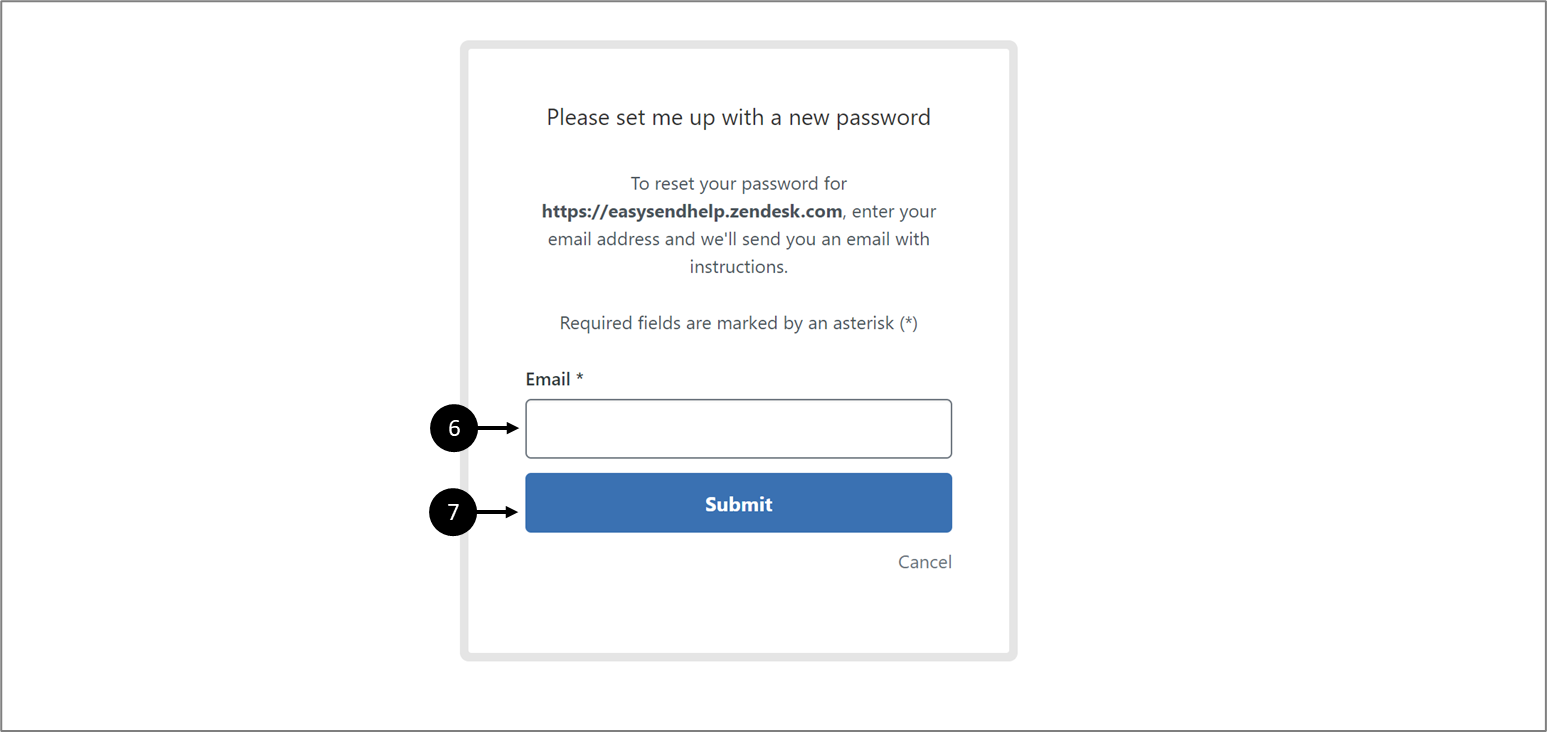
Figure 6: Setting a New Password
After clicking Submit, a reset password email will be received, for example:
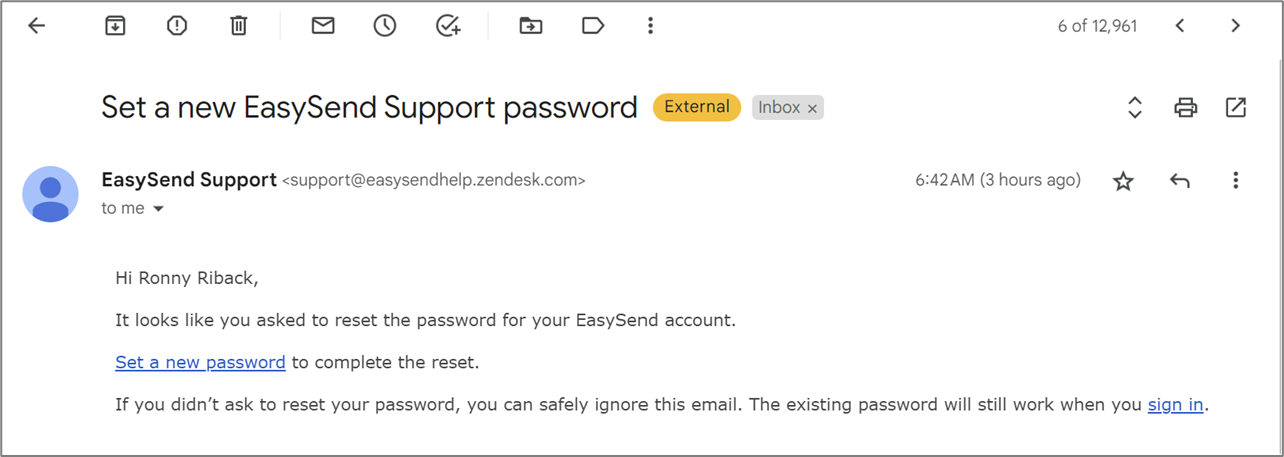
Figure 7: Reset Password Email
Follow the instructions to continue with the process.
Once you are signed in, click the Open a ticket button (8).
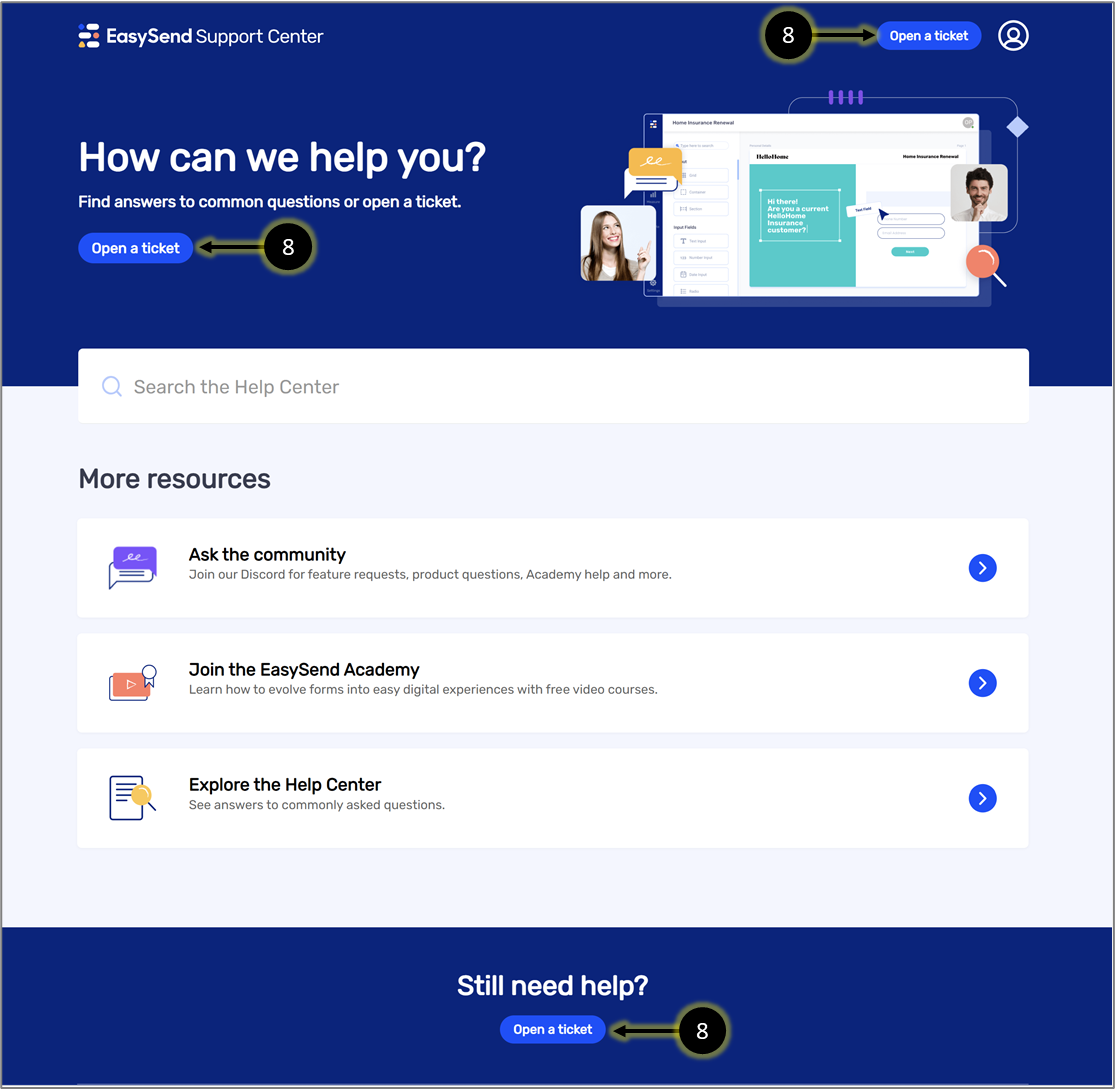
Figure 8: Open a ticket Button
When the Open a ticket screen appears select one of two options:
- I need support (9) - if you need help solving technical issues
- I have a request (10) - if you want to request a process modification
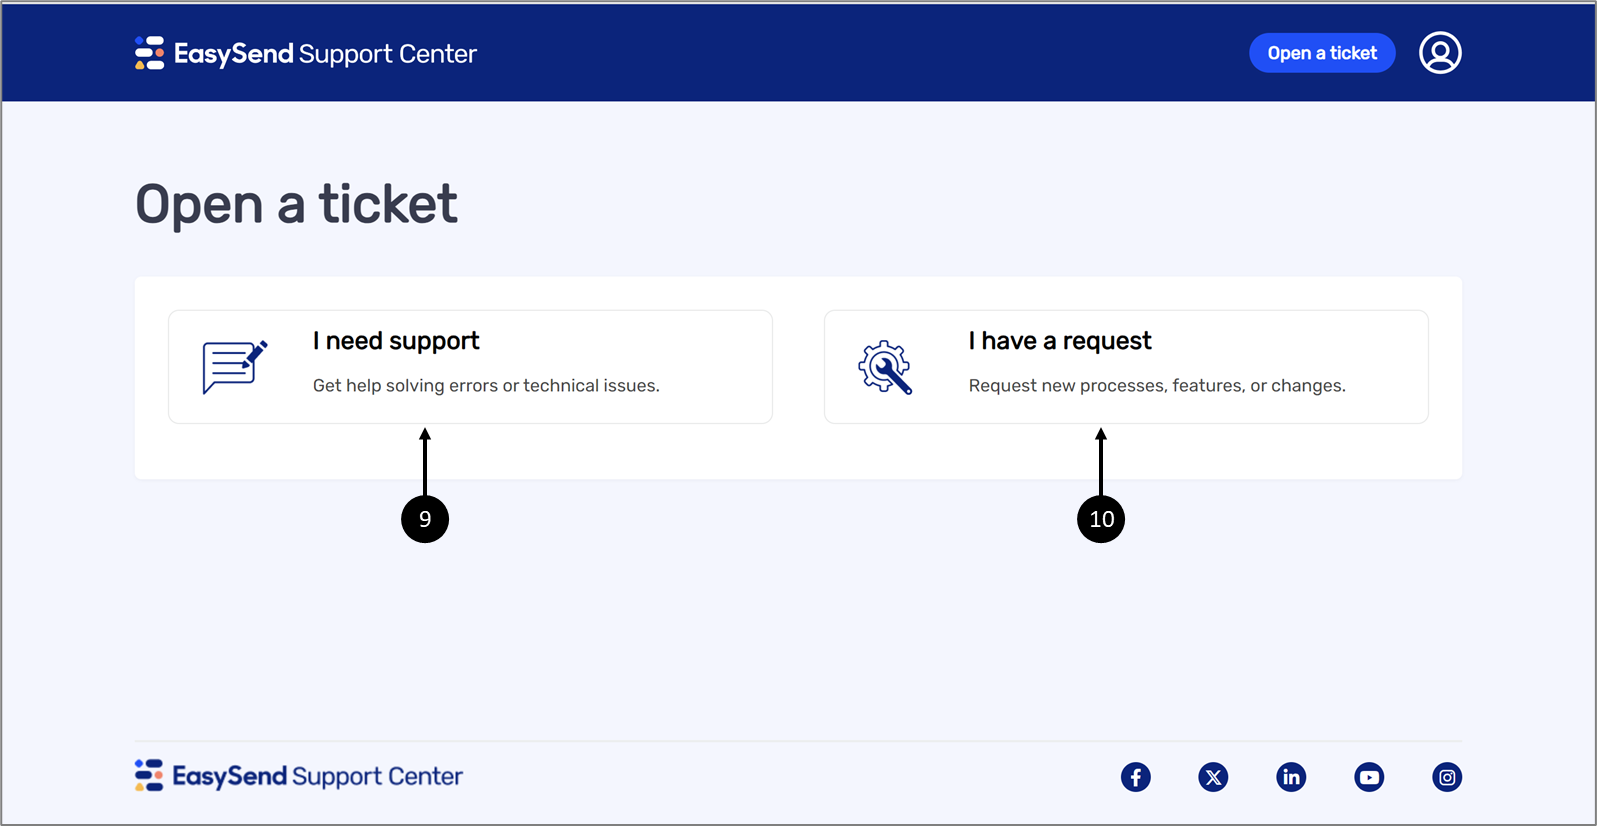
Figure 9: Open a ticket Screen
If you have clicked I need support (9), fill out the following information:
- Additional email recipients (CC)
- subject
- Description
- Environment:
- Prod
- Dev
- Process name
- Process link
- Scope
- All processes
- Specific process
- Builder
- Impact
- All users
- Single users
- Platform
- Player
- ES2
- Builder
- Impact
- Platform
- Attachments
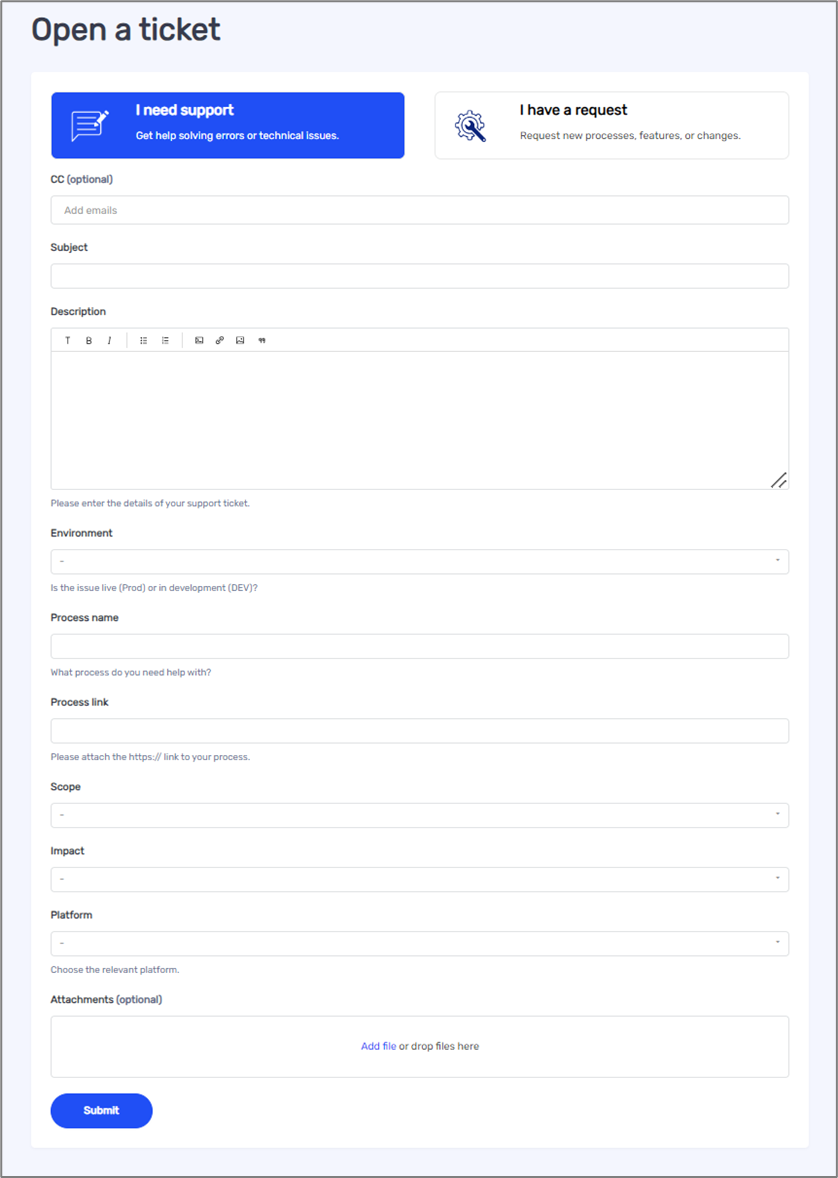
Figure 10: Open a ticket Screen - I need support
If you have clicked I have a request (10), fill out the following information:
- Additional email recipients (CC)
- subject
- Add/Change
- Add
- Change
- New process
- Process name
- What to change / add? (you may add more than one)
- Field
- Validation
- Theme
- Pre-populated data
- Conditions
- Design
- Other
- Description
- Attachments
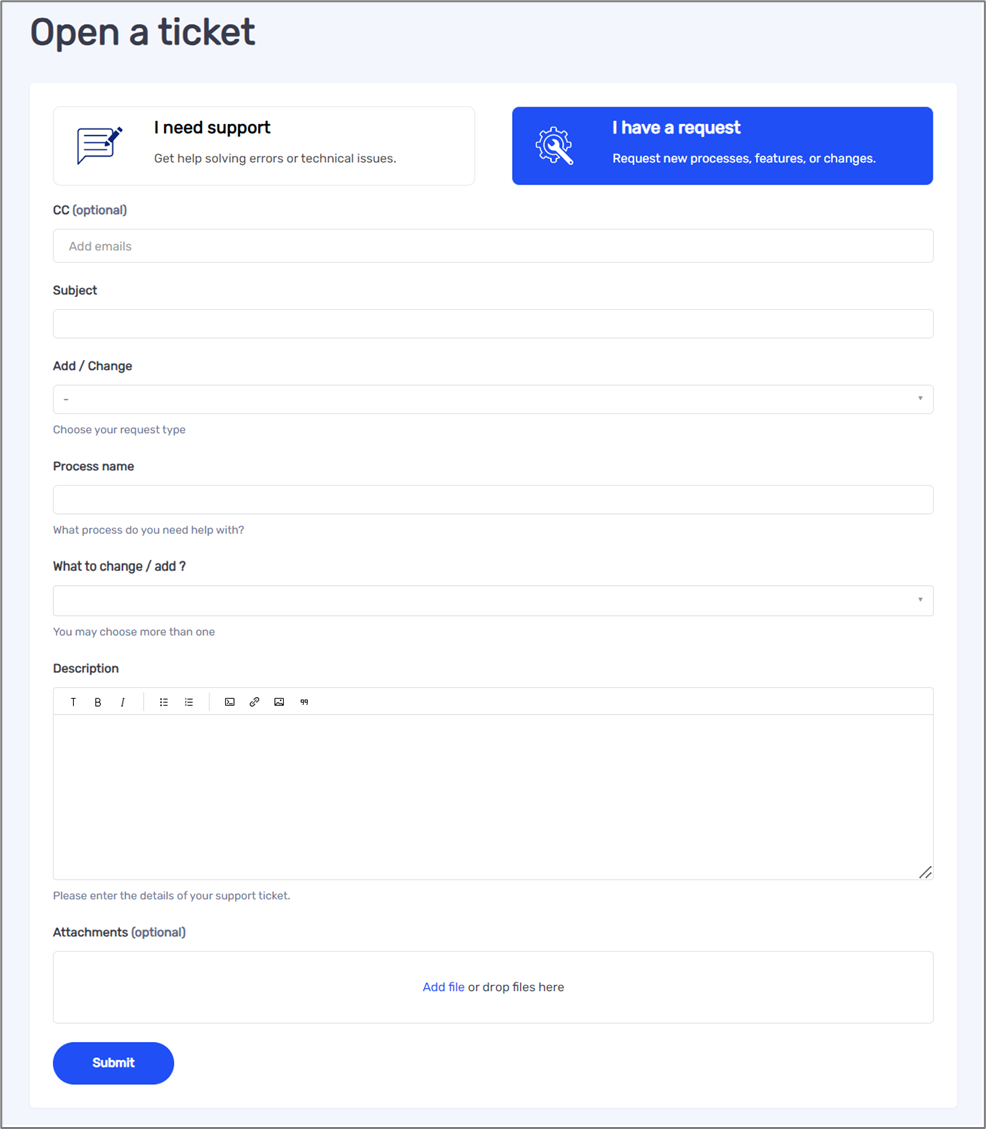
Figure 11: Open a ticket Screen - I have a request
After submitting your ticket, click the icon (11), and then the My activities option (12).
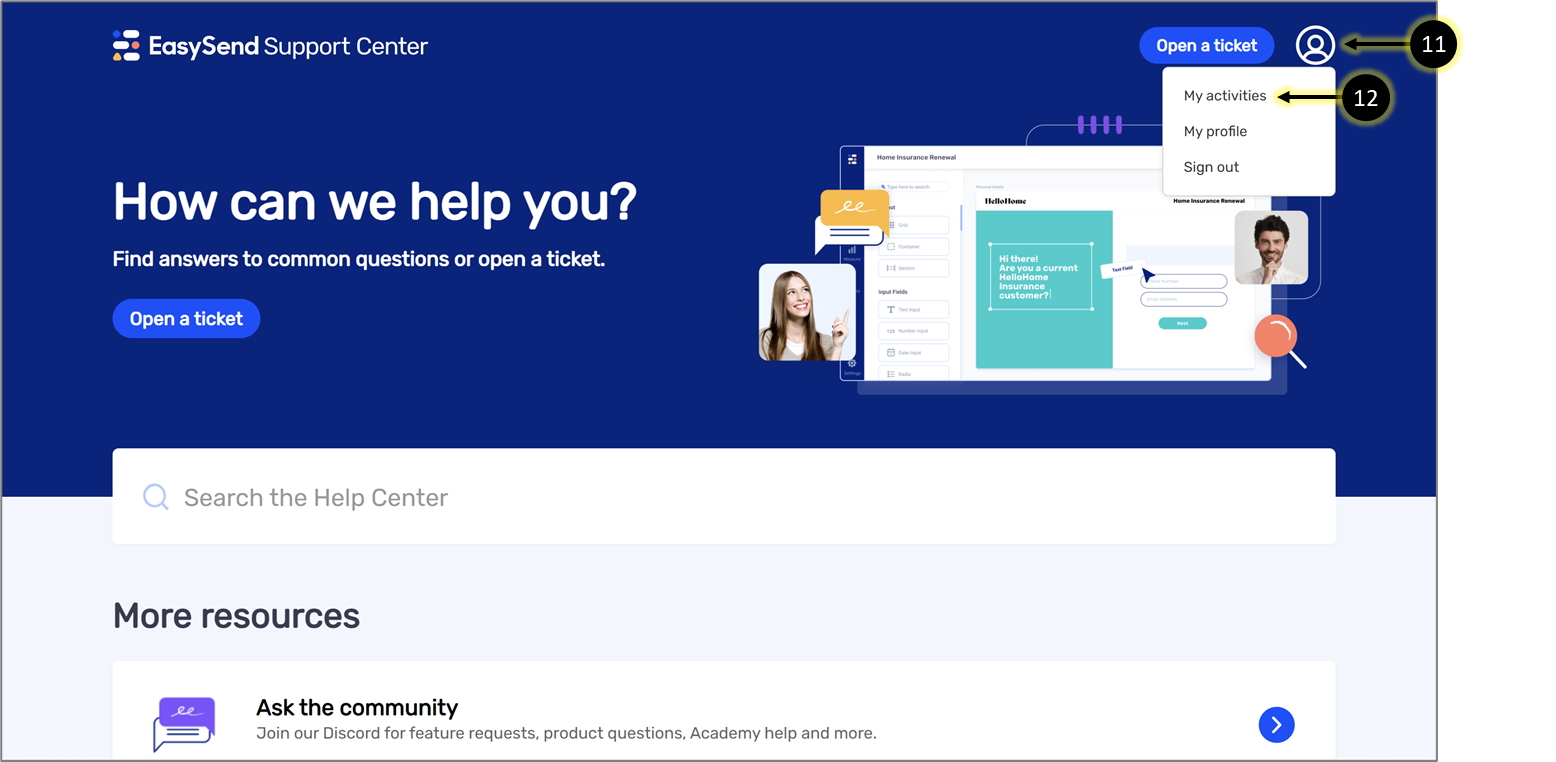
Figure 12: My activates Option
Under My activities, you can search our knowledge base articles for answers (13) and track your different requests (14), for example:

Figure 13: My activates