Article Overview
The following article describes EasySend's One-Time Password feature. It describes how to configure it and how to add it to a digital process.
What is a One-Time Password?
(See Figure 1)
A One-Time Password (OTP) is a password that is valid for only one login session or transaction, on a computer system or other digital device. OTP is the most used method for customers to authenticate users before entering an EasySend/EasySign process. EasySend developed a standardized feature that allows you to easily create and assign OTPs.
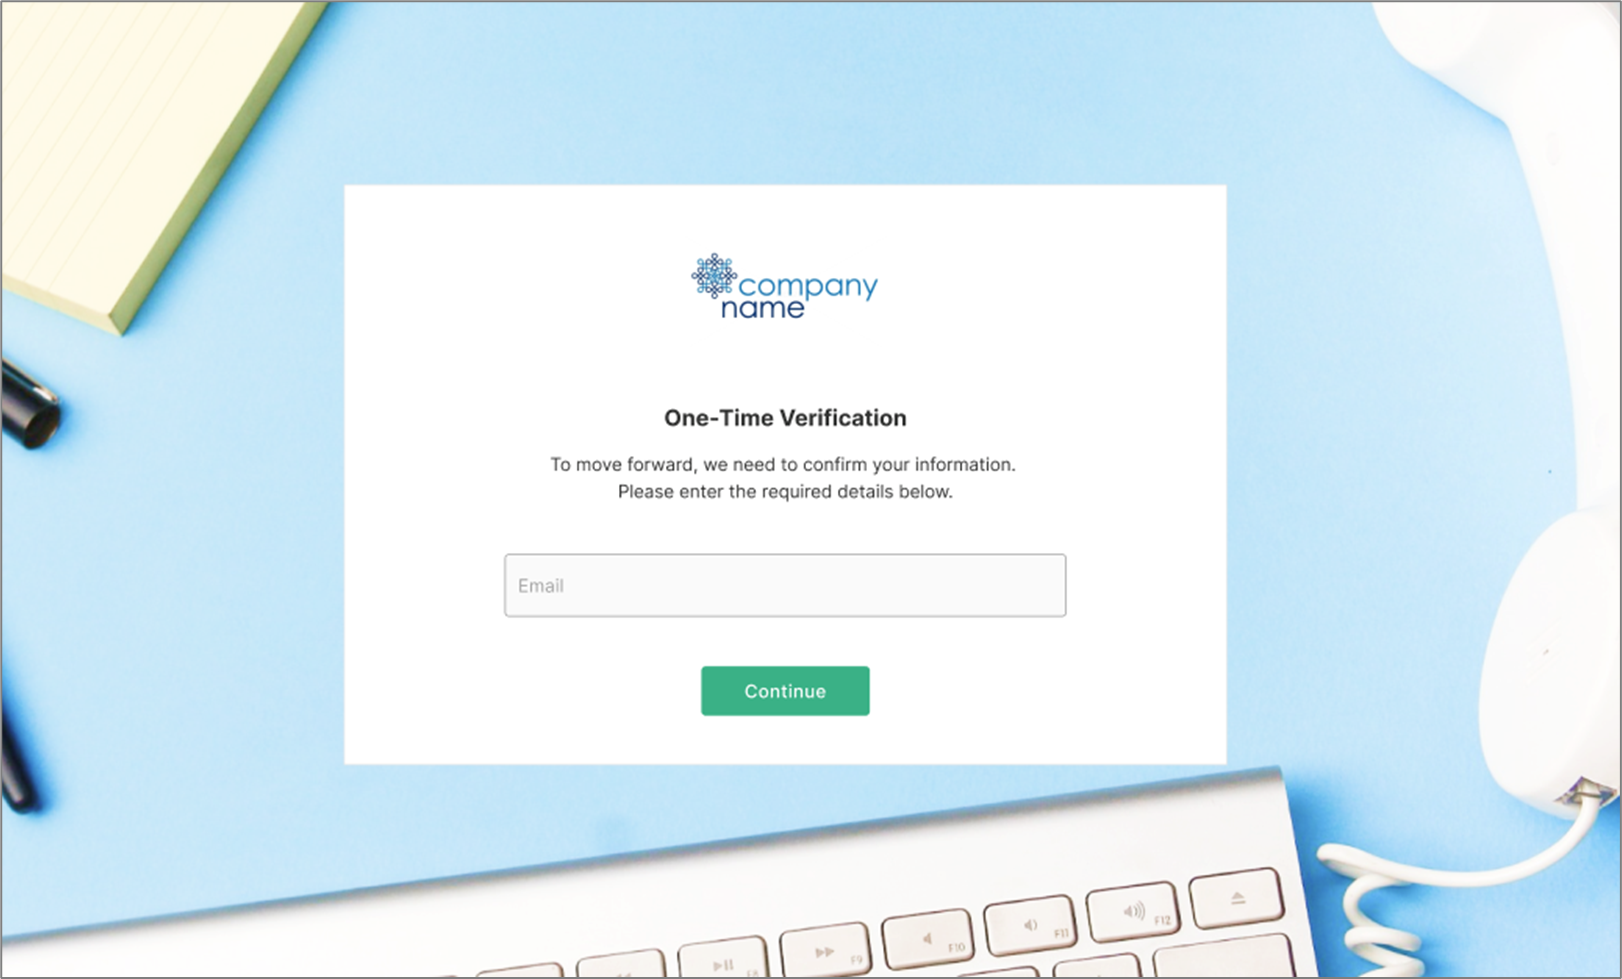
Figure 1: OTP
How To Access the Feature
(See Figure 2)
To access the OTP feature, access your Builder environment, click Build (1) and then the One Time Password option (2).
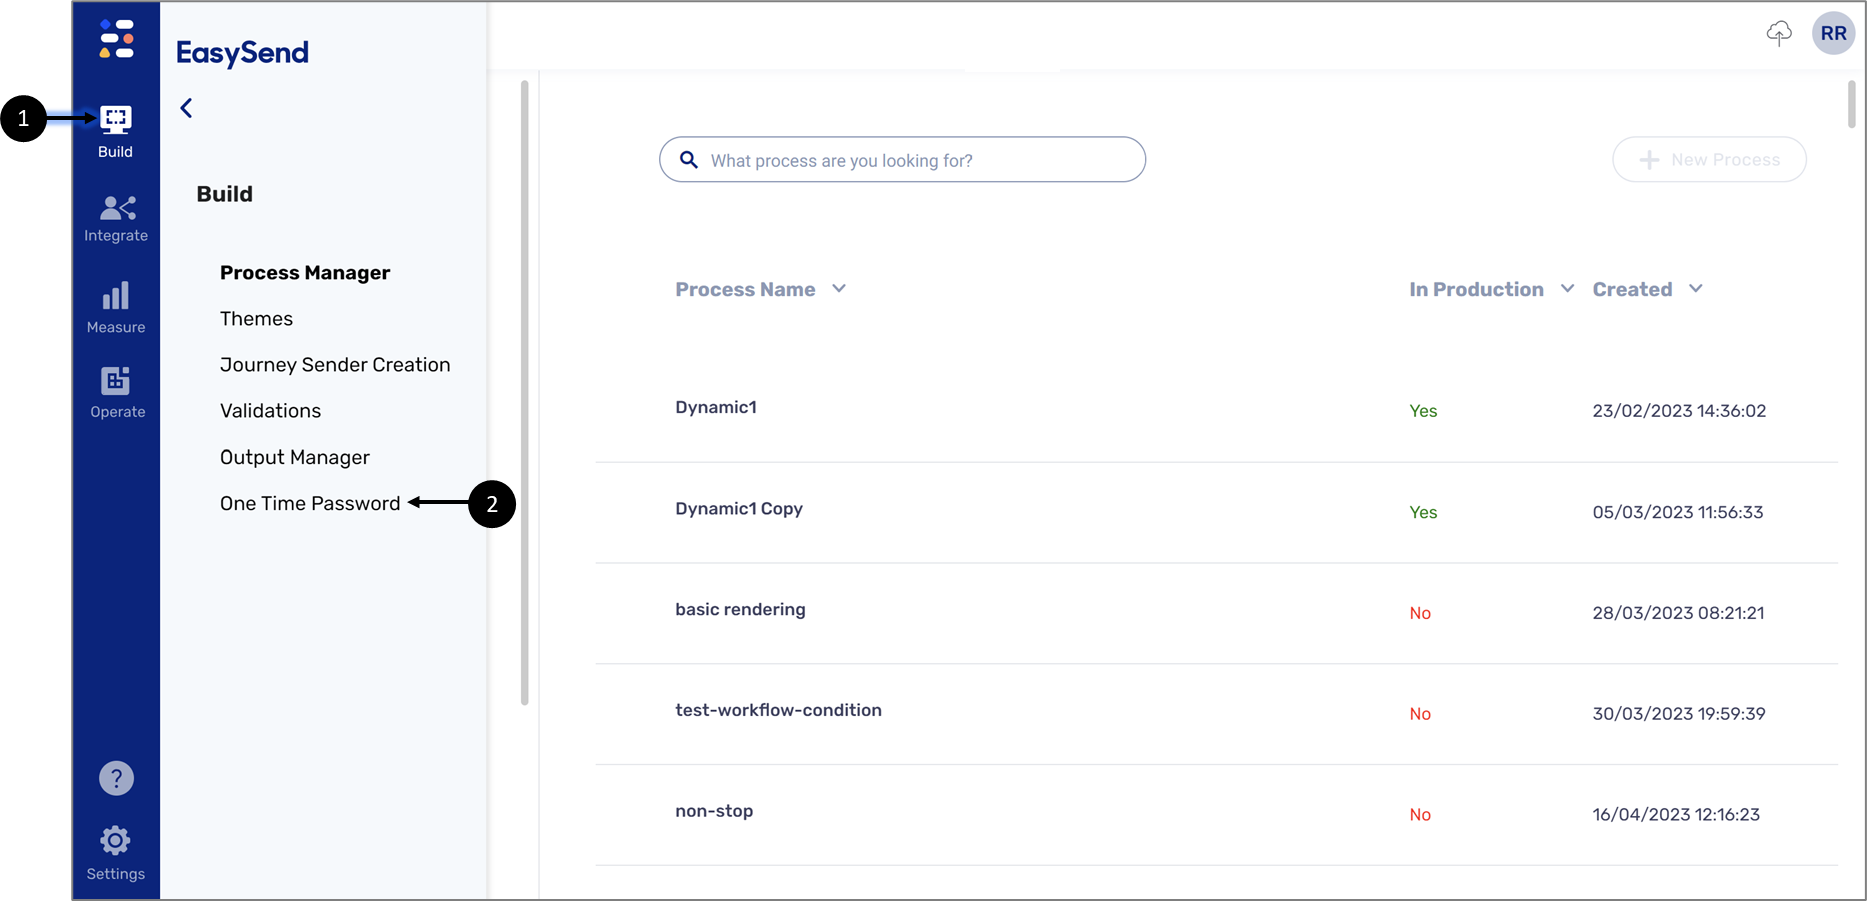
Figure 2: Accessing OTP
OTP Screen
(See Figure 3)
The OTP screen lets you configure OTP functionality and behavior consistently across all processes. It is divided into three main sections:
- General Settings (1)
- Text Customization (2)
- Design Customization (3)
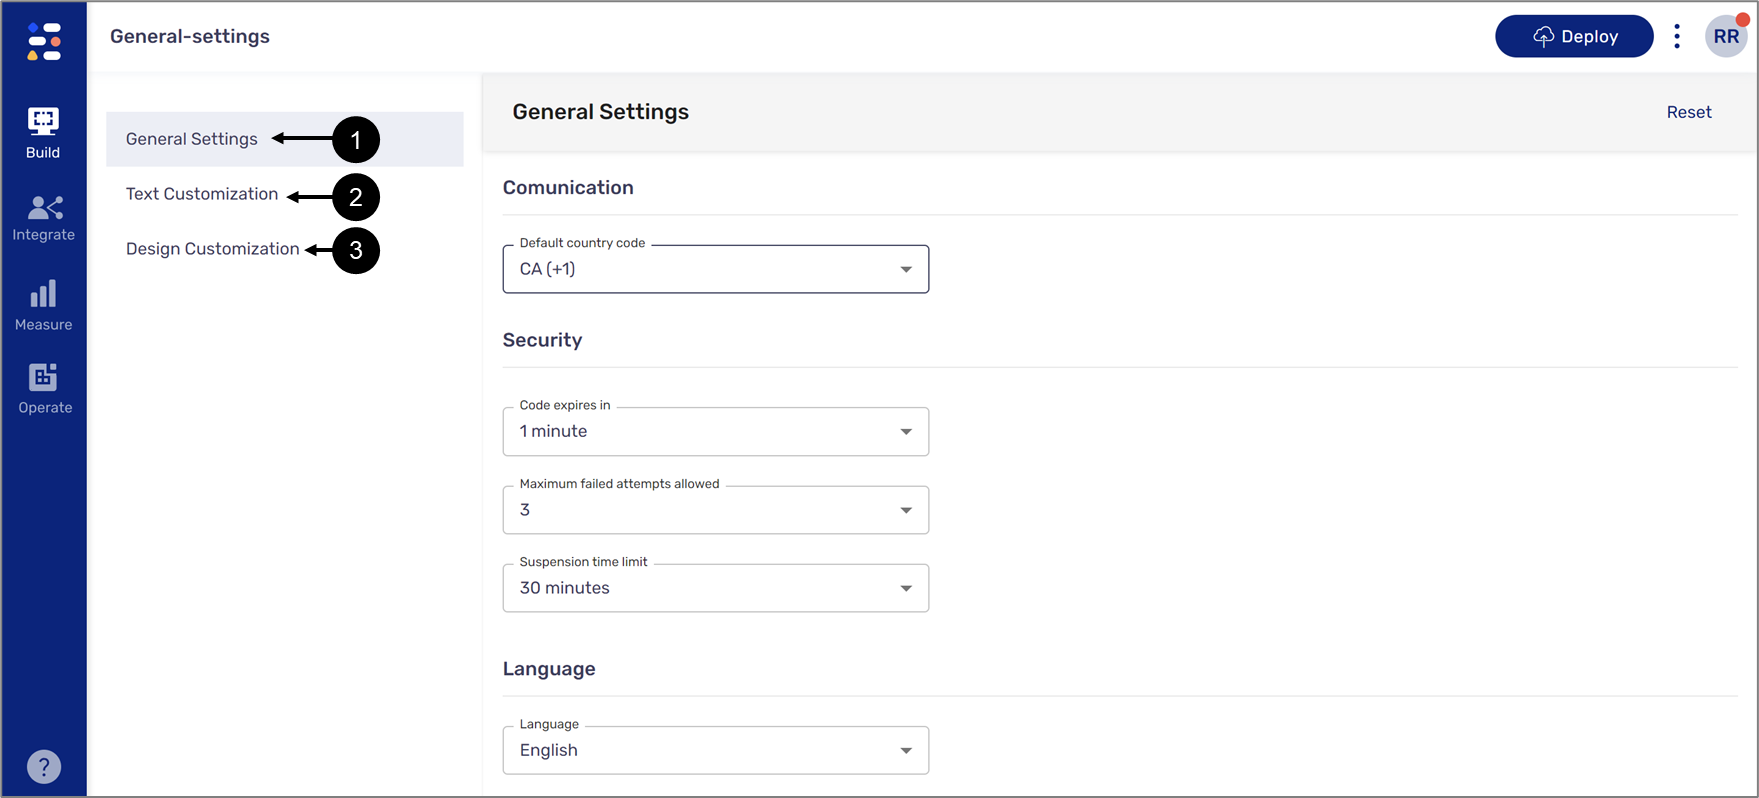
Figure 3: OTP Screen
General Settings
(See Figure 4)
The default section that appears when accessing the OTP screen. Using this section, you can customize security and language preferences for OTP authentication by setting:
- A Default country code will be used as part of the phone number that will receive an SMS with the OTP
- When the OTP code will expire:
- 30 seconds
- 1 minute
- 5 minutes
- 10 minutes
- The maximum number of allowed attempts:
- 3
- 4
- 5
- 10
- How long will the end-user be suspended in case all OTP attempts fail:
- 10 minutes
- 30 minutes
- 1 hour
- 24 hours
- The language (according to the languages set in your Builder environment)
- Button labels
- Email content
- SMS content
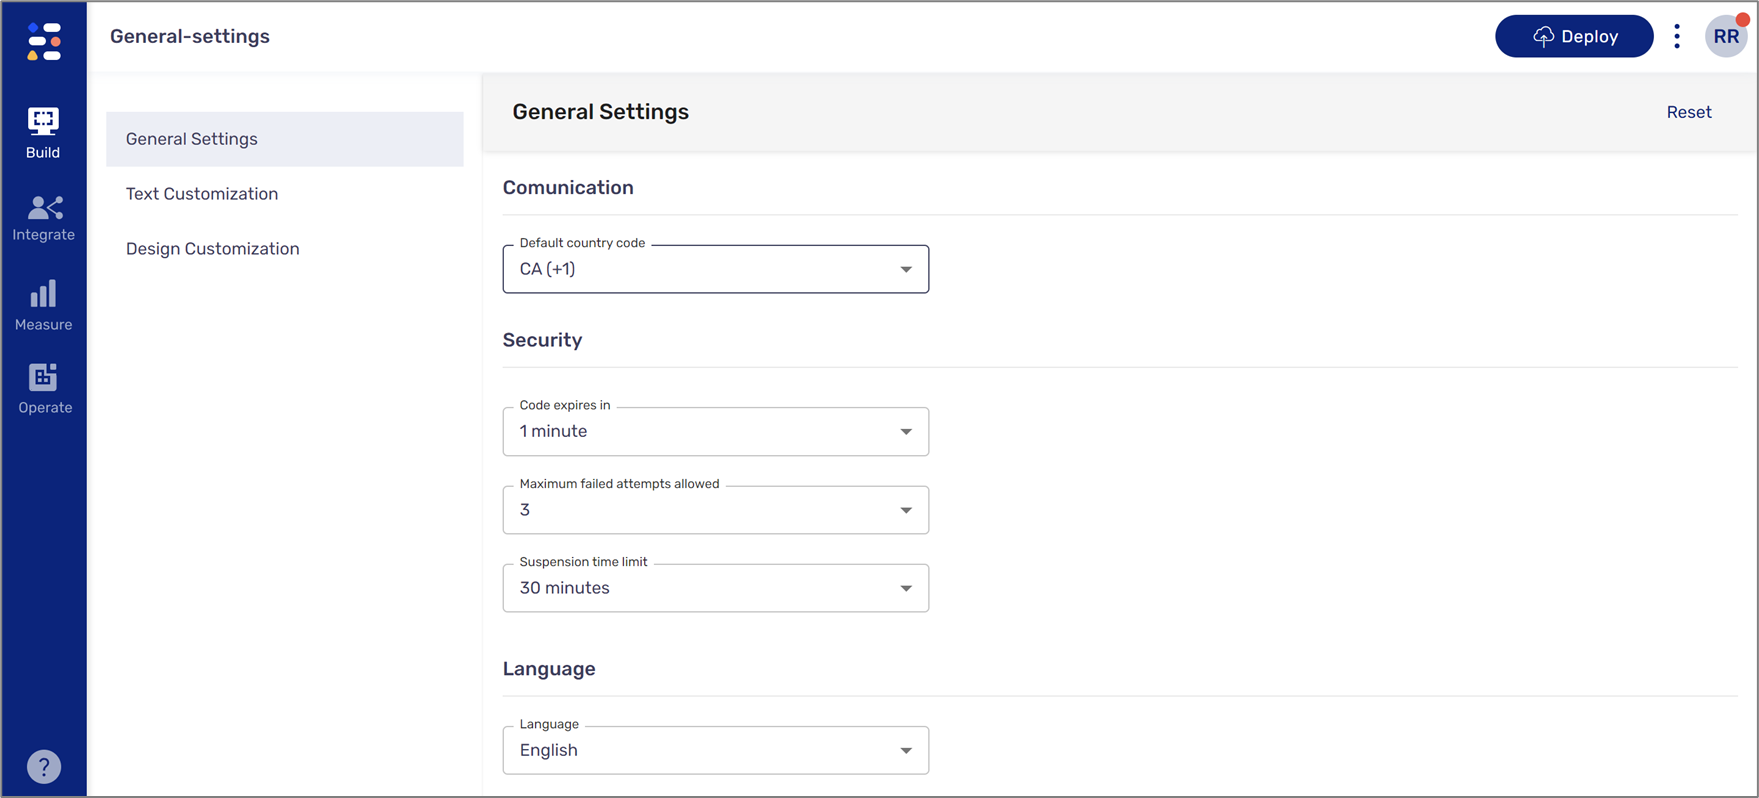
Figure 4: General Settings
Text Customization
(See Figure 5 to Figure 7)
Using this section, you can define the text displayed to end-users during the OTP authentication process. You can define text in different available environment languages for three different screens:
- Enter Code Screen:
- Will be used by the end-user to enter the OTP
- Source will automatically display the communication method defined in the Workflow Manager of the process (email, SMS, or both)
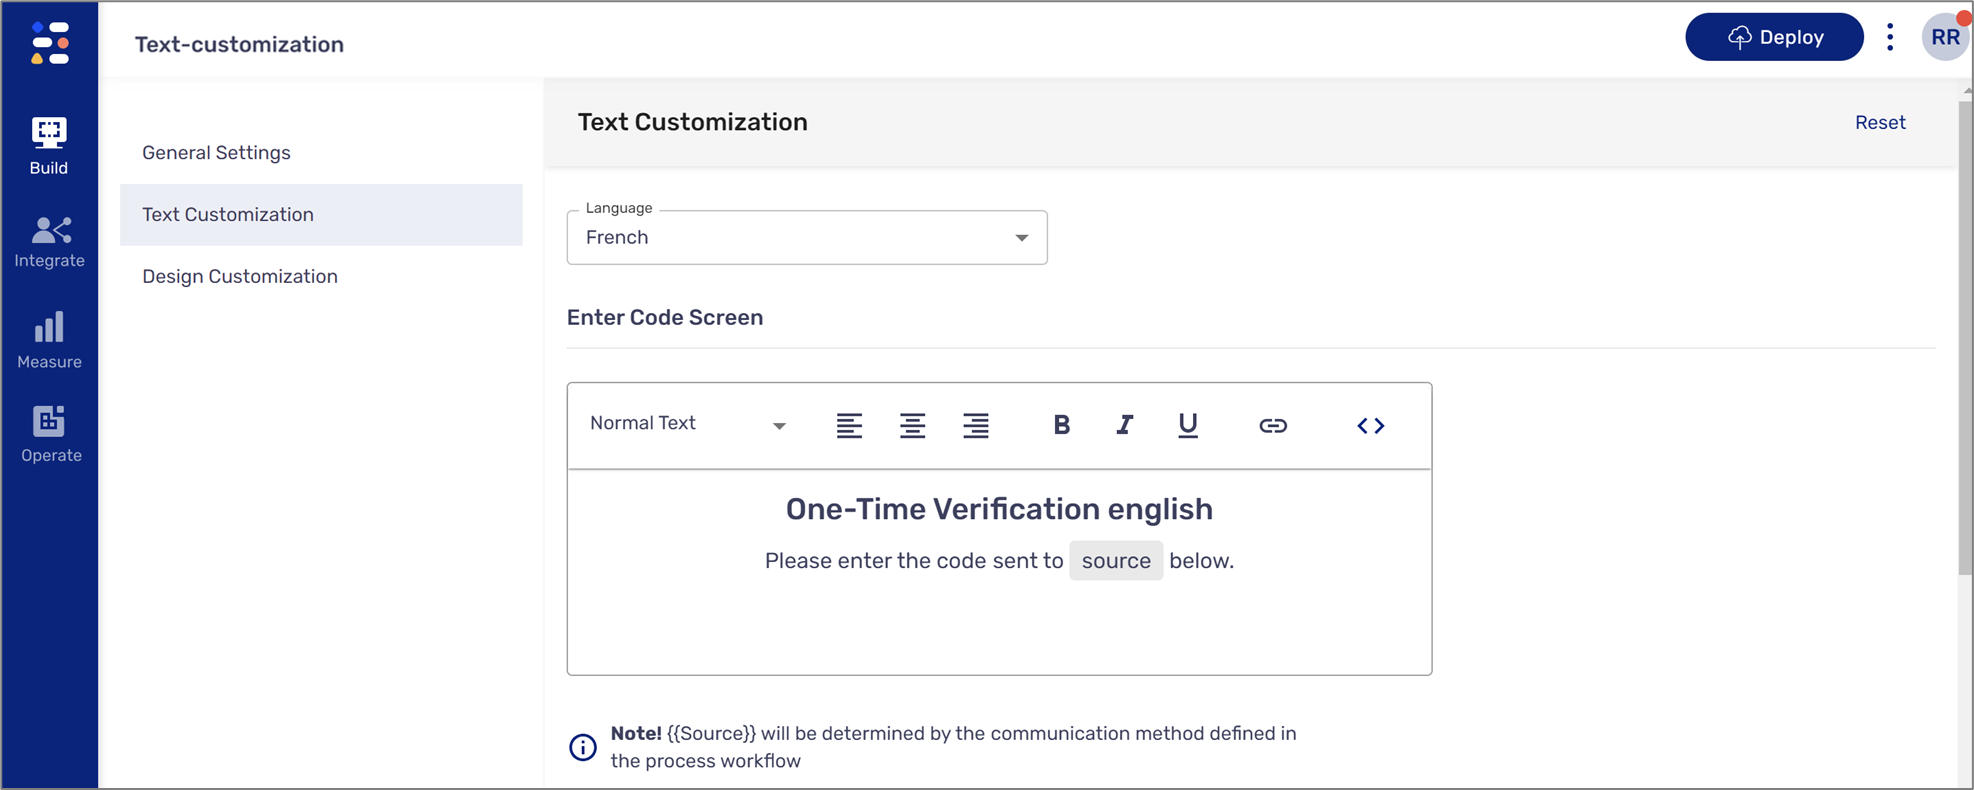
Figure 5: Enter Code Screen
 icon will add the Source variable to the text.
- Enter Identifying Details Screen:
- Will be used by any end-user to enter identifying details (email, SMS, both)
- Can be used as a two-factor authentication screen for known existing users
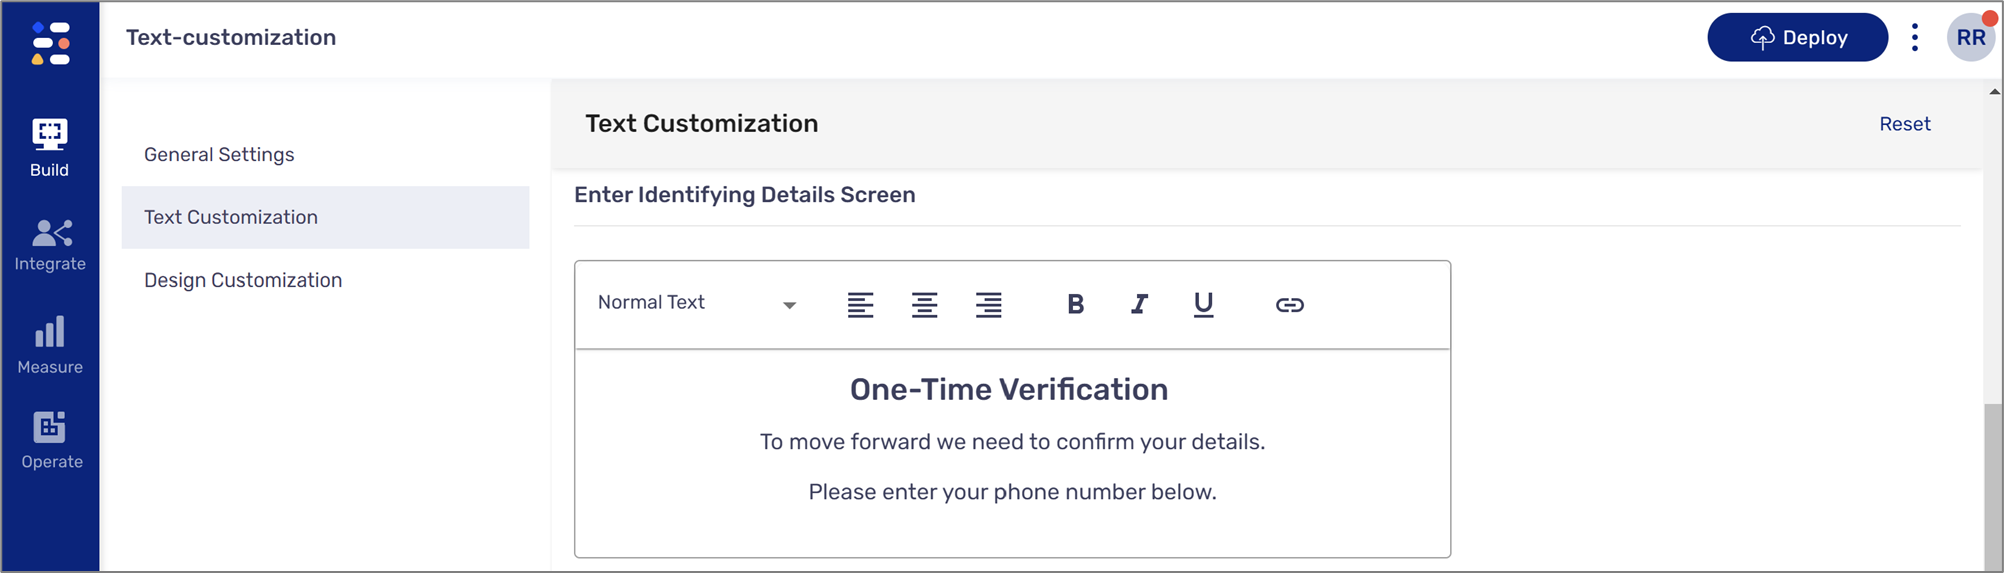
Figure 6: Enter Identifying Details Screen
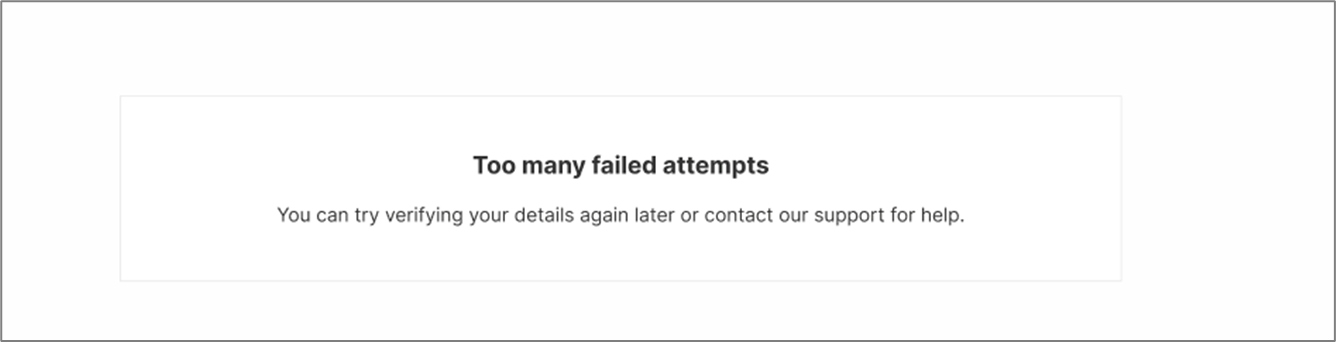
- Suspension Screen:
- Will be visible to an end-user who failed all OTP attempts
- Will disappear once the suspension duration is over
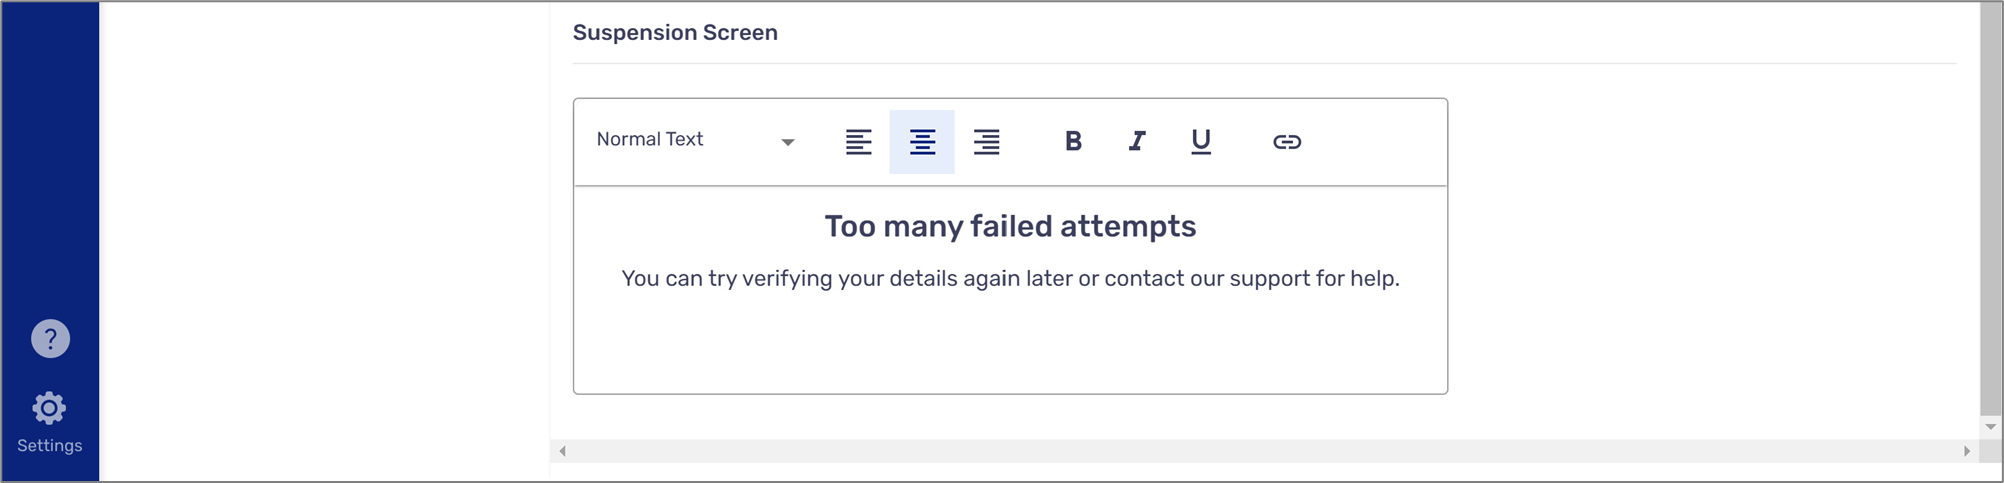
Figure 7: Suspension Screen
Design Customization
(See Figure 8)
Using this section, you can set the visual appearance of the OTP authentication process to align with your branding by:
- Assigning colors:
- Primary
- Background
- Font
- Button
- Uploading Images:
- Logo
- Background
- Only PNG and JPEG files under 5MB can be uploaded.
- For best results, upload a logo image of at least 150px by 150px.
- For best results, upload a background image of at least 1920px by 1080px.

Figure 8: Design Customization
Managing OTP Using the Workflow Manager (Older Version)
The following sections describe how to add, edit, and remove an OTP using the older version of the Workflow Manager.
Accessing The Workflow Manager
(See Figure 9)
The Workflow Manager screen allows you to set an OTP authentication for one or more steps of a digital process. To set an OTP authentication, hover above the desired step, click the three dots (1), and then click Require Authentication (2).
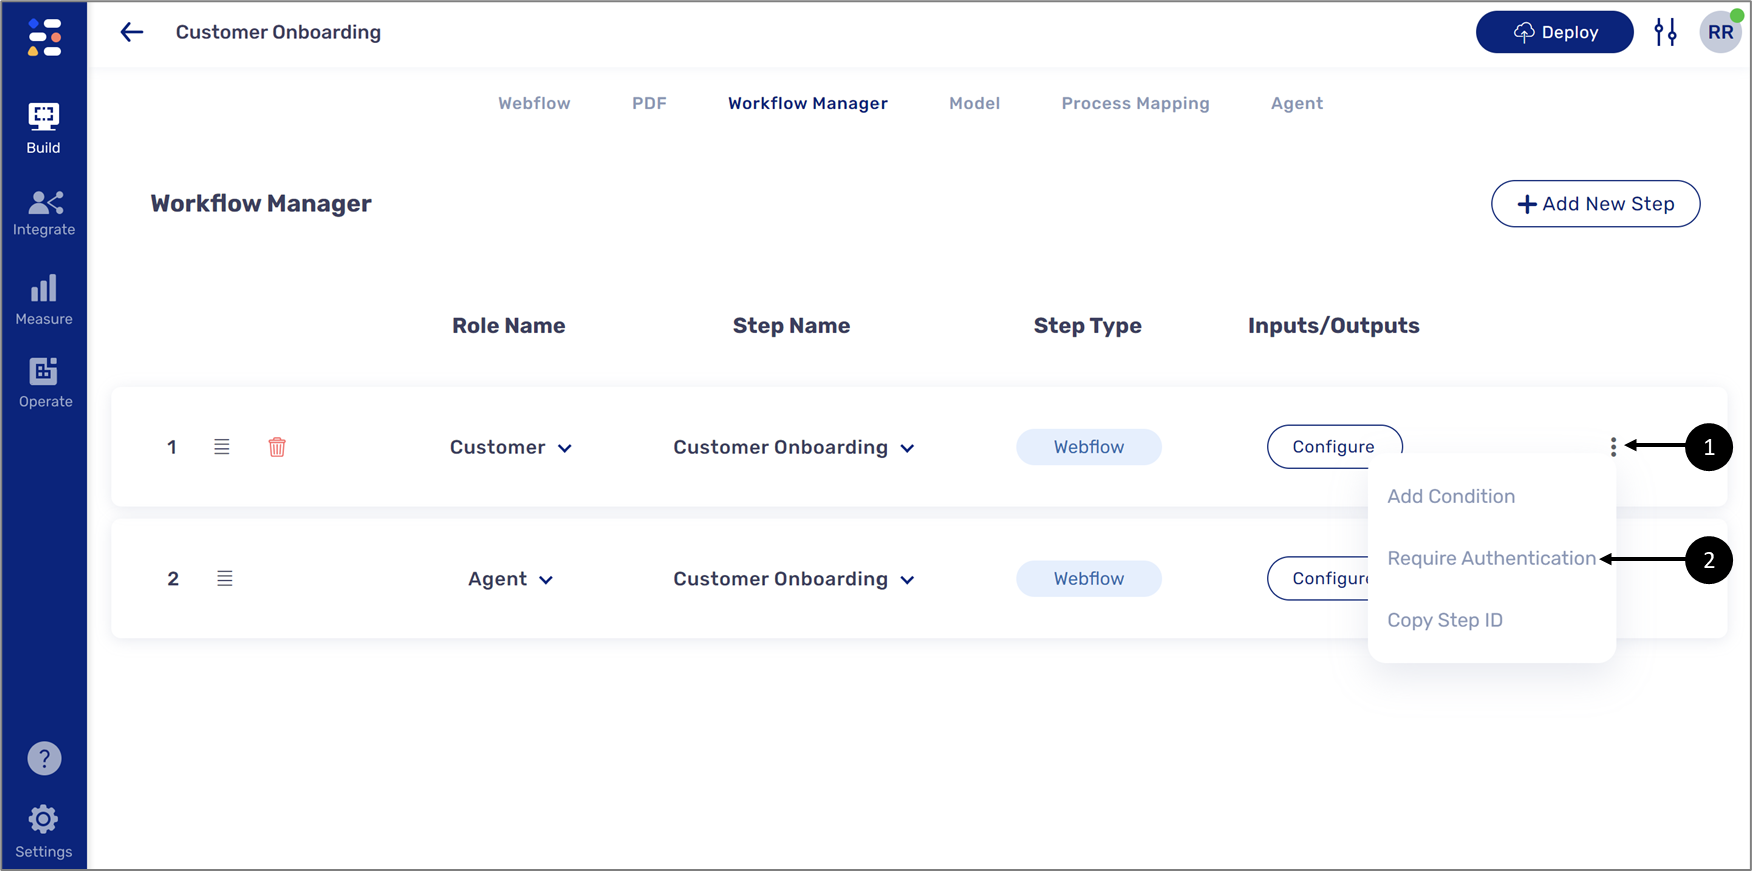
Figure 9: Adding Authentication
Configuring the Authentication Window
(See Figure 10)
After clicking the Require Authentication option, the Authentication window appears. This window contains two dropdowns:
- Who will you authenticate (1):
- Known user - an end-user whose initial information, email, SMS, or both, is already known, for example:
- The information exists in your database or was provided in a previous step
- The information is available in the Model of the digital process through integration with the database or a previous step
- Anyone to known user - When an end-user, whether new or existing, accesses the process for the first time, they are considered as Anyone due to the absence of their details; however, once identified, subsequent entries into the process will require authentication.
- Known user - an end-user whose initial information, email, SMS, or both, is already known, for example:
- How code is sent (2):
- SMS
- Both
- Email or SMS
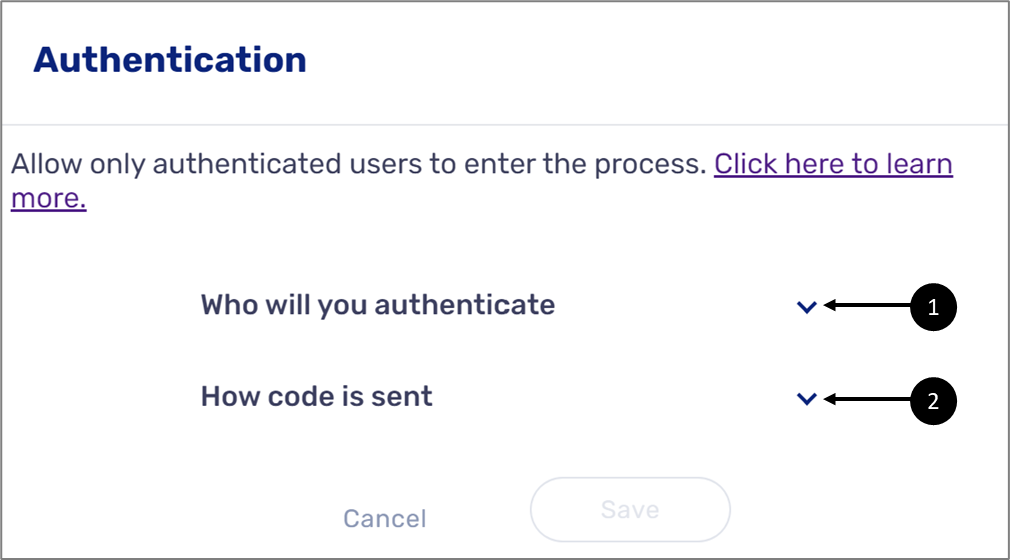
Figure 10: Authentication Window
Depending on your dropdown selections, additional options will appear.
Authenticating Known Users using Email and SMS
(See Figure 11 to Figure 14)
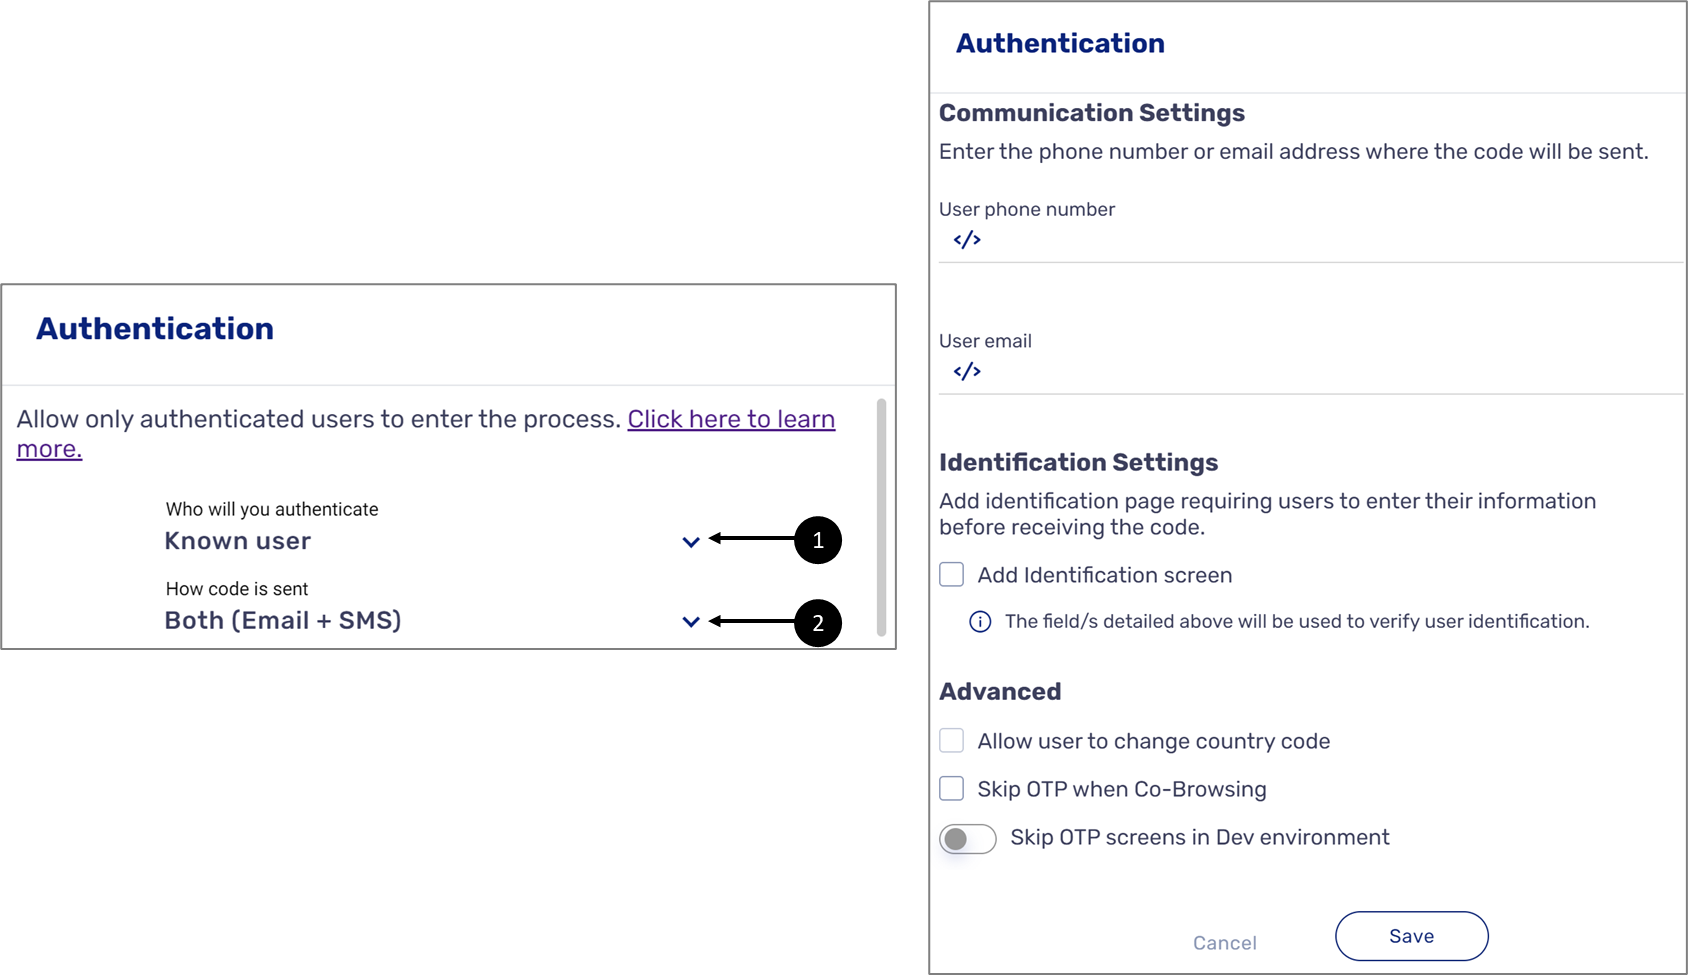
Figure 11: Authentication Window Dropdowns
When you select to authenticate a known user (1) and to send the OTP via Email and SMS (2), the following sections appear:
- Communication - using this section, you will specify the Model data items that contain the phone number (3) and email (4) information of the end-user
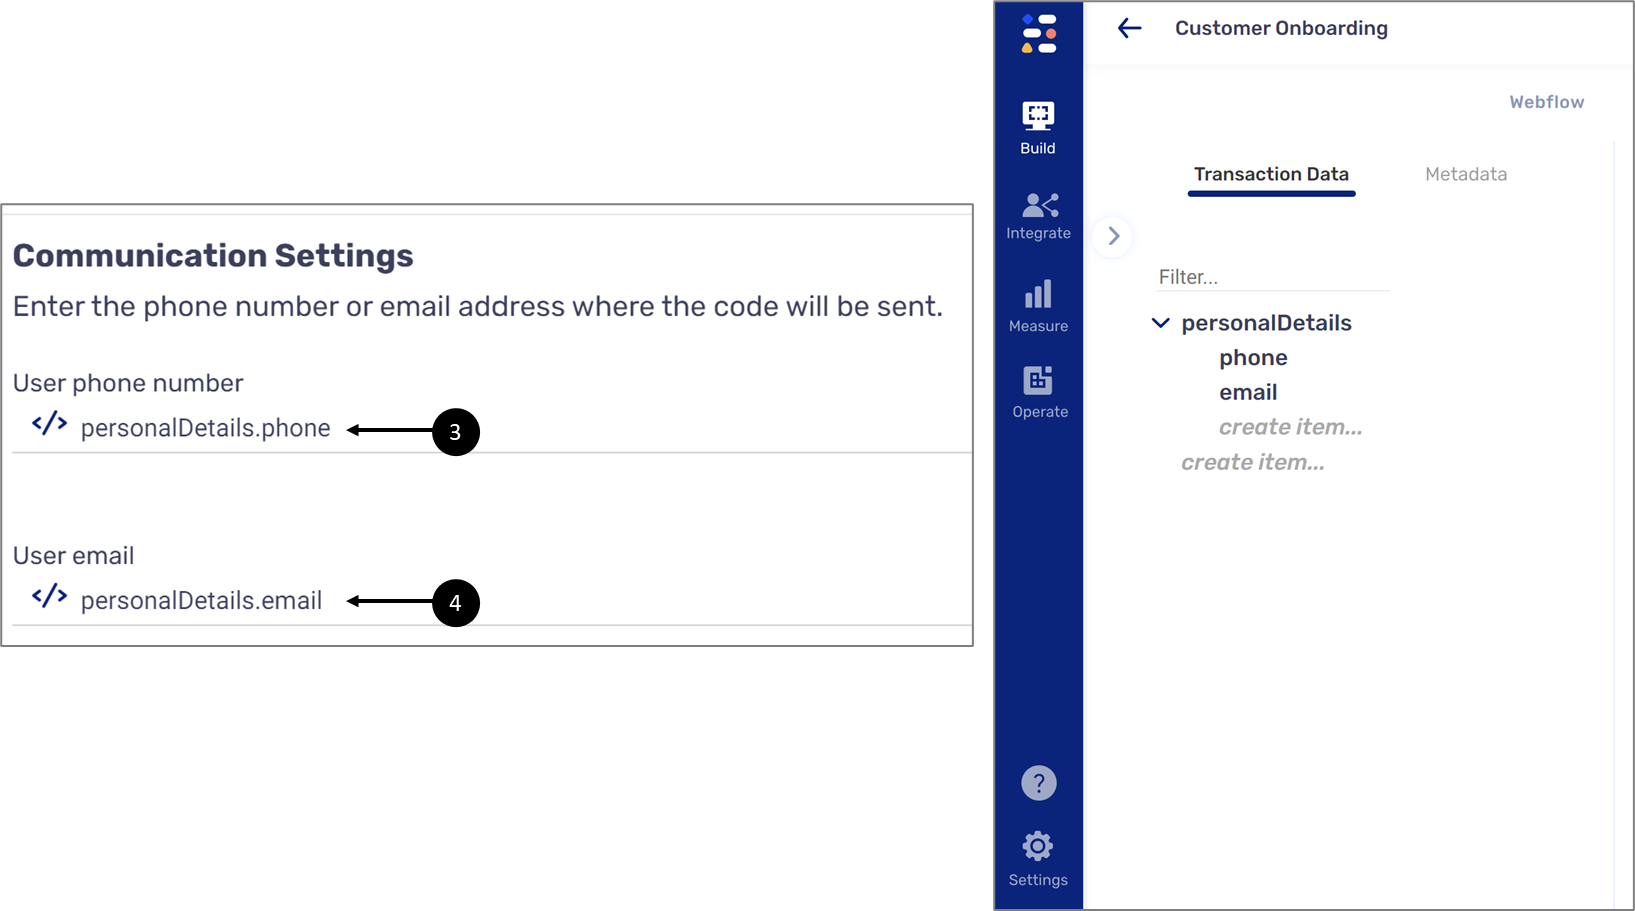
Figure 12: Communication Settings

- Identification Settings - using this section, you can use the checkbox (5) to display the Enter Identifying Details Screen:
- If you choose to display the screen, it will be used as a two-factor authentication:
- The end-user will have to enter their identifying details (email, SMS, or both)
- The entered details will be compared against the information that was stored in the Model data items through integration
- The end-user will receive the OTP only if the entered information matches the stored values
- If you choose to display the screen, it will be used as a two-factor authentication:
If you choose not to display the screen, the end-user will receive the OTP to the selected methods (email, SMS, or both) immediately once they enter the process.
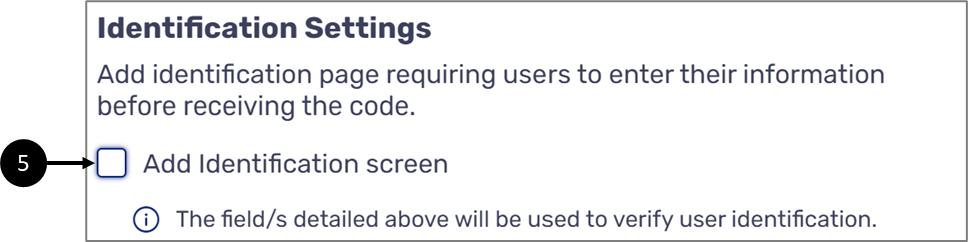
Figure 13: Identification Settings
- Advanced - using this section, you can allow:
- End-users to change the country code (6) when the Enter Identifying Details Screen appears
- Any end-users, with a different role, who open the digital process using Co-Browsing to skip OTP (7)
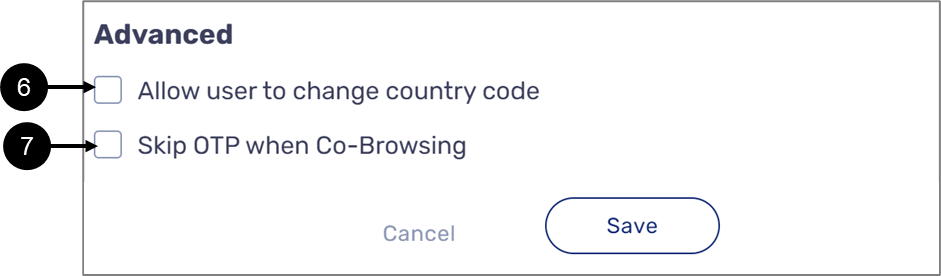
Figure 14: Advanced
Authenticating Anyone to a Known User
- The first time the end-user opens the link to the process, they will encounter the Anyone authentication flow
- If the end user passed the flow once, the next time this link is reopened, the flow will change to the Known User flow
- You can choose if there is an Identification screen or not
- According to the choice, the end-user either gets the code immediately or has to re-enter the details entered in the Anyone authentication flow
Editing/Removing Existing Authentication
(See Figure 15 to Figure 17)
It is possible to edit or remove existing authentication. To do so, navigate to the Workflow Manager screen and locate the step that has a required authentication, you can identify it by the lock icon (1).
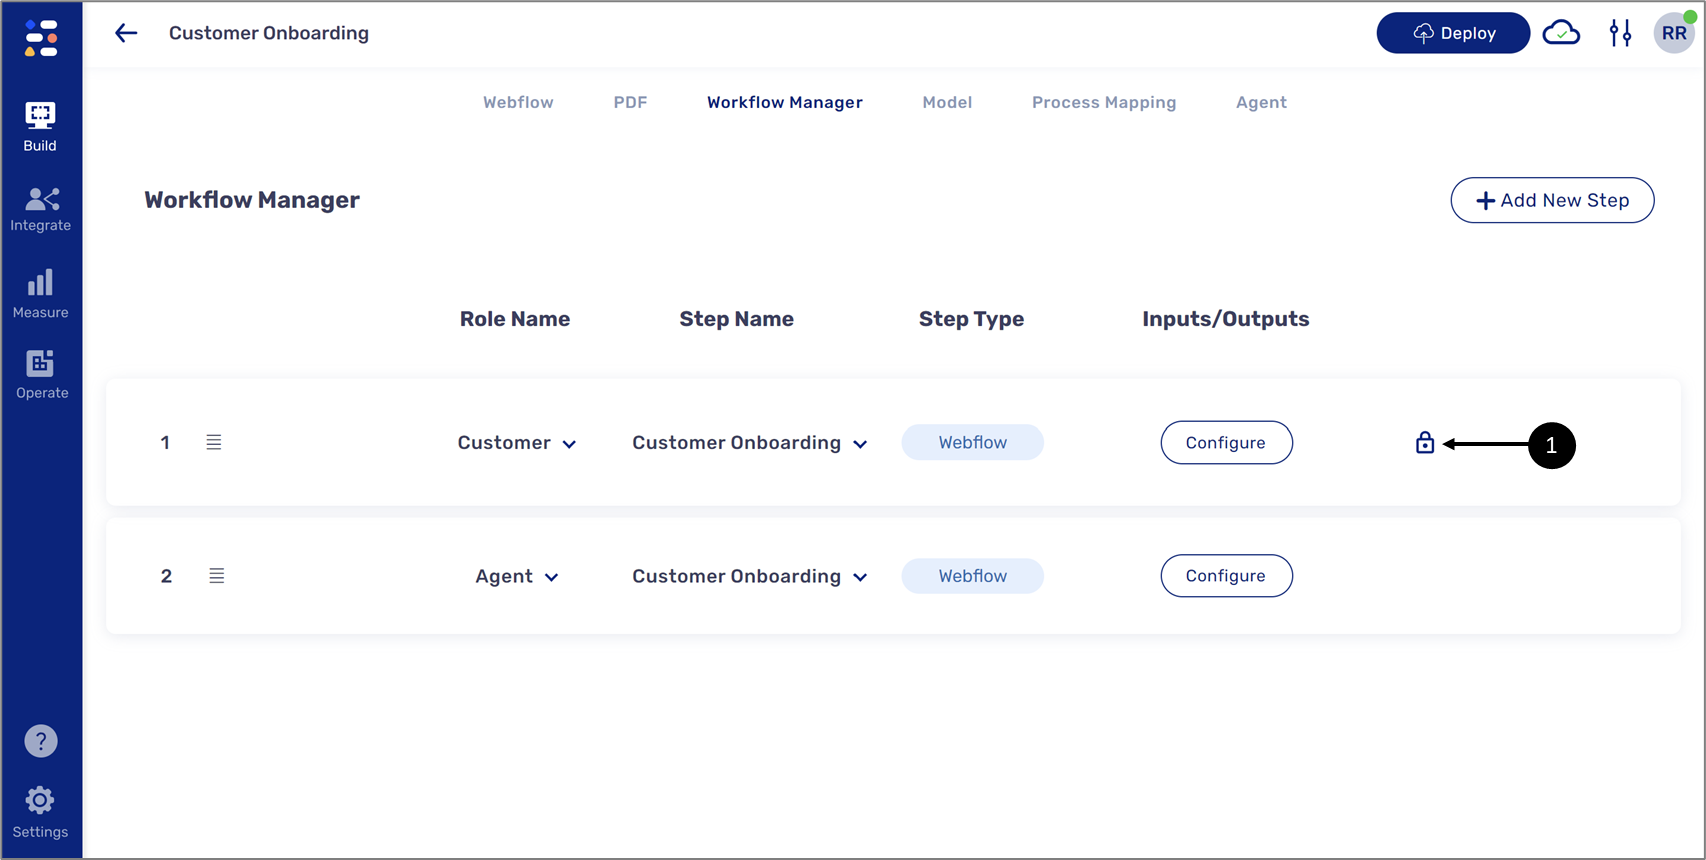
Figure 15: Lock Icon
To edit the authentication, click the lock (1) or hover above the step until the three dots appear (2). Click the three dots and then click Edit Authentication (3) - the Authentication window will appear.
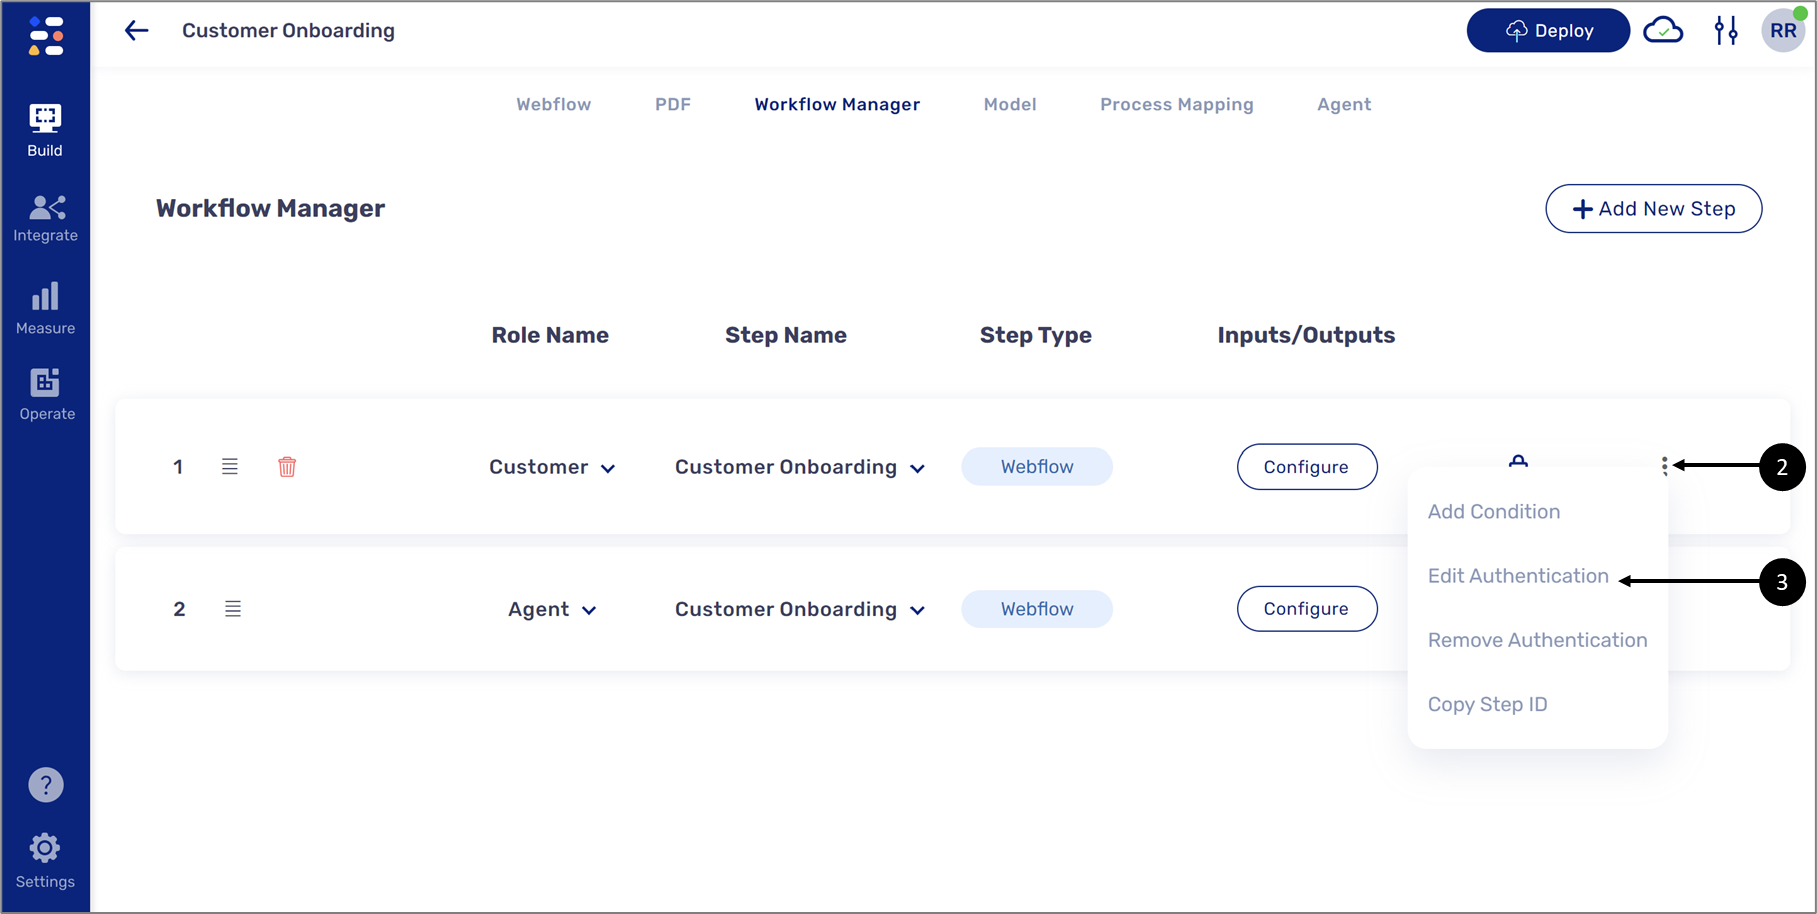
Figure 16: Edit Authentication
To remove the authentication, hover above the step until the three dots appear (1). Click the three dots and then click Remove Authentication (2).
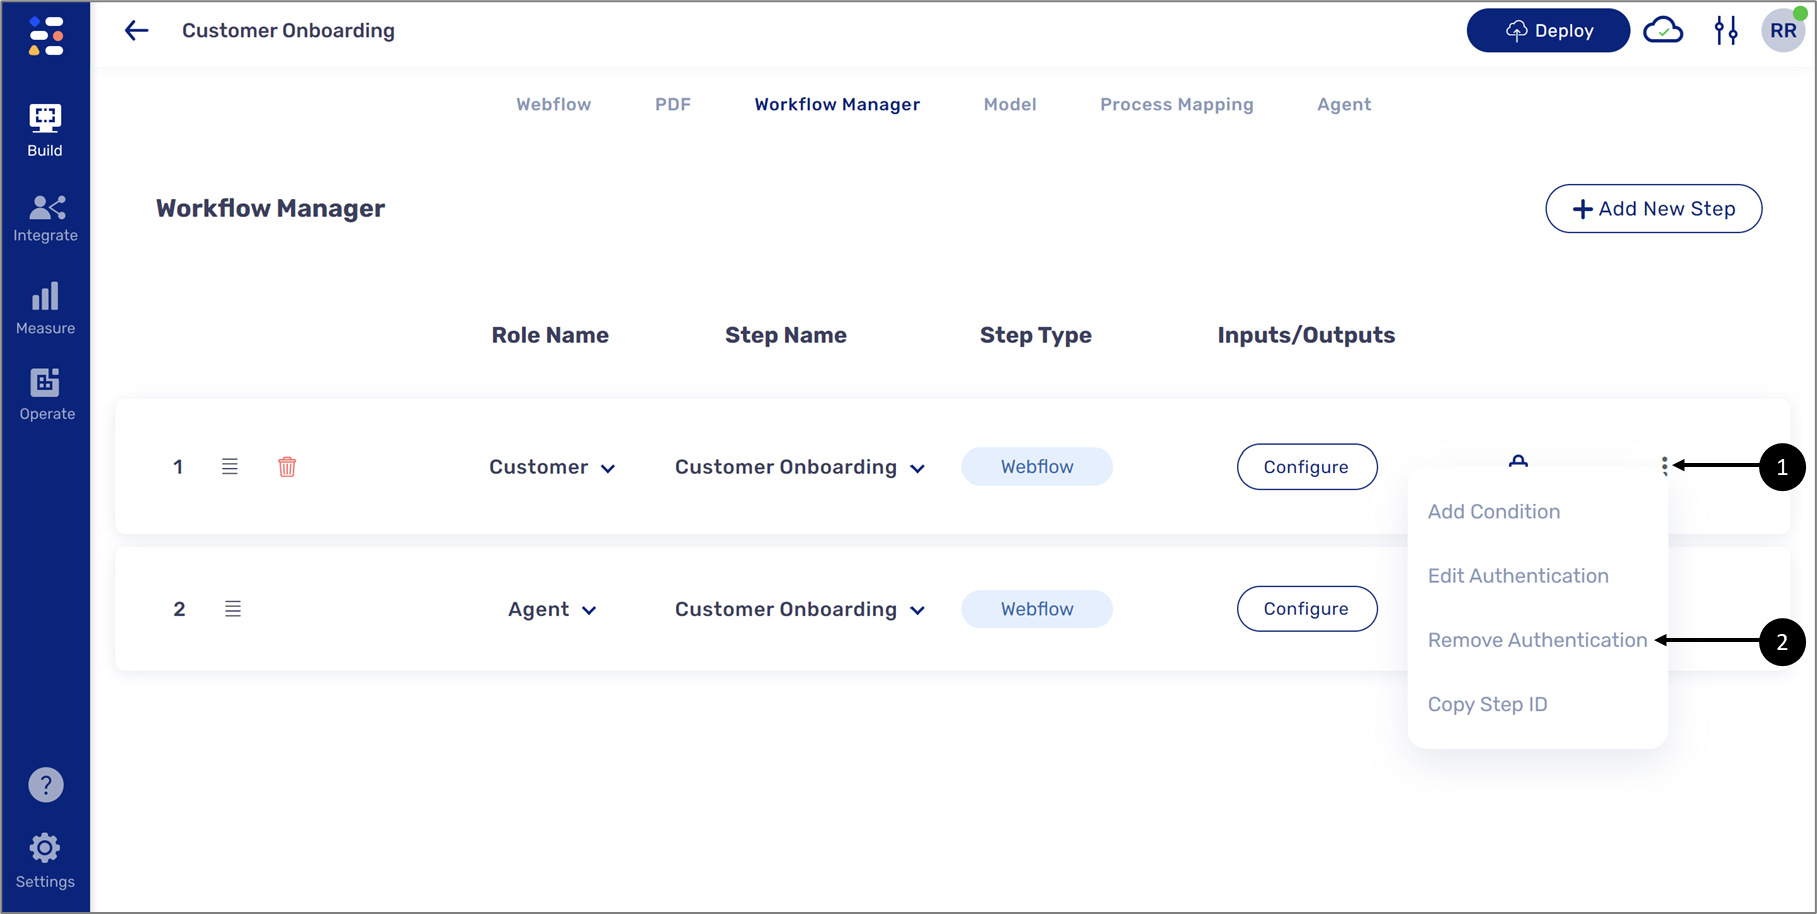
Figure 17: Remove Authentication
Managing OTP Using the Workflow Manager (New Version)
The following sections describe how to add, edit, and remove an OTP using the new version of the Workflow Manager.
Enabling an OTP Authentication
(See Figure 18)
The Workflow Manager screen allows you to set an OTP authentication. To do so, click a Generate Webflow building block (1), then click the More Options drop-down (2), and then toggle the switch to on (3).

Figure 18: Enabling OTP Authentication
Configuring the Authentication Window
(See Figure 19)
After toggling the switch to on, the OTP Authentication window appears. This window contains a few sections:
- Authentication Method (1):
- Known user - an end-user whose initial information, email, SMS, or both, is already known, for example:
- The information exists in your database or was provided in a previous step
- The information is available in the Model of the digital process through integration with the database or a previous step
- New user - When an end-user accesses the process for the first time, they are considered new due to the absence of their details; however, once identified, subsequent entries into the process will require authentication.
- How code is sent:
- SMS
- Both
- Email or SMS (both required)
- Communication Settings - adding the email, SMS, or both. Can be static or a data item.
- Known user - an end-user whose initial information, email, SMS, or both, is already known, for example:
- Identification Screen (2):
- When the box is checked - requires users to enter their information before receiving the code.
- When the box is not checked - does not require users to enter their information before receiving the code.
- Advanced (3):
- When the box is checked - will skip OTP screens in DEV environments.
- When the box is not checked - will not skip OTP screens in DEV environments.
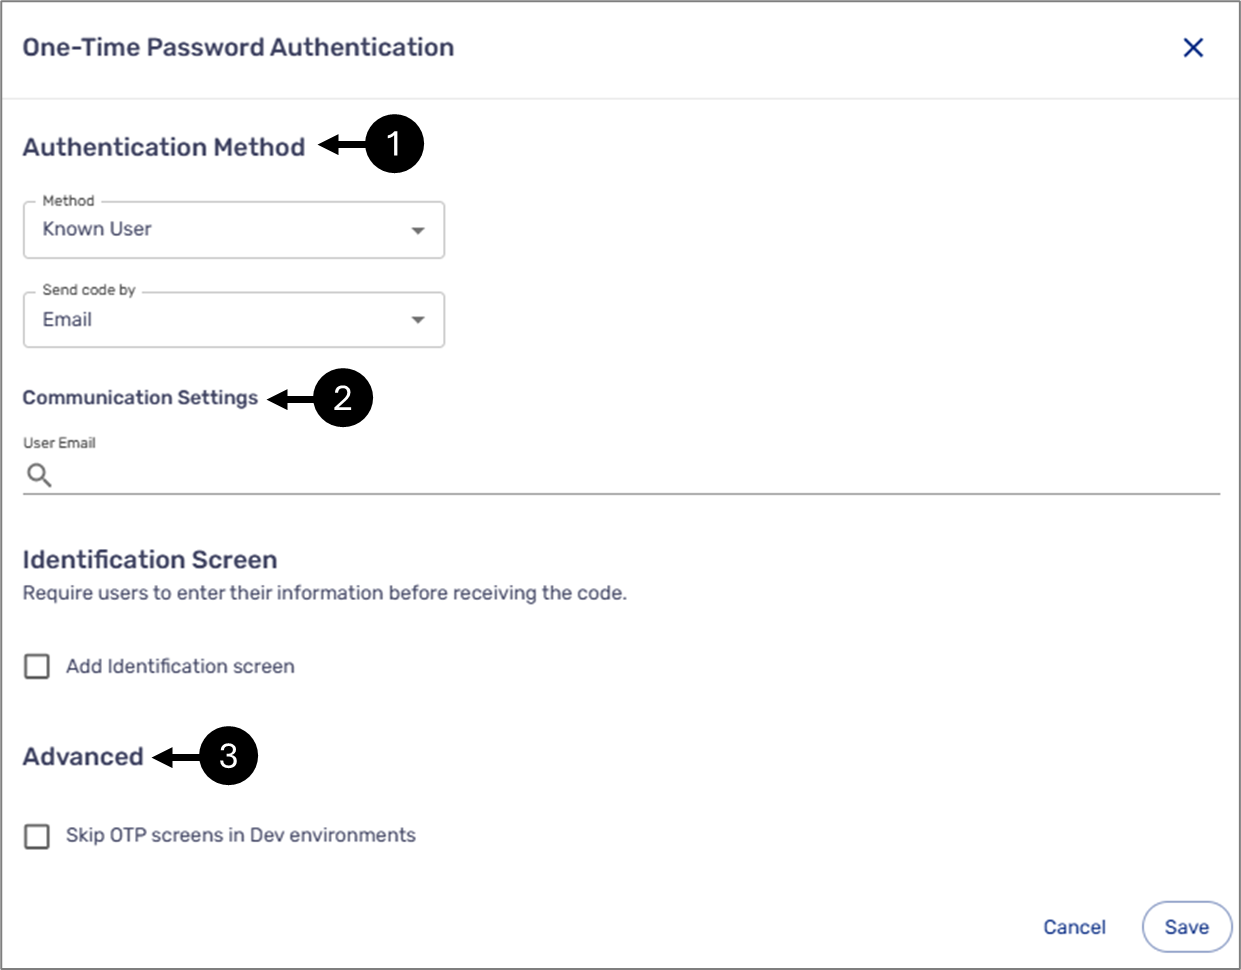
Figure 19: OTP Authentication Window
Notes About Security
- The number of permitted failed attempts for an end-user, involving incorrect details and/or codes, can be adjusted within the range of 3 to 10
- This configurable setting applies independently to each OTP screen, such as the Enter Identifying Details screen and the Enter Code screen, therefore, in scenarios where both screens are present for two-factor identification, the configured number applies separately to each screen
- On the Enter Code screen, if the user opts to resend the code, they will also have the same number of attempts allowed to resend the code, however, once the code has been resent, the attempt count for that specific code will reset
- When authenticating Anyone, if an end-user repeatedly attempts the same process (with different Request IDs), they will eventually be blocked from continuing to prevent them from repeatedly entering details and sending OTP codes indefinitely