Article Overview
The following article describes how to embed EasySend processes with a Software Development Kit (SDK) to operate within your website or web-based applications.
Why use the SDK?
(See Figure 1 )
This SDK provides a toolset for application developers to seamlessly embed EasySend processes within your website or web-based applications to operate smoothly with a native look that matches your brand. Using the SDK can also improve the loading-time performance of the process.
The SDK can be included by embedding a <script> tag in the HTML of a web-based application. Once the SDK is imported to the webpage, the following is possible:
- Preload processes to optimize their loading time
- Open Processes inside an <iframe>, while also synchronizing the user-scrolling between the host and the inner frame
- Register and act upon built-in process events (such as next page, previous page, completed, failed)
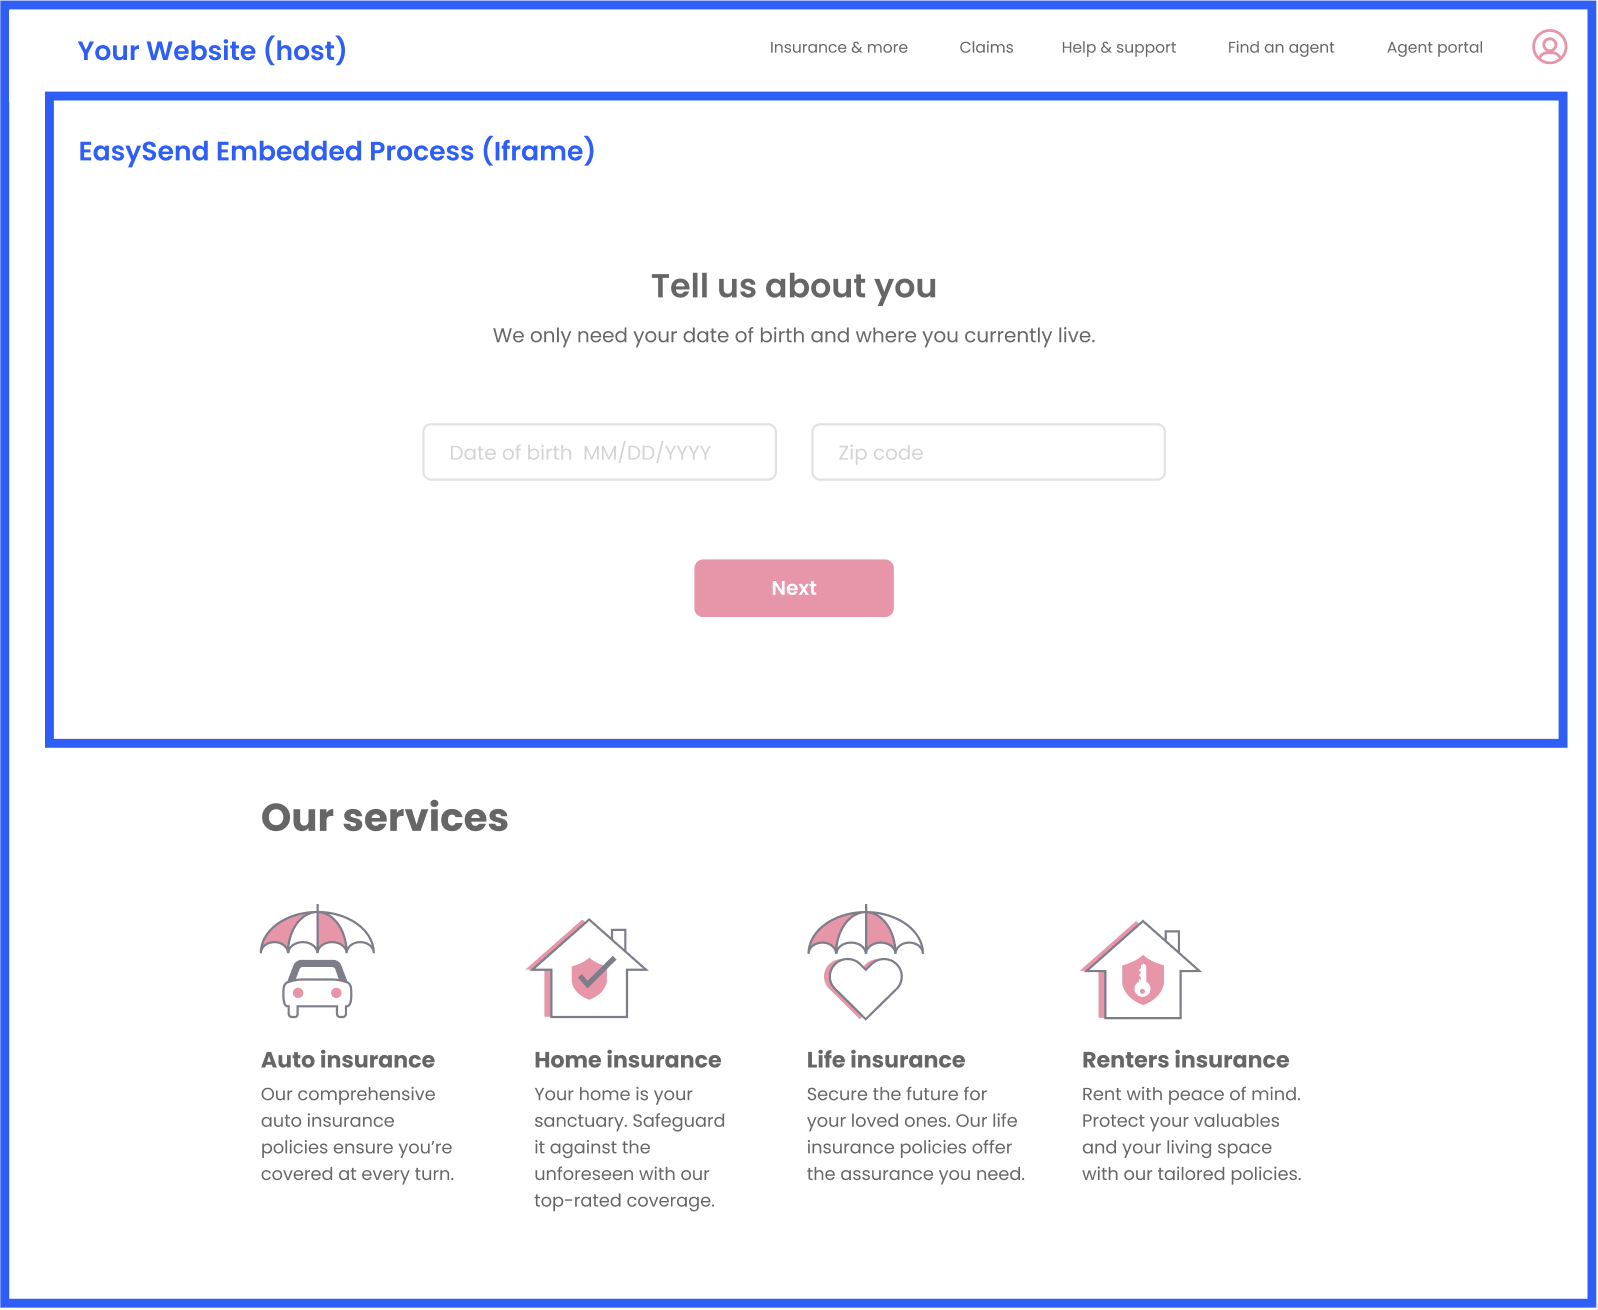 Figure 1: Example of embedded Process
Initial Setup
The following sections describe the steps of the initial setup.
1. Install
To make the JavaScript SDK available to your application or site, install the package in your project using the npm installer
npm i easysend-sdk2. Create a Player Handler
The Player handler is used for creating form handlers. It represents a single EasySend player instance, or a “run-time server”. To find the URL of the player server, open a process in the EasySend builder and click on “preview” (see here for more information) or contact your EasySend admin.
import core from 'easysend-sdk'
const esPlayer = await core.getPlayer("http://example.easysend.app")
3. Create a Form Handler
The form handler is used for working with a single form. It represents a single EasySend process and helps users to manage it. Form handler can be created by form ID or derived from a URL
- From a constant Form ID:
const esForm = esPlayer.getForm("form_id", "customer_id")
- From a URL generated by the “generate_link” API call:
const esForm = esPlayer.useGeneratedLink("[url_from_generate_link_api]")Working with EasySend Forms
The following sections describe how to work with EasySend forms.
SDK Exposed Capabilities
- esForm.preload() - preloads all the process assets (such as images, fonts, etc.) to optimize the loading time of the process.
- esForm.createIframe() - Creates a new iframe for the form. Returns: an initialized Iframe with the form in a hidden state.
const iFrameManager = esForm.createIframe();- iFrameManager.showInContainer (container, width?, height?) - the form can be opened in the frame by calling this function, allowing the user to set form dimensions.
esForm.openInTab();- esForm.createEventsListener() - listen to form events based on the sending form URL:
- It's important to use the same form URL to create event listeners and open the form.
- In addition, event listeners need to be created before opening the form.
Form Events
- onPrevPageListener - called when a user navigates to the previous form step.
- onNextPageListener - called when a user navigates to the next form step.
- onFormSubmittedListener - called when a form is submitted.
- onFormFailedListener - called when a form has failed to submit.
let eventListener = esForm.createEventsListener();
eventListener.onFormSubmittedListener = () => { window.parent.postMessage("formSubmitted", "*") window.alert("form submitted"); };
// At the end of your code:
eventListener.release()
Supporting Multiple Processes on the Same Iframe
It is possible to enable end-users to access multiple processes on the same page, all embedded within the same Iframe. An Iframe can only contain a single process at a time. The solution is to allow "switching" processes within a single Iframe. Based on the end-user's selection, the Iframe will clear and display the relevant process.
const iframeManager = esForm.createIframe(); iframeManager.onLoad(() => { // ON LOAD CALLBACK IF NEEDED });

iframeManager.showInContainer( preloadDiv[0], width, height );
const newIframeManager = anotherEsForm.createIframe();

newIframeManager.onLoad(() => { // ON LOAD CALLBACK IF NEEDED });
//IframeManager will change form in the same container (preloadDiv[0]) by using the following command:
newIframeManager.showInContainer( preloadDiv[0], width, height );
Technical Requirements
- Update your environment servers to version 31.2.0 or above.
- The SDK can be used on your environment services only with verified URLs - to enable the SDK within your application, you need to provide EasySend with the URL/s in which the SDK will be implemented, to enable it on your environment servers.
- The domain approved on EasySend servers must include 'https://'.
- Certain browsers may restrict the functionalities of iframes if the domain hosting the iframe differs from that of the iframe itself. To optimize the SDK capabilities, it's advisable to use a subdomain of the main (host) domain for the inner (iframe) component in which the process is embedded. For instance, if the host domain is "easysend.app", the iframe could effectively use "process.easysend.app" as a subdomain.
Design Guidelines and Implementation Limitations
- Process page headers and footer should be removed
- The Call To Action (CTA) should be placed in a visible area without requiring scrolling (above the fold)
- Forms should be relatively short and simple, for example, the 101 form, the get a quote request, FNOL
- Each page should contain a limited number of fields to fill out, typically between two and five
- Certain built-in functionalities, such as Co-Browsing or "Save and Continue," will open the process in a new tab rather than within its embedded context.
- Pop-up elements may appear unusual or out of place within the design
- Embedding processes into other pages is only feasible for processes with a single step or the initial step of a process
- It’s recommended to adjust the theme - buttons, page layout, a page with height, no header, to suit the specific requirements of each customer
- Welcome pages may not be necessary and can be replaced with informative titles for a better user experience
- Data might be lost when navigating to a different location on the website (since a new RID might be generated every time)