Documents Tab
- PDF
Documents Tab
- PDF
Article summary
Did you find this summary helpful?
Thank you for your feedback!
Article Overview
The following article describes how to define PDF fields and connect them to data items.
Defining PDF Fields
(See Figure 1 to Figure 3)
An uploaded PDF is used for displaying the end-user's inputs while interacting with the journey. After uploading a PDF, use the icon (1) to enter edit mode and tag its fields.
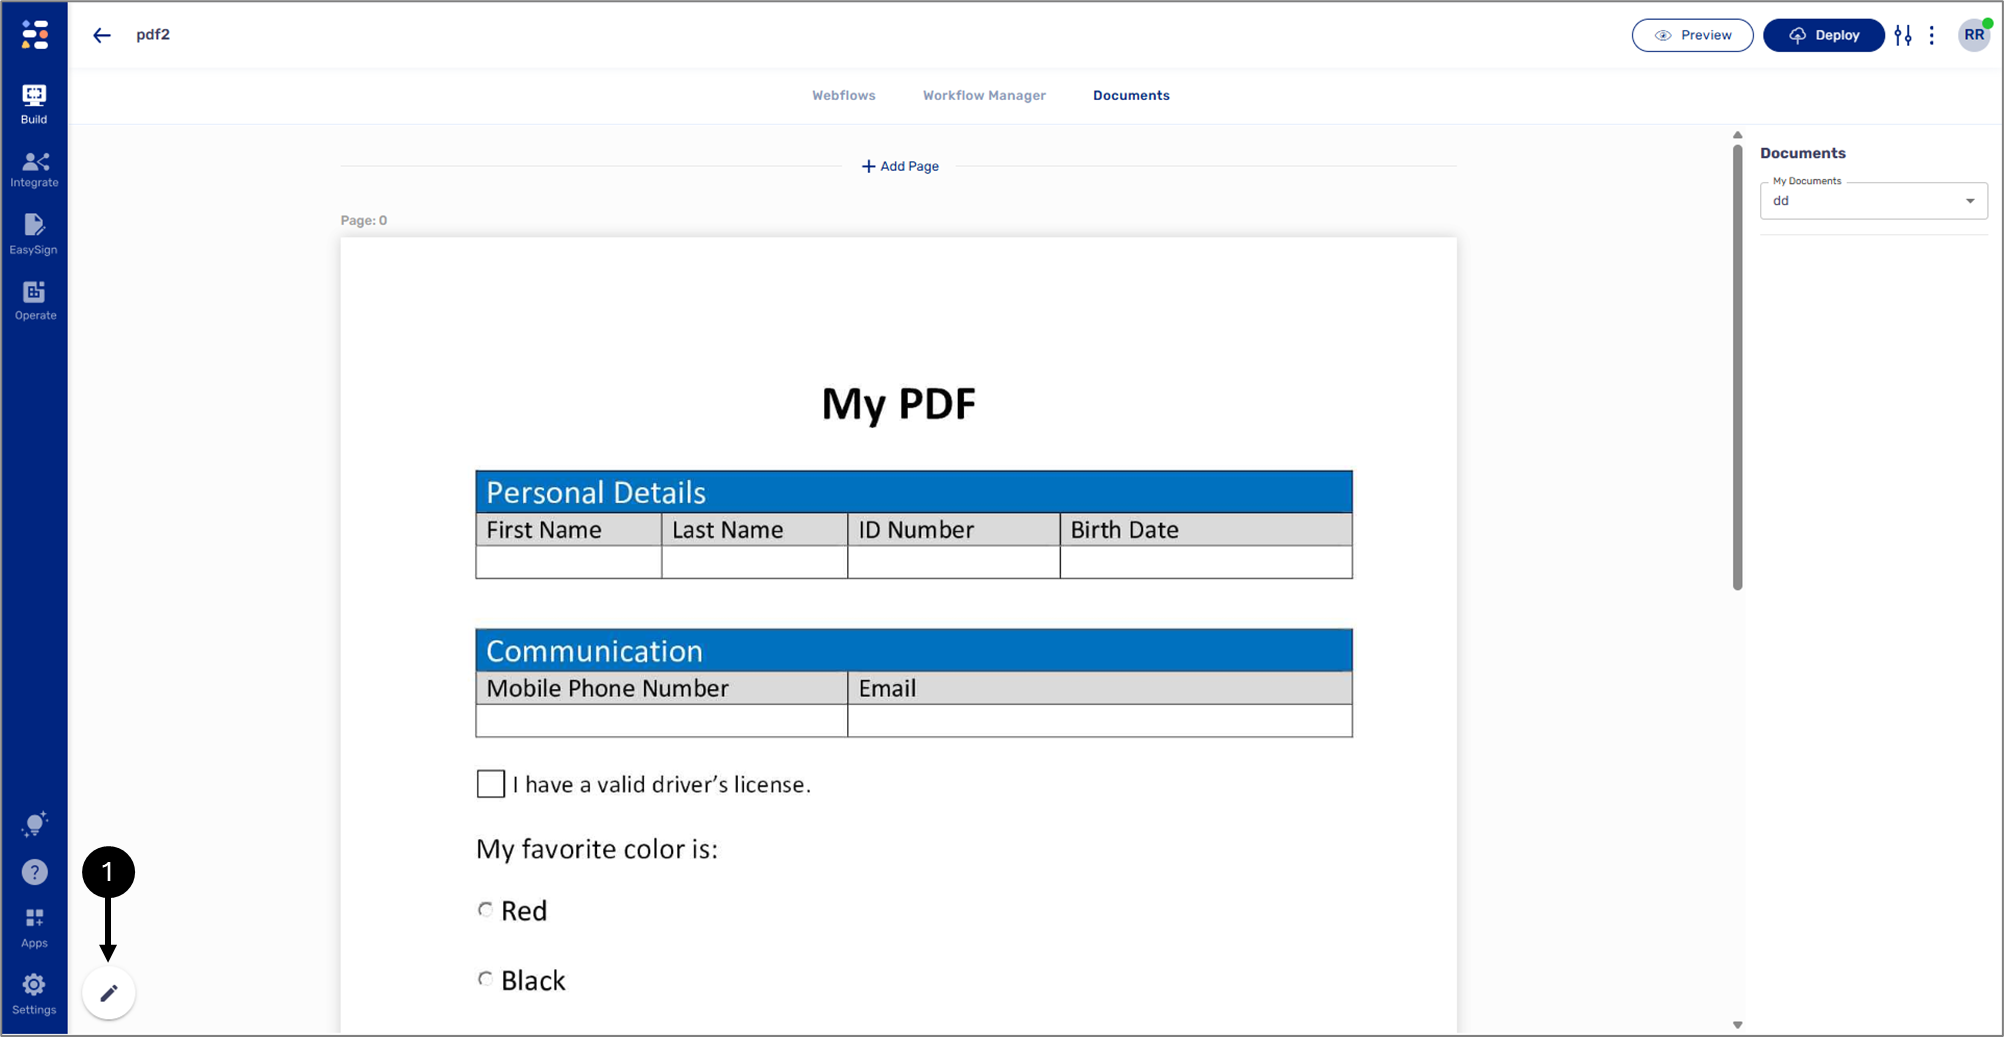
Figure 1: Edit Mode Icon
NOTE
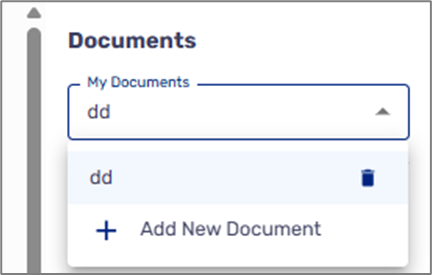
You can delete or add additional PDFs by clicking the My Documents dropdown:
Once in edit mode, use the left click of the mouse to tag fields, for example (2):
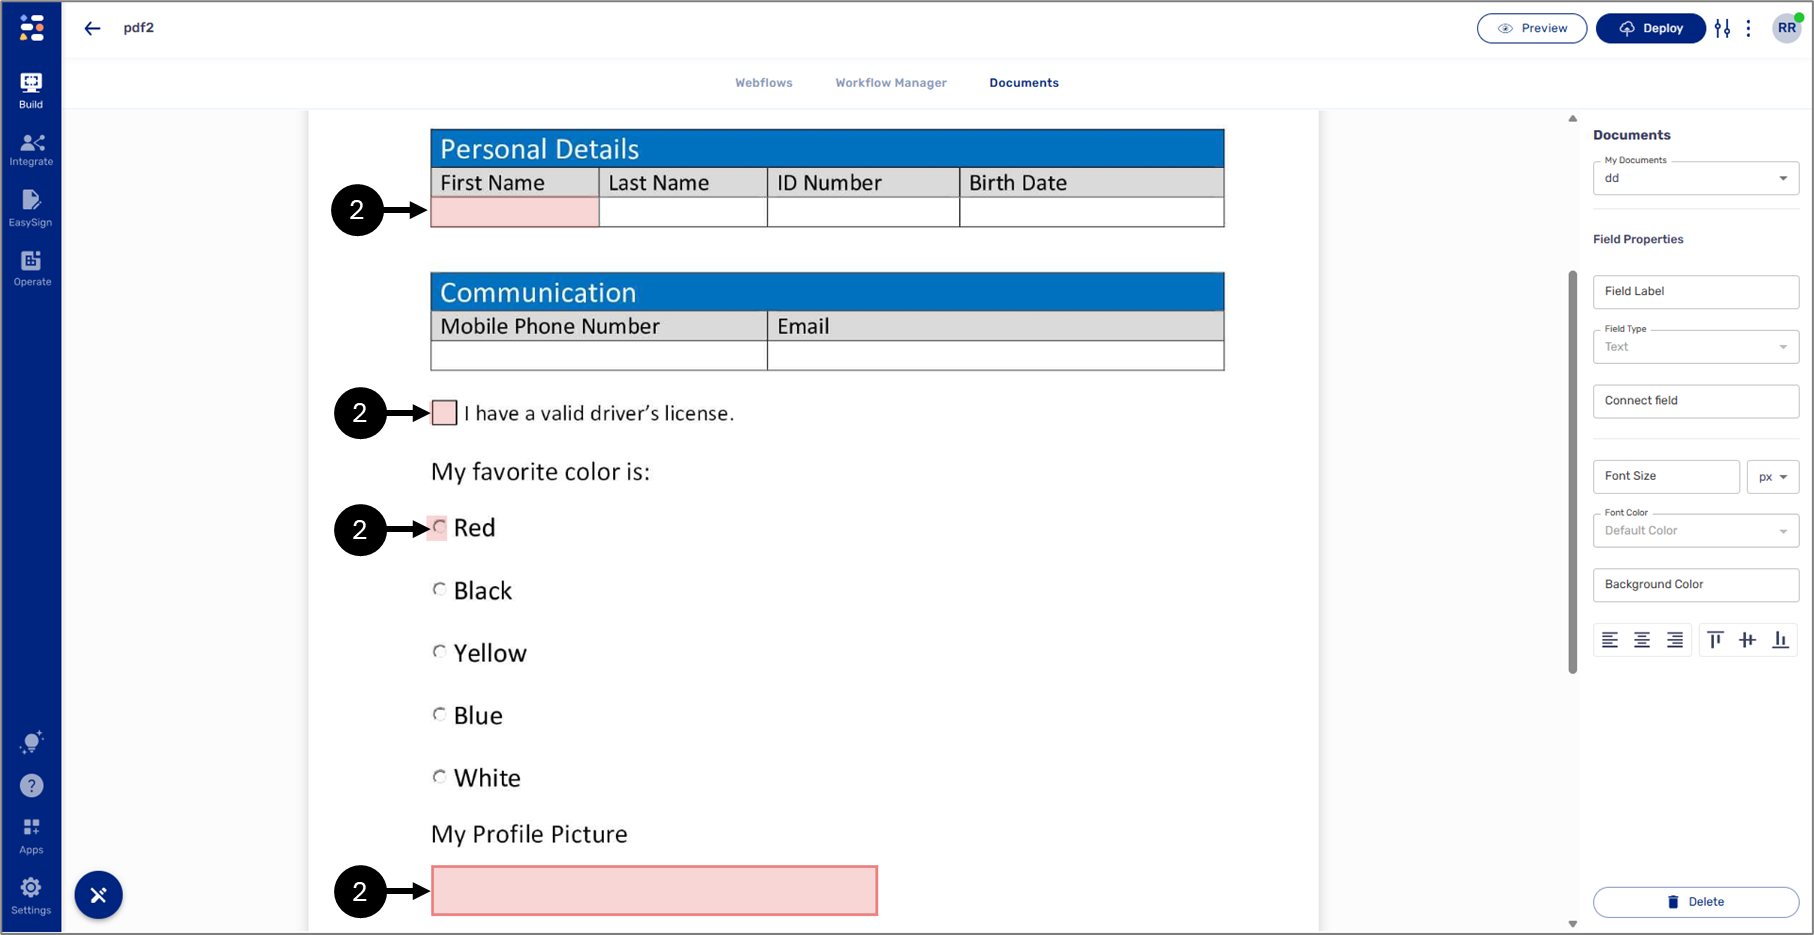
Figure 2: Tagged Fields
A tagged field has different properties (3) used for connecting it to a data item and designing the look and feel of the displayed data.
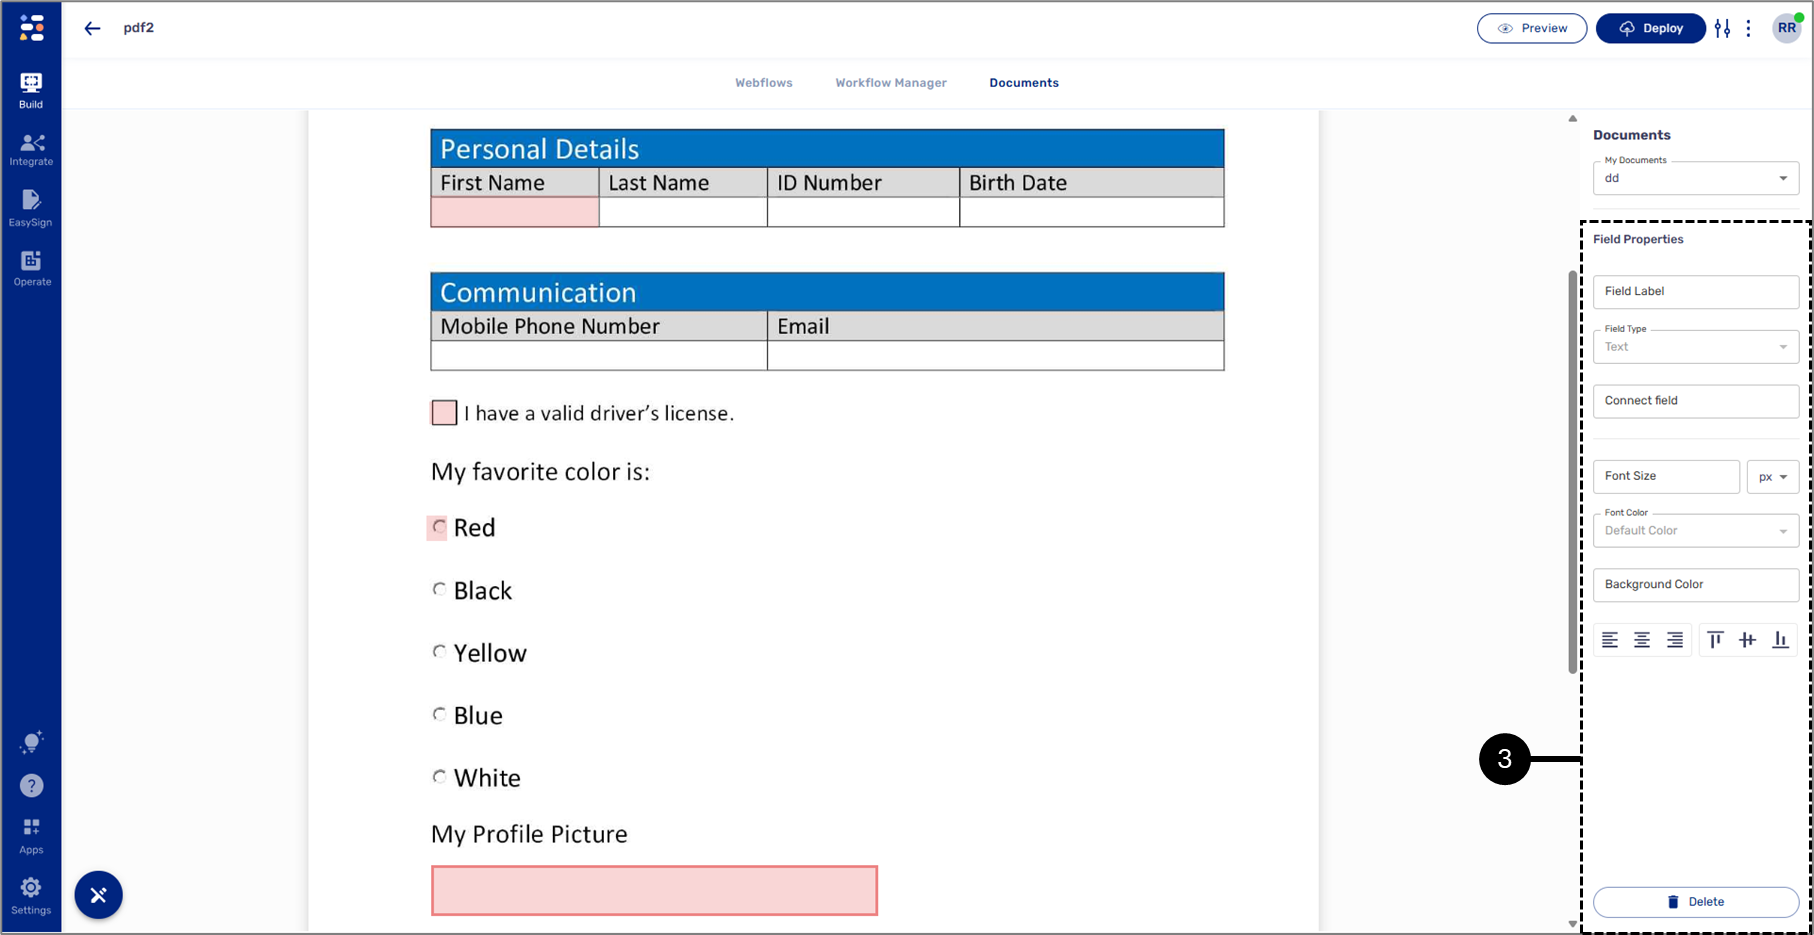
Figure 3: Field Properties
By default, each tagged field type is set to Text. To change that, connect a field to a data item to define it.
Connecting and Defining Fields
(See Figure 4 to Figure 6)
Tagged fields must be connected to a data item to be defined and display data. After clicking the Connect Field button (1), select the desired data item from the list (2):
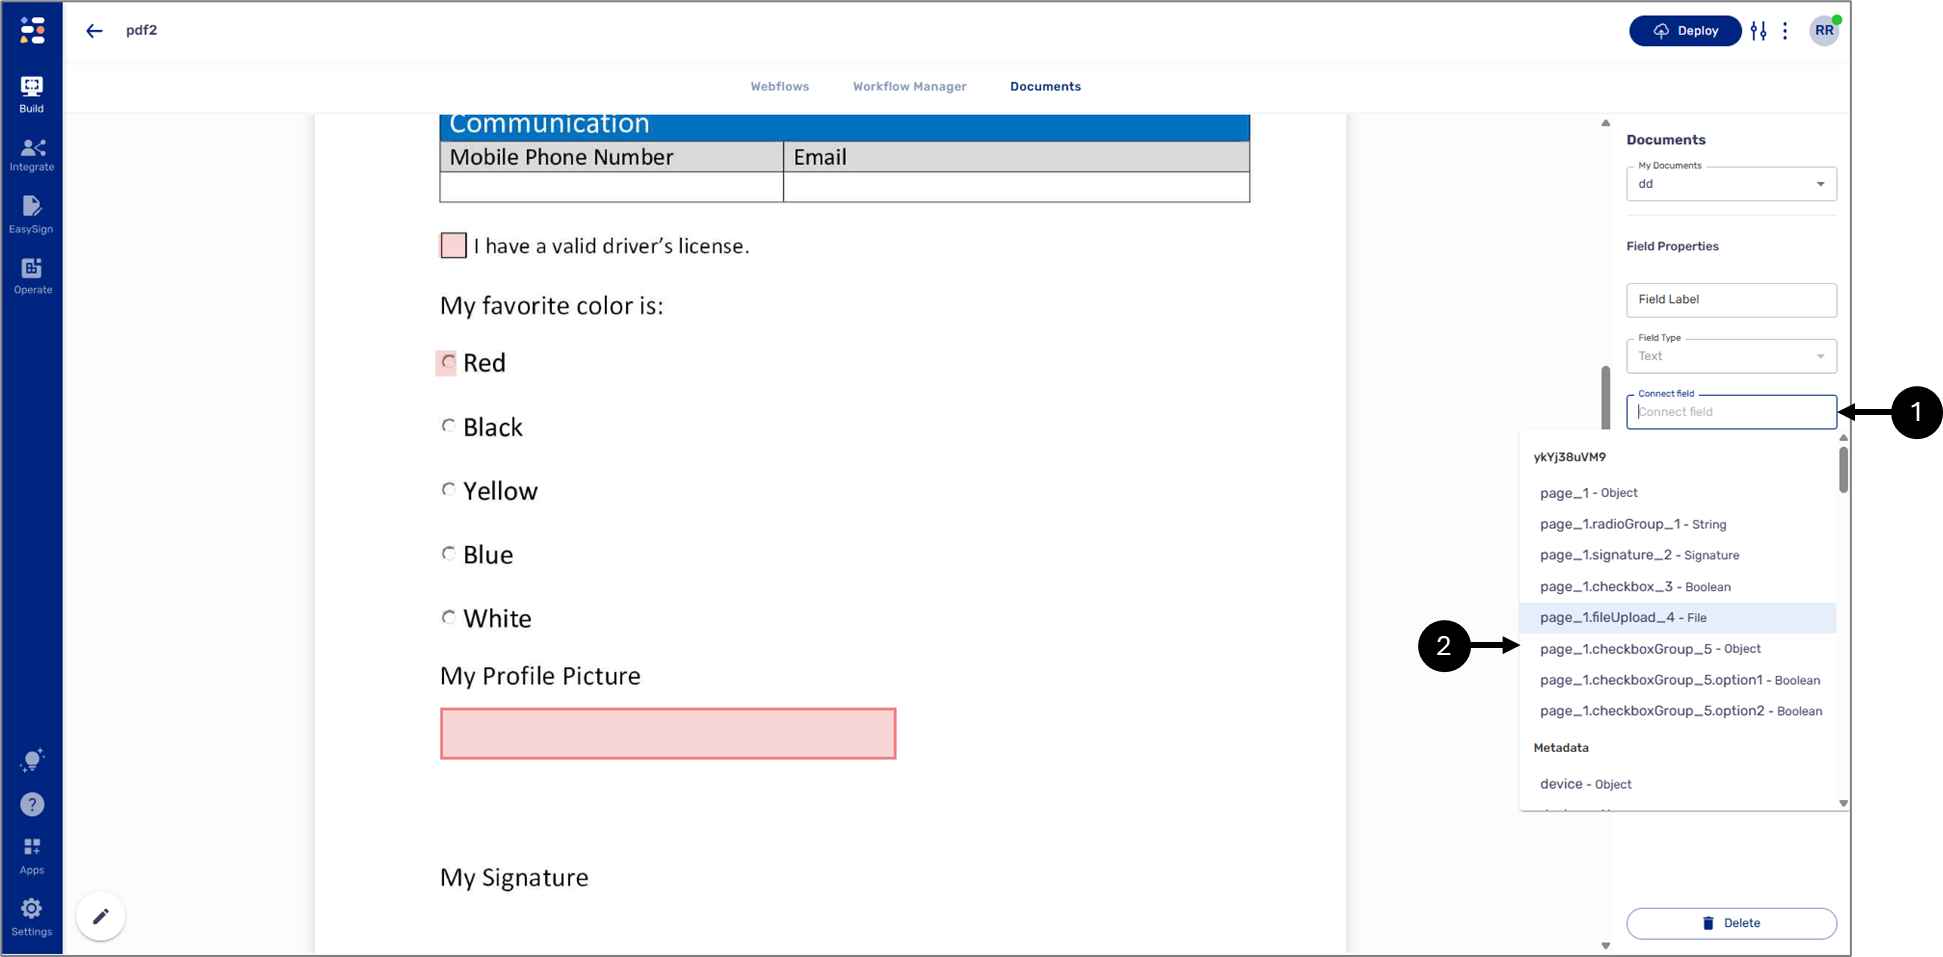
Figure 4: Connecting PDF Fields
After connecting the field, its type (3) will be defined according to the data item (4):
- Text - for example - Text Field, Date Input, Dropdown
- File - Upload File
- Radio question
- Checkboxes - single or multiple
- Signature
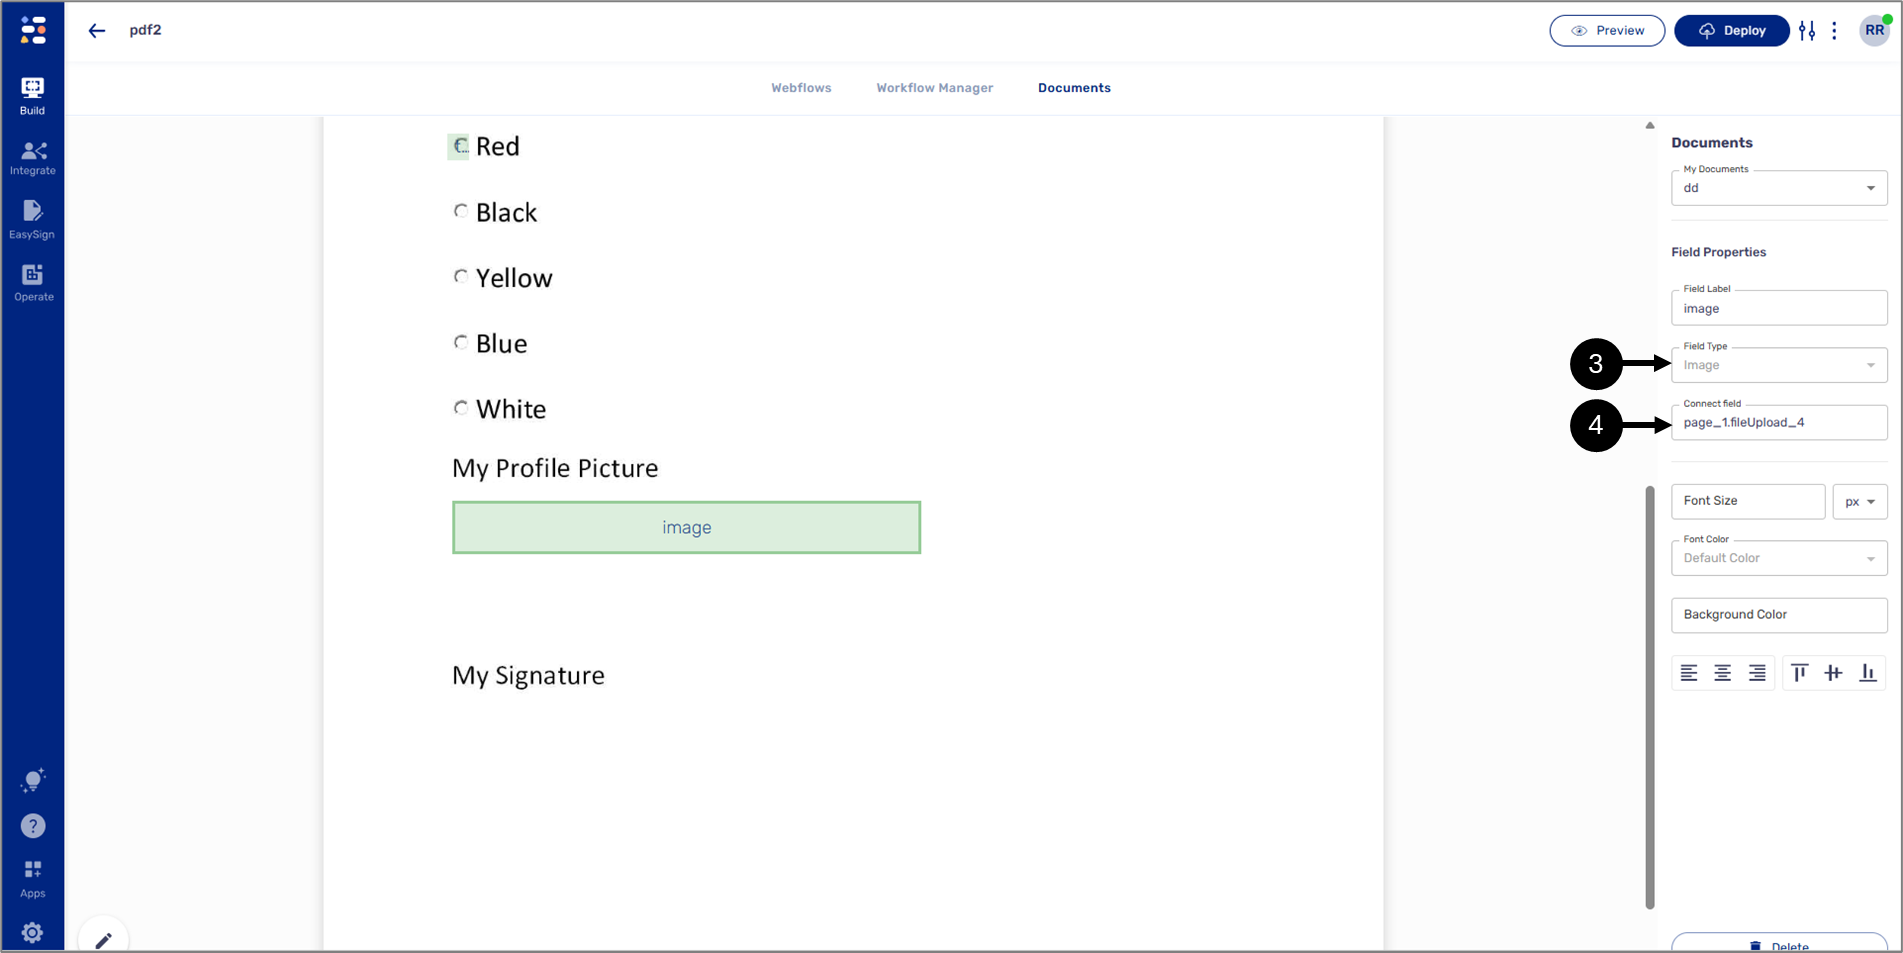
Figure 5: Connected and Defended Field
When connecting a Radio Question data item to a tagged PDF field, additional dropdowns appear:
- Value - a radio question option, must be selected to display data reflecting the end-user's input (4).
- Mark Type - the mark that will be displayed on the PDF when the end-user selects the option (5):
- O Mark
- X Mark
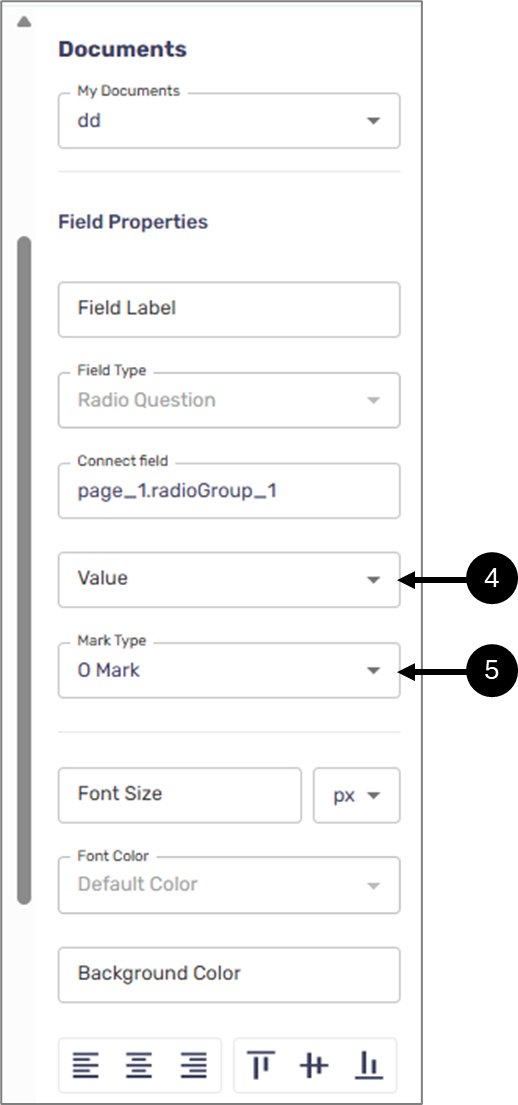
Figure 6: Additional Dropdowns
Automatically Tagged, Connected, and Defined PDF
(See Figure 7)
When creating a new journey by uploading a PDF, two things will happen:
- The Webflow screen will appear with its physical structure built according to the uploaded PDF.
- The uploaded PDF will appear under the Documents tab, and its fields will be automatically tagged, connected to data items, and defined.

Figure 7: Automatically Tagged/Connected Fields
Manual Adjustments
In some cases, manual adjustments are required when a PDF is automatically tagged, connected, and defined.
Manually Tagging, Connecting, and Defining
(See Figure 8 and Figure 9)
Tagged and connected fields will appear with a green background. Fields that are tagged but not connected to a data item will appear with a red background. Fields that were not tagged or connected will not appear with a background.
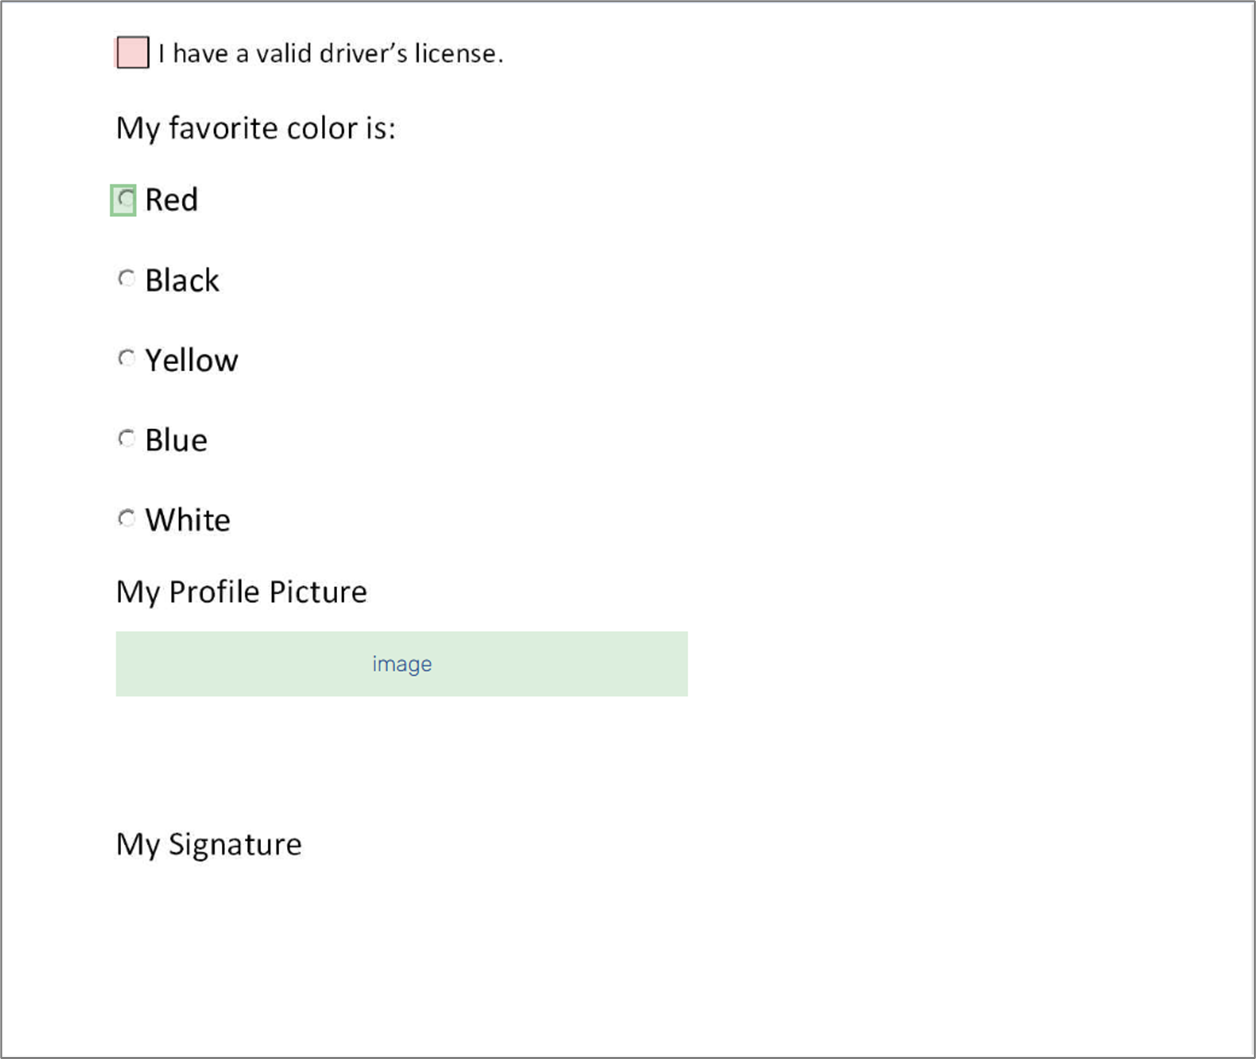
Figure 8: Tagged/Connected Fields
To manually tag, connect to data items, and define fields, enter edit mode (1), use the left click of the mouse, and utilize options from the Fields Properties section (2).
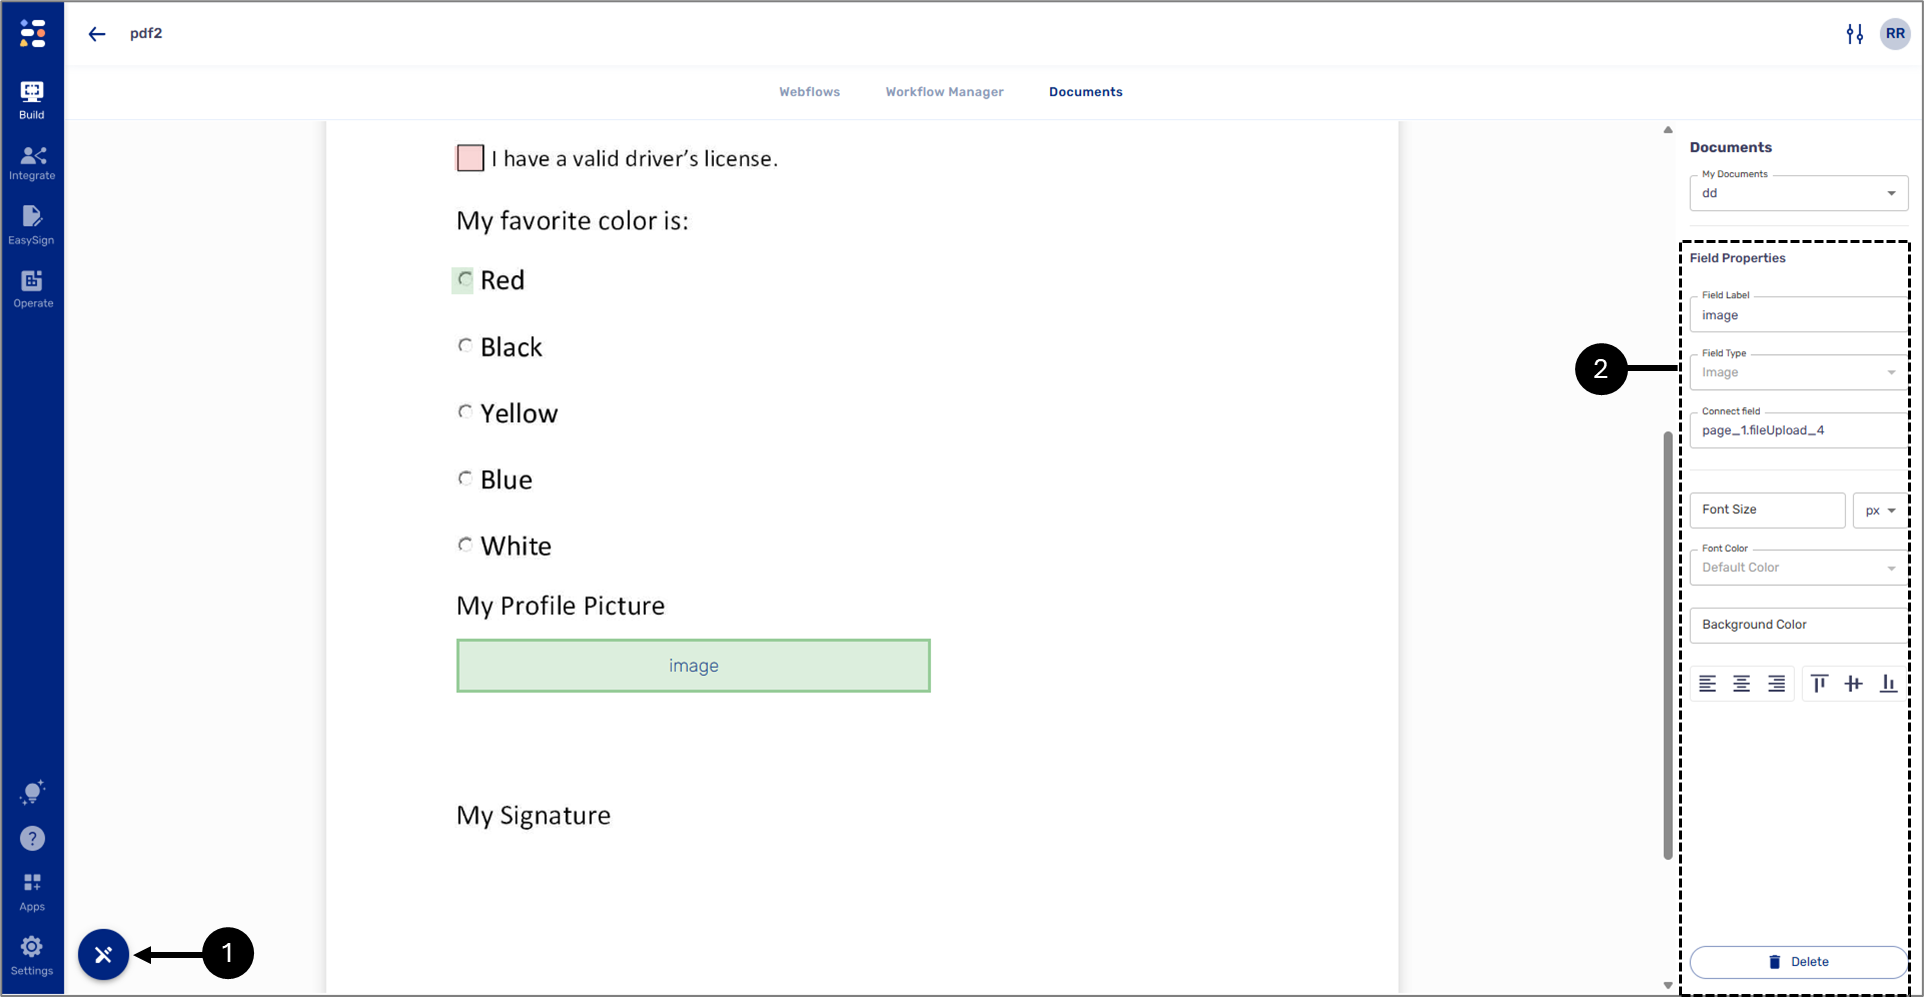
Figure 9: Edit Mode and Field Properties
Assigning Radio Question Options
(See Figure 10)
When connecting a Radio Question data item to a tagged PDF field, additional dropdowns appear:
- Value - a radio question option, must be selected to display data reflecting the end-user's input.
- Mark Type - the mark that will be displayed on the PDF when the end-user selects the option:
- O Mark
- X Mark
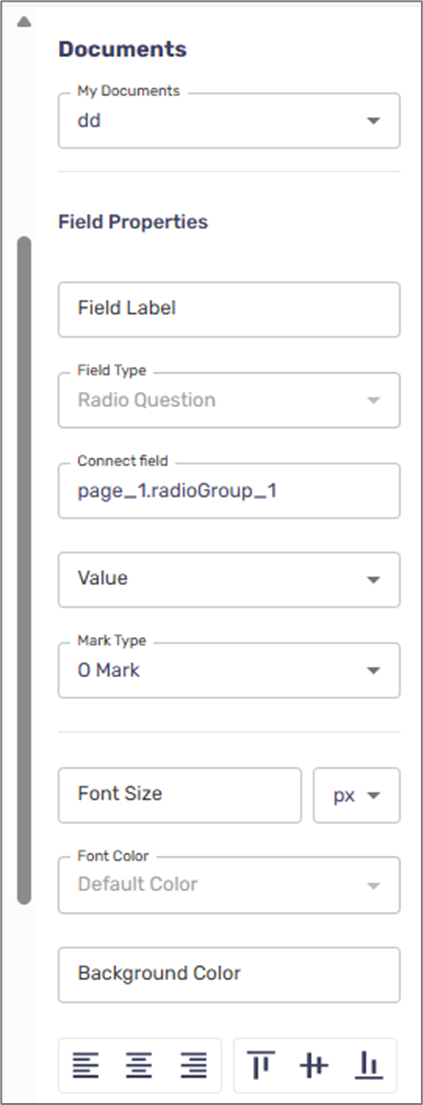
Figure 10: Additional Dropdowns
Preview and Attachment
To view the PDF as a preview as part of the journey, add a Preview page and connect it to the PDF. For additional information, click here. To send the PDF as an attachment via email, select it as an attachment in the Workflow Manager. For additional information, click here.
Was this article helpful?