Article Overview
This article describes what is the difference between global and local deployment and what to check before deploying a digital process. The article also details the different deployment environments, how to deploy and view a digital process, and what actions to perform when warnings or errors are discovered.
Global and Local Deployment
Deployment is a process of publishing new changes into a selected server or environment. The Deploy button exists in various screens such as Themes, Services, Webflow, and Model. When you click the Deploy button you are prompted to select an environment to which the new changes will be published. When initiating deployment from global platform screens such as Themes or Services, the newly published changes will be implemented across the platform on all relevant created digital processes. At the stage of creating a digital process, when you click the Deploy button from screens such as the Webflow, Model, PDF, and Workflow Manager, changes will be published locally and affect only the digital process you are currently working on and will appear when viewing it. Figure 1 describes the flow of publishing new changes from a global platform screen such as Themes:
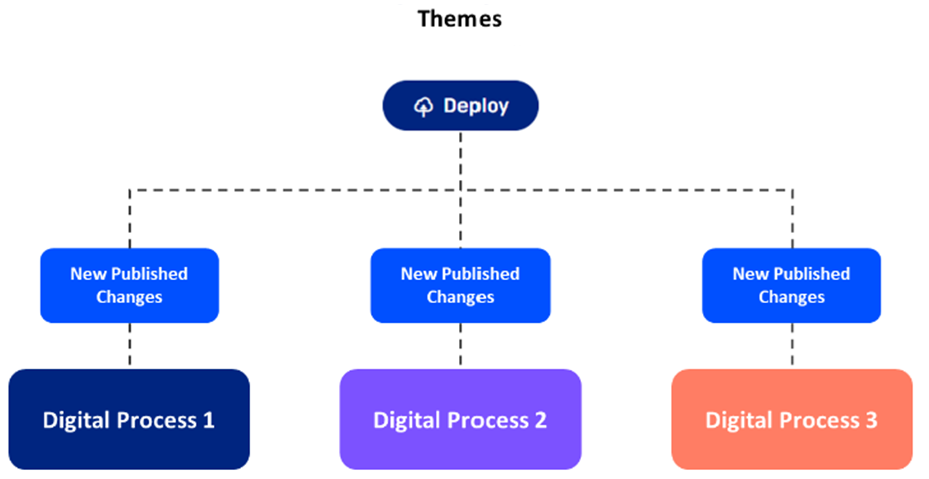
Figure 1: Deployment from a Global Platform Screen
Figure 2 describes the flow of publishing new changes from screens such as Webflow, Model, and PDF while creating a digital process:
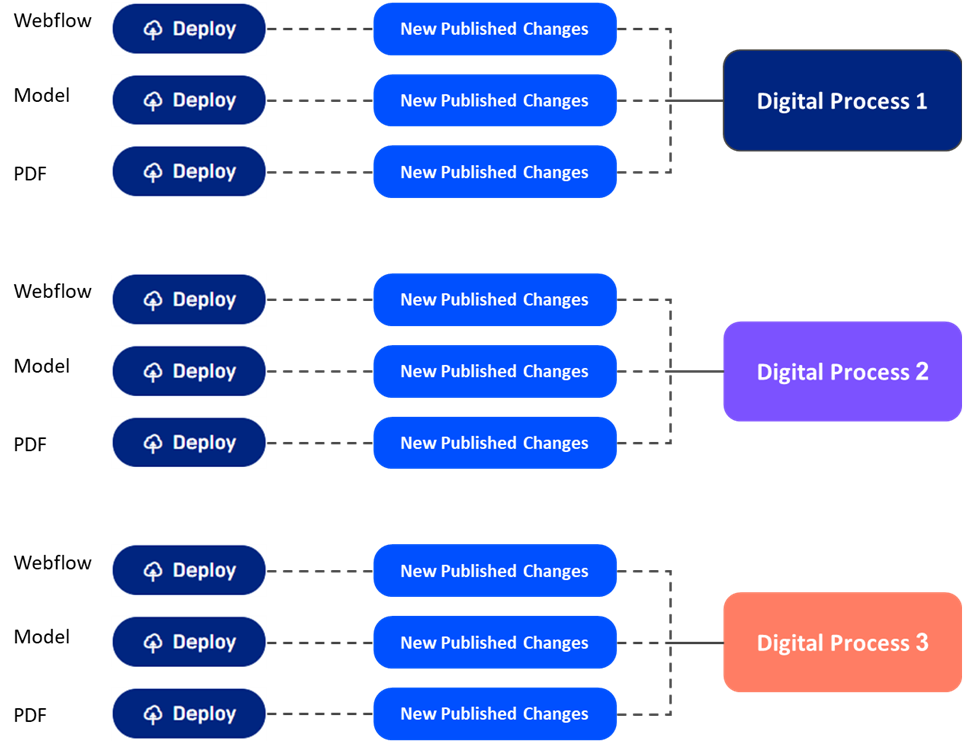
Figure 2: Local Deployment while Creating a Digital Process
The rest of the sections in this article describe how to deploy and view a digital process.
What to check Before Deploying a Digital Process?
This section describes best practices to check and verify before deploying a digital process. It is important to remember that not everything listed in the section is mandatory, it depends on what you are building.
- Webflow:
- The Webflow is attached to the desired theme (if more than one theme exists)
- Webflow components are added to the canvas, and their properties are configured
- Webflow components are connected to the model
- Model:
- The transaction data items are created and organized according to the desired data structure (objects).
- Each transaction data item is set to the appropriate field type:
- string
- object
- boolean
- file
- signature
- Each transaction data item is set to the appropriate field type:
- Each transaction data item is associated with a Webflow component
- The association is valid (highlighted in yellow)
- Implementation of:
- Values:
- User Input (Default)
- Formula
- Autocomplete Service
- Multi-option (Static)
- Computed (Service)
- Computed (Inline)
- Expression
- Conditions:
- Visibility
- Edit
- Validations
- Permissions
- Values:
For additional detailed information regarding the Model, view the Model Overview, Values, Conditions, Field Types, Validations, Permissions, and Setting Up the Model articles.
- PDF:
- Adding a PDF:
- Add pages
- Connect PDF to the preview component.
- Define fields
- Connect to the Model
- Connect pages to the Model to apply conditioning
- Adding a dynamic document:
- Download EasySend's Add-in from the Microsoft App Store
- Connect dynamic document to the preview component
- Create/edit pages with Microsoft Word and the Add-in
- Adding a PDF:
For additional detailed information regarding PDFs, see the PDF Overview and the Creating and Defining a PDF articles.
- Workflow Manager:
- Creating steps
- Applying step conditions
- Creating communication channels
For additional detailed information regarding the Workflow Manager, view the Workflow Manager Overview and the Configuring a Workflow articles.
Which Environment to Use?
(See Figure 3)
You will usually have two types of environments that you can use to deploy a digital process:
- Development (dev) - an environment for testing
- Production (PROD) - an environment for live deployment
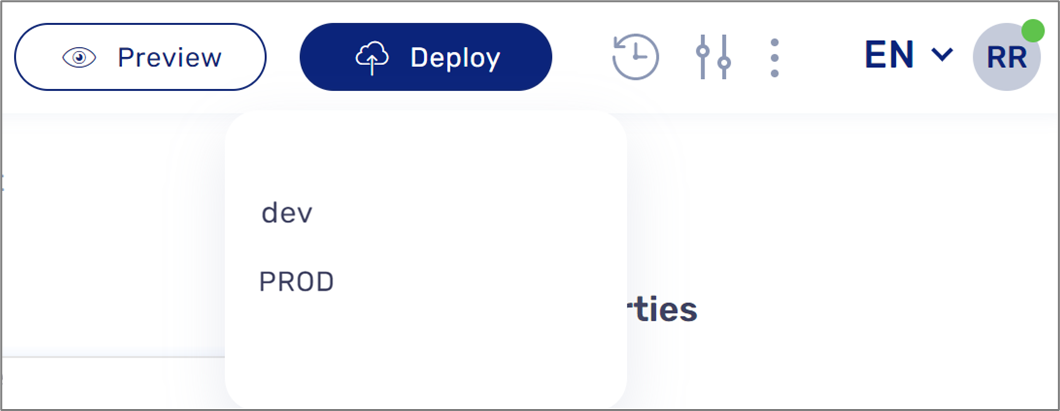
Figure 3: Deploy Environments
How to Deploy and View?
(See Figure 4 to Figure 8)
To deploy and view a digital process, perform the following steps:

Figure 4: Deploy Button
- Click the Deploy button (1).
Result:
A list of available environments (dev and PROD) (2) appears:
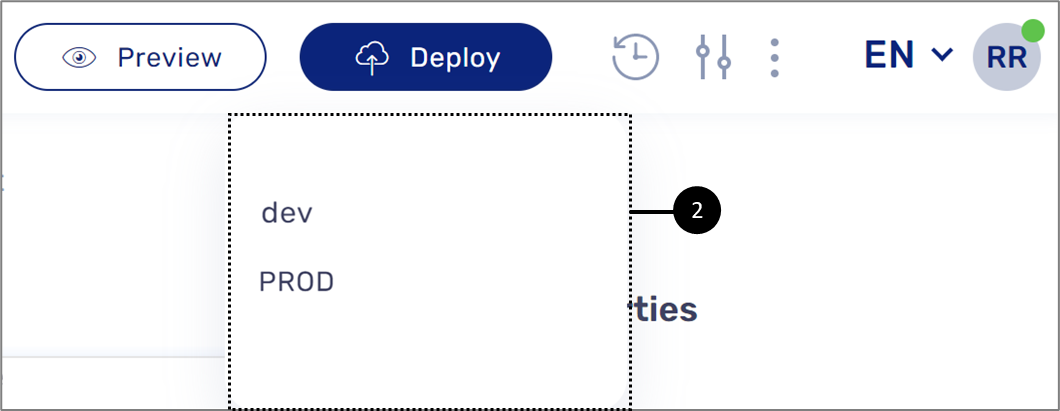
Figure 5: Available Environments
- Click the desired environment from the list (2).
If you are deploying to a production server with version 36.4.0 or higher, you can choose whether the changes will affect live transactions. For more information, click here.
Result:
A deployment popup window appears for a few seconds and then the deployment indicator (3):

Figure 6: Deployment Indicator
- Wait until the deployment indicator (3) disappears.
Result:
The deployment is finished, and the result indicator appears (4):
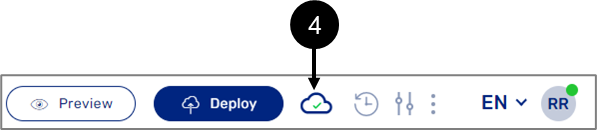
Figure 7: Result Indicator
- If the deployment result indicator is
 it means that the deployment process failed with errors. For additional details see the Deployment Warnings section.
 - If the deployment result indicator is
 it means that the deployment process passed but with warnings. For additional details see the Deployment Errors section.
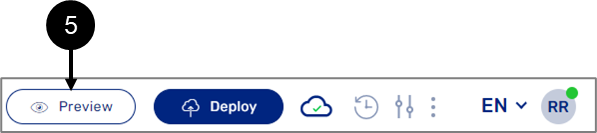
Figure 8: Preview Button
- Click the Preview button (5).
Result:
The digital process is viewed.
Sharing a Digital Process Link
A transaction is an instance of a digital process. Each unique transaction has its master Request Identifier (RID). A transaction is usually comprised of one step or more. Each step has its unique RID. The URL of a transaction is sharable, for example:
https://your-server.easysend.app/fnol-journey/page0/0?preview=1&rid=PhdODWeuO18
A New RID is generated every time a new transaction is generated and it is a part of its URL.
When sharing the URL, the RID parameter must not be included, for example: https://your-server.easysend.app/fnol-journey/
Each time this link is shared and used, a new unique RID will be generated automatically.
In case the RID is shared as part of the link, it will result in a single transaction that is shared for all users with the link, making all information fields public.
The URL can always be edited using the Process Settings screen. For additional information, see the Process Settings Screen section of the Webflow Overview article.
Warning and Errors System Logic
The deployment process may produce warnings and/or errors in case something goes wrong. Figure 9 describes the warnings and errors system logic: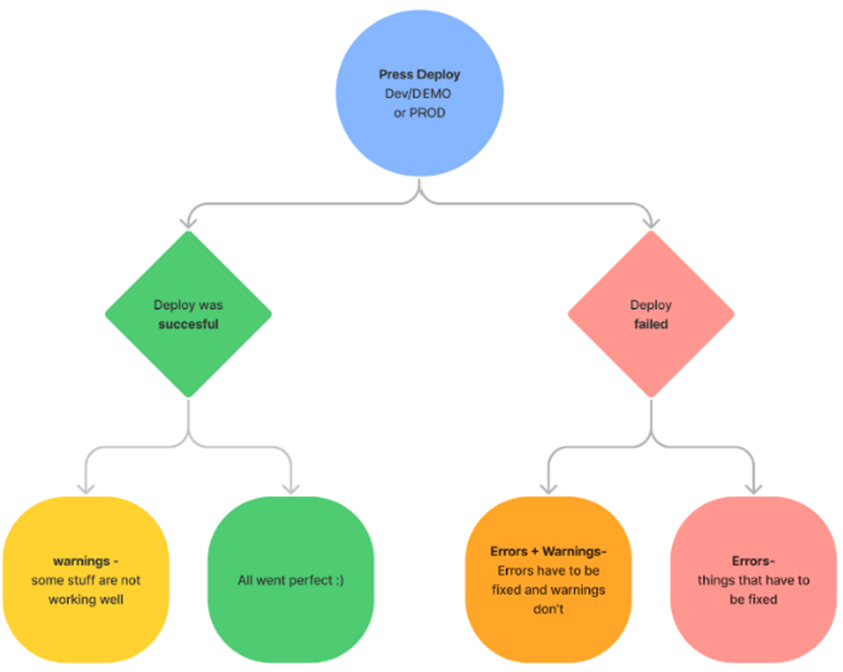
Figure 9: Warnings and Errors System Logic
Deployment Warnings
(See Figure 10)
Deployment warnings appear only when deploying a process to a dev environment and there is an incorrect setup in one of the modules, such as: Webflow, Model, PDF, and Workflow Manager. For example, a component is linked to a data item from the model that no longer exists. Warnings do not prevent the process from being deployed, but the process might not work well. Clicking the warnings indicator (1) opens a popup window that displays the deployment status. For additional information see the Viewing and Resolving Warnings and Errors section.

Figure 10: Warnings Indicator
Viewing a Digital Process with Warnings
(See Figure 11)
As mentioned above, a digital process deployed to a dev environment can still be viewed even if warnings were discovered and have not been resolved yet. When viewing a digital process with warnings the following message will appear:
Figure 11: Viewed Digital Process with Warnings
Deployment Errors
(See Figure 12)
Deployment errors appear when deploying a digital process to a dev or a PROD environment and the system discovers failures that prevent the deployment process from finishing, for example, a Preview component is not connected to a PDF form. Clicking the error indicator (1) opens a popup window that displays the deployment status. For additional information see the Viewing and Resolving Warnings and Errors section.

Figure 12: Errors Indicator
Viewing and Resolving Warnings and Errors
When warnings or errors occur, clicking the indicators will open a popup window that displays the deployment status. There are four types of deployment messages (see Figure 13 to Figure 16):
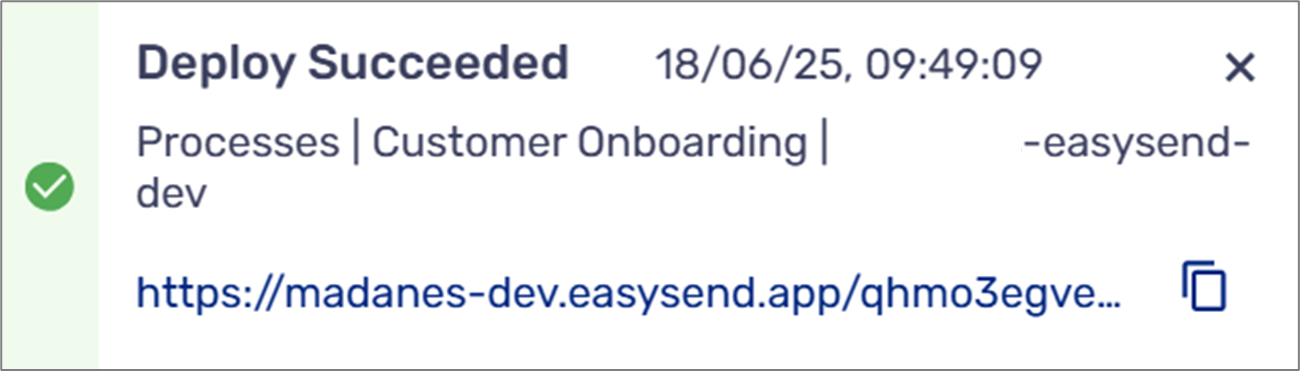
- Deployment Succeeded:
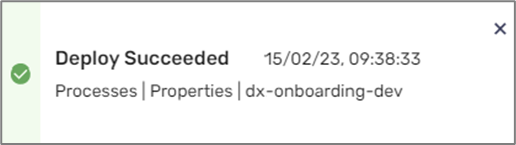
Figure 13: Deployment Succeeded
- Deployment Succeeded with warnings to resolve (dev environment only):
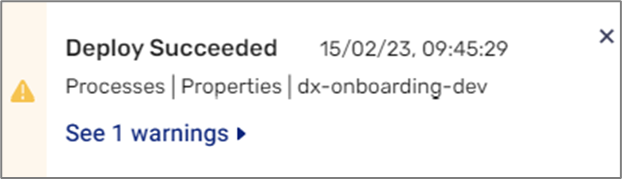
Figure 14: Deployment Succeeded with Warnings to Resolve
- Deployment With Failed with errors:
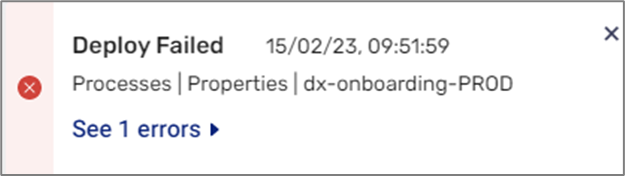
Figure 15: Deployment Failed with Errors
- Deployment Failed with Warnings/Errors (dev environment only):
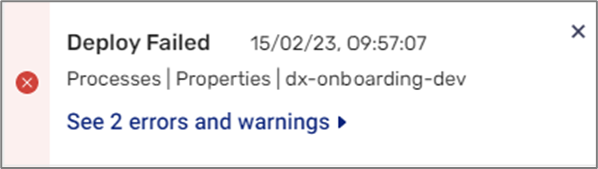
Figure 16: Deployment Failed with Warnings/Errors
A deployment message contains the following information (see Figure 17):
- Timestamp (1) - the exact time and date of deployment
- Deployment information (2):
- Platform area:
- Processes and name of process (Webflow, PDF, Workflow, Model, Agent)
- Theme
- Validation
- Services
- Webflow and global-agent (Journey Sender)
- Server name and type
- Platform area:
- Warnings/errors (3) - displays the number of deployment warnings/errors or an indication that all the warnings and errors were resolved.
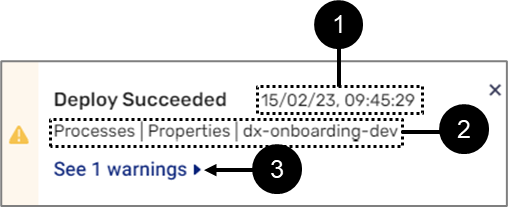
Figure 17: Deployment Message Information
When clicking the number of deployment warnings/errors (3), the Fixing mode window appears.
Fixing Mode Window Structure
Figure 18 displays the structure of the Fixing mode window:
- Reposition (1) - enables to drag and reposition the Fixing mode window across the screen.
- Close window (2) - enables to close the Fixing mode window. Clicking the deployment warning/error indicator will display the window again.
- Errors Tab (3):
- If errors exist, indicate their number
- Enables to display a detailed list of errors
- Warnings Tab (4):
- If warnings exist, indicate their number
- Enables to display a detailed list of warnings
- Resolved Tab (5):
- If warnings or errors were resolved, indicate their number
- Enables to display a detailed list of resolved warnings and errors

Figure 18: Fixing mode Window
Warnings/Errors Detailed List
The Fixing mode window displays a detailed list of warnings or errors and allows the platform user to perform different actions (see Figure 19):
- Dropdown (1) - enables to display/hide details and actions
- The name of the warning/error (2)
- The code of the warning/error (3) (for internal usage)
- The description of the warning/error (4)
- Go to item (5) - enables to automatically focus on the item related to the warning/error
- Mark as resolved (6) - enables to mark the warning/error as resolved
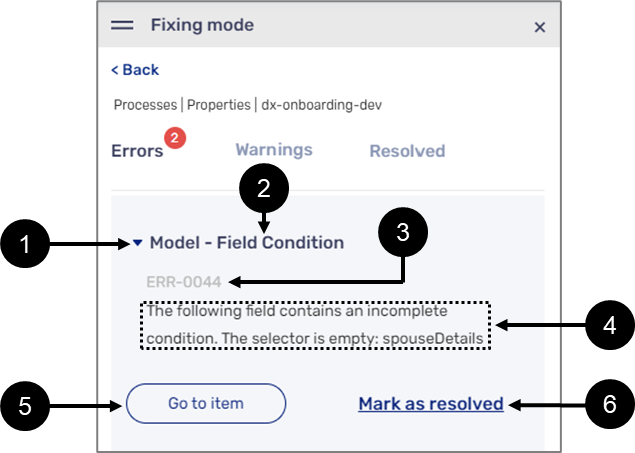
Figure 19: Detailed information and Actions
Once the error/warning is marked as resolved it will automatically transfer and appear under the Resolved tab (see Figure 20):
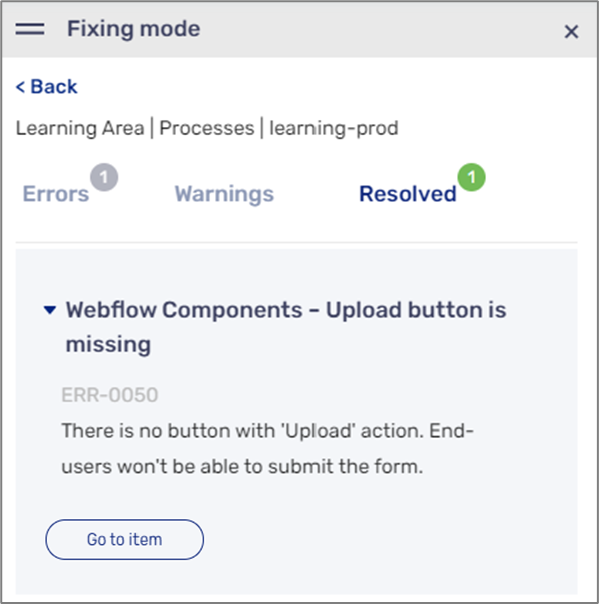
Figure 20: Resolved Error/Warnings
Resolving all Warnings and Errors
Once all the errors or the warnings are resolved the fixing mode window will display a message indicating the new status (1) and a button to close the Fixing mode window (2) (see Figure 21):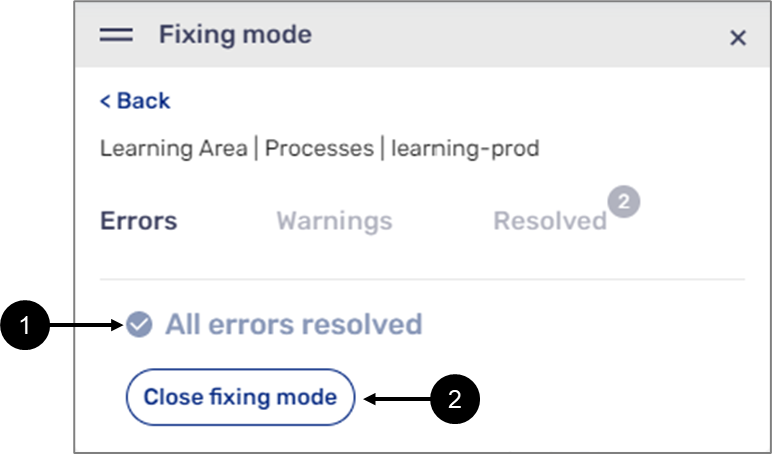
Figure 21: Fixing Window cleared
When all errors and/or warnings are resolved, a message (1) will appear on the deployment status popup window and the red dots above the indicators will disappear (2) (see Figure 22):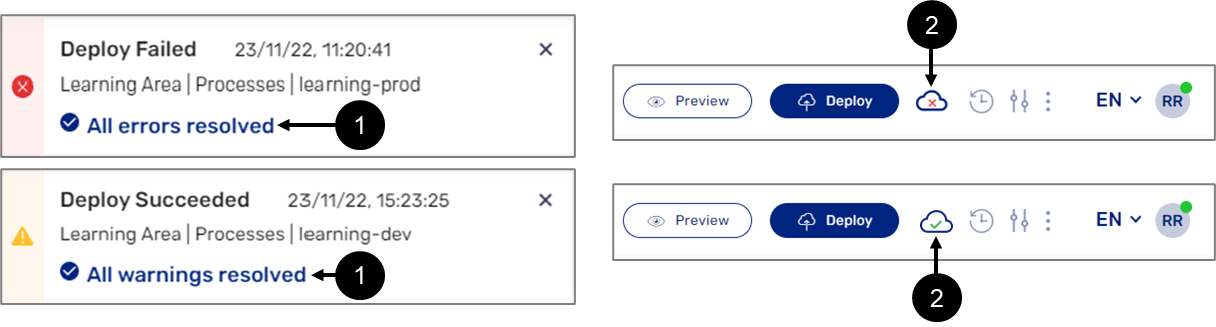
Figure 22: Deployment Process Popup window
Additional Warning/Error Messages
The following sections describe additional warning/error messages that could appear when deploying a process.Editor Exception Error
(See Figure 23)In some cases, The Editor exception error will appear. This type of error requires the attention of our support team because it cannot be resolved by the platform user. When the error appears, use the button (1) to copy the deploy ID and send it to EasySend’s support team.
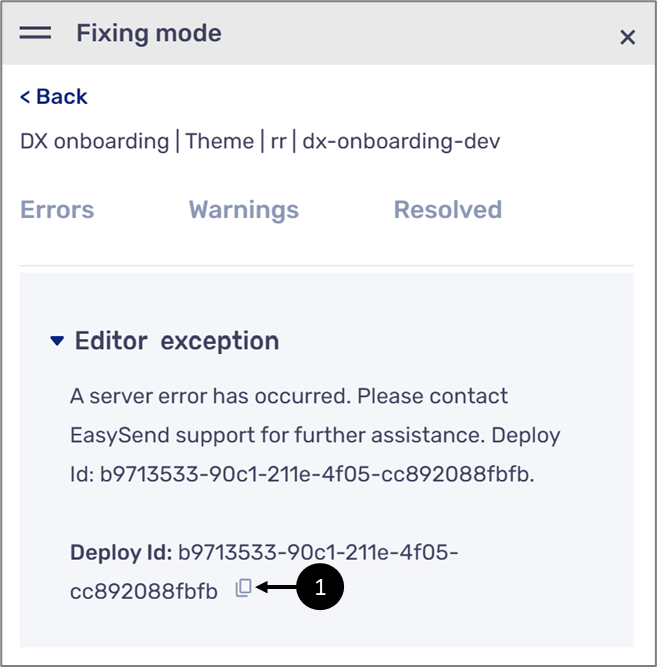
Figure 23: Editor exception
New Warnings/Errors and Existing Processes
(See Figure 24 and Figure 25)As part of our continued efforts to improve your platform usage experience, EasySend periodically adds warning or error messages to help you catch and prevent issues while deploying your digital processes. As these new warnings and errors can affect your existing processes, the platform will not immediately prevent you from deploying them to a production server, but instead display a warning message such as:

Figure 24: Future Issue Warning
When clicking the warning indicator (1), detailed information about the warning will appear, including the last deadline to resolve it before it becomes an error (2), for example:
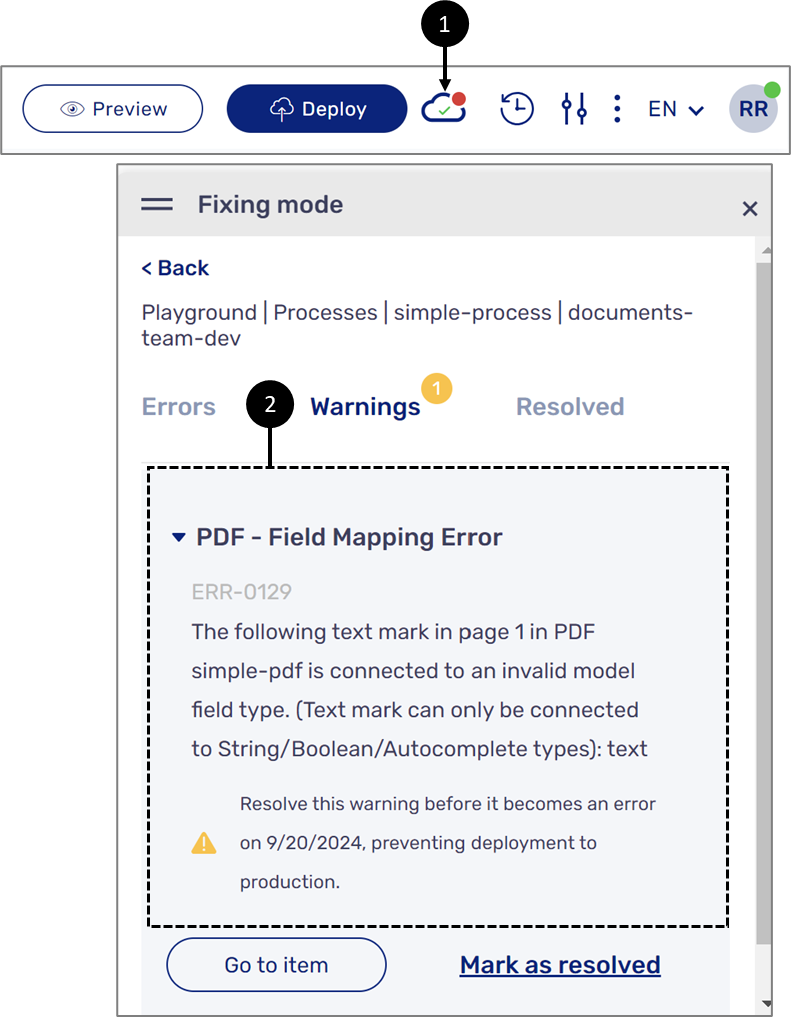
Figure 25: Detailed Information
Run Deploy Error Check
EasySend allows you to use a run deploy error check option to simulate a deployment to a production environment for locating warnings and errors, and evaluating your process before actually deploying it. To use the option, perform the following steps (see Figure 26 and Figure 27):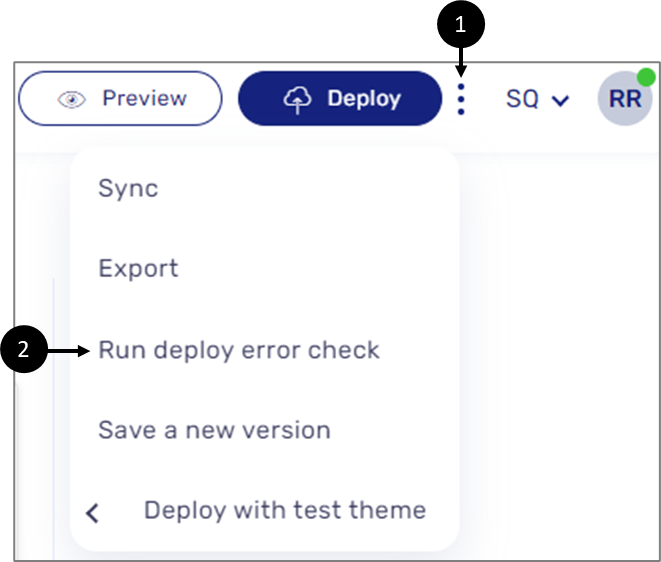
Figure 26: More Options and Run deploy error check
- Click More options (1).
- Click Run deploy error check (2) and wait for the deployment process to end.
- View and address the warnings and errors.

Figure 27: Error Check in Progress
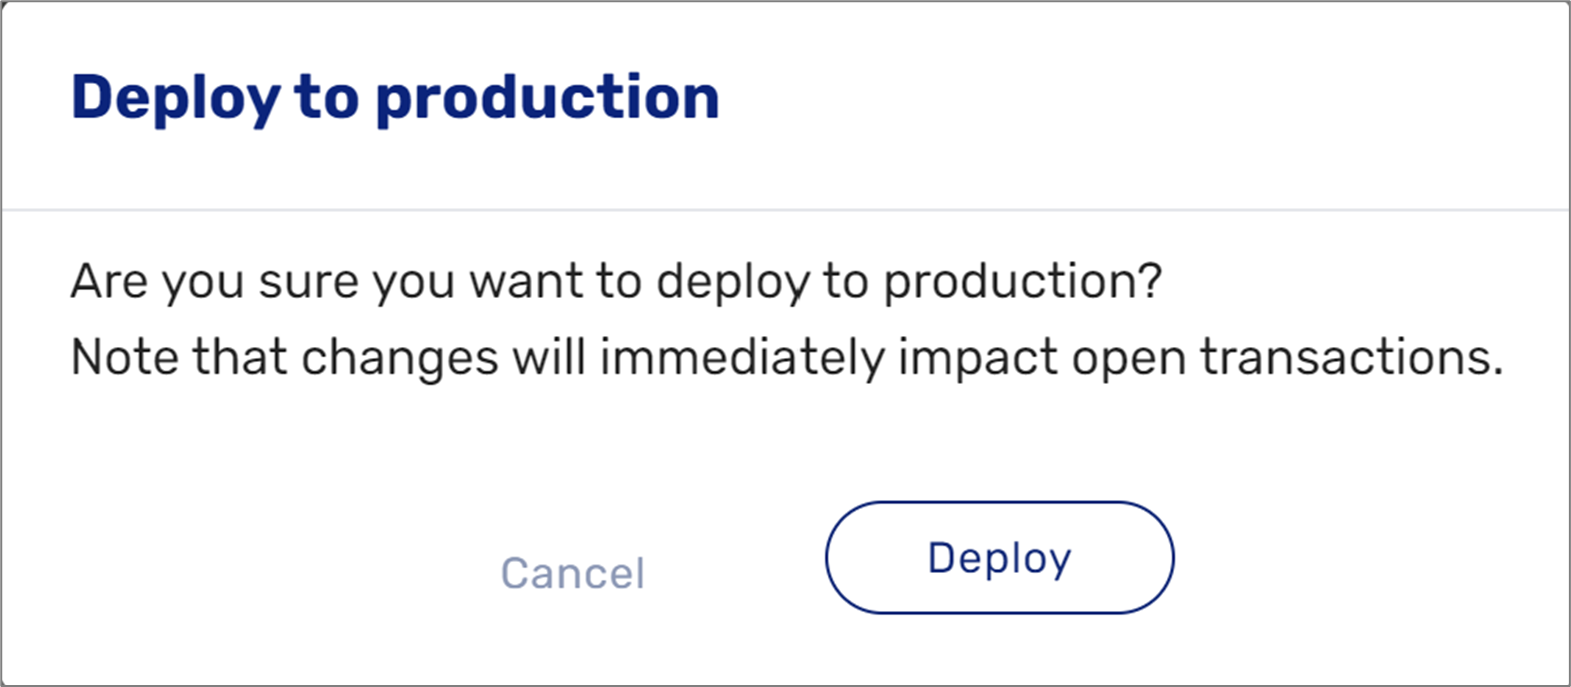
Impacting Live Transactions
(See Figure 28)
Production deployments, by default, will apply only to new transactions, ensuring that structural changes do not disrupt transactions already in progress.
To reduce this risk and ensure greater process stability, if you need to apply a change to active transactions, please get in touch with Support, and our team will review the request.
Before reaching out to Support, please deploy the changes so they apply to new transactions only, and verify that the changes were successfully applied in production. Once completed, please share the following details with our Support team:
- Process name
- Process link in Builder
- Short description of the deployed changes
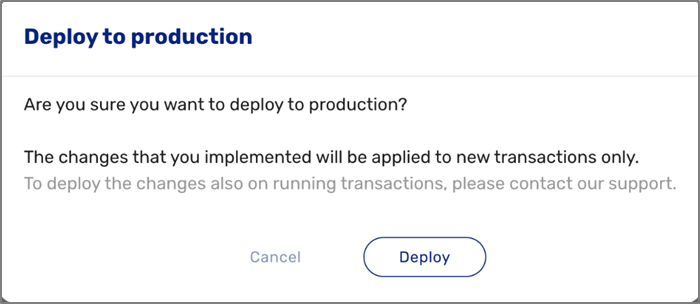
Figure 28: Deploy to production