Introduction
- PDF
Introduction
- PDF
Article summary
Did you find this summary helpful?
Thank you for your feedback!
Article Overview
The following article introduces EasySend's Journeys
What is a Webflow?
A Journey is a digital process. A digital process is built using a Webflow, which defines the process's physical and logical structure. Using a Webflow you can:
- Build and edit the physical structure of a digital process.
- Configure components' design properties.
- Set behavioral conditions.
- Apply a specific look and feel to a process by selecting a theme.
- Create Salesforce integrations.
- Deploy and preview a process.
Creating Your First Process
(See Figure 1)
After signing up, the following window appears:
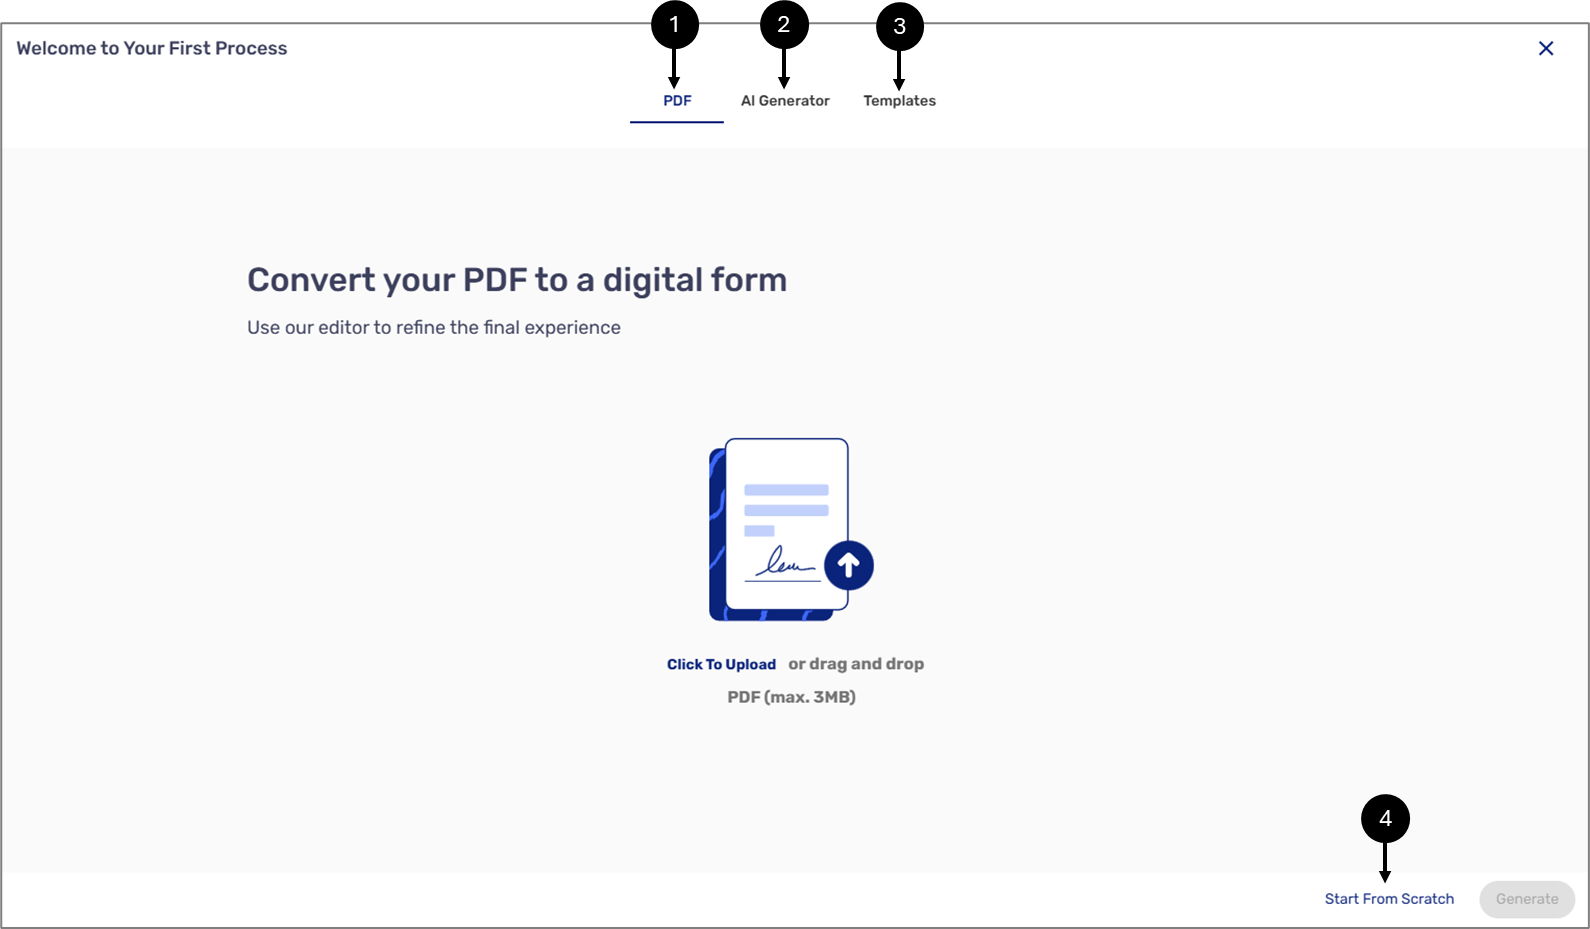
- Figure 1: Create Your First Process
It contains the following options:
- PDF (1) - convert an uploaded PDF into a process (default option).
- AI Generator (2) - utilize AI to build your first process by describing what you need.
- Templates (3) - use a template to develop your process.
- Start From Scratch (4).
After selecting an option, the Webflow screen will appear. To learn more about the Webflow structure, click here.
AI Generator
(See Figure 2)
When the selected option is AI Generator, describe the title of your process, or choose one option from the list.
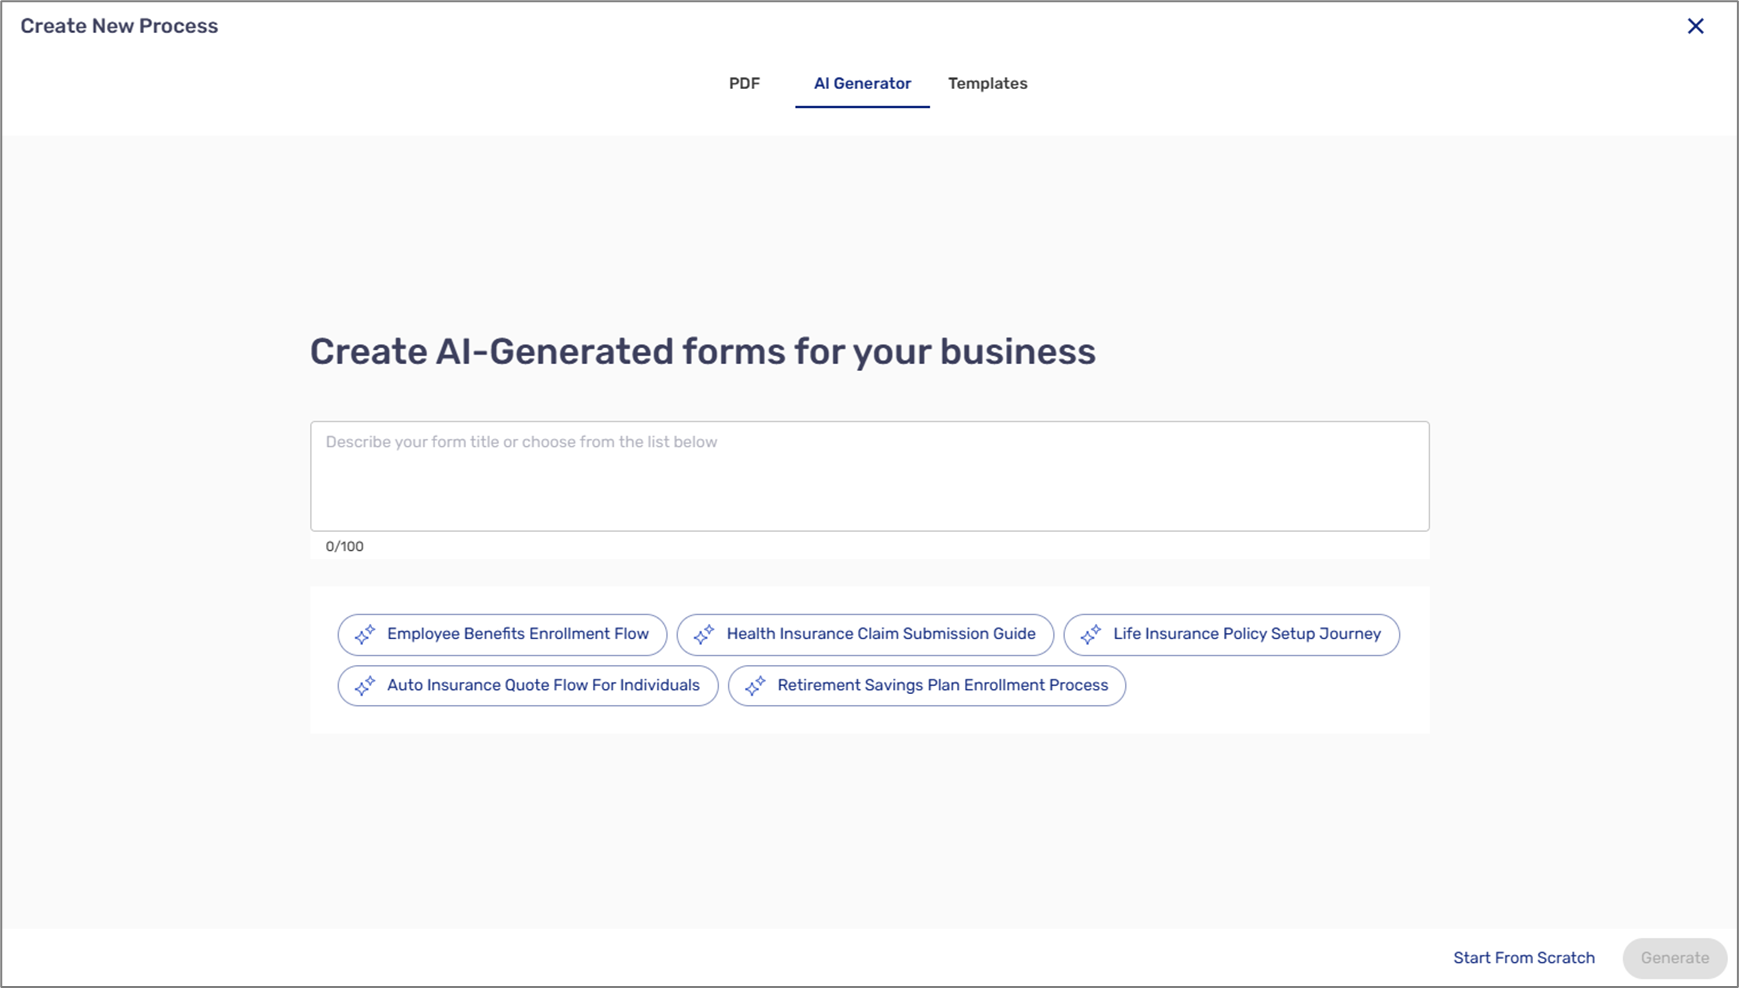
- Figure 2: AI Generator
Templates
(See Figure 3)
When the selected option is Templates, select which template to use to develop your first process.
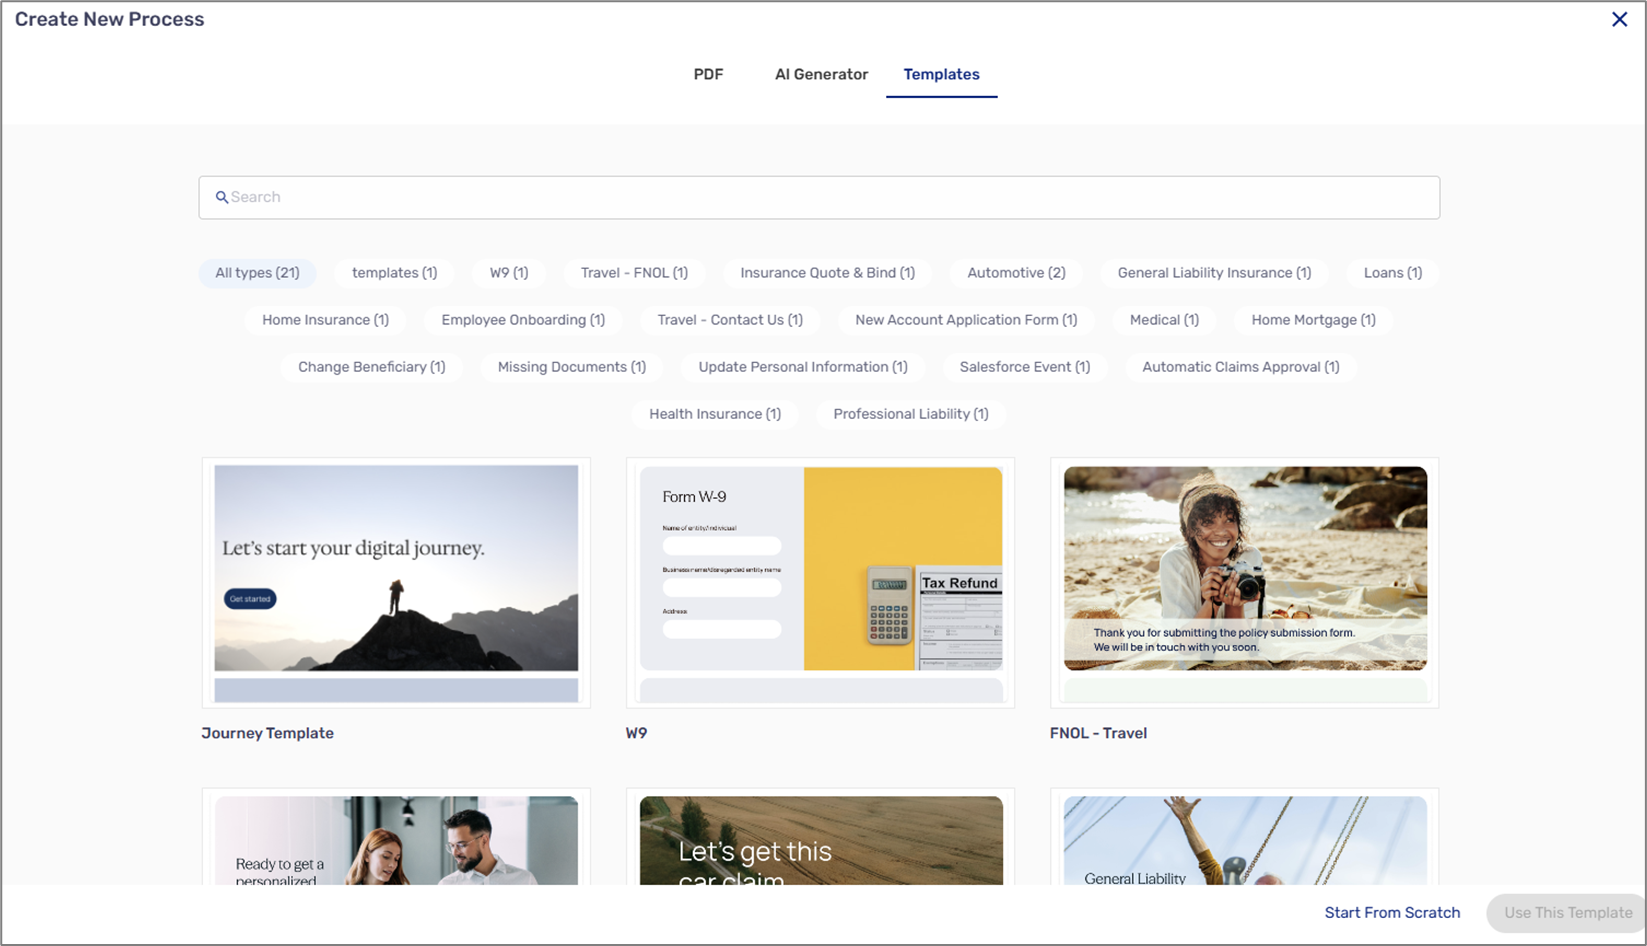
- Figure 3: Templates
Left Navigation Bar
(See Figure 4)
The left navigation bar contains the Build tab that enables you to access the:
- Process Manager screen
- Themes screen
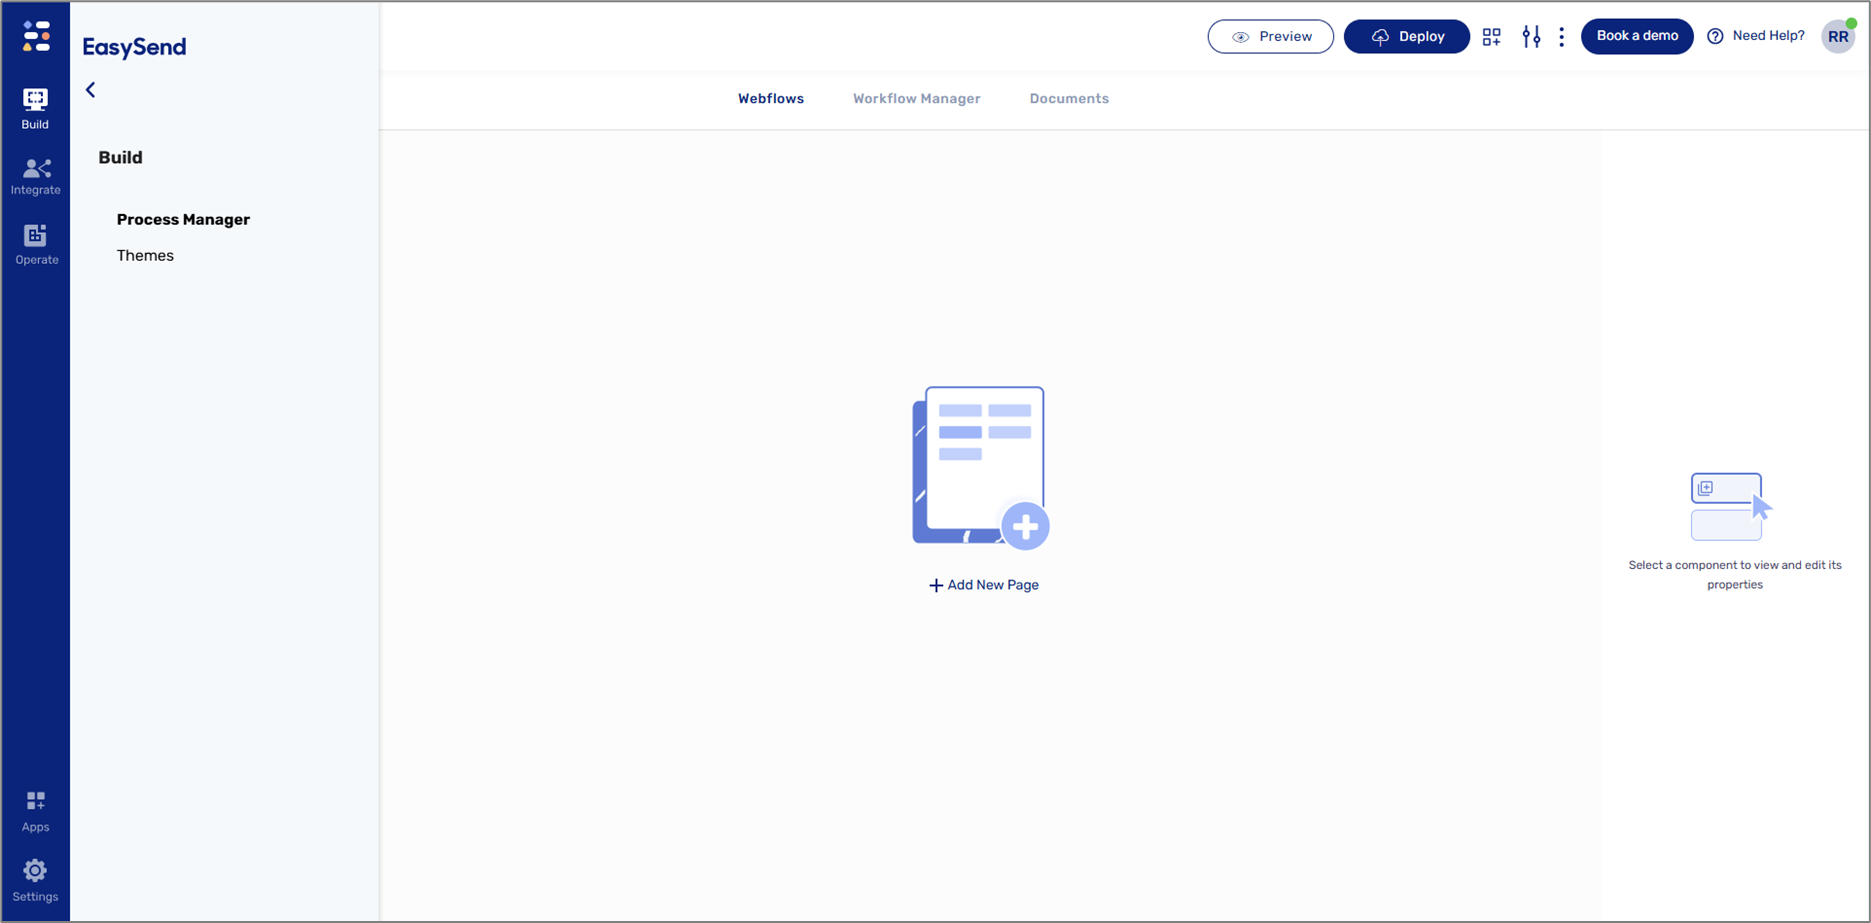
- Figure 4: Build Tab Options
- NOTE
To learn more about Themes, click here.
Process Manager Screen
(See Figure 5 and Figure 6)
The Process Manager screen holds your business groups and processes. A business group functions as a folder that contains a list of all your processes, no matter how they were created (PDF, AI, template, or from scratch). By default, the Process Manager screen contains a default business group (My Journeys) (1) and a default process (Trial Journey). You can create additional business groups by clicking the + New Business Group button (2). To create a new process, you must click a business group and then the + New Process button (3). Each process has an In Production status (No/Yes) (4) and a created timestep (5).
NOTE
A process status will change to In Production Yes after performing a deployment. For additional information, click here.
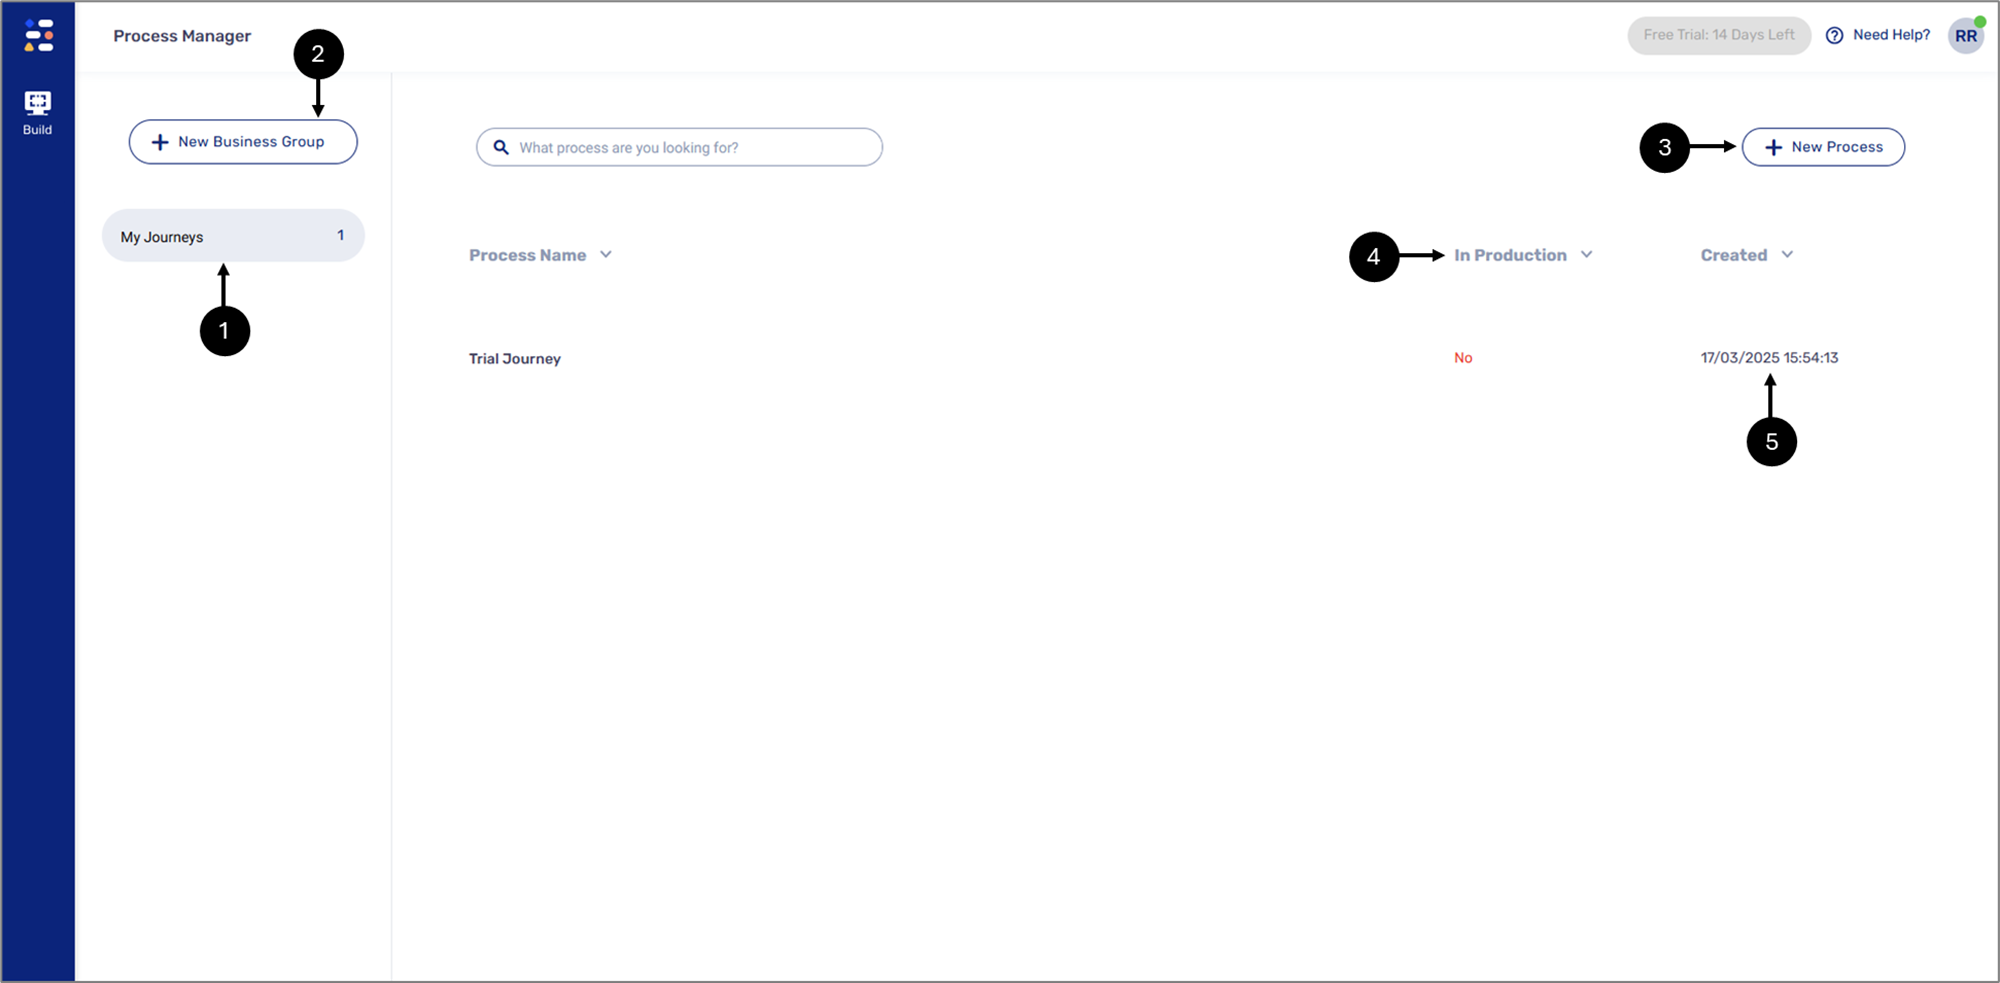
- Figure 5: Process Manager Screen 1 of 2
Hovering over a process displays additional options such as deleting it and duplicating it.
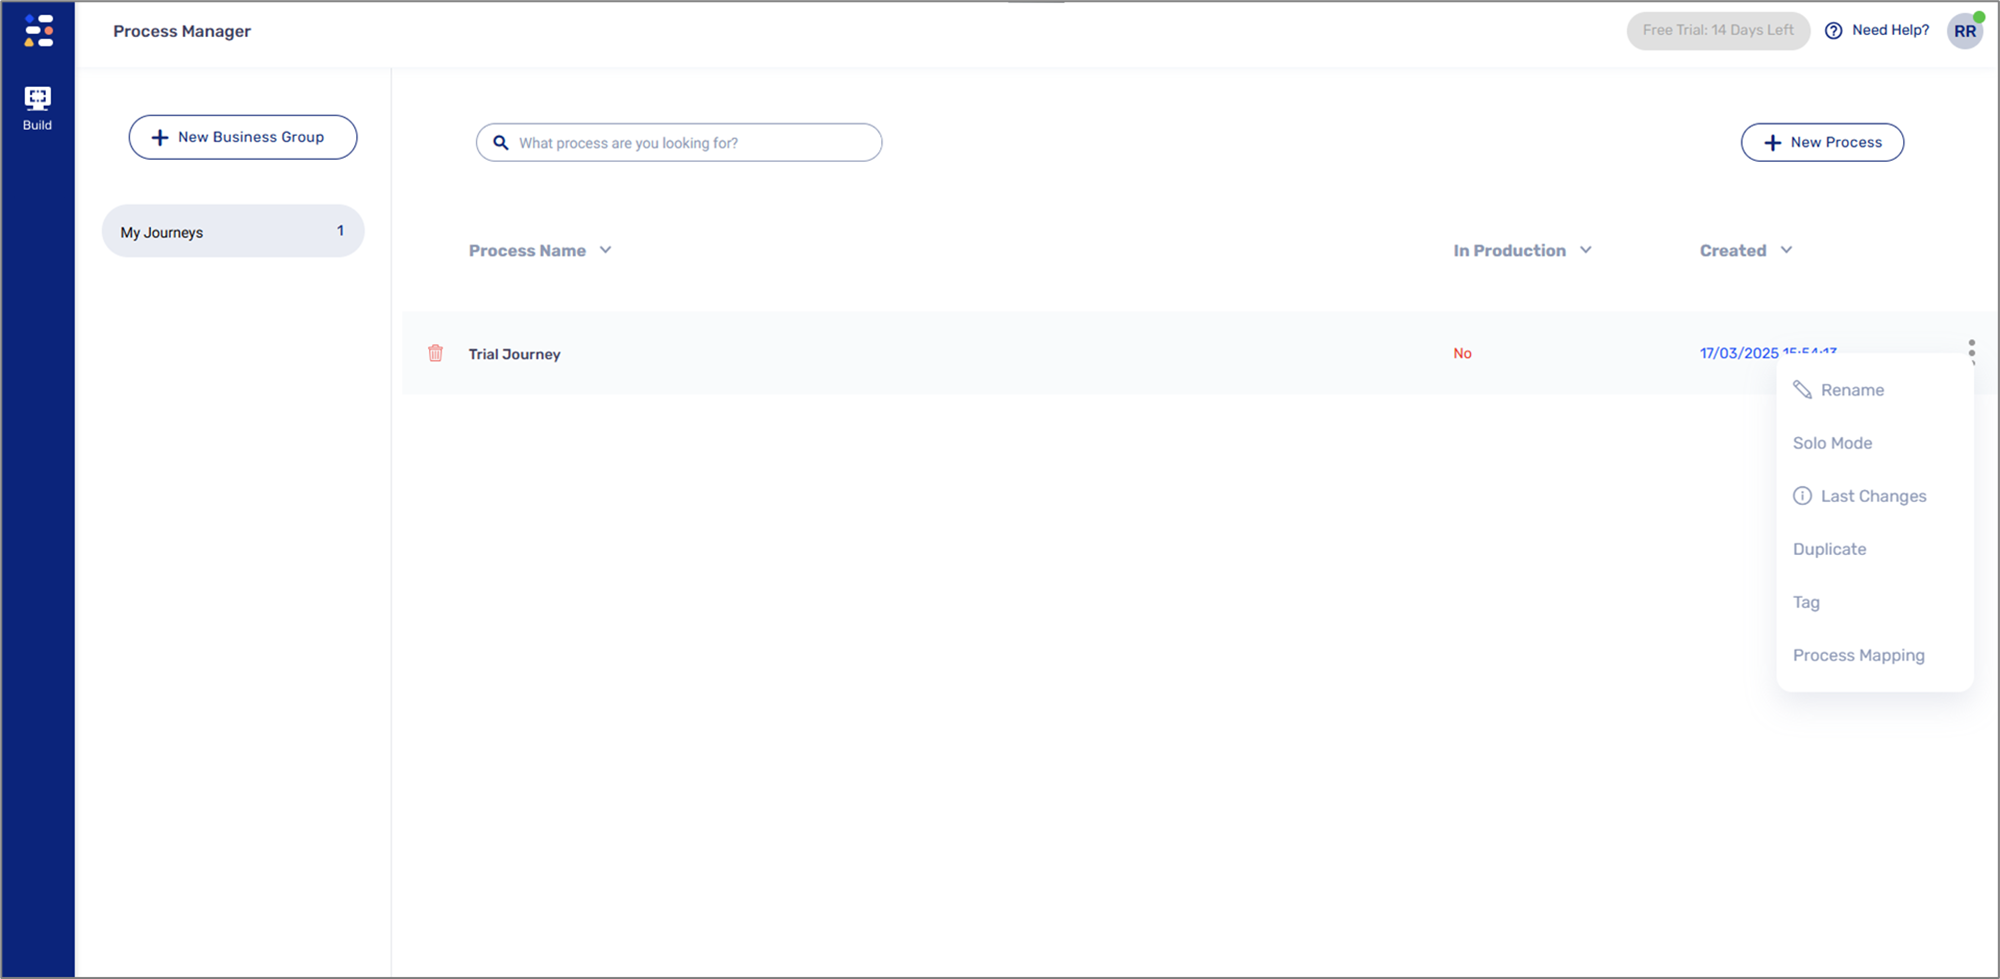
- Figure 6: Process Manager Screen 2 of 2
How to Create a New Webflow
(See Figure 7 to Figure 11)
To create a new Webflow, perform the following steps:
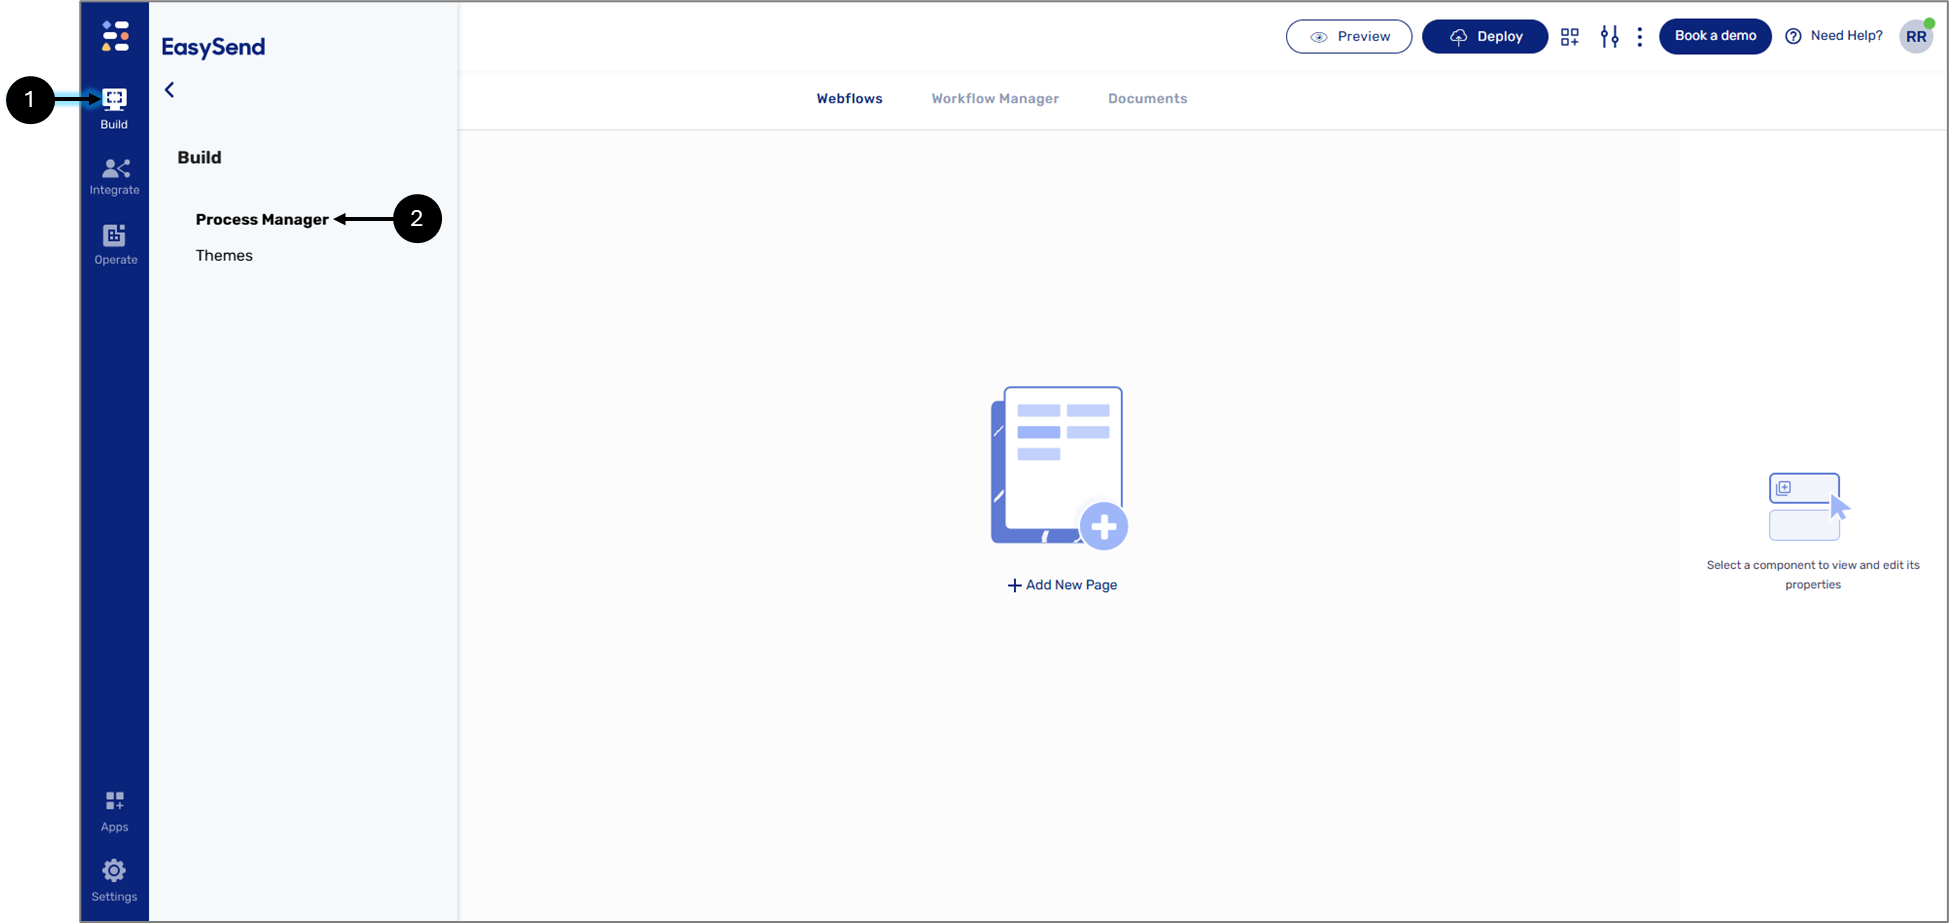
- Figure 7: Build -> Process Manager
- Click the Build tab (1) and then Process Manager (2).
Result:
The Process Manager screen appears:
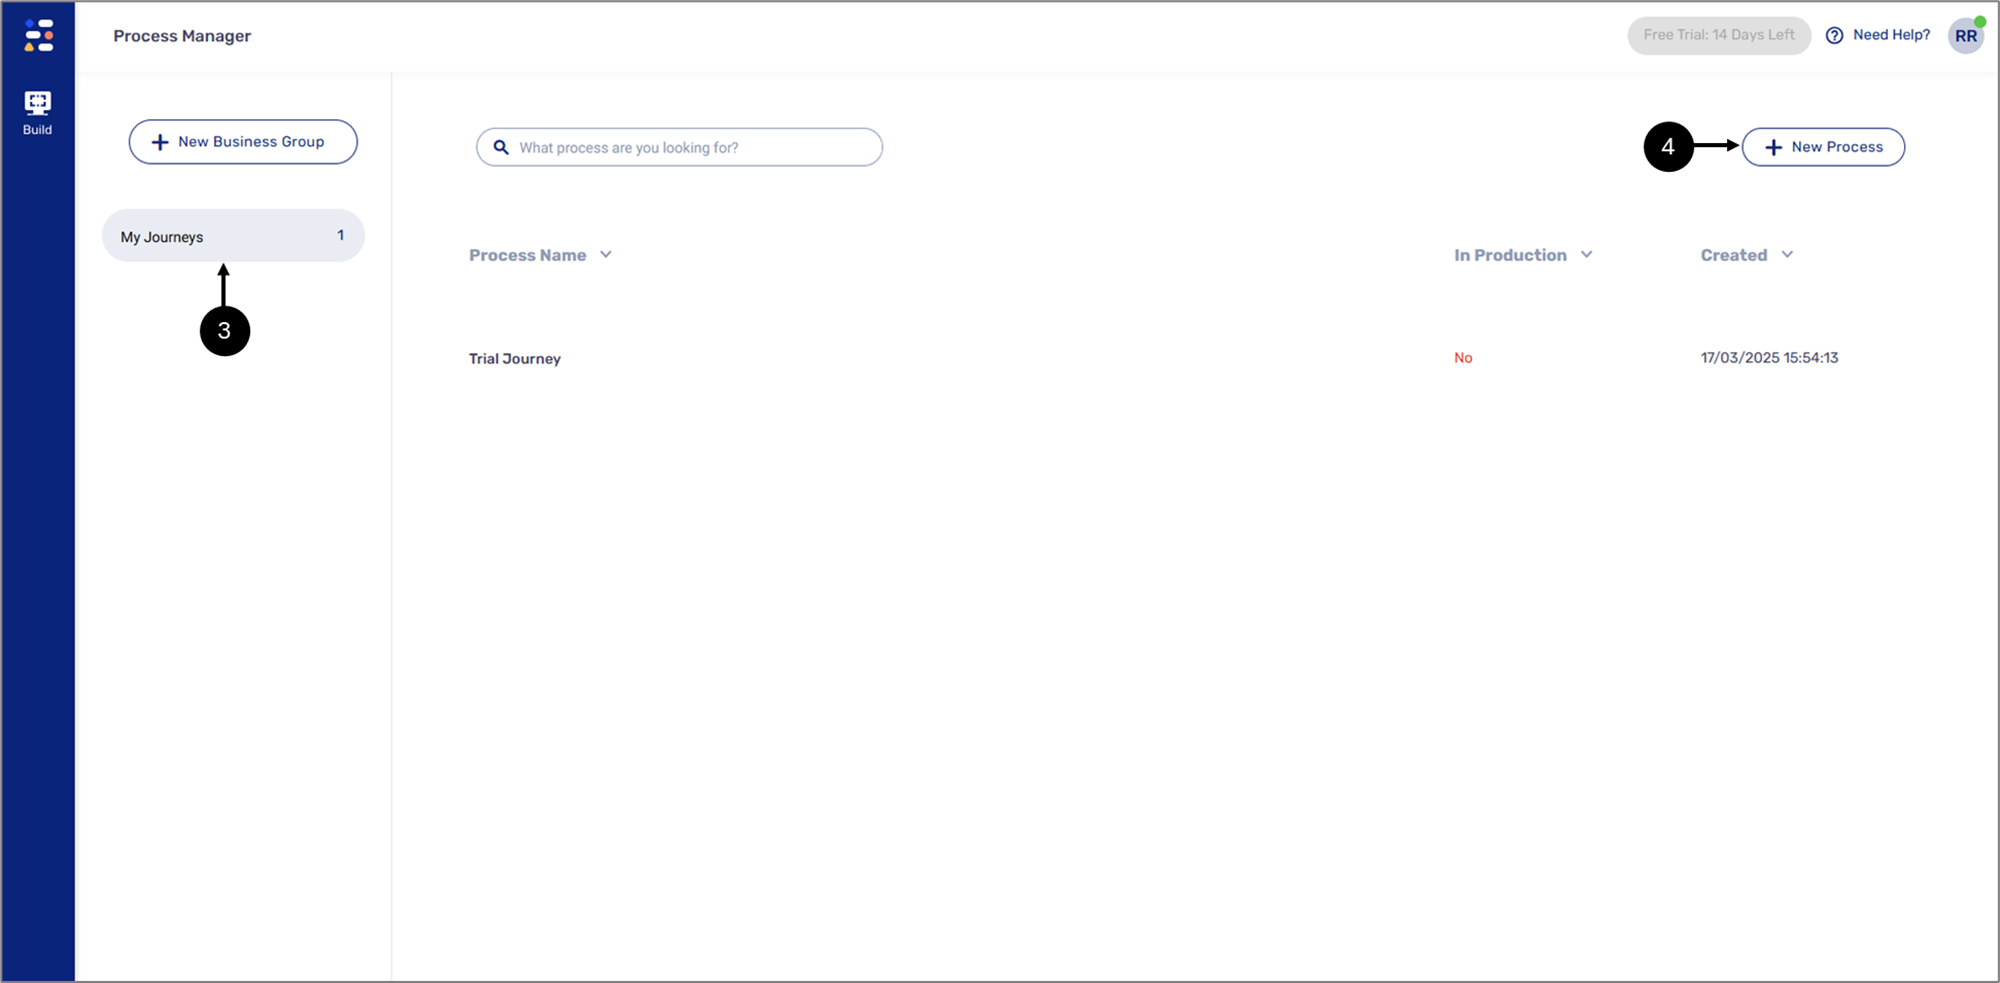
- Figure 8: New Process
- Click the default business group (3) and then click the + New Process button (4).
Result:
The Create a Process window appears:
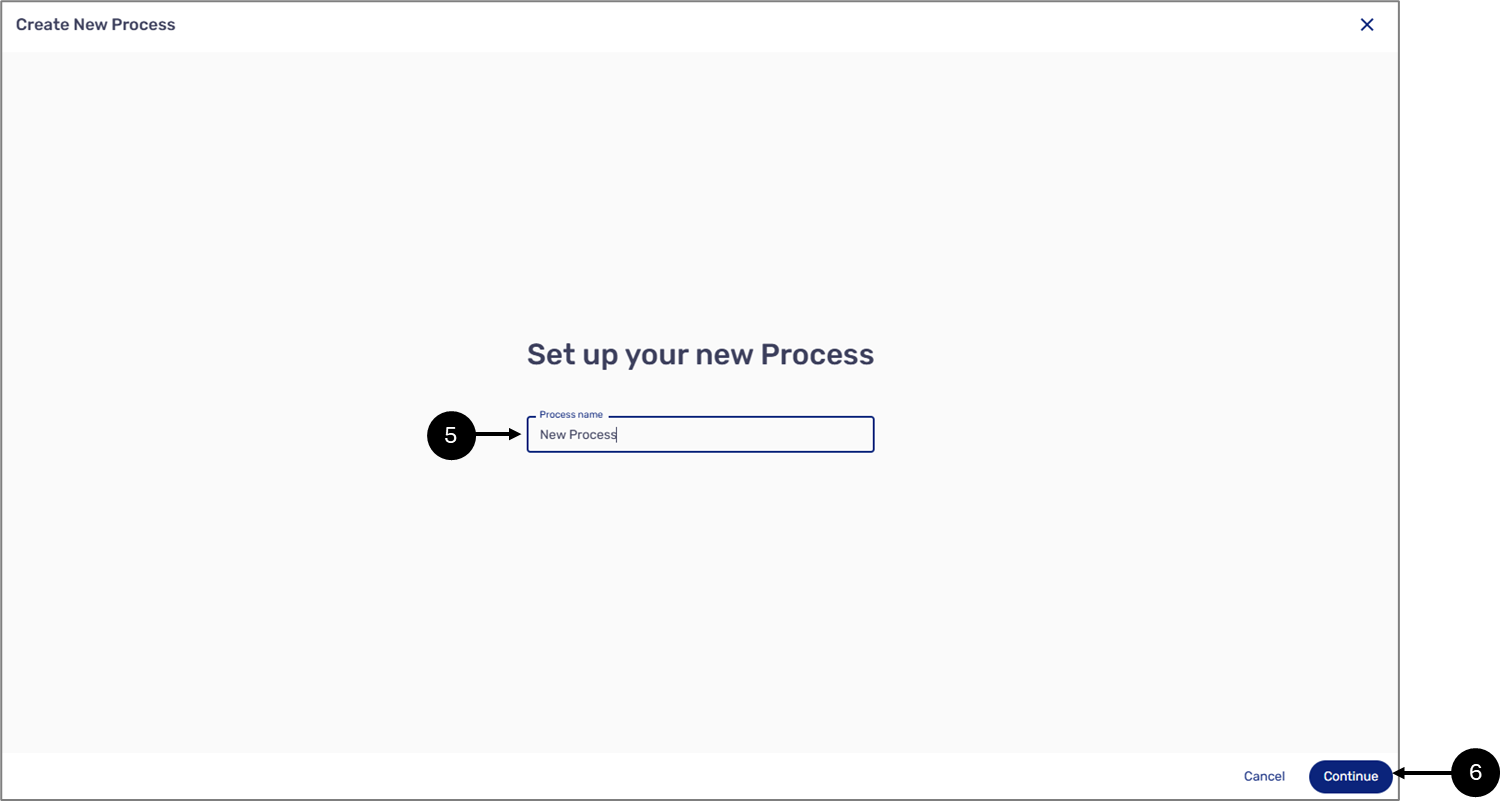
Figure 9: Create a Process Window
- Enter the name of the process (5) (it will also be the name of the Webflow).
- Click Continue (6).
Result:
The Welcome to Your First Process window appears:
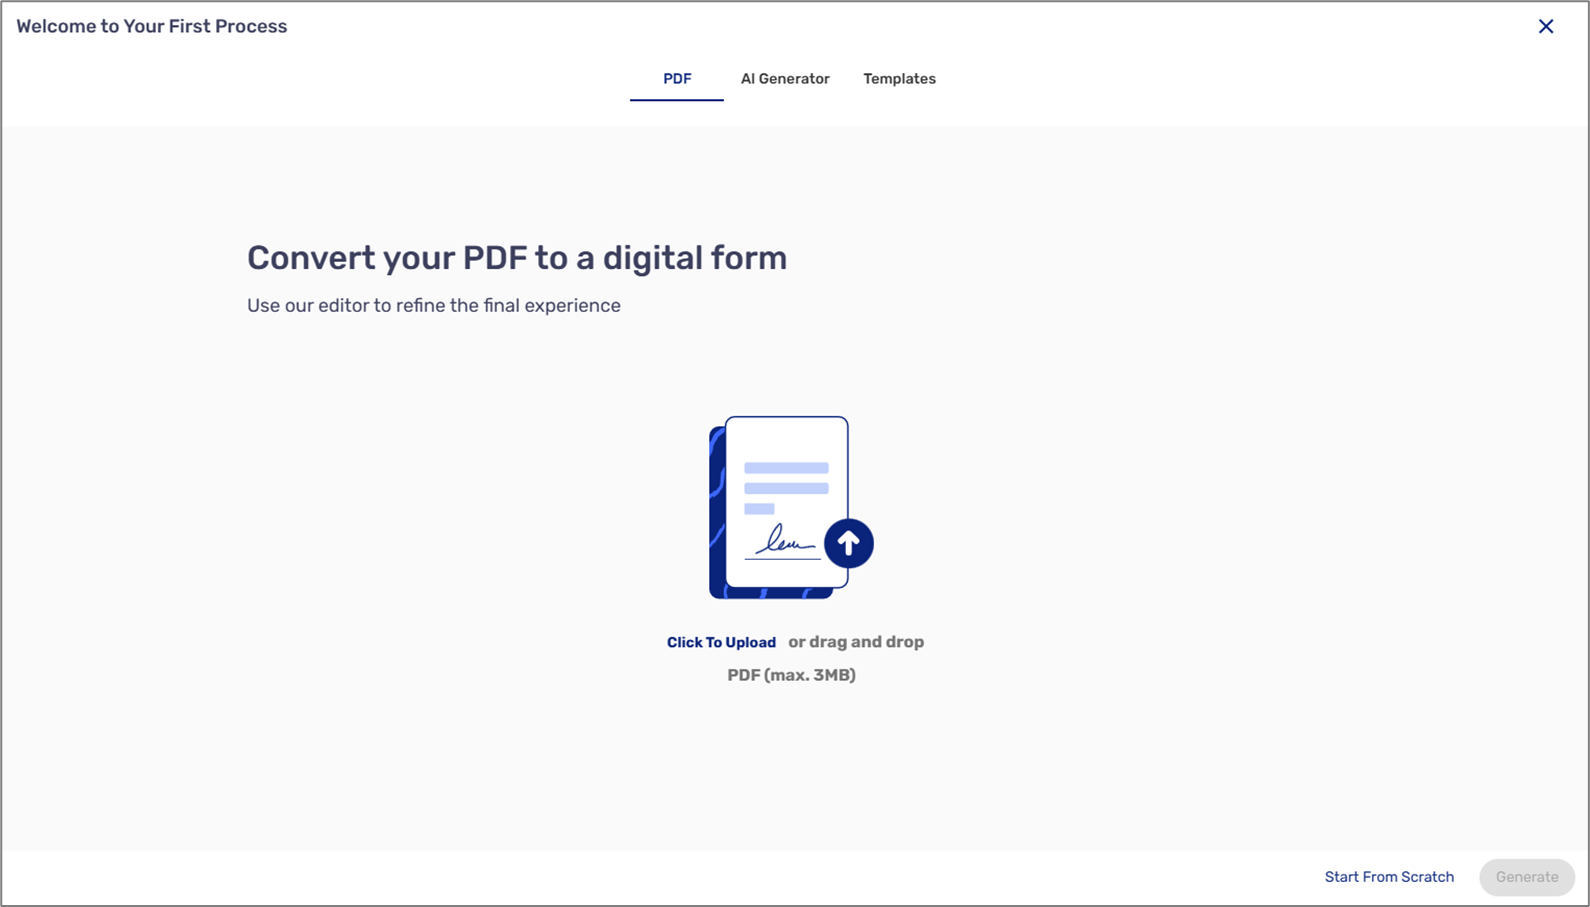
Figure 10: Welcome to Your First Process Window
- Select your desired option.
Result:
The Webflow page appears:

Figure 11: Webflow Main Screen (Start from Scratch Example)
Was this article helpful?