Article Overview
The following article describes the building blocks located under the Webflow category.
Webflow
(See Figure 1)
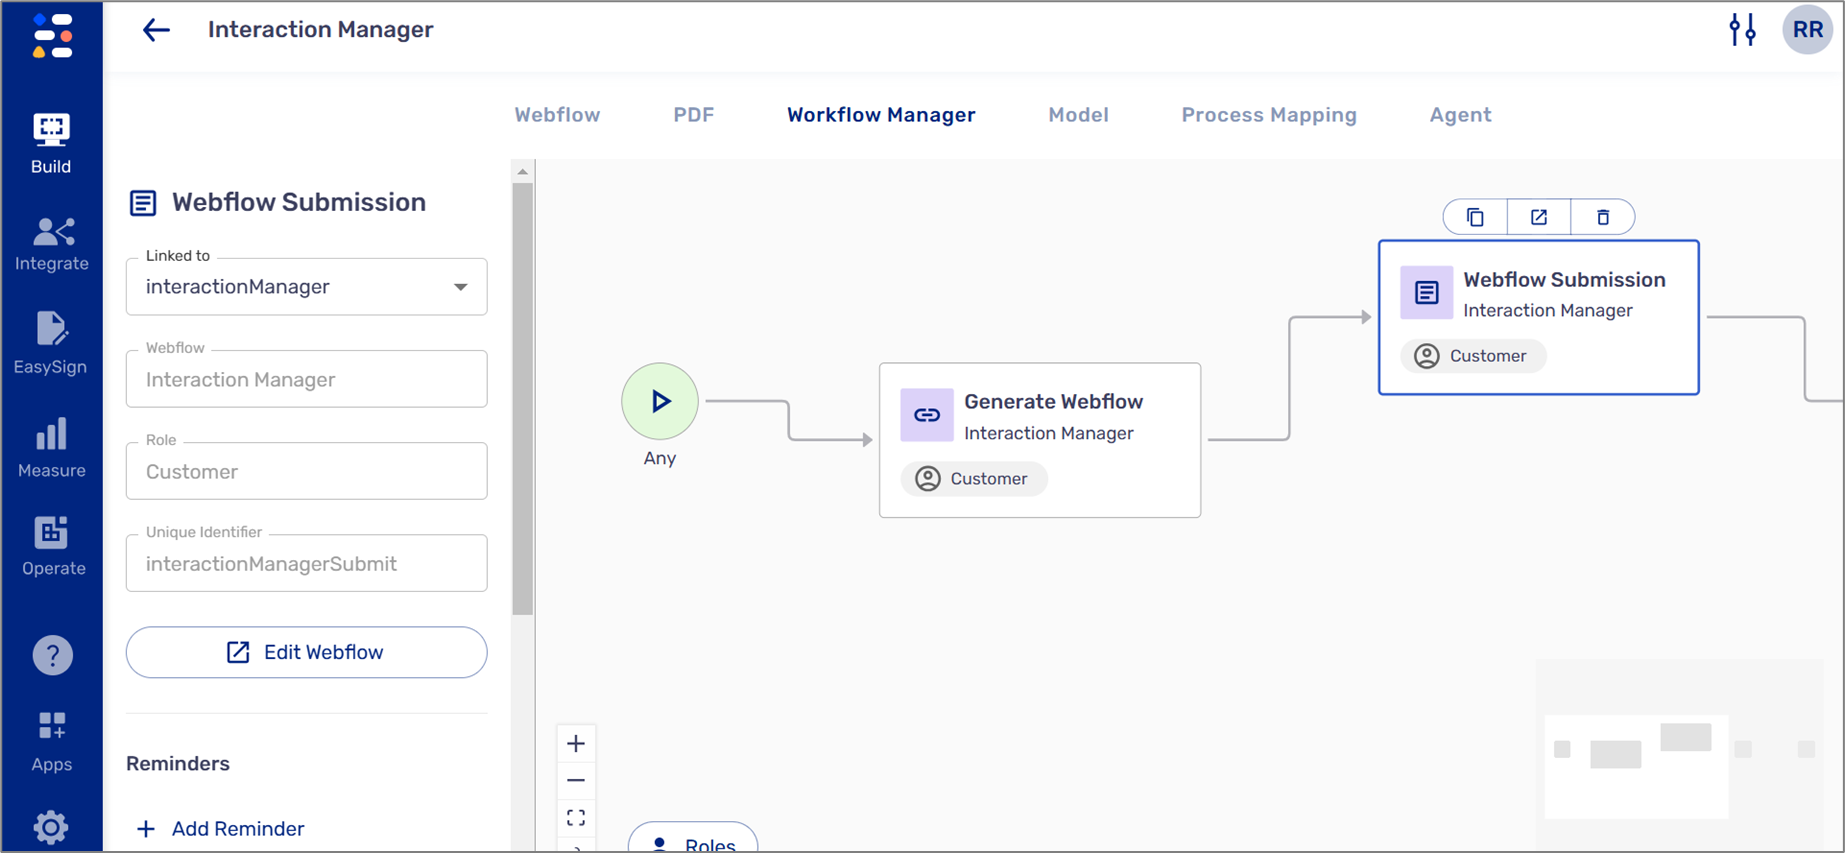
Using a Webflow you build the physical structure of the process using components and define the business logic such as conditions and validations. The Webflow category contains two building blocks:
- Generate Webflow
- Webflow Submission
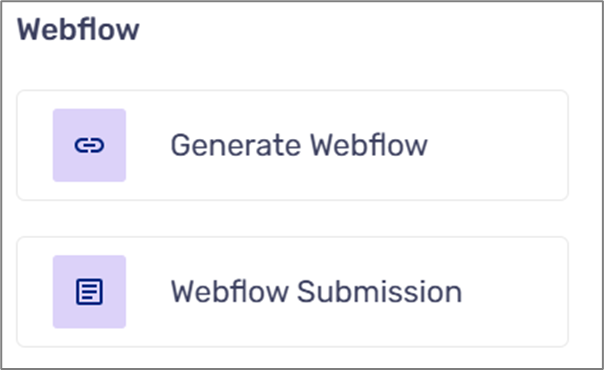
Figure 1: Webflow
Generate Webflow
(See Figure 2)
This building block generates a selected Webflow link. It contains the following fields and options:
- Webflow dropdown for selecting the Webflow (required)
- Role (required)
- Unique Identifier
- More Options dropdown:
- Brand - when the end-user clicks the link, the process will appear with the assigned brand
- Theme Variant - when the end-user clicks the link, the process will appear with the assigned theme variant
- One-Time Password (OTP) Authentication
- Generate Co-Browsing Link
- Description

Figure 2: Generate Webflow and More Options
OTP Authentication
(See Figure 3)
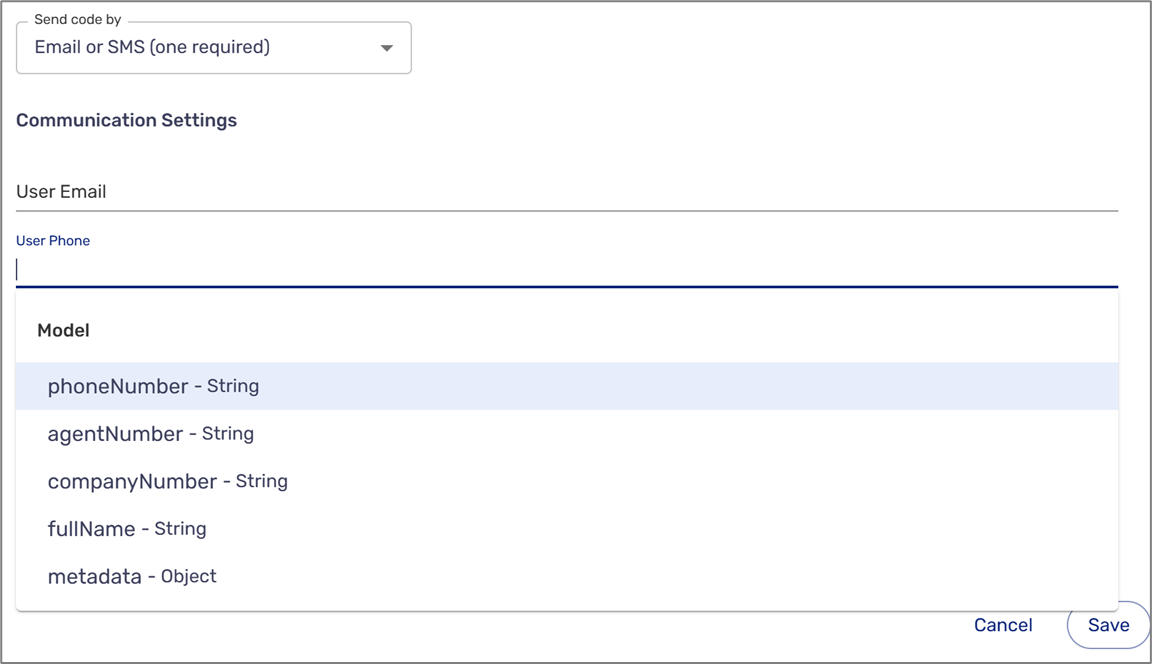
The Authentication switch enables you to secure the Webflow link and restrict access to authenticated users only by setting up an OTP. When the switch is toggled to on, the OTP Authentication window appears.
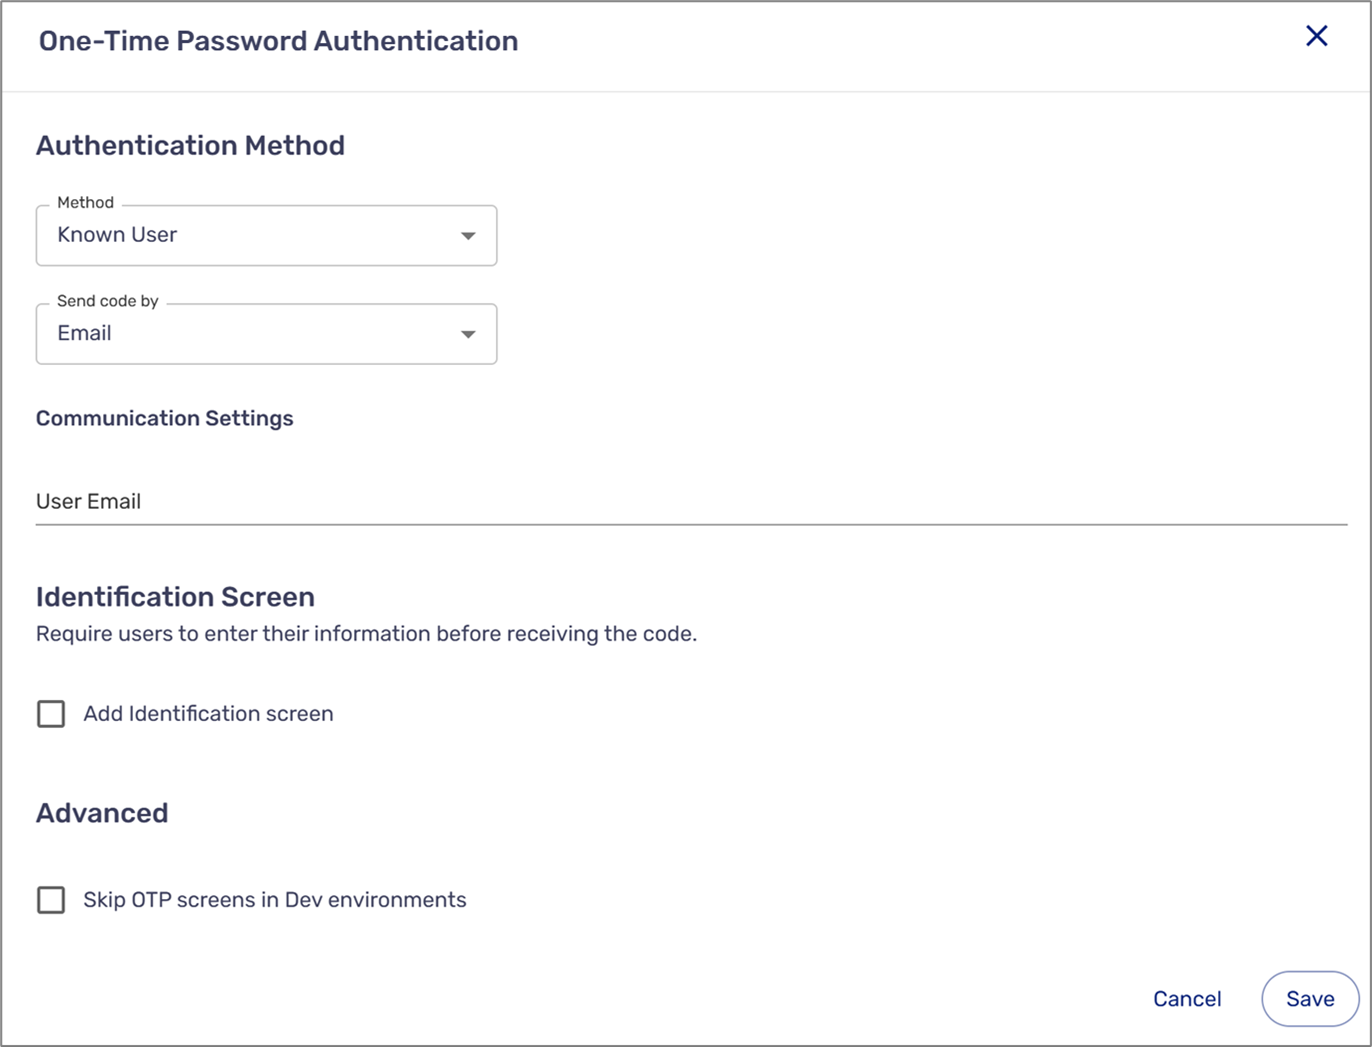
Figure 3: OTP Authentication Window
The window allows you to configure:
- The authentication method
- How to send the OTP:
- SMS
- Email and SMS (both required)
- Email or SMS
- Identification screen options
- Emails and SMSs are added by using data items and/or metadata items
- To learn about the different OTP options, click here.
Generate Co-Browsing Link
(See Figure 4)
The Generate Co-Browsing Link switch allows other end-users such as your agents to join the customer's process with a co-browsing link and provide real-time online assistance. When the switch is toggled to on, a dropdown to select a Co-Browsing role (required) appears. The permissions attached to the role will determine what the end-user can do while participating in the Co-Browsing.
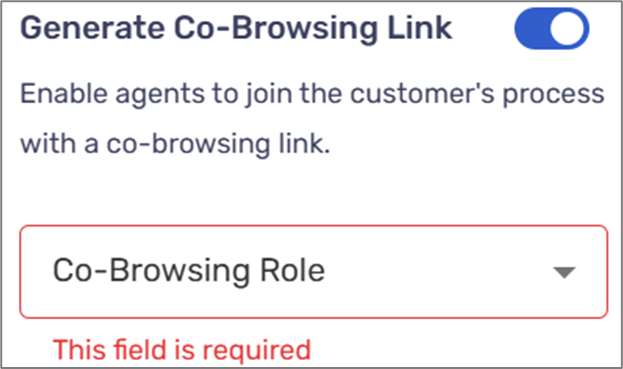
Figure 4: Co-Browsing Role Dropdown
Webflow Submission
(See Figure 5)
This building block signifies that the process is being submitted. The next building block after the Webflow Submission, such as a condition or an email, determines what happens next in the process. When adding the Webflow Submission to the work area, the following properties appear:
- Linked to - links the Webflow Submission building block to an existing process Webflow
- Webflow - according to the linked Webflow
- Role - according to the linked Webflow
- Unique identifier - according to the linked Webflow
- Edit Webflow - navigates and opens the linked Webflow
- Add Reminder - see the Reminders section
- Add to sequence - see the Add to Sequence section
- Can be Submitted by - determines who can submit the process:
- Specific role
- Anyone
- Add Description
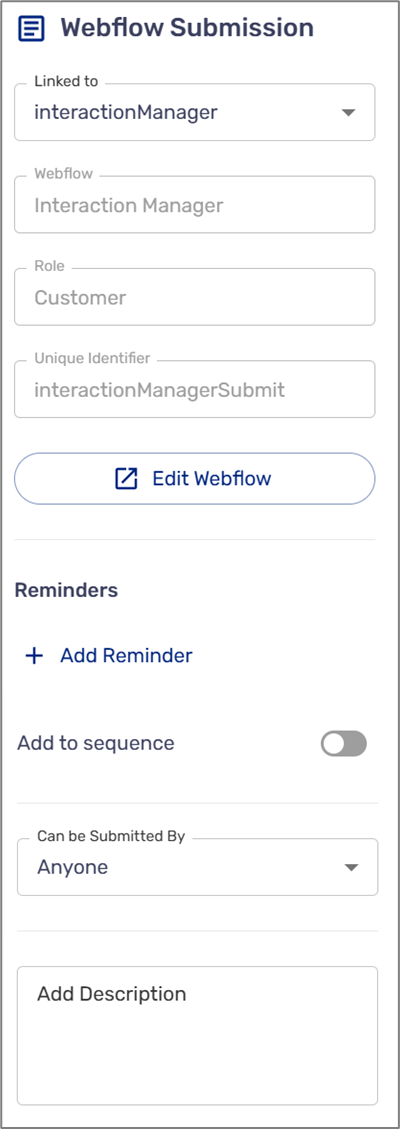
Figure 5: Webflow Submission Properties
Reminders
(See Figure 6 to Figure 19)
The section enables you to set up and configure reminders that will be sent via:
- SMS
- Service
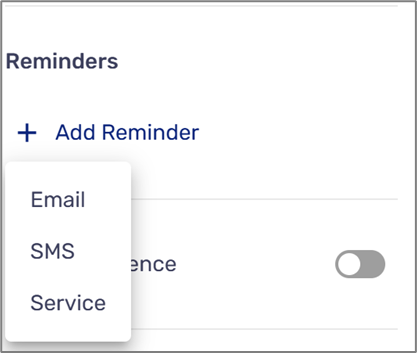
Figure 6: + Add Reminder Options
Email Reminder:
The email reminder contains the following options and fields:
- Delete the reminder

- Edit the email

- Trigger:
- Last Opened
- Link Sent
- After:
- Number of days between 0 and 10
- Time - Same Hour or between 12 AM and 11 PM
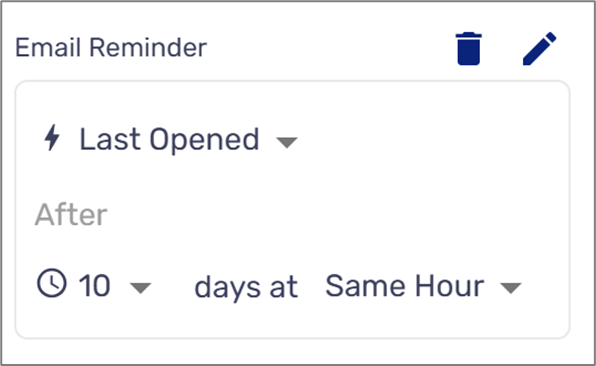
Figure 7: Email Reminder
When clicking the icon, the Edit Message window appears. This window is divided into two sections:
- Message Content
- Advanced
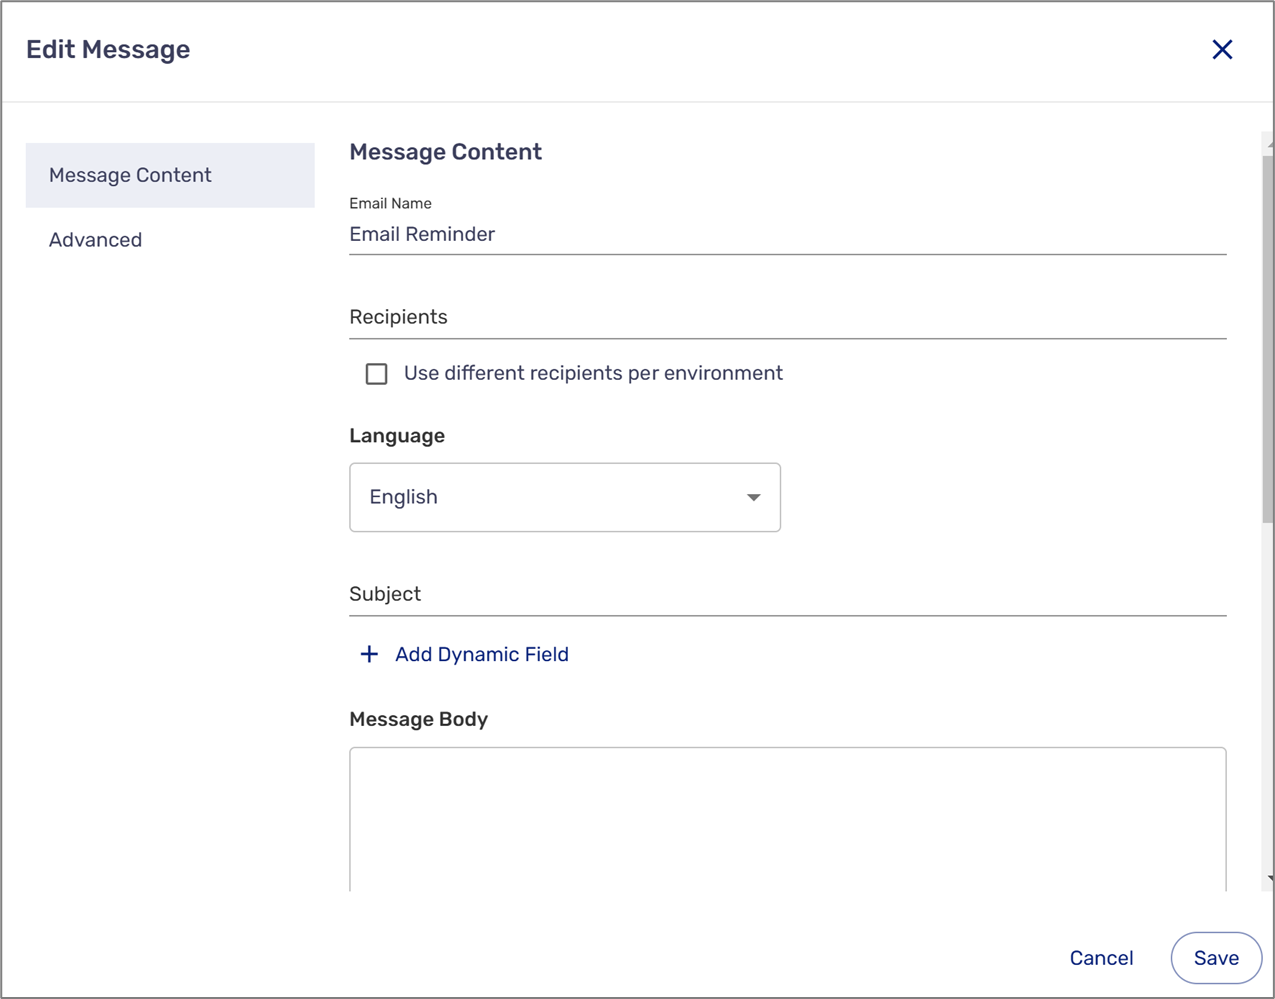
Figure 8: Edit Message Window
The Message Content section contains the following fields and options:
- Email Name
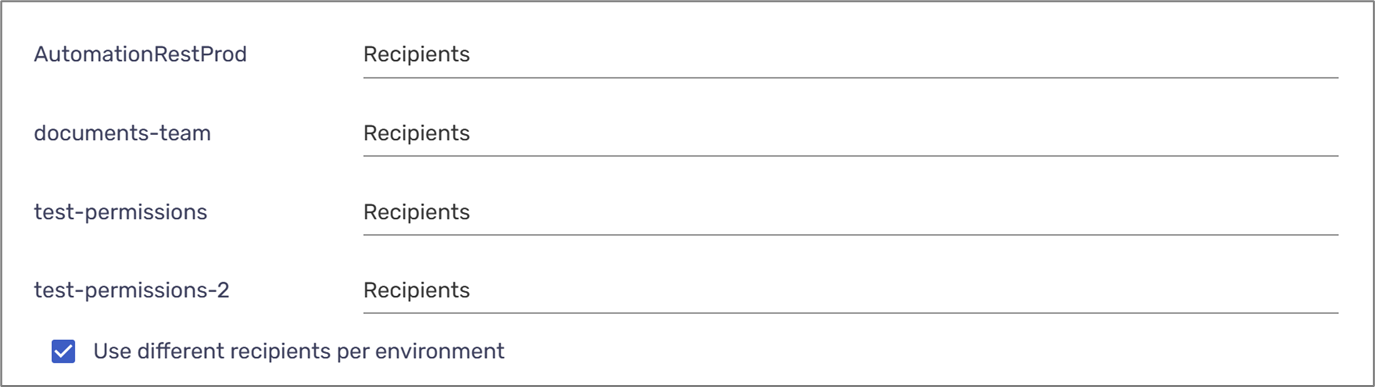
- Recipients - can be static or dynamic:
- Static - for example r.riback@easysend.io
- Dynamic - ata items and/or metadata items
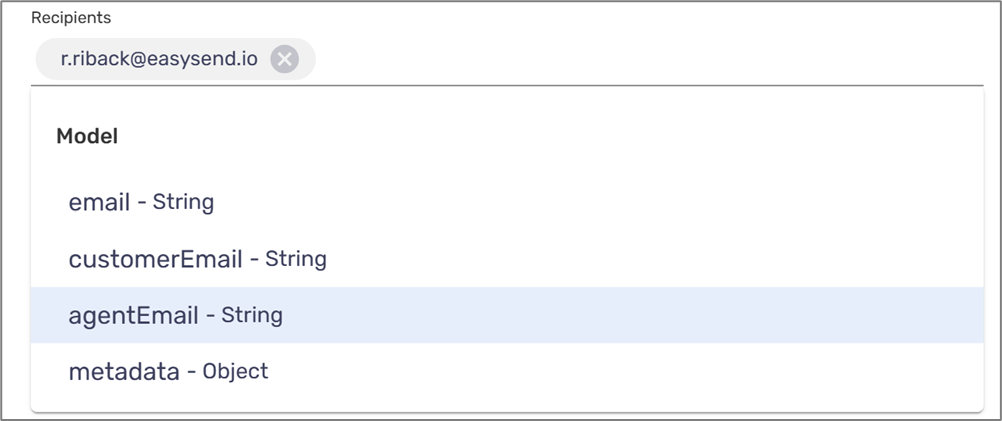
Figure 9: Adding Recipients

- The language of the email (according to available languages in your environment)
- Subject - can include dynamic data items and/or metadata items

Figure 10: Subject
- Message Body - the content of the email:
- Written in HTML
- HTML tags such as <br> and <a> can be used
- The content can include dynamic fields:
- Data items
- Metadata items
- A Process link and a Co-Browsing link can be included in the content by clicking the + Add Dynamic Field option and selecting from the list under the Workflow category (1):
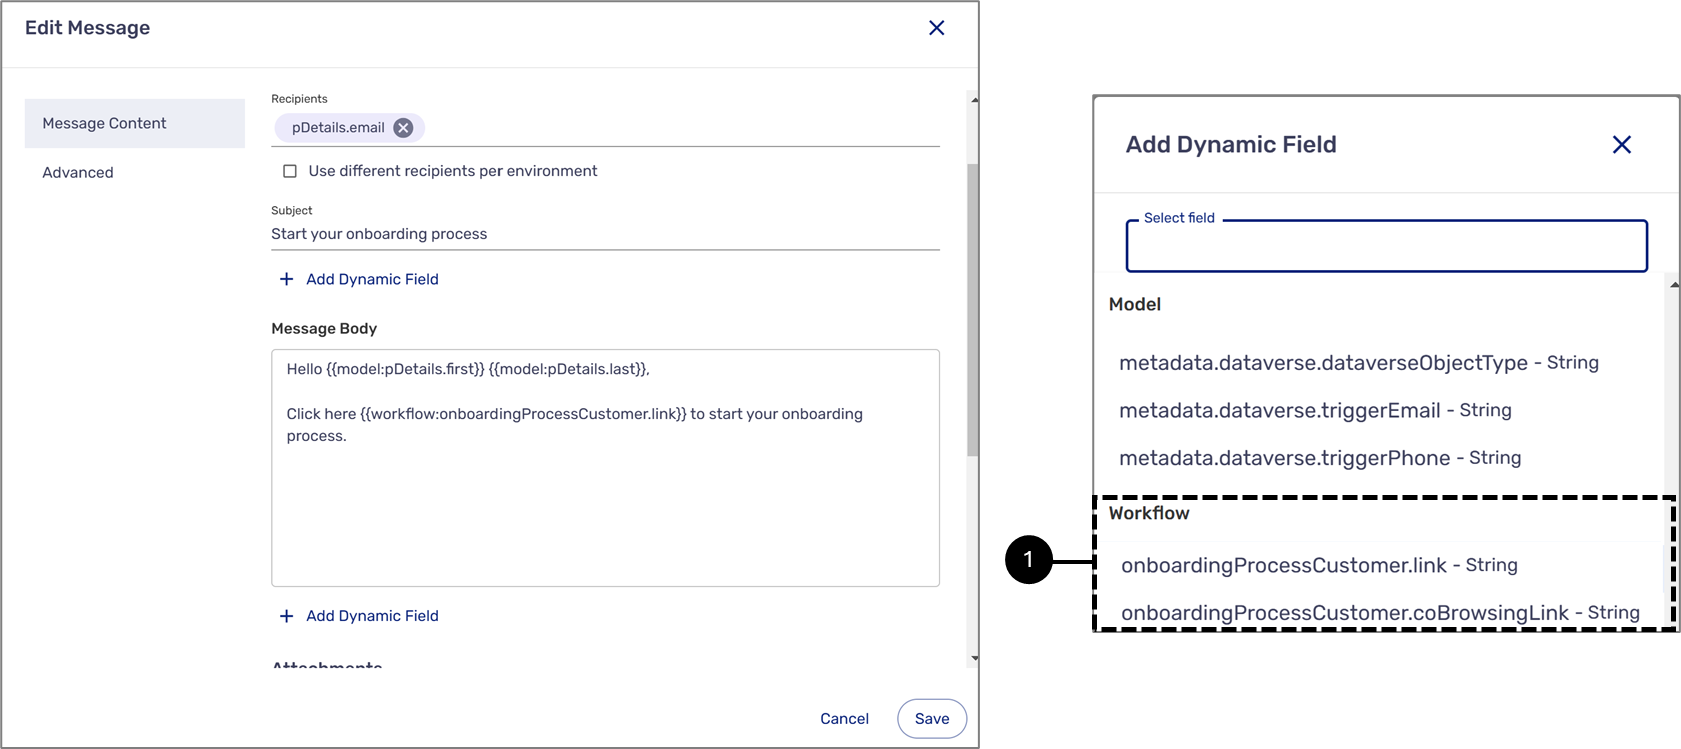
Figure 11: Message Body
The Advanced section contains the following fields and options:
- Attachments - can include:
- Forms - the PDF files that were uploaded to the Builder platform as part of the platform
- User Files - the files that were uploaded by the end-user during the process
- Model As - a copy of the Model of the process in three different formats:
- JSON
- XML
- CSV
- Audit Trail As - an audit trail copy of the process in two different formats:
- JSON
- Model As - a copy of the Model of the process in three different formats:
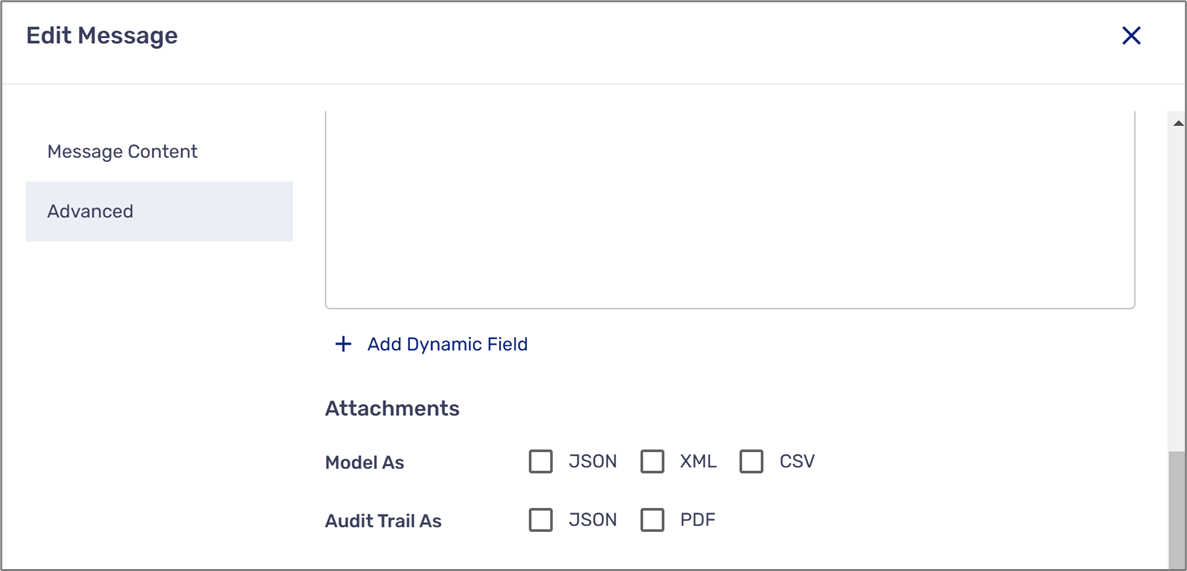
Figure 12: Advanced Options 1 of 2
- Advanced options:
- Set a custom reply-to email address:
- When toggled on - enables to set a custom reply-to email address
- When toggled off - the option is disabled
- Encrypt all PDF documents attached to email:
- When toggled on - enables to encrypt attached PDF documents with a password
- When toggled off - the option is disabled
- Email footer:
- When toggled on - enables to select a footer template
- When toggled off - the option is disabled
- Set a custom reply-to email address:
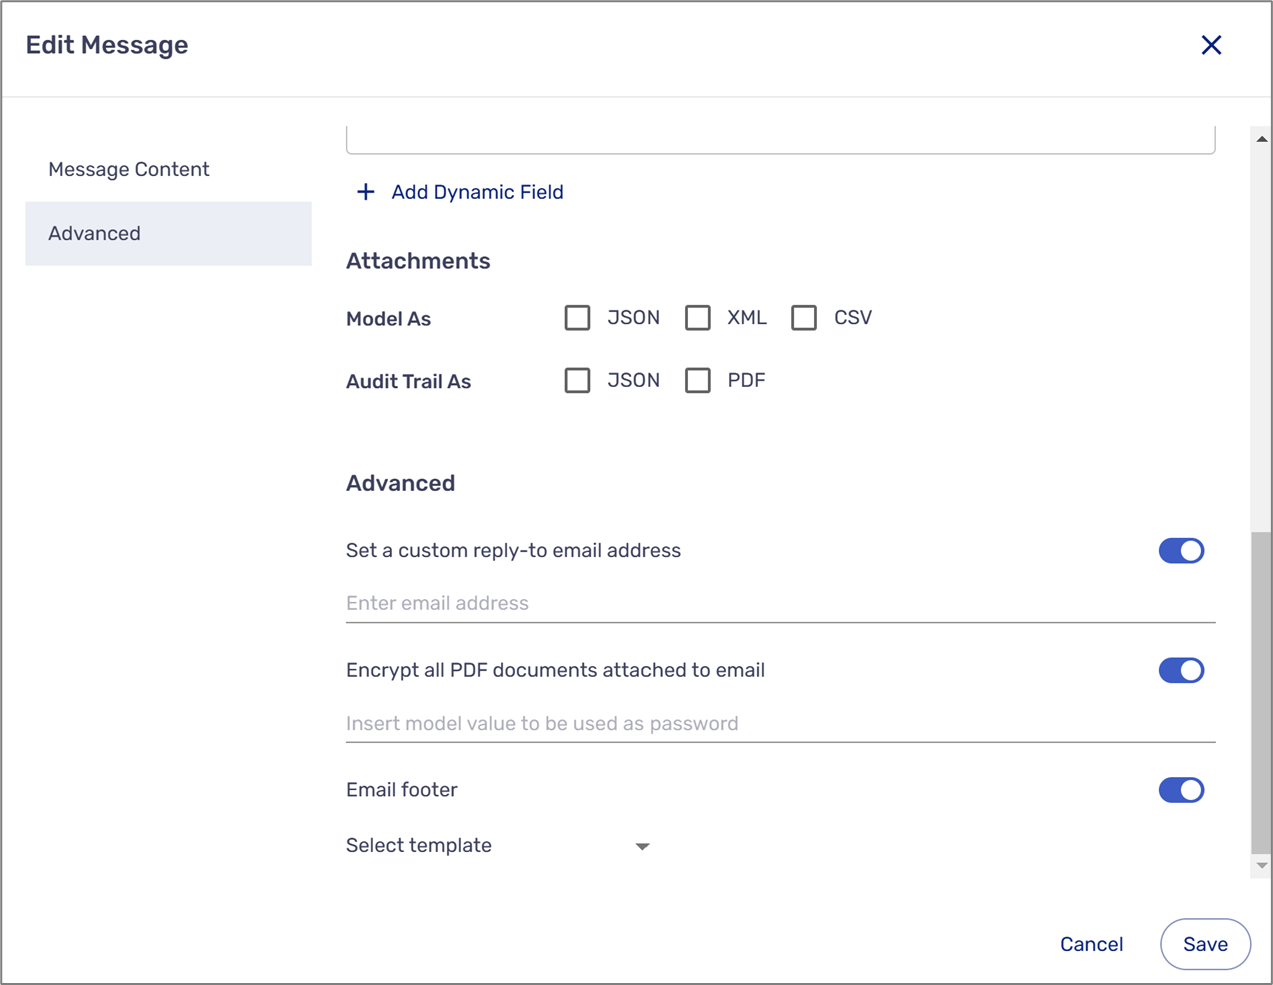
Figure 13: Advanced Options 2 of 2
SMS Reminder:
The SMS reminder contains the following options and fields:
- Delete the reminder
- Edit the SMS
- Trigger:
- Last Opened
- Link Sent
- After:
- Number of days between 0 and 10
- Time - Same Hour or between 12 AM and 11 PM

Figure 14: SMS Reminder
When clicking the icon, the Edit Message window appears. This window contains the Message Content section with the following fields and options:
- Email Name
- Recipients - can be static or dynamic:
- Static - for example, 2679834455
- Dynamic - Data items and/or metadata items
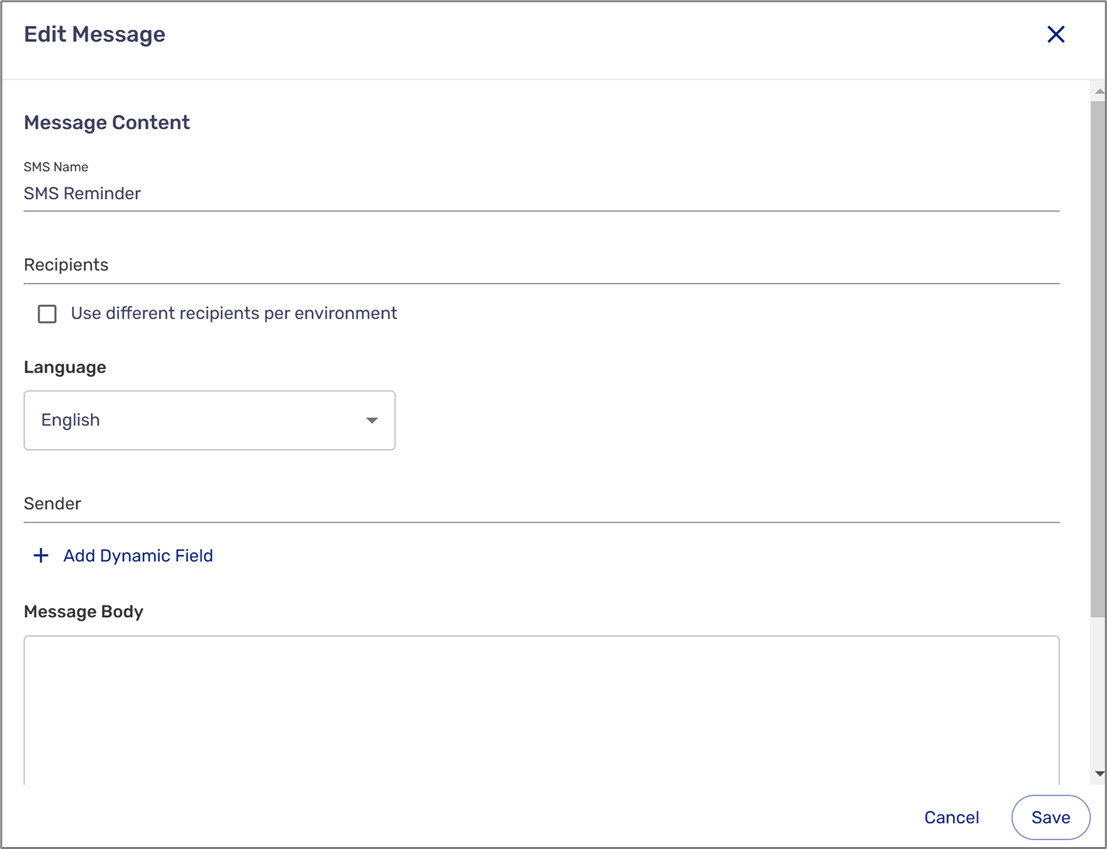
Figure 15: Edit Message Window
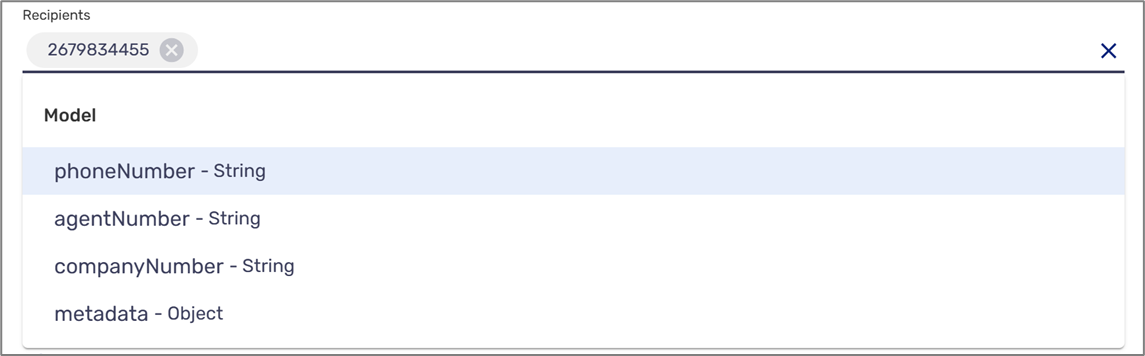
Figure 16: Adding Recipients
- The language of the SMS (according to available languages in your environment)
- Sender - can include dynamic data items and/or metadata items

Figure 17: Sender
- Message Body - the content of the SMS:
- The content can include dynamic fields:
- Data items
- Metadata items
- A Process link and a Co-Browsing link can be included in the content by clicking the + Add Dynamic Field option and selecting from the list under the Workflow category (1):
- The content can include dynamic fields:
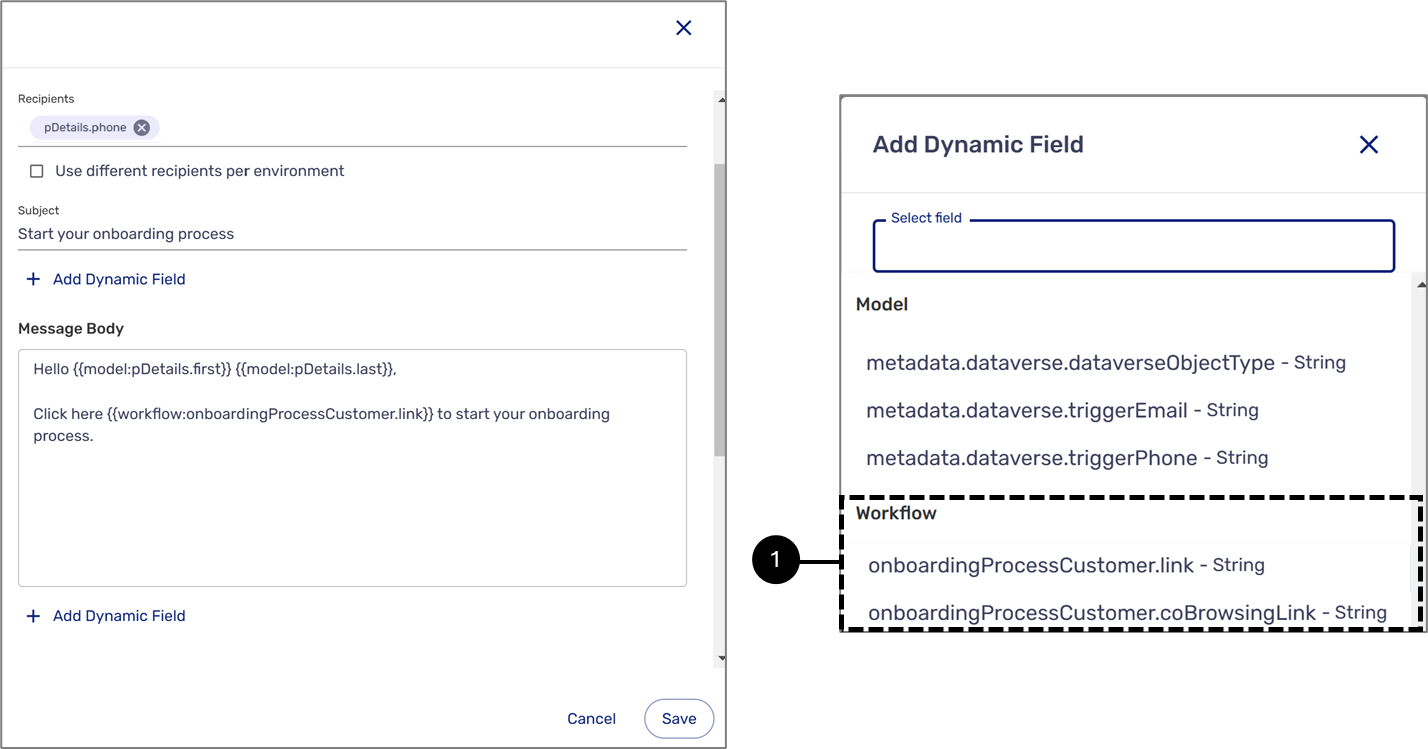
Figure 18: Message Body
Service Reminder:
The Service reminder contains the following options and fields:
- Delete the reminder
- Service selection dropdown (required) - a list of services from your environment.
- Trigger:
- Last Opened
- Link Sent
- After:
- Number of days between 0 and 10
- Time - Same Hour or between 12 AM and 11 PM
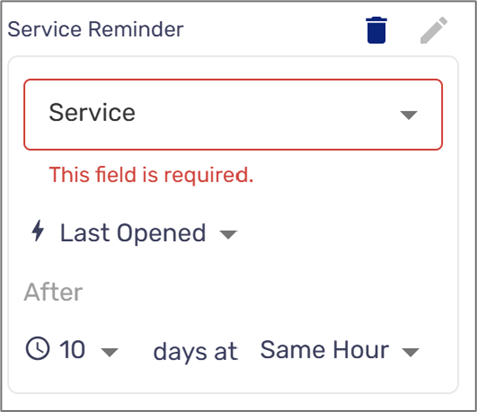
Figure 19: SMS Reminder
Add to Sequence
(See Figure 20 to Figure 22)
Add to sequence enables you to create a nonstop workflow. A nonstop workflow consists of multiple Webflow Submission building blocks that act as one continuous Webflow Submission. You can only add Webflow Submission building blocks with the same role that branched out from the same flow. When the Add to sequence switch is toggled on, you must select a sequence from the list or create a new one.
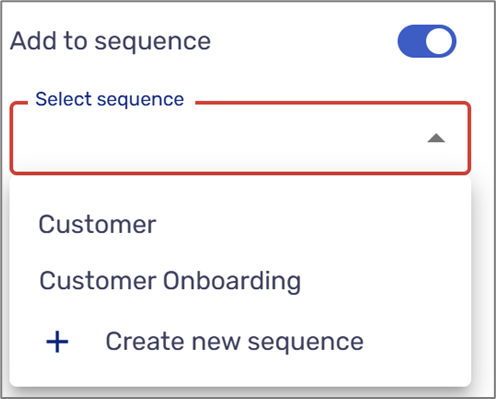
Figure 20: Add to sequence
You provide a new name to a sequence and select whether or not to show a submission success pop-up between webflows.
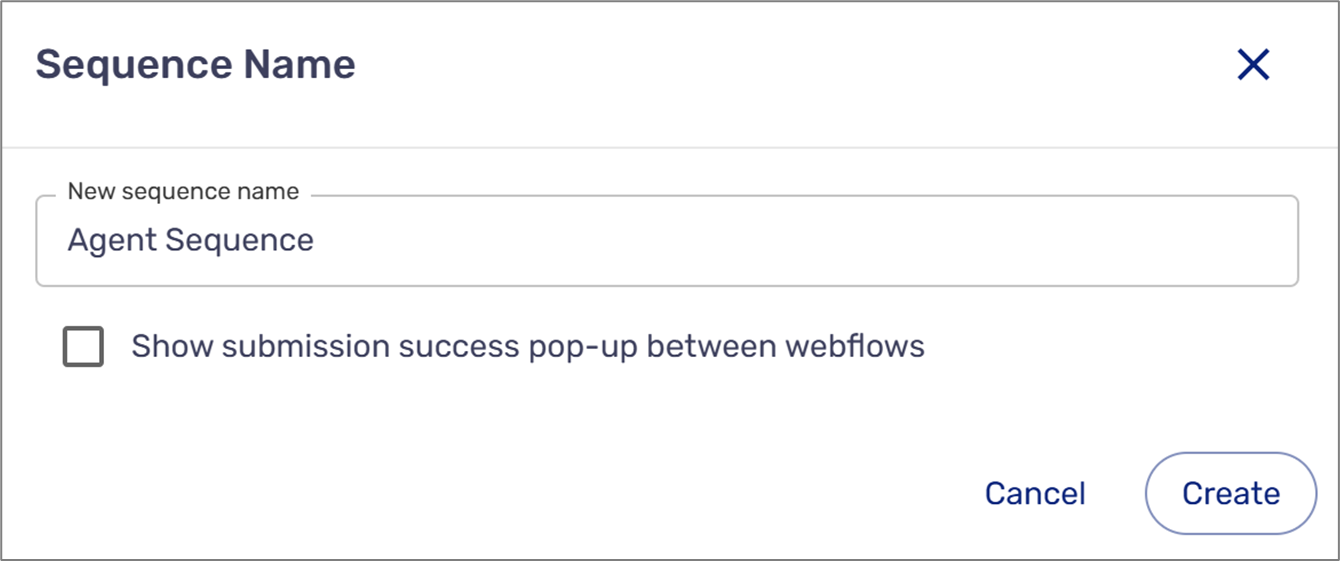
Figure 21: Creating a New Sequence
After creating or selecting a sequence, add Weblfow Submission building blocks to it. Each added Webflow Submission will appear with an indicator and a sequence number.
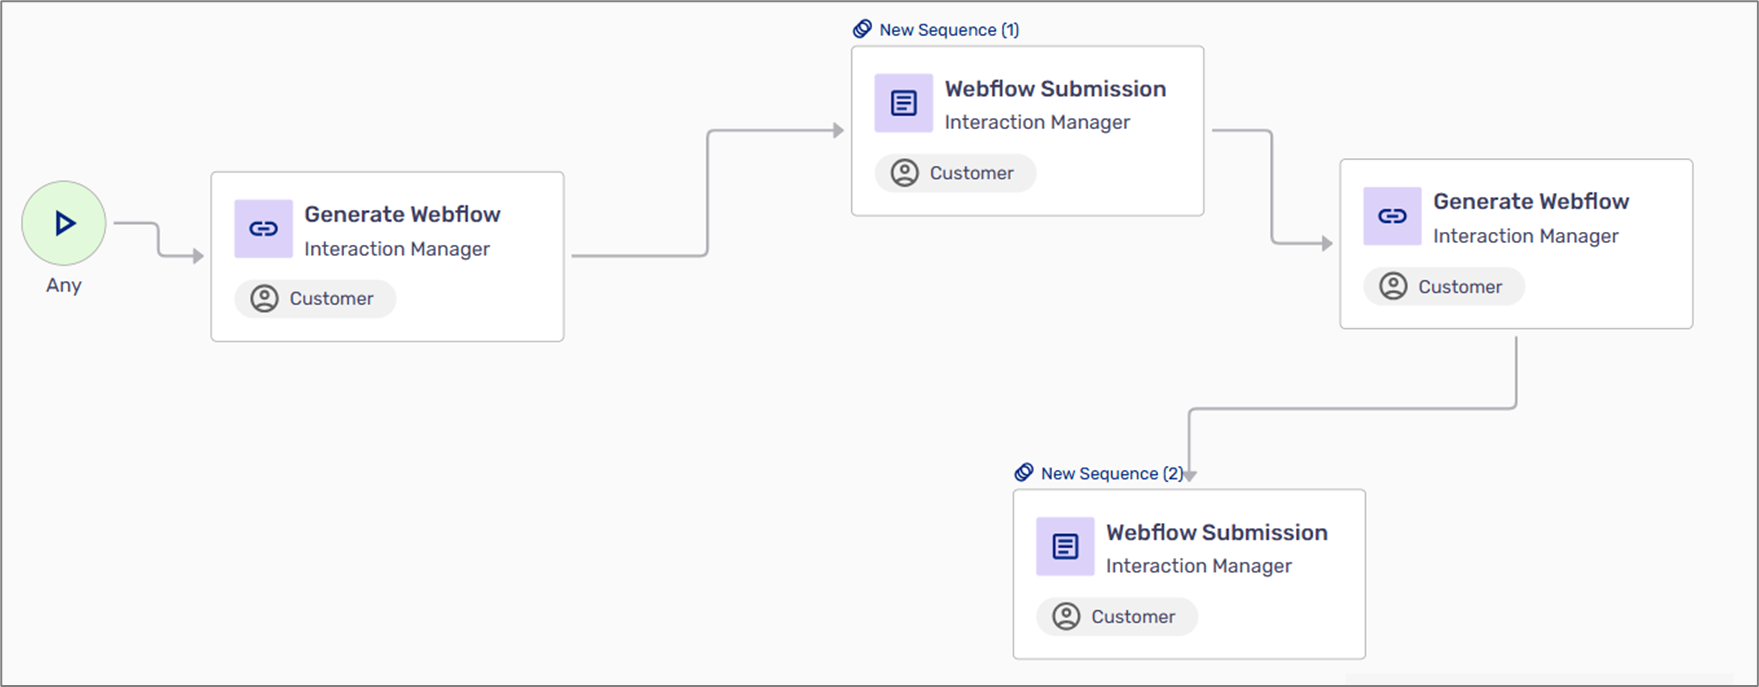
Figure 22: Sequence Example
Description
A textual description of the Webflow.