Webflow Introduction
The following sections describe what the Webflow is and its main capabilities.
What is the Webflow?
The Webflow is the physical layer of a digital process. It enables you to build and edit the physical structure of a digital process.
The Webflow contains all the tools you need to transform any manual form into a process.
Using the Webflow, you will access different layers of a digital process such as the Model screen where you be able to implement processes with custom roles, permissions, validations, and conditions to fit different scenarios and workflows.
In addition, the Webflow also enables you to access:
- The PDF screen where you can digitize PDF forms, upload them, define their fields, and convey data to them.
- The Workflow Manager screen where you can set the flow of your process.
How to Create a Webflow?
(See Figure 1 to Figure 3)
To create a Webflow, perform the following steps:
- Select a business group (1) and click the + New Process button (2).
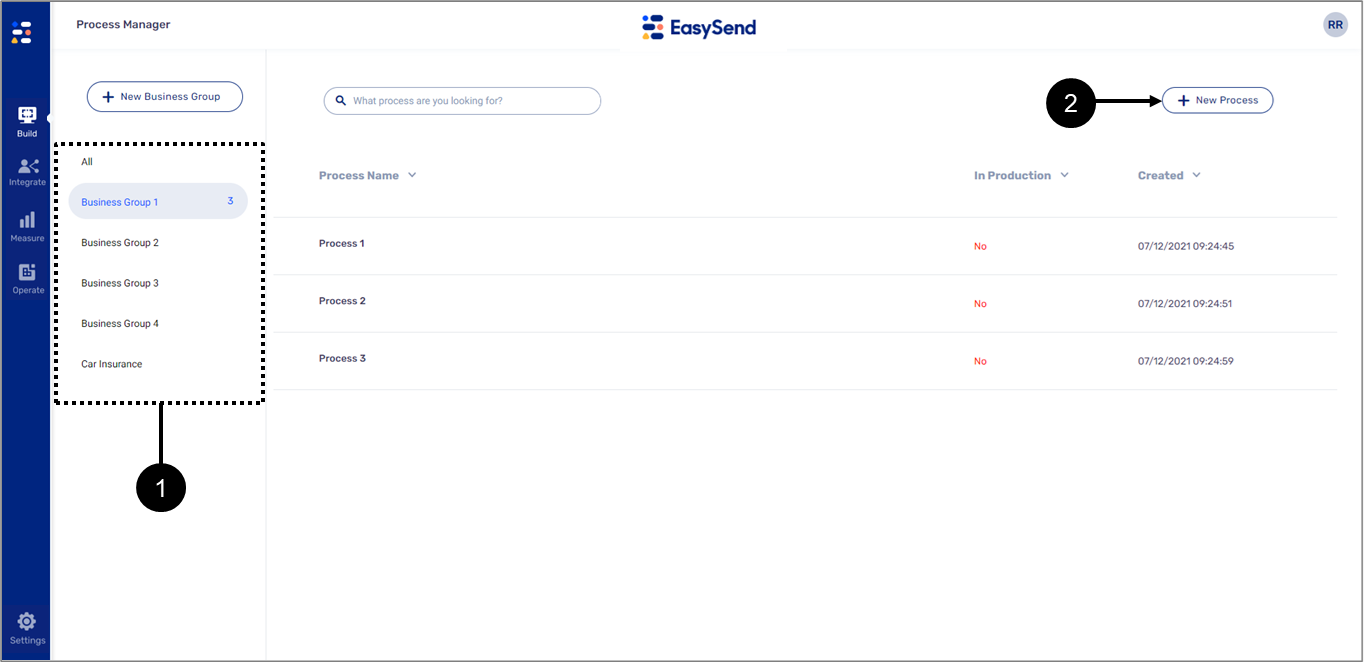
- Figure 1: Process Manager Screen
Result:
The Create a Process window appears:
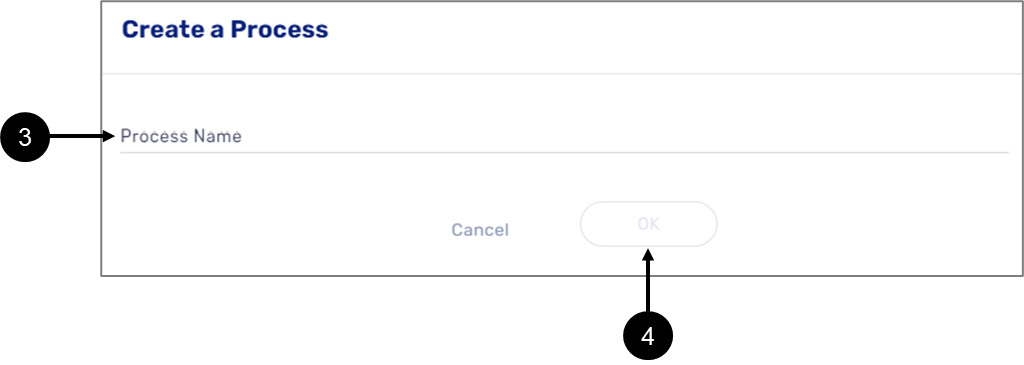
Figure 2: Create a Process Window
- Enter the name of the process (3) (it will also be the name of the Webflow).
- Click OK (4).
Result:
The Webflow main screen appears:
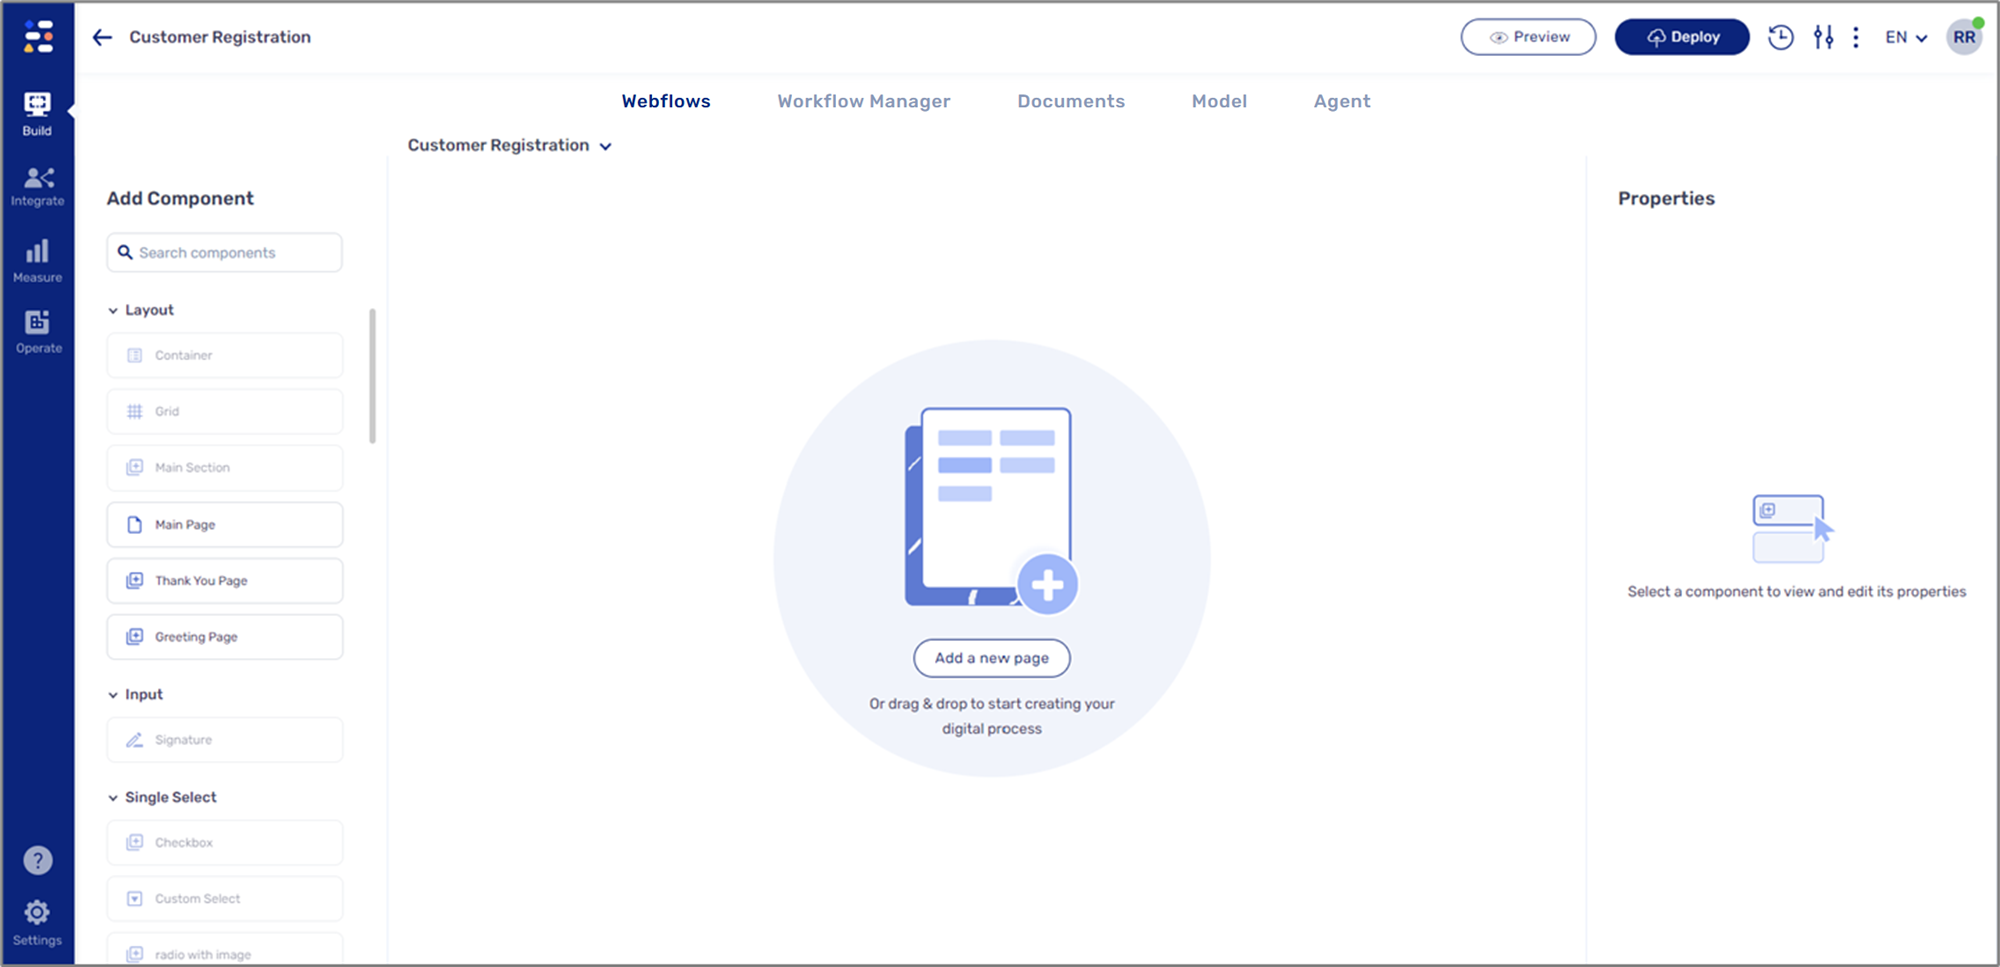
Figure 3: Webflow Main Screen
- Within a process, a Webflow name must be unique.
- The Webflow name is only displayed internally.
- The Webflow Name is limited to 100 characters.
Webflow Structure and Navigation
The following sections describe the structure of the Webflow main screen and the Process Settings screen.
Webflow Main Screen
Figure 6 and Table 1 describe the structure of the main screen of the Webflow.
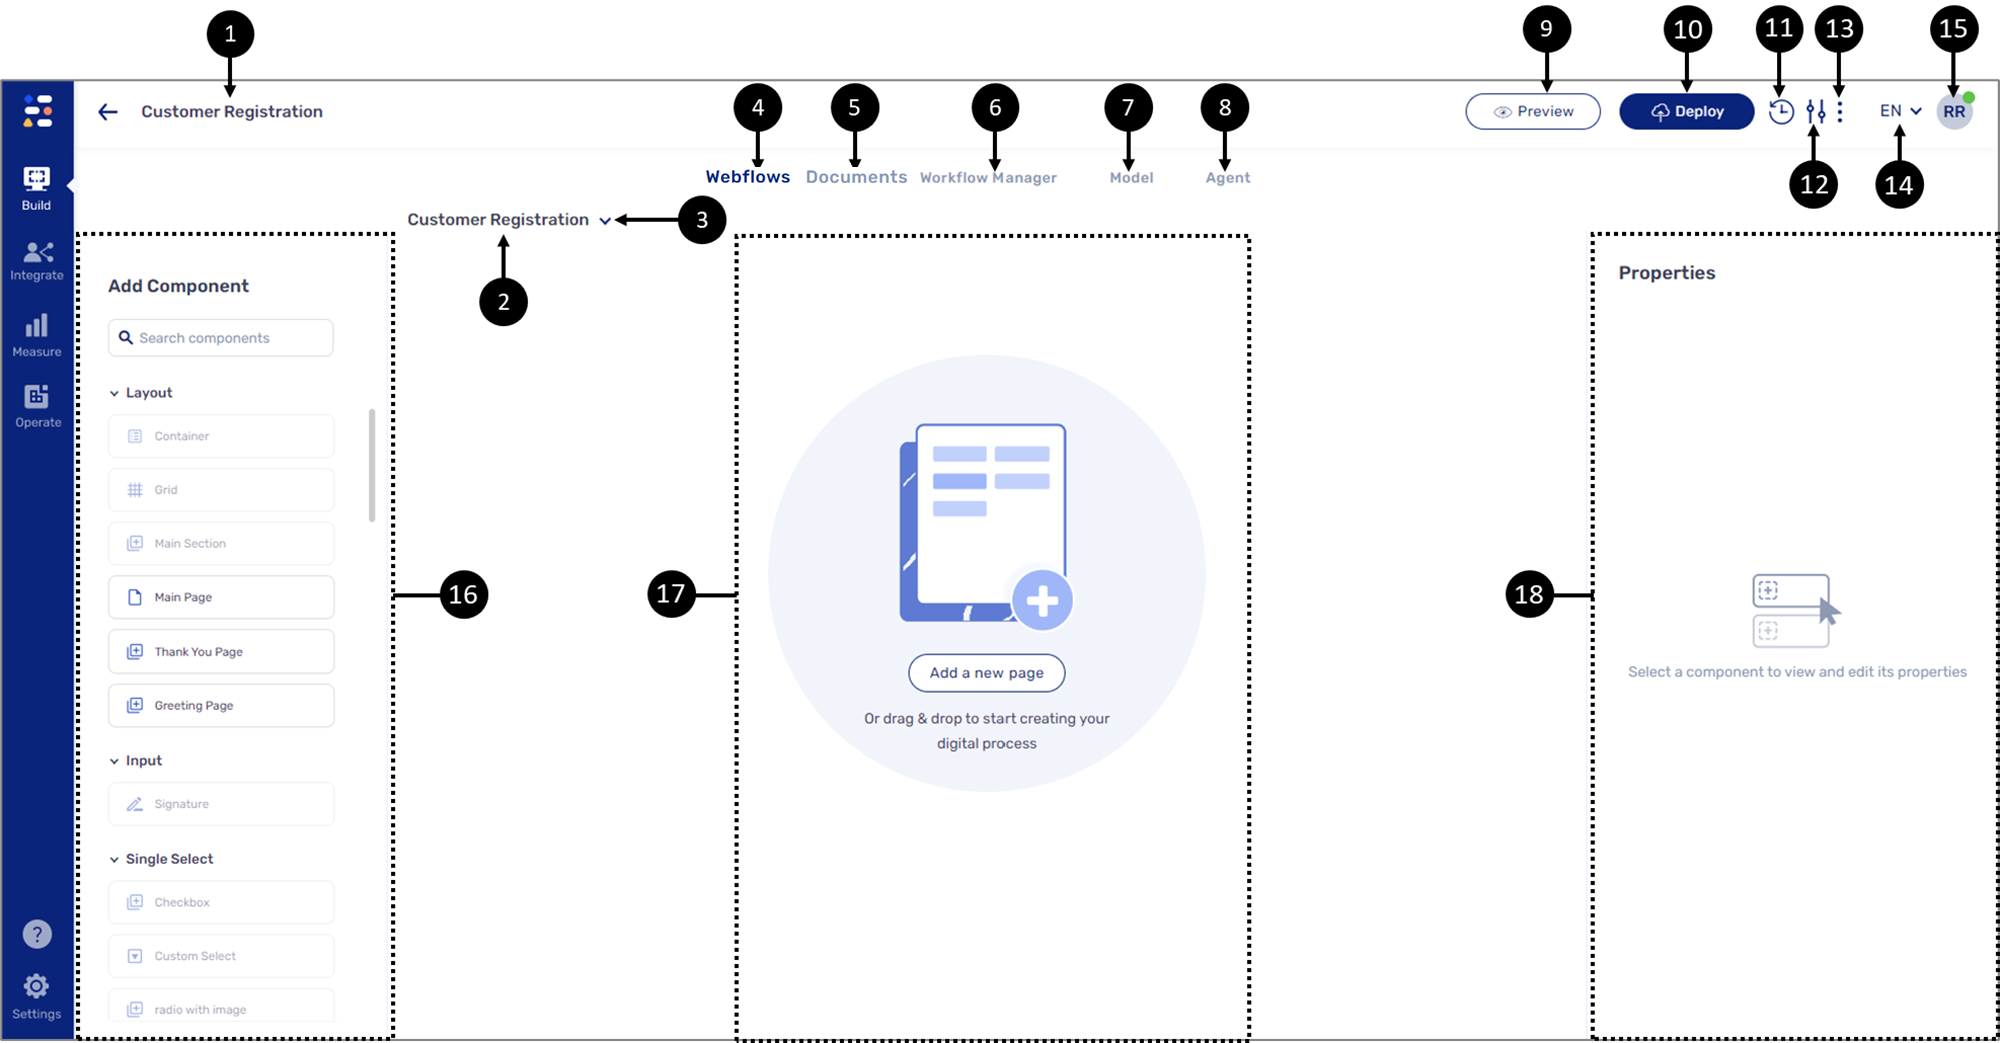
Figure 6: Webflow Main Screen
Table 1: Webflow Main Screen
Number | Icon | Name | Description |
|---|---|---|---|
| 1 | - | Process Name |
|
| 2 | - | Webflow Name | Displays the internal Webflow name |
| 3 |  | Additional Options | Enables to perform additional actions:
NOTE When more than one Webflow exists, a number indicating the number of Webflows appears next to the dropdown |
| 4 | - | Webflows | Displays the Webflow main screen NOTE For additional information, see the Creating a Web Flow article |
| 5 | - | Documents | Displays the Documents main screen NOTE For additional information, see the PDF Overview and the Creating and Defining a PDF articles |
| 6 | - | Workflow Manager | Displays the Workflow Manager main screen NOTE For additional information, see the Workflow Manager Overview and Configuring a Workflow articles |
| 7 | - | Model | Displays the Model main screen NOTE |
| 8 | - | Agent | Displays the Agent main screen NOTE For additional information, see the Journey Sender article |
| 9 | - | Preview | Enables to view a Webflow after it was deployed to an environment NOTE
|
| 10 | - | Deploy | Enables to publish changes made to a Webflow, to a selected environment:
NOTE
|
| 11 |  | Versions | Displays the process versions screen NOTE To learn more about the process versions screen, click here |
| 12 |  | Process Settings | Displays the Process settings screen |
| 13 |  | More Options |
NOTE
|
| 14 |  | User Icon |
NOTE If Solo Mode is activated only one user can edit a Webflow, for additional information, please contact our support team
|
| 15 |
| Language |
NOTE This icon will appear only if more than one language is available for selection |
| 16 | - | Add Component | Displays available components to add to the canvas NOTE
|
| 17 | - | Canvas | Contains added components NOTE
|
| 18 | - | Properties | Displays the properties of a selected component NOTE For additional information, see the Components Properties articles |

Process Settings Screen
The following sections describe how to navigate to the Process Settings screen and its structure.
Navigating to the Process Settings Screen
(See Figure 7)
To access the Process Settings screen, locate the Process Settings icon (1) and click it.
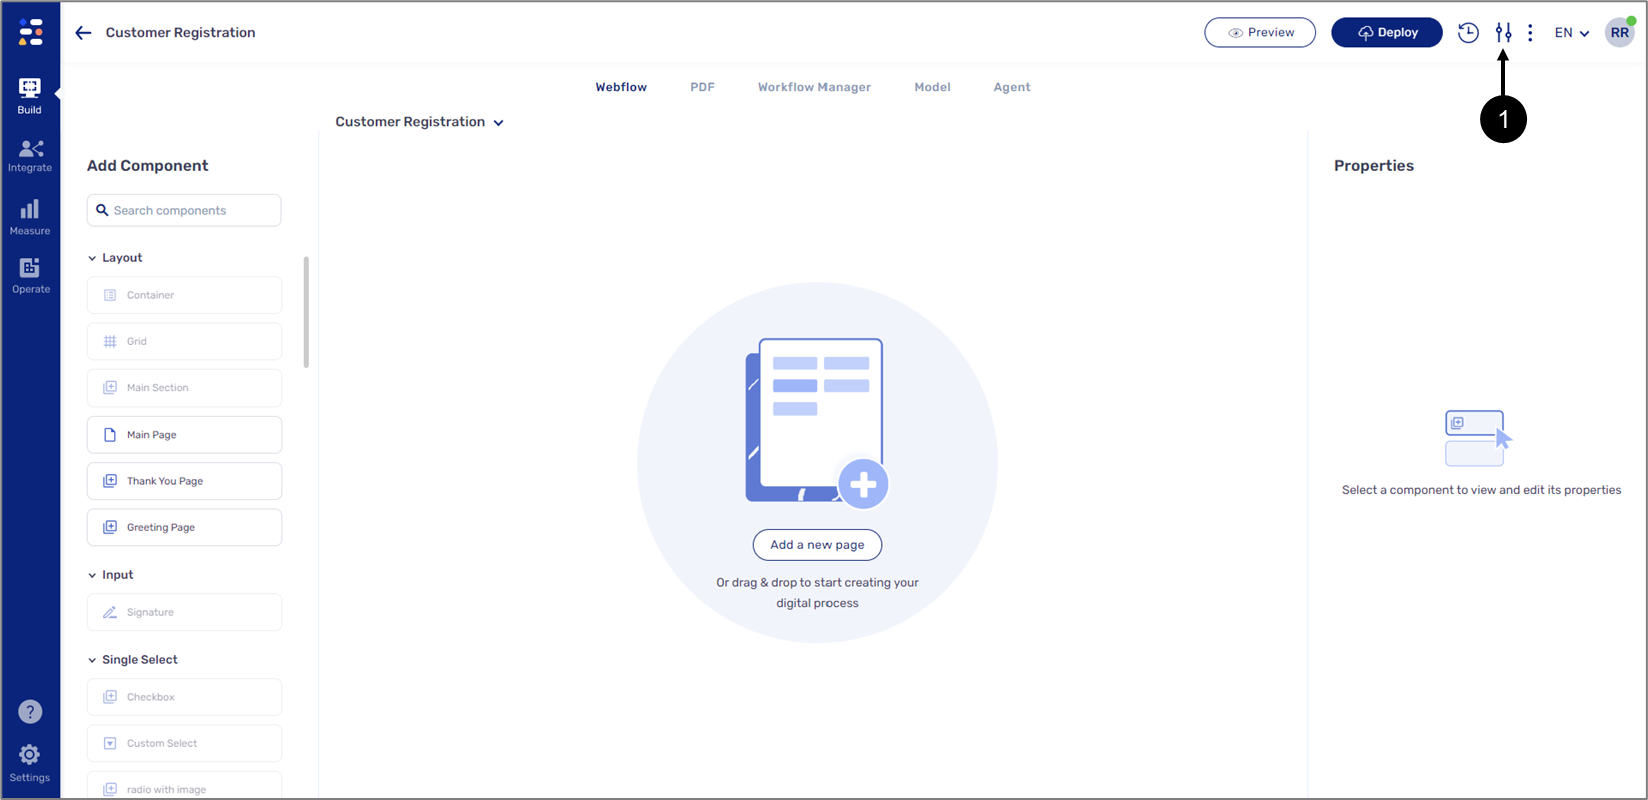
Figure 7: Accessing the Process Settings Screen
Process Settings Screen Structure
Figure 8 and Table 2 describe the structure of the Process Settings screen.
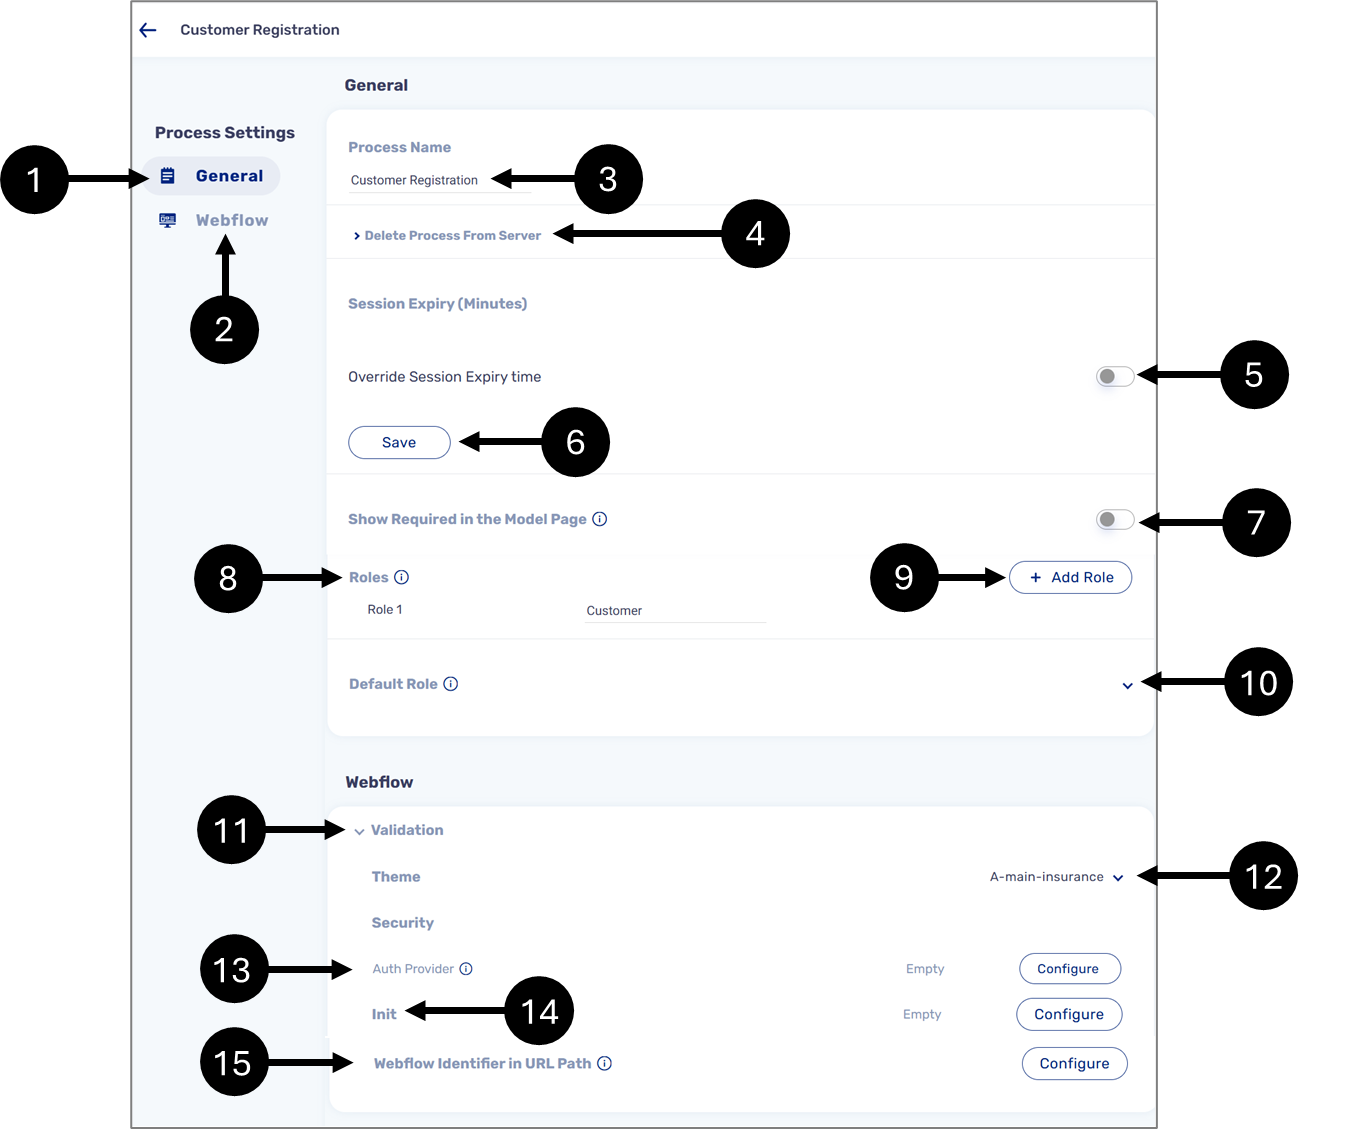
Figure 8: Process Settings Screen
Table 2: Process Settings Screen
Number | Icon | Section | Name | Description |
1 |
| - | General | Navigates to the General Section NOTE The changes done to settings in this section affect all the Webflows created for the process |
2 |
| - | Webflow | Navigates to the Webflow Section NOTE The changes done to settings in this section affect only the selected Webflow and not all of them at once |
3 | - | General | Process Name |
|
| 4 | - | Delete Process From Server | Enables to delete the process from available environment servers NOTE
| |
| 5 | - | Session Expiry Toggle |
NOTE Once a session is inactive according to the set expiry time an alert message will appear automatically | |
| 6 | - | Save | Enables to save the changes made to the session expiry time | |
| 7 | - | Show Required in the Model Page |
| |
| 8 | - | Roles | Displays a list of personas that can be used when:
| |
| 9 | - | Add Role | Enables to add new roles (for additional information, see the Configuring a Workflow article) | |
| 10 | - | Default Role | Defines a default role for a step in the Workflow Manager if no other role was selected (for additional information, see the the Workflow Manager Overview article) | |
| 11 | - | Webflow | Display/Hides | Displays/Hides the selected Webflow options |
| 12 | Theme | Enables to attach a theme to the Webflow NOTE For additional information, see the Themes Overview article | ||
| 13 | - | Auth Provider | Used for SSO configuration NOTE For additional information, please contact our support team | |
| 14 | Init | Enables to inject JavaScript into a process NOTE For additional information, click here. | ||
| 15 | - | Webflow Identifier in URL Path | Enables to edit the unique identifier of the Webflow as presented in the path of the URL NOTE
|

