Validations
- PDF
Validations
- PDF
Article summary
Did you find this summary helpful?
Thank you for your feedback!
Article Overview
The following article describes how to add validations with examples.
What Are Validations?
(See Figure 1)
Validations are used to ensure the integrity of the information entered by end-users while interacting with a digital process.
Adding Validations
(See Figure 1)
Validations are applied to Webflow components. When clicking a component, the Behavior tab appears on the right section.
The Behavior tab includes a checkbox to apply a required validation (1) and an option to add other EasySend built-in validations (2).
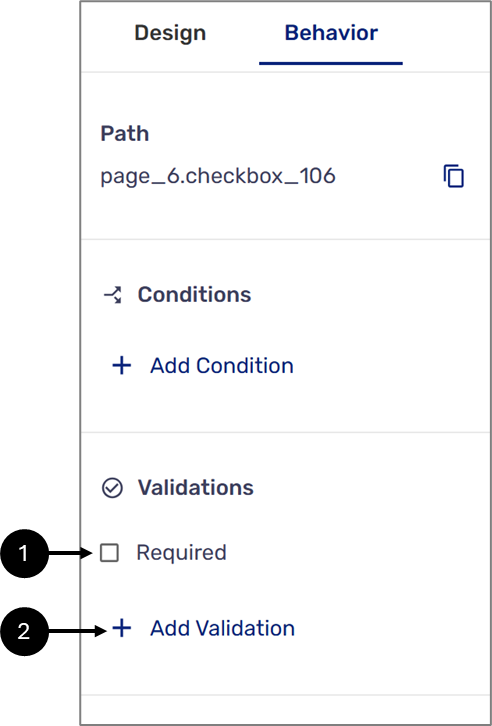
Figure 1: Behavior Tab
NOTE
- You cannot apply validations to the following components:
- Page
- Container
- Array
- Grid
- Buttons
- Static Text
- Date Input
- To view a list of built-in EasySend validations, click here.
The Required Validation
(See Figure 2 and Figure 3)
A required validation makes sure that a field is not left blank. It forces the end-user to provide a value before navigating, ensuring that all necessary information is collected. To turn a field into a required field, click a component, display its Behavior tab (1), and check the Required checkbox (2).
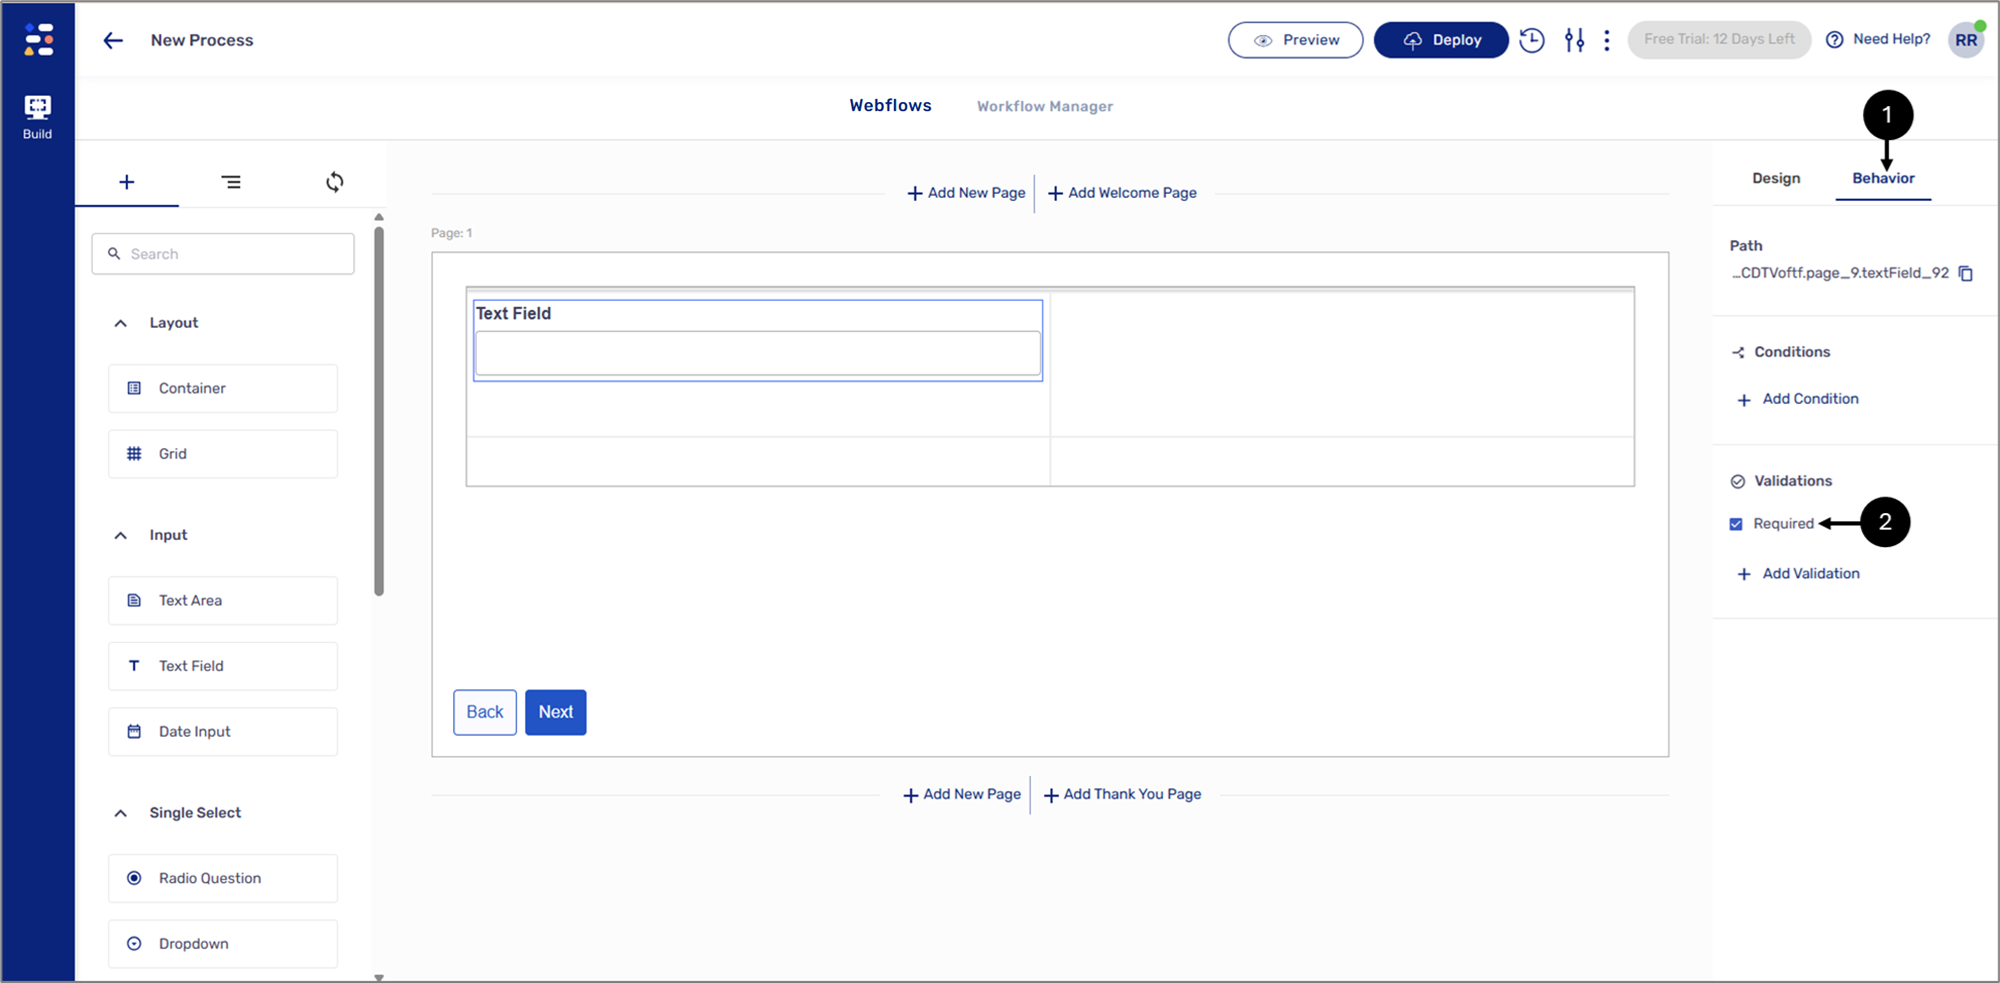
Figure 2: Required Checkbox
In a digital process, a required field appears with an asterisk (3). When trying to leave a page with an empty required field, an error message appears (4).
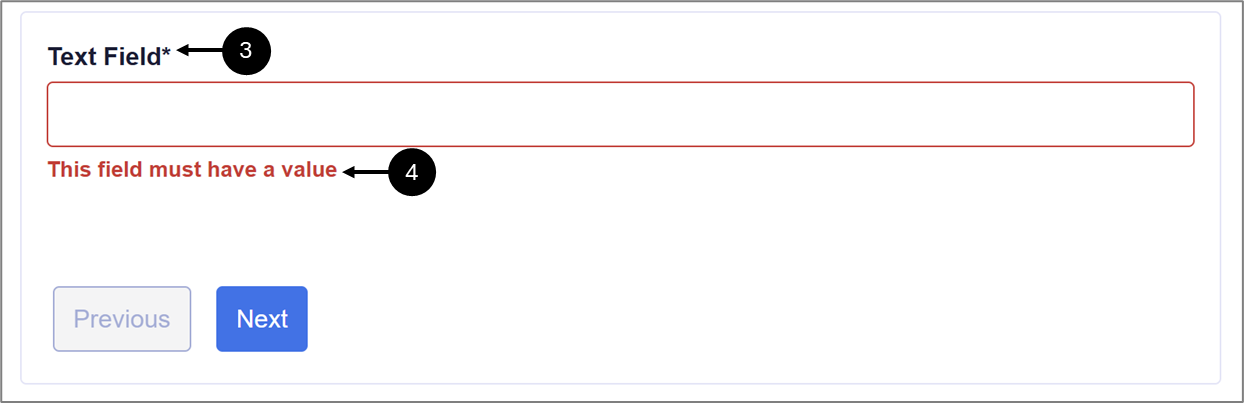
Figure 3: Required Validation
Adding Validations
(See Figure 4 to Figure 7)
To add a validation, click a component, display its Behavior tab (1), and click the + Add Validation option (2).
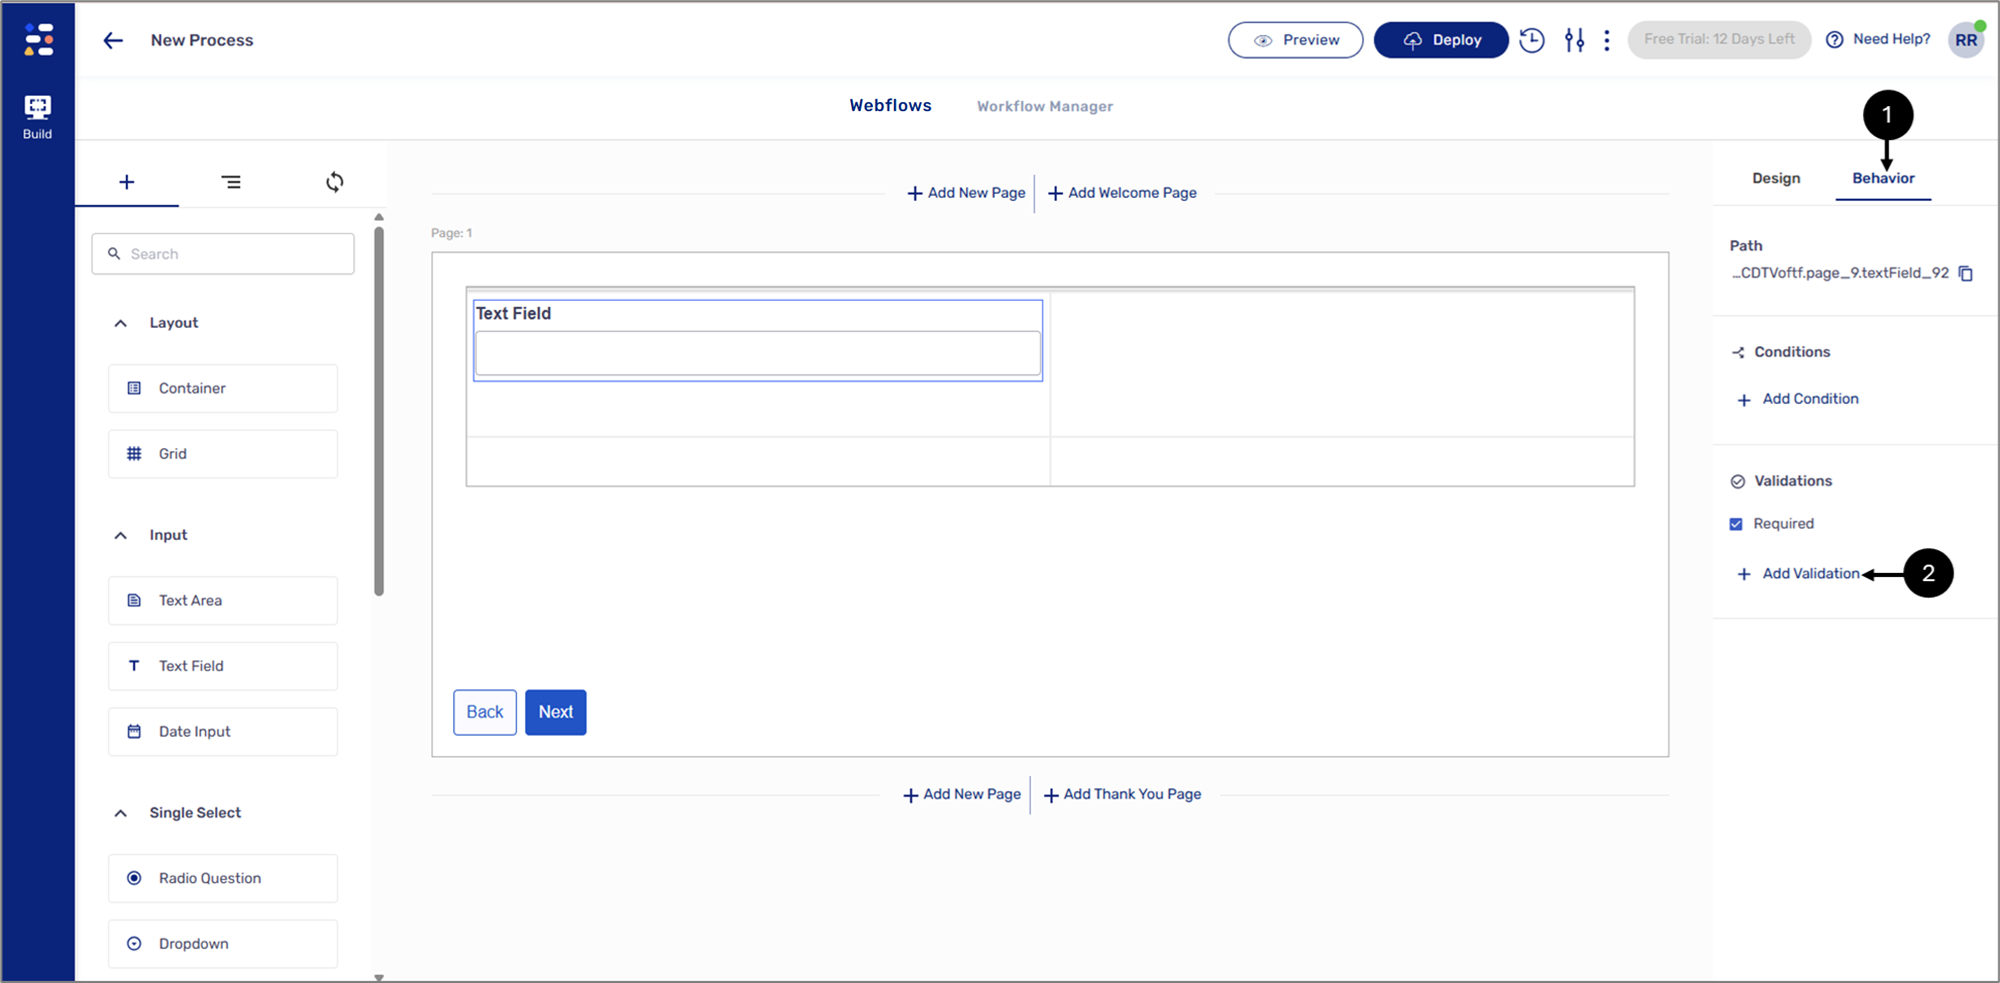
Figure 4: + Add Validation
When clicking the + Add Validation option, the Edit Validation window appears. The Edit validation window contains a dropdown (3) with a list of available built-in EasySend validations.

Figure 5: Validations Dropdown
Some selected validations require you to input parameters, for example, adding the Cellphone validation requires you to select a country code (4).
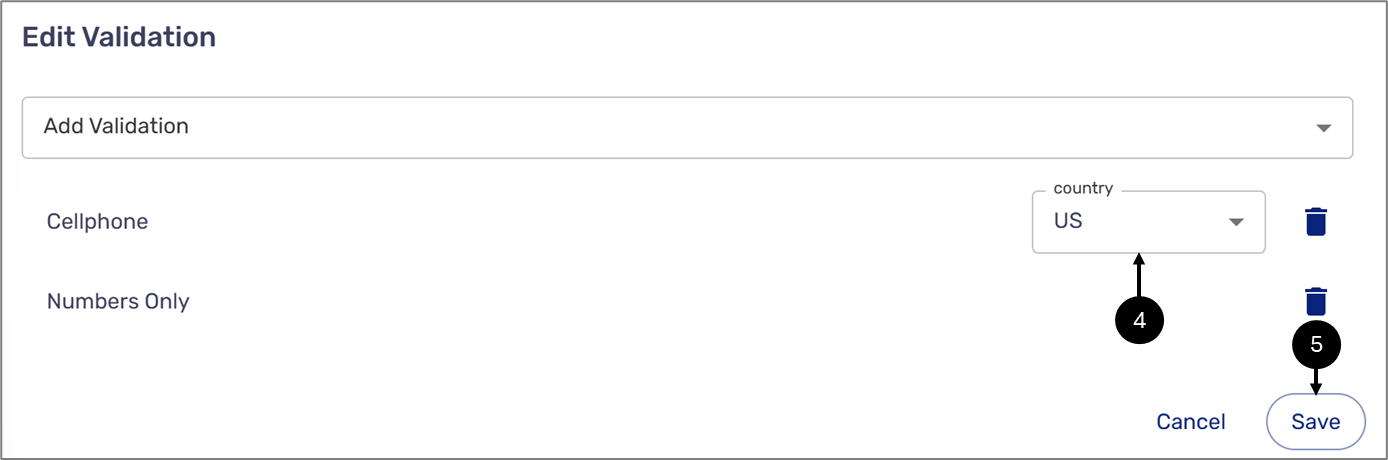
Figure 6: Validation Parameter
After clicking the Save button (5) the list of added validations (6) appears in the Behavior tab.
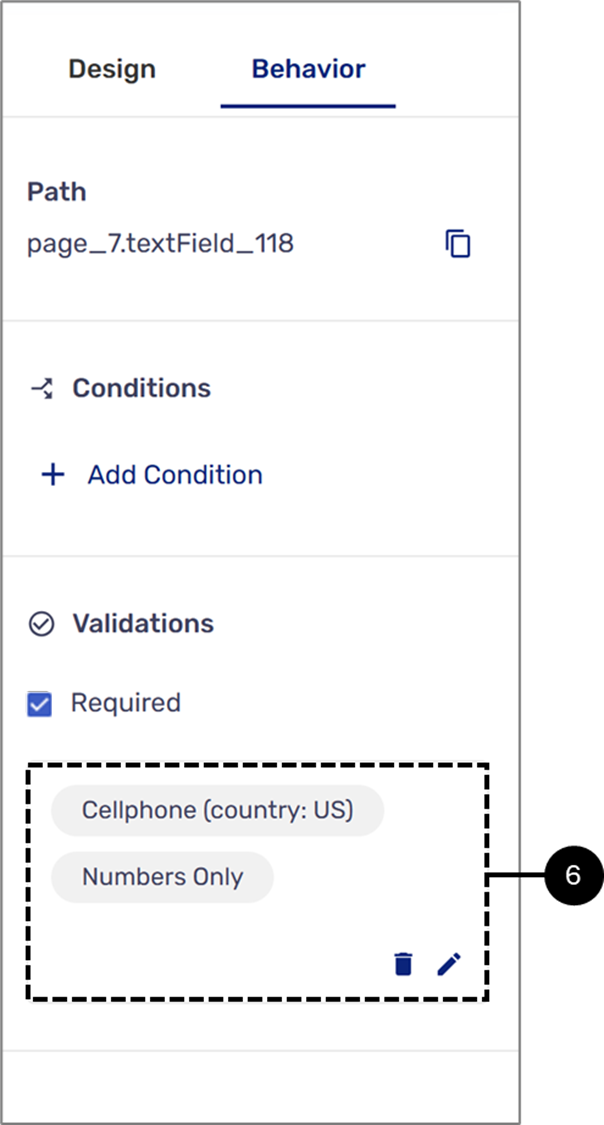
Figure 7: Added Validations
NOTE
When applying multiple validations to a single field, the sequence in which the validations are triggered is determined by the order in which they were added.
Was this article helpful?