Article Overview
The following article describes how to work with conditions in a dynamic document.
Adding Conditions
(See Figure 1 to Figure 5)
When a Webflow is implemented with conditioning, the conditioning output must also be reflected in the dynamic document. For example, a Webflow contains a Radio Question component with a yes or no question (1). The visibility of the Array (2) below the Radio Question depends on the Radio Question's answer:
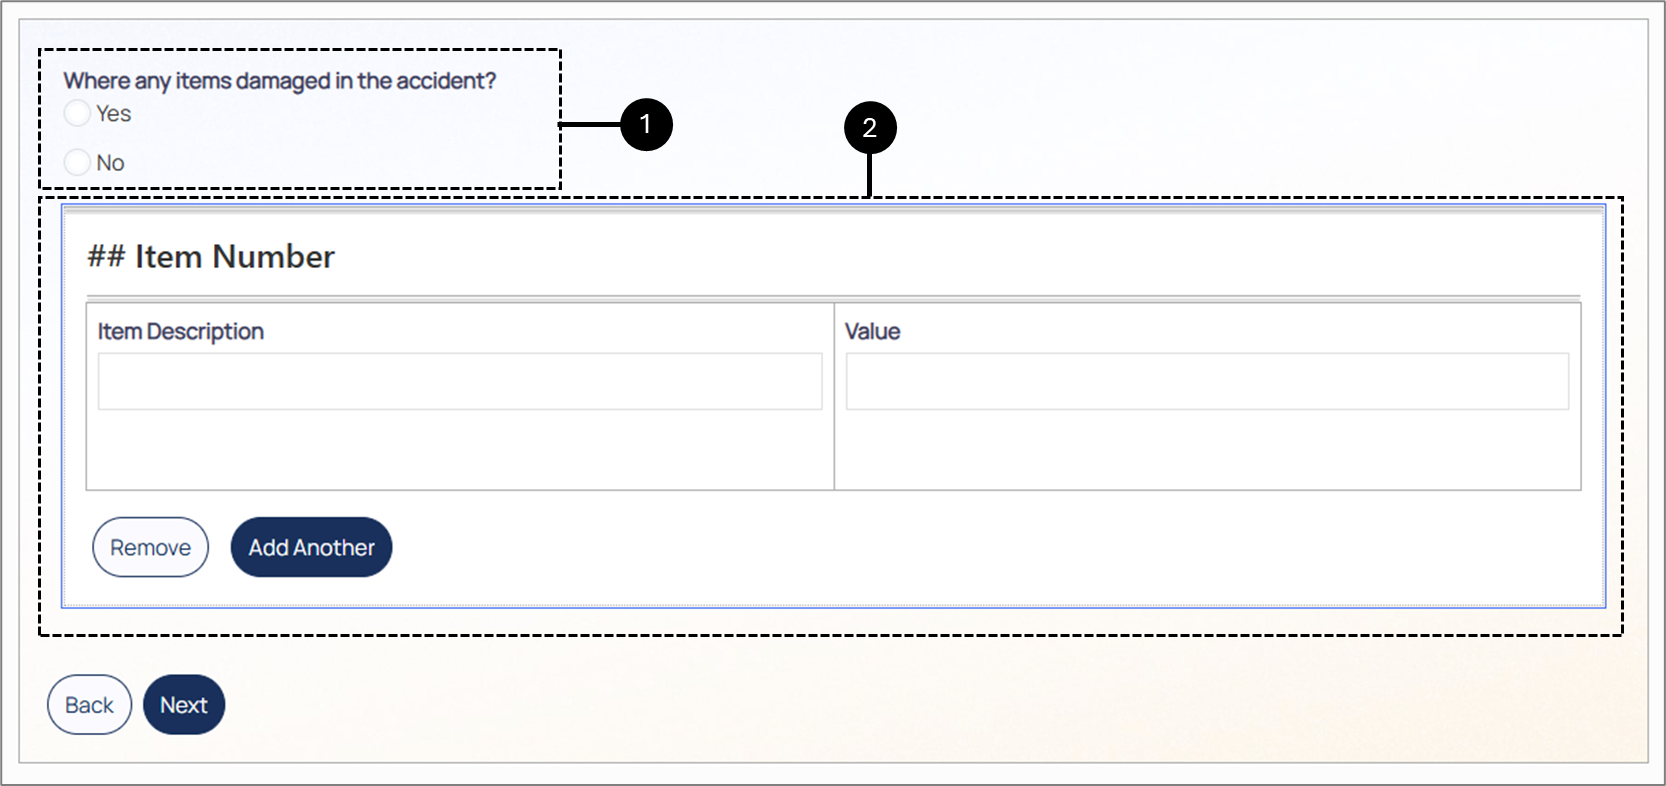
Figure 1: Webflow
To enforce the business logic, the array (3) must be implemented with a visibility condition (4):
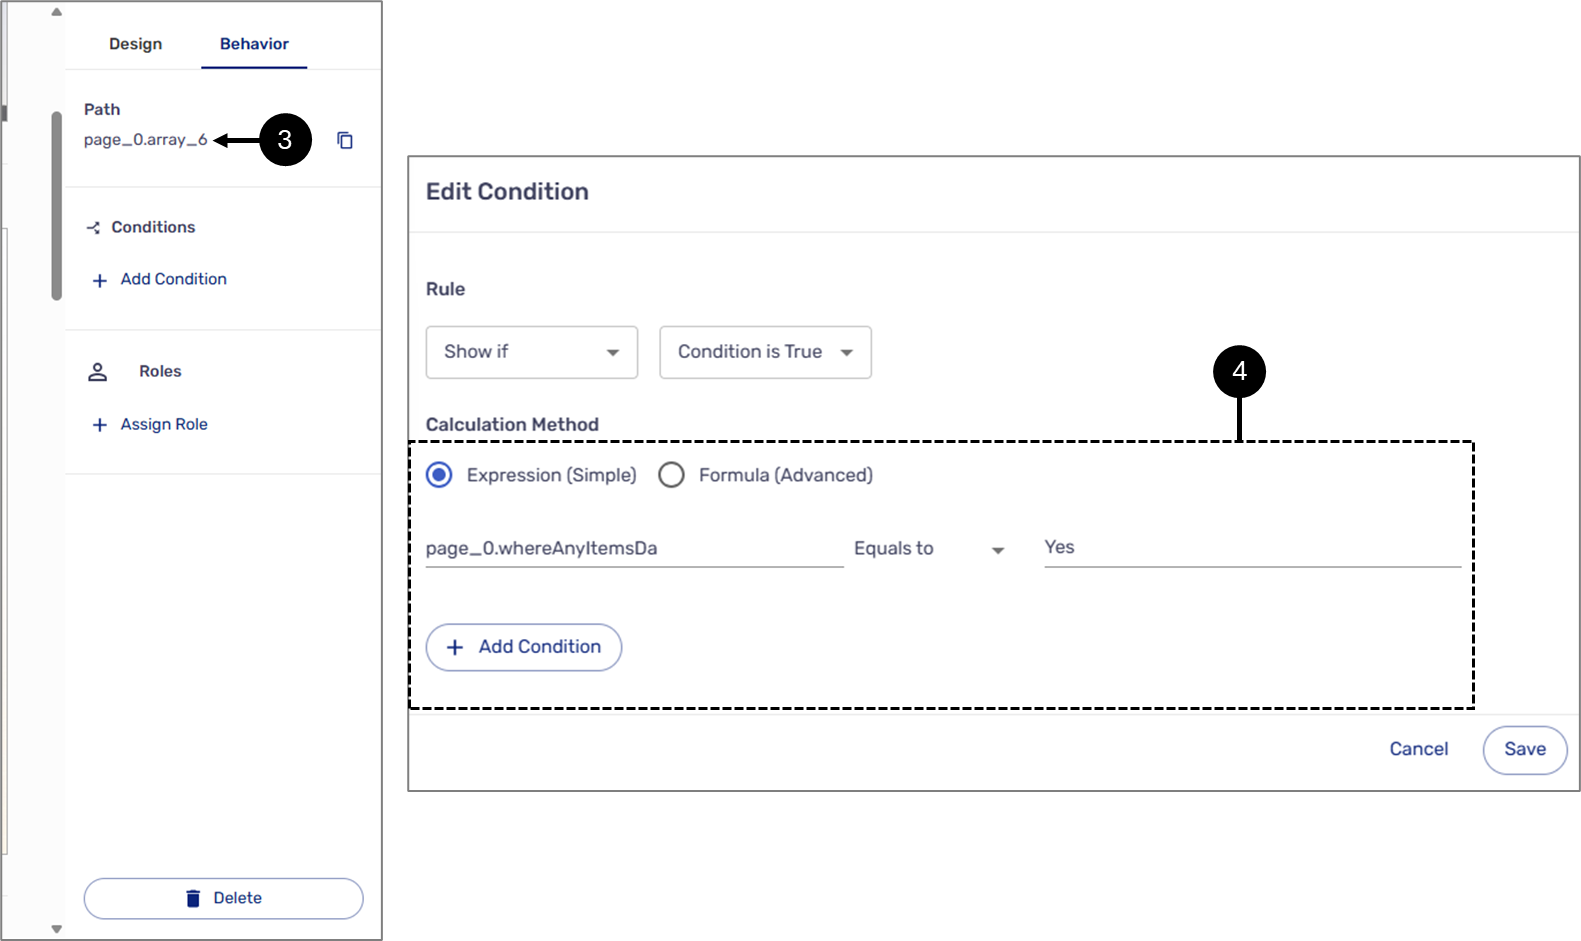
Figure 2: Condition
The same condition must also be reflected in the dynamic document:
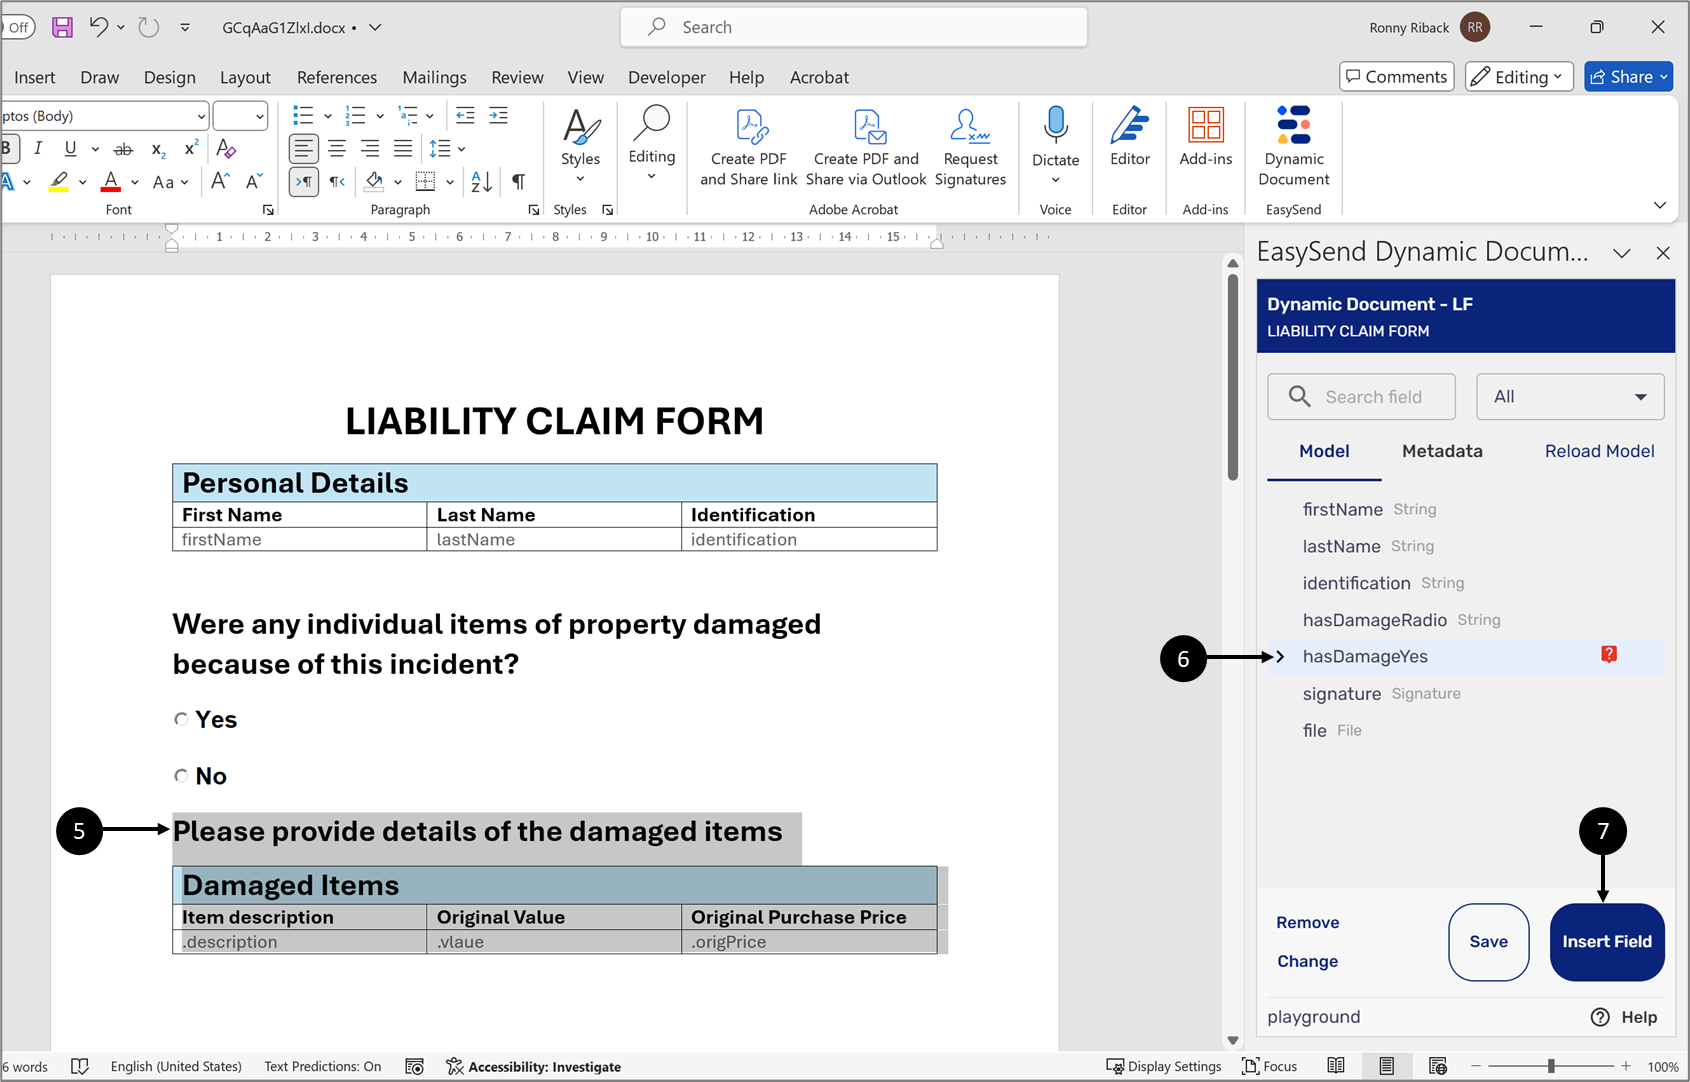
Figure 3: Insert Data Item
- On the dynamic document, select all the elements you want to apply the conditions to (5).
- Click the item implemented with the condition (6) (identified by the question mark icon).
- Click the Insert Field button (7).
Result:
The elements are nested inside the item with the condition (8):
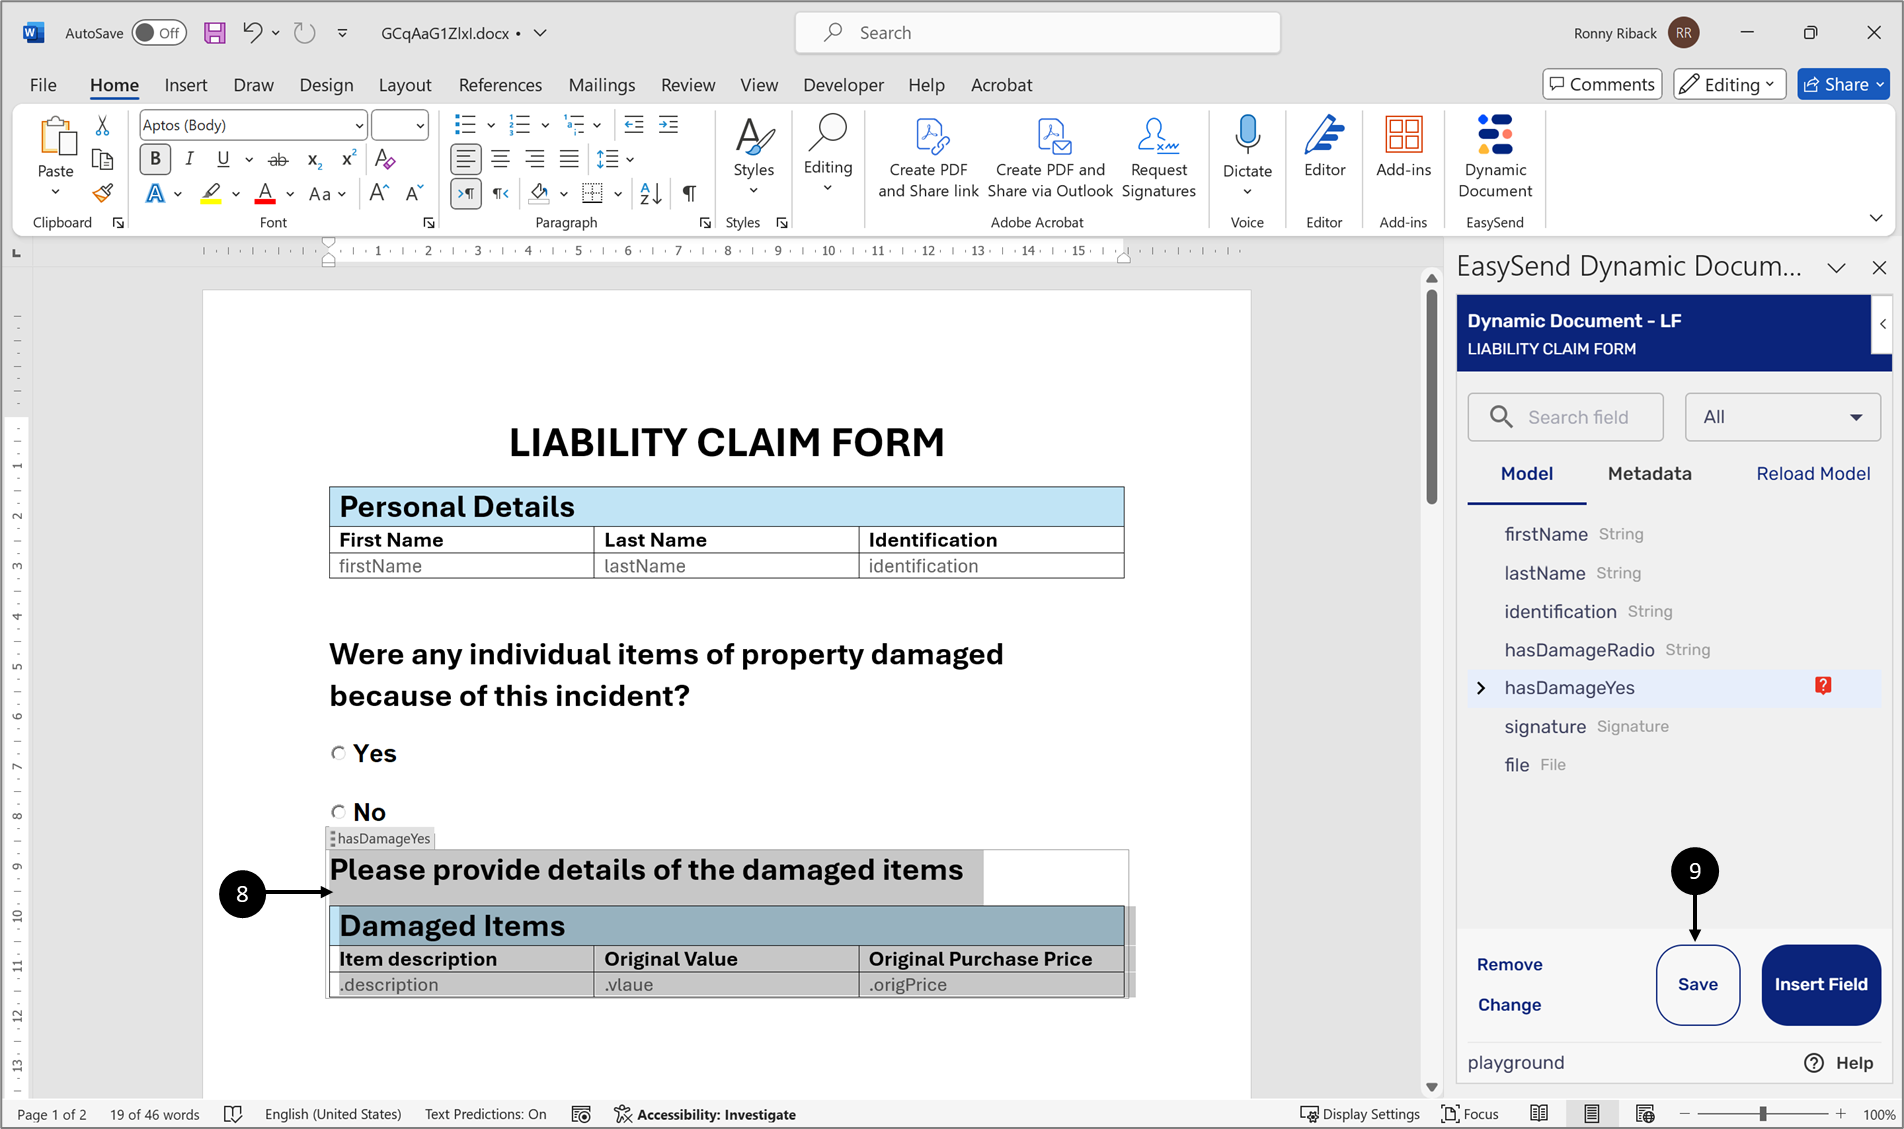
Figure 4: Nested Objects
- Click the Save button (9).
In the journey, if the answer to the Radio Question is yes, then the information will be displayed on the preview page:
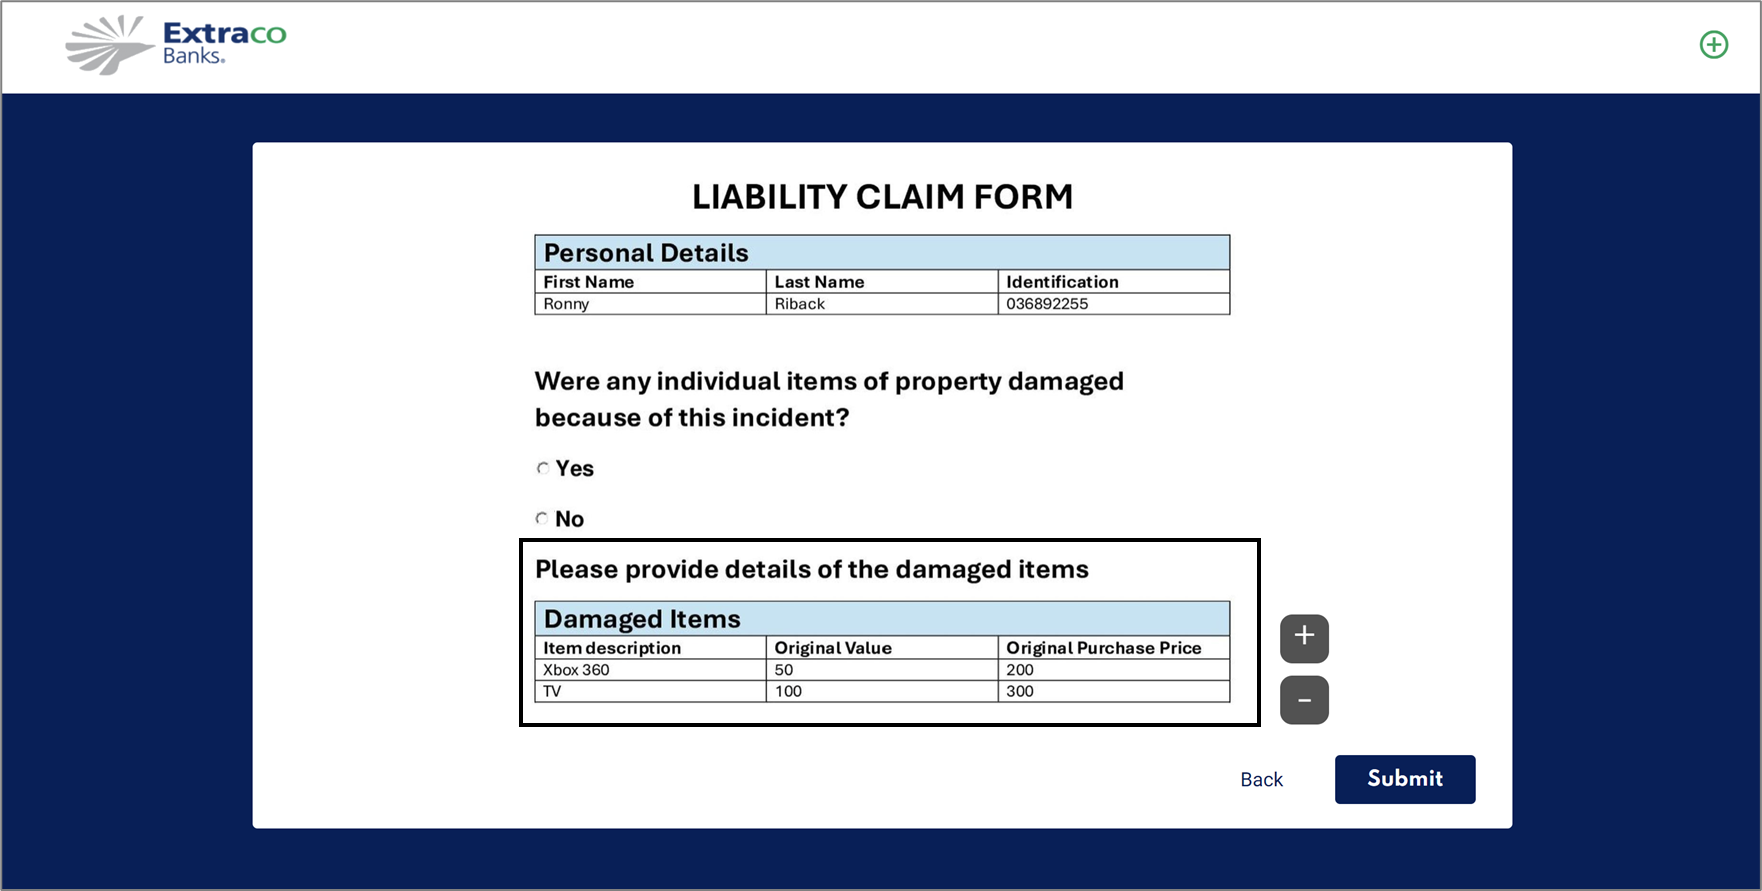
Figure 5: Displayed Information
Conditions and the Page Break Marker
(See Figure 6 to Figure 13)
Using conditions in a dynamic document may cause certain content to disappear, requiring the document to automatically restructure itself. To maintain the integrity of the document’s layout, specifically where sections start and end, it may sometimes be necessary to include Word’s Page Break Marker within the condition. For example, in an Employee Onboarding process, conditions can be used to display fields for entering spouse and children information only when relevant to the end user.
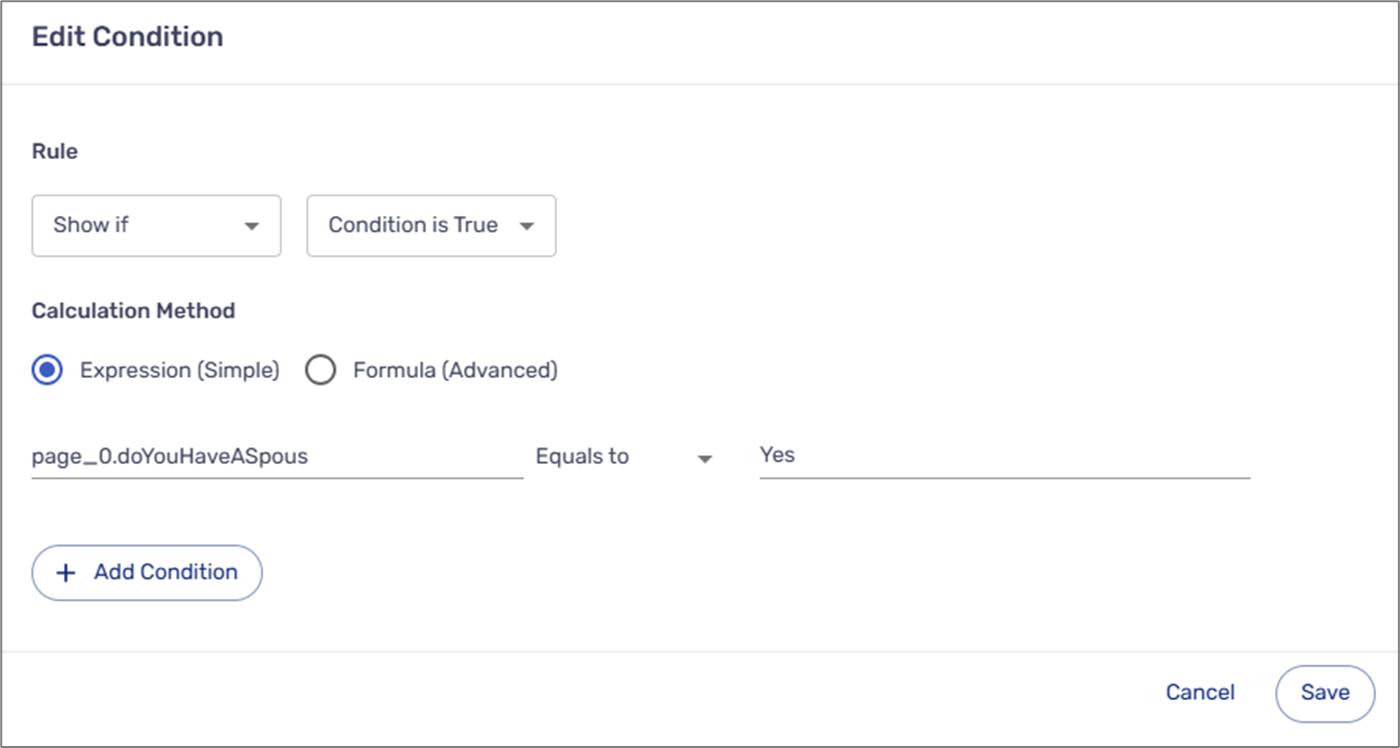
Figure 6: Condition Example
The same logic must be reflected in the dynamic document. If the end user does not have a spouse or children, the dynamic document will automatically restructure itself- ensuring that the Family Information section (1) does not appear, and that the Address Information section (2) appears immediately after the Personal Information section (3).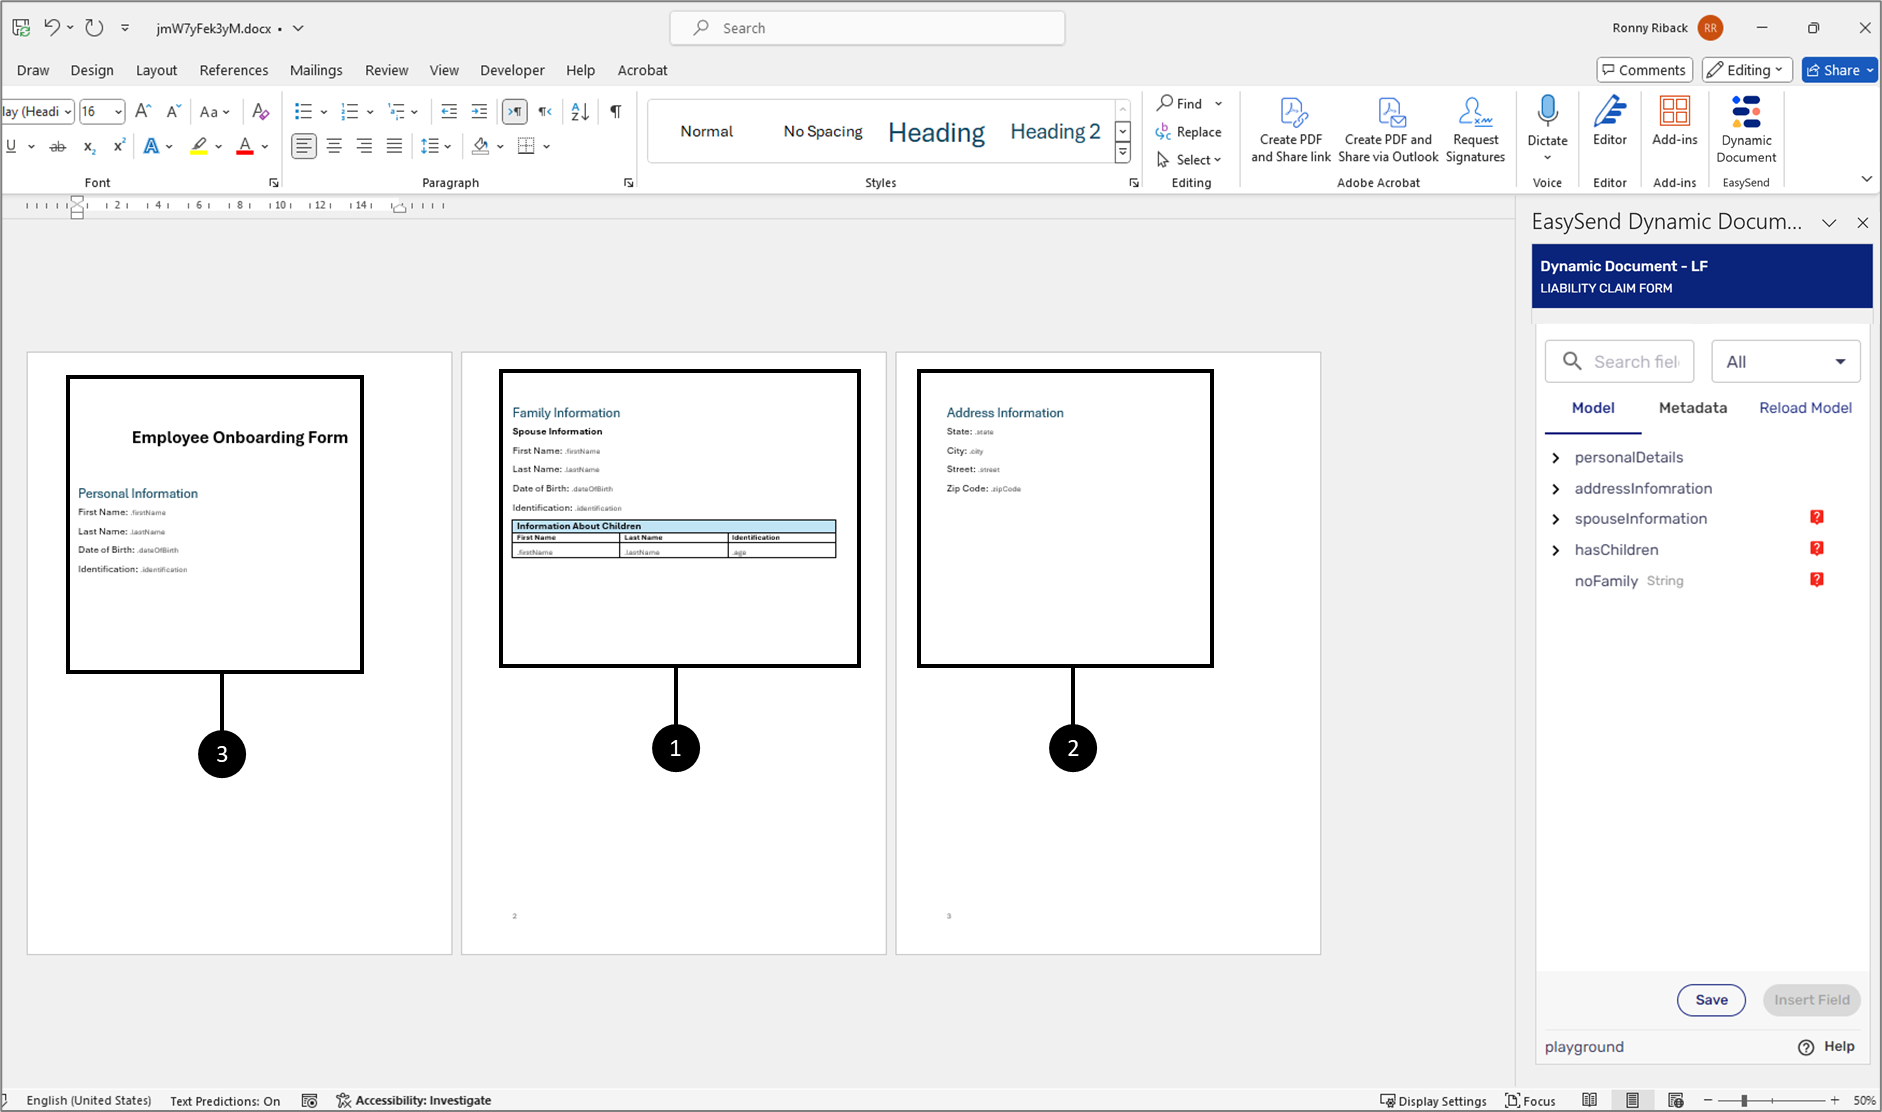
Figure 7: Dynamic Document Sections
This will require the Page Break marker to be included in the condition:
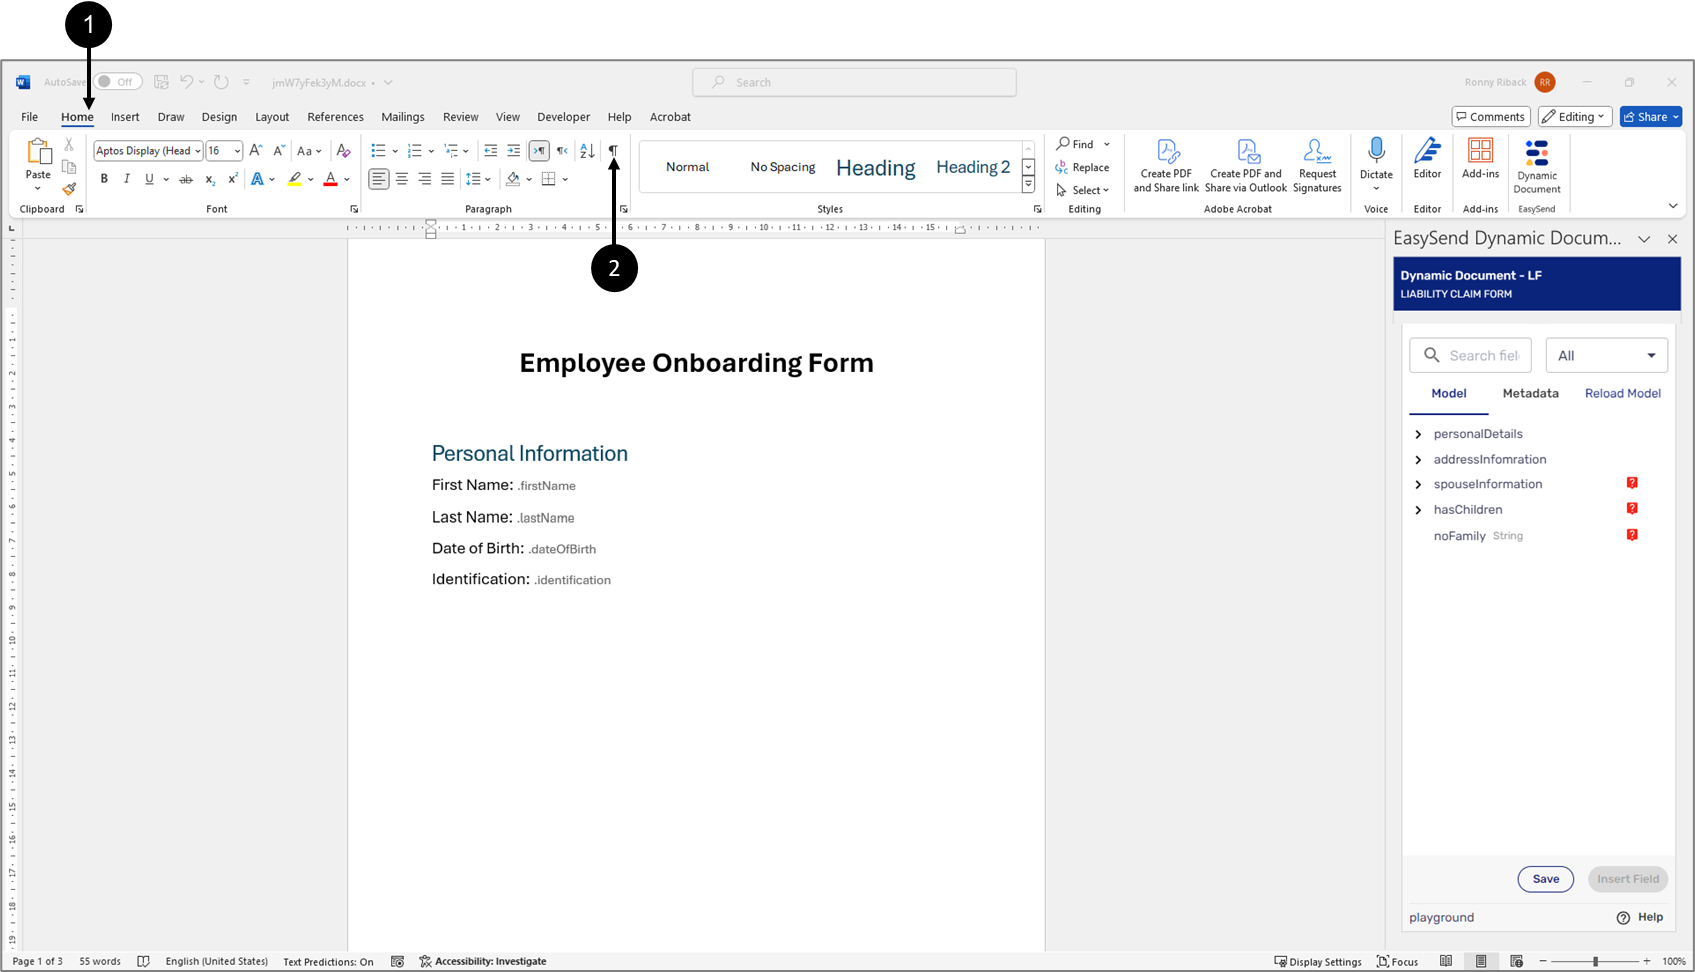
Figure 8: Home Tab + Show/Hide Paragraph Marks Button
- Click the Home tab (1).
- Click the Show/Hide Paragraph Marks button (2).
Result:
Paragraph Markers appear all over the document, revealing Page Break Markers (3):
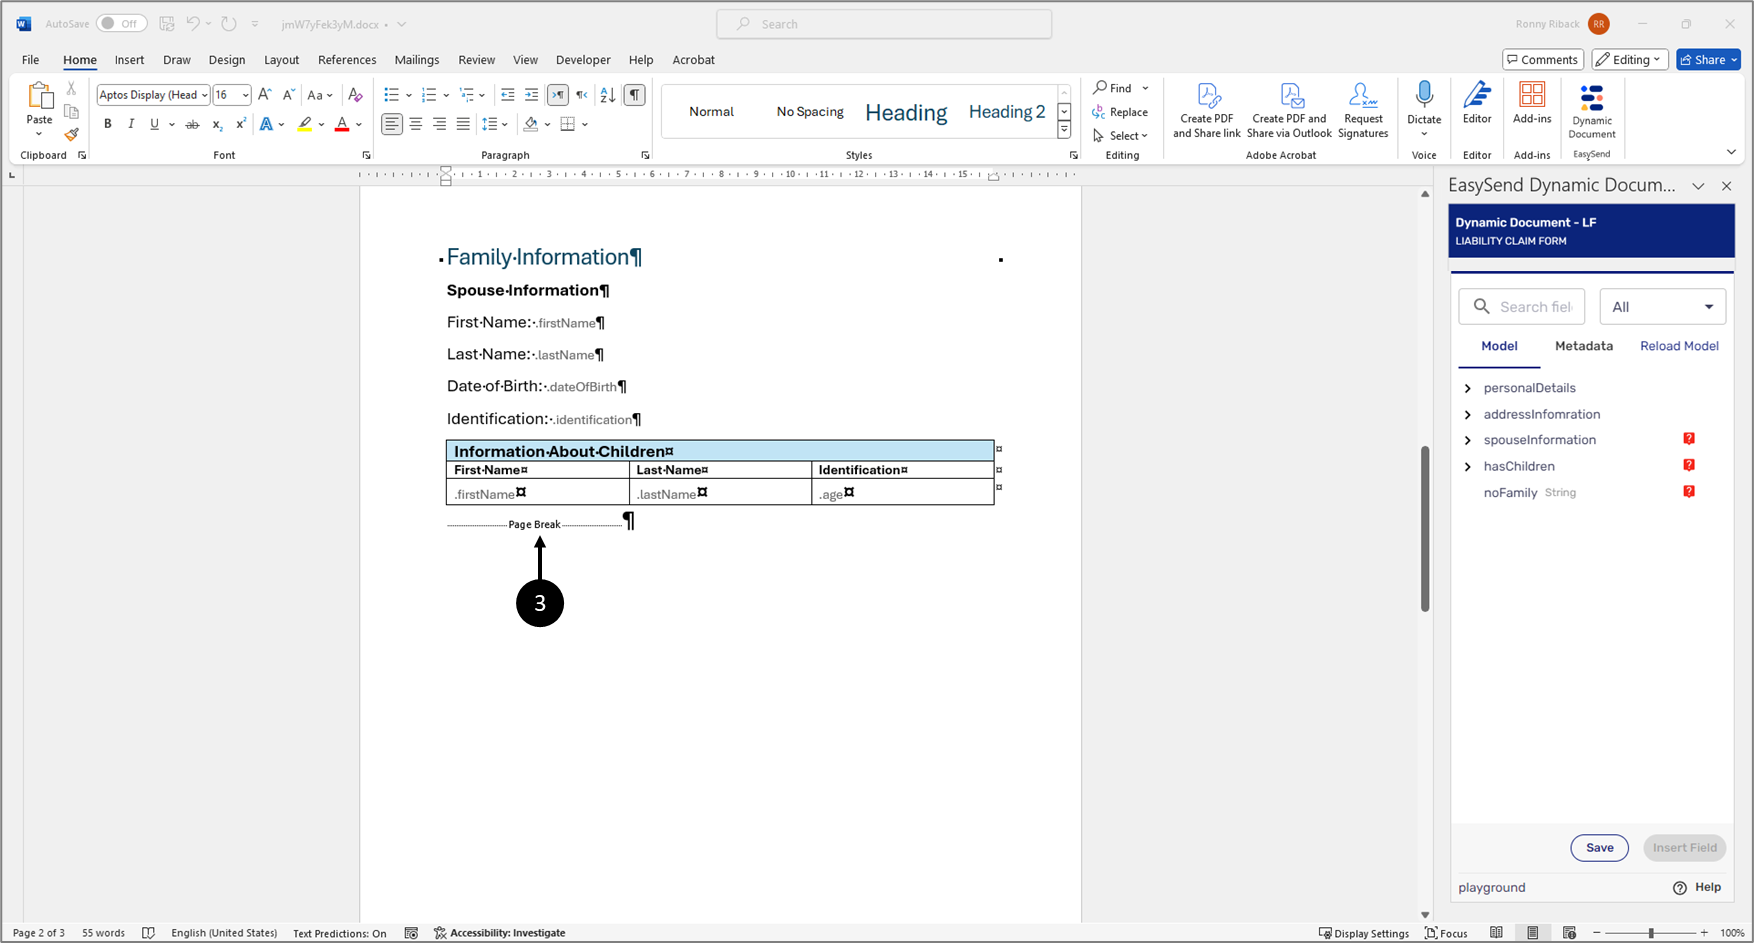
Figure 9: Page Break Marker
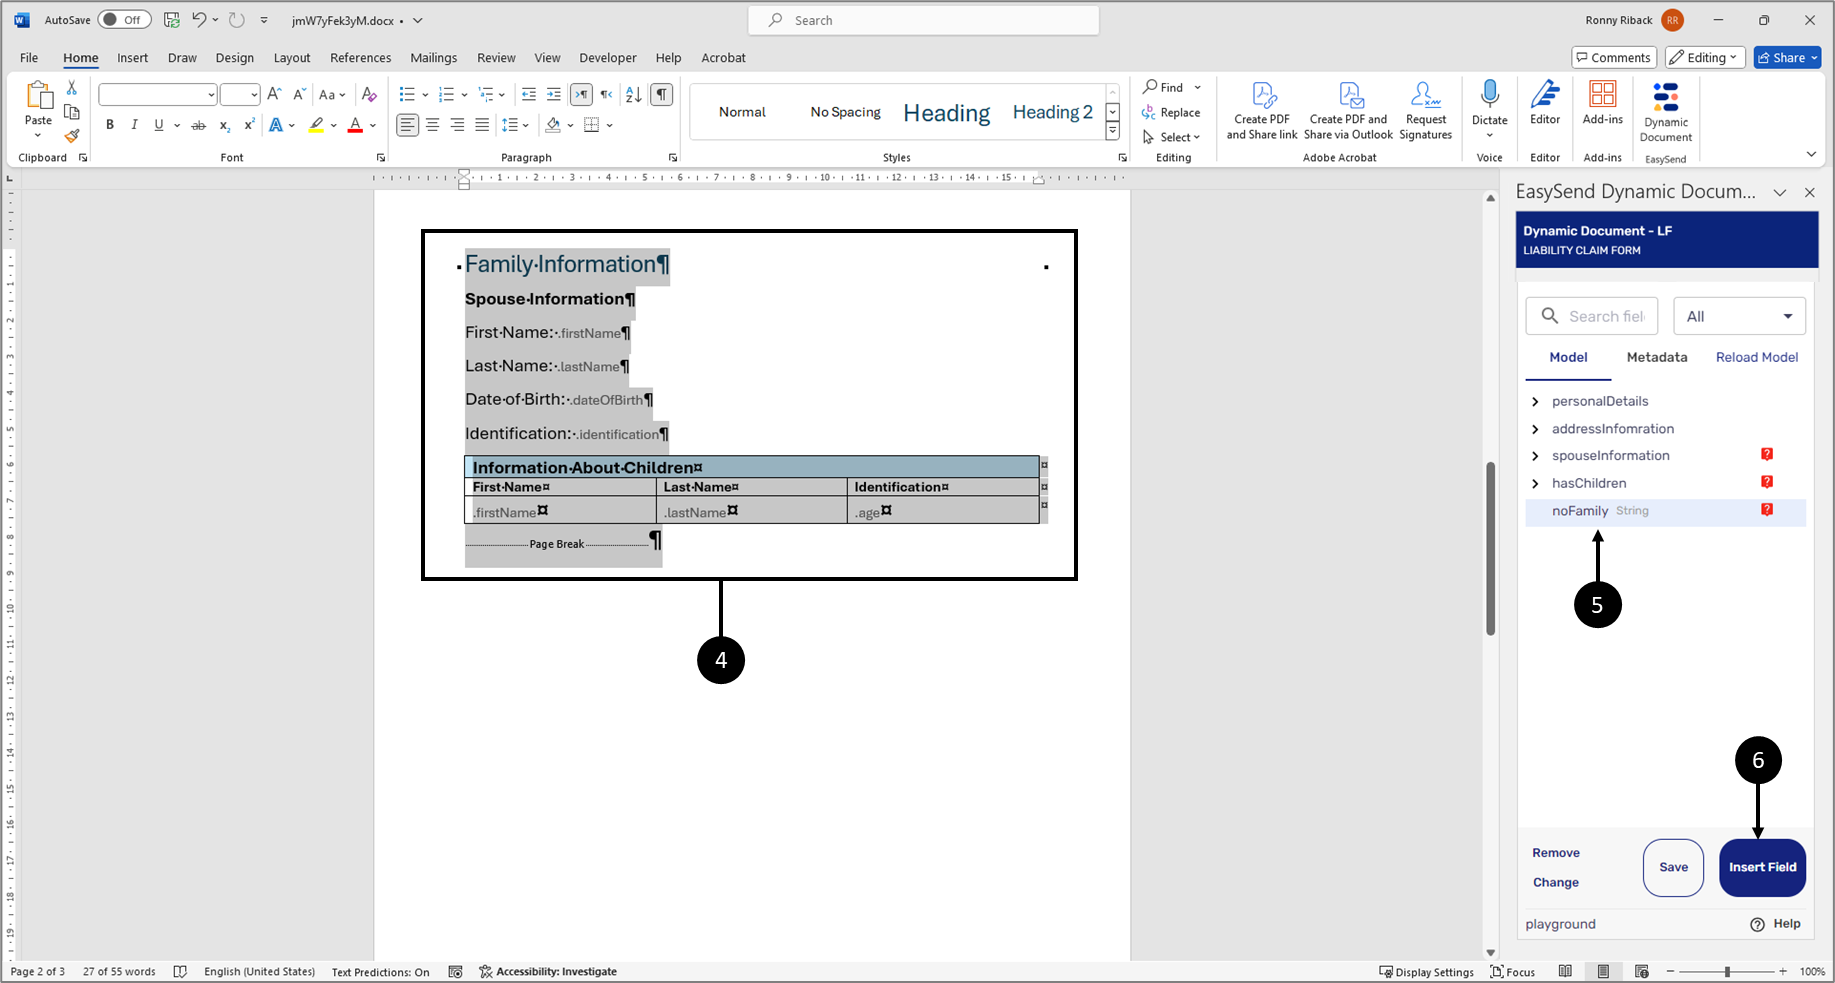
Figure 10: Adding Condition
- Mark the entire Family Information section, including the Page Break (4).
- Click the field with the relevant condition (5).
- Click the Insert Field button (6).
Result:
The Family Information section and the Page Break marker are nested inside the item with the condition (7):

Figure 11: Added Condition
- Click the Save button (8).
Figure 47 displays a preview of a dynamic document in which the Page Break marker was not included in the condition. Notice that the document did not restructure itself:
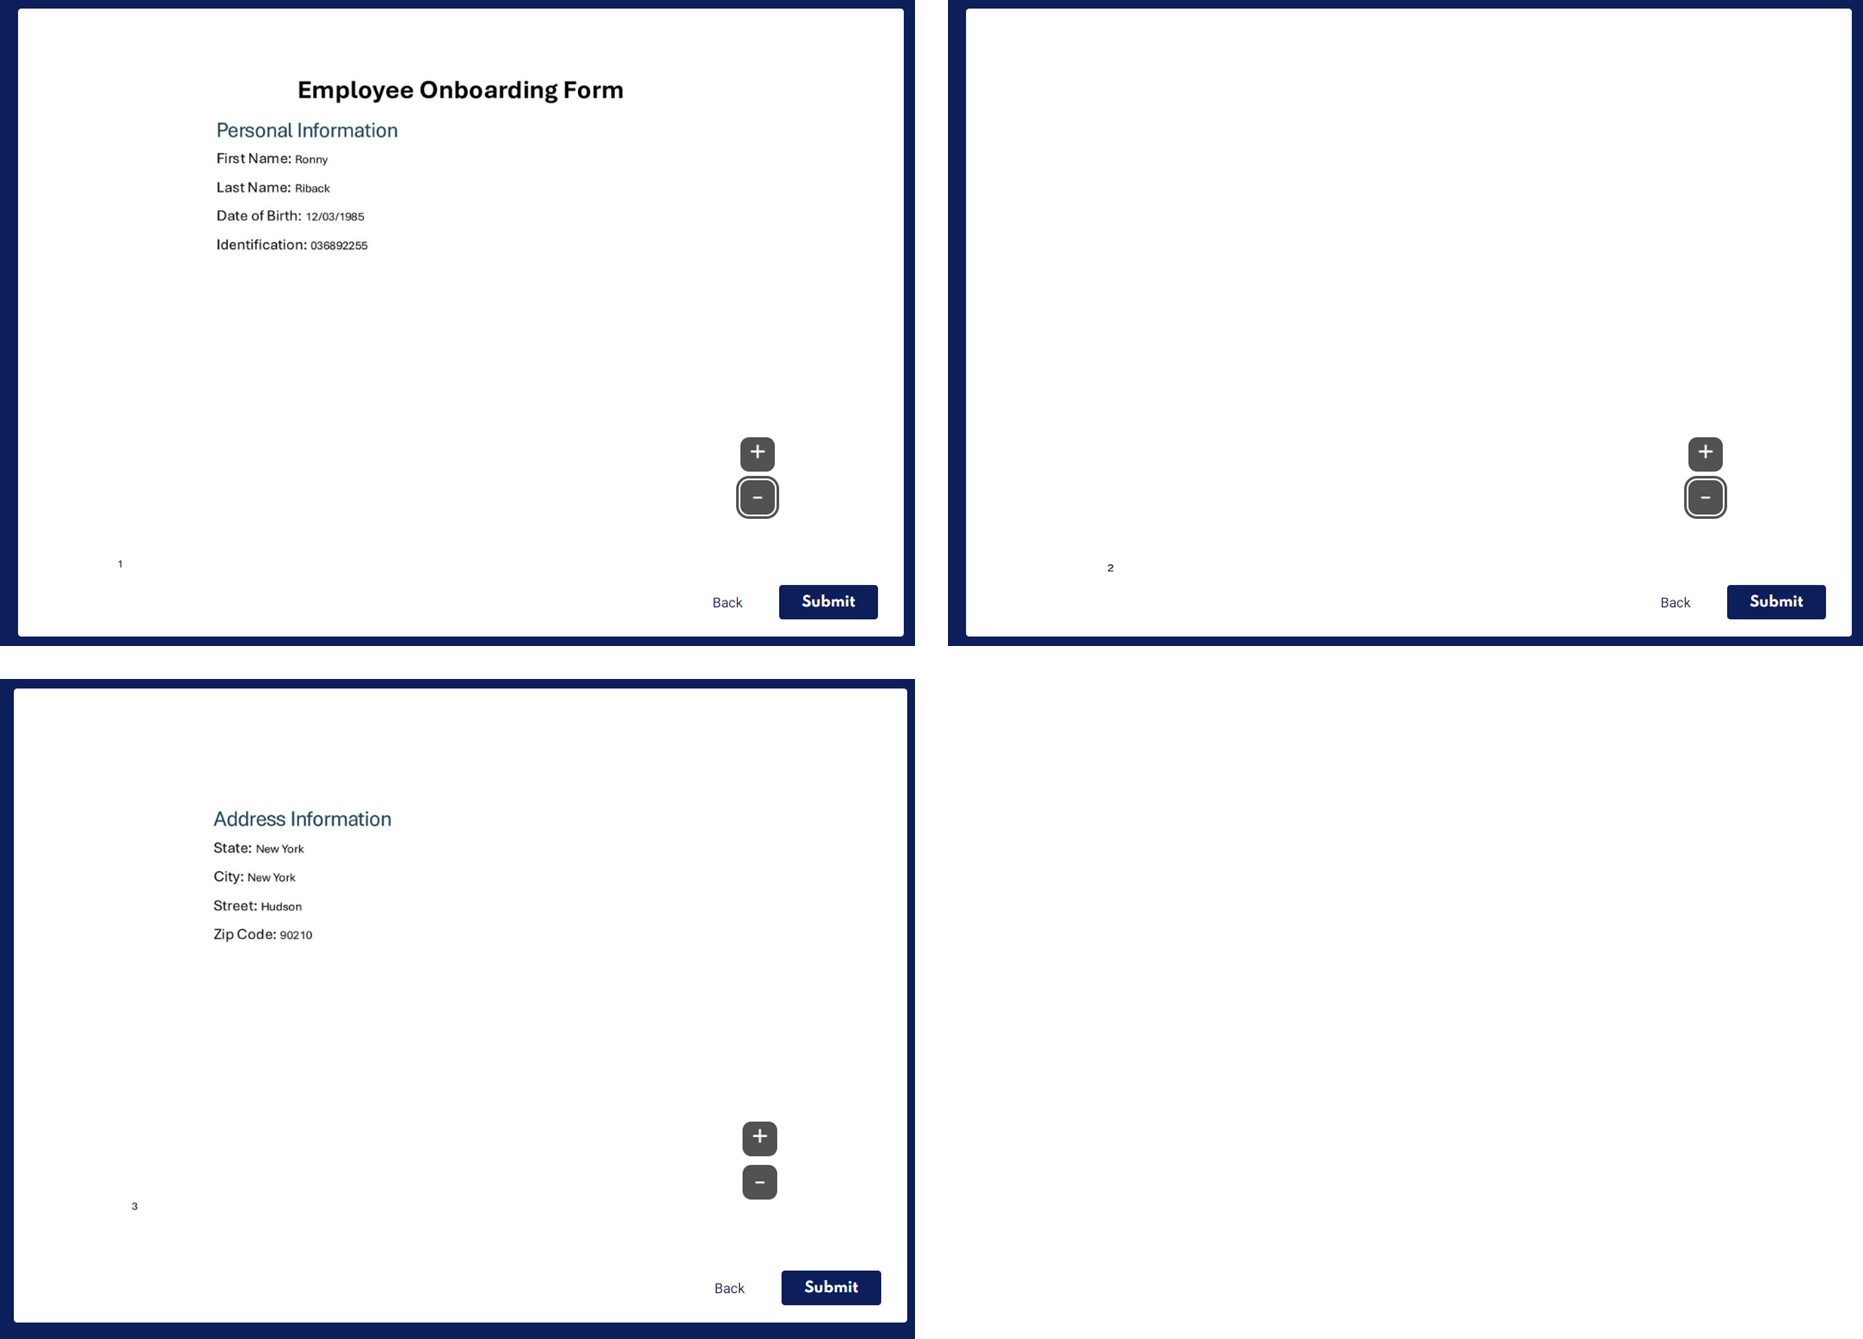
Figure 12: Page Break Marker Not Included
Figure 48 displays a preview of a dynamic document in which the Page Break marker was included in the condition. Notice that the document restructured itself:
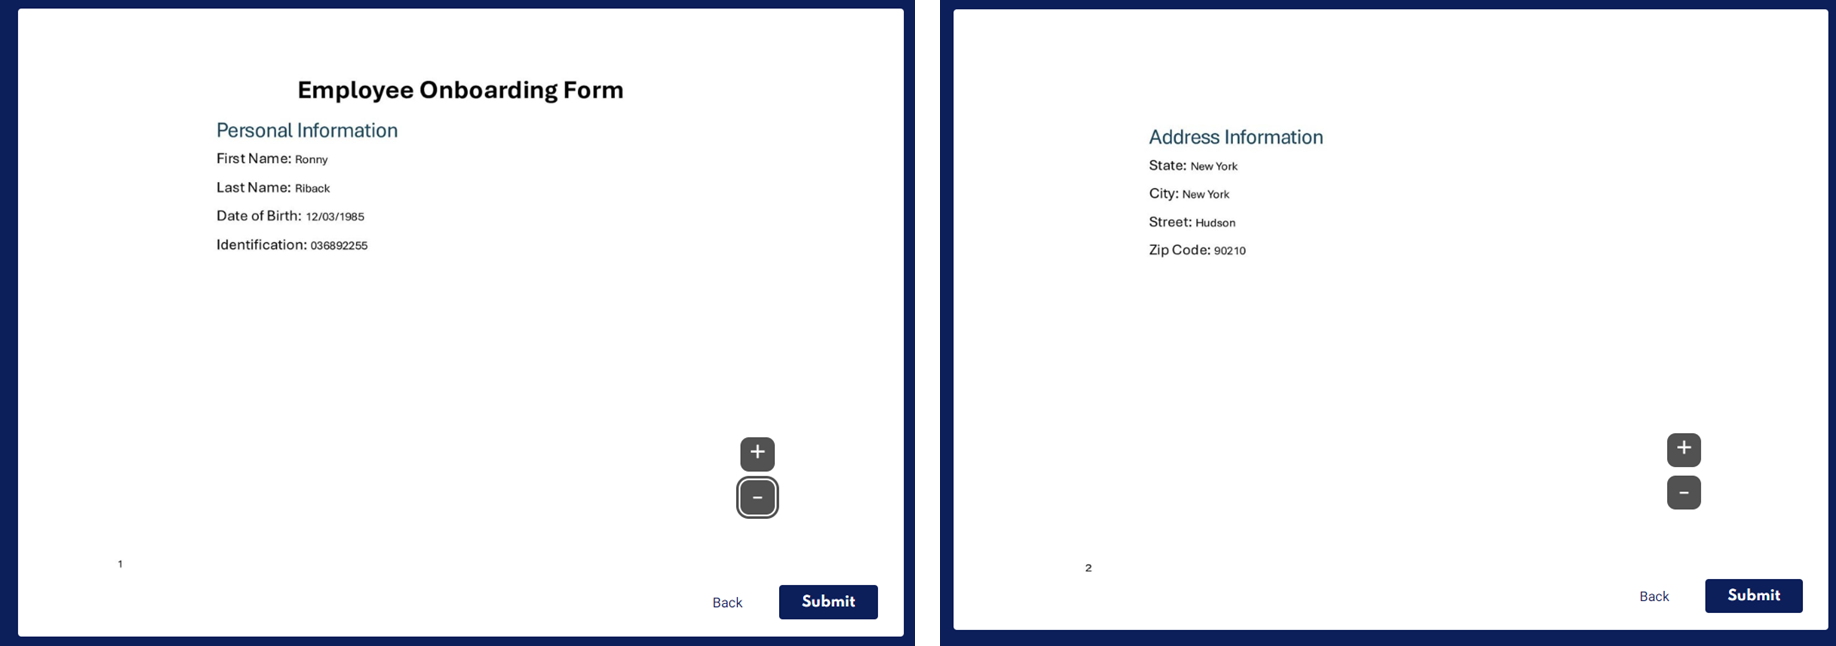
Figure 13: Page Break Marker Was Included