Article Overview
The following article describes a document use case.
Dynamic Document Use Case - Liability Claim Form
The following sections describe a dynamic document liability claim form use case.
Overview
A company has a journey that allows its end users to fill out a liability form. The journey includes an option to enter details about damaged items in a table and to upload a supporting image if needed. Before submitting the form, the information entered by the end user is displayed on the original claim form. The journey is dynamic and adaptive, meaning only relevant information is shown to the user. However, the preview form currently displays the damaged items table and the image placeholder even when they are empty. To resolve this, we will use a dynamic document.
Step 1: Building the Journey
(See Figure 1 to Figure 9)
To enable the journey to be dynamic, the information about the damaged items will be filled out in an array (1) that will only appear if the answer to the Radio Question is Yes (2).
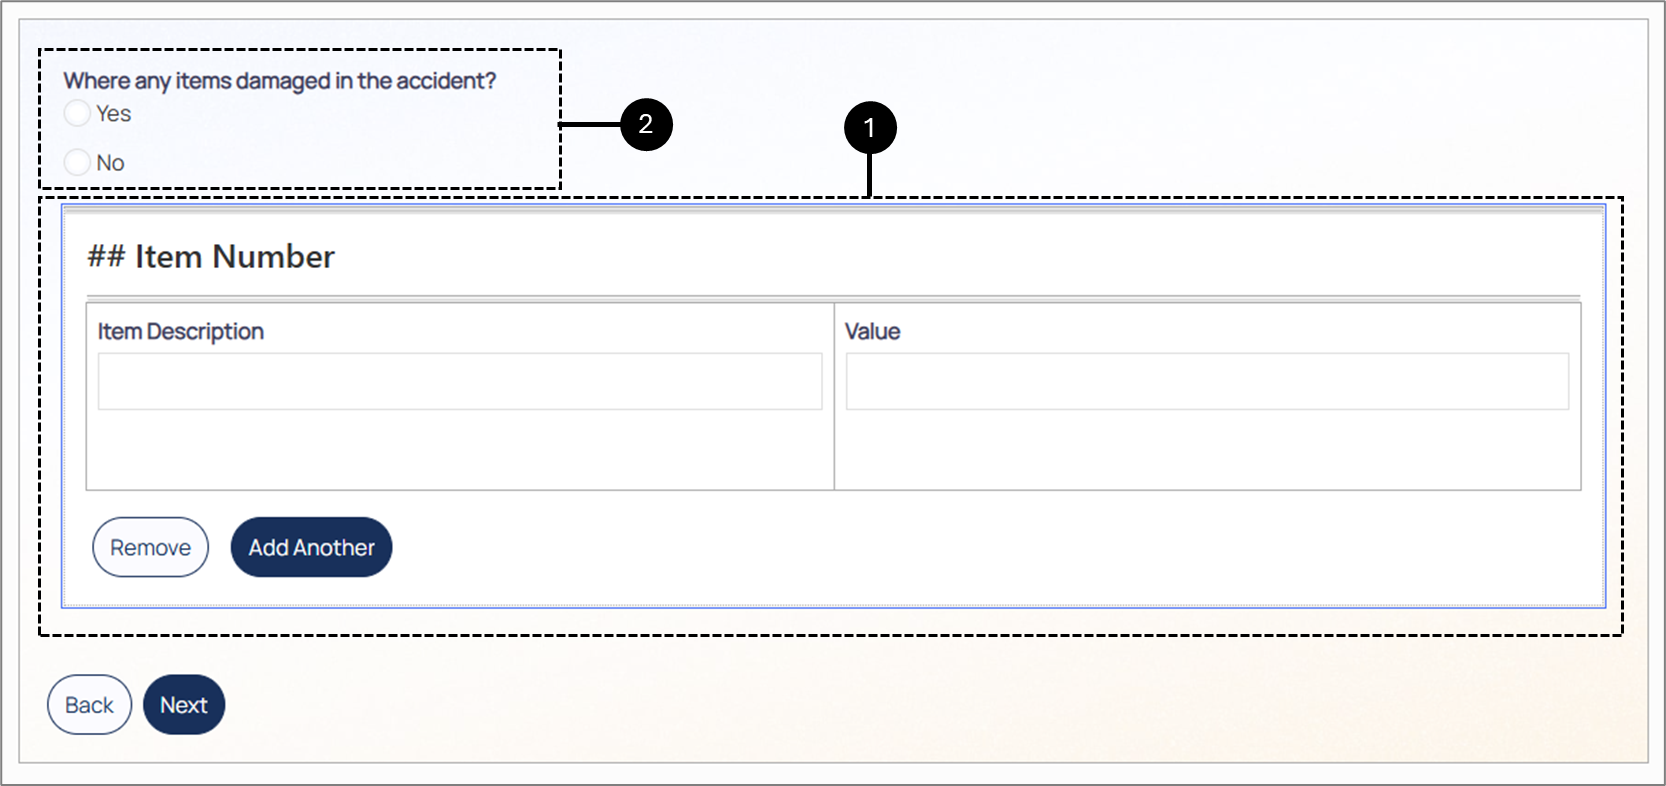
Figure 1: Webflow Structure 1 of 2
The component to upload an image (3) will appear only if the checkbox (4) is checked.
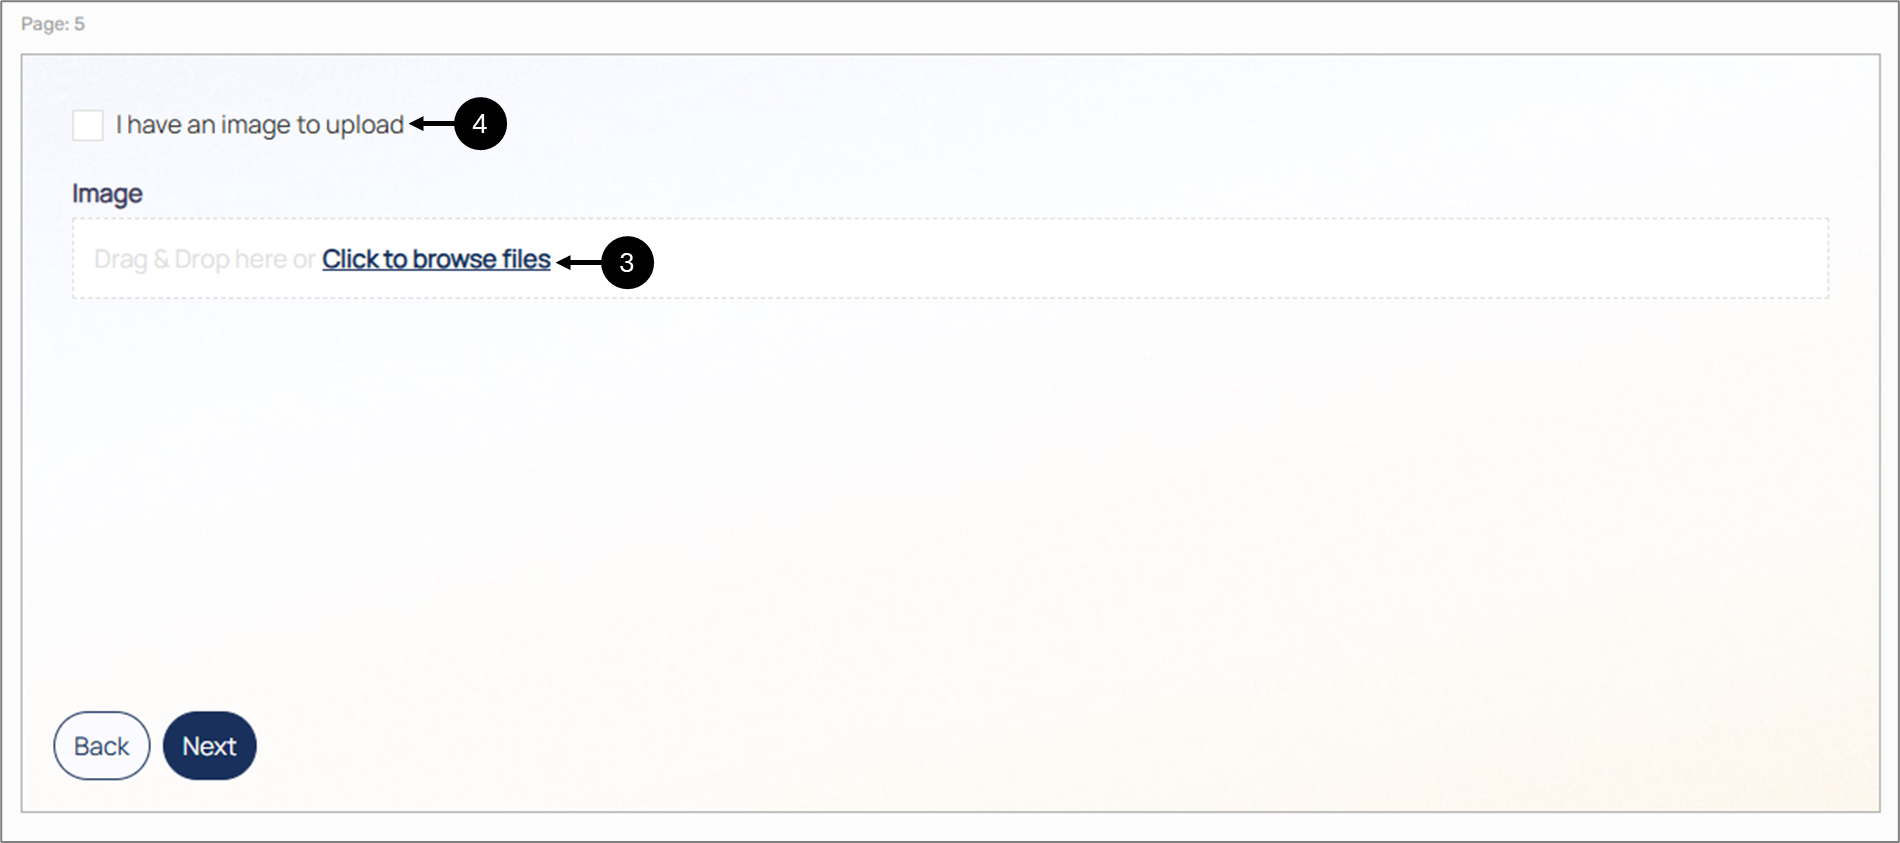
Figure 2: Webflow Structure 2 of 2
The array (5) is implemented with a visibility condition (6).
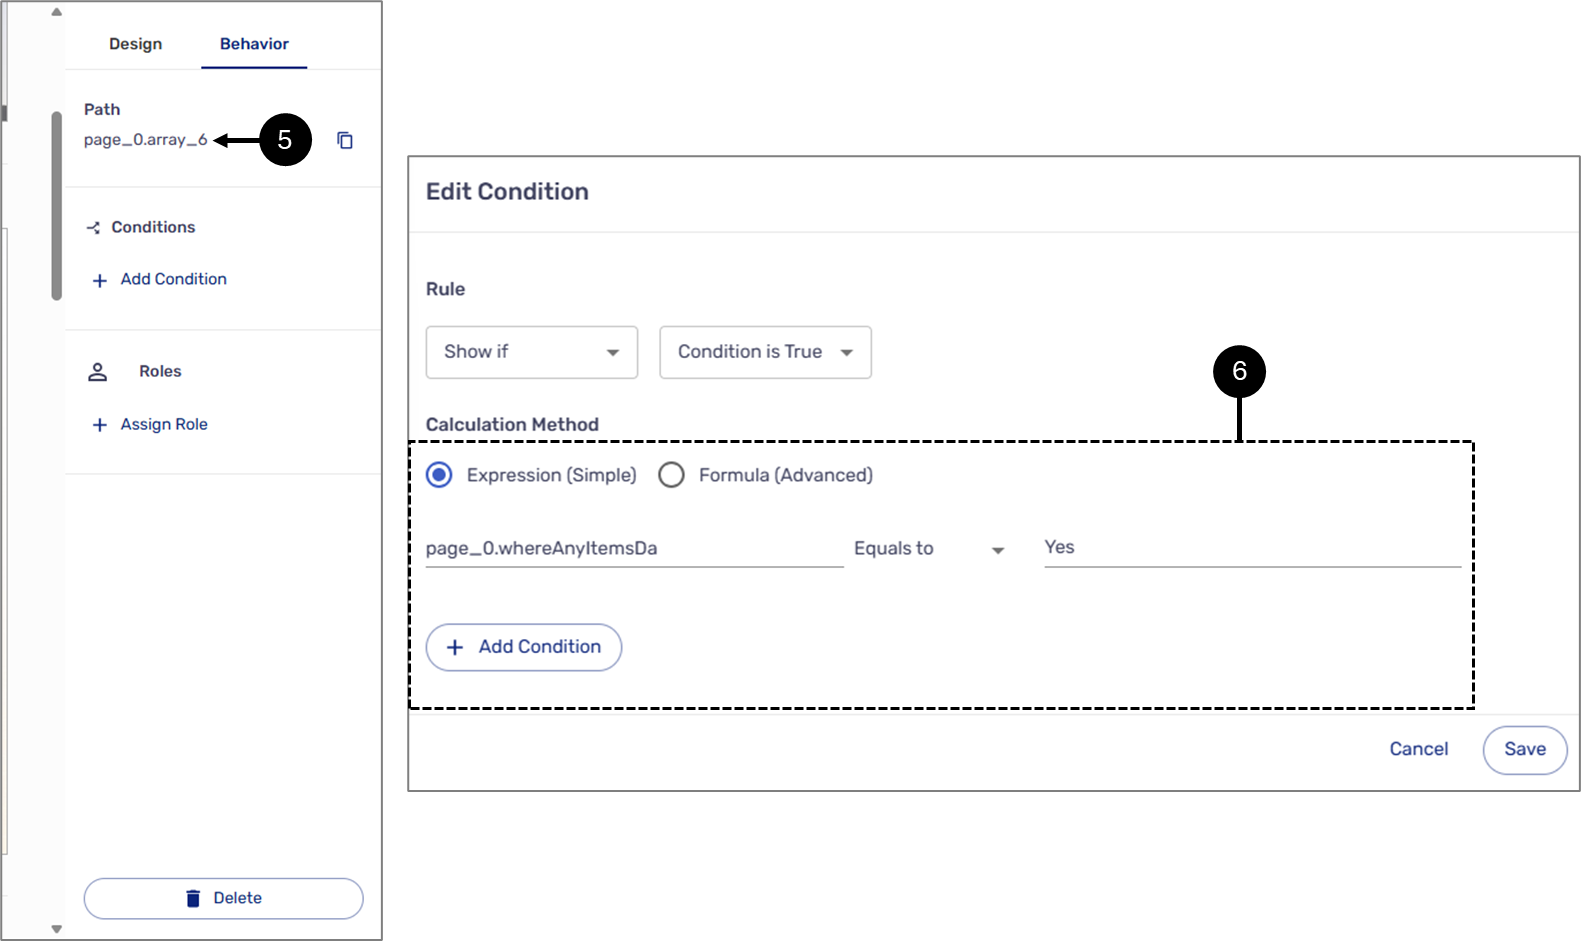
Figure 3: Condition 1 of 2
A visibility condition (7) is also implemented on the data item (8) connected to the Upload Component.
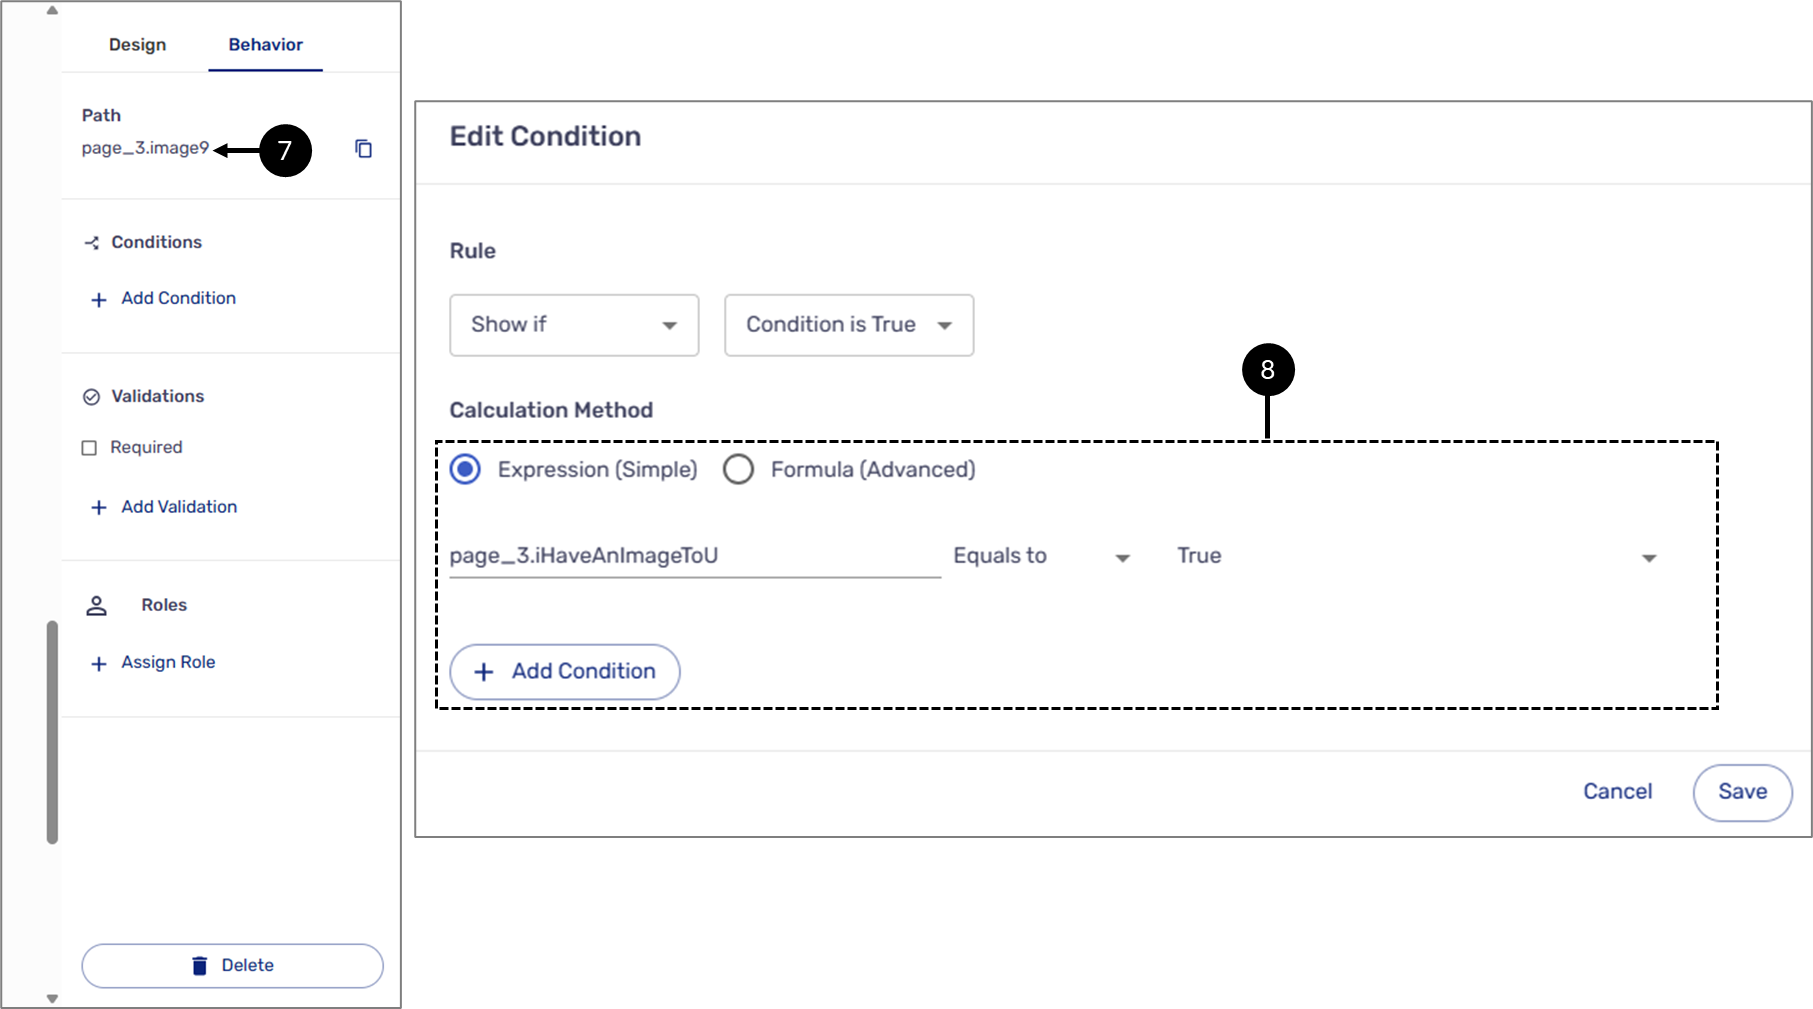
Figure 4: Condition 2 of 2
On the Documents screen, perform the following steps:
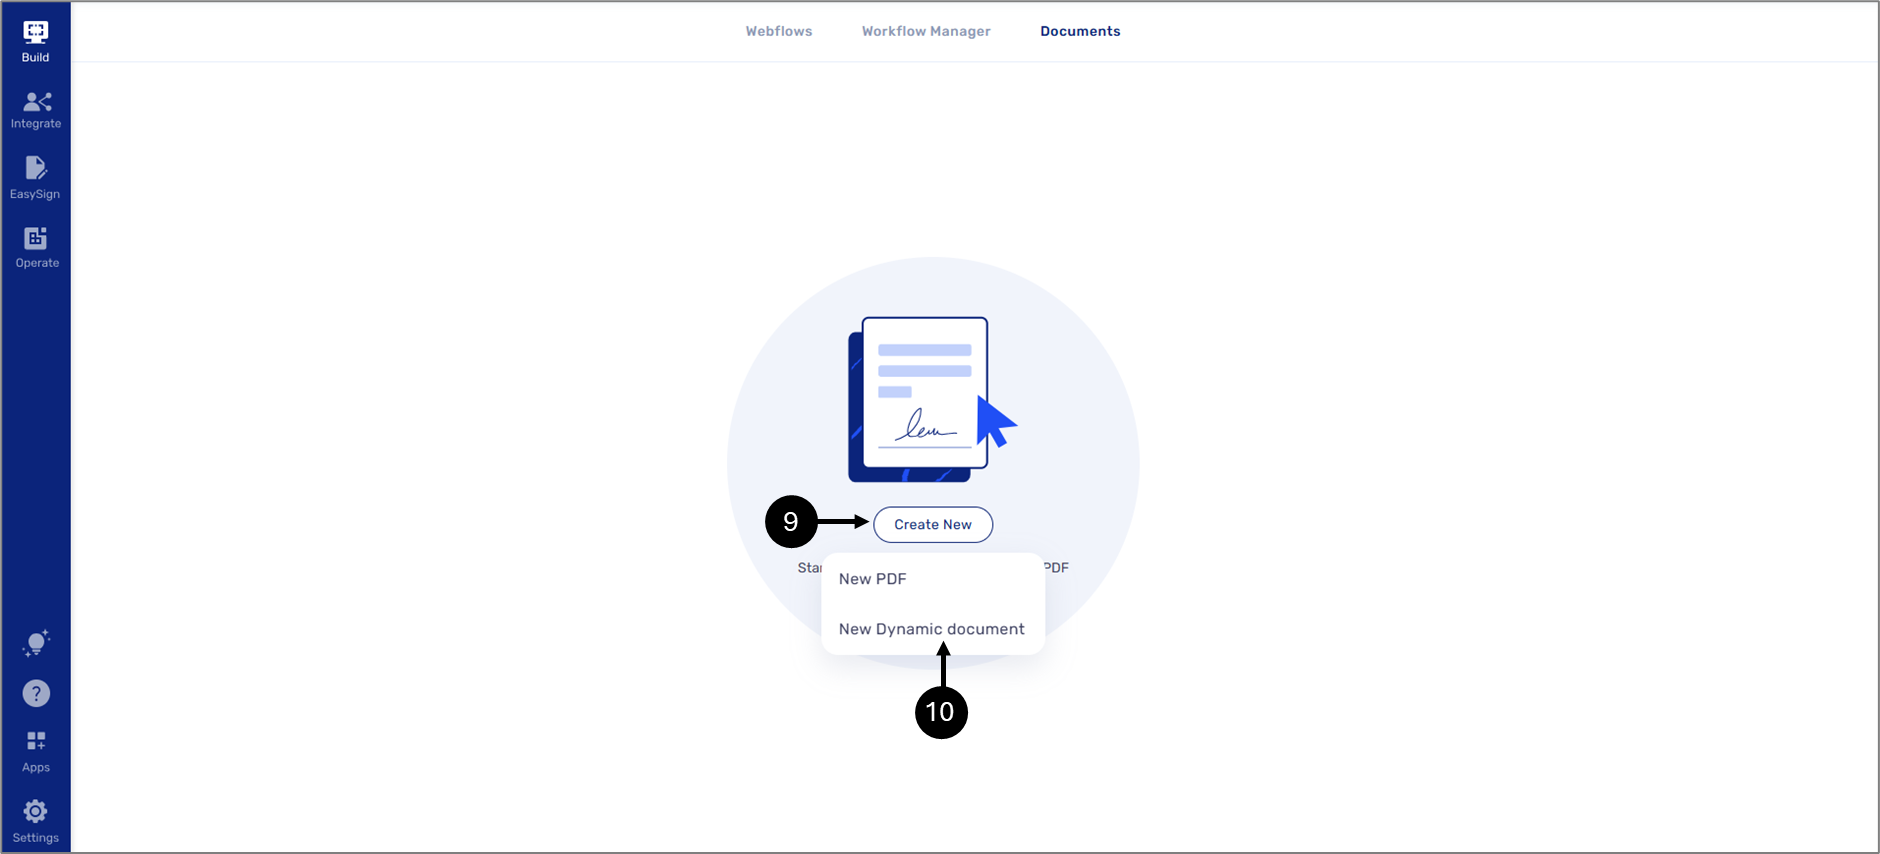
Figure 5: Create New
- Click Create New (9) and then New Dynamic Document (10).
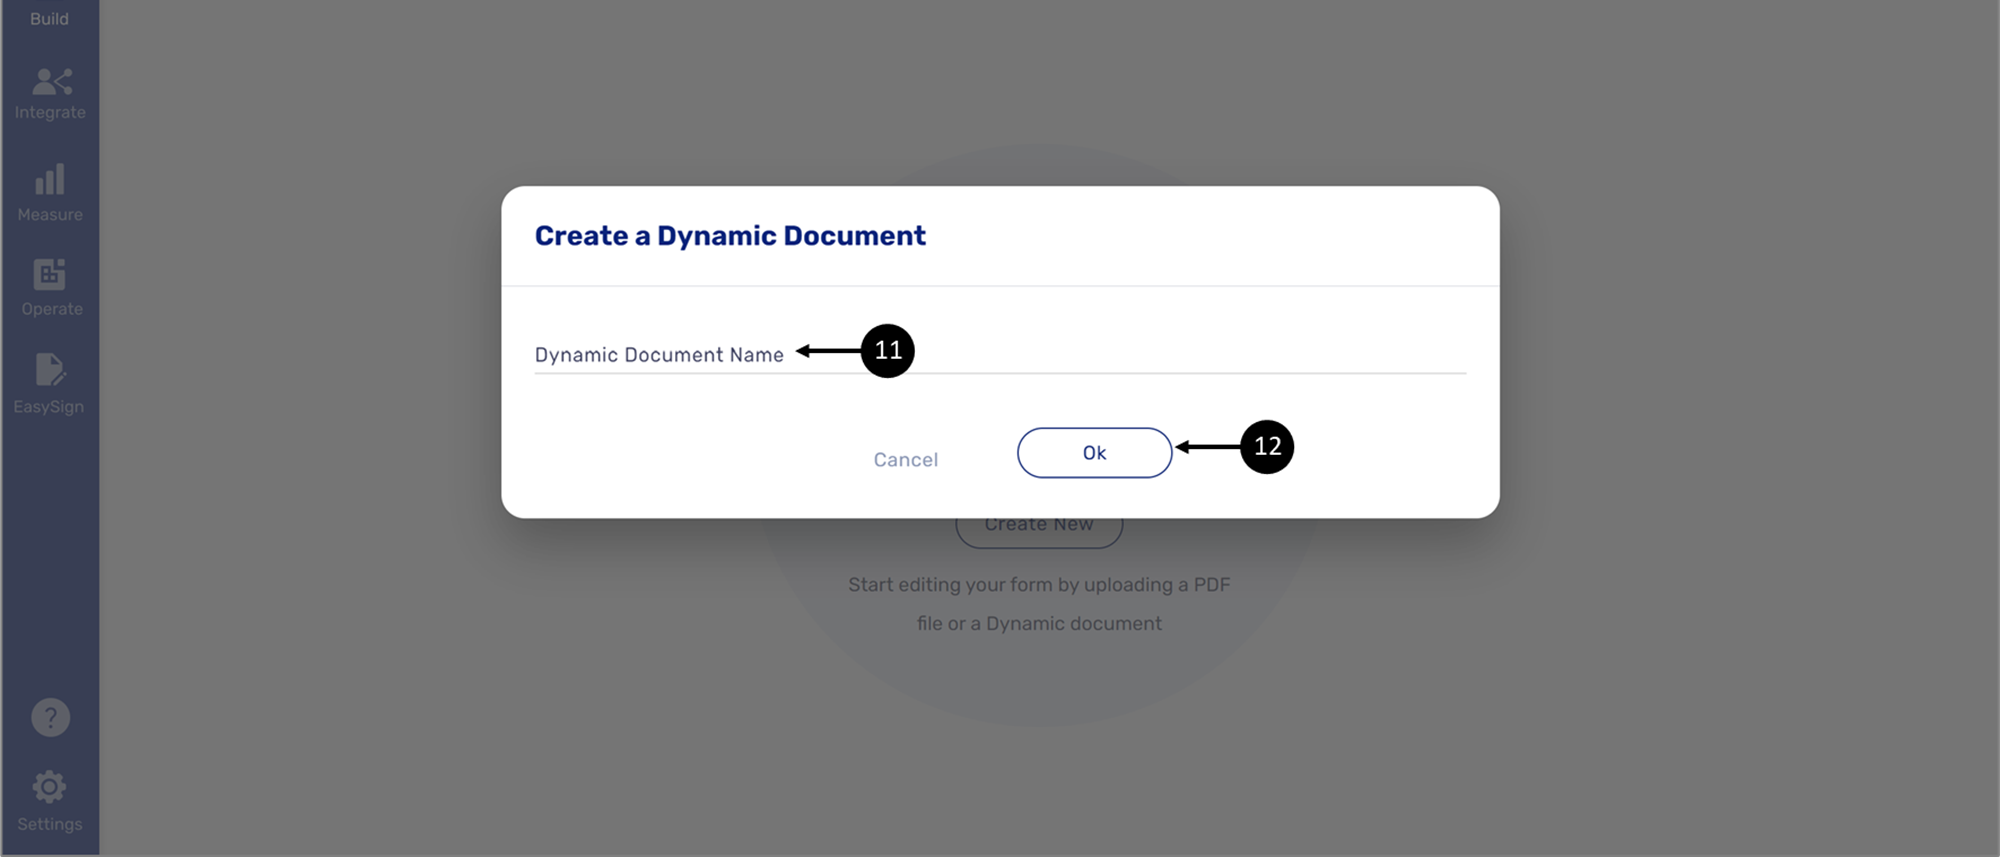
Figure 6: Create a Dynamic Document
- Using the Create a Dynamic Document window, enter a Dynamic Document Name (11) and then click Ok (12).
Result:
A new dynamic document is created:

Figure 7: New Dynamic Document
- Click the Upload Document option (13) and then select the desired file.
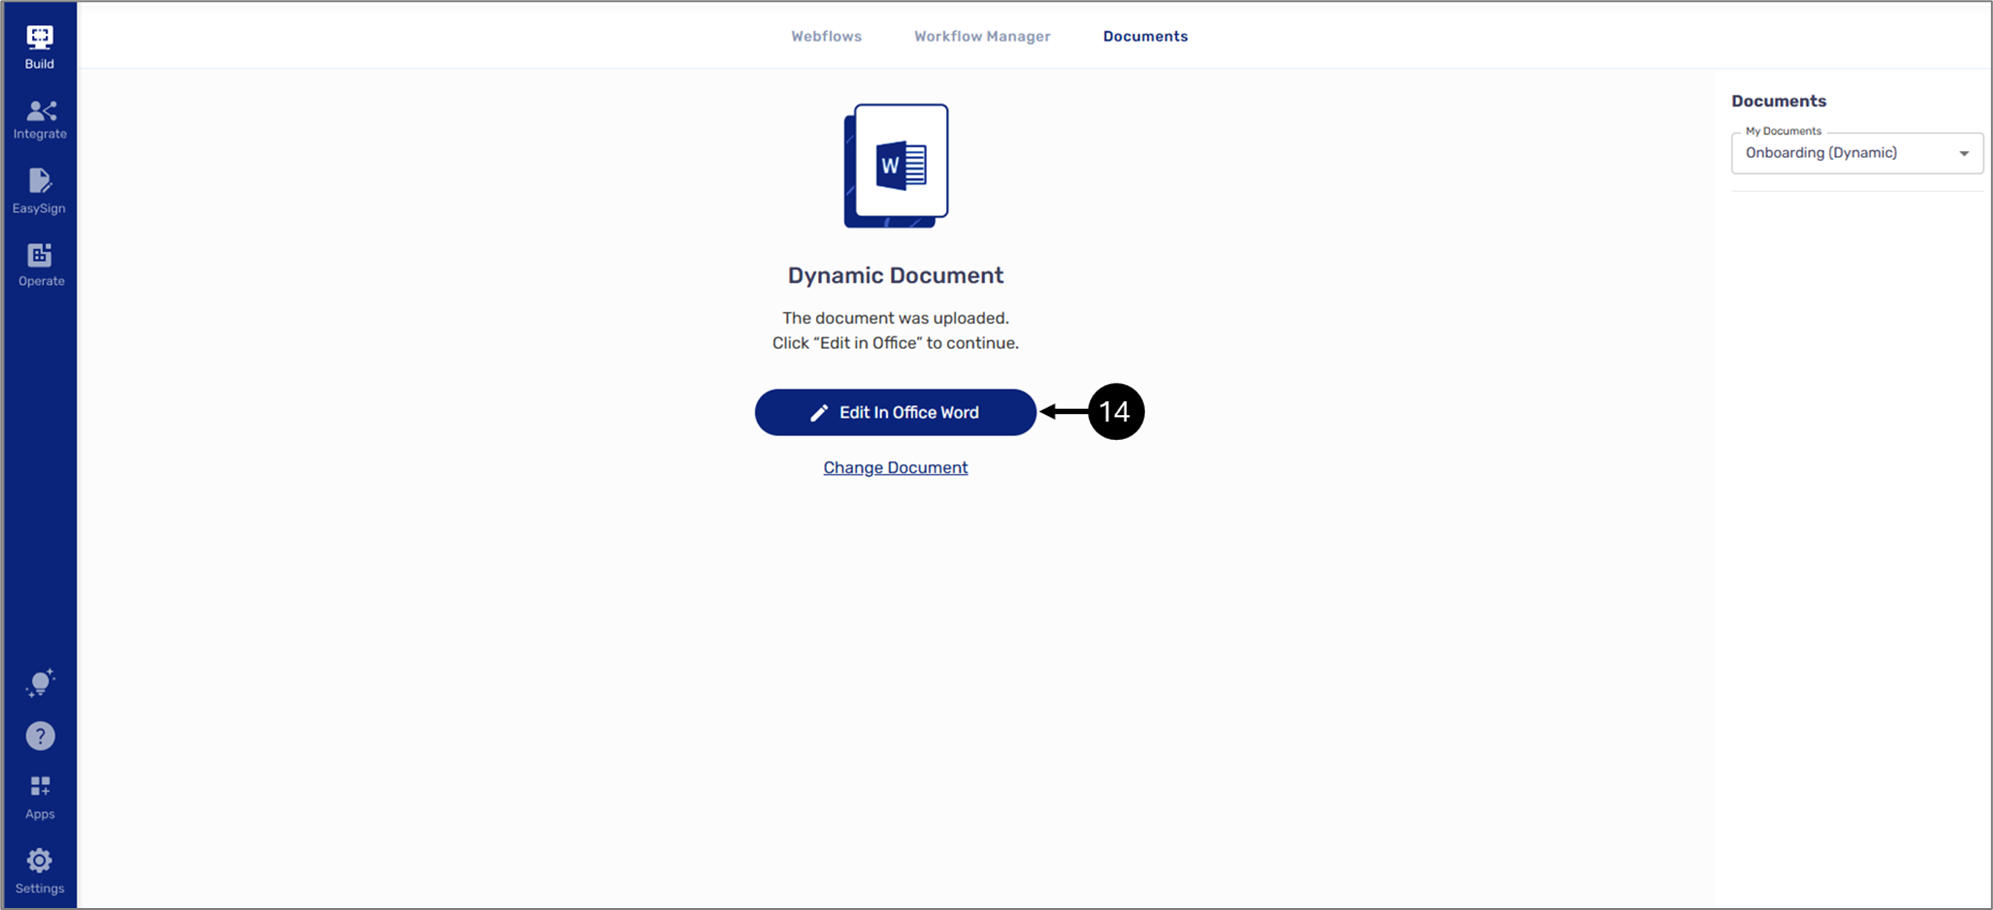
Figure 8: Edit In Office Word
- Click the Edit In Office Word button (14).
Result:
The Word document opens with the EasySend Dynamic Document Editor section:
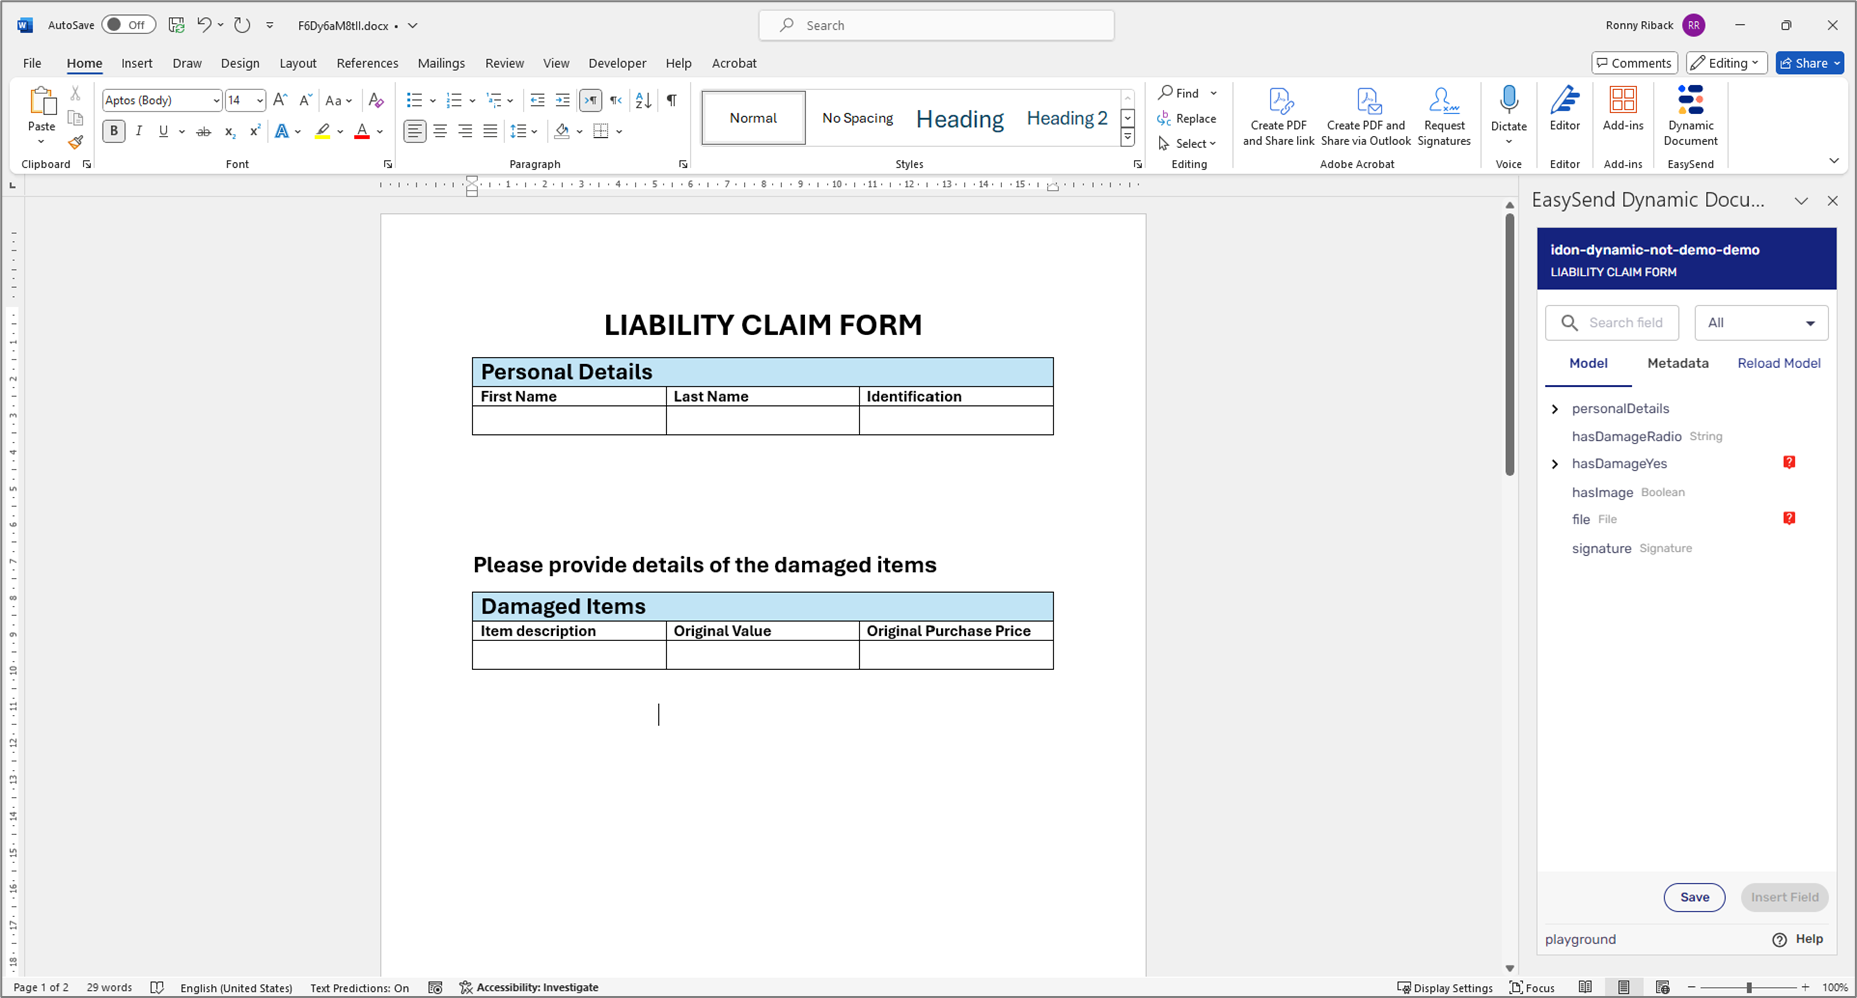
Figure 9: EasySend Dynamic Document Editor
Step 2: Using EasySend's Microsoft Add-in
(See Figure 10 to Figure 26)
The Word document must become a dynamic document to reflect the business logic implemented in the journey. In addition, the first page of the document needs to contain the name of the journey in its Header and the transaction's RID in its Footer. To convert the Word document into a dynamic document, perform the following steps:
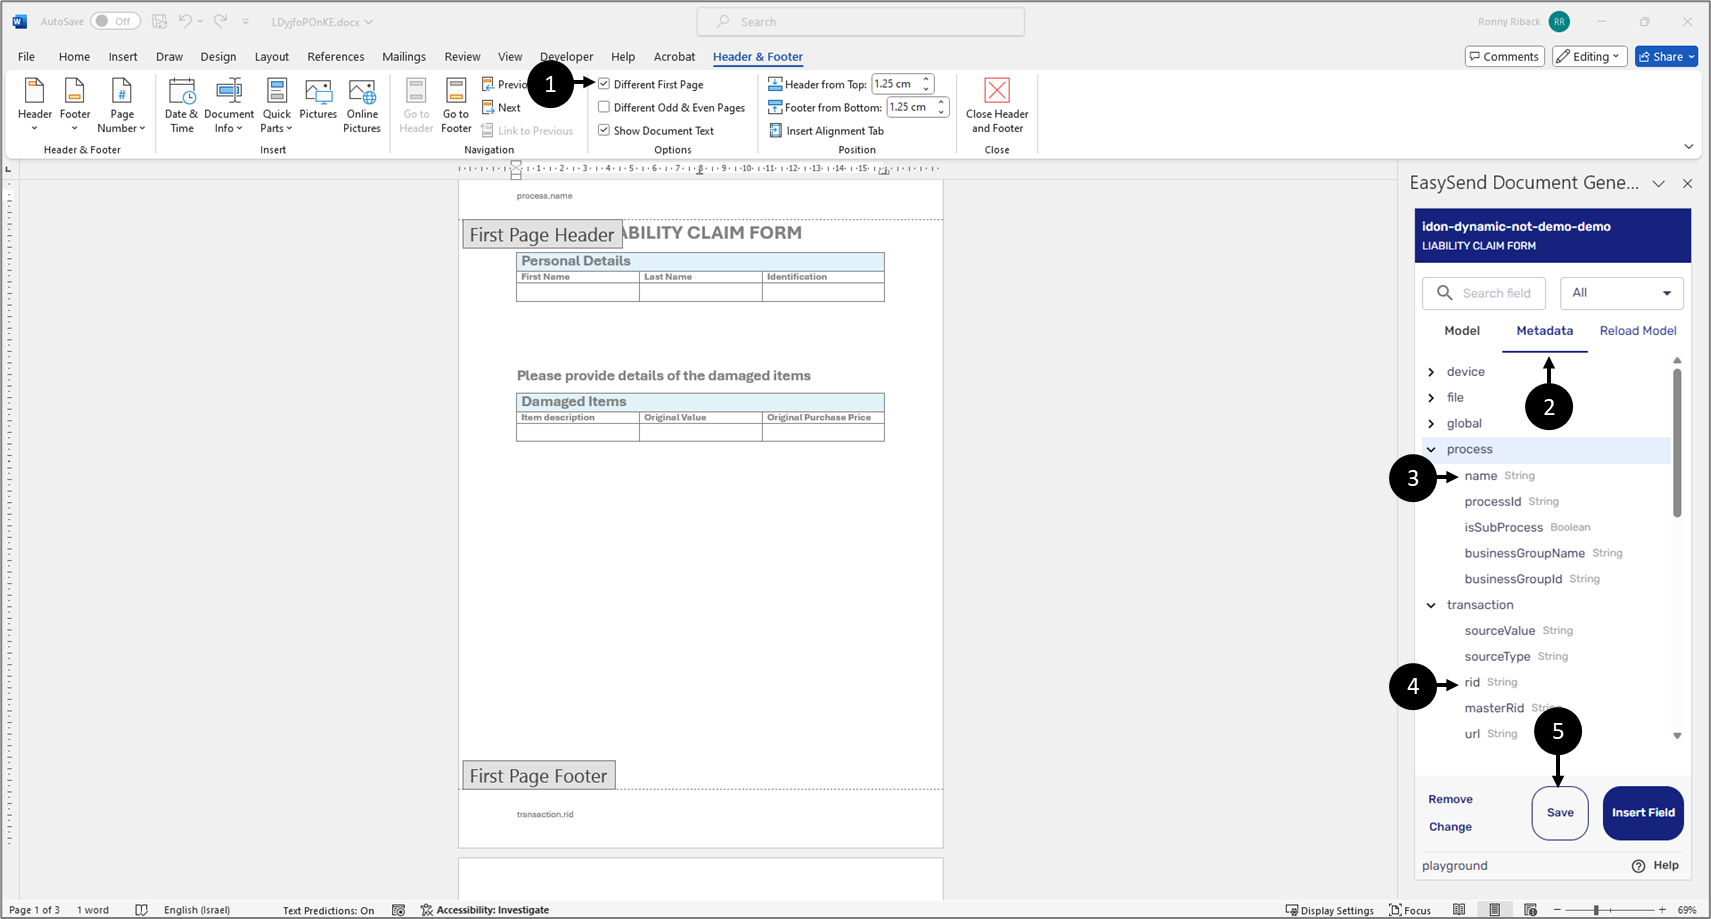
Figure 10: First Page Header and Footer
- Edit the Header and Footer of the first page:
- Display the Header and the Footer.
- Ensure the first page is different than the other pages (1).
- Click the Metadata tab (2).
- Insert the process name (3) into the Header.
- Insert the transaction rid (4) into the Footer.
- Click the Save button (5).
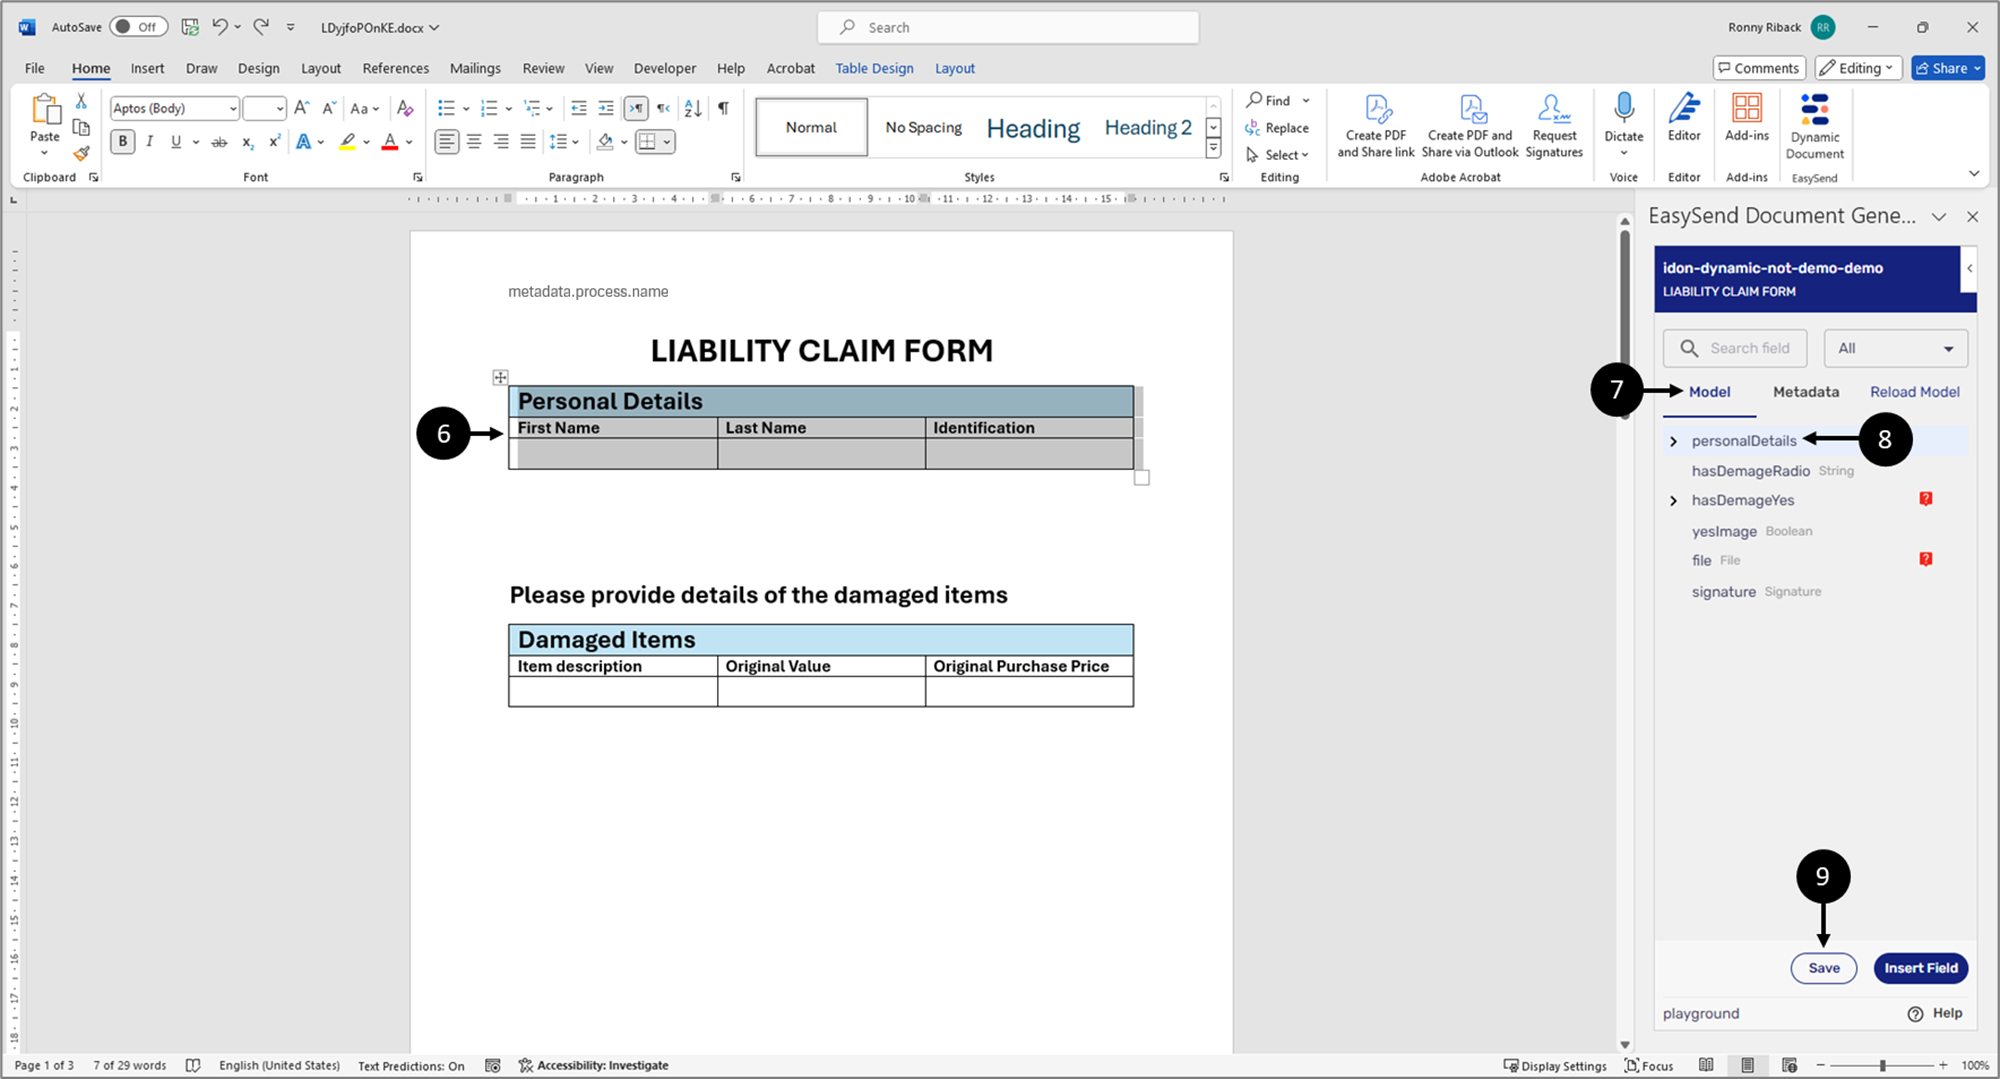
Figure 11: personalDetails
- Nest the Personal Details table inside an object-type data item:
- Select the Personal Details table (6).
- Click the Model tab (7).
- Click the personalDetails object-type data item (8).
- Click the Insert Field button (9).
Result:
The table is nested inside the personalDetails data item (10):
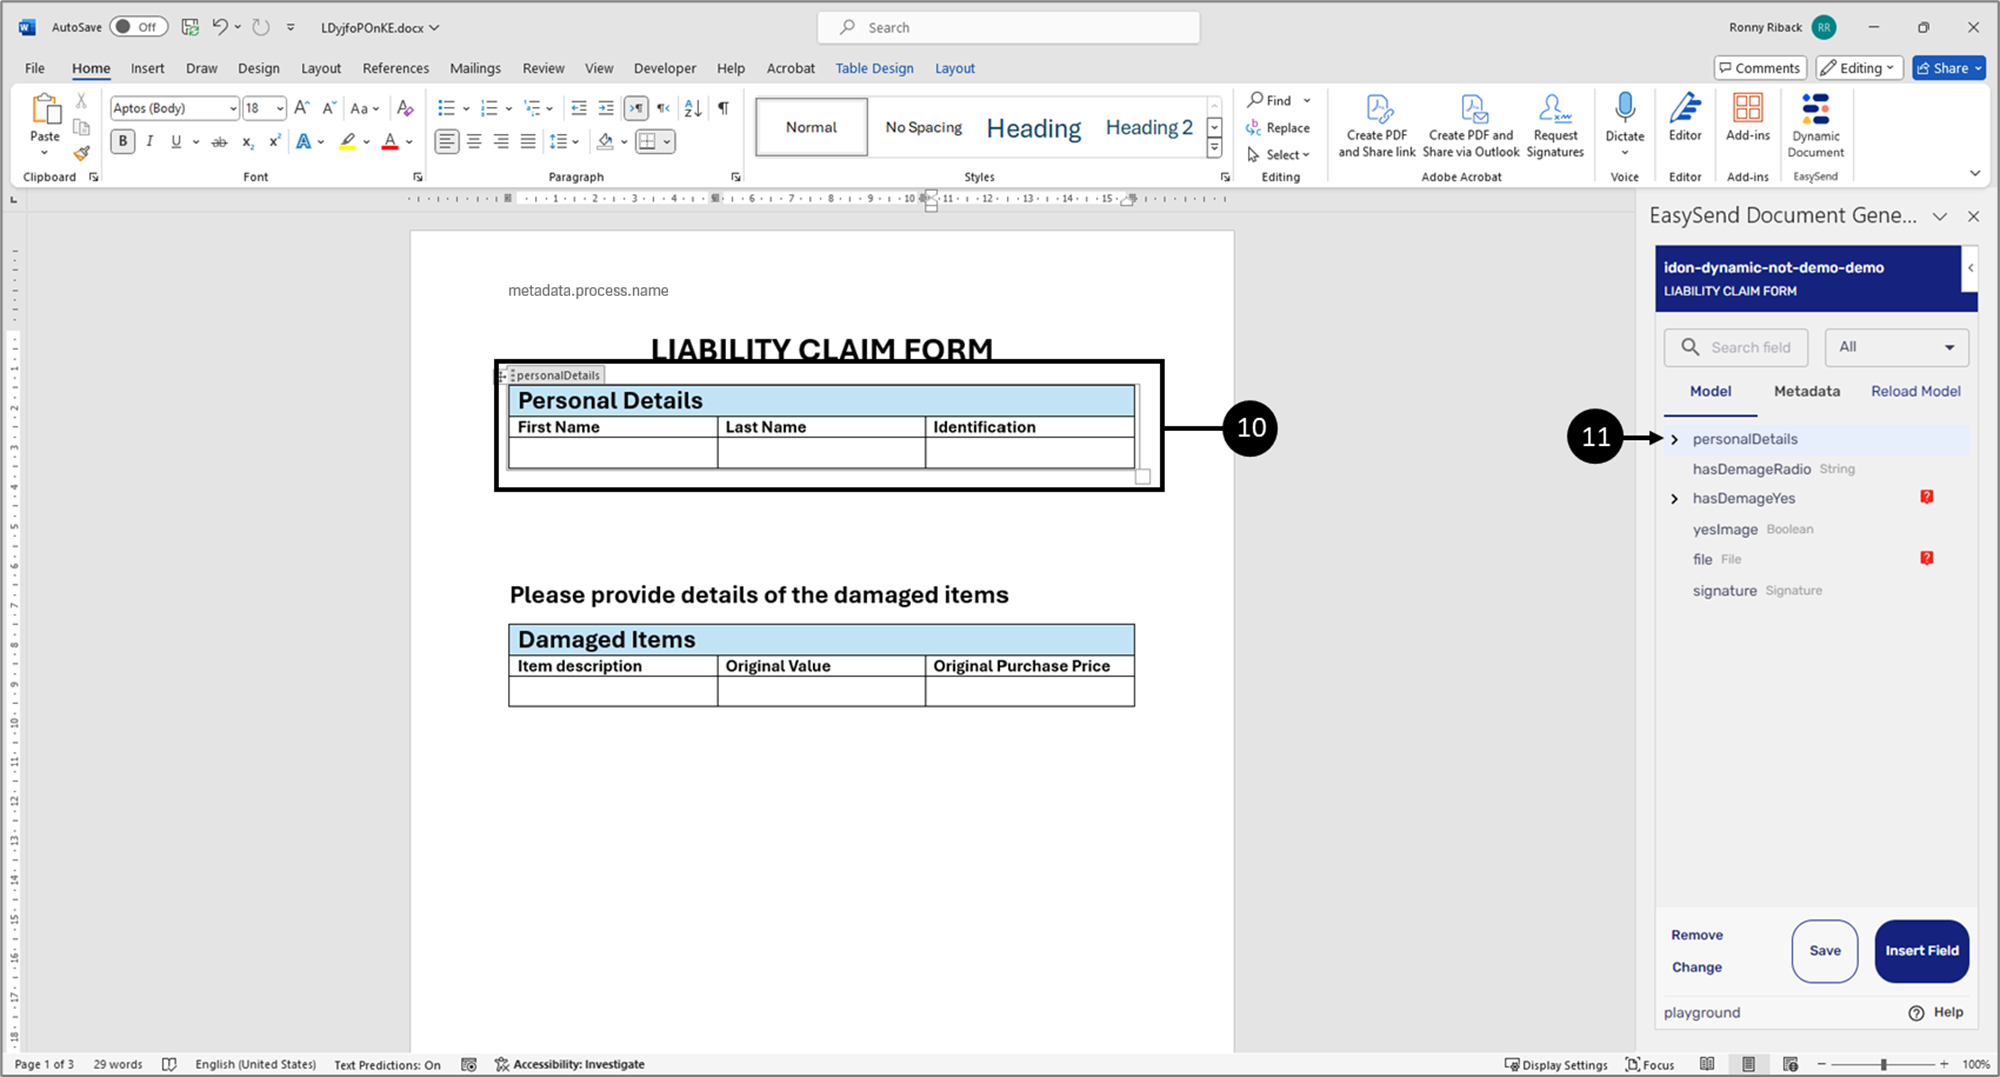
Figure 12: Nested Table
- Click to expand the personalDetails item (11).
Result:
The nested items appear (12):
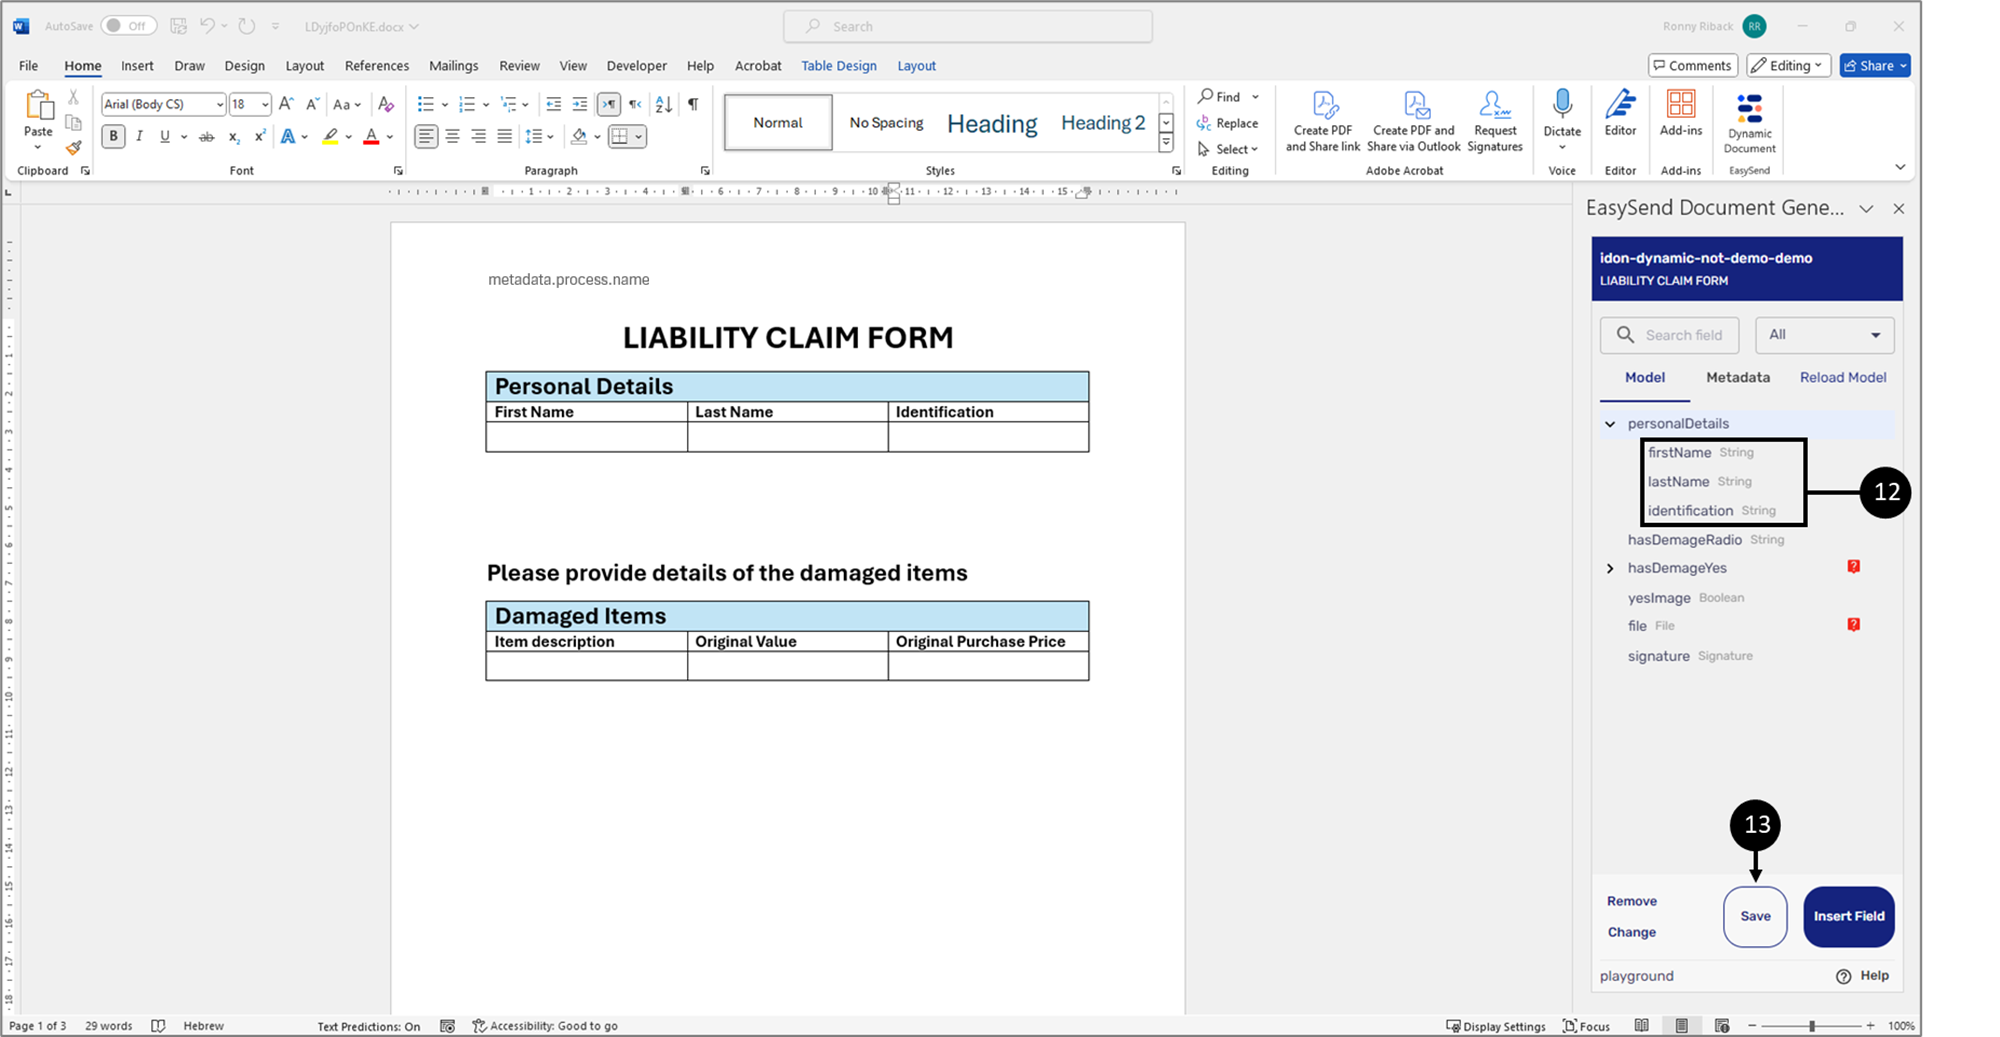
Figure 13: Nested Items
- Insert all other nested items (12).
- Click the Save button (13).
Result:
The items are inserted into the document:
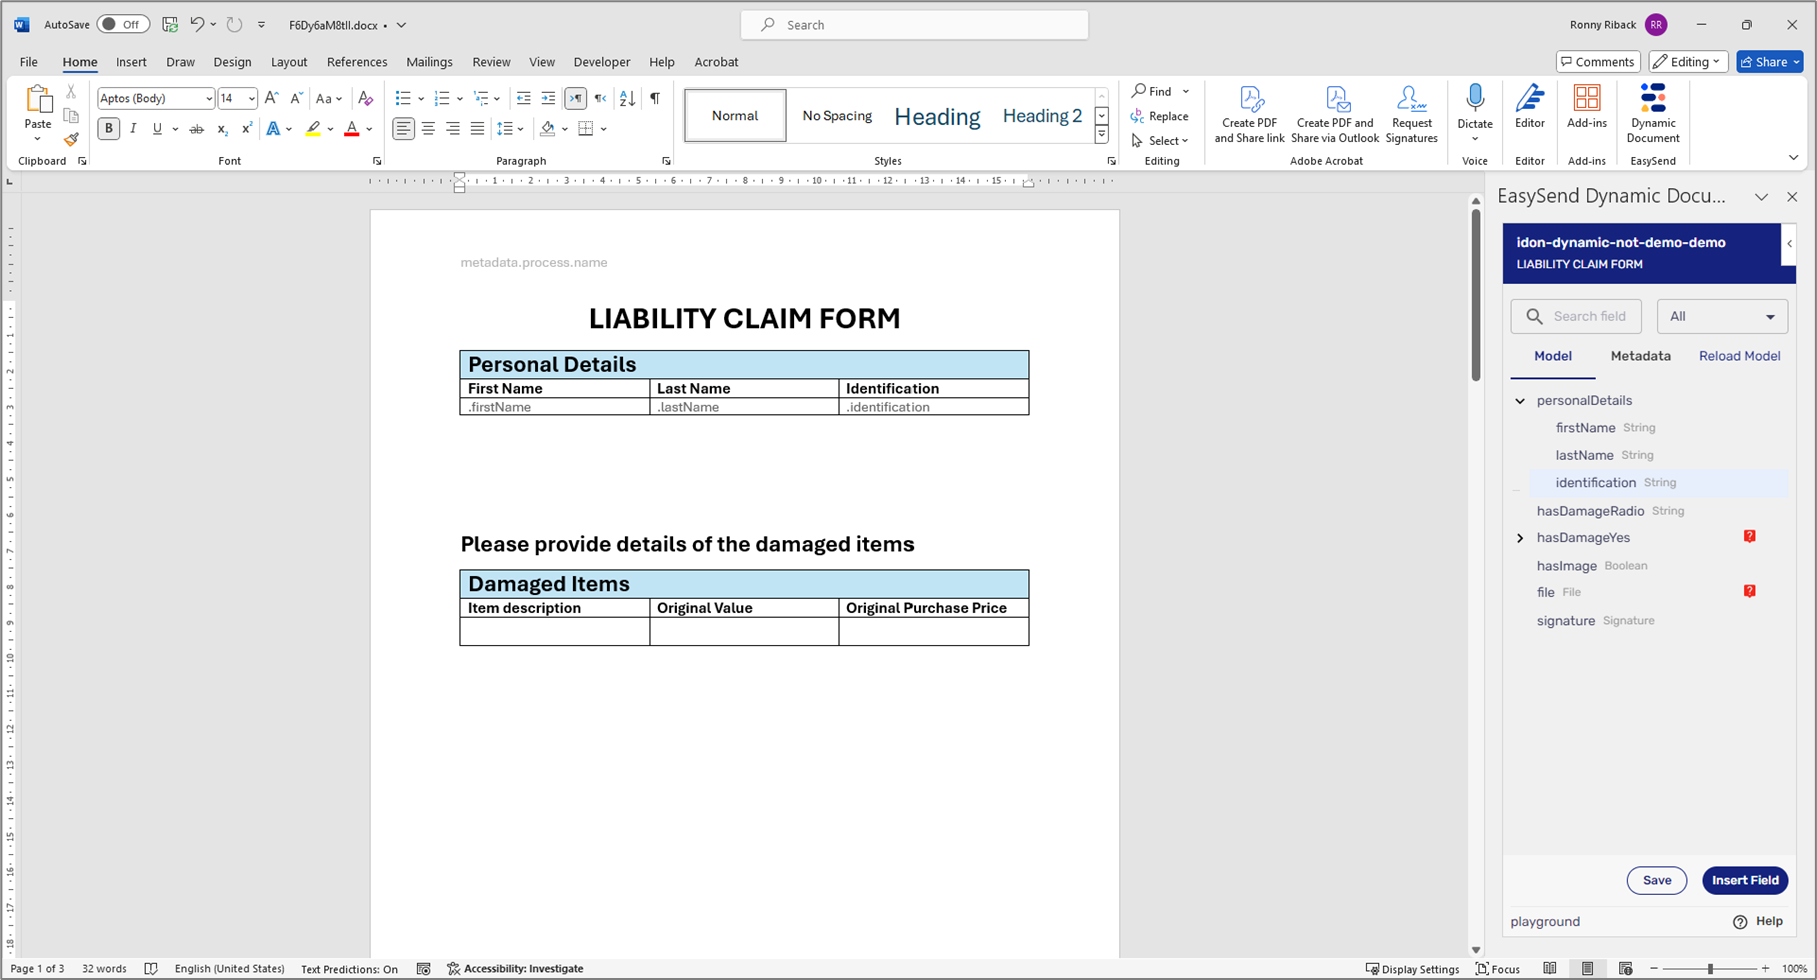
Figure 14: Dynamic Document with Inserted Items
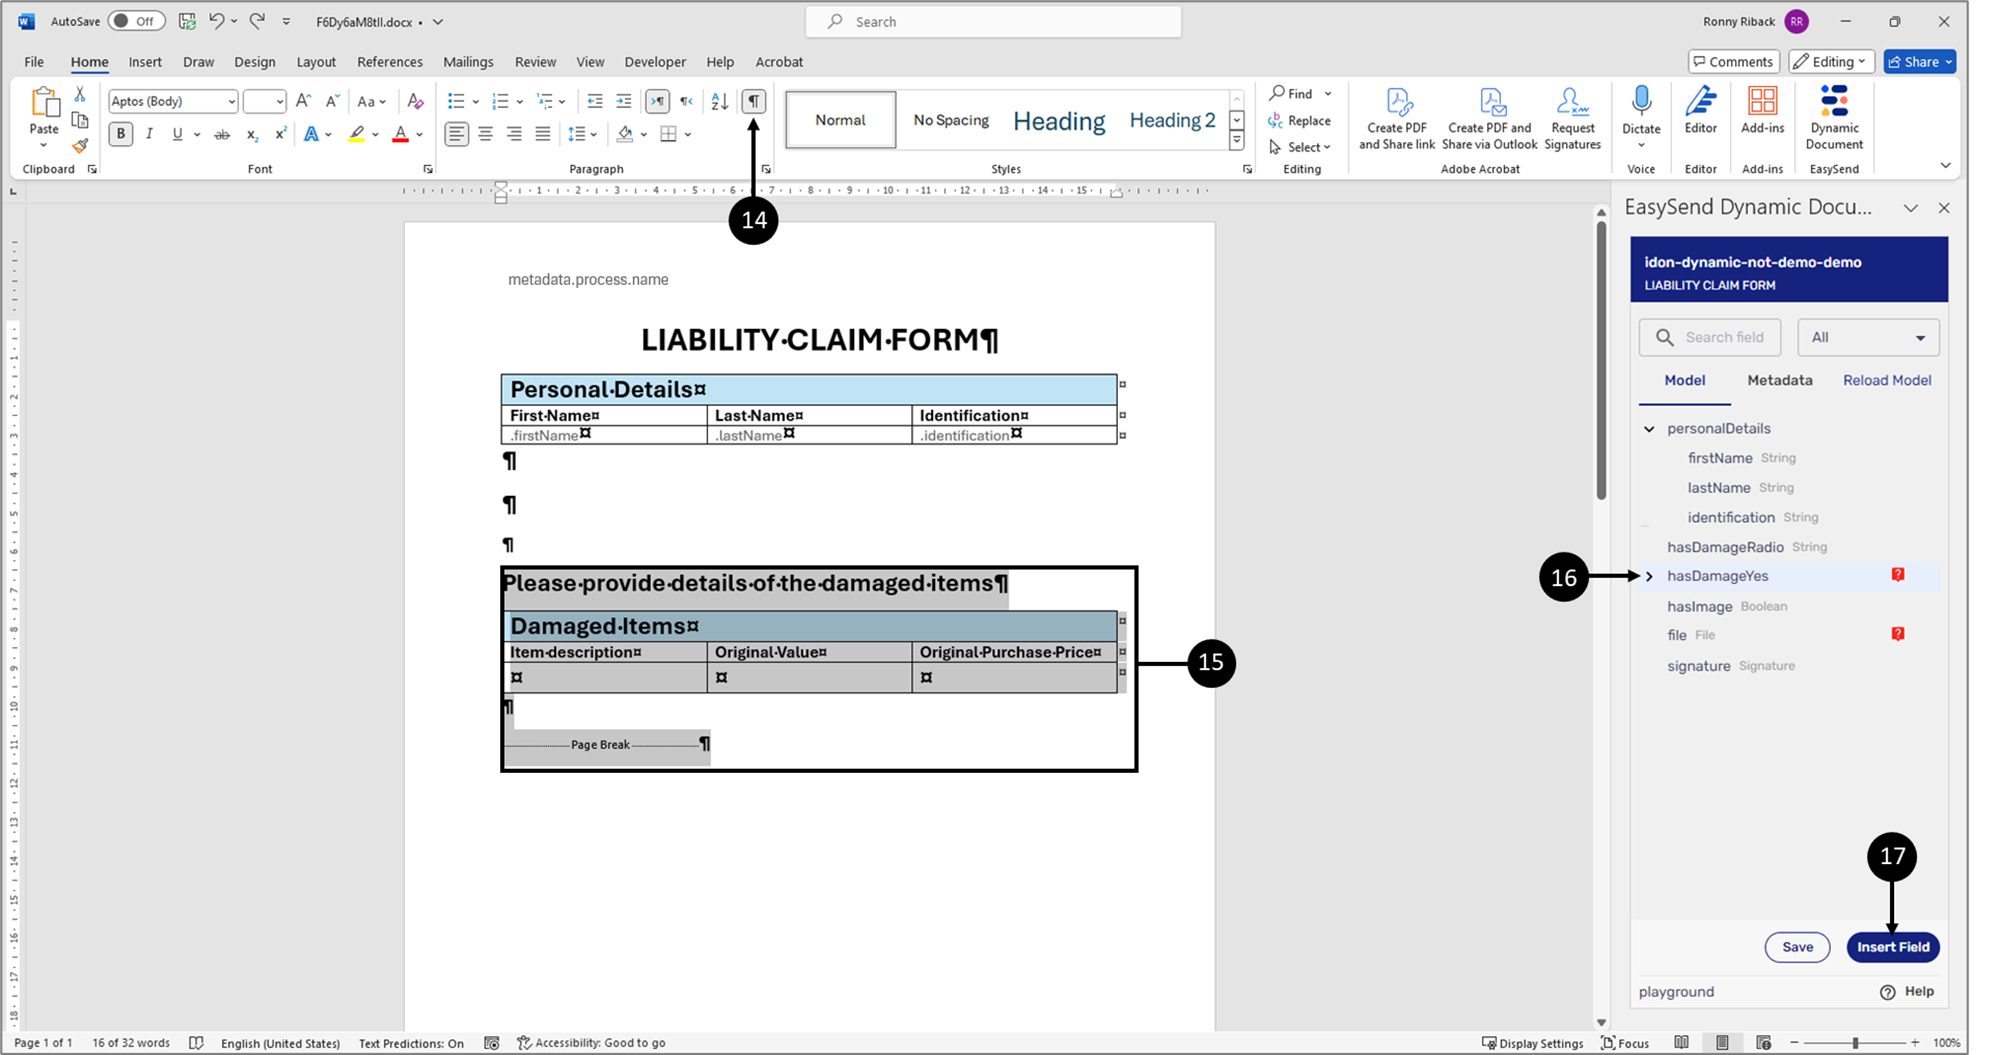
Figure 15: Selecting Elements
- Nest elements inside an object-type item with a condition:
- Display the Page Break marker (14).
- Select the heading, the table, and the Page Break marker (15).
- Click the hasDamageYes object-type item (16).
- Click the Insert Field button (17).
Result:
The elements are nested (18):
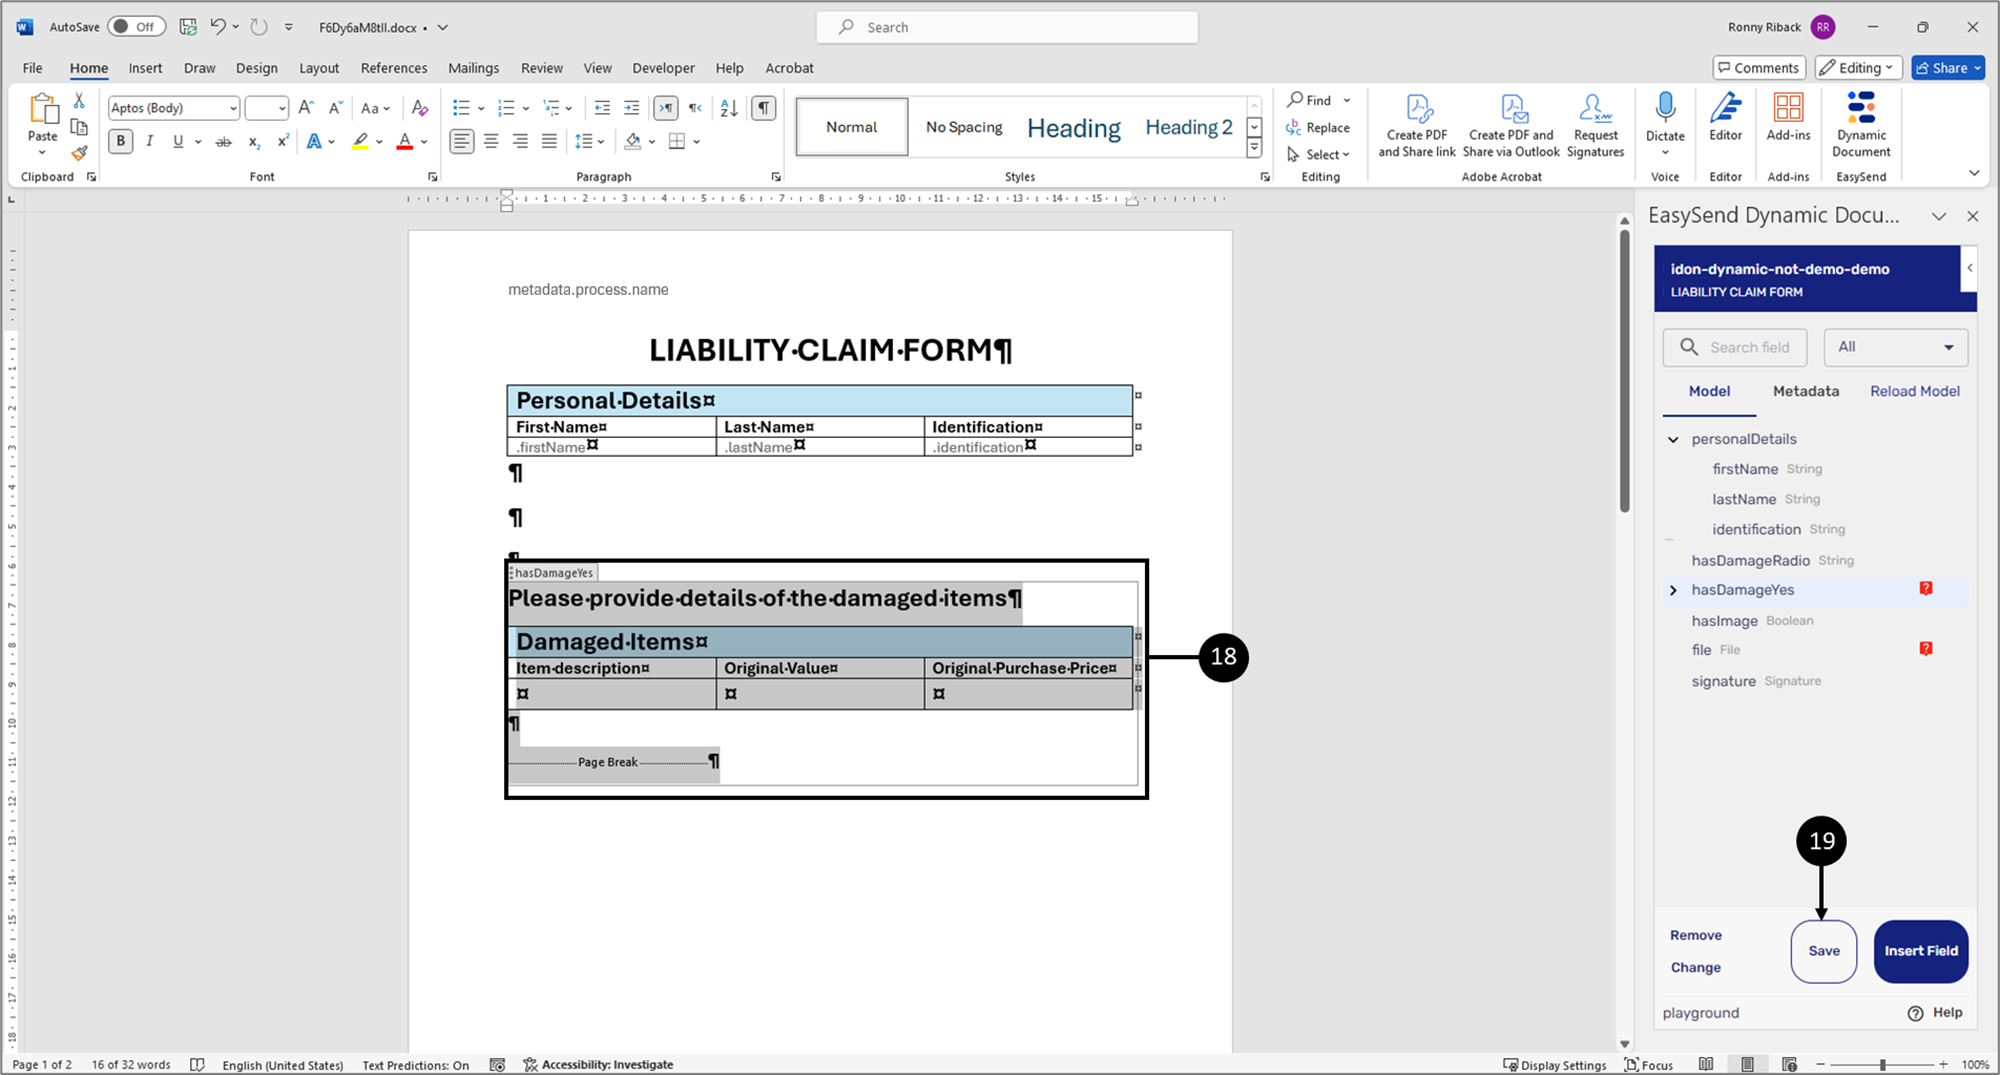
Figure 16: Nested Elements
- Click the Save button (19).
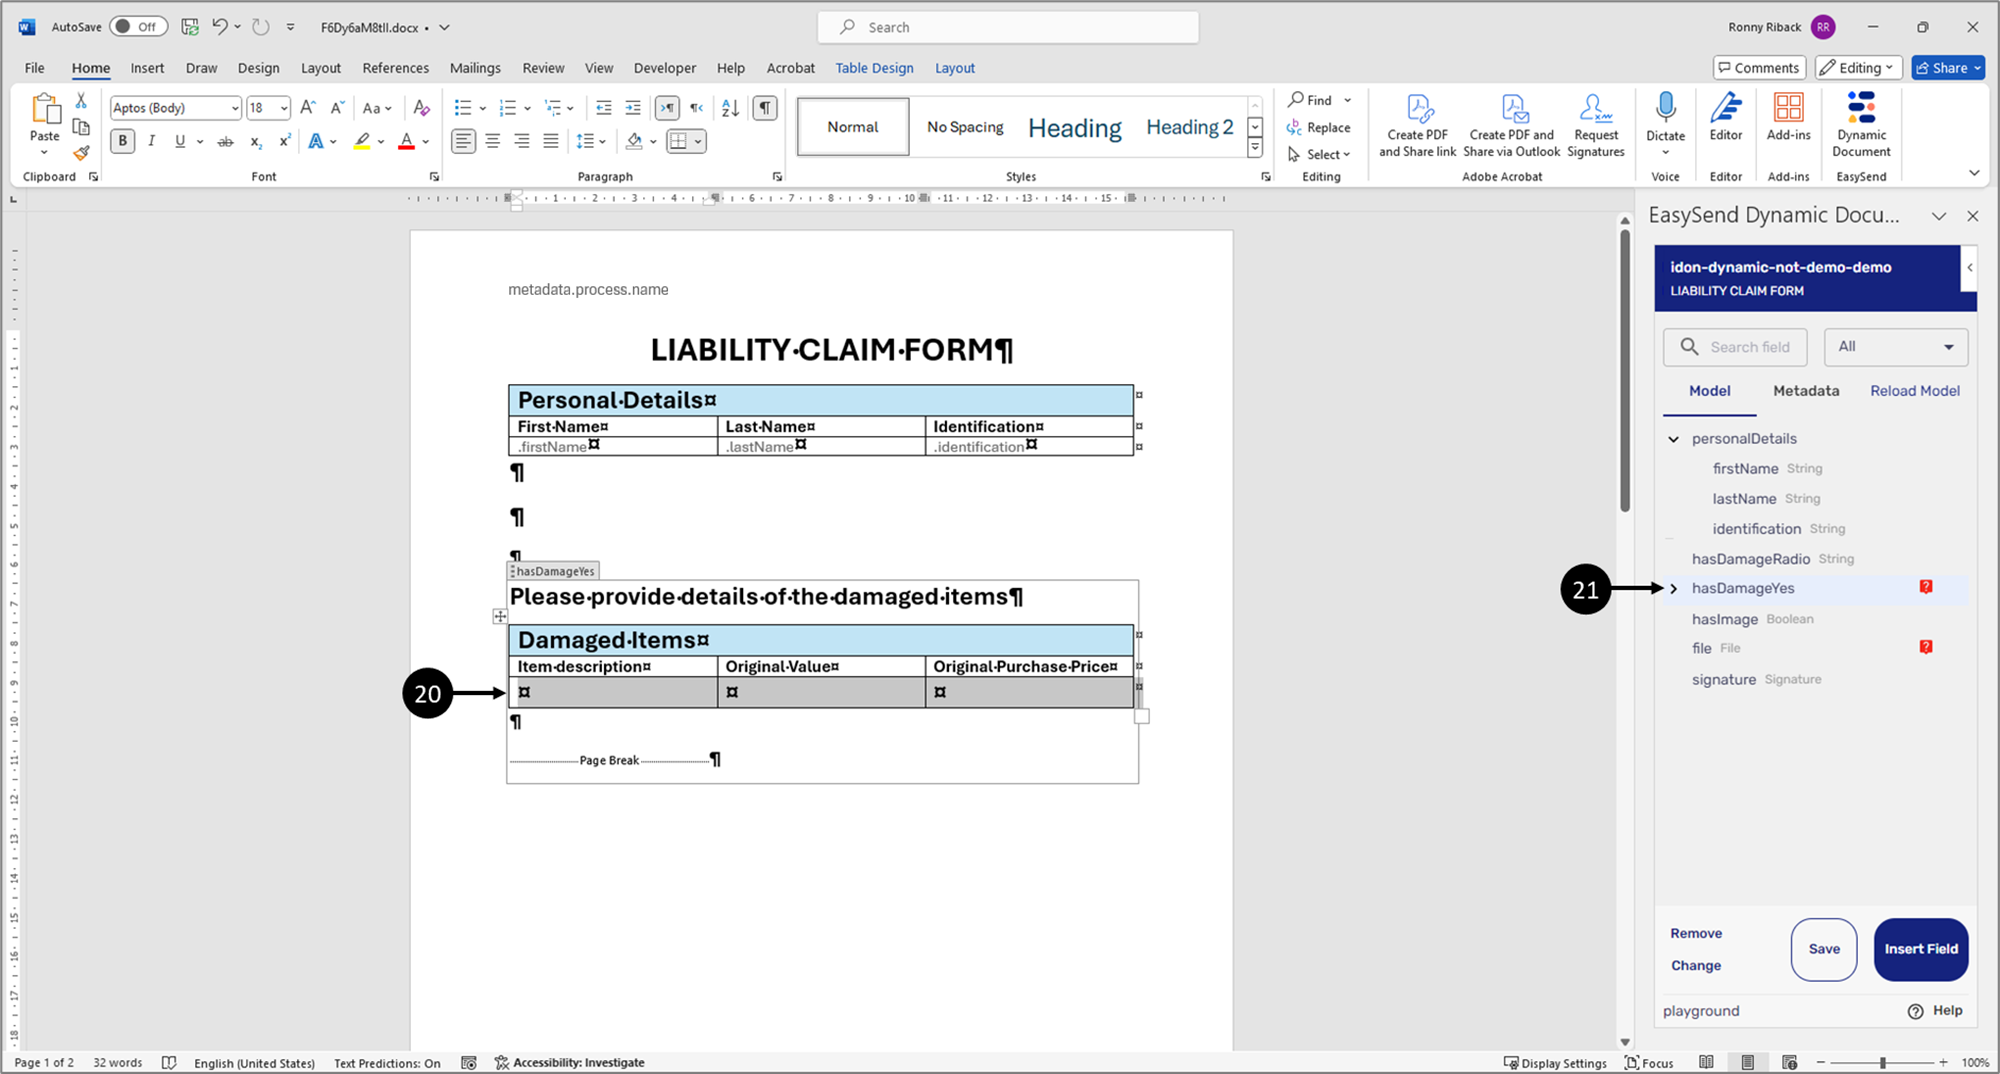
Figure 17: Table Row
- Nest the table row in an array-type item:
- Select the table row (20).
- Expand the object-type item (21).
Result:
The array-type item appears (22):
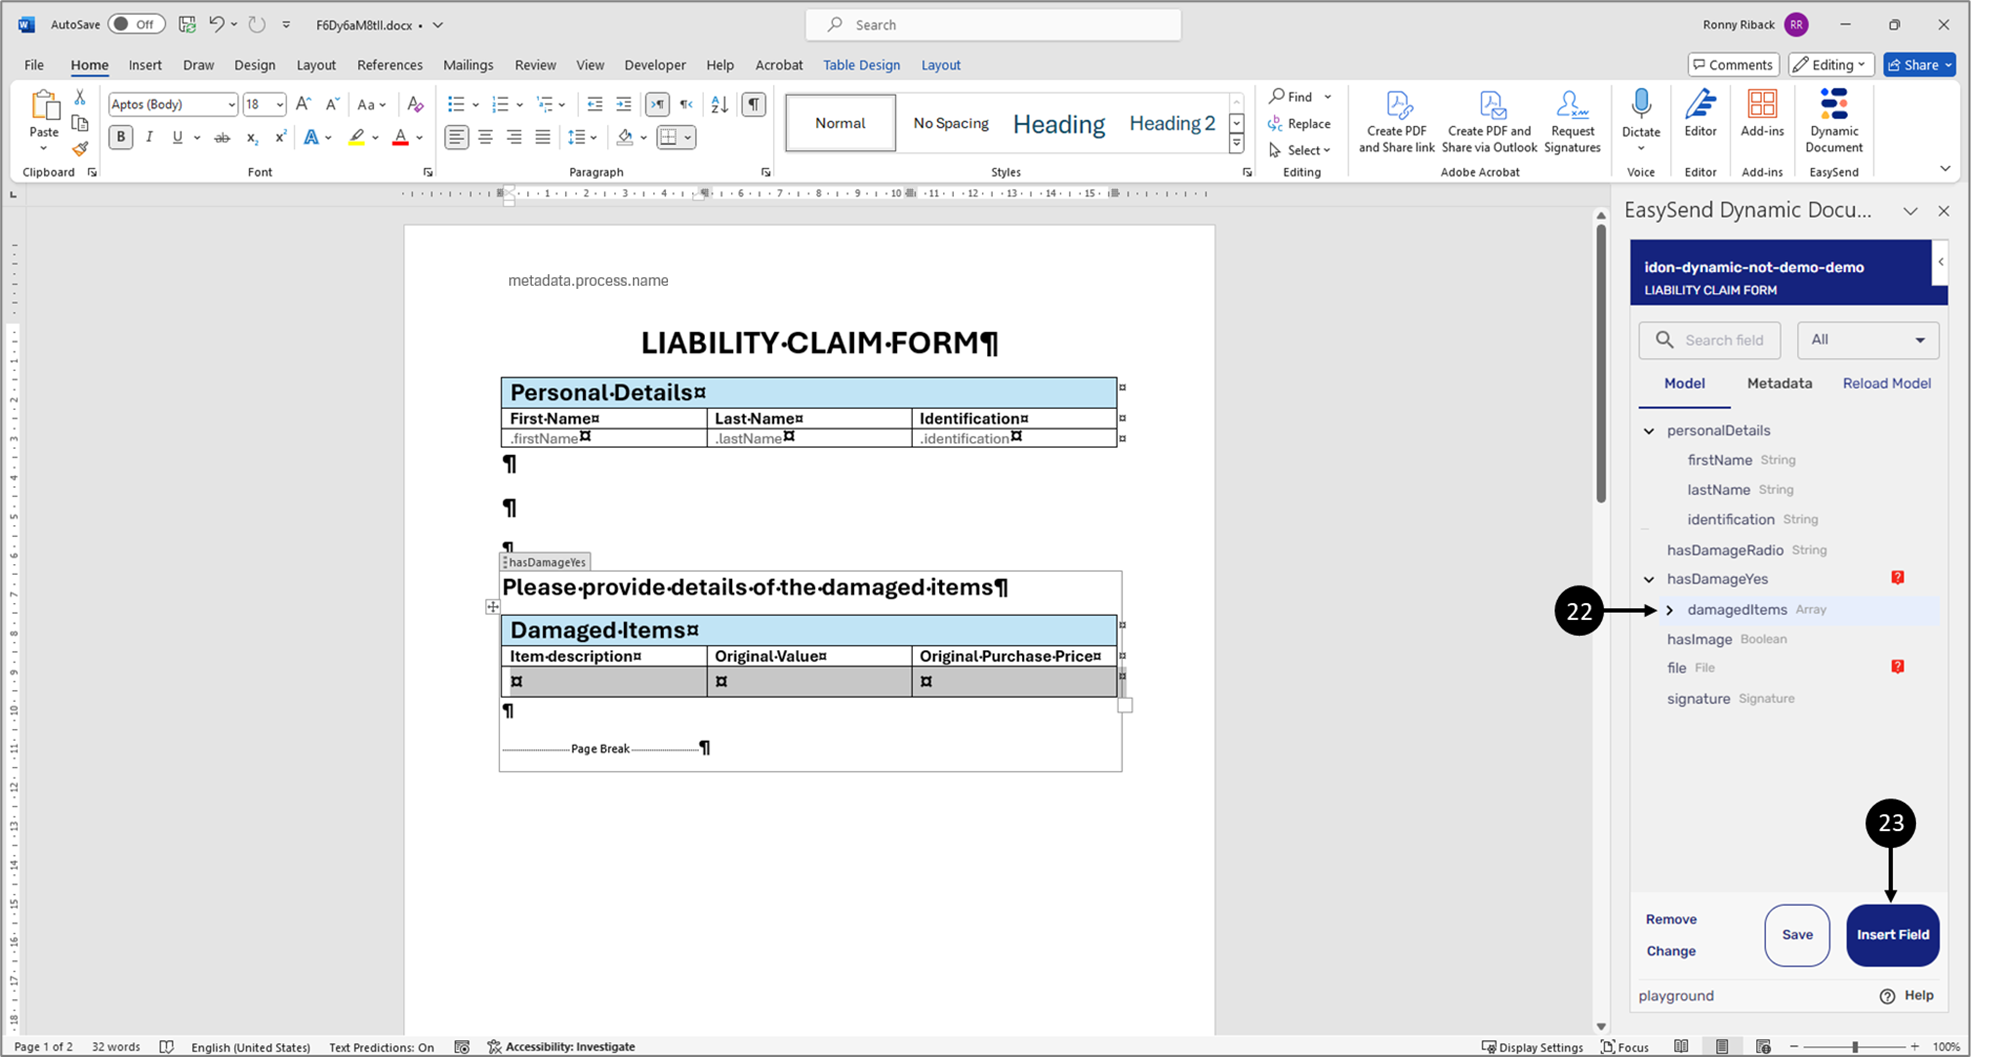
Figure 18: Array-Type Item
- Click the array-type item (22).
- Click the Insert Field button (23).
Result:
The table row is nested inside the array-type item (24):
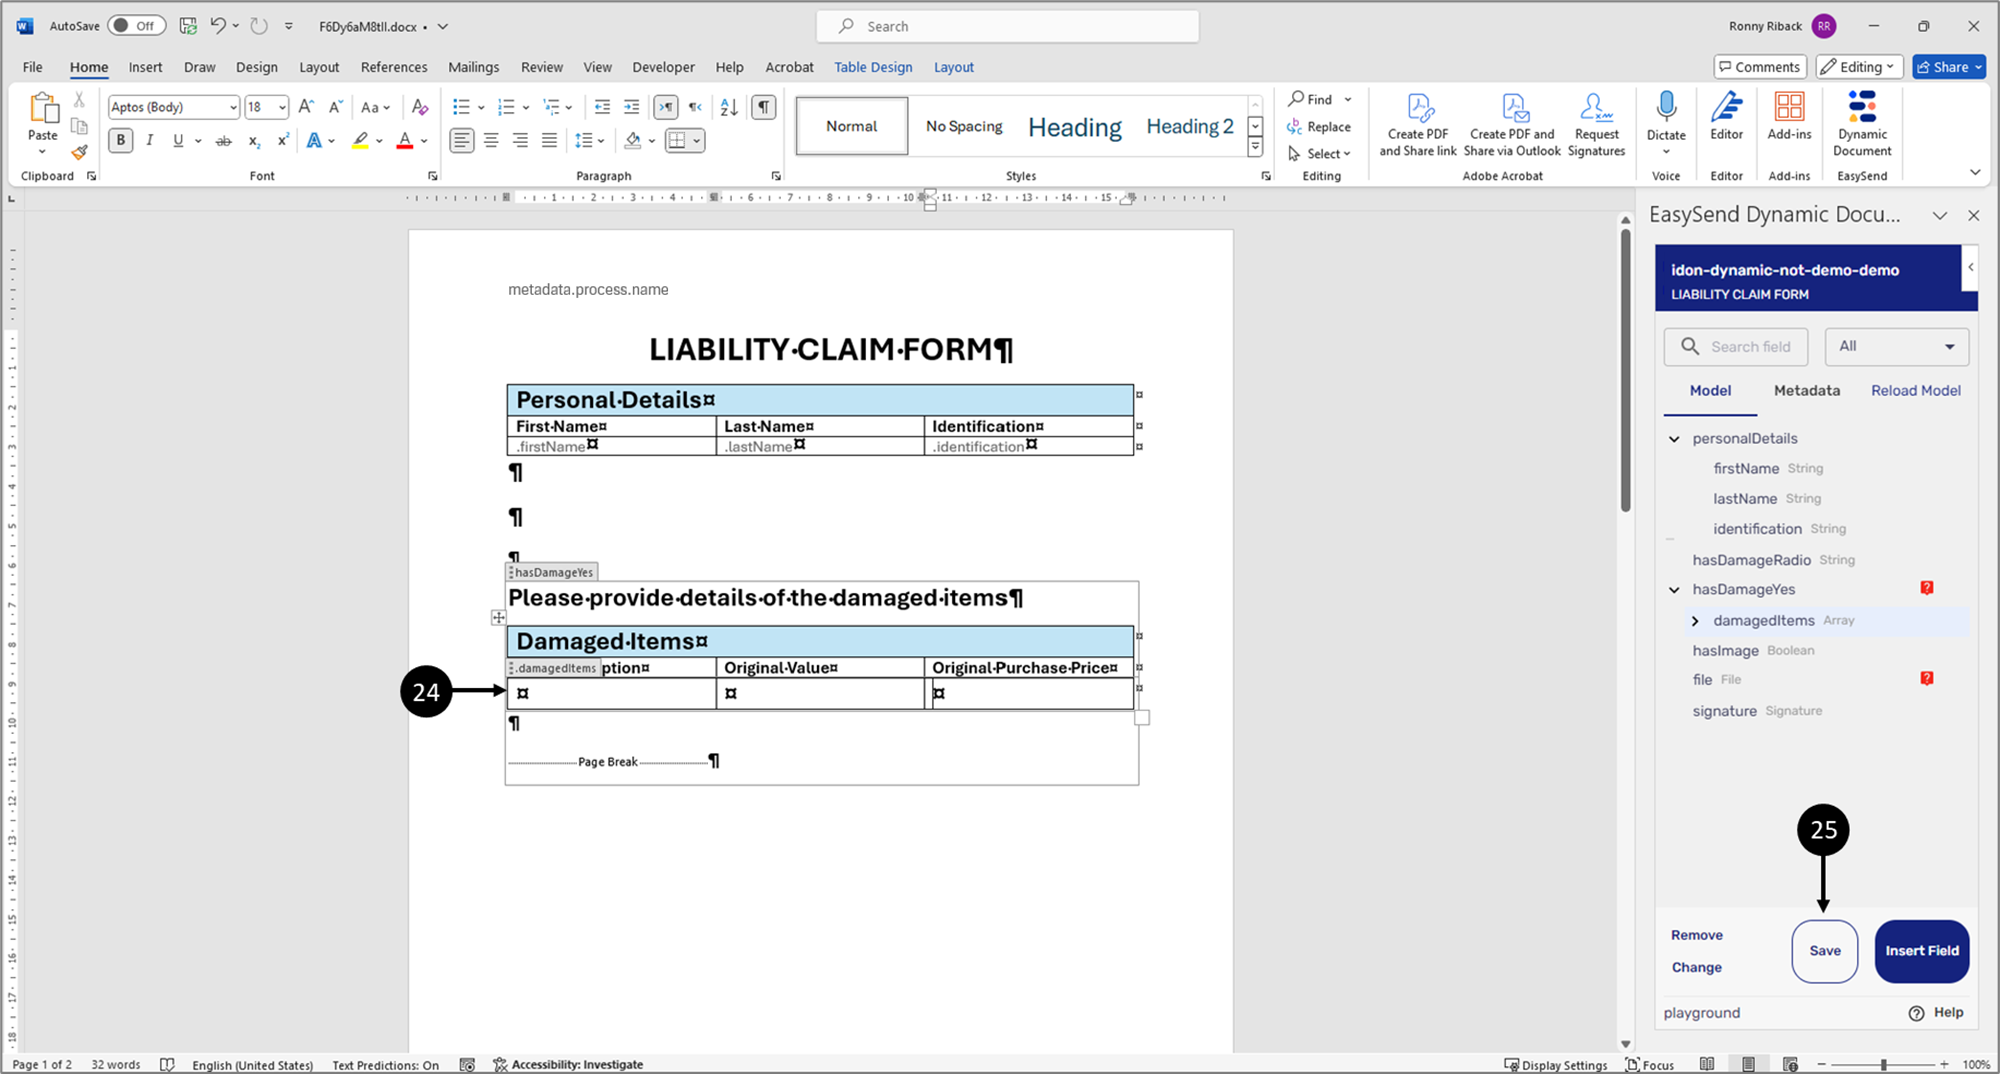
Figure 19: Nested Table Row
- Click the Save button (25).
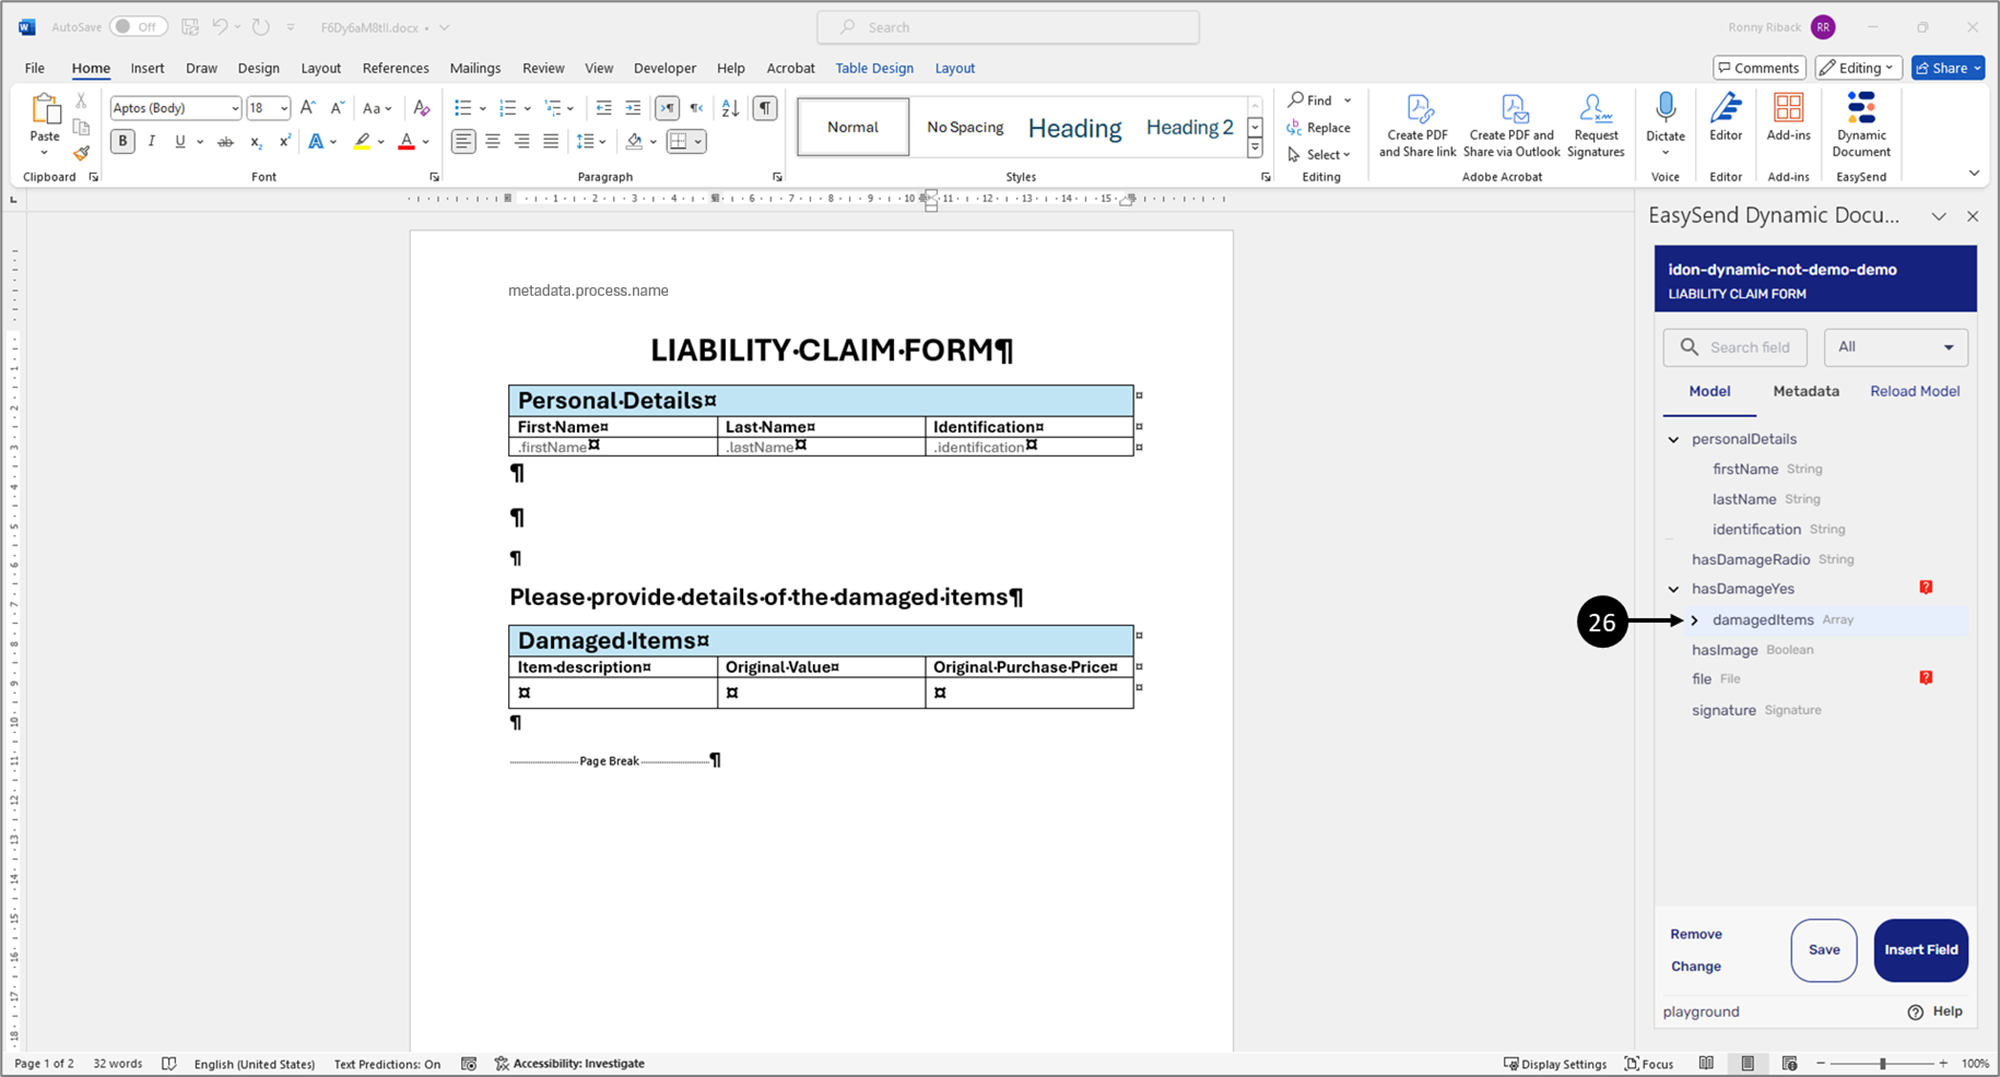
Figure 20: Array-Type Item
- Insert the array items:
- Expand the array-type item (26).
Result:
The nested items appear (27):
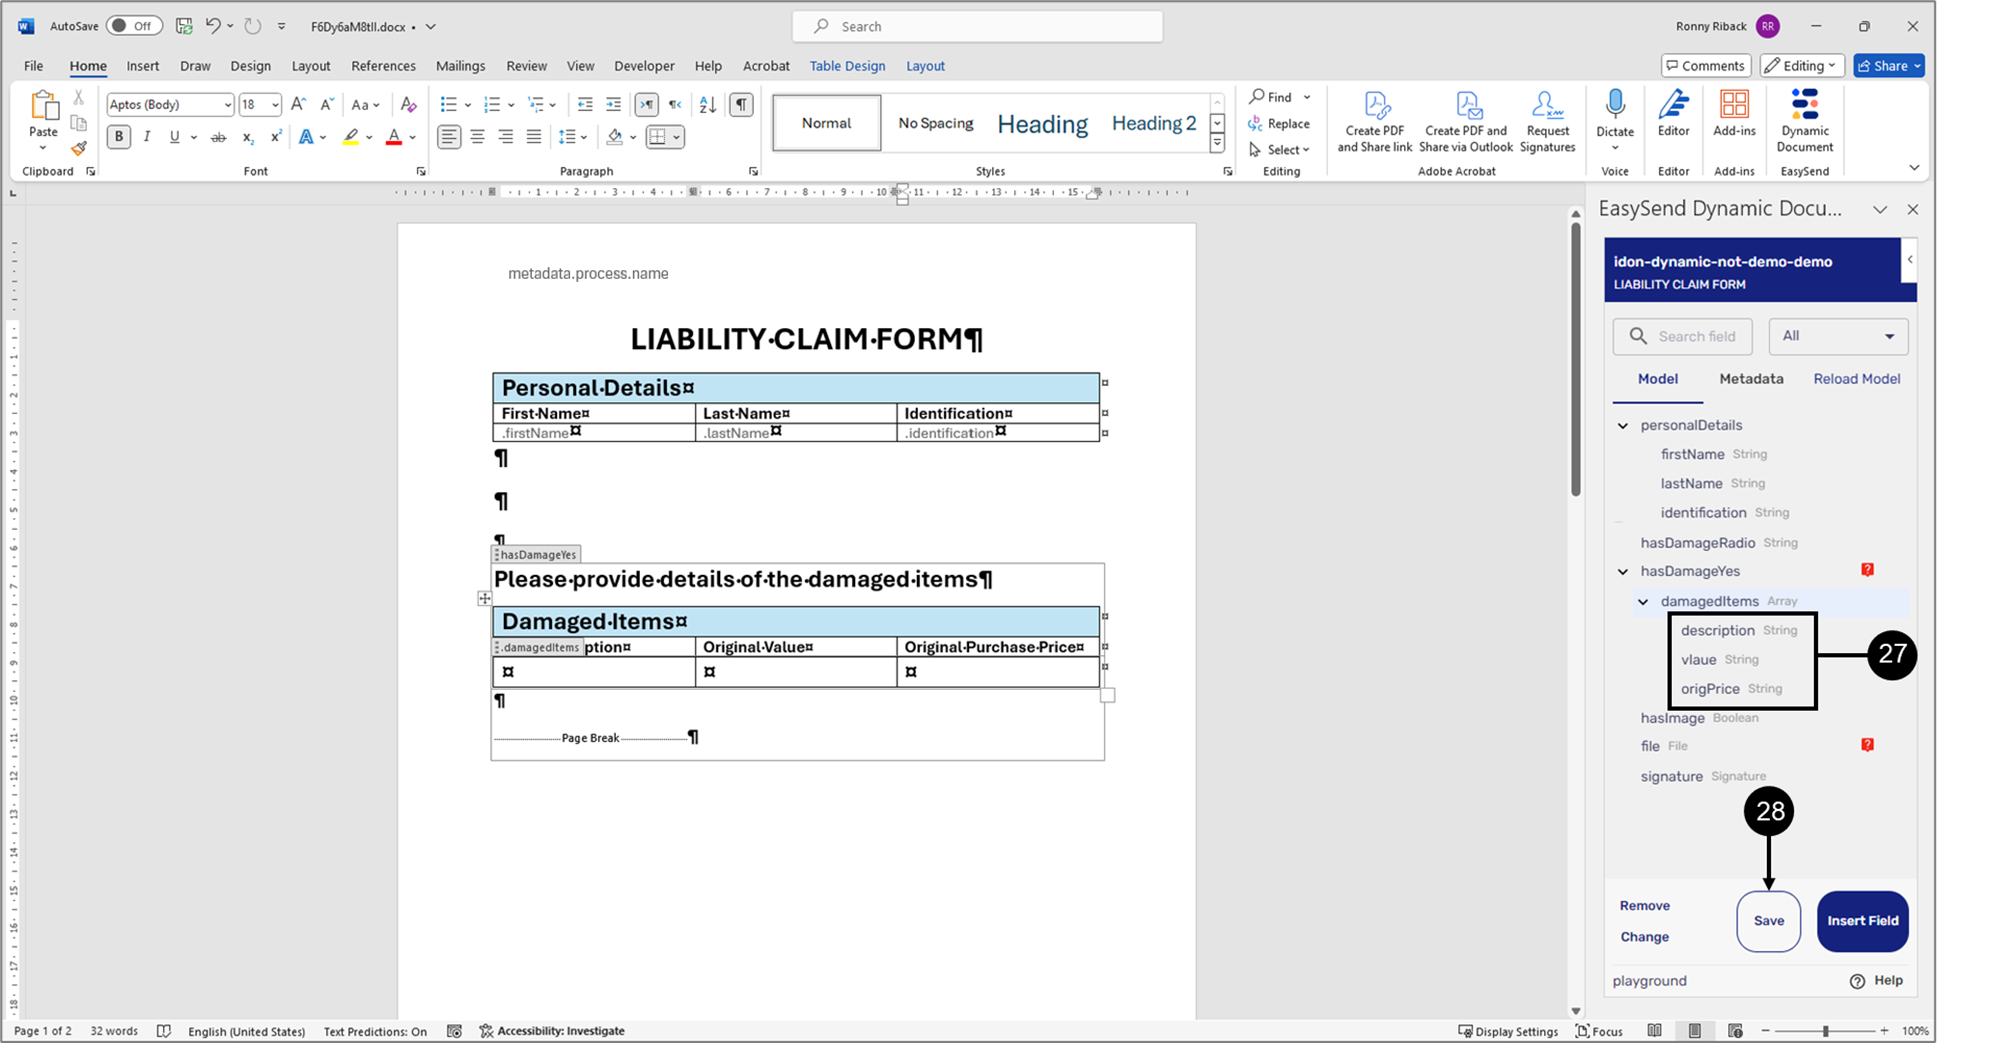
Figure 21: Nested items
- Insert all nested items (27).
- Click the Save button (28).
Result:
The items are inserted into the document:
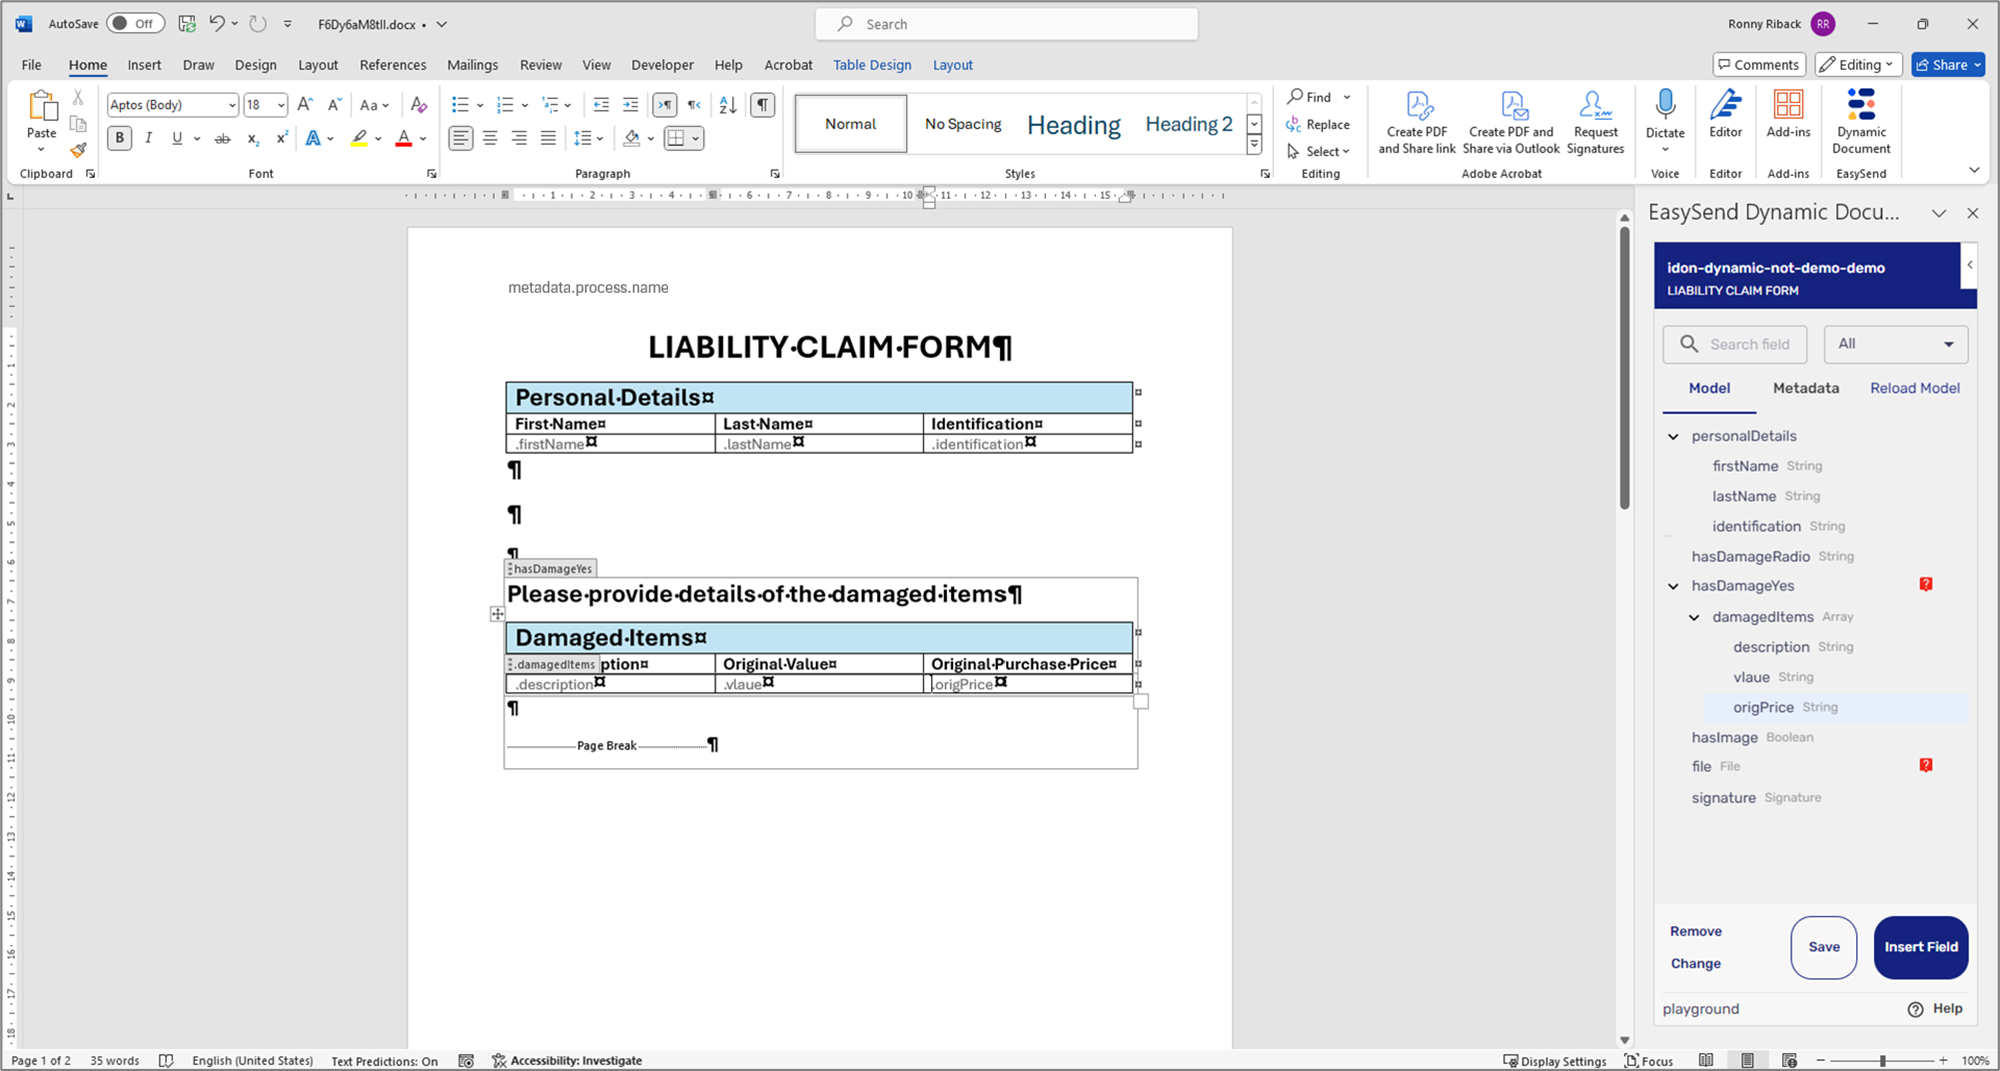
Figure 22: Dynamic Document with Inserted Items
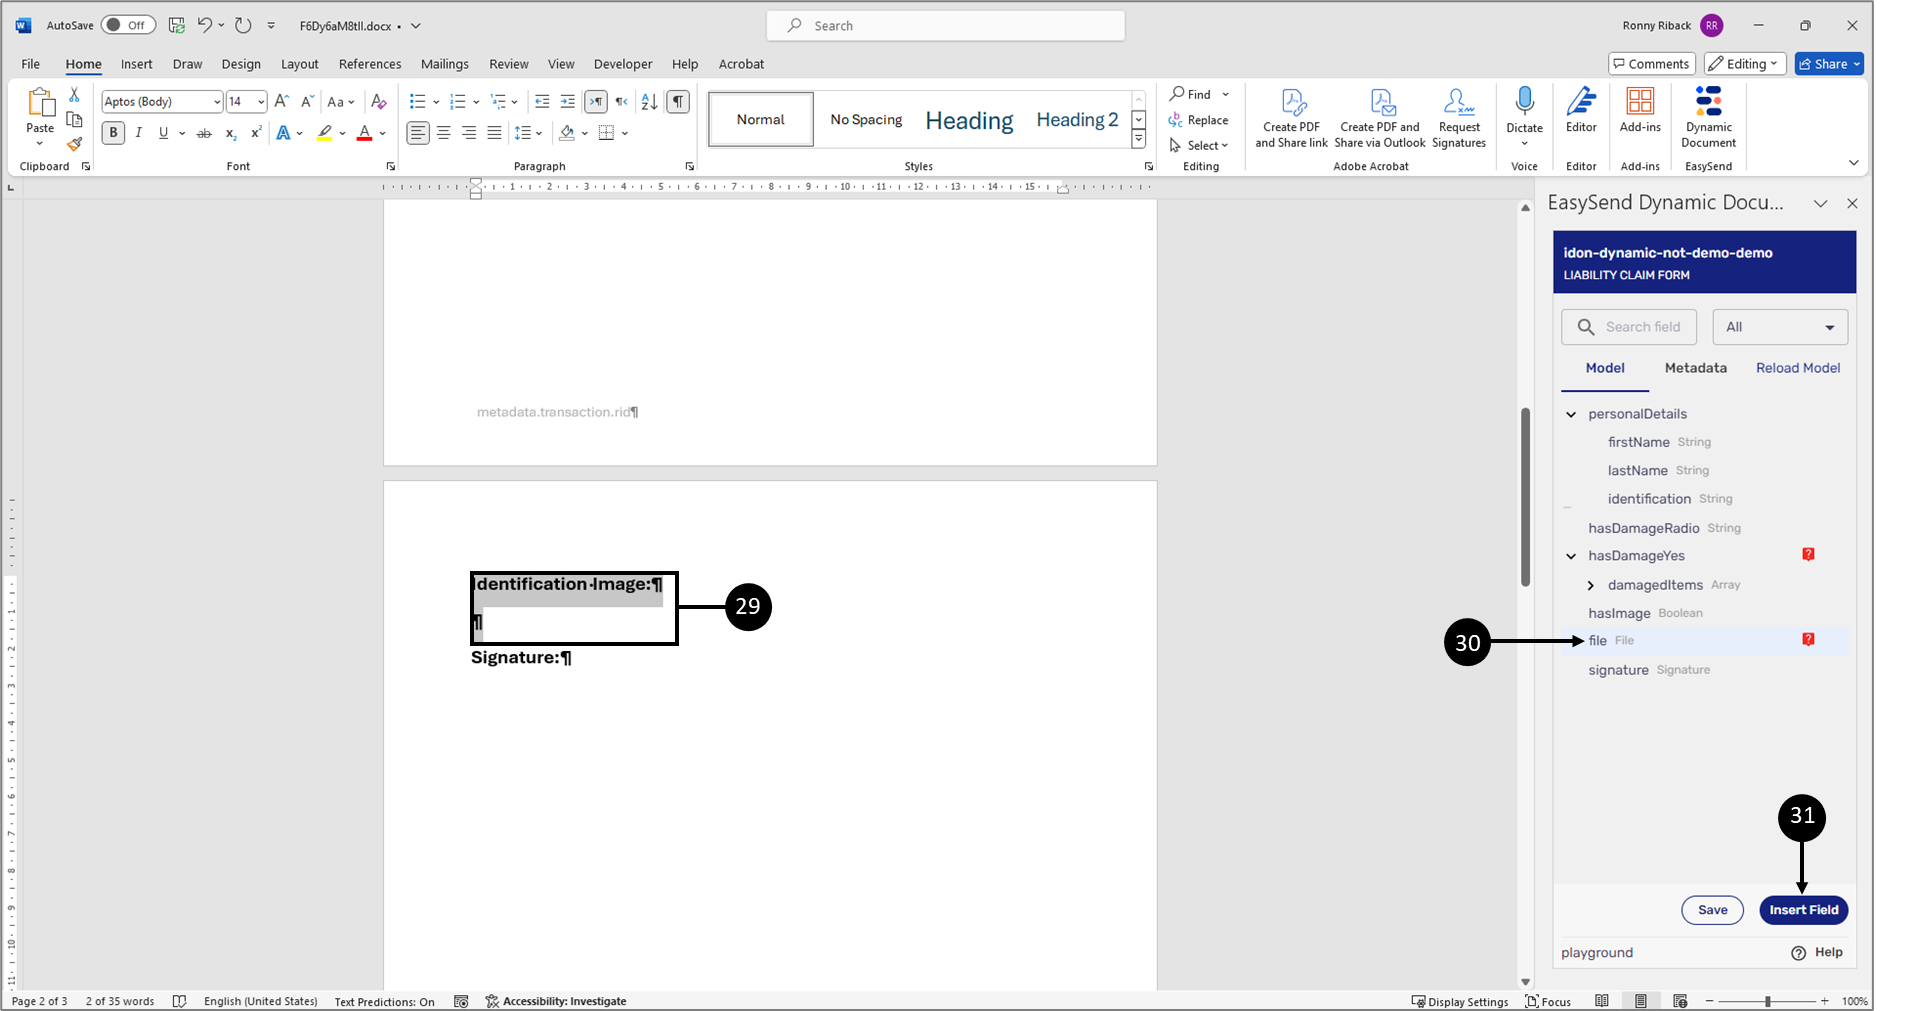
Figure 23: Inserting an Image 1 of 2
- Insert an image with a condition:
- Select the headline and the image location (29).
- Click the file-type item (30).
- Click the Insert Field button (31).
Result:
The image and the condition are inserted into the dynamic document:
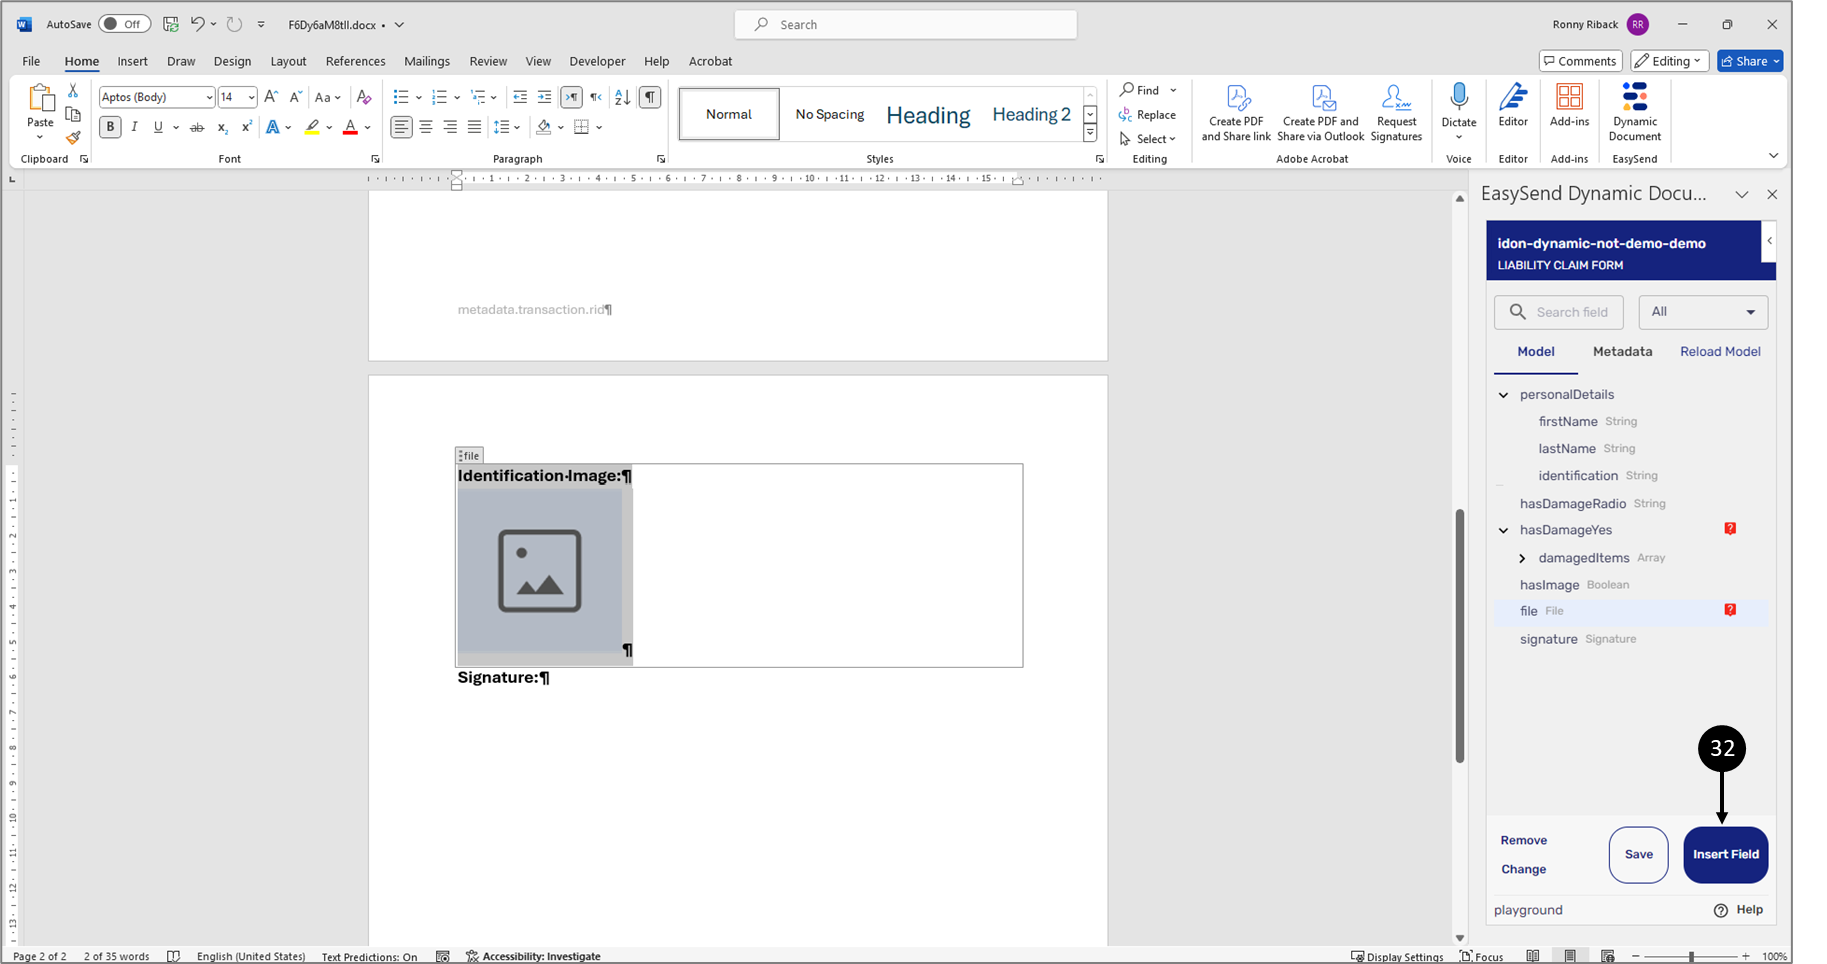
Figure 24: Inserting an Image 2 of 2
- Click the Save button (32).
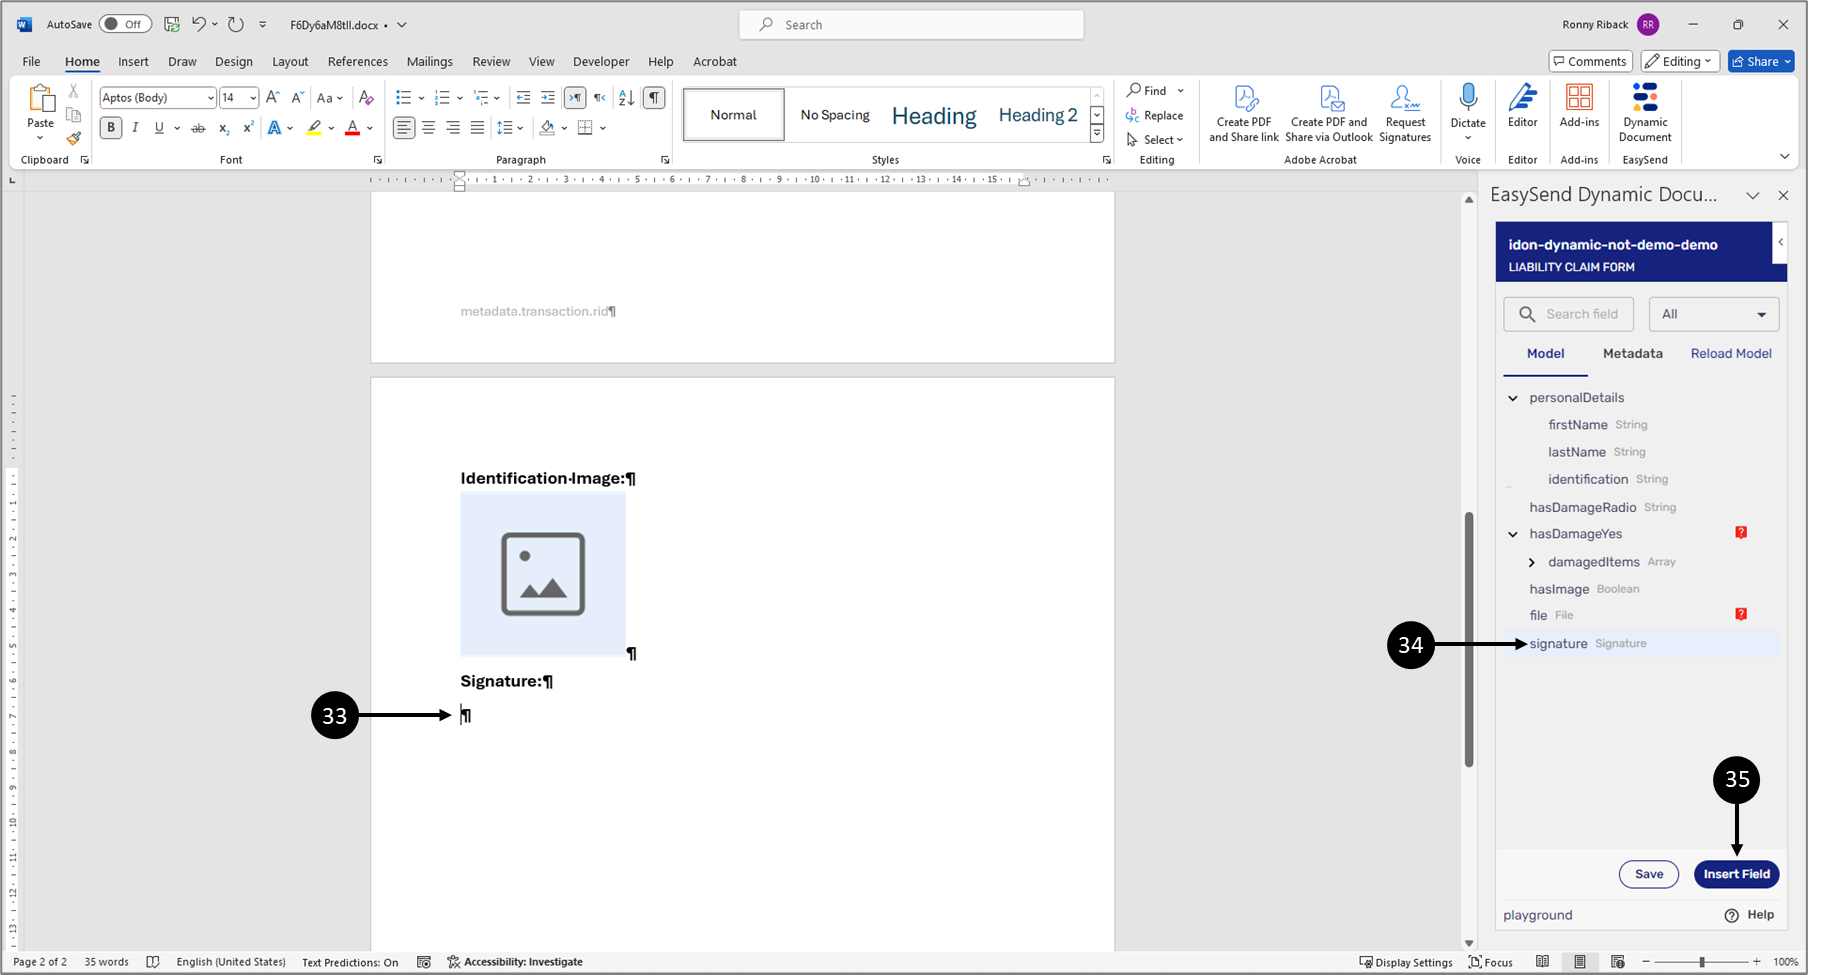
Figure 25: Inserting a Signature 1 of 2
- Insert a signature:
- Click the desired location in the dynamic document (33).
- Click the signature-type item (34).
- Click the Insert Field button (35).
Result:
The signature is inserted into the dynamic document:

Figure 26: Inserting a Signature 2 of 2
- Click the Save button (36).
Step 3: Deploy and Preview the Journey
Navigate back to the Webflow screen, deploy, and preview the journey.
Step 4: Interacting with the Journey
(See Figure 27 to Figure 30)
While the end-user interacts with the journey, they answer the Radio Question - Yes or No (1). The Damaged Items array will appear depending on their answer (2). Using the Add Item button (3) the end-user can add additional items to the array.
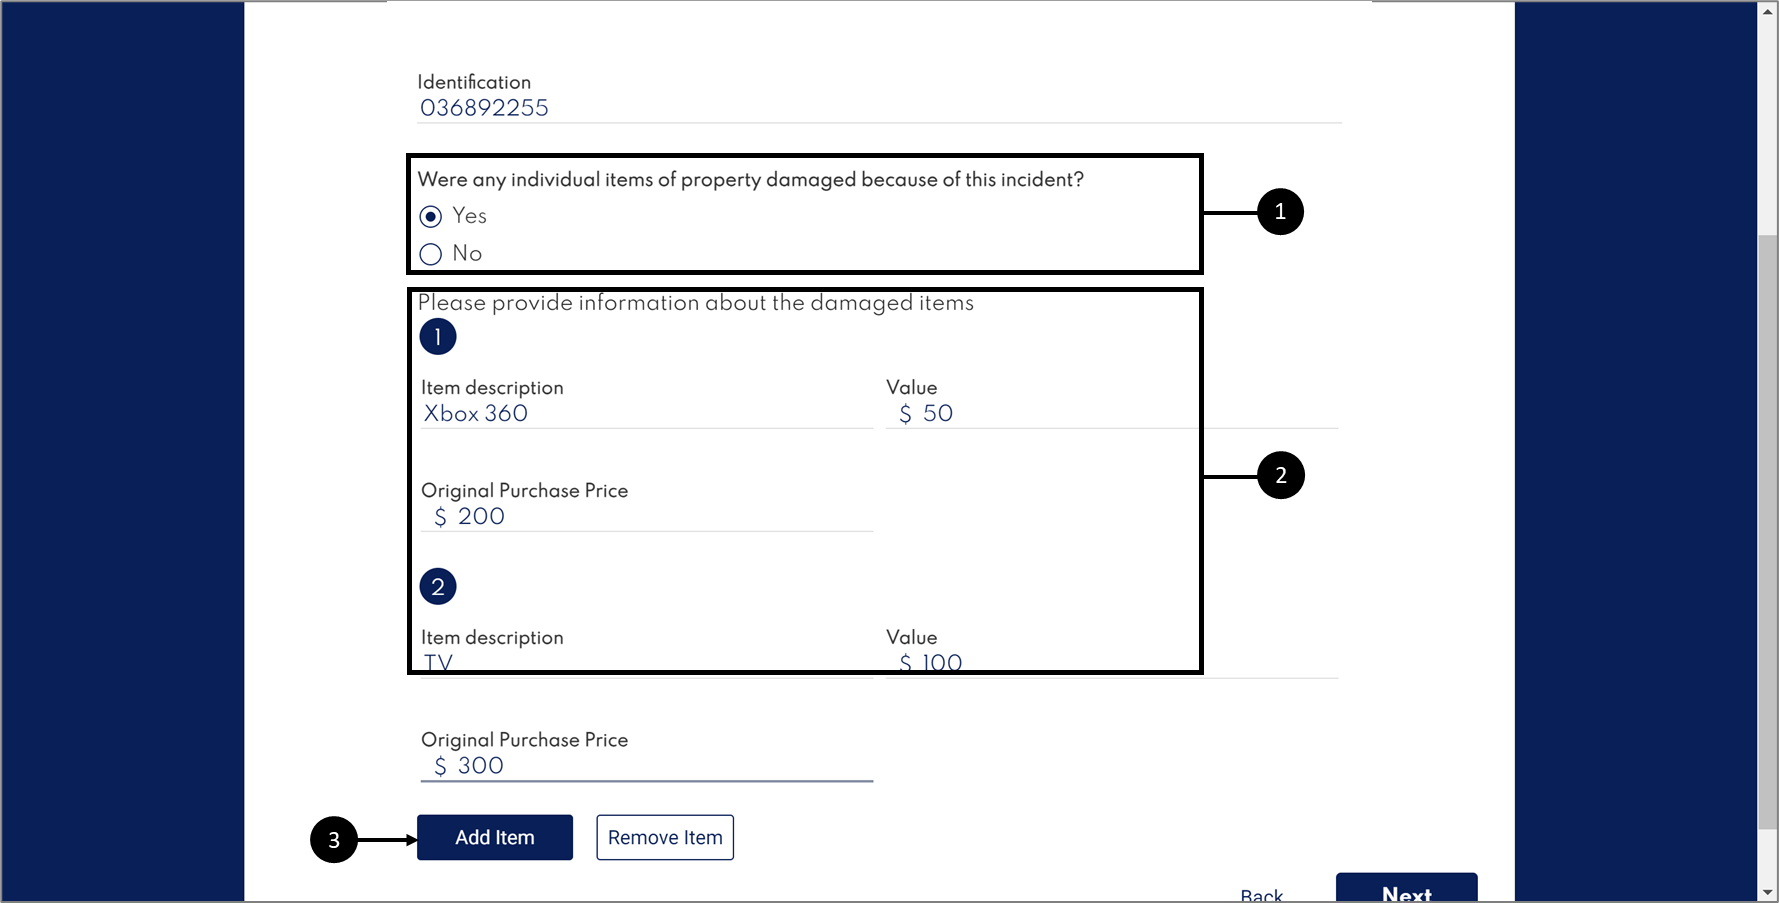
Figure 27: Radio Question and Conditioned Array
If the end-user has an image to upload, they will check the checkbox (4) and the Upload Component will appear (5).
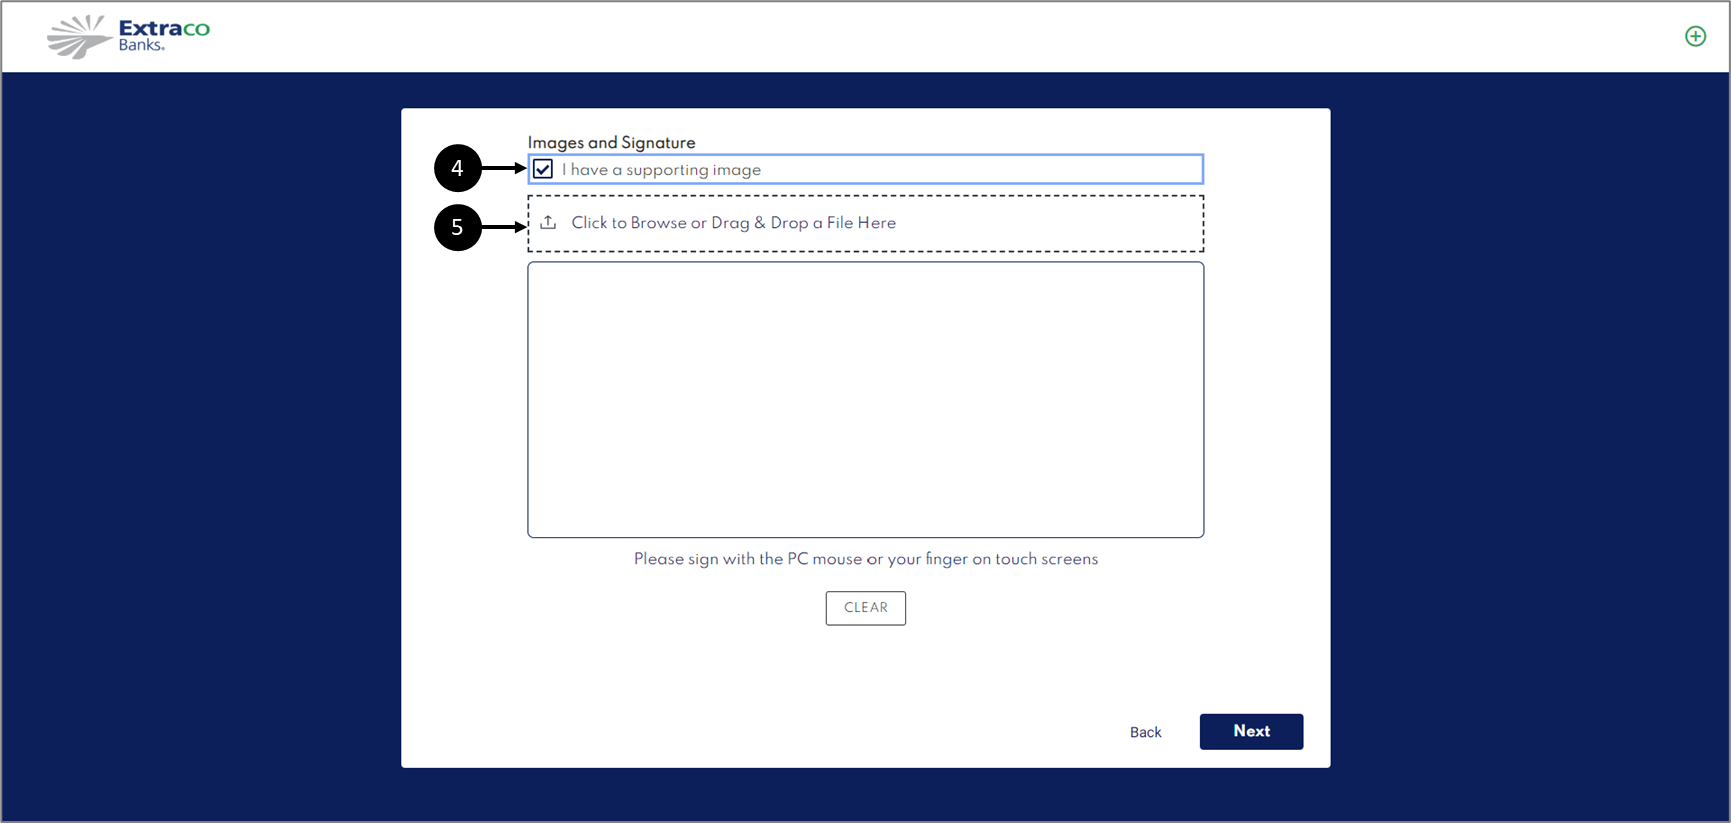
Figure 28: Uploading an Image
Because the dynamic document was built with the same business logic, the end-user's actions will affect it as well. Figure 29 displays the dynamic document with the Damaged Items array.
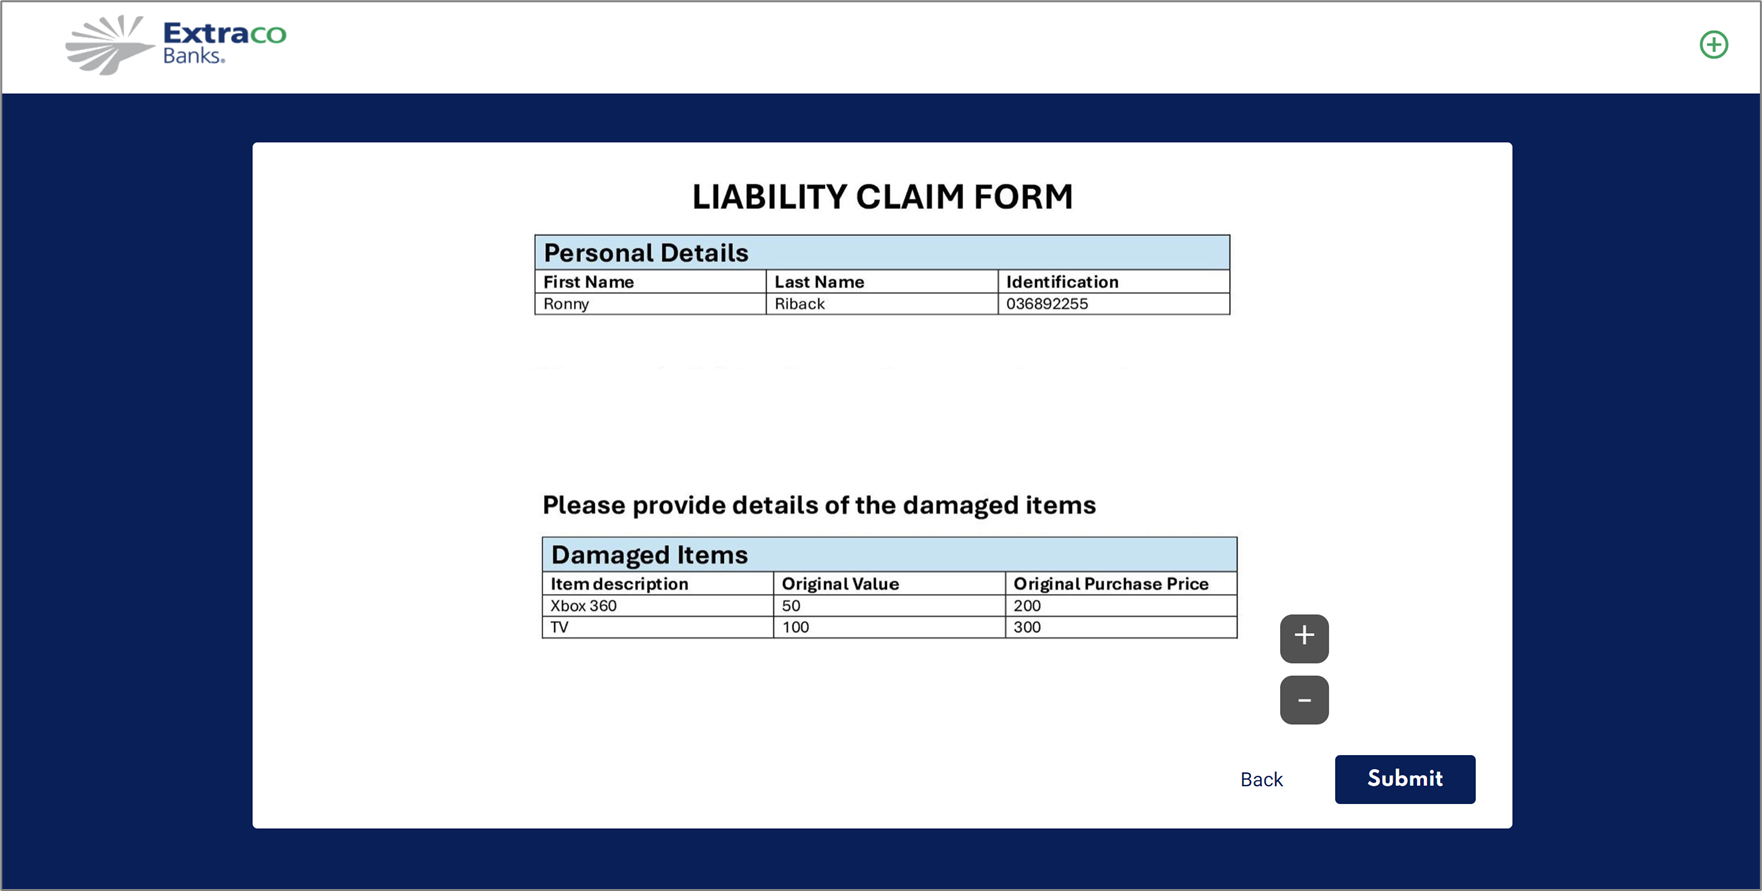
Figure 29: Dynamic Document with Damaged Items Array
Figure 30 displays the dynamic document without an image.
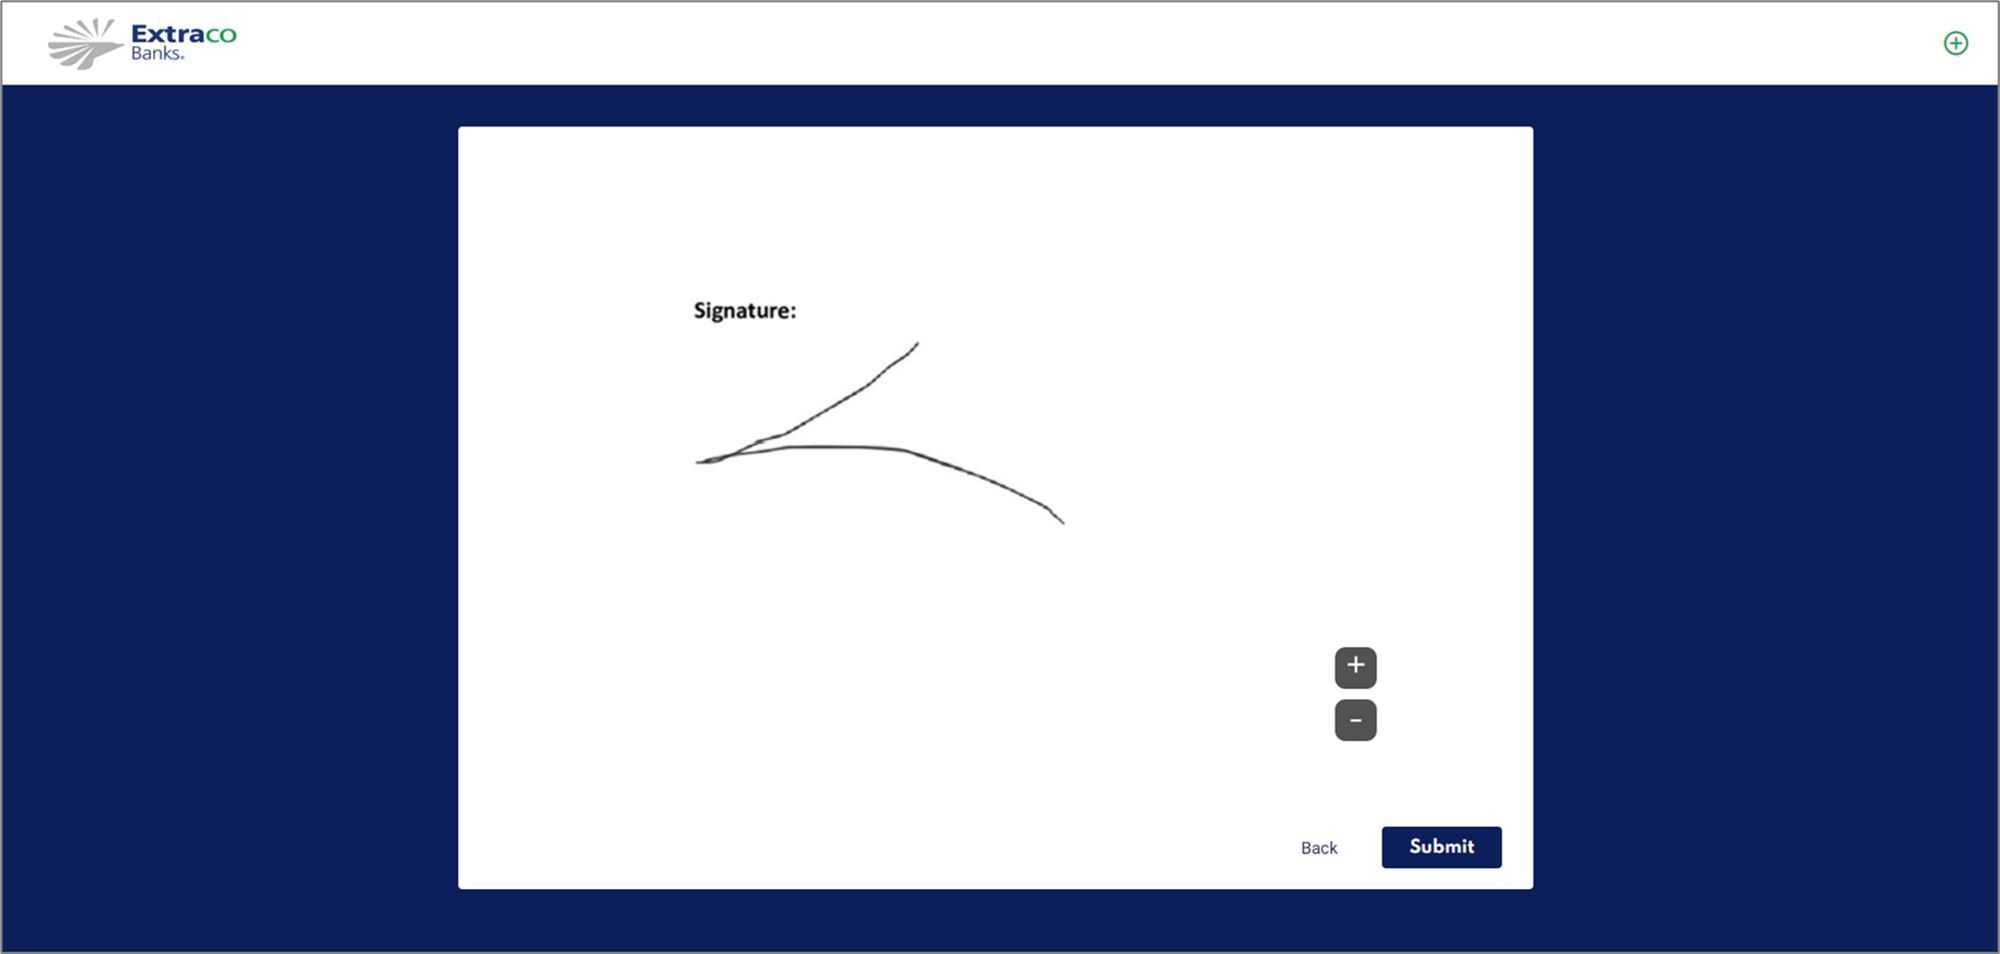
Figure 30: Restructured Dynamic Document