Article Overview
The following article describes EasySign's dashboard.
Dashboard Overview
(See Figure 1)
The dashboard is the first page you access once you enter your EasySign account. It contains the following sections and buttons:
- The main bar (1) - enables you to access your:
- Account settings to upgrade your EasySign plan
- Help Center - to read EasySign-related articles
- New Signature Request (2) - enables you to create a new eSignature request
- My Templates (3) - enables you to create new eSignature templates
- My Account (4) - enables you to view details about your account:
- How many eSignatures requests were sent
- How many templates were built
- How many users are active in your account
- Monthly Statistics (5) - enables you to track the performance of your eSignature requests:
- How many were sent
- How many are in progress
- How many have been completed
- Plan Upgrade (6) - enables you to click Go Premium to upgrade your EasySign plan
- Recent Activity (7) - enables you to create your first eSignature request, if requests already exist they will appear in a list with the following information:
- Creation time and date
- Name
- Type
- Customer name
- Customer email
- Sent by
- Status:
- Link-Sent - a link was sent to a signer
- Opened - the link was clicked and opened by a signer
- Reminder-Sent - a reminder was sent to a signer
- Completed-Step - a signer completed a step
- Completed (Process Completed) - the entire eSignature request was completed
- Canceled - a link was canceled
- Last updated
- Learning and Resources (8) - enables you to access helpful guides and resources for assistance
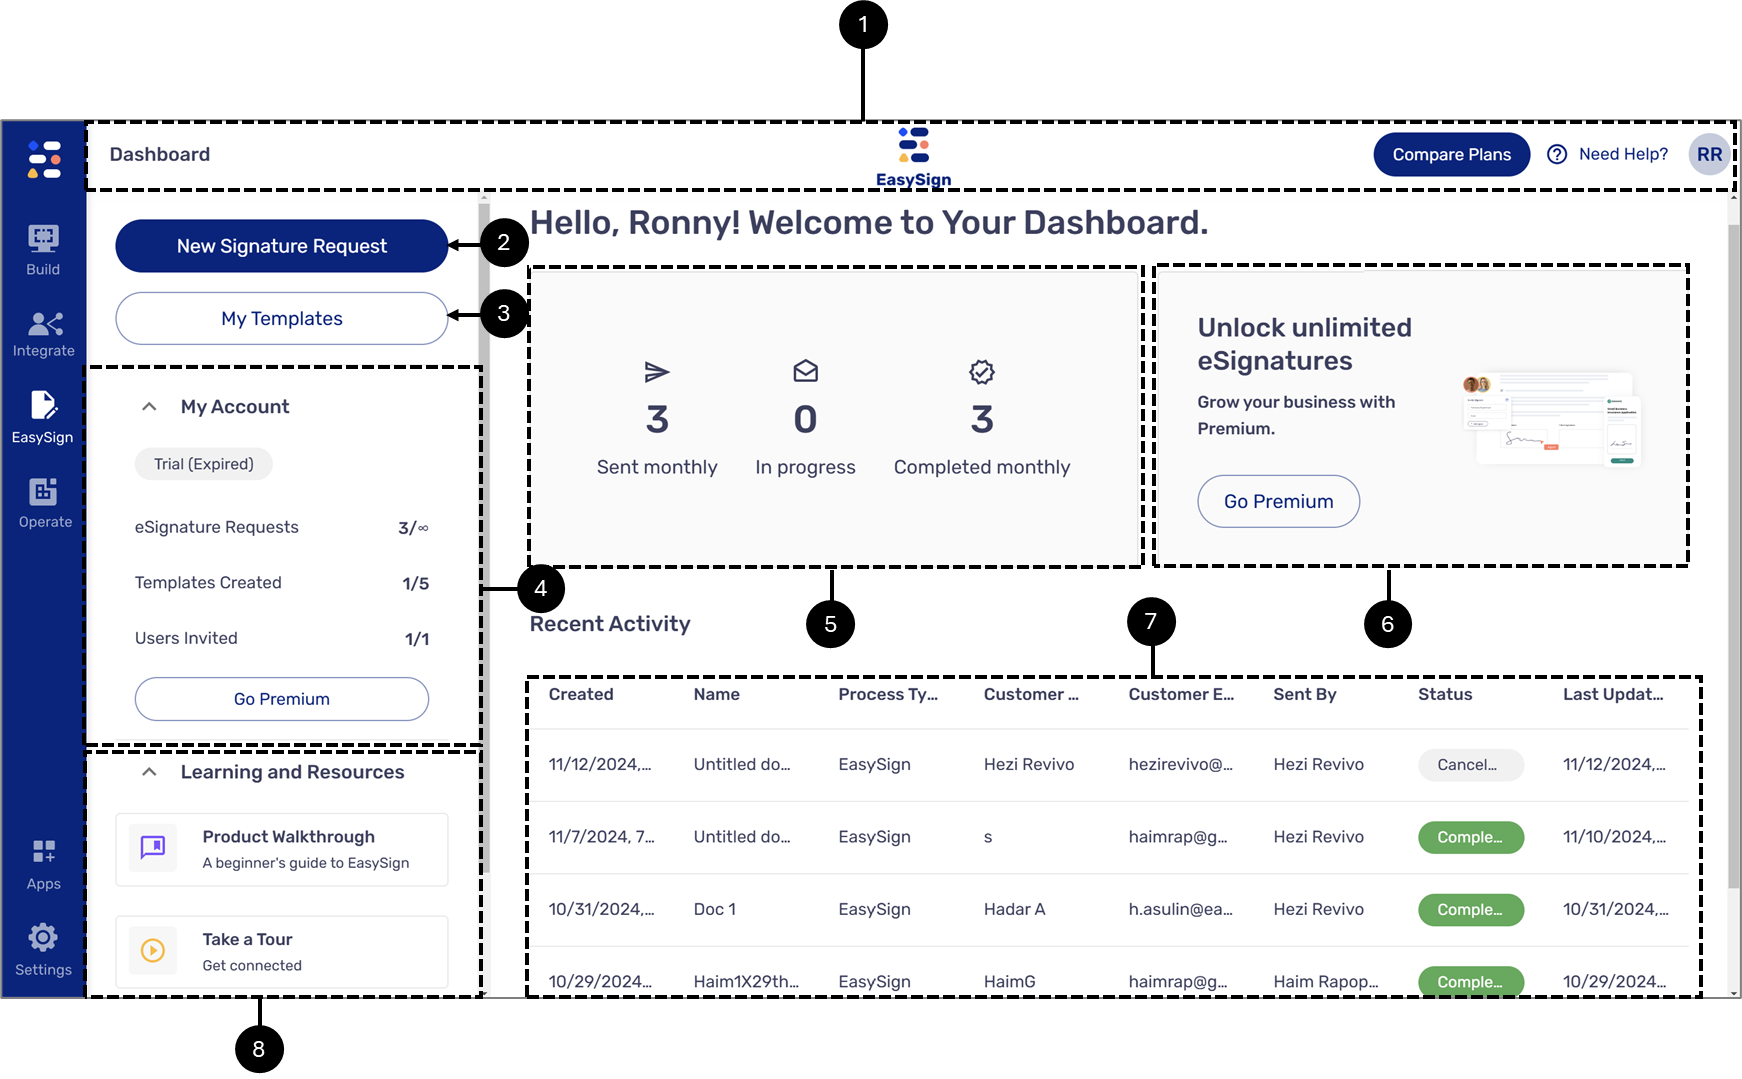
Figure 1: The Dashboard
The Navigation Bar
(See Figure 2)
The navigation bar appears when you access your account throughout the different EasySign screens. It contains three tabs:
- EasySign (1)
- Operate (2)
- Settings (3)

Figure 2: The Navigation Bar
EasySign Tab
(See Figure 3)
This tab enables you to:
- Access the dashboard
- Create a new eSignature request
- Build a template
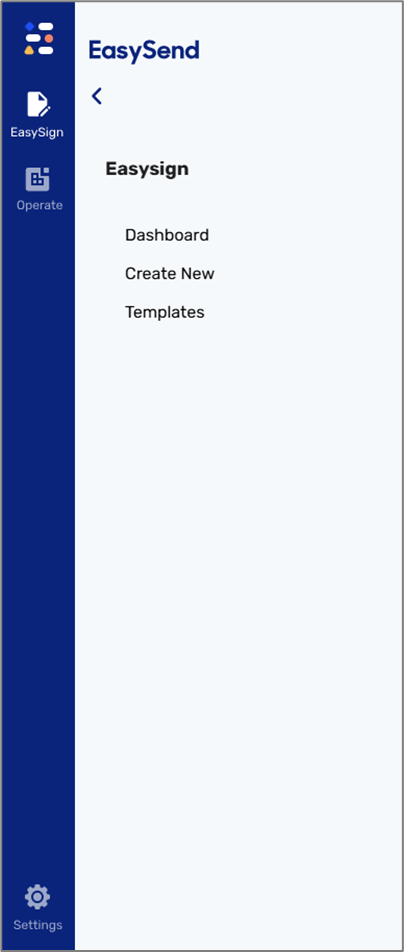
Figure 3: EasySign Tab
Operate Tab
This tab enables you to access the Journey Tracker.
Settings Tab
(See Figure 4)
This tab enables you to:
- Manage the users in your account (see Figure 5)
- Manage advanced EasySign settings, set reminders for signers, contact support, and upgrade your current EasySign plan (see Figure 6)
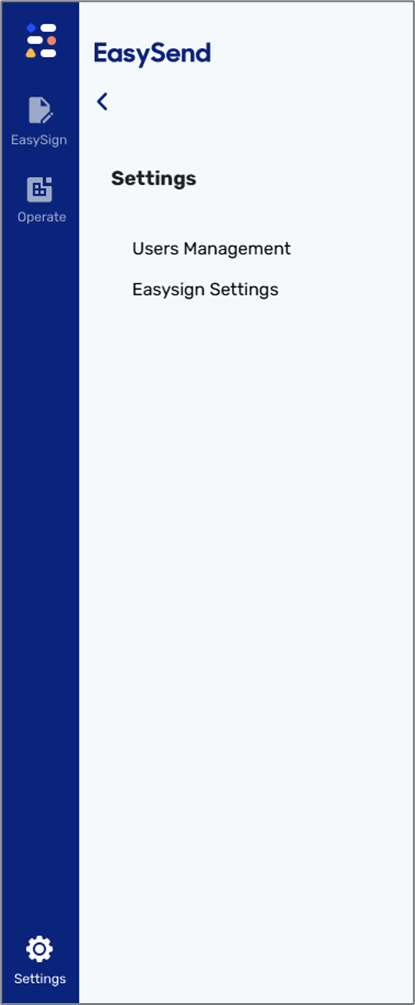
Figure 4: Settings Tab
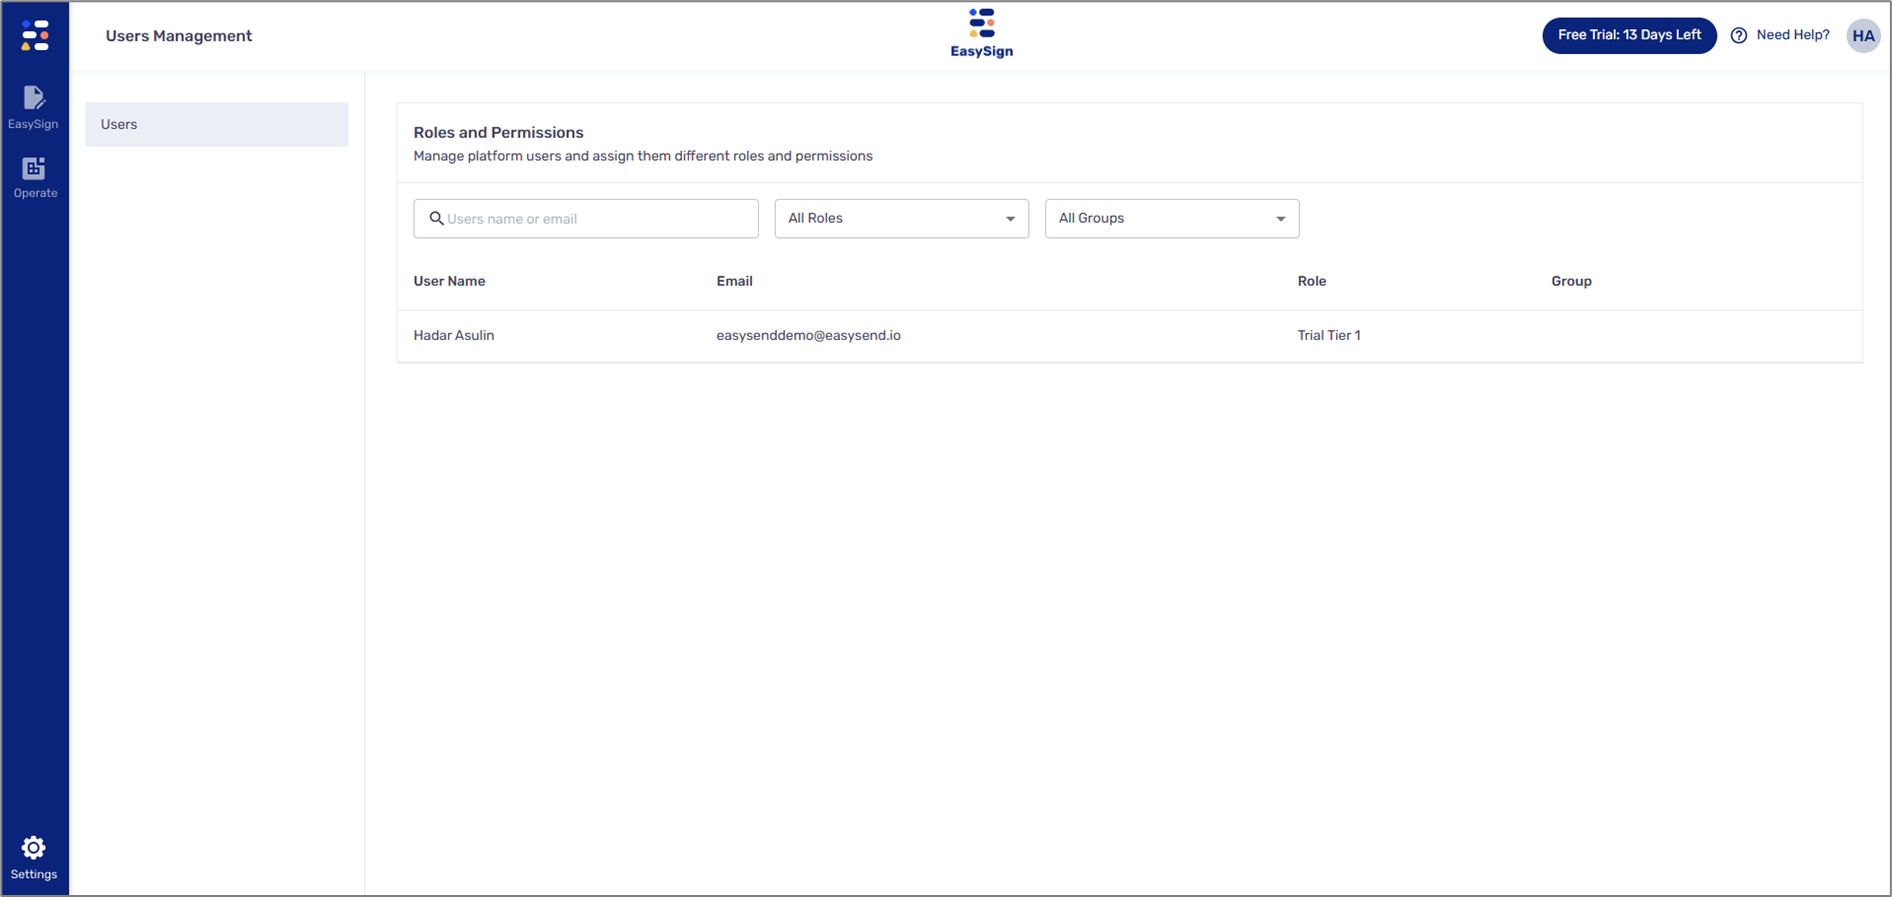
Figure 5: Users Management
Figure 6: EasySign Settings
Setting Reminders For Signers
(See Figure 7 to Figure 9)
To set reminders for signers, perform the following steps:
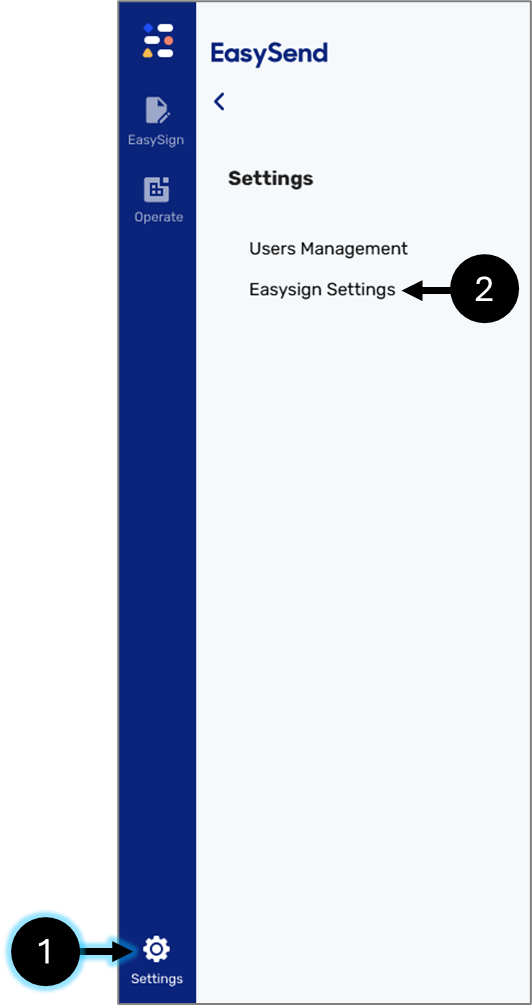
Figure 7: EasySign Settings
- Click the Settings tab (1) and the EasySign Settings option (2).
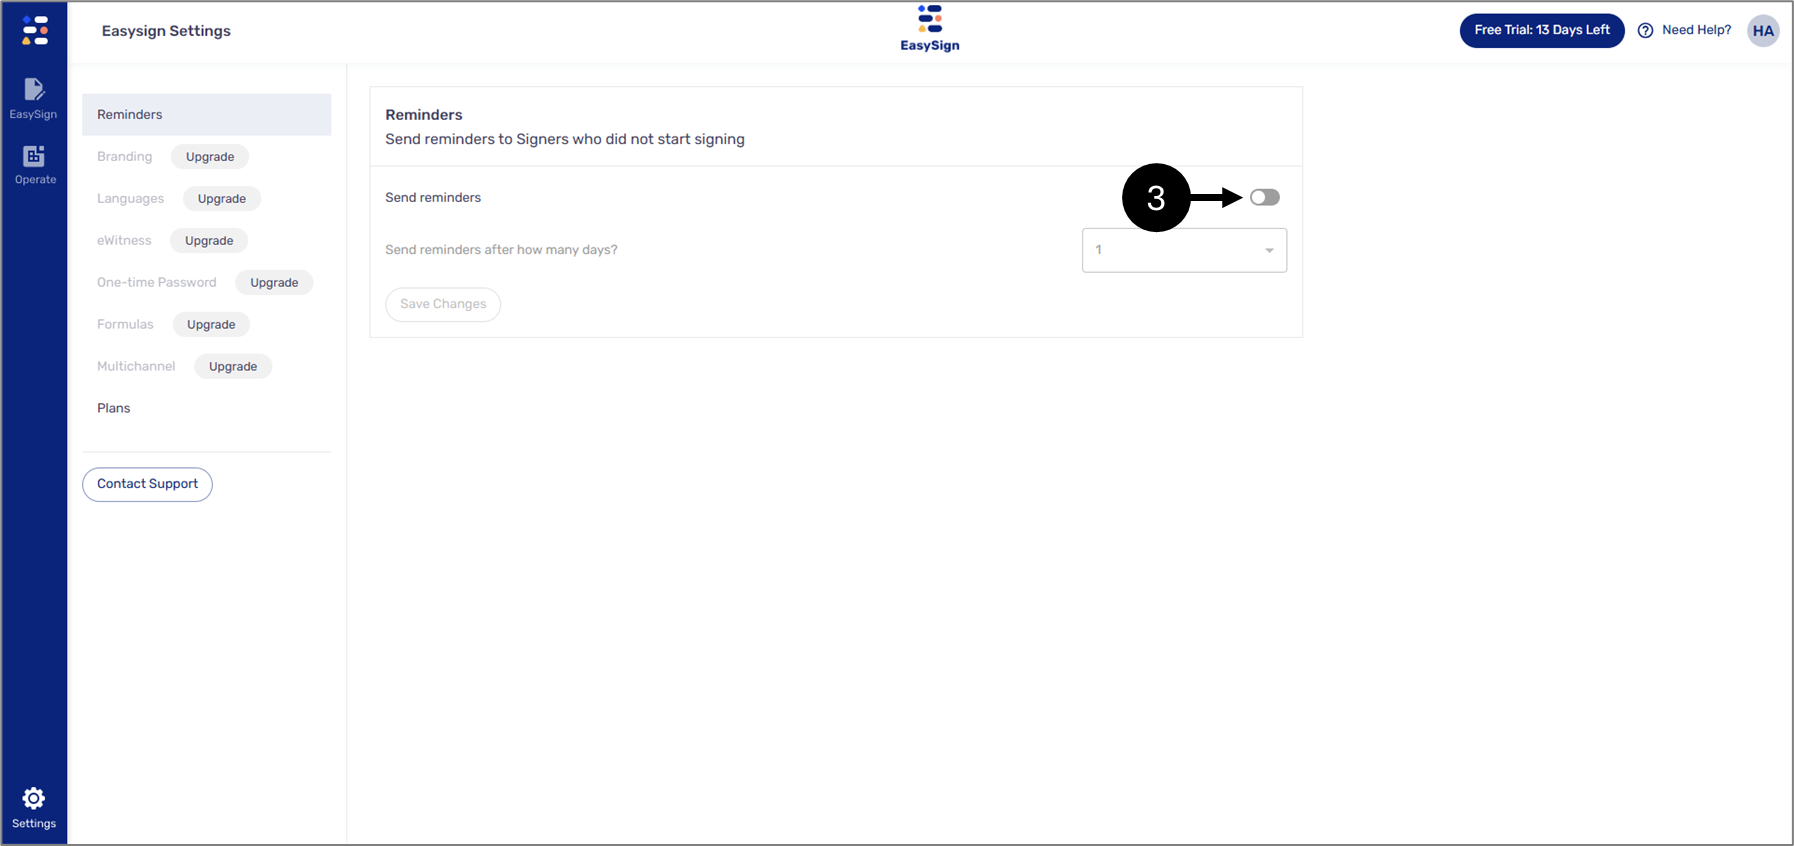
Figure 8: Send reminders Toggle
- Toggle the Send reminders switch (3) to on.
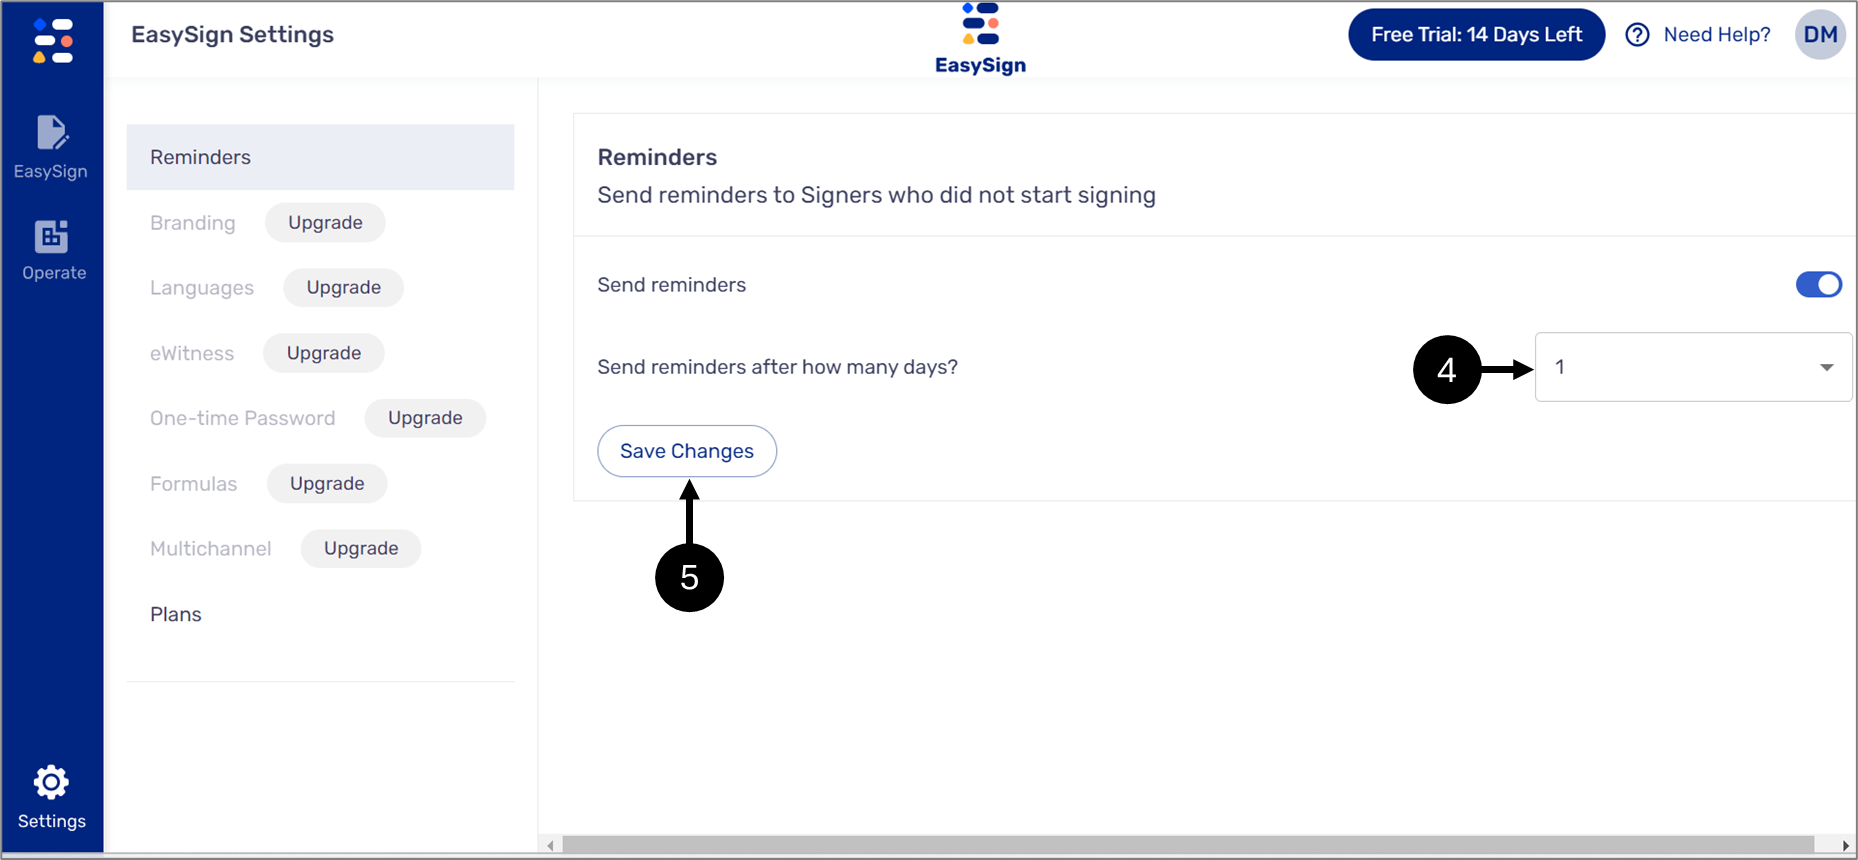
Figure 9: Number of Days + Saving Changes
- Click the dropdown (4) and select the number of days to pass before sending a reminder (1 to 4 days)
- Click Save Changes (5).