Physical Layouts and Logical Hierarchies
- PDF
Physical Layouts and Logical Hierarchies
- PDF
Article summary
Did you find this summary helpful?
Thank you for your feedback!
Article Overview
The following article describes the Navigator section.
Overview
(See Figure 1)
Each time a component is added to the canvas, a corresponding data item is automatically created in the navigator. Data items are used for conditions and validations. There are six types of data items:
NOTE
To learn more about conditions and validations, click here.
- Object:
- Page
- Container
- Array
- String:
- Text Area
- Text Field
- Date Input
- Radio Group
- Dropdown
- Boolean - Checkbox
- File - File Upload
- Signature - Signature
- Other:
- Primary/Secondary Button
- Text
- Mirror
- Grid
The navigator displays a structured list of data items, organized based on the Webflow's physical layout and a logical hierarchy.
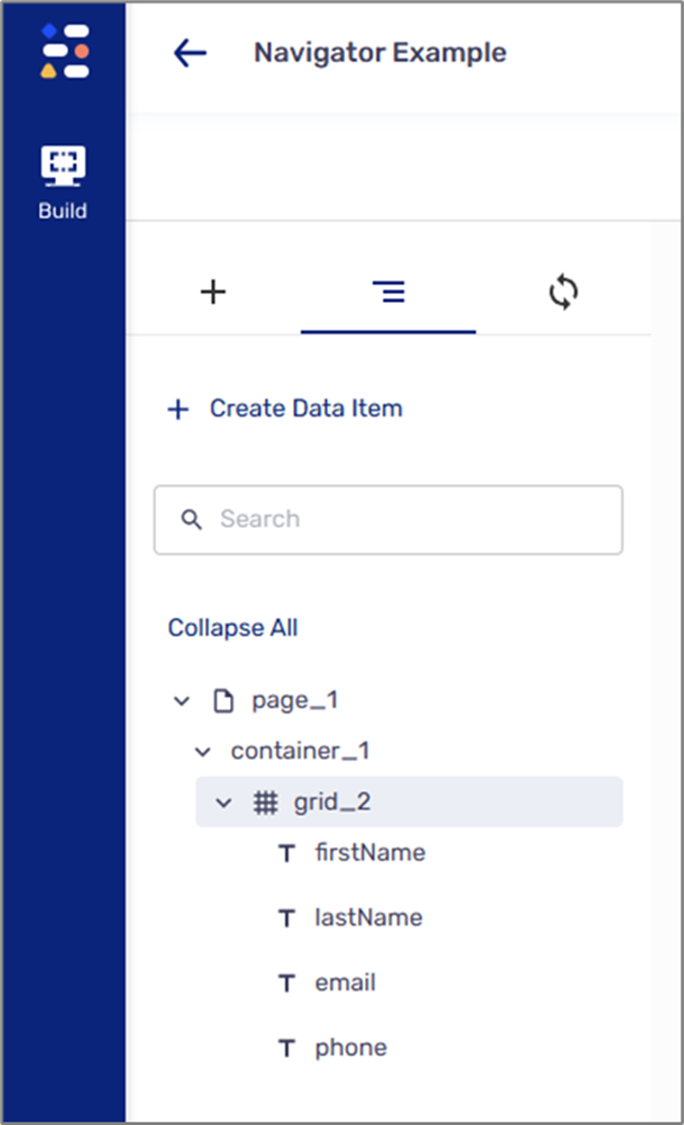
Figure 1: Navigator Example
Physical Layout
When building a Webflow, the Page, the Container, and the Array are Object-type components that hold other components.
- A Page can hold:
- A Container
- An Array
- A Grid
- All other components
- A Container can hold:
- An Array
- A Grid
- All other components
- An Array can hold:
- A Container
- A Grid
- All other components
The exception is the Grid which is not an Object-type component but can also hold other components:
- A Container
- An Array
- All other components
Logical Hierarchy
The following sections provide examples of logical hierarchies displayed in the navigator based on different physical layouts.
Example 1
Figure 2 displays the following physical layout:
- The Page holds the Container
- The Container contains a Grid
- The Grid holds four Text Field components

Figure 2: Physical Structure
Figure 3 displays the logical hierarchy that will be displayed in the navigator according to the described physical layout:
- The Page nests the Container
- The Container nests the Grid
- The Grid nests four Text Field components
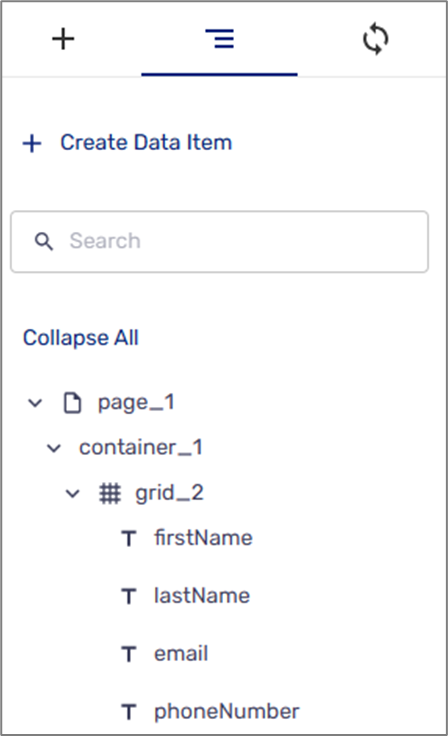
Figure 3: Logical Structure and Hierarchy
Example 2
Figure 4 displays a Page that holds the following components:
- Static Text
- Checkbox component
- Signature
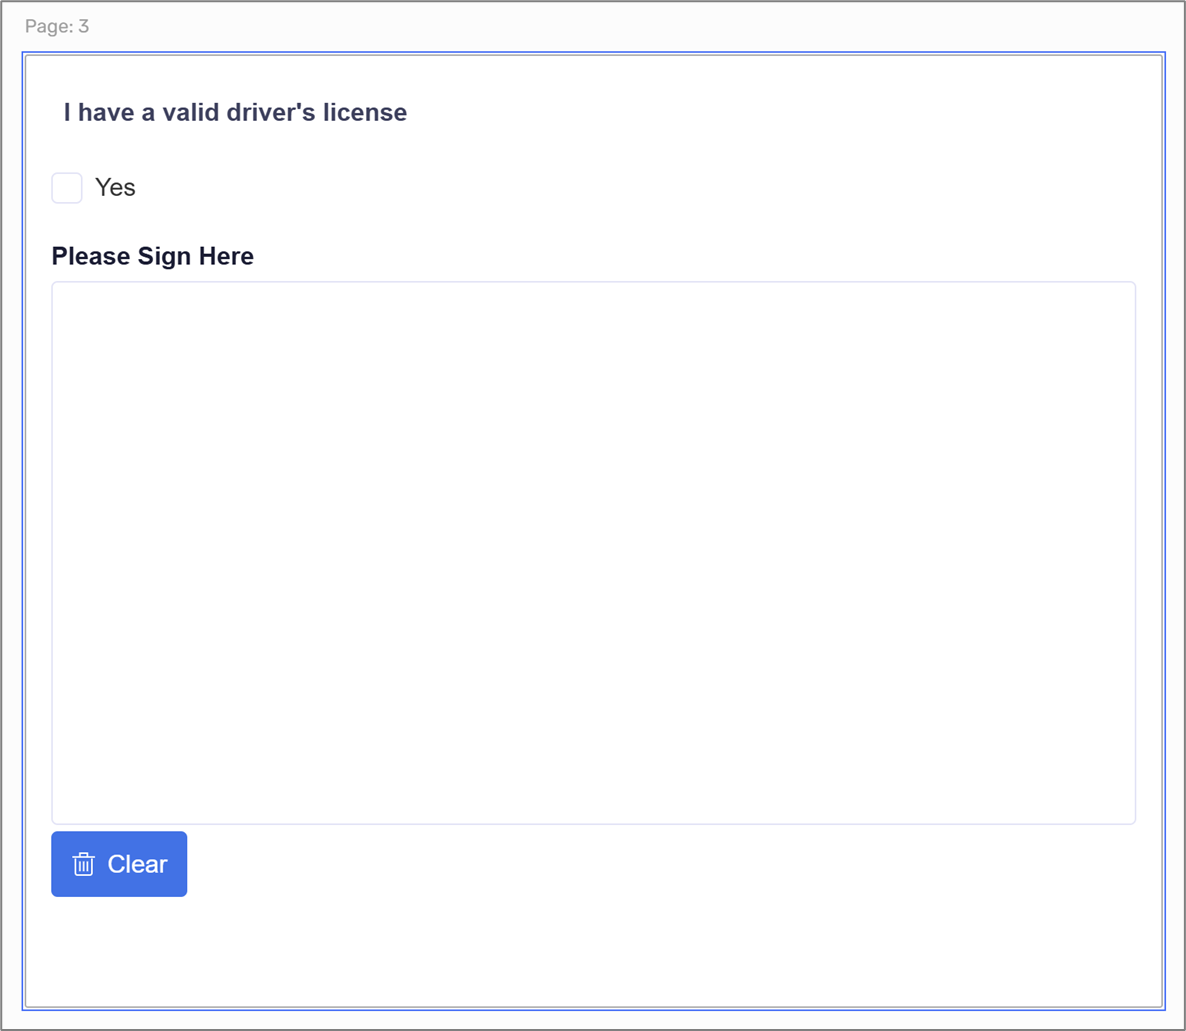
Figure 4: Physical Structure
Figure 5 displays the navigator's logical hierarchy in which the Page nests all other components.
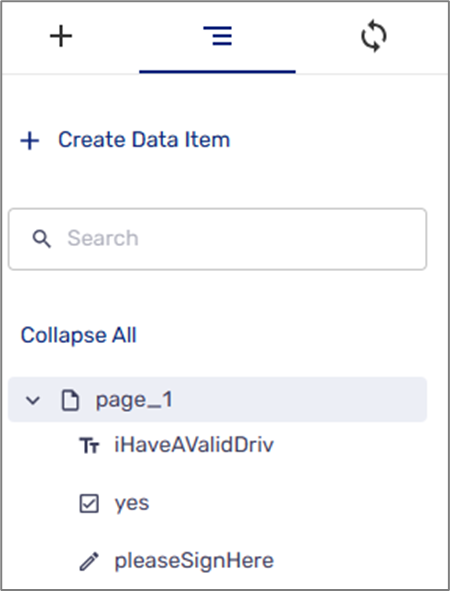
Figure 5: Logical Structure and Hierarchy
Example 3
The Navigator of a Webflow with multiple pages will display logical hierarchies according to the number of pages (see Figure 6).

Figure 6: Multiple Pages
Naming Convention
(See Figure 7 to Figure 9)
When first adding components to the canvas, their corresponding data items appear in the navigator with a unique icon and a default name comprised of the component's name and a sequence number, for example:
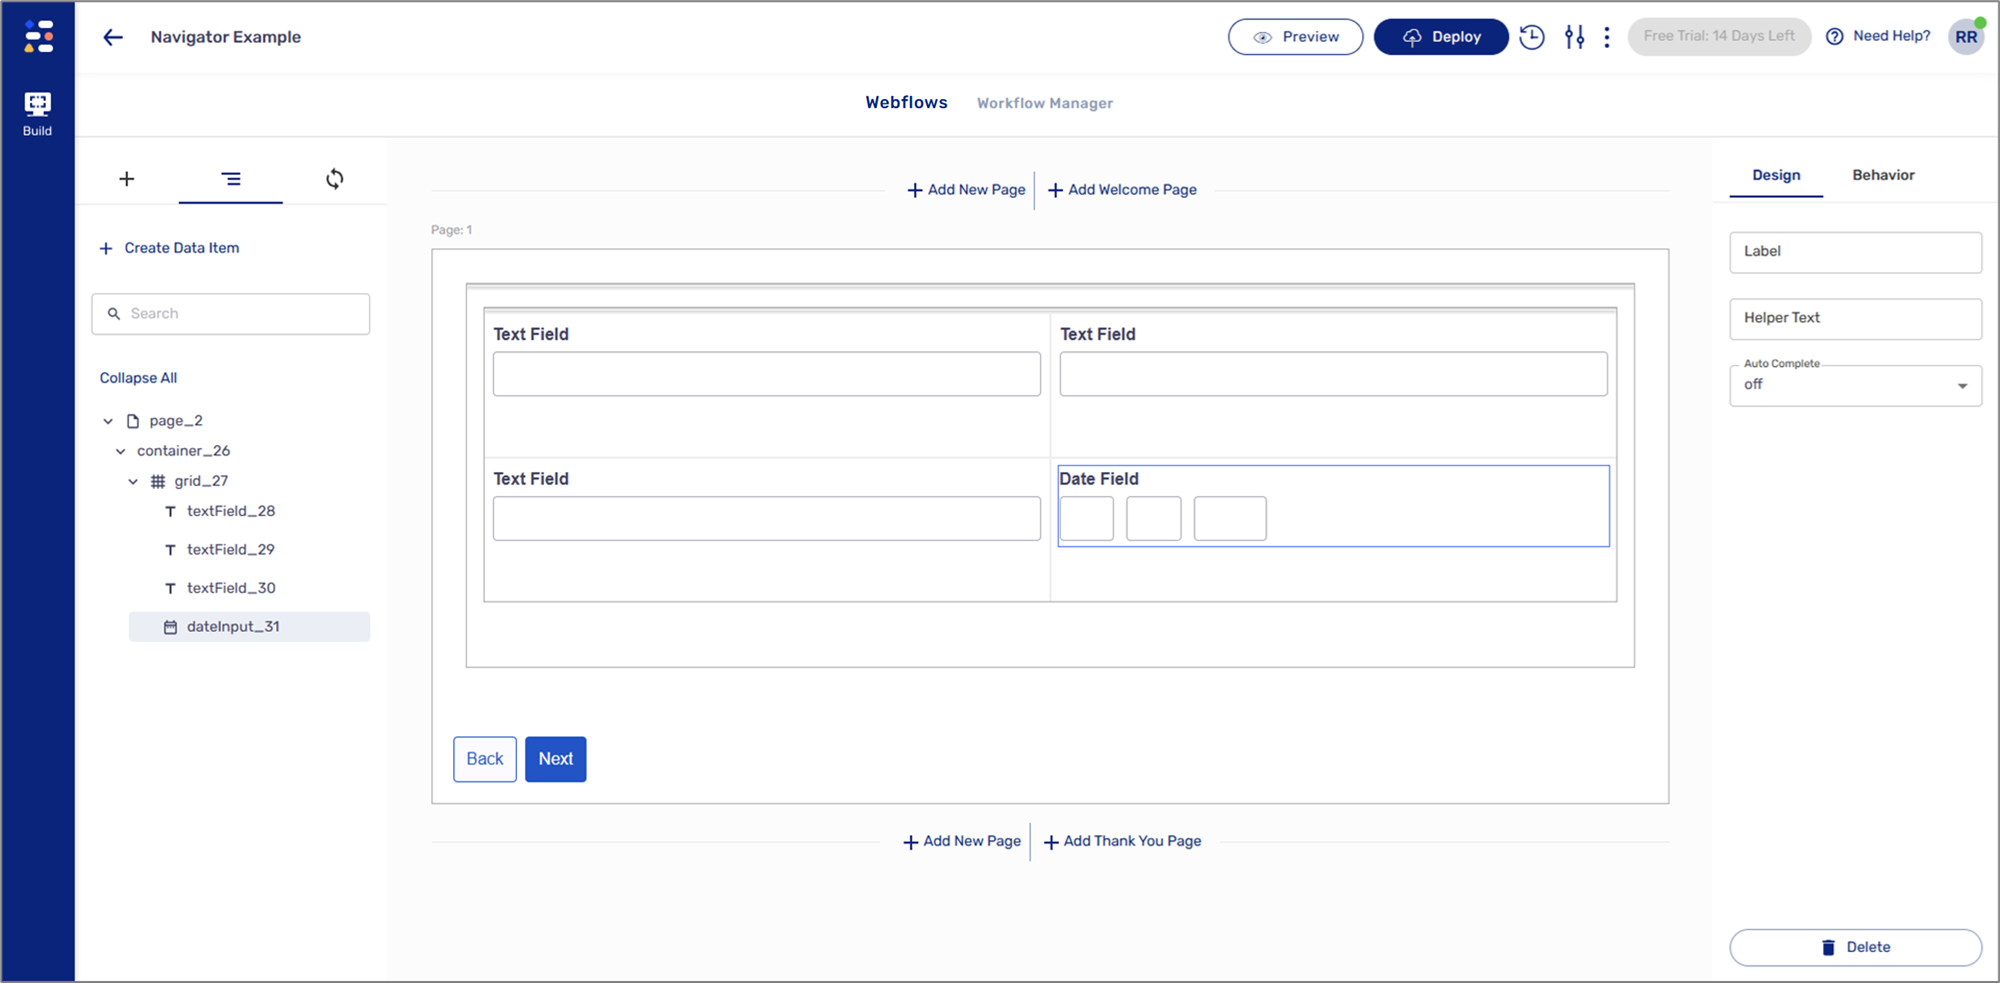
Figure 7: Default Naming Convention
You can edit a data item's name by changing a component's Label property in the Design tab.
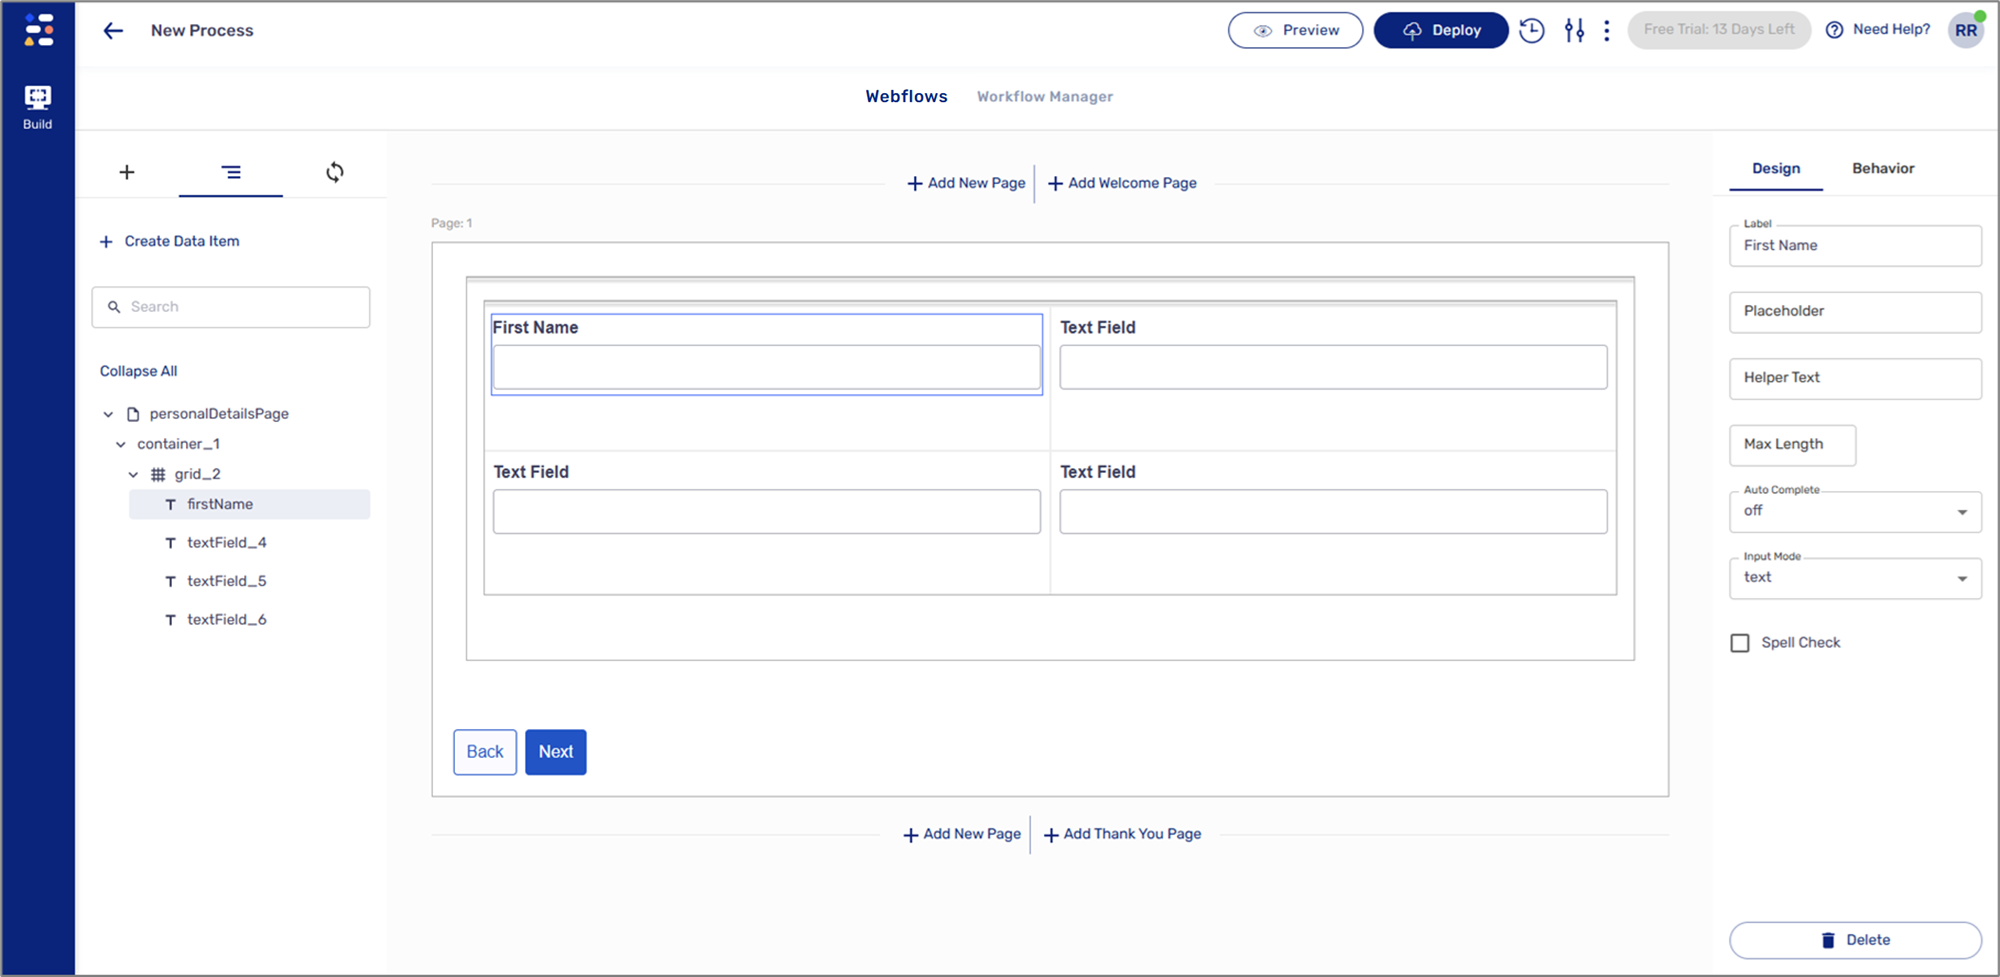
Figure 8: Editing Names From the Design Tab
Important!
Editing a data item's name directly from the navigator disconnects it from the Label property.
The following components do not have a Label property so the names of their data items can only be edited directly from the navigator:
- Text
- Container
- Grid
- Array

Figure 9: Editing Names From the Navigator
NOTE
- When you edit a data item's name, its path also updates.
- When a data item name is comprised of two words or more, the first word will be written in all lowercase letters while the next words will also be written in lowercase letters, excluding the first letter of each word, for example, firstName or customerFirstName.
Physical Structure, Hierarchy, and Conditions
Building accurate physical layouts and logical hierarchies is very important when setting and implementing behavioral conditions for two main reasons:
- Inheritance - when you apply a behavioral condition to an Object-type component (Page, Container, and Array), all nested components will automatically inherit that condition.
- The path of nested components must be accurate when used with behavioral conditions.
NOTE
- Because a Grid is not an Object-type component, it is not part of the logical hierarchy.
- To learn more about behavioral conditions, click here.
Was this article helpful?