What are the Model Permissions
Model permissions are used to define the level of access that different users with different roles have to the fields of a digital process. Roles are created using the Process Settings screen (for additional information about roles and how to create roles, see the Webflow Overview, Workflow Manager Overview, and the Configuring a Workflow article).
How to Implement Permissions
Permission is implemented on transaction data items associated with different Webflow components, most commonly on object-type transaction data. The Implemented permissions on an object are also inherited by all the transaction data items nested within. For example, a digital process could be used by a few different users with different roles such as:
- Customer
- Representative
Using permissions, you can set access for each role:
- full - view and edit digital process fields
- readonly - only view digital process fields
- none - digital process fields are not visible
Permissions Usage Example
Figure 1 displays a Webflow with a grid and text input components, four of them for inputting customer personal details and the fifth one for inputting the email address of the agent that will receive a link to the digital process for review once the customer is finished inputting personal details.
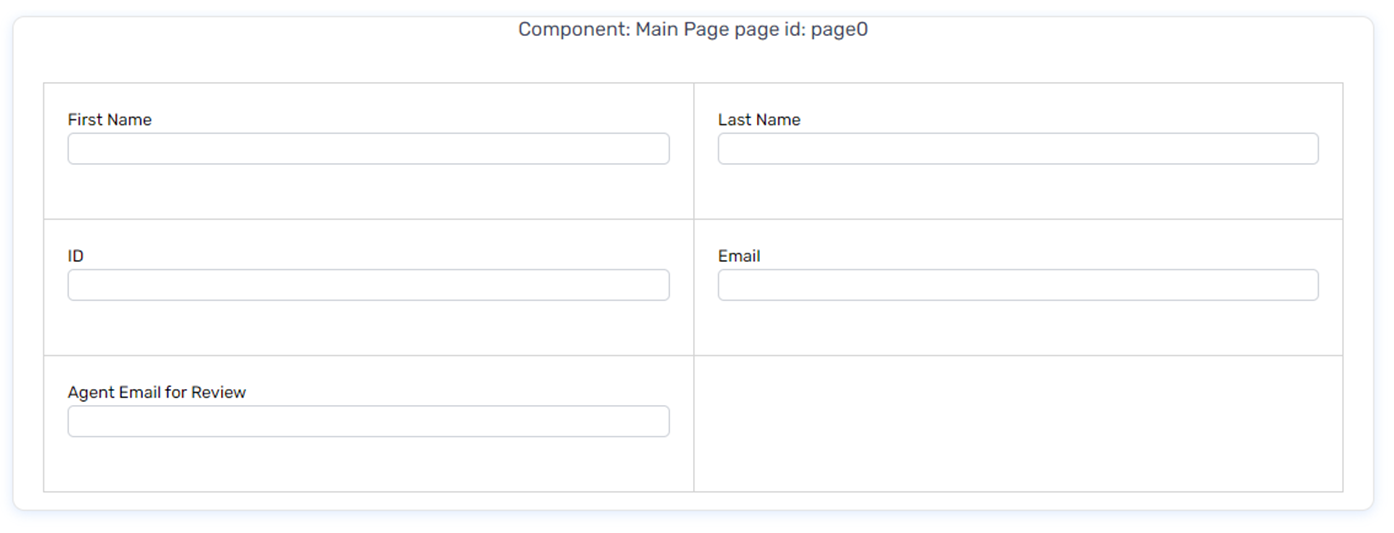
Figure 1: Webflow Components
Figure 2 displays the Model of the Webflow. The cusotmerDetails (1) is an object-type transaction data item that contains other transaction data items:
- firstName
- lastName
- id
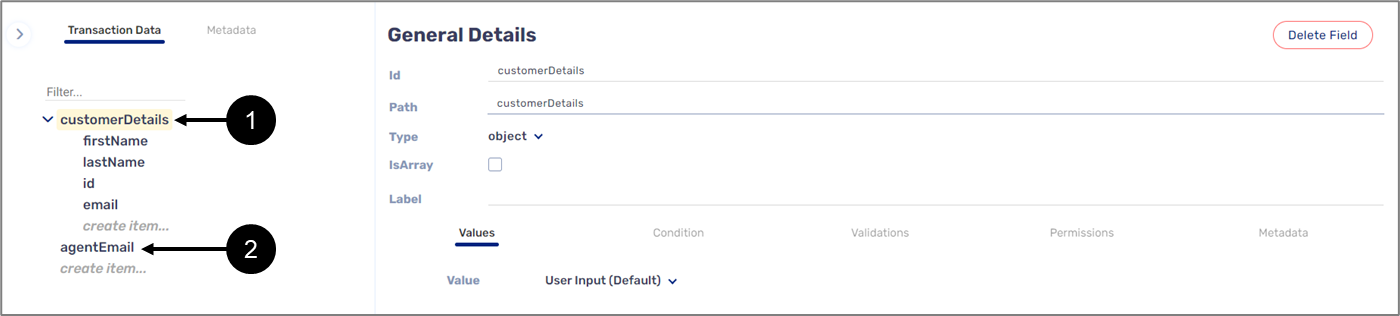
Figure 2: The Model
The exception is the agentEmail data item that is located outside the customerDetails object. When clicking the Permissions tab (3), an option to add roles and set access permissions (4) appears (see Figure 3):
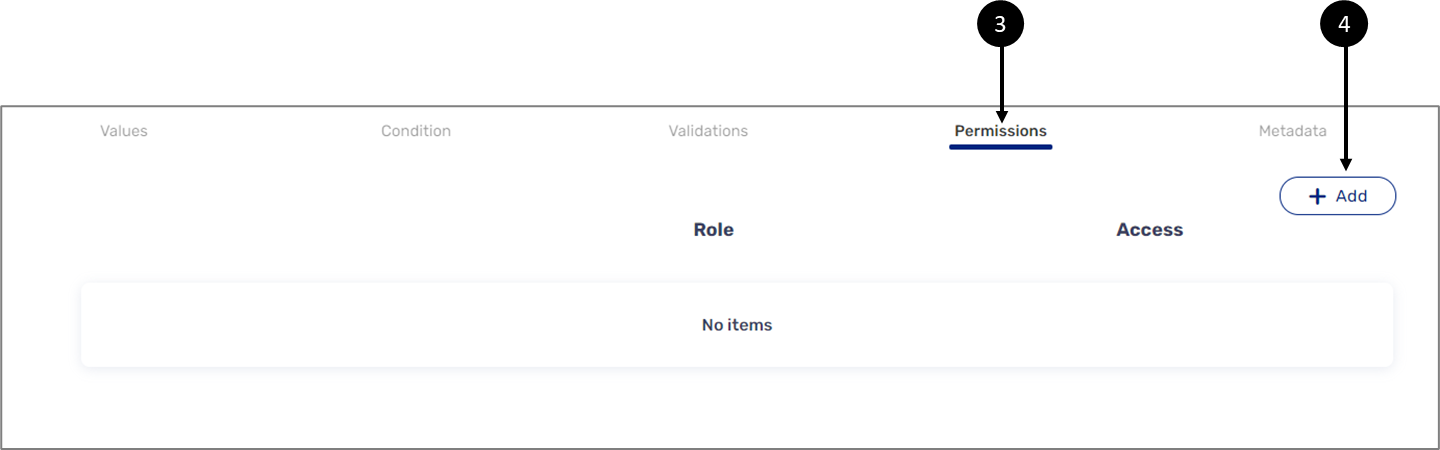
Figure 3: Permissions Tab
Clicking the +Add button to add a new row where the role (5) and the permission (6) can be set (see Figure 4):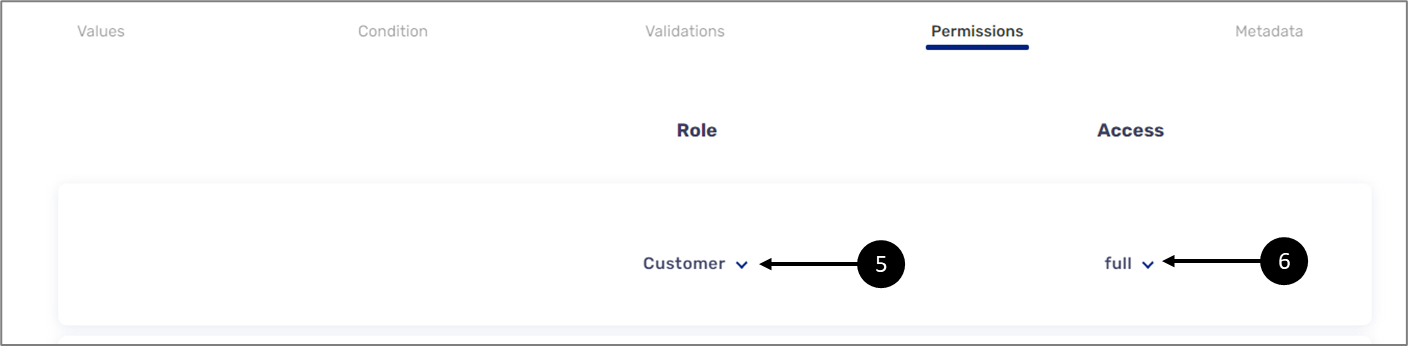
Figure 4: Roles and Access Permissions
In this example, the cusotmerDetails transaction data item (7) and all the data items inside of it are implemented with access permissions for a customer role and an agent role. The customer role gets full (8) access, and the agent role receives a readonly (9) access permission. That means that the Webflow components associated with the cusotmerDetails transaction data item and all the transaction data items nested within will be editable for the customer but not for the agent. The agentEmail transaction data item will be editable for both (see Figure 5):
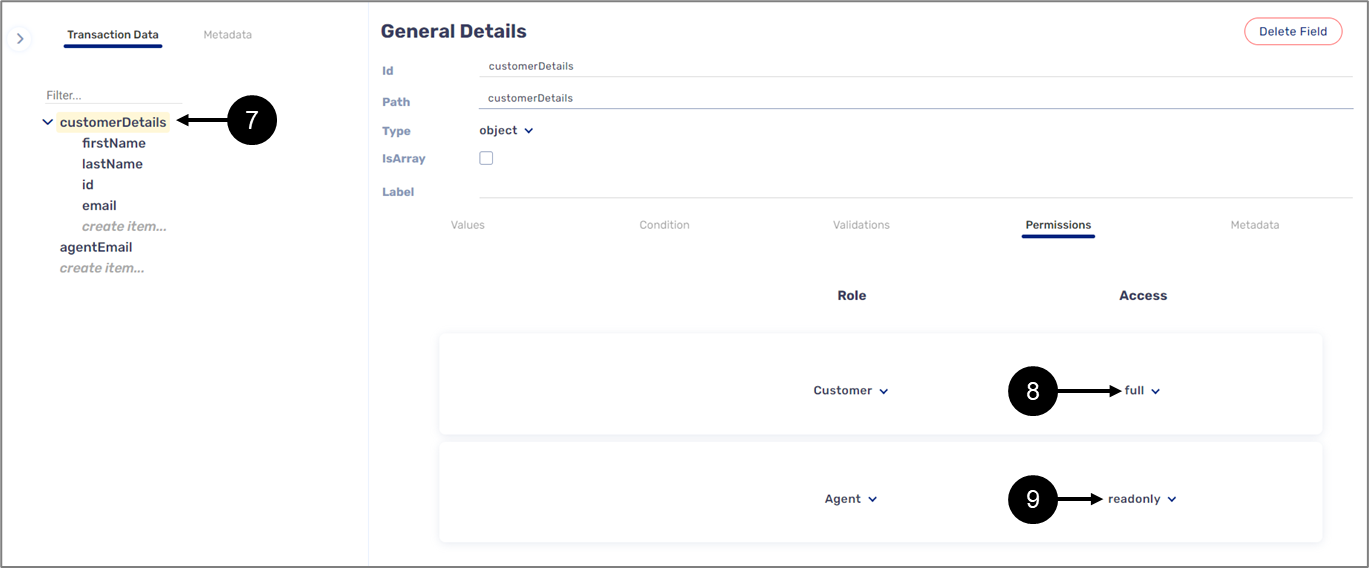
Figure 5: Setting Access Permissions
According to the steps defined in the Workflow Manager, once the end-user with the customer role interacts with the digital process and submits it, the end-user with the agent role receives an email with the link to the process (see Figure 6):
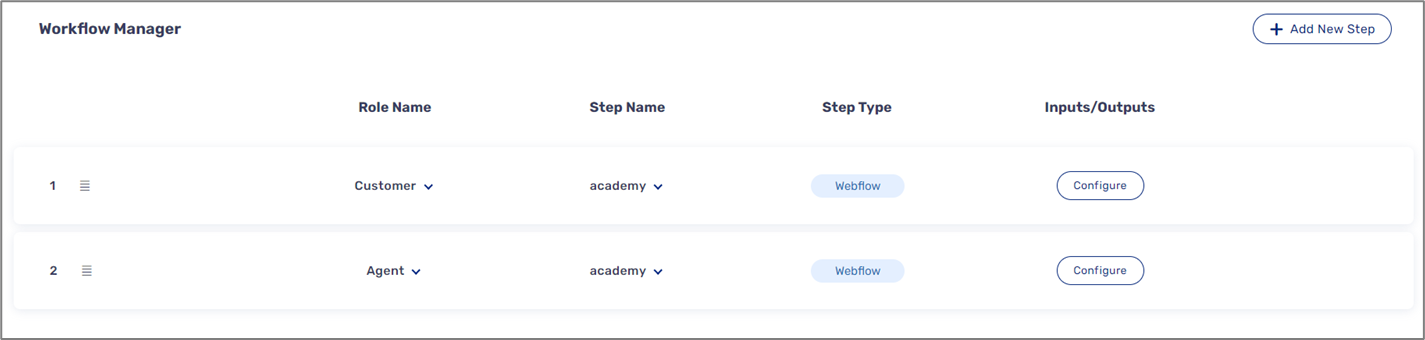
Figure 6: Workflow Manager Steps
Figure 7 displays the digital process as viewed by a customer:
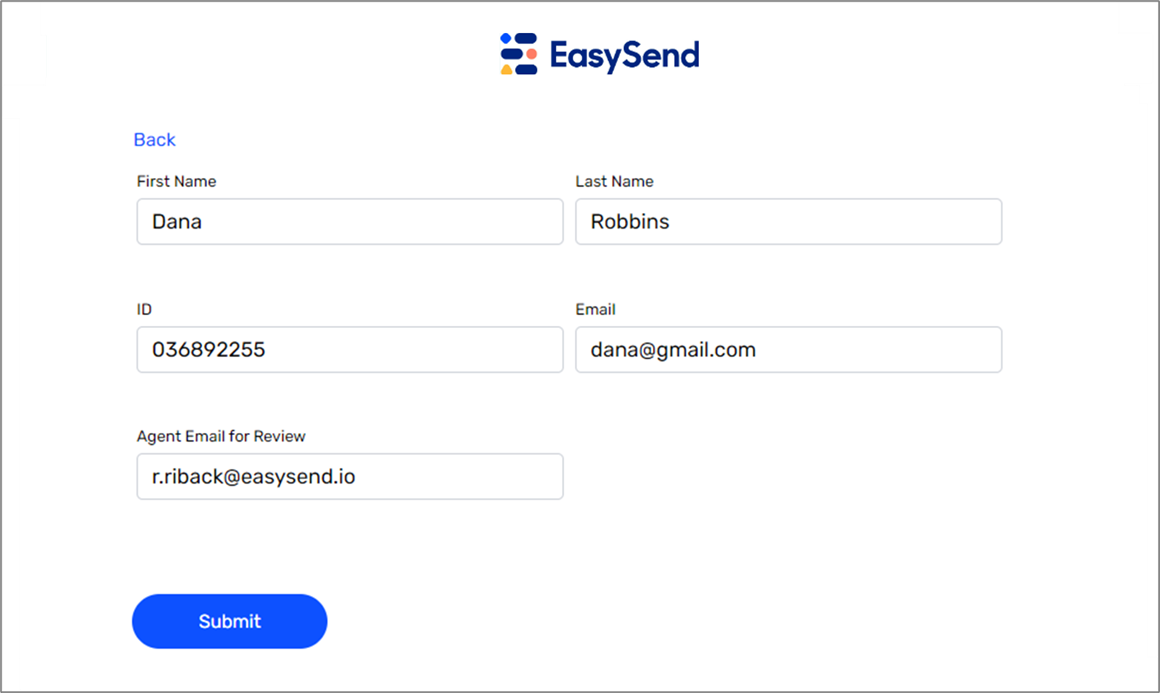
Figure 7: Customer View
Figure 8 displays the digital process as viewed by an agent:
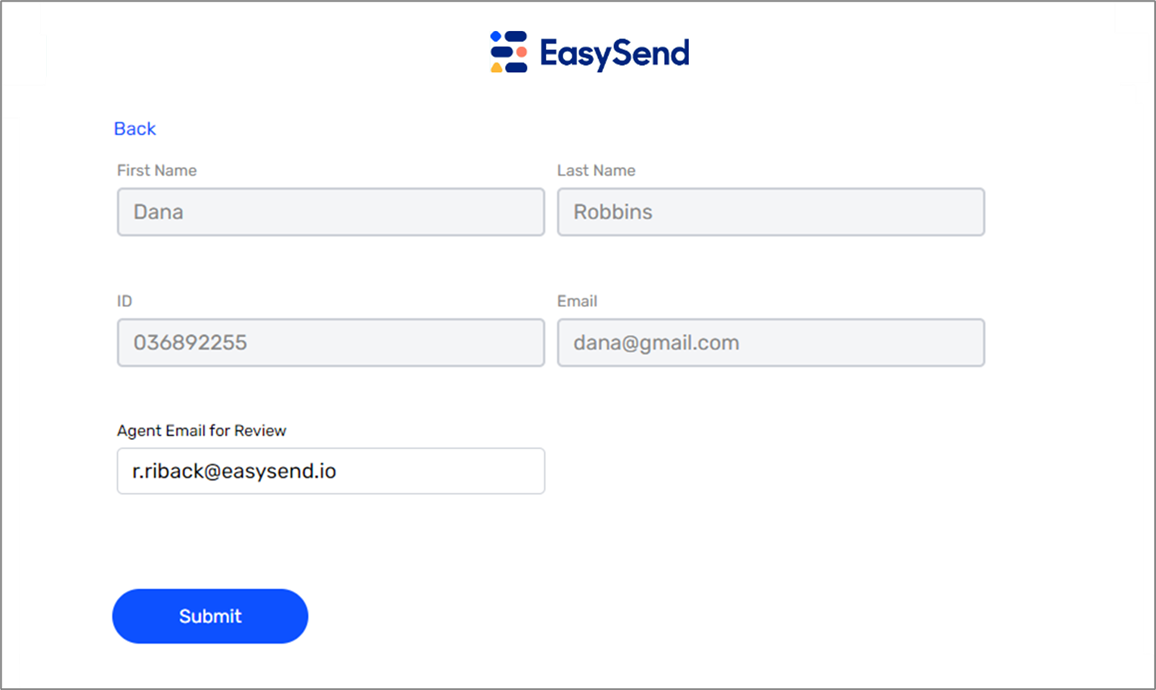
Figure 8: Agent View