Overview
- PDF
Overview
- PDF
Article summary
Did you find this summary helpful?
Thank you for your feedback!
Article Overview
The following article describes EasySend's theme tool - what it is and how to create a new theme.
What is a Theme?
EasySend supports full brand customization of your digital processes.
The Builder separates your digital processes' business logic and your branding's configuration. While business logic is managed per digital process, the brand guidelines are set up in the Theme area. A Theme includes the following:
- All the components that can be dragged and dropped into the canvas while building a Webflow
- Colors
- Styles
- Fonts
- Logos
- backgrounds
When a process is built from scratch or a PDF, the screen will contain one default theme. When a process is built using the AI Generator or a template, additional themes will appear.
How to Access Your Themes
(See Figure 1)
To access your themes, click the Build tab (1) and then Themes (2).
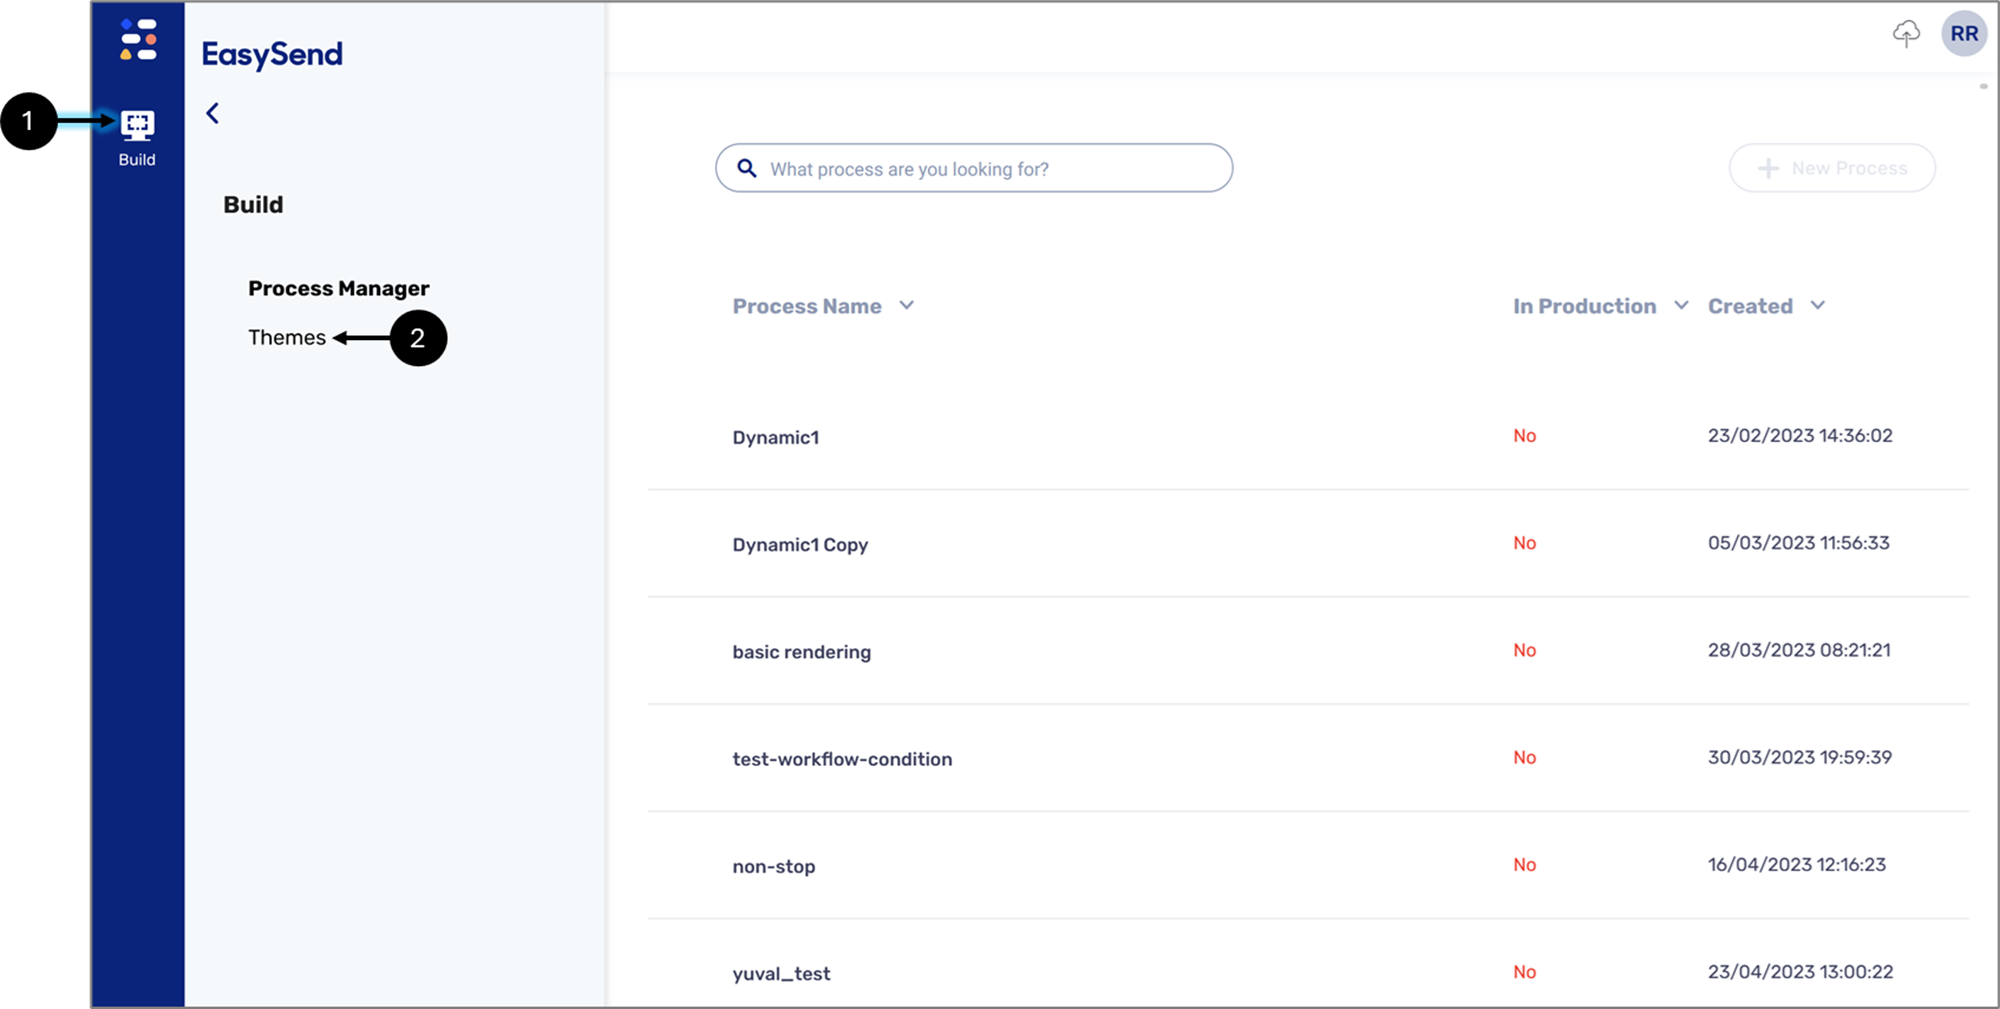
Figure 1: Themes
The Themes Screen
(See Figure 2)
Using the Themes screen you can create new themes (1) and edit existing ones (2).
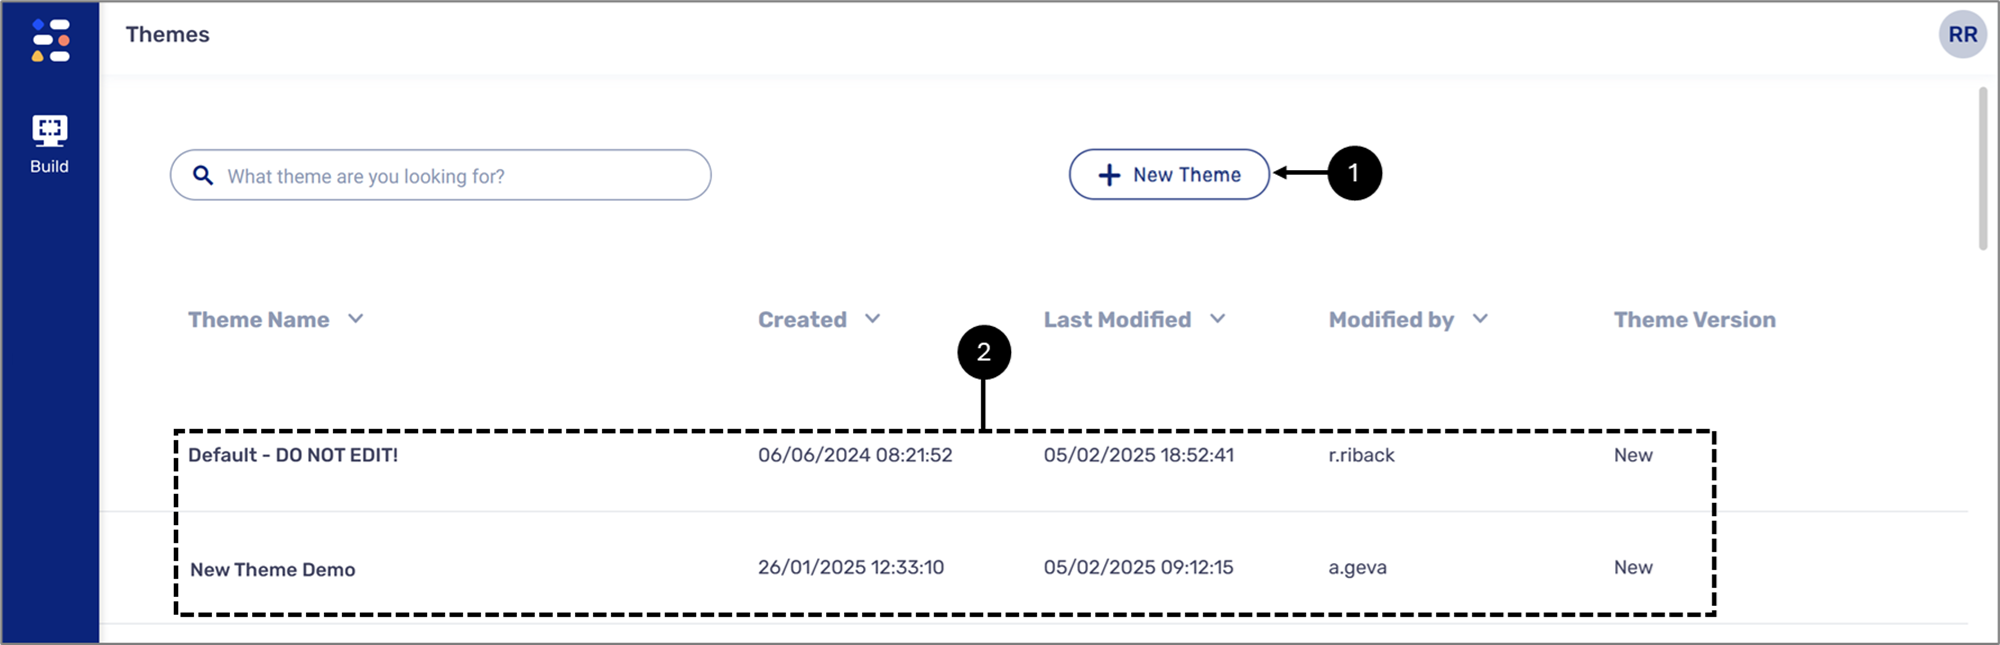
Figure 2: Themes Screen
Clicking a theme from the list, enables you to edit it.
NOTE
For additional information about editing themes, click here.
Applying Themes to a Webflow
(See Figure 3 and Figure 4)
Each Webflow is created with a default theme. To apply a new theme, first, access the Process Settings screen (1).
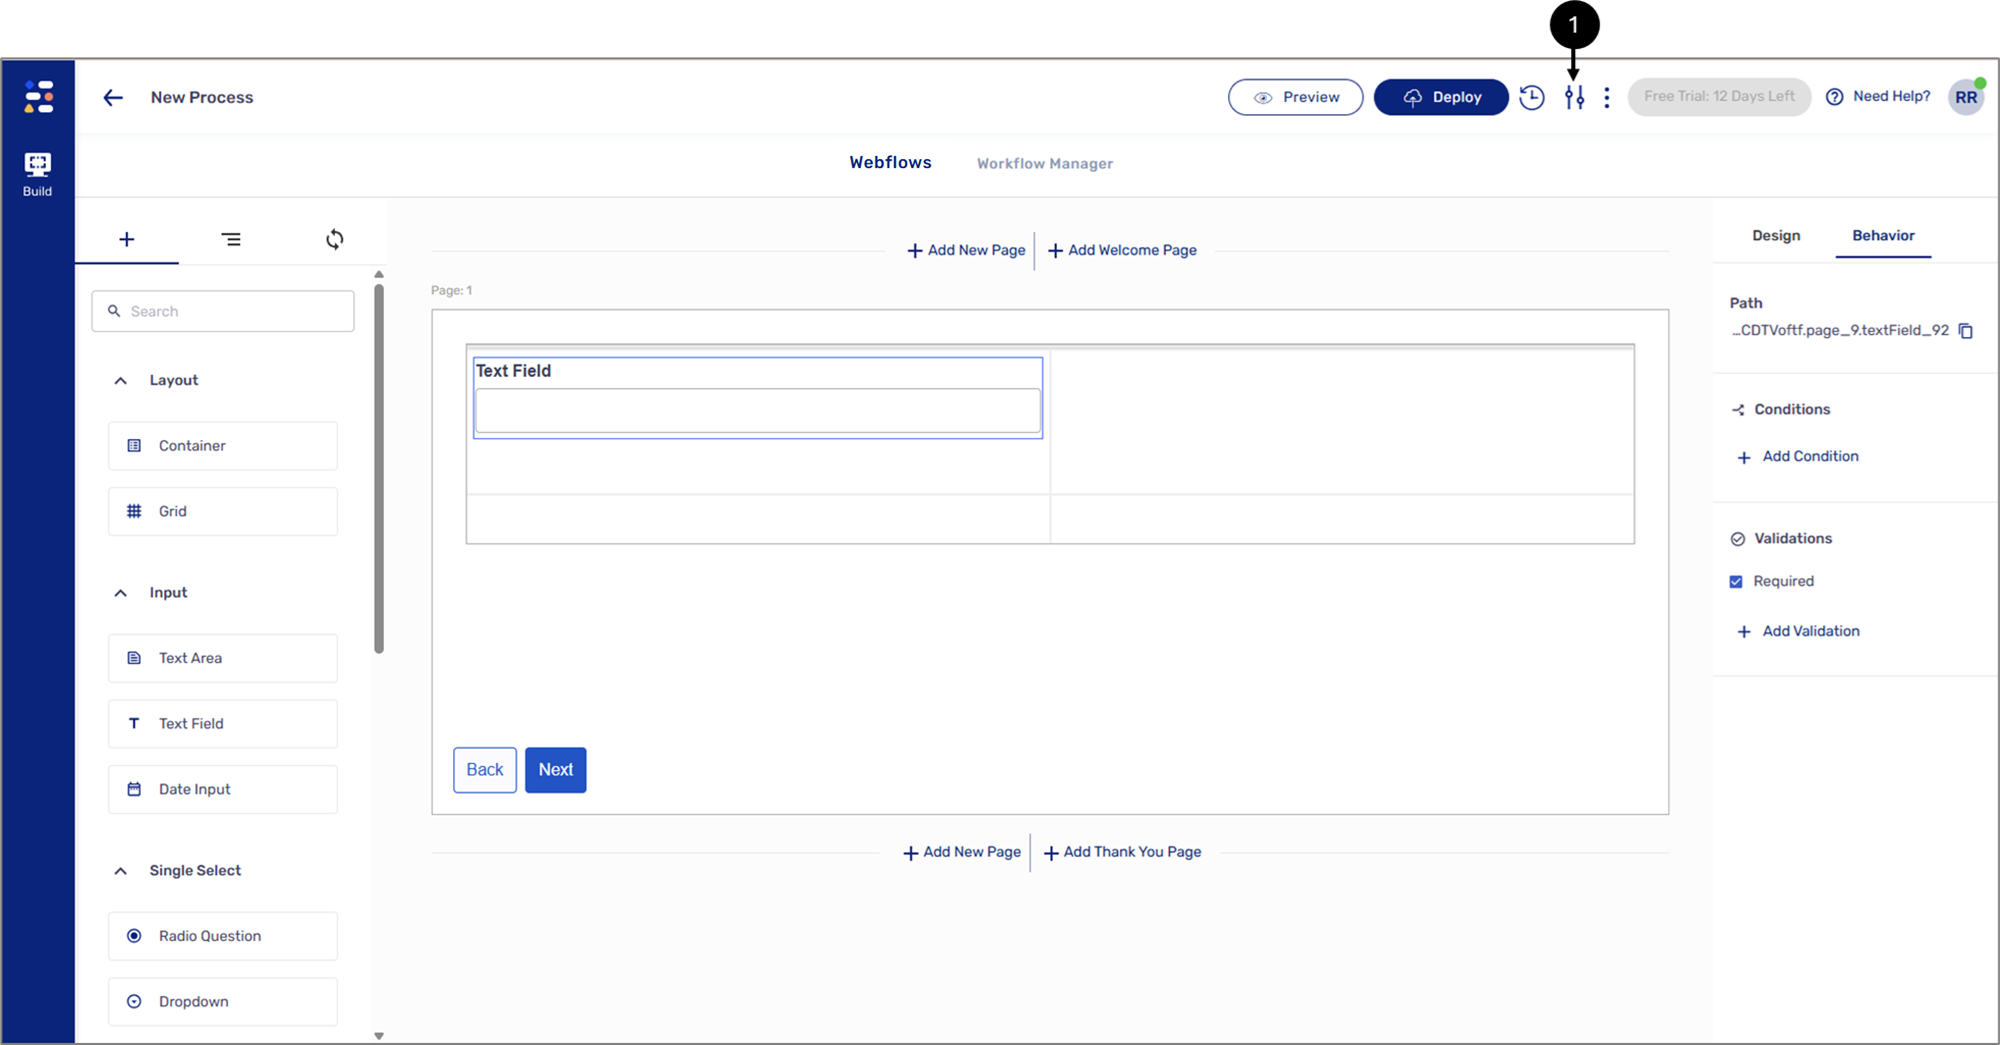
Figure 3: Process Settings Icon
In the Process Settings screen, click the dropdown (2) to display the New Theme switch and toggle it to on (3). Click the dropdown (4) to select a theme from the list.
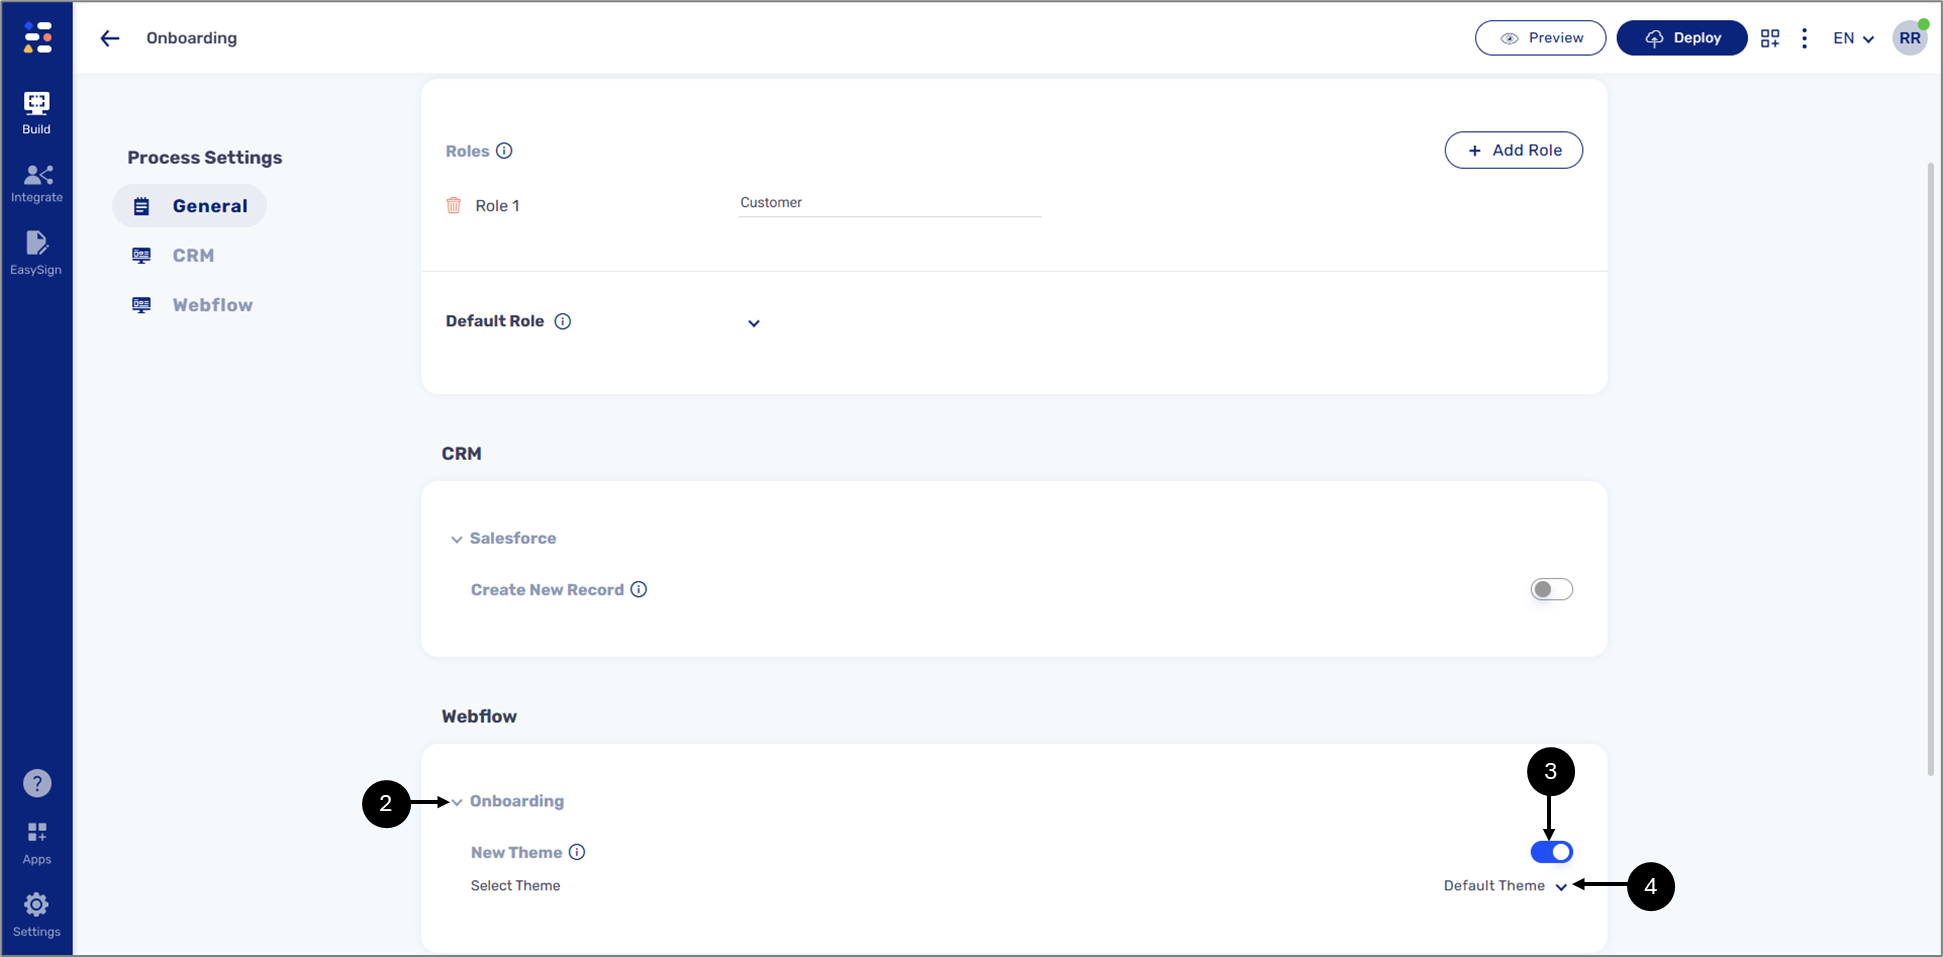
Figure 4: Process Settings Screen
The applied theme and its configuration will be visible in the Webflow without the need to deploy and preview it.
Switching Between Themes
You can switch between themes while building a Webflow. Changes are applied immediately and reflected in components, such as the Welcome Page background image, fonts, and colors.
Was this article helpful?