Article Overview
The following article describes how to use the Workflow Manager with an onboarding process.
Specification Process Example
A company asked you to create an online customer onboarding process based on an old PDF form. The customer will use the process to fill out personal information. If the customer is married, the process will have to reach the spouse so they can also provide information before final submission. Links to the process will be sent via email. When the process is submitted the provided information will be integrated into the company's database and will be displayed on top of the original PDF form.
Specification Questions And Answers
High-Level Questions:
Q: What is the name of the process?
A: Customer onboarding.
Q: What is the goal of the process?
A: Provide a quick and user-friendly onboarding process for new customers.
Q: What information is being collected during the process?
A: Personal information including ID pictures and signatures.
Q: What is the look and feel of the process?
A: Using the company's brand and logo.
End-Users Questions:
Q: Who are the roles that will interact with the processes?
A: The customer and a spouse (optional).
Q: How do I communicate with the end-users?
A: Emails. Each end-user will be informed about the progress of the process.
Q: How do I implement compartmentalization between different end-users?
A: By creating two different Webflows - one for the customer and one for the spouse.
Q: Do I need to authenticate end-users?
A: By using a One-Time Password (OTP).
Q: What is the process flow between all end-users? Who starts the process and who finishes it?
A: The customer starts the process, if a spouse is relevant they will continue and finish. If a spouse is not relevant, the customer will start and finish the process.
Workflow Questions:
Q: Where is the process initiated from? A single initiation channel or multiple channels?
A: Via a customer portal.
Q: What happens to the collected data?
A: The data will be presented on top of the original PDF and integrated into the company's database.
Q: Does my process split into different paths according to end-users and roles?
A: Yes. One path for a customer with a spouse and another for a customer without a spouse.
Q: When does my process end?
A: The process ends when the customer or the spouse (if relevant) submits it.
Visualizing, Mapping, and Configuring
Create a new process and access the Workflow Manager. Visualize, map, and configure the process:
- Drag and drop a Start building block and configure its Source to Direct Link.

Figure 1: Start - Direct Link
- Drag and drop a Generate Webflow building block and configure its properties.
- Connect the Start building block with the Generate Webflow building block and configure its properties.
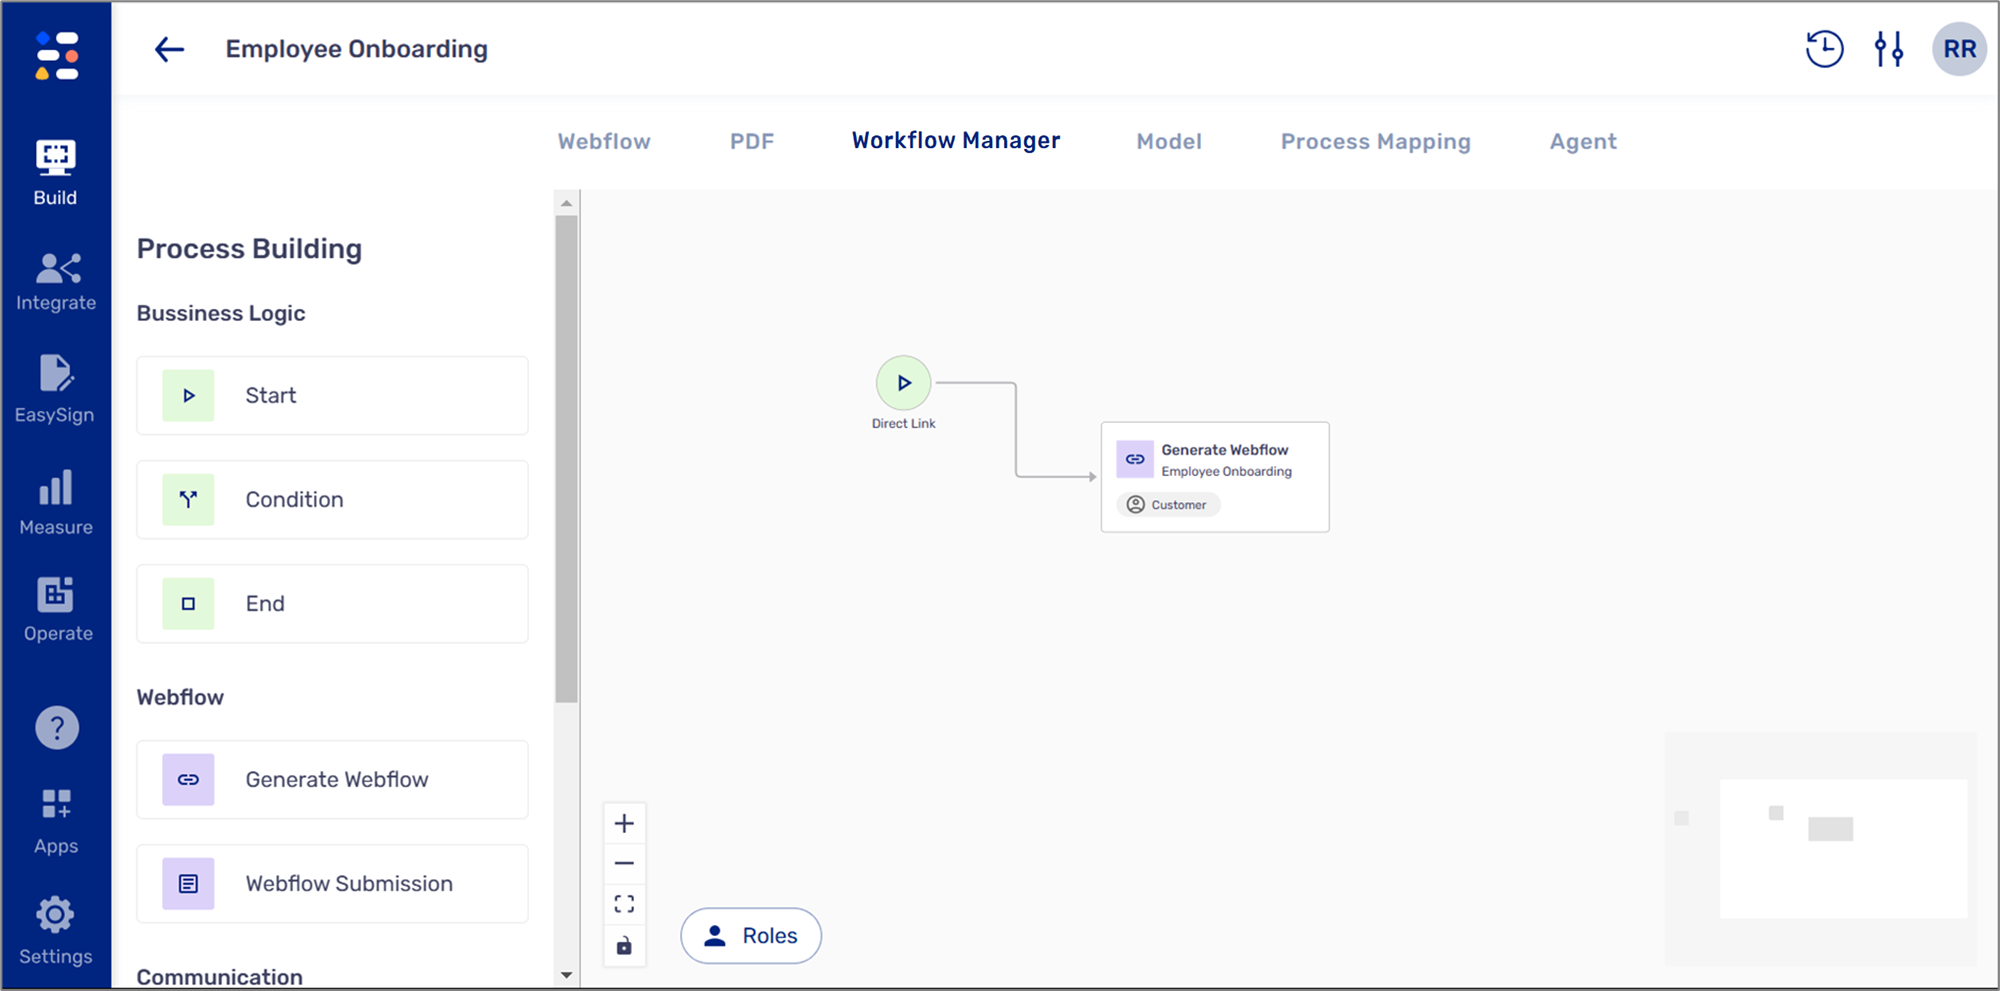
Figure 2: Generate Webflow
- Drag and drop a Webflow Submission building block.
- Connect the Generate Webflow building block with the Webflow Submission building block.
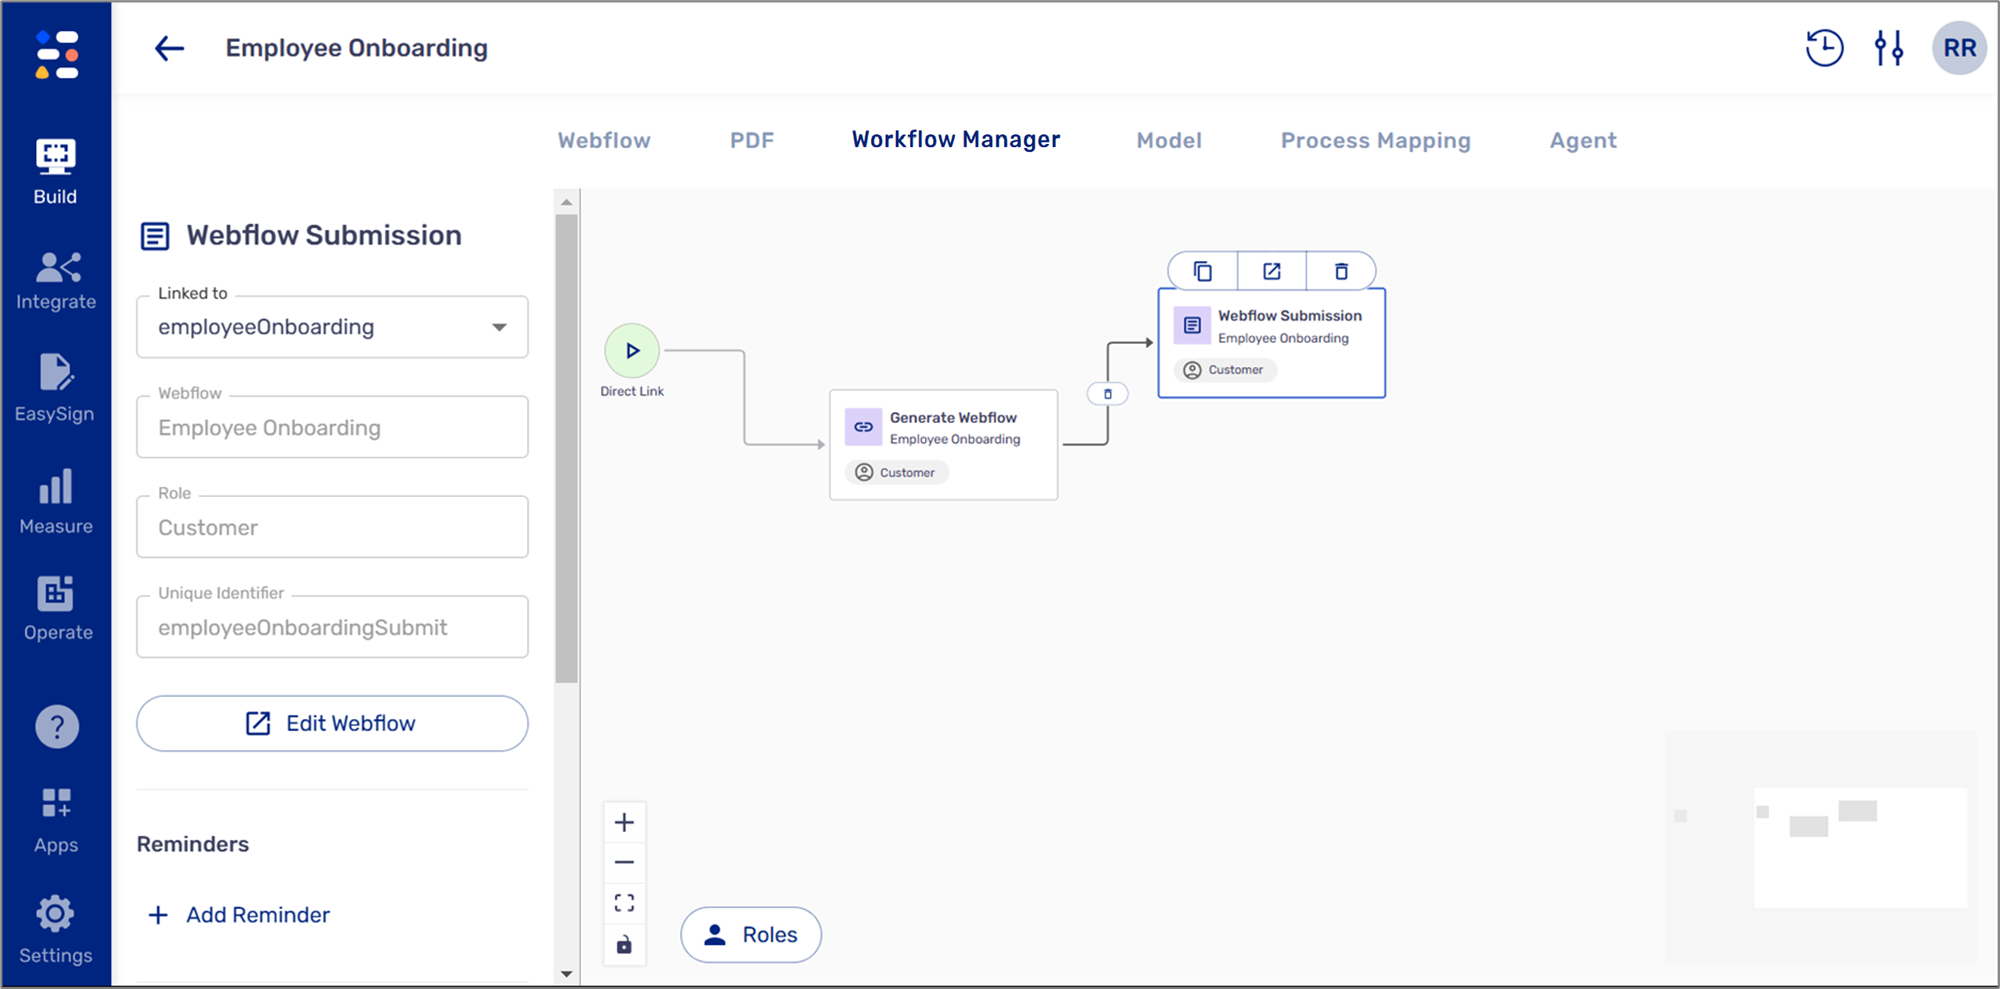
Figure 3: Webflow Submission
- Drag and drop a Condition building block.
- Add a label - Spouse Info?
- Connect the Webflow Submission building block to the Condition building block.
- Drag and drop an Integration building block.
- Connect the Condition building block to the Integration building block (False).
- Drag and drop an End building block.
- Connect the Integration building block to the End building block.
- Drag and drop a Generate Webflow building block and configure its properties.
- Connect the Condition building block to the Generate Webflow building block (True).
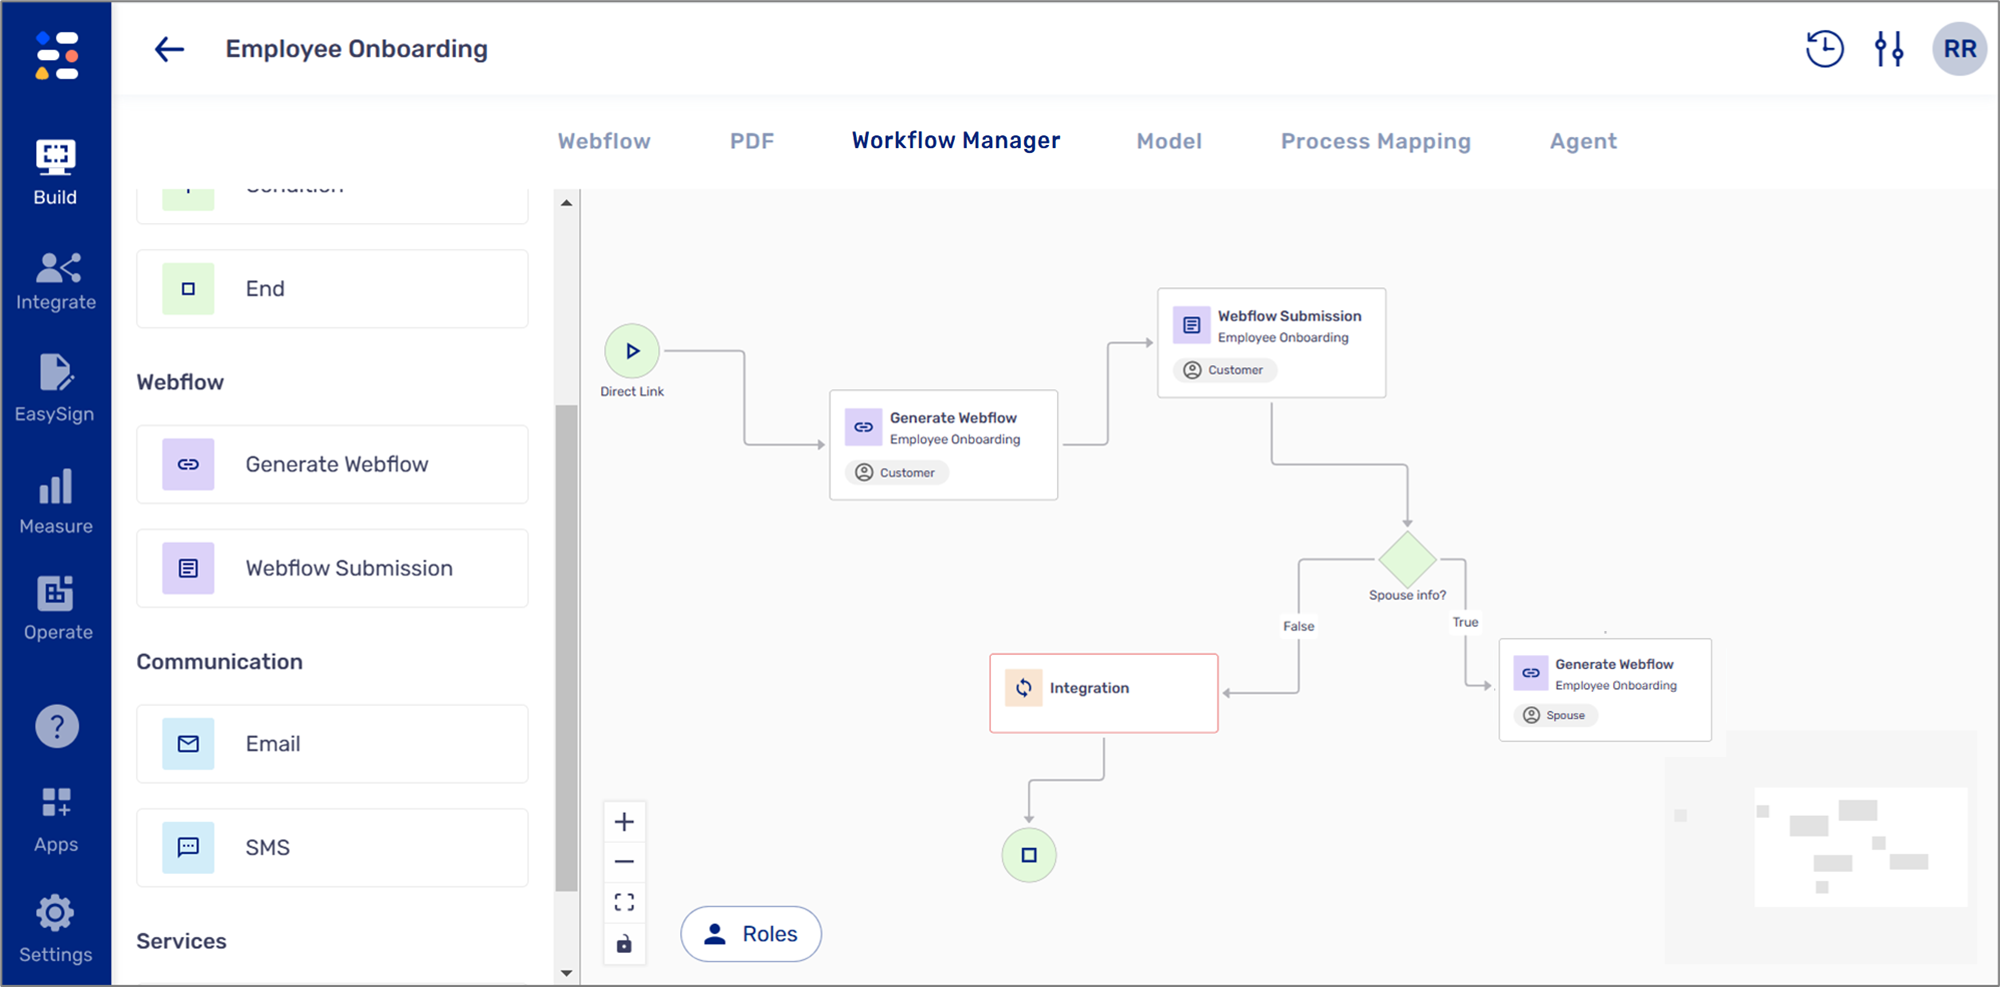
Figure 4: Condition
- Drag and drop an Email building block.
- Connect the Generate Webflow building block with the Email building block.
- Drag and drop a Webflow Submission building block and connect it to the Condition building block.
- Connect the Email building block with the Webflow Submission building block.
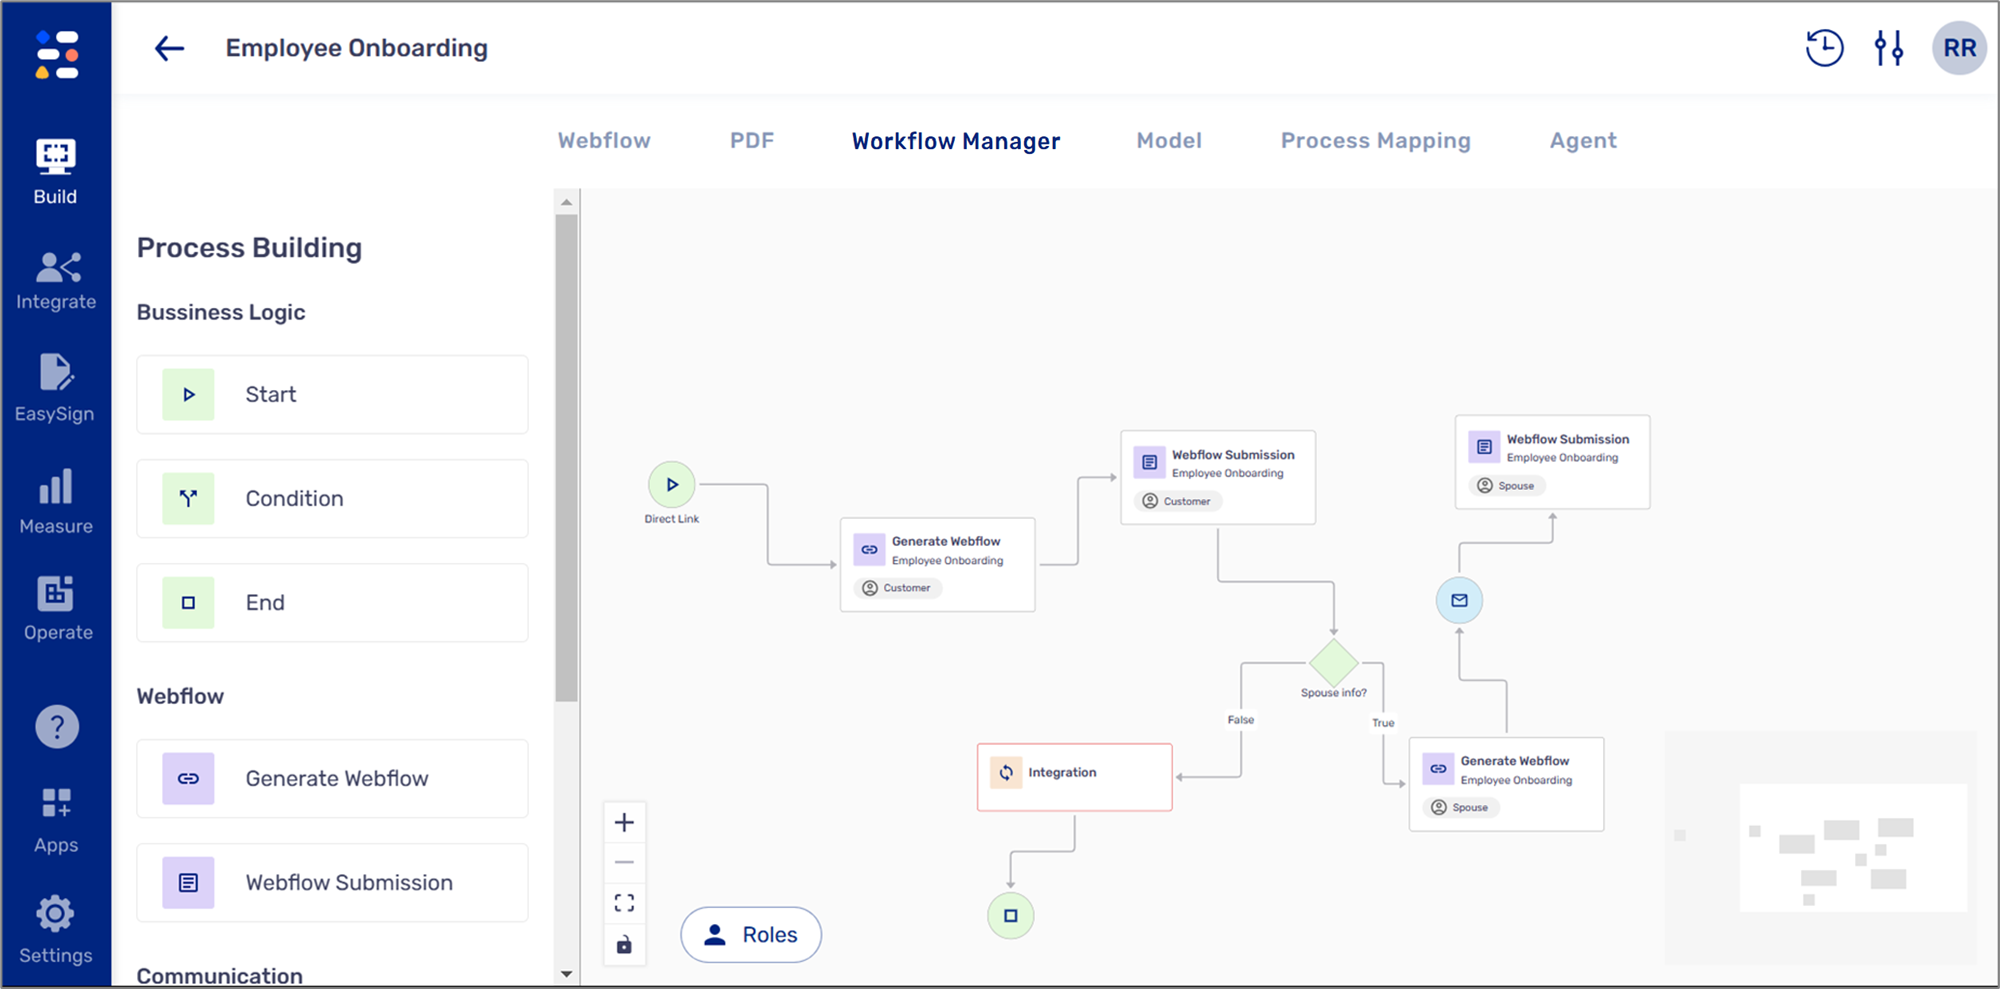
Figure 5: Condition Split
- Drag and drop an Integration building block.
- Connect the Webflow Submission building block to the Integration building block.
- Drag and drop an Email building block.
- Connect the Webflow Submission building block to the Email building block.
- Connect the Integration building block to the End building block.
- Connect the Email building block to the End building block.
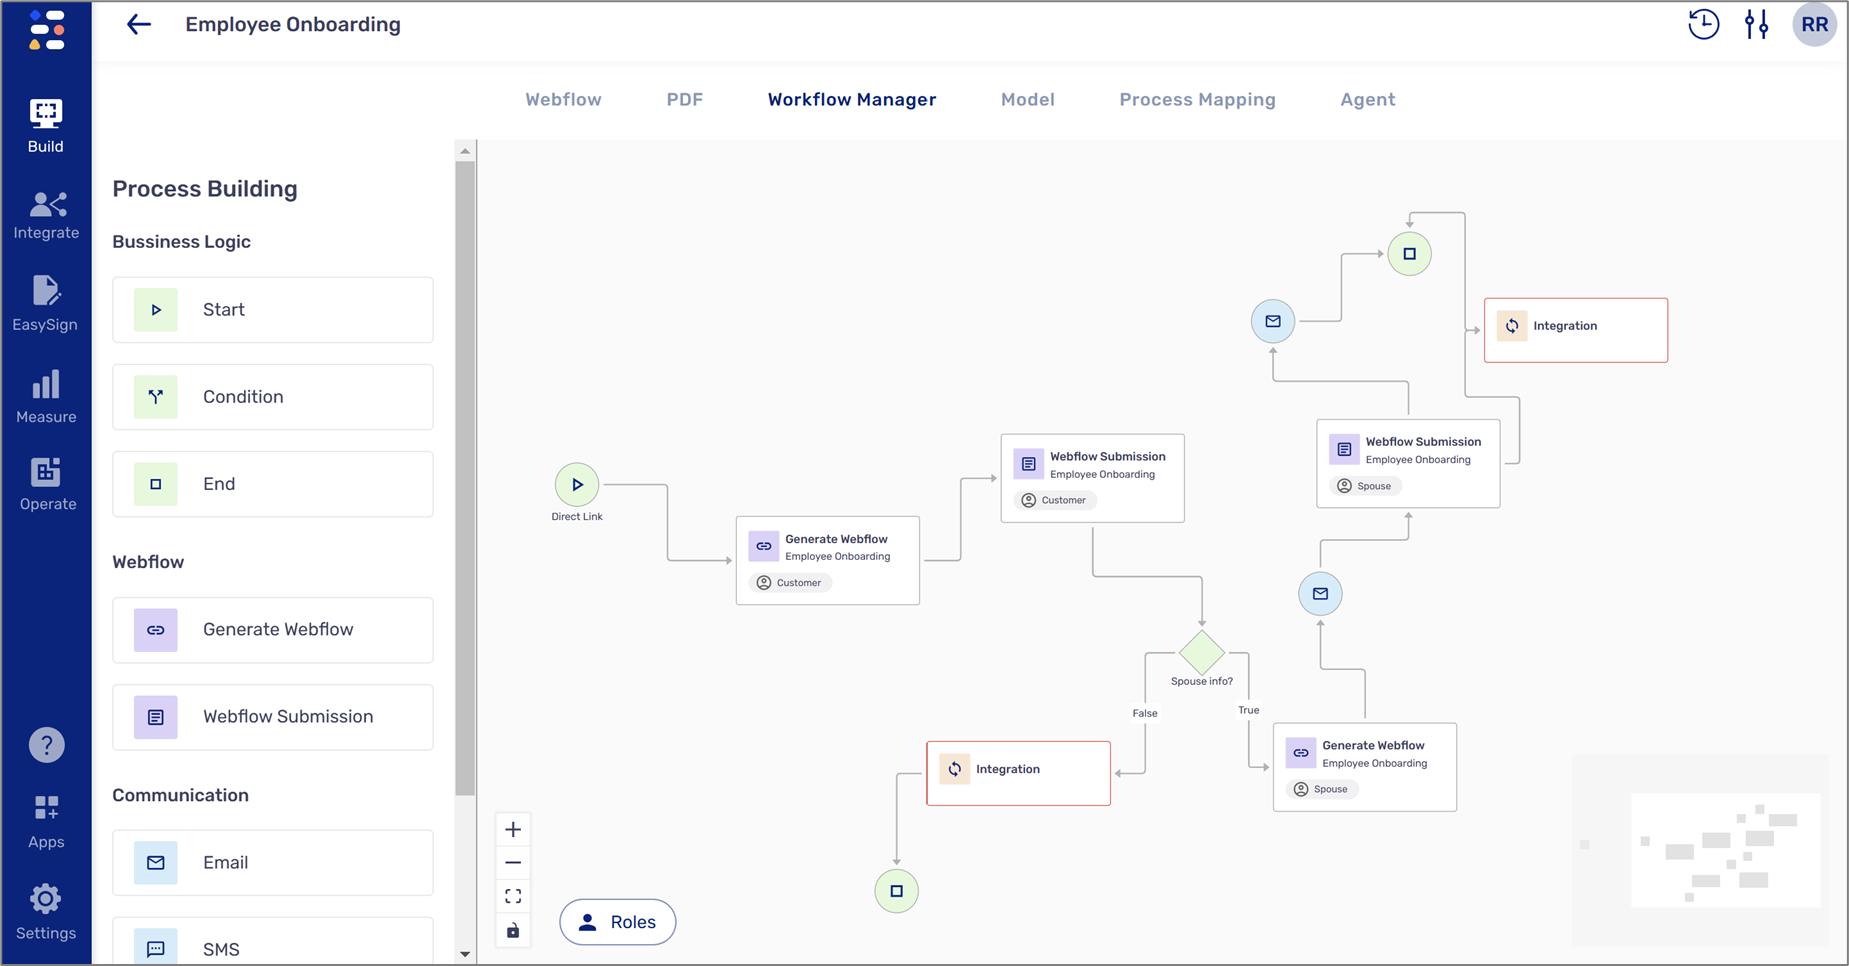
Figure 6: End
Build the Process and Business Logic
(See Figure 7)
Click a Webflow Submission and use the Edit Webflow button to access the Webflow and build the physical structure of your process and the business logic. In addition, create required services, roles, and authentications.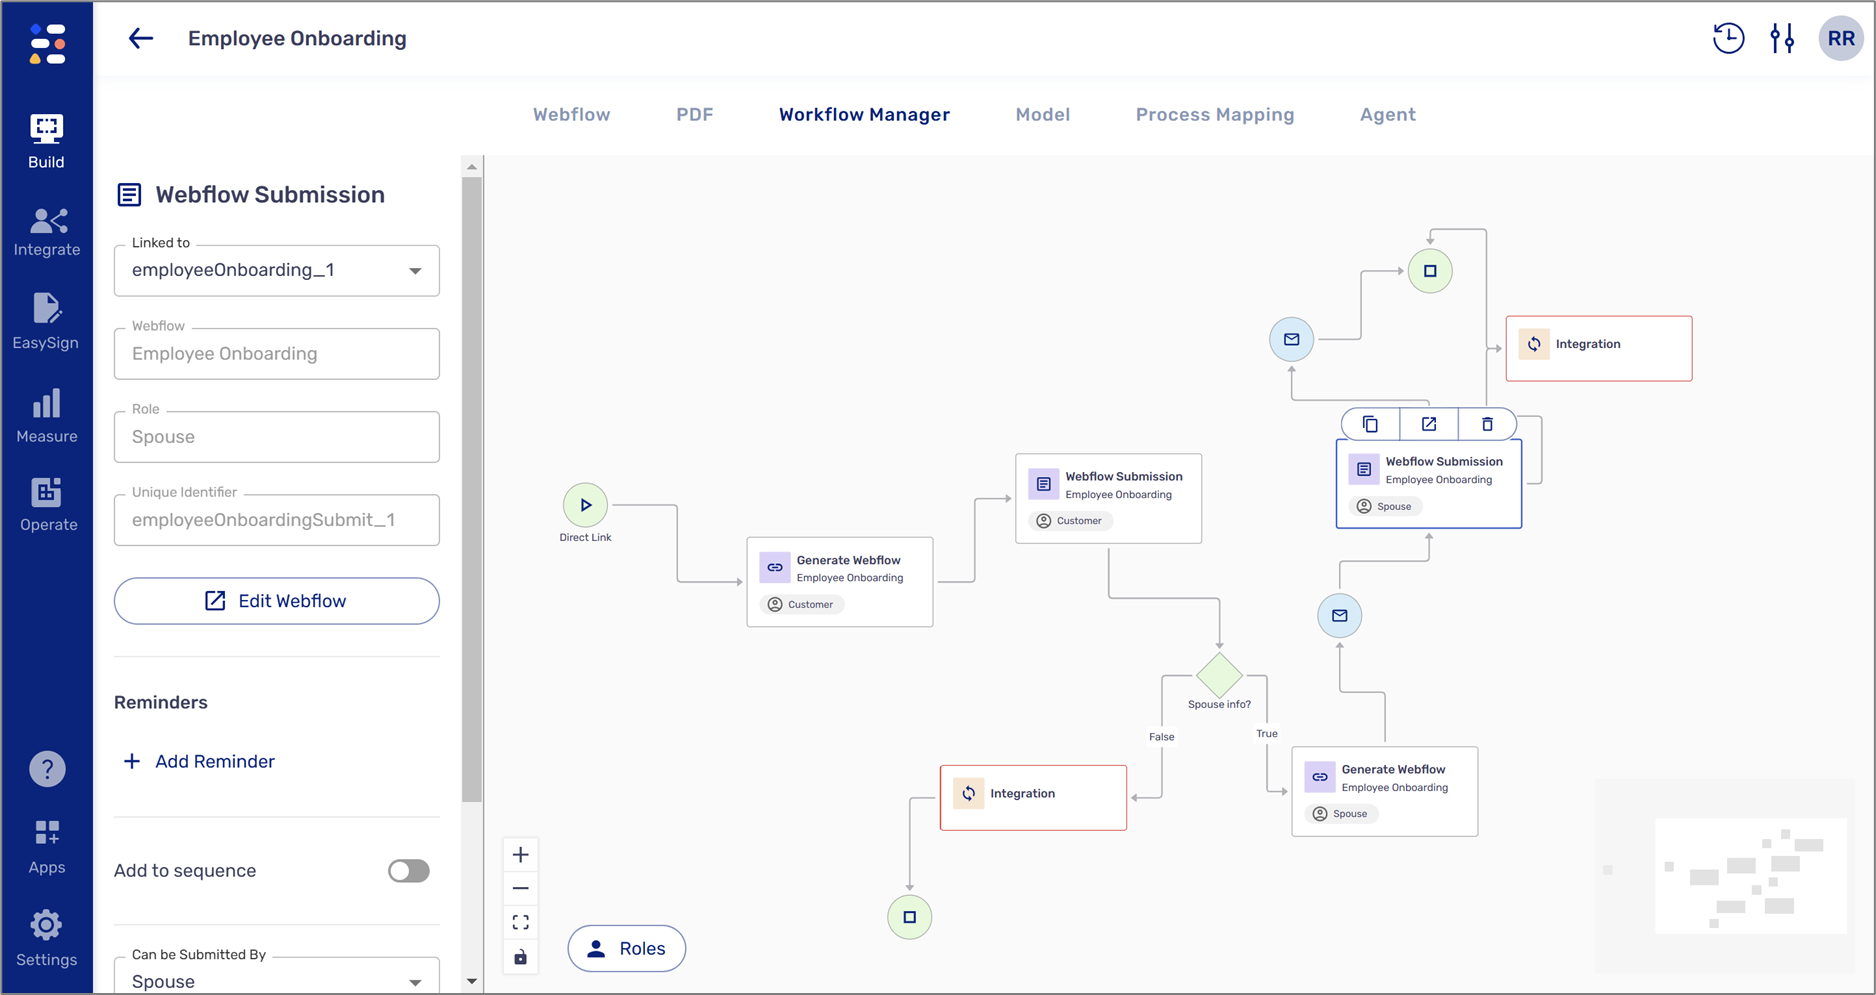
Figure 7: Edit Webflow
Configure and Complete the Workflow
(See Figure 8)
Access the Workflow Manager and finish to configure the Workflow:
- Select the Integrations
- Write labels and comments
- Configure emails
- Set authentications
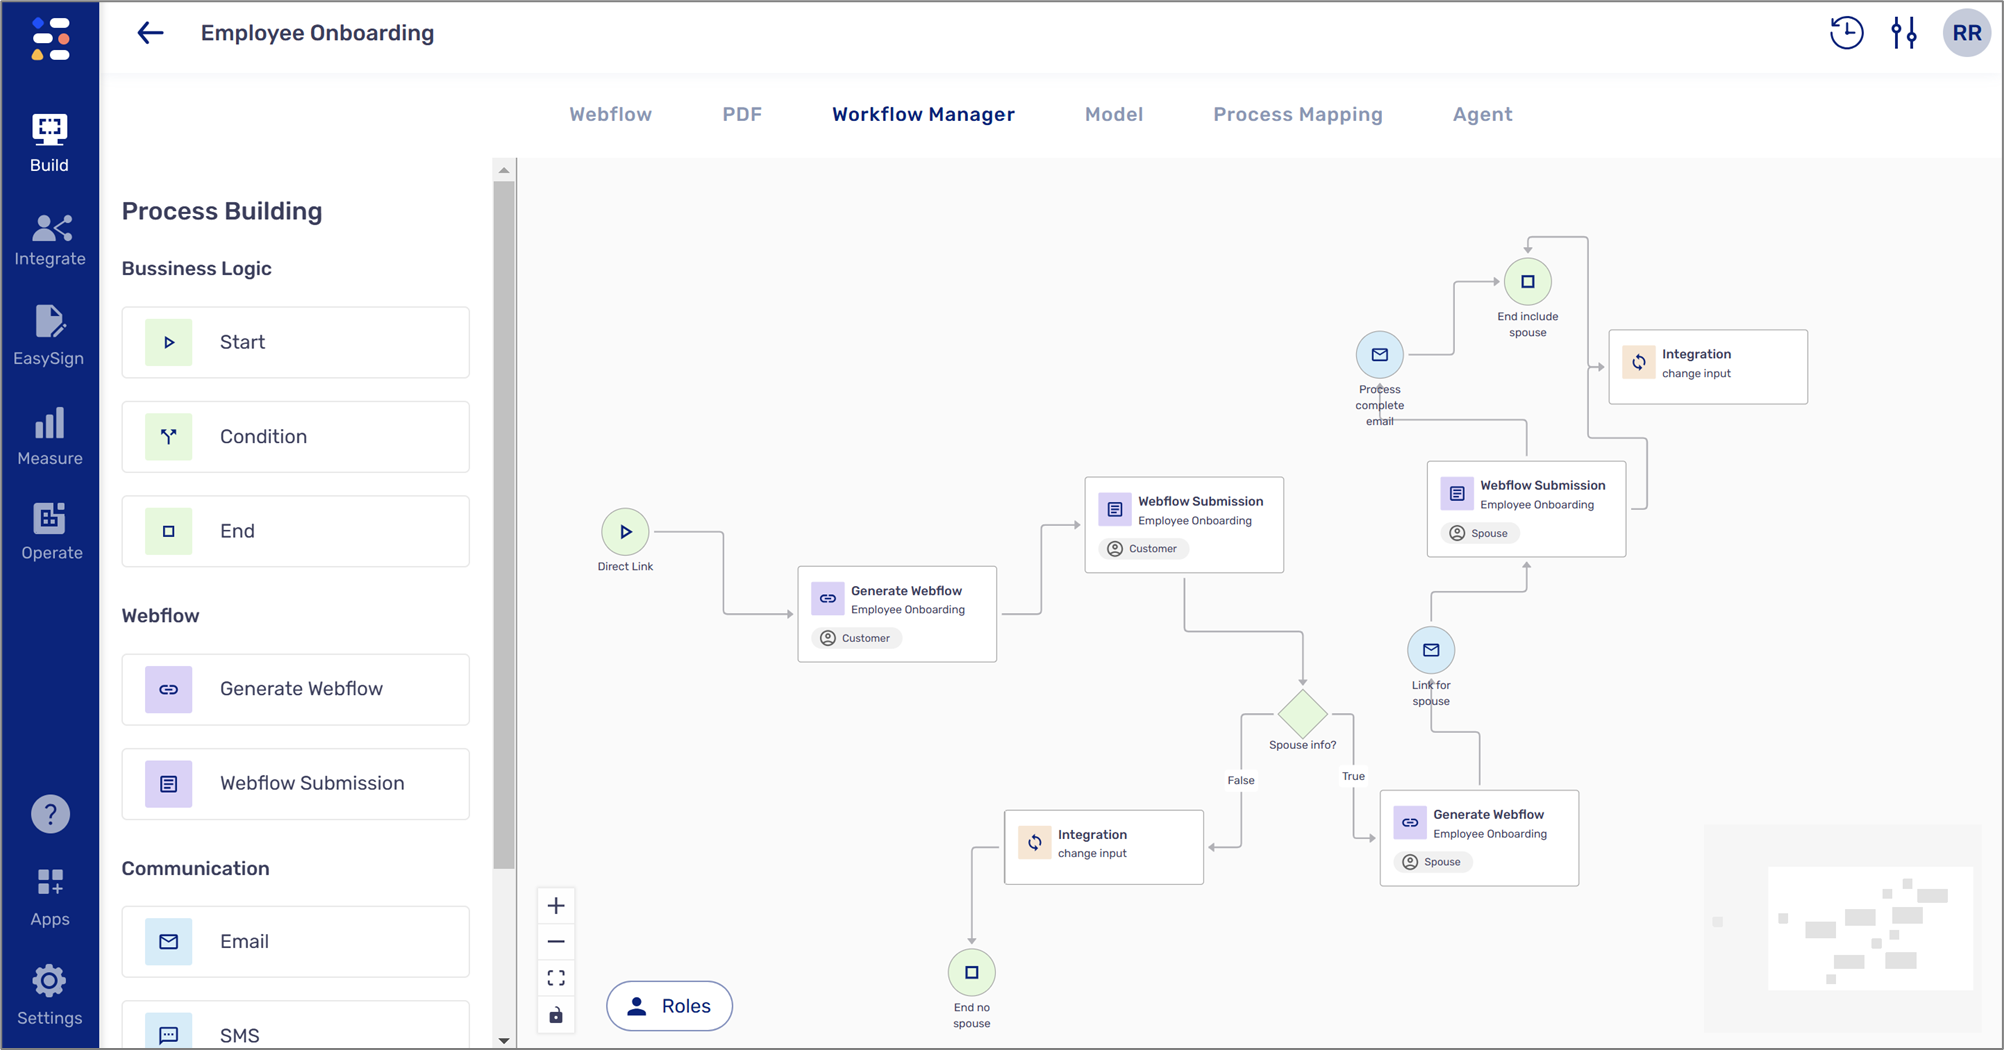
Figure 8: Complete Configuration