Article Overview
For detailed information about messaging, click here.
Overview
The messaging building block enables you to integrate your journey with a team communication and collaboration app, such as Slack.
Adding the EasySend App to Your Slack Channel
(See Figure 1 to Figure 4)
Before configuring the Messaging building block, perform the following steps:
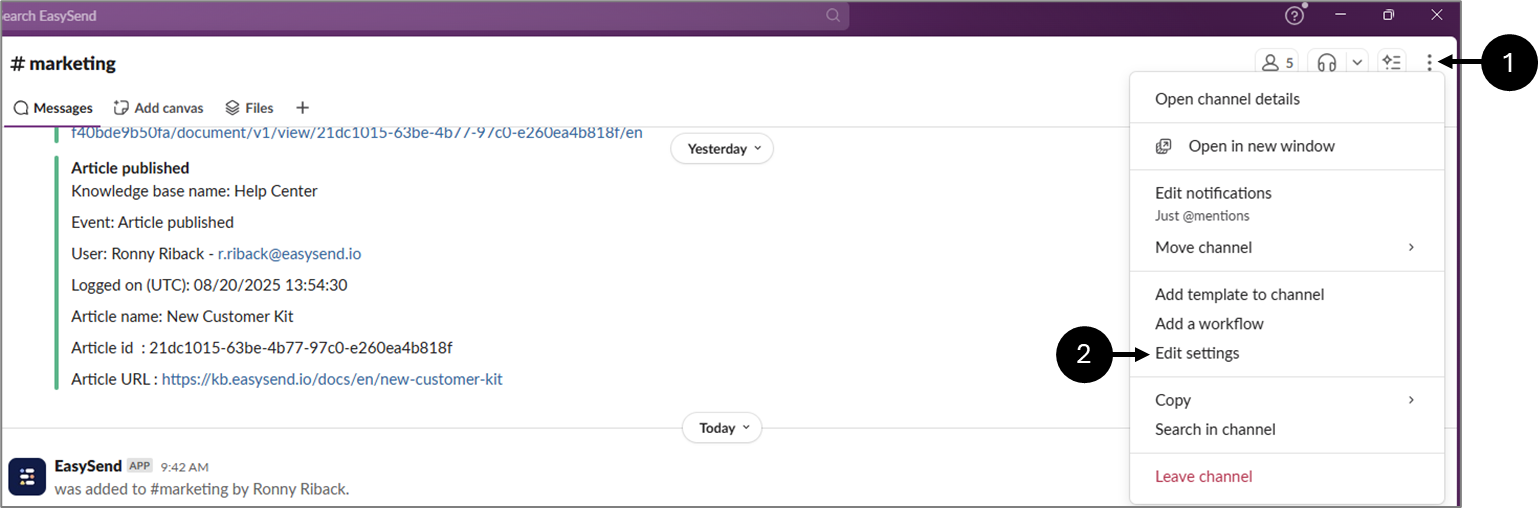
Figure 1: Messaging
- Locate the desired channel on Slack, for example, #Marketing.
- Click the three dots (1).
- Click Edit Settings (2).
Result:
The following window appears:
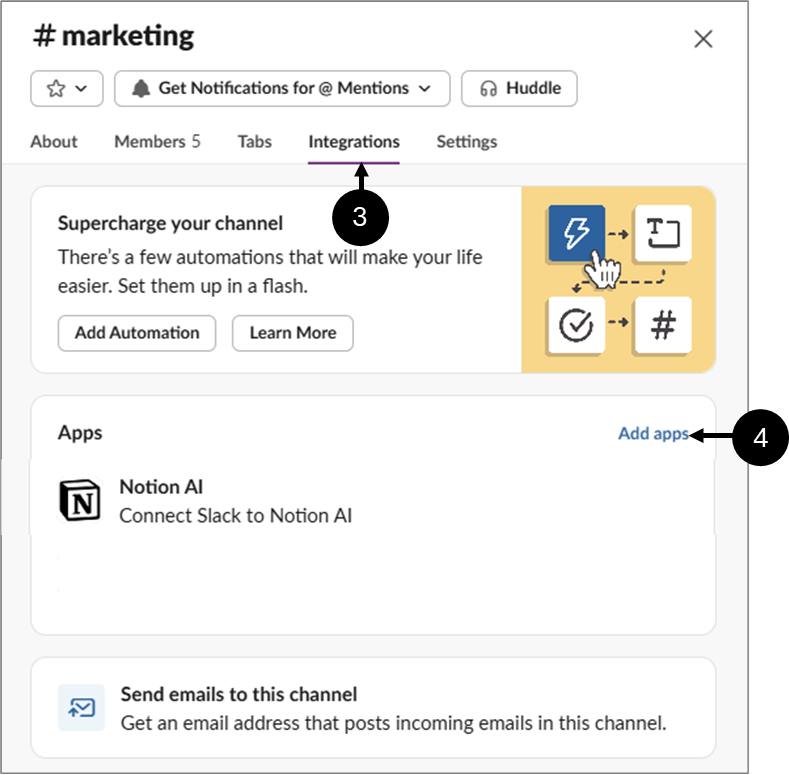
Figure 2: Adding Apps
- Click Integrations (3).
- Click Add apps (4).
Result:
The following window appears:
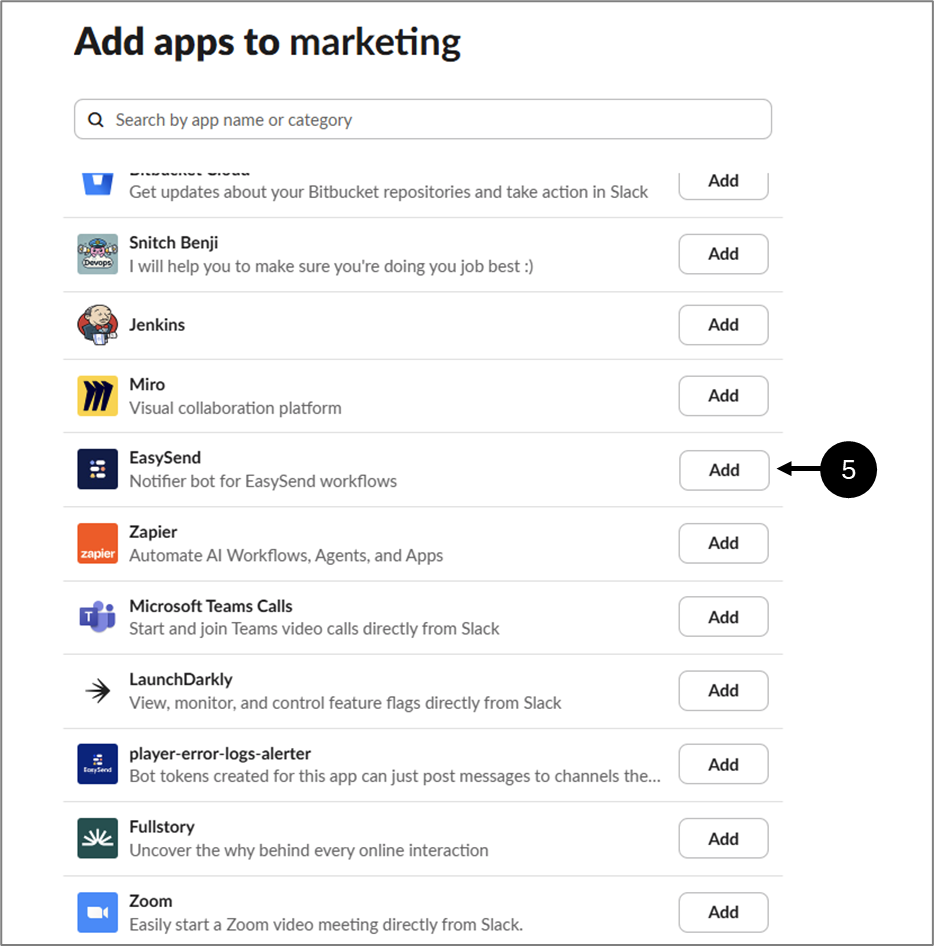
Figure 3: Adding Apps
- Locate the EasySend app and click Add (5).
Result:
The app is added:
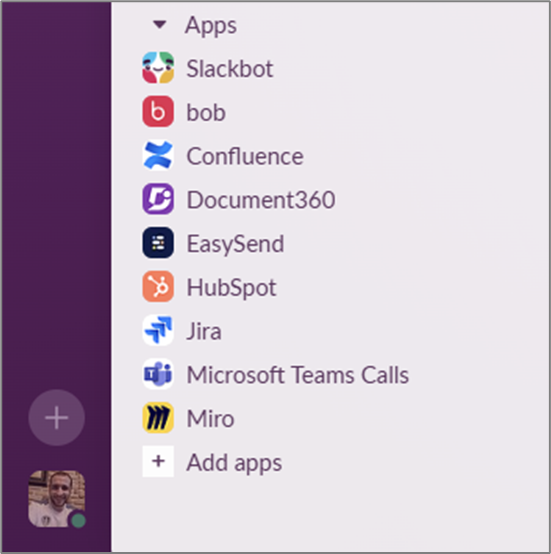
Figure 4: Added Apps
Messaging Options and Configuration
(See Figure 5 and Figure 6)
The Messaging contains the following options and fields:
- Label
- Provider (currently Slack only)
- Role (optional)
- Resource
- Edit Message
- Description
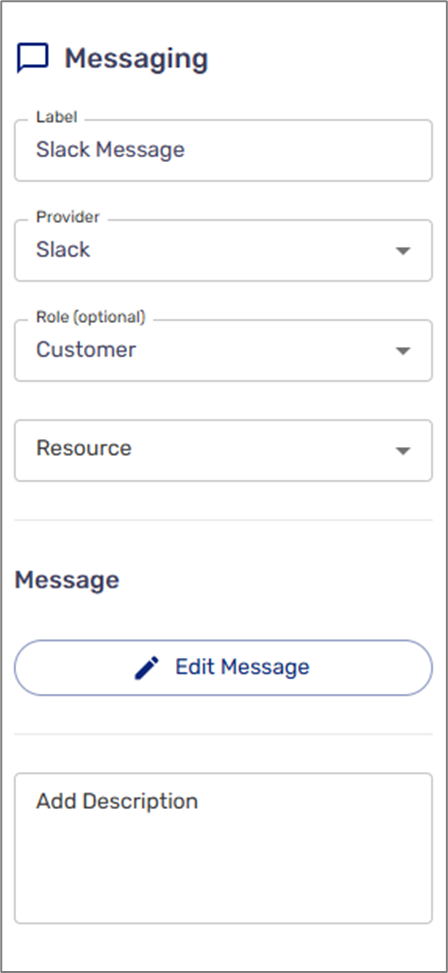
Figure 5: Messaging
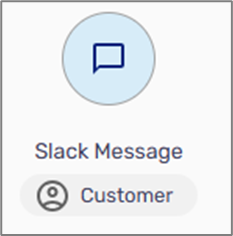
Figure 6: Label and Role
Adding a Resource
(See Figure 7 to Figure 9)
To add a new Slack resource, click the dropdown (1) and click + Create New Resource (2).
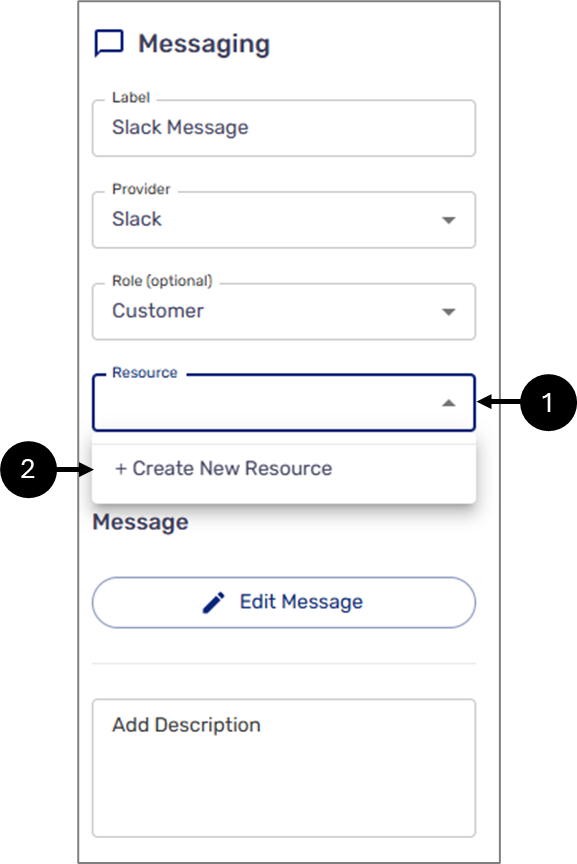
Figure 7: Creating a New Resource
After clicking, provide your Slack information:
- Workspace name
- Credentials
If the provided information is validated, the following window will appear:
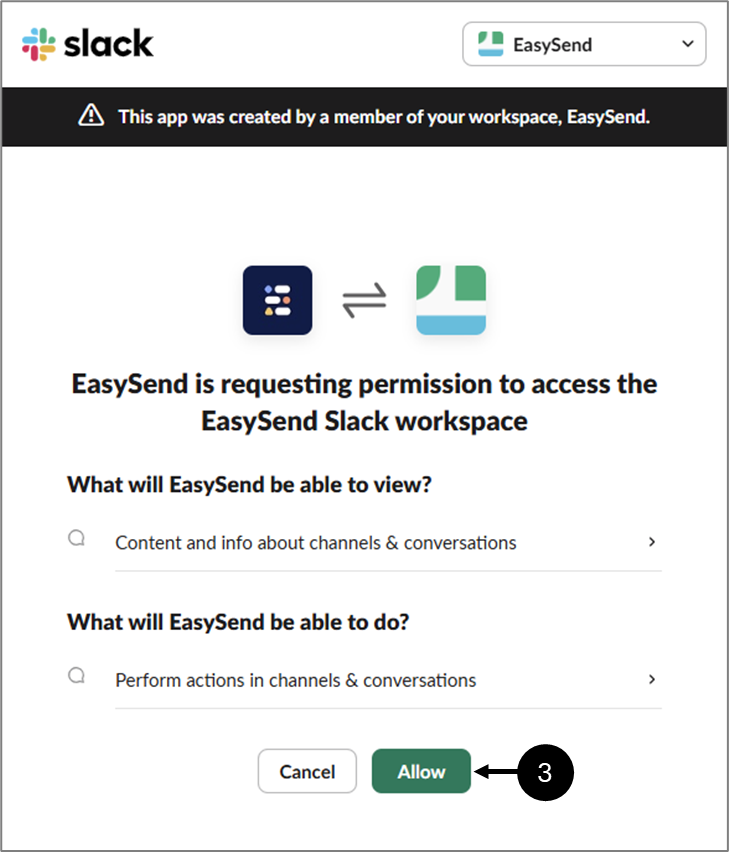
Figure 8: Allowing Permissions
Click Allow (3) to provide permissions to the EasySend app.
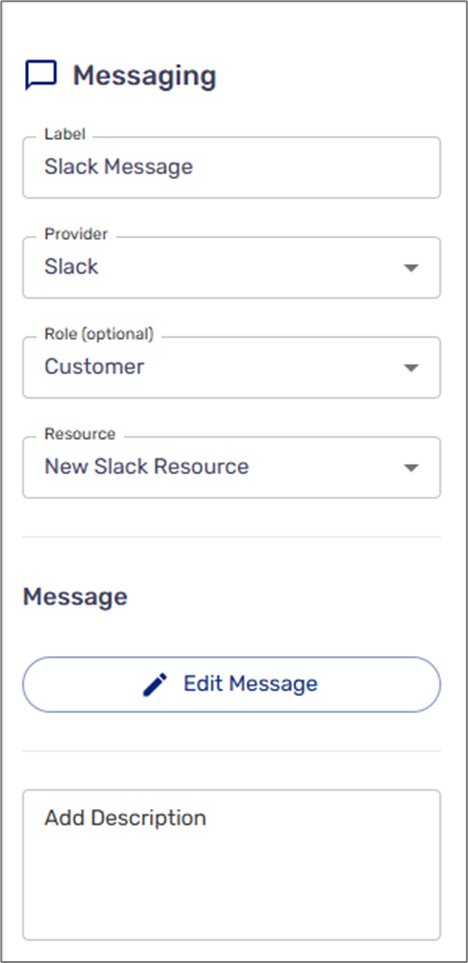
Figure 9: Added Resource
Edit Message
(See Figure 10)
When clicking the Edit Message button, the Edit Message window appears. The window contains the following fields and options:
- Message Name (can also be set through the label)
- Recipaints - the Slack channel you added the EasySend app to, for example, #Marketing.
- Different recipients per environment checkbox:
- When checked - enables you to add recipients per environment
- When not checked - recipients will be added to the default environment
- Message Body - the text that will be sent to the Slack channel
- + Add Dynamic Field - add dynamic fields to the text:
- Data items
- Metadata items
- Save - confirms all the changes and closes the window
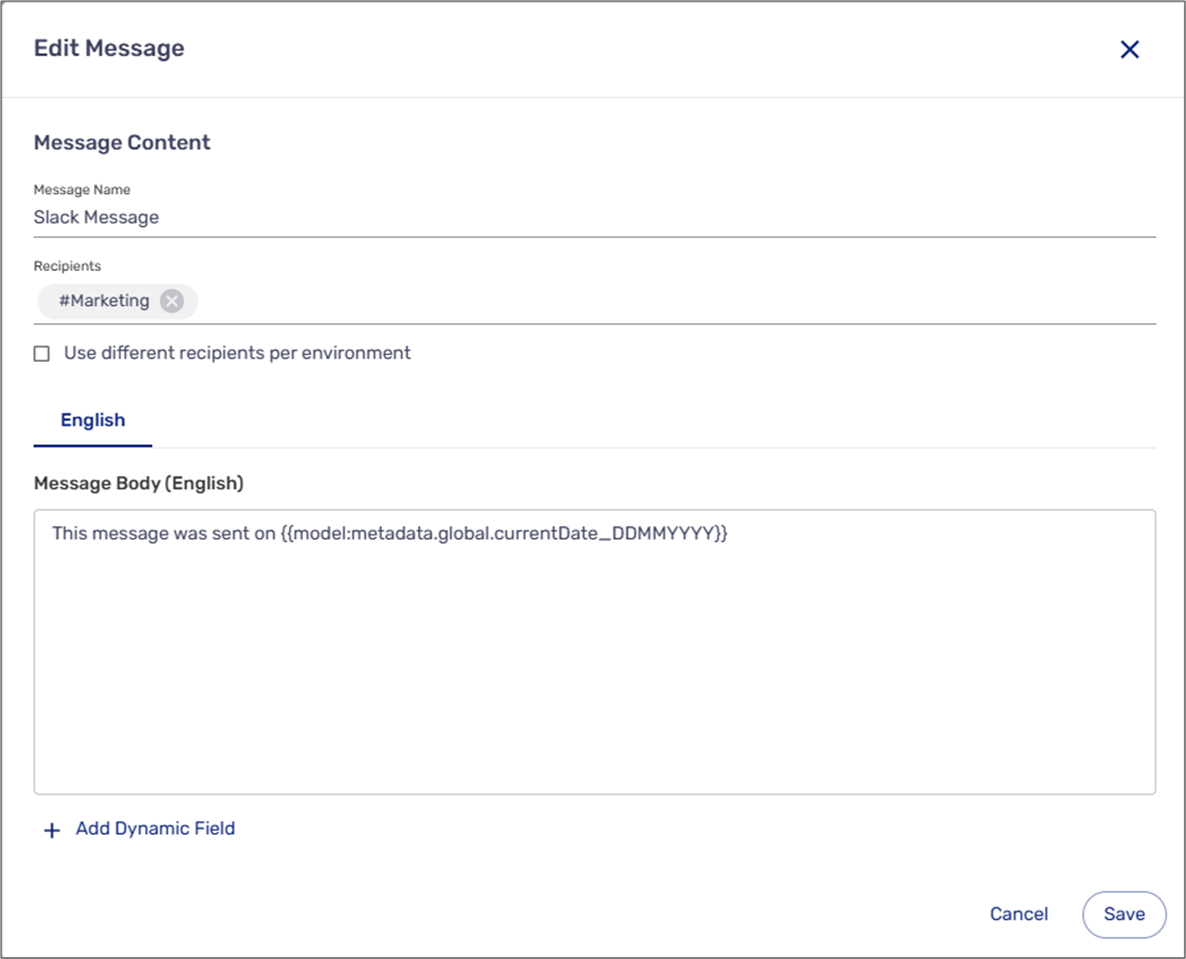
Figure 10: Edit Window Message