Article Overview
The following article describes how to integrate Credit Guard with EasySend.
What is Credit Guard?
Credit Guard is a global payment-processing platform that provides infrastructure for accepting and managing online payments.
Step 1: Creating Credit Guard Resource
(See Figure 1 and Figure 2)
The create a Credit Guard resource, perform the following steps:
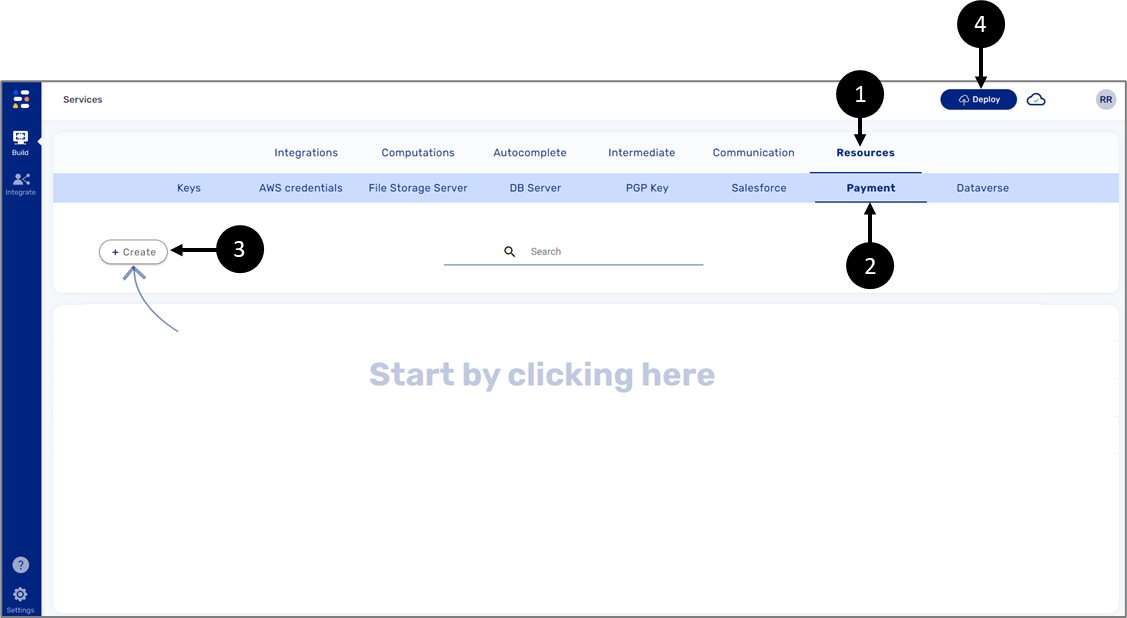
Figure 1: Credit Guard Resource
- Navigate to the Service screen.
- Click Resources (1).
- Click Payment (2).
- Click + Create (3).
A Credit Guard resource must be created with the following information:
- URL
- Terminal Number
- User
- Password
- MID
- CG Version
- Card ID
- Description
- All fields except Description are required.
- The information is provided by Credit Guard.
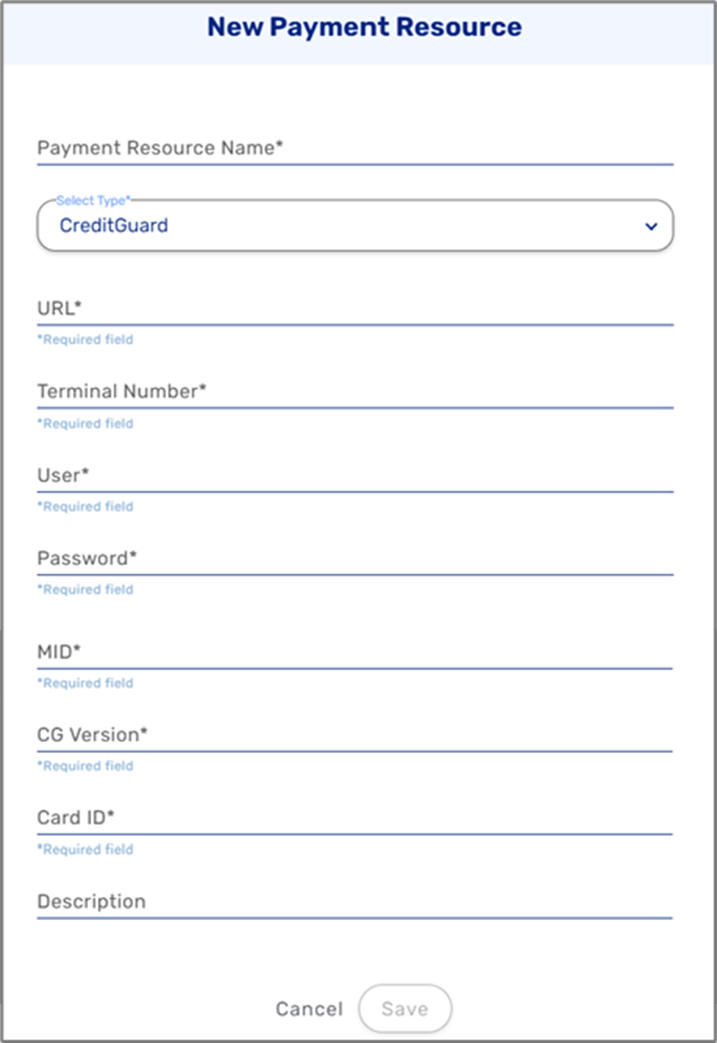
Figure 2: Credit Guard Resource
- Once the resource is created, click the Deploy button (4).
Step 2: Adding and Configuring a Credit Guard Component
(See Figure 3 and Figure 4)
To add and configure a Credit Guard component, perform the following steps:
- Navigate to the Webflow screen.
- Under Payment Solutions, drag and drop the Credit Guard component (1) onto the canvas.
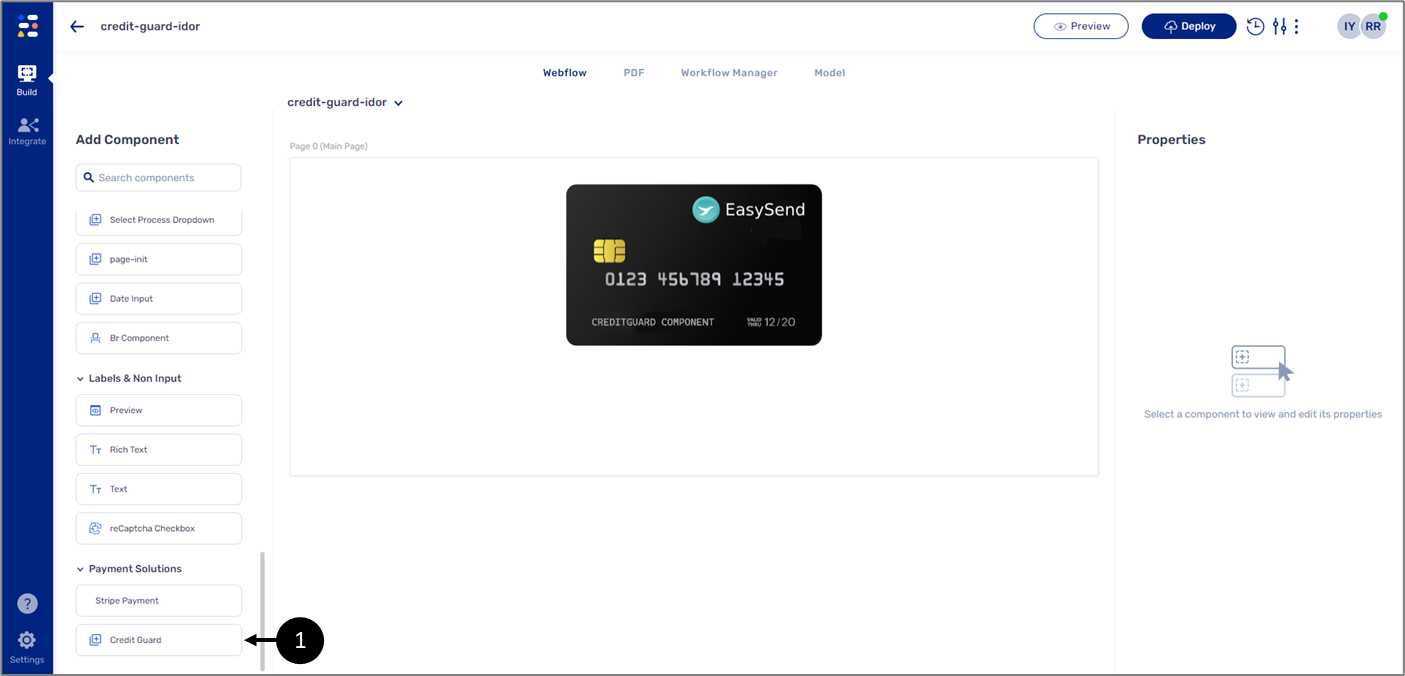
Figure 3: Credit Guard Component
- Click the component it to display its Properties section.
.png)
Figure 4: Credit Guard Properties
- Configure the properties:
- Connect it to the created Credit Guard resource (2).
- Set the Language (3).
- English (ENG)
- Hebrew (HEB) NOTEThe selected language will affect how Credit Guard components are displayed while viewing the digital process:
- Text direction
- Text (including the default Description message)
- Button labels
- Set the Currency (4).
- ILS
- USD
- EUR
- Enter the Billing Amount (5) - the billing amount must be written in cents, for example: when writing 50000 the displayed amount will be 500.00, if no amount was entered the default value of 1 NIS will be applied. NOTE
- Set the Transaction Type (6):
- Debit
- Recurring Debit
- Set the Credit Type (7):
- Regular Credit
- Installments
- Set the Number Of Installments (8):
- 1 - 12
- 1 - 12, 24
- 1 - 12, 24, 36
- Write the following messages (9):
- Success
- Failure
- Description
It is possible to override the message with new text or remove it by entering " " in the Description Message field.
Step 3: Create Credit Guard Data Structure
(See Figure 5)
In the Model screen create the following required data structure:
- creditGuard (object)
- CG_Token (string)
- CG_Data (object)
- cardId (string)
- You can add more data items under CG_Data to display additional information, for example:
- cardMask (string)
- cardExpiration (string)
- sessionCD (string)
- cardBrand (object)
- code (string)
- text (string)
- creditType (object)
- code (string)
- text (string)
- id (string)
- authNumber (string)
- statusText (string)
- You can also create a data item to display user email information, for example: emailModelValue (string).
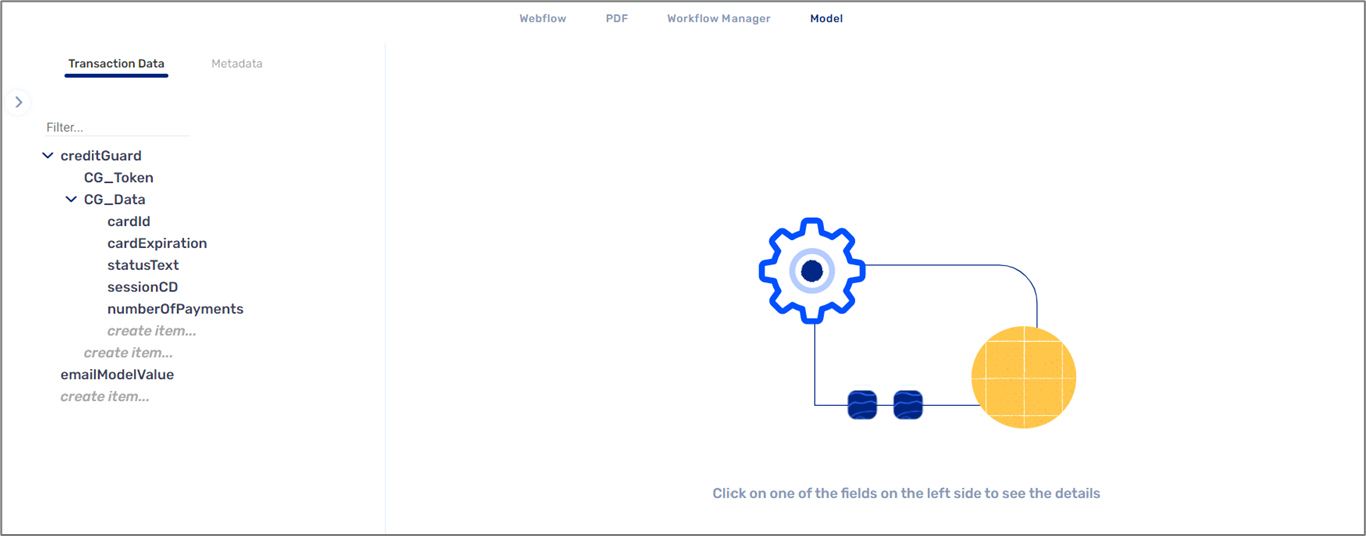
Figure 5: Data Structure
Step 4: Connecting Data Items
(See Figure 6)
Connect the properties to data items according to Table 2:
Table 2: Connecting Data Items
Property | Connect to |
C G Token | creditGuard.CG_Token |
Data | creditGuard.CG_Data |
Payment User Email | emailModelValue NOTE This data item must also be connected to a data input component such as a Text Input |
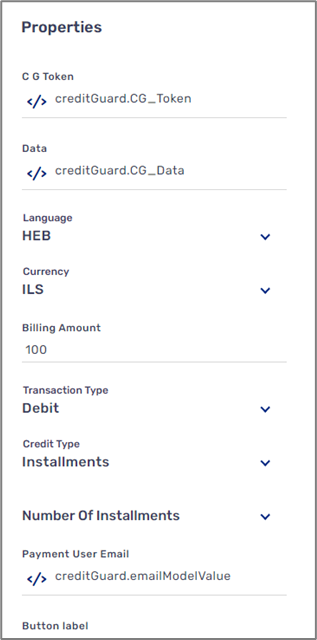
Figure 6: Credit Guard Component Properties
Step 5: Deploy and Preview
(See Figure 7)
After configuring the properties and connecting the data items click the Deploy button to start the deployment process and then click Preview.
Please note that deployment warnings will occur if:
- A Success message, a Failure message, or both are missing.
- The Credit Type is set to Installments but the Number Of Installments was not set.

Figure 7: Deployment Warnings
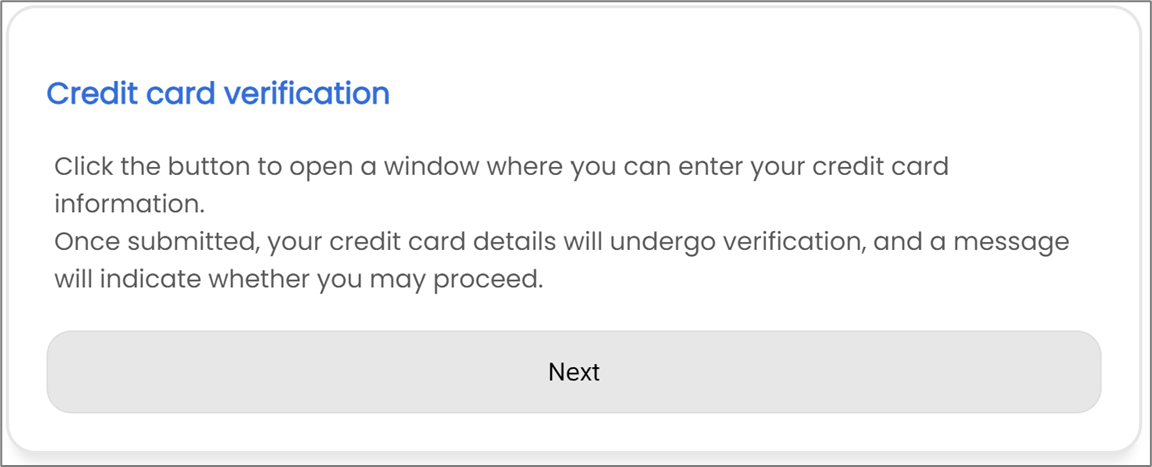
Figure 8 displays an example of a digital process integrated with Credit Guard:
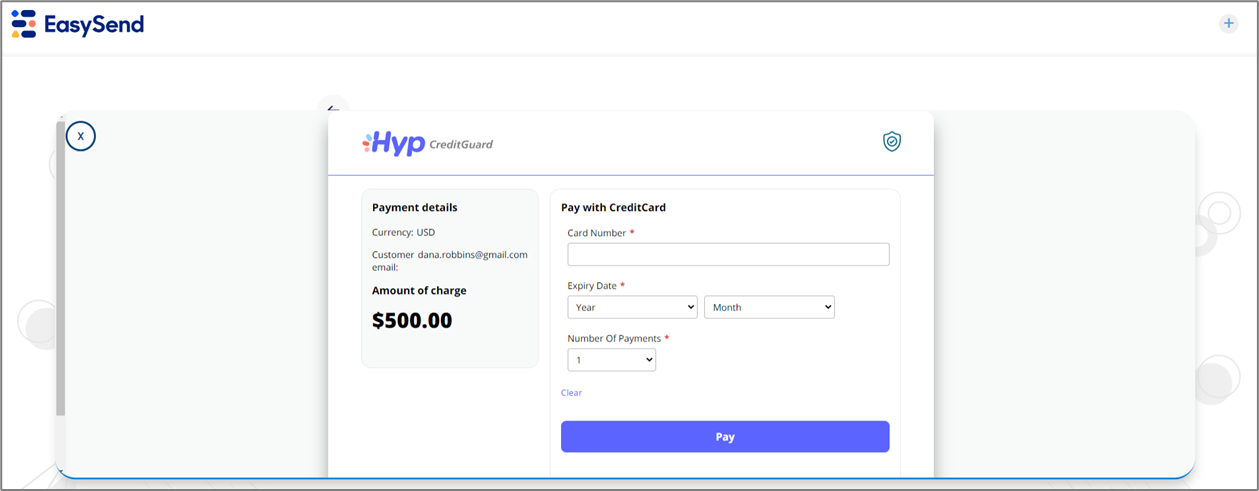
Figure 8: Digital Process with Credit Guard
Authentication and Security
When displaying the digital process in the browser, the integration utilizes an Iframe to facilitate secure transactions. The process begins with an initial request to Credit Guard using your API key, secret key, and the specific sum to be received. This request generates a link for the Iframe. Once the user completes the interaction, Credit Guard provides a transaction ID. EasySend then initiates a follow-up request to Credit Guard with this ID to finalize and confirm the charge.
Additional information regarding authentication and credentials storage :
- The user and the encrypted password are stored in the database.
- When Easysend needs to use the resource's credentials, the password will be decrypted solely on the server side, as will the different API calls made to Credit Guard.
- For resource encryption, Easysend uses the AWS encryption class with KMS encryption.