Release Note Overview
This month's product release includes an enhancement to our security features - inactivity timeout.
Inactivity Timeout
(See Figure 1)
Once a user has interacted with a digital process, but it becomes inactive for a predefined number of minutes (30 minutes is the default), the user sees a session expiry message on his screen, and he is logged out.
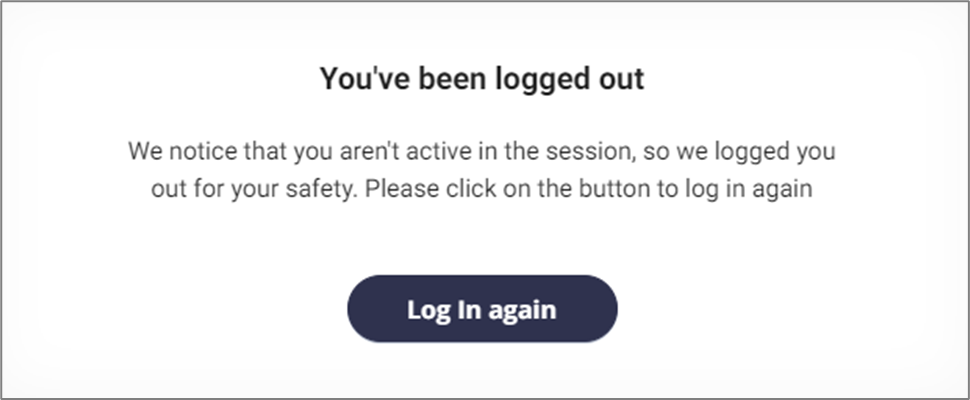
Figure 1: Session Expiry Message
How to Override the Session Expiry Time?
(See Figure 2 and Figure 4)
To override the digital process's session expiry time, perform the following steps:
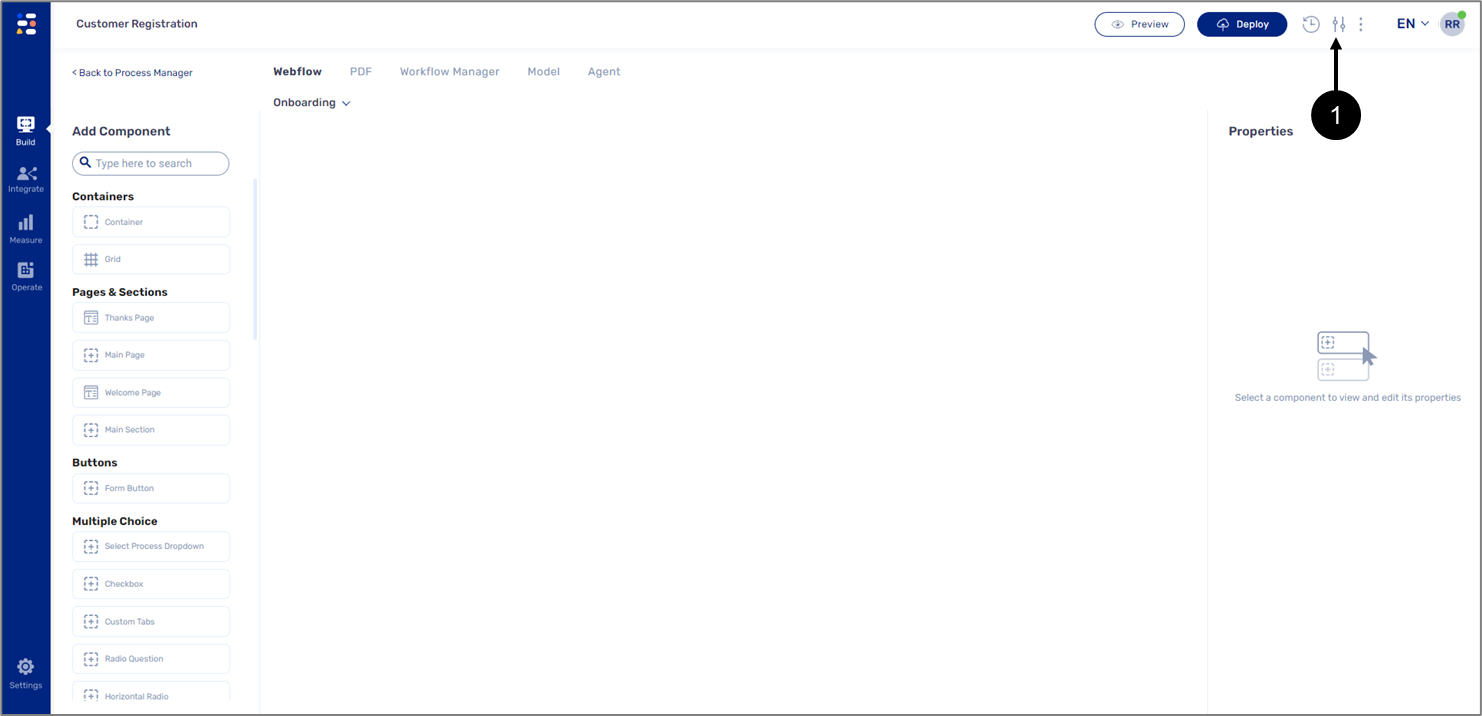
Figure 2: Process Settings Icon
- On the Webflow screen, click the Process Settings icon (1).
Result:
The Process Settings screen appears:
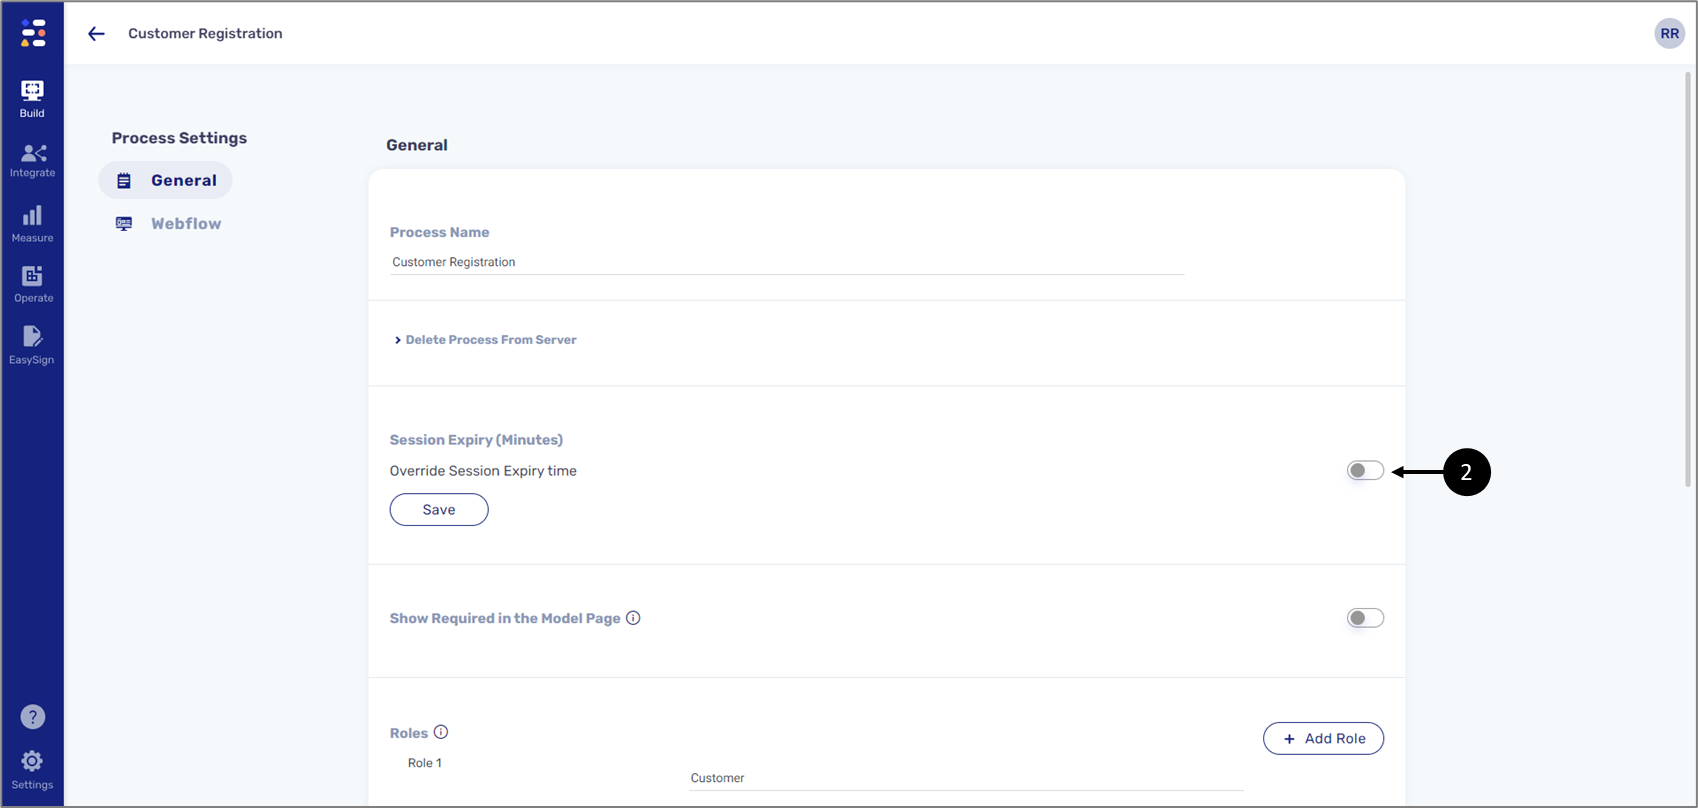
Figure 3: Override Session Expiry time Switch
- Toggle the Override Session Expiry time switch (2) to on.
Result:
A new line appears:
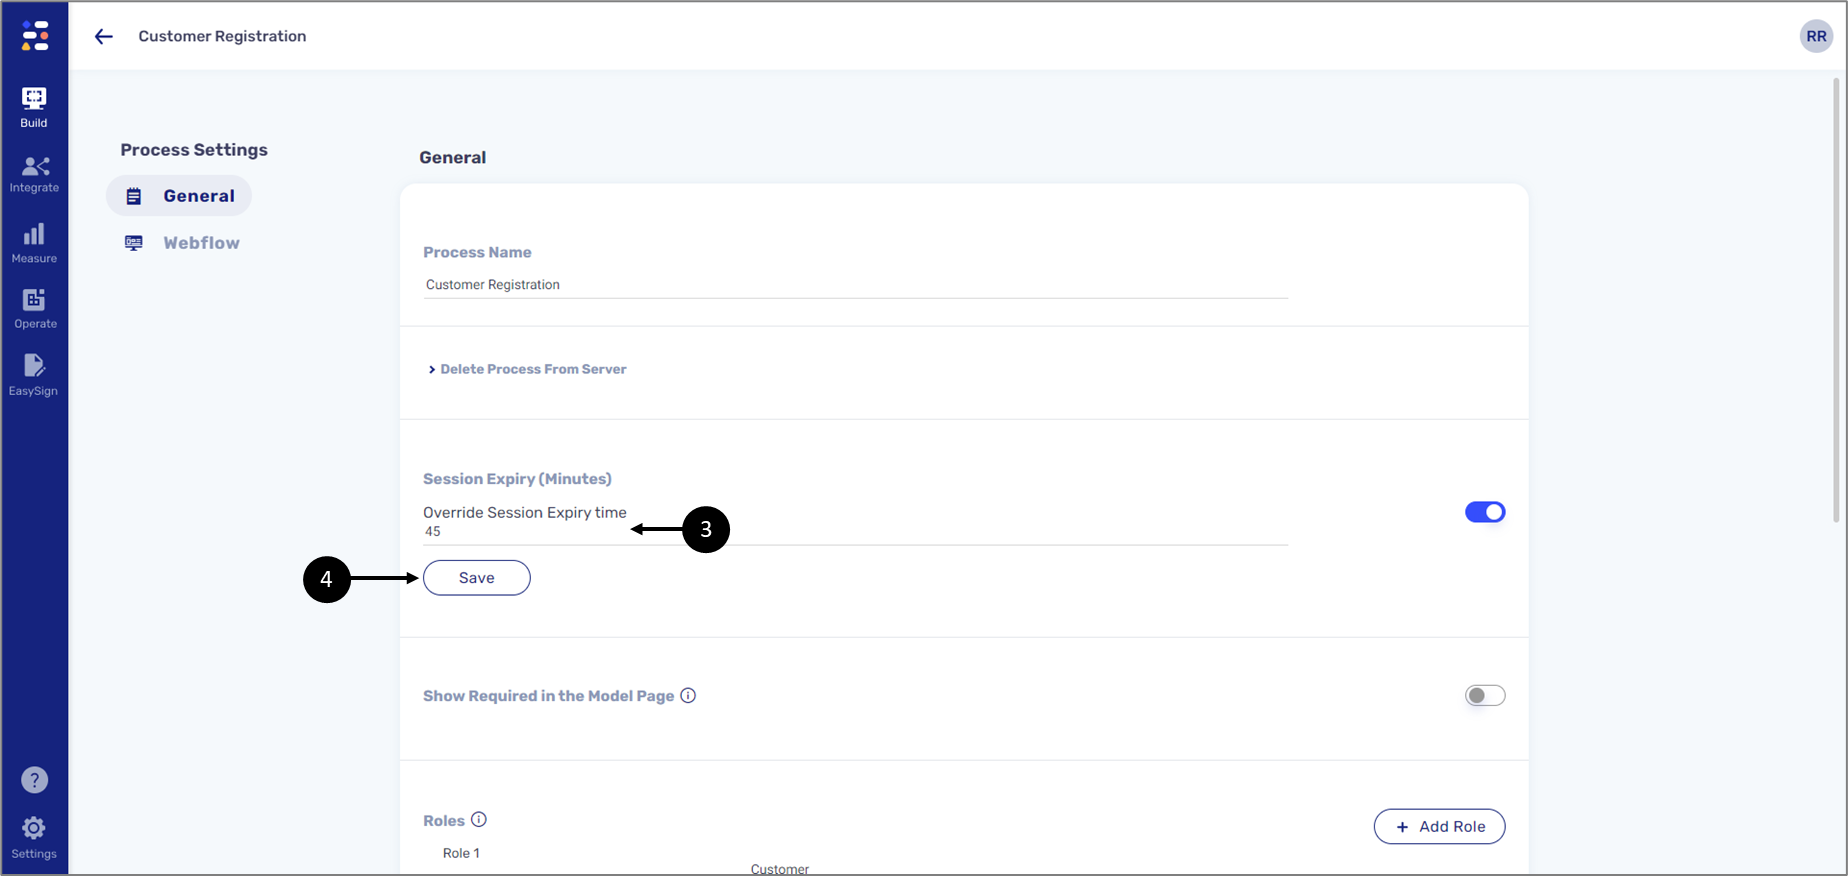
Figure 4: New Expiry Time
- Enter a new expiry time (3).
- Click the Save button (4).
Result:
The new session expiry time is set for the digital process.
How to Override the Session Expiry Message? (Text and Color)
(See Figure 5 to Figure 12)
To override the session expiry message (text and color), perform the following steps:
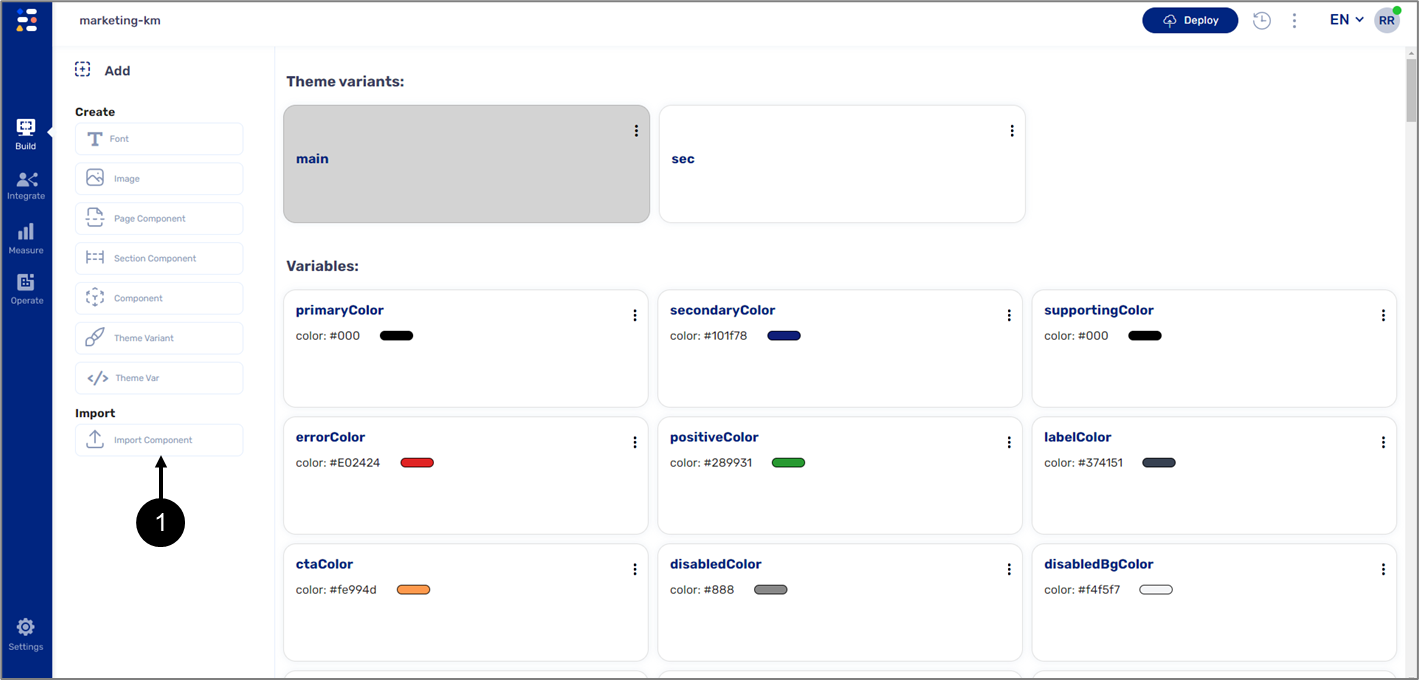
Figure 5: Import component
- Access your Theme.
- Import the Session Timeout Modal component:
- Click Import Component (1).
Result:
The Import component window appears:

Figure 6: Global Components Dropdown
- Click the Global Components dropdown (2).
Result:
A list of global components appears:
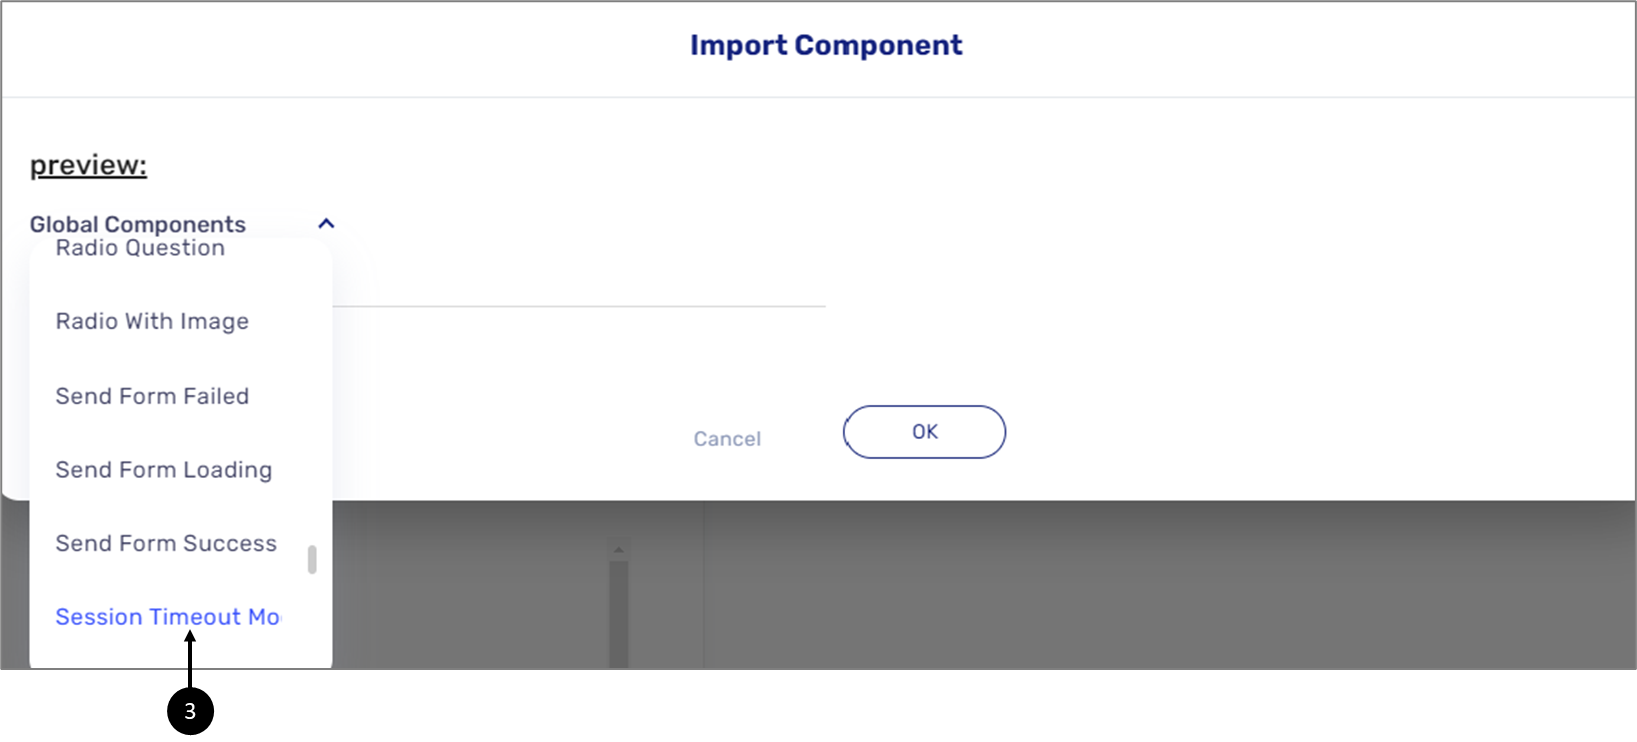
Figure 7: Session Timeout Modal 1 of 2
- Scroll and click Session Timeout Modal (3).
Result:
The component appears in the Preview: section (4):
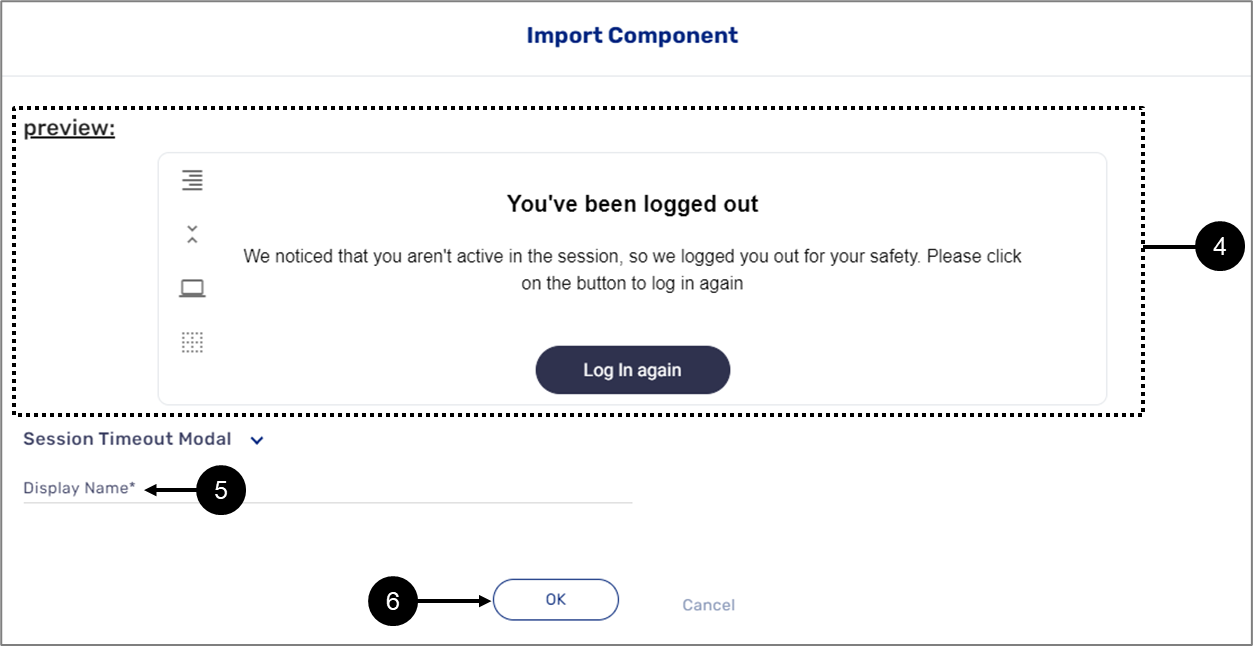
Figure 8: Session Timeout Modal 2 of 2
- Enter a Display Name (5).
- Click the OK button (6).
Result:
The component (7) appears under the Other: section:
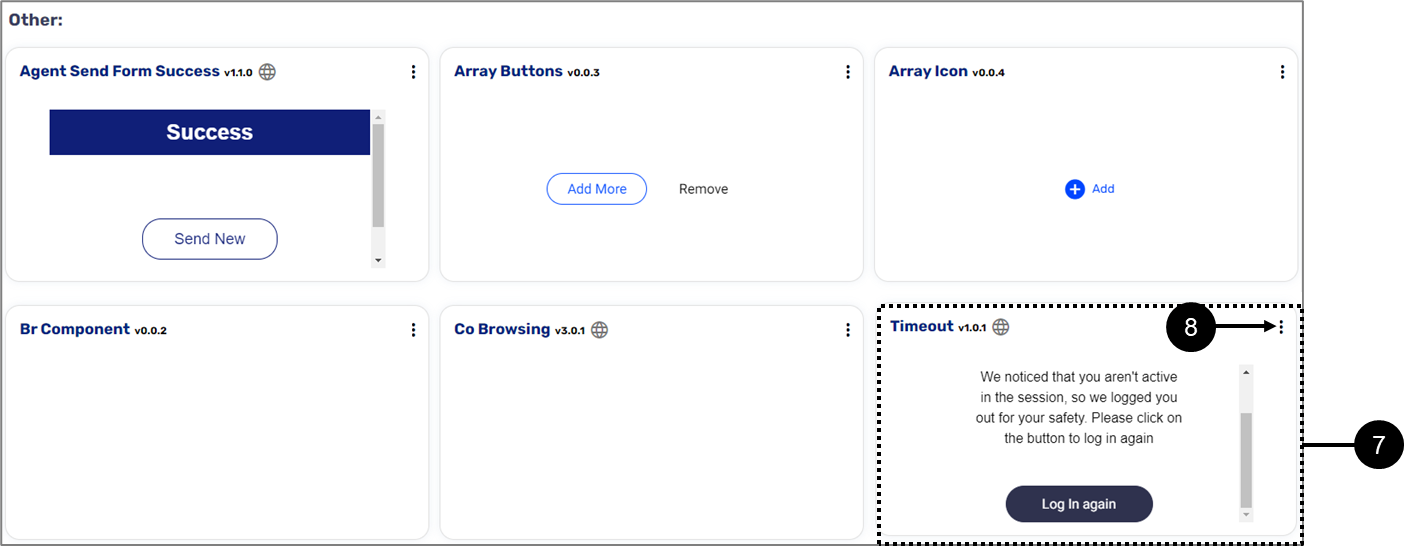
Figure 9: Other: Section
- Edit the component's variables:
- Click the three dots (8).
Result:
Additional options appear:
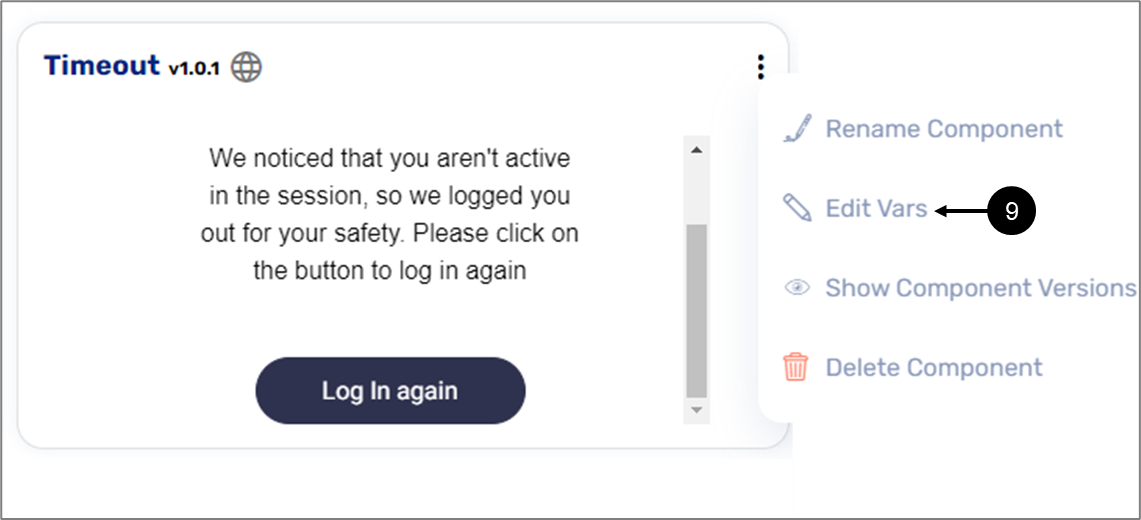
Figure 10: Other: Edit Vars
- Click Edit Vars (9).
Result:
A list of the component's variables appears:

Figure 11: List of Variables
- Edit the desired variables, for example, edit the text (10), the button text (11), or font color (12).
- Click the OK button (13) to finish.
- To publish the changes, click the Deploy button (14) and wait for the deployment process to finish.
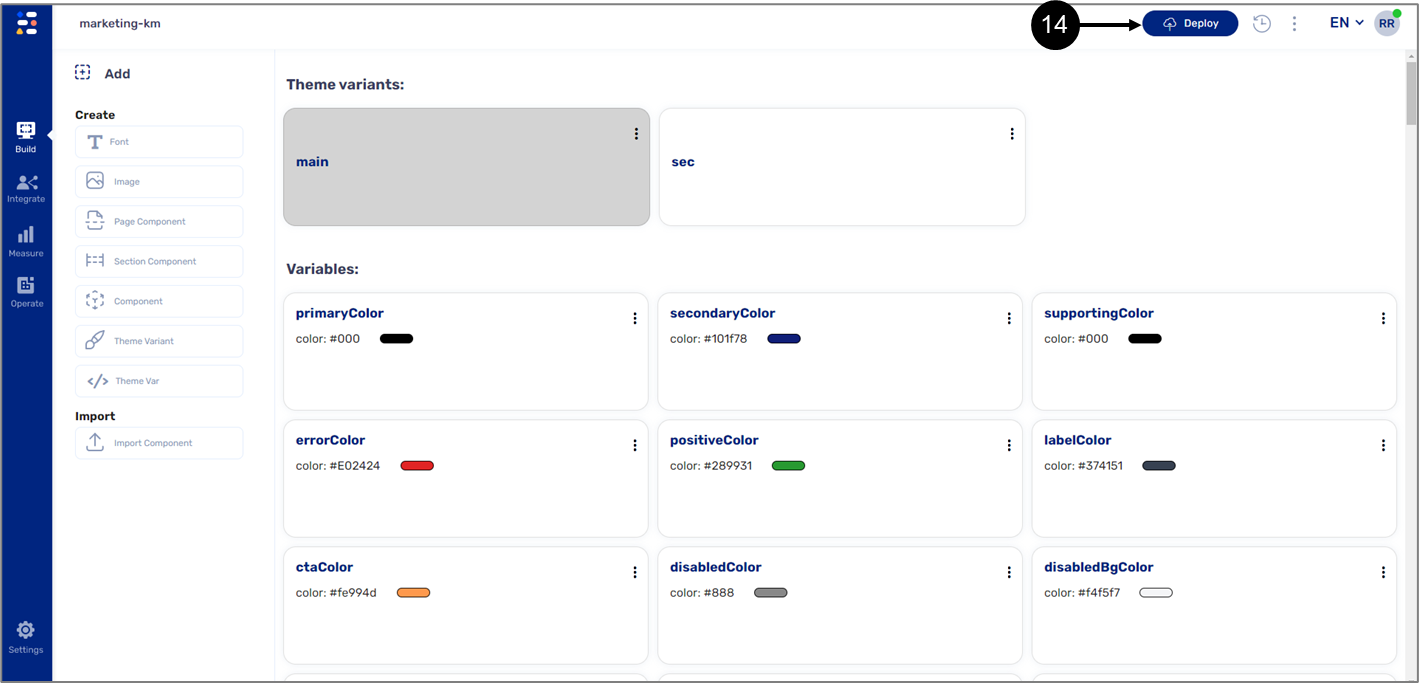
Figure 12: Deploy Button
Session Timeout Notification
(See Figure 13 to Figure 20)
As part of EasySend's ongoing support with level A Web Content Accessibility Guidelines (WCAG), it is also possible to display a session timeout notification message. This message alerts the end-user that they will be logged out in one minute. The message provides an option for the end-user to stay logged in.
To use a session timeout notification, perform the following steps:
To override the session expiry message (text and color), perform the following steps:
Figure 13: Import component
- Access your Theme.
- Import the Session Timeout Modal component:
- Click Import Component (1).
Result:
The Import component window appears:
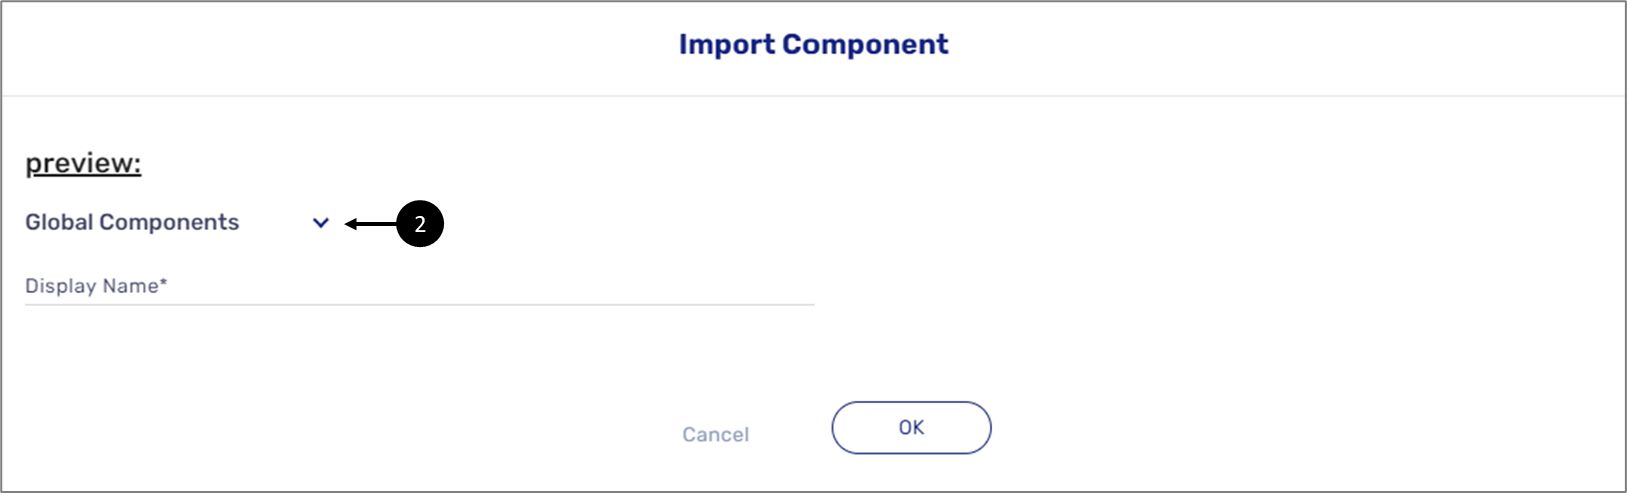
Figure 14: Global Components Dropdown
- Click the Global Components dropdown (2).
Result:
A list of global components appears:
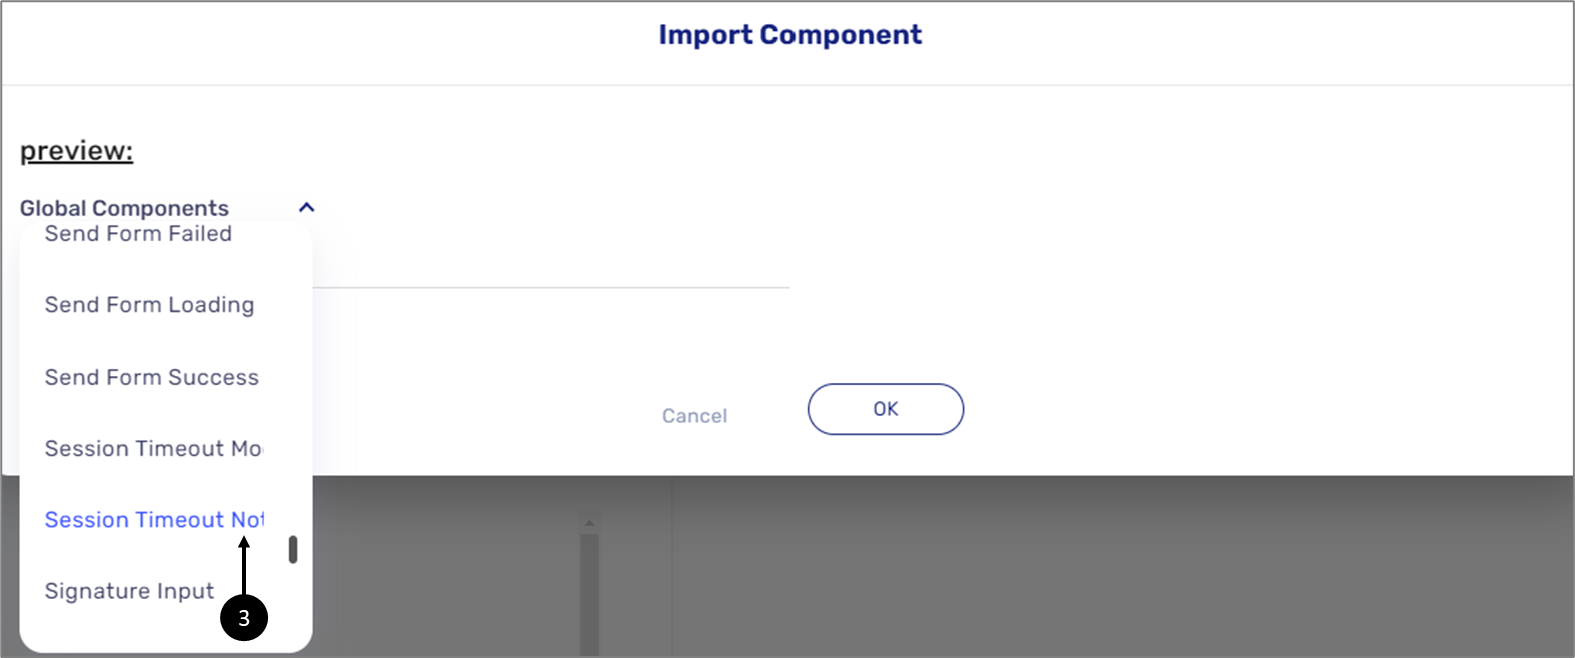
Figure 15: Session Timeout Modal 1 of 2
- Scroll and click Session Timeout Notification Modal (3).
Result:
The component appears in the Preview: section (4):
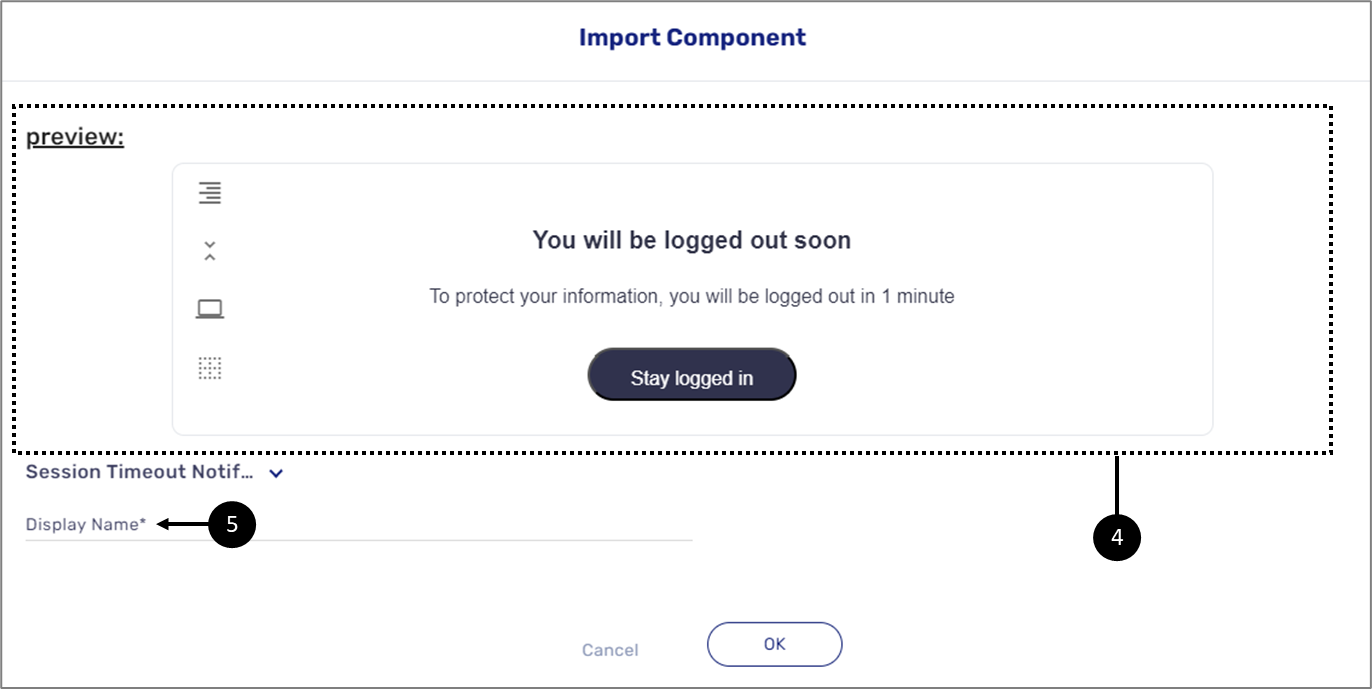
Figure 16: Session Timeout Modal 2 of 2
- Enter a Display Name (5).
- Click the OK button (6).
Result:
The Session component (7) appears under the Other: section:
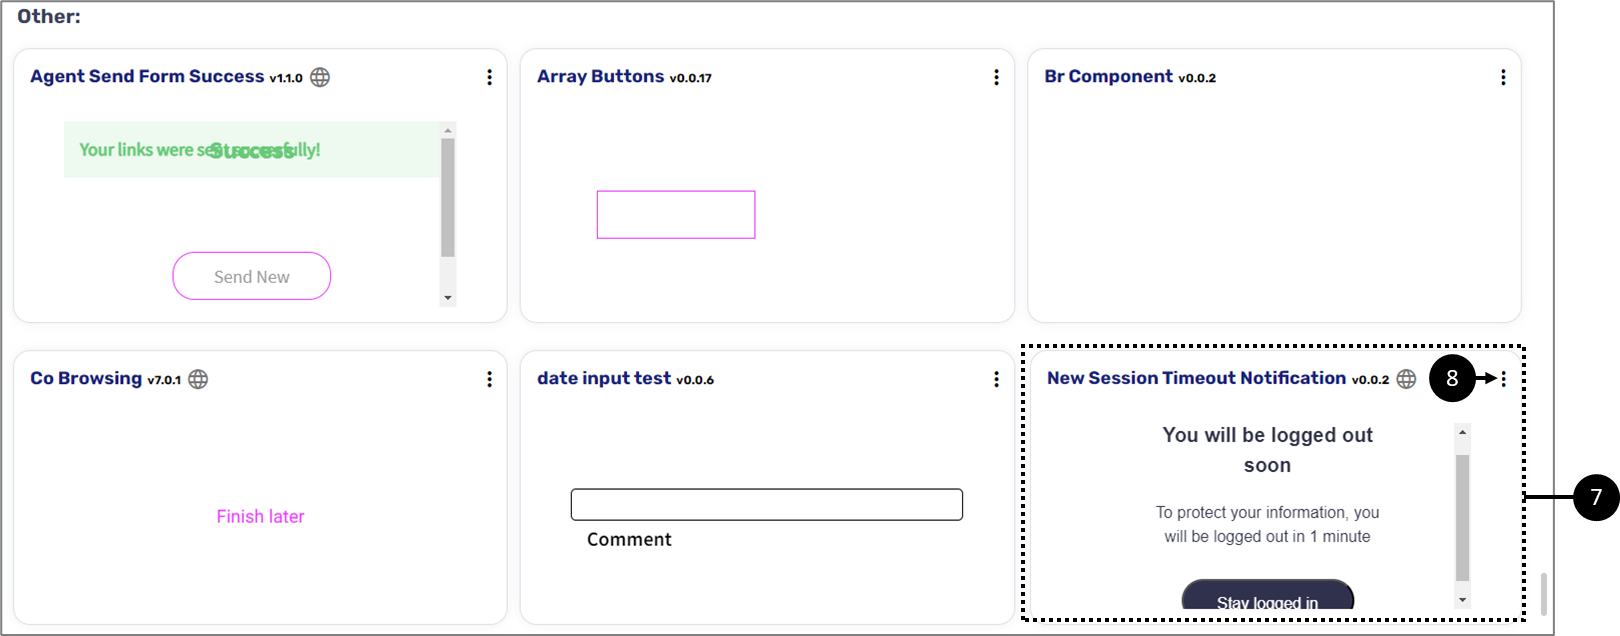
Figure 17: Other: Section
- Edit the component's variables:
- Click the three dots (8).
Result:
Additional options appear:
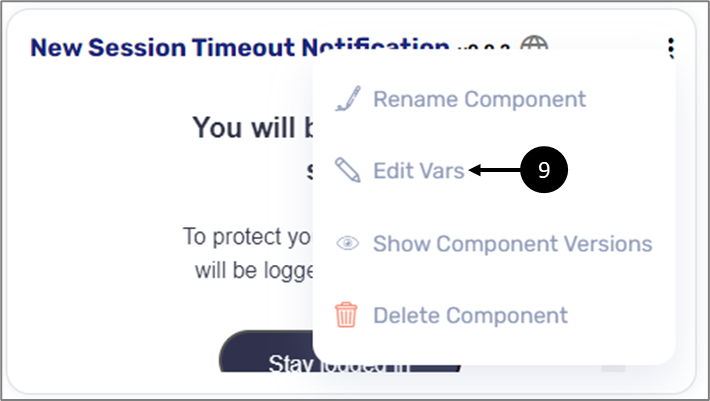
Figure 18: Other: Edit Vars
- Click Edit Vars (9).
Result:
A list of the component's variables appears:

Figure 19: List of Variables
- Edit the desired variables, for example, edit the text of the title (10), the text of the subtitle (11), or the text of the button (12).
- Click the OK button (13) to finish.
- To publish the changes, click the Deploy button (14) and wait for the deployment process to finish.
Figure 20: Deploy Button
EasySign Session Expiry Time
(See Figure 21 and Figure 22)
The session expiry time feature exists also for EasySign processes. To set the session expiry time for EasySign processes, perform the following steps:
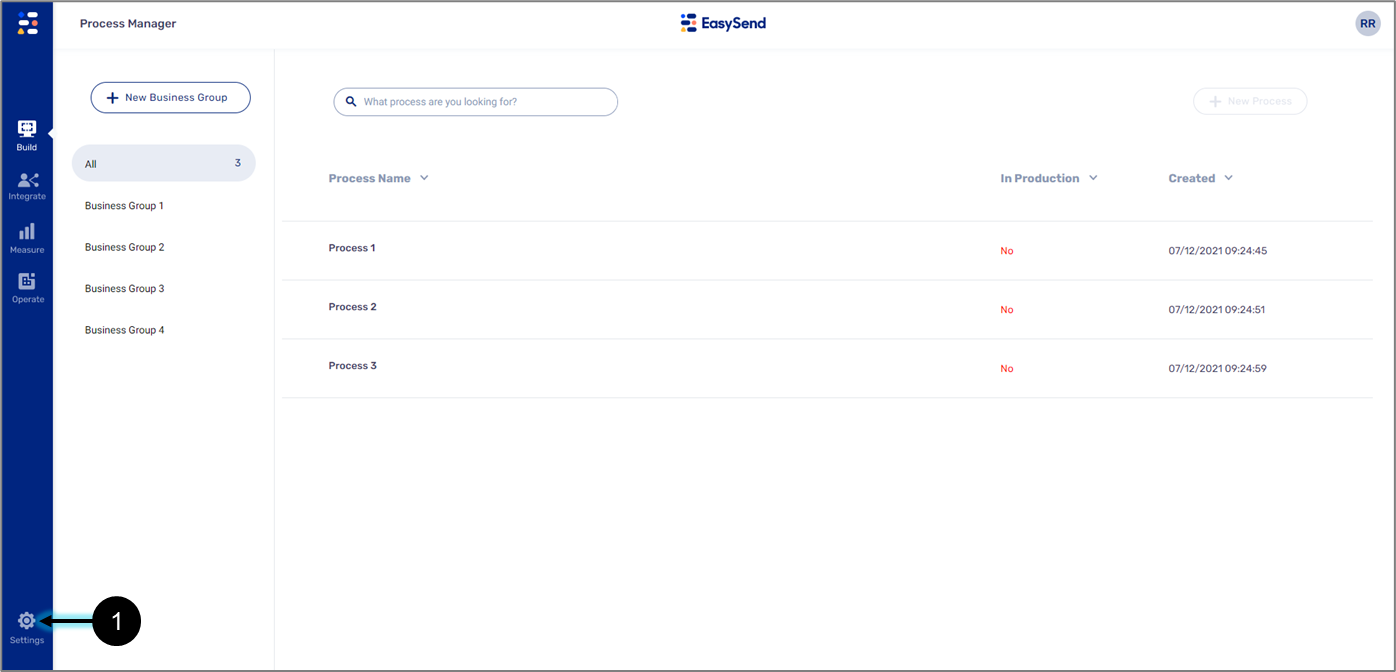
Figure 21: Customer Settings Icon
- Access your Process Manager screen.
- Click the Customer Settings icon (1).
Result:
The Customer Settings screen appears:
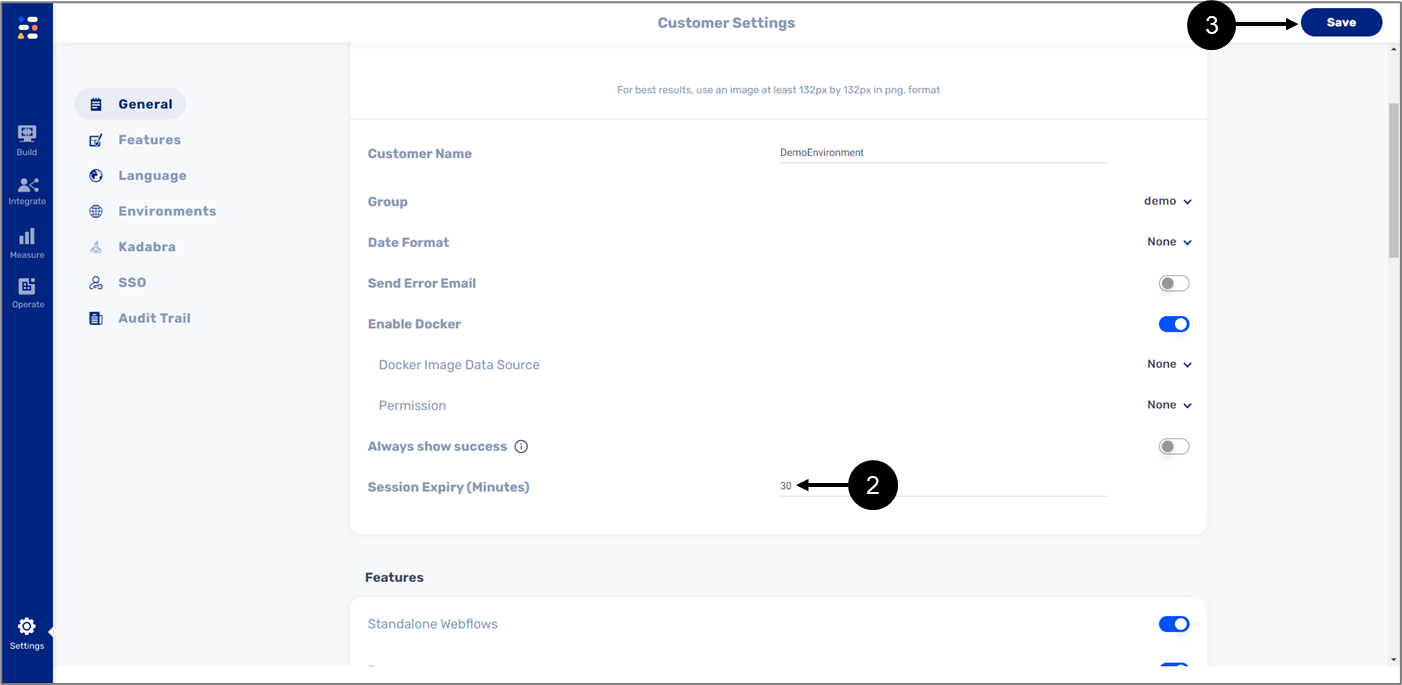
Figure 22: Customer Settings Screen
- Enter a new expiry time (in minutes)(2).
- Click the Save button (3).
- The expiry time must be between 30 to 720 minutes.
- The Customer Settings screen can only be accessed by EasySend, for further information, please contact our support team.