- PDF
Managing Users and Groups
- PDF
Article Overview
The following article describes how to manage users and groups using the options found under the Settings Tab. It details how to:
- Invite users and apply roles and permissions
- How to edit users infromation
- How to create and edit groups
The Settings Tab
(See Figure 1)
The Settings Tab (1) contains two options:
- Customer Settings (2) - opens the Customer Settings screen for configuring different settings such as the availability of features in your environment.
- Users Management (3) - opens the users management screen for managing roles and permissions for users and groups.
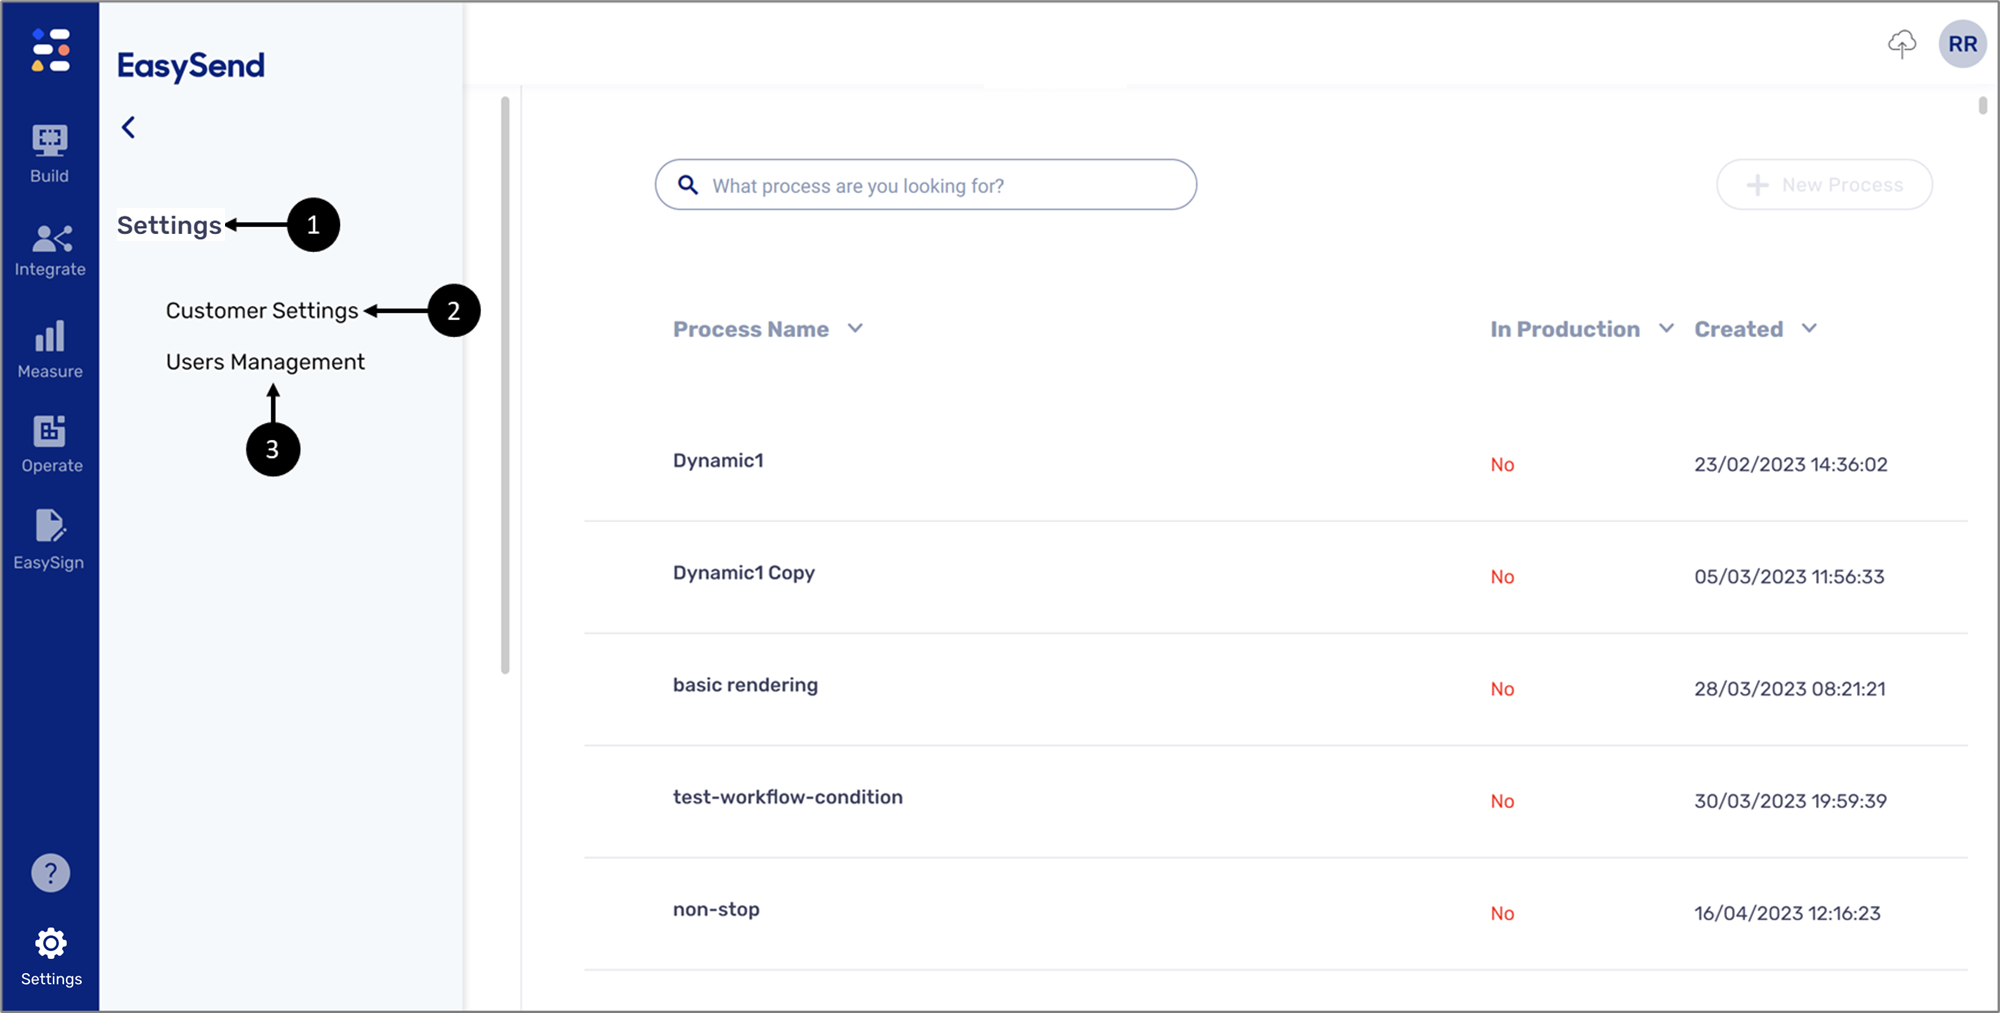
Figure 1: Settings Tab
Users Management
(See Figure 2)
The users management screen contains two options:
- Users Groups (1) - displays the Groups section for creating and managing groups.
- Users (2) - displays the Users section for managing platform users.
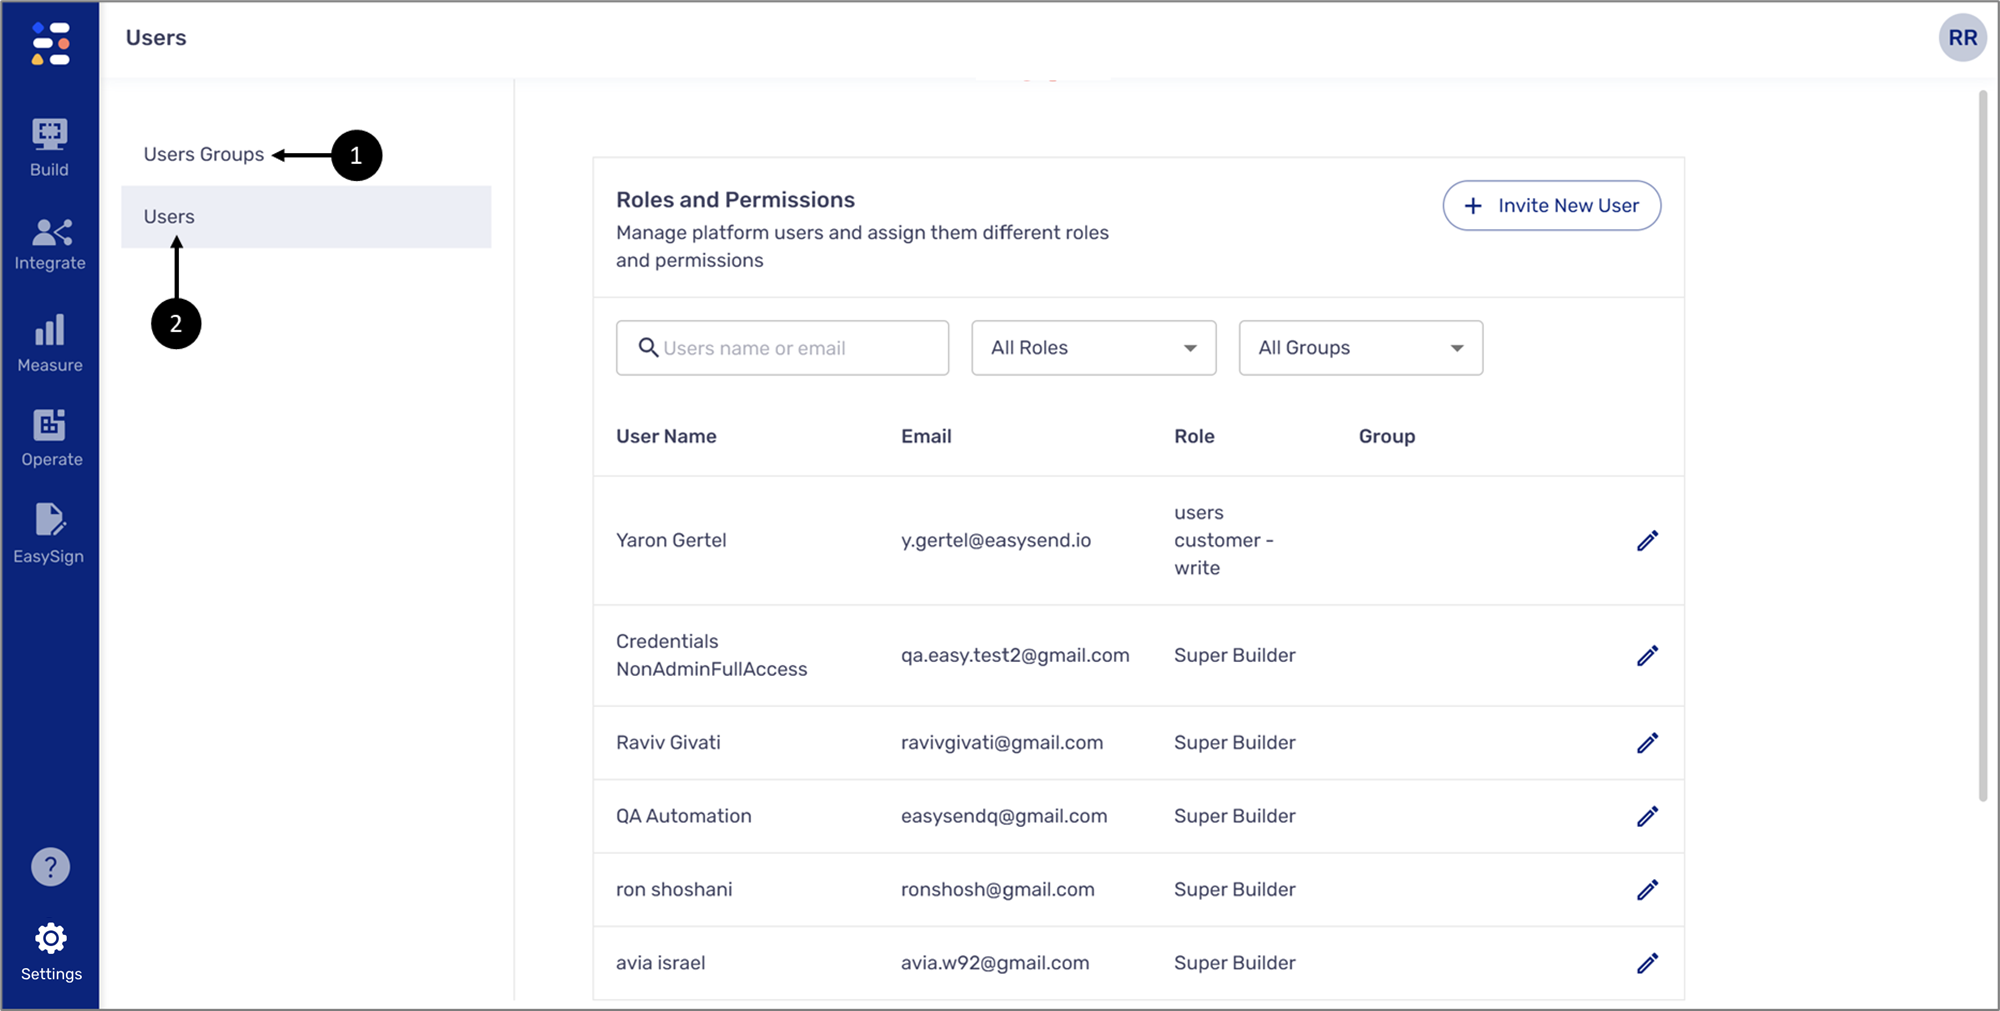
Figure 2: Users Management Screen
Users
(See Figure 3)
This section enables you to manage platform users and assign them different roles and permissions. It contains a button inviting new users to your Builder environment (1) and a list of existing users (2) with the following information:
- User Name
- Role
- Group

The list can be filtered by:
- Searching for a user's name or email (3).
- Selecting a role (4).
- Selecting a group (5).
The pencil icon (6) enables you to edit existing user details, for additional information see the Edit User Details section.
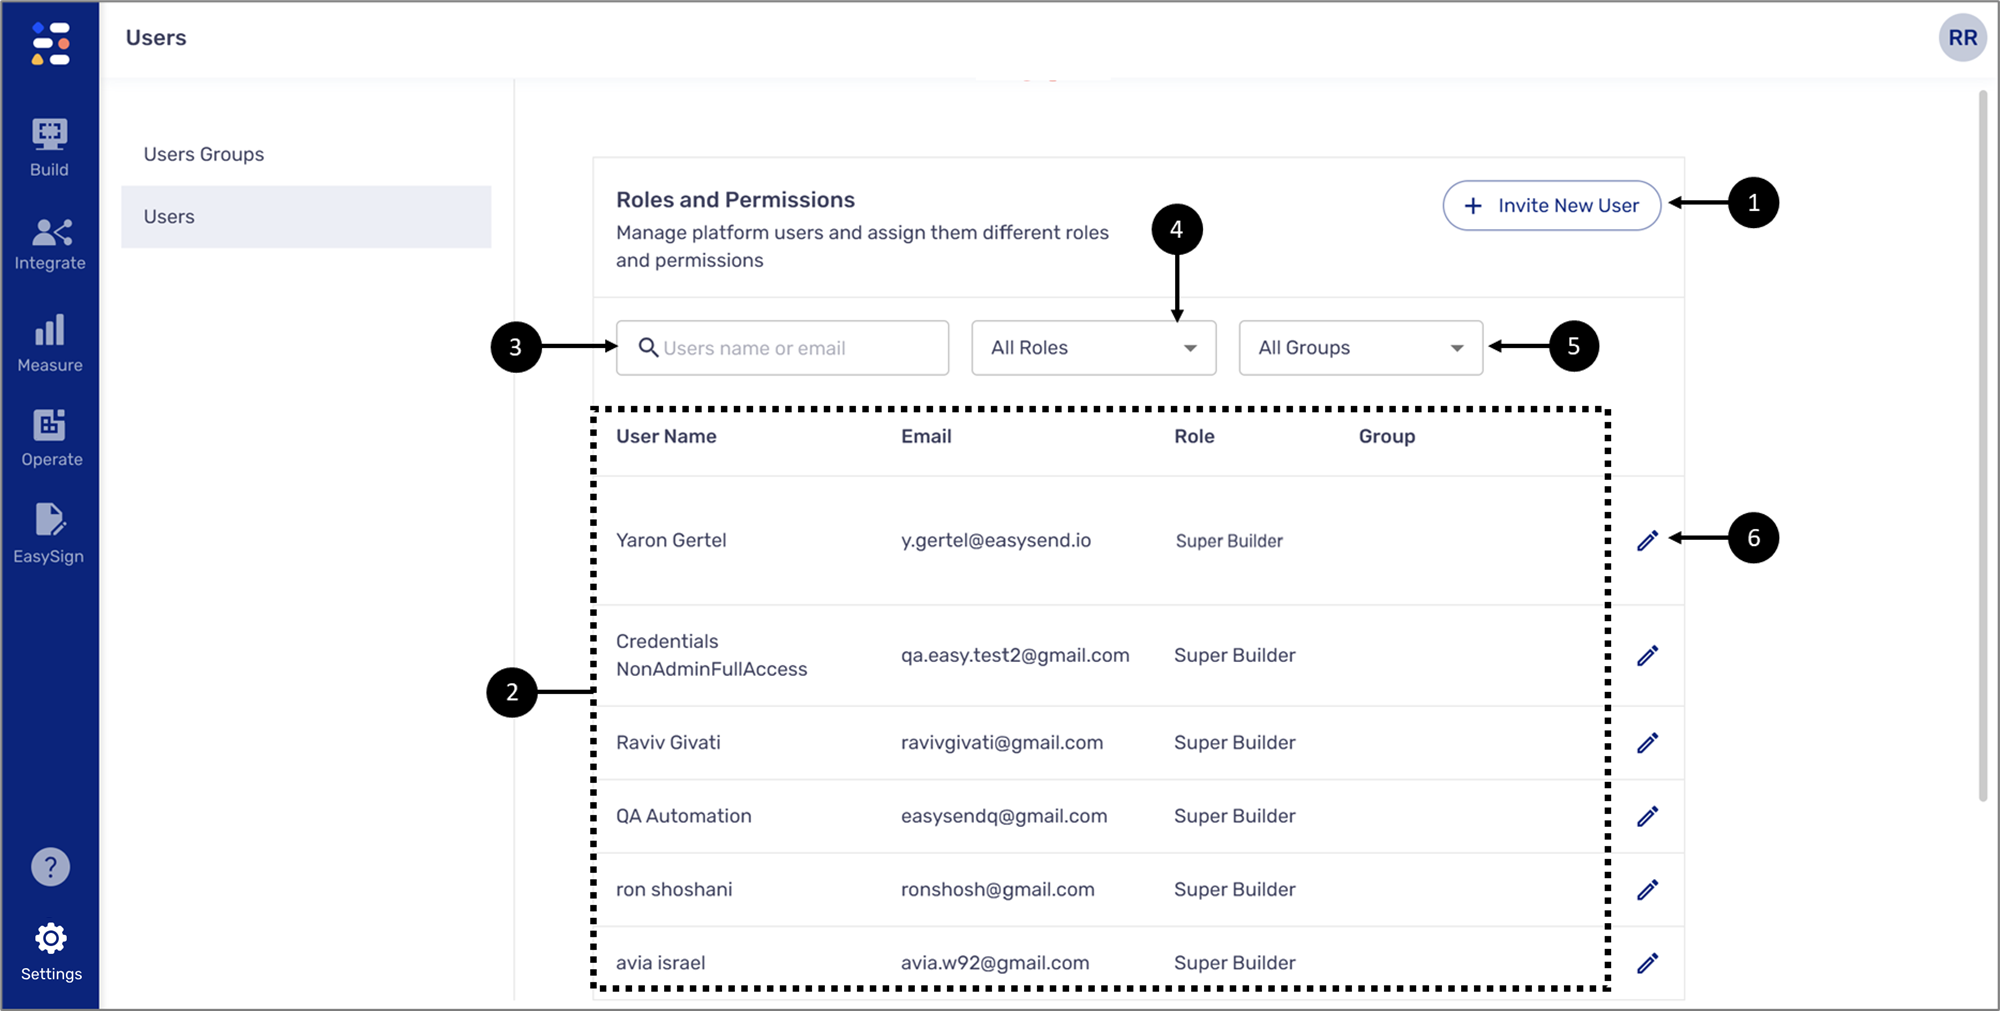
Figure 3: Users
Invite New User
(See Figure 4 to Figure 6)
After clicking the + Invite New User button the user details section appears. It contains the following information:
- User initials placeholder (1).
- First Name (2).
- Last Name (3).
- Email (4).
- User Login (5):
- Email and password.
- Google (for internal EasySend usage only).
- Permissions granted based on (6):
- User - permissions will be granted based on a role and will be executed on selected business groups (7). The roles are:
- Super Admin - manages users and groups, edits permissions, and has full access to all builder and monitoring capabilities.
- Admin - manages users and groups, edits permissions, and has integration permissions with SSO configuration.
- Super Builder - manages, edits, and deploys all builder modules (processes, themes, validations, and integrations) and has limited access to monitoring capabilities.
- Builder - creates, edits, and deploy digital processes.
- Business Manager - has full access to the platform business and insights applications (Reports, Analytics, Transaction Tracking).
- Agent - initiates EasySend processes and EasySign forms and accesses full monitoring capabilities.
- Group - permissions will be granted based on a group created with the Users Groups option (See Figure 5).
- User - permissions will be granted based on a role and will be executed on selected business groups (7). The roles are:
- Grant access to Business Insights (BI) analytics dashboards (8) - this toggle grants the user access to BI analytics dashboards and will appear only if BI analytics dashboards exist in your environment.
- Send Invite (9) - sends an invite email to the user (See Figure 6).
- Cancel (10) - cancels and closes the section.
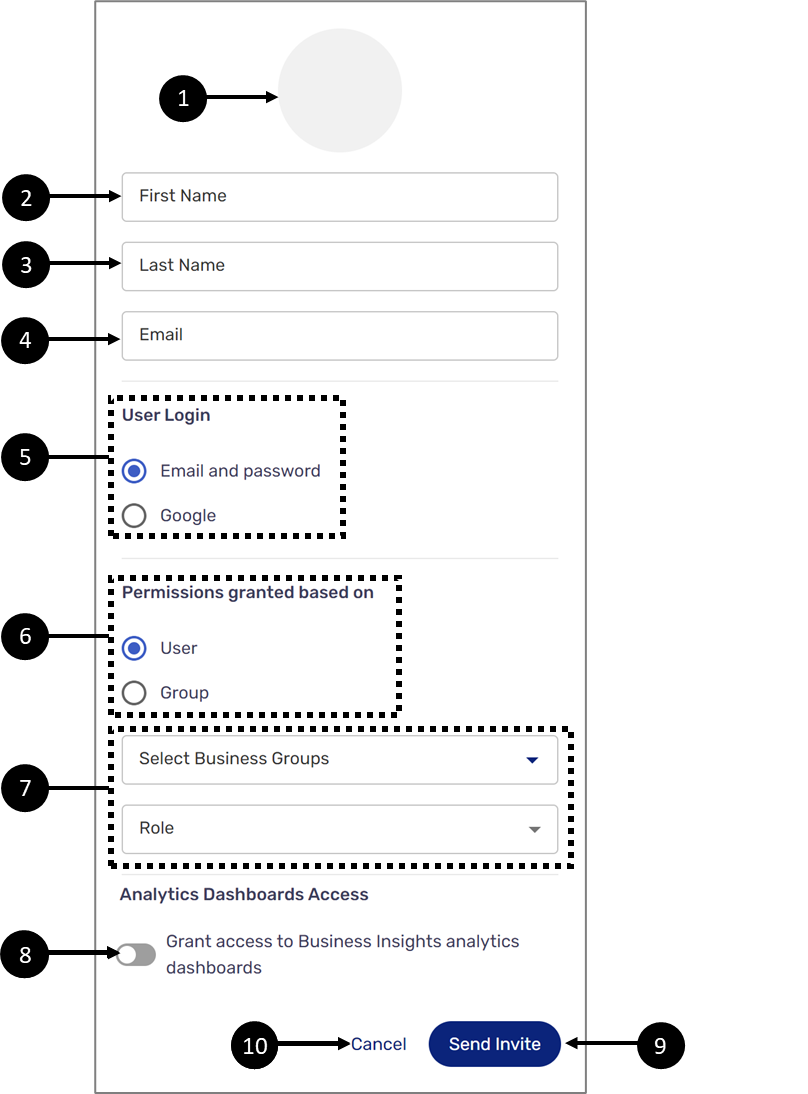
Figure 4: User Details 1 of 2
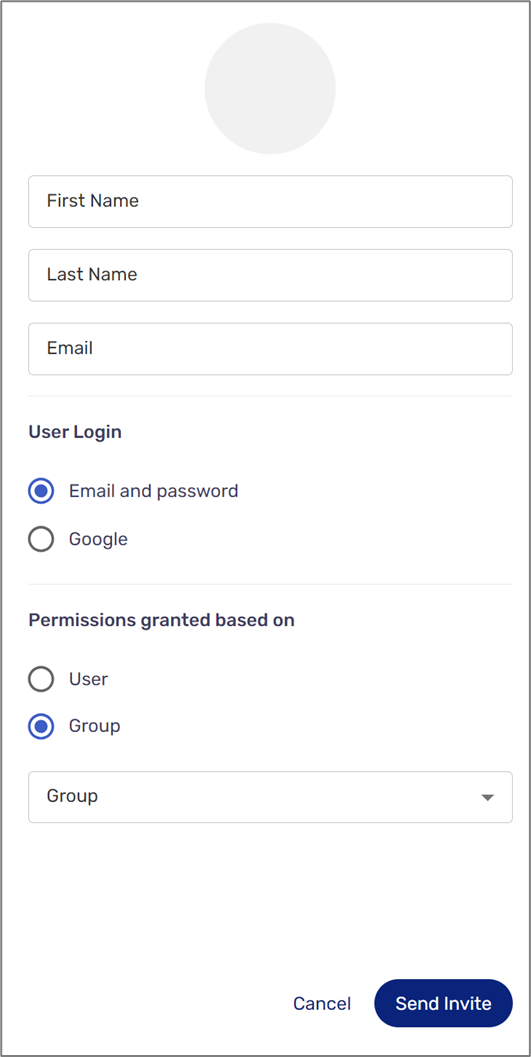
Figure 5: User Details 2 of 2
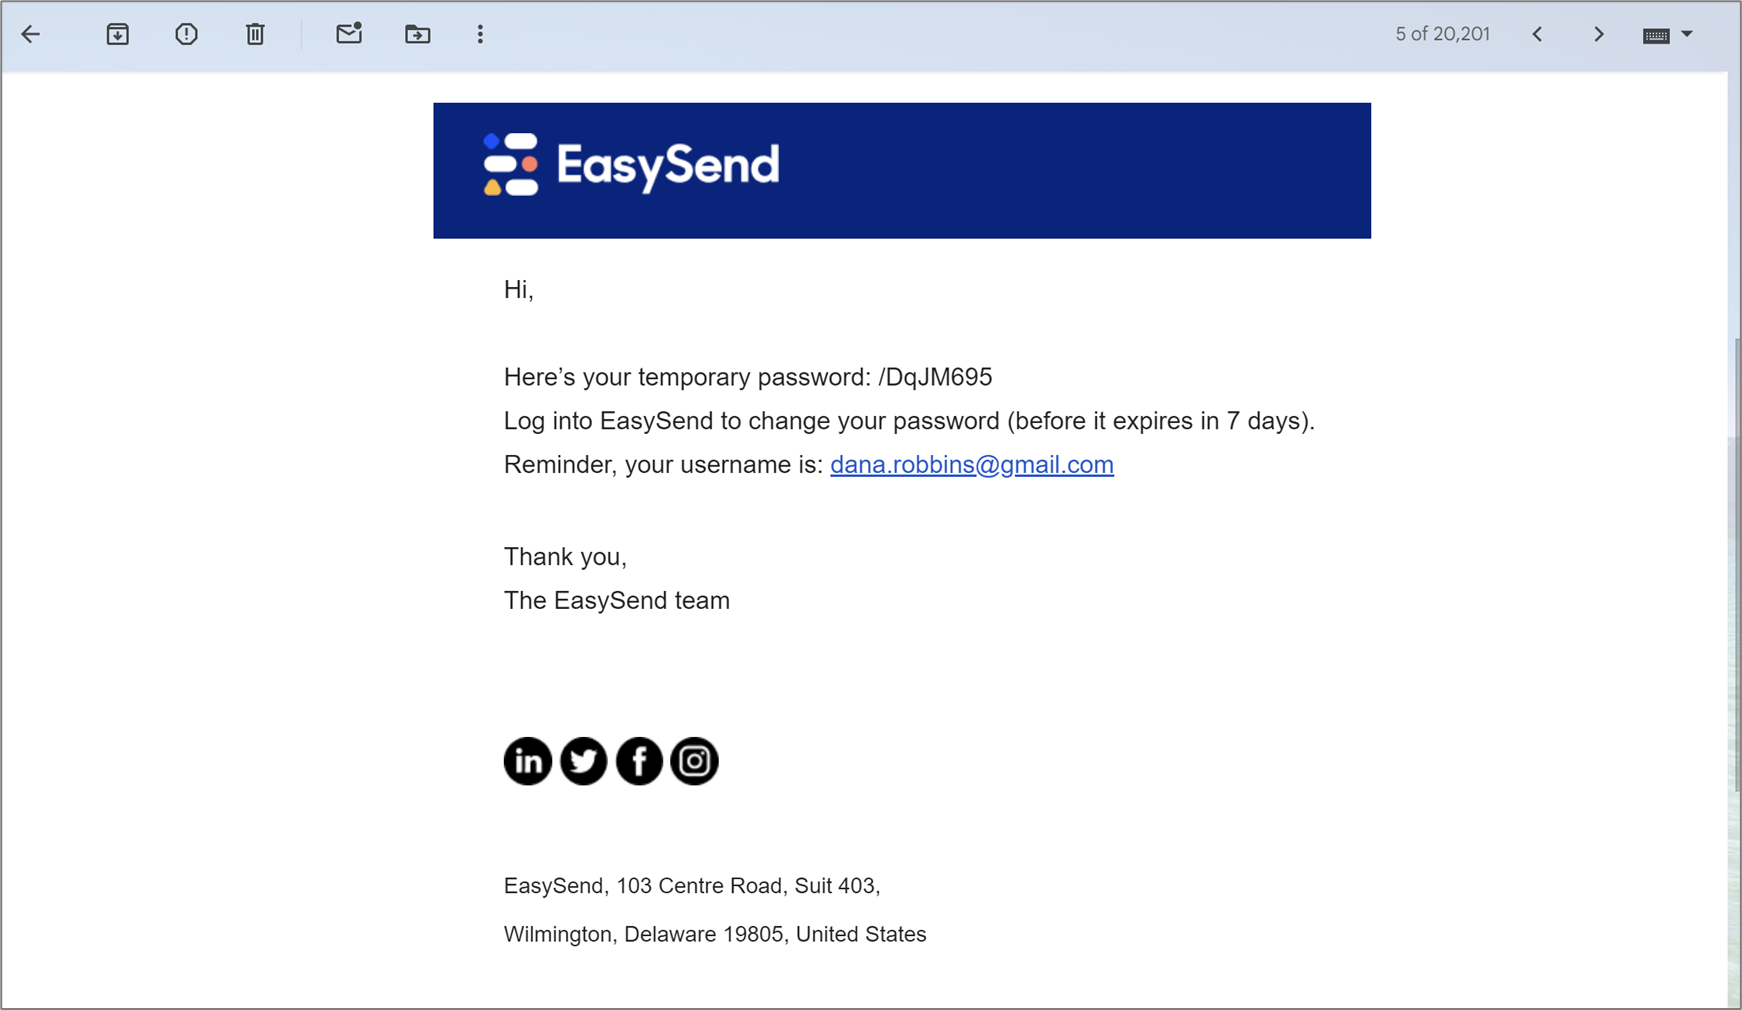
Figure 6: Invite Email
Edit User Details
(See Figure 7)
When clicking the  icon the user details section appears allowing you to edit the details of the user (besides email) and perform additional actions:
- Resend the password (1).
- Delete the user (2).
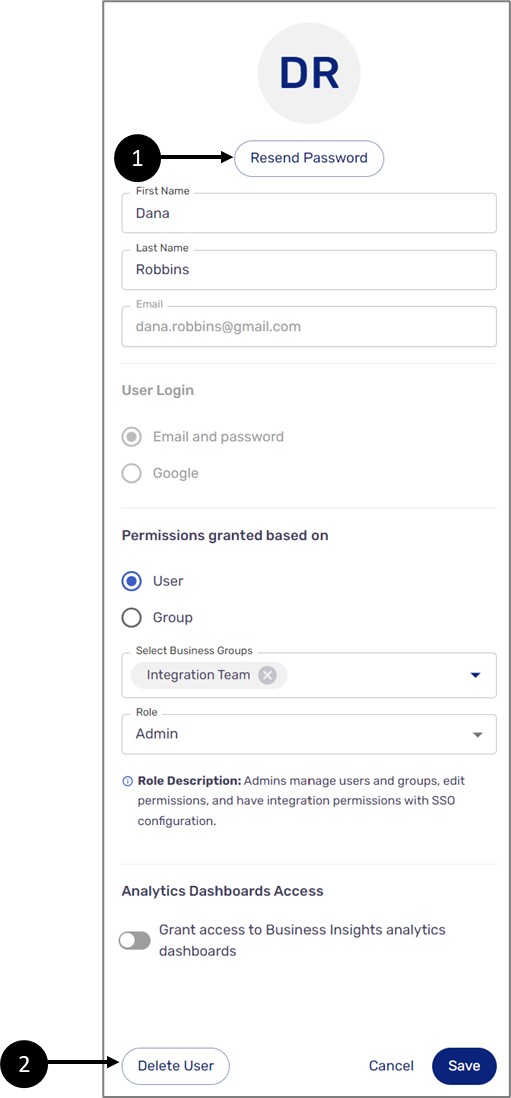
Figure 7: Edit User Details
Users Groups
(See Figure 8)
This section enables you to create and manage groups to efficiently assign permissions to sets of users. It contains a button creating a new group (1) and a list of existing groups (2) with the following information:
- Group Name.
- Description.
- Business Groups - specifies the attached business groups.
- Role - specifies the attached role.
- Members - specifies the members enrolled in the group.
The list can be filtered by searching for a group's name (3). The pencil icon (4) enables you to edit existing group details (4).
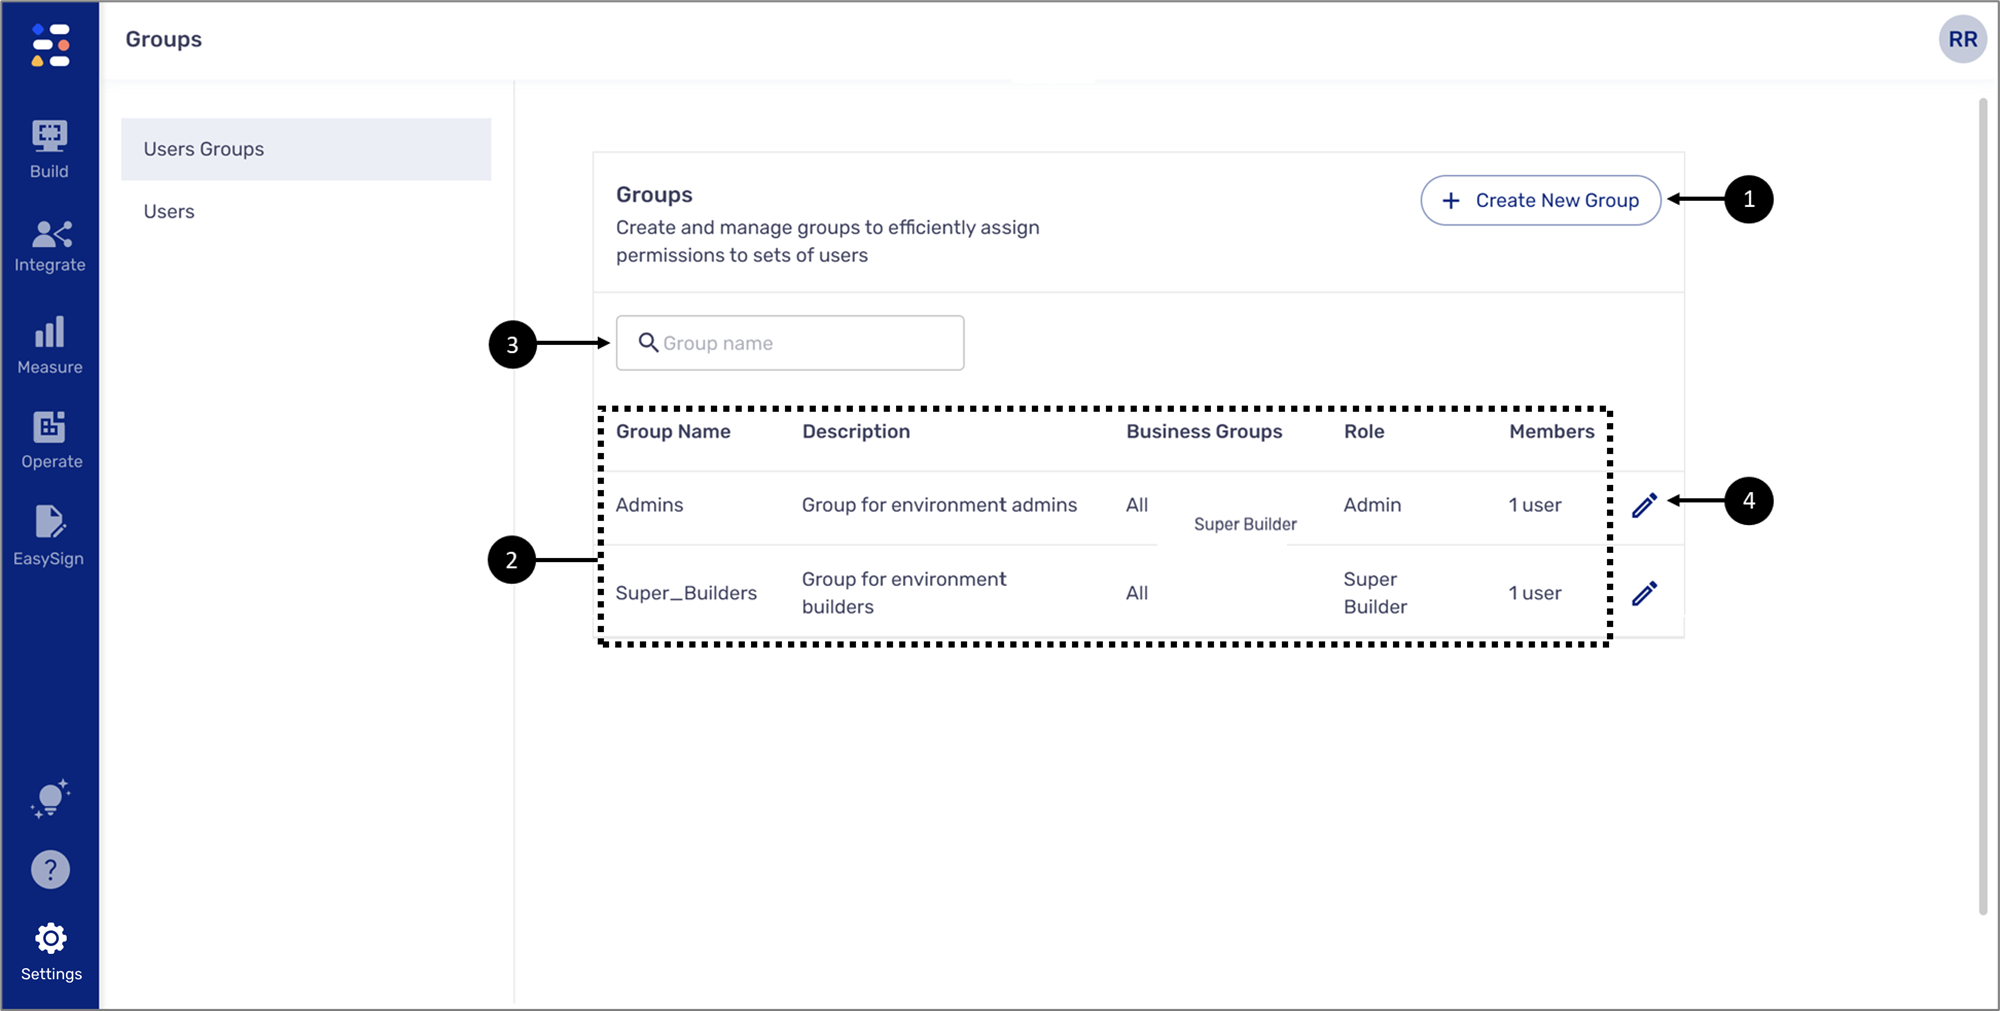
Figure 8: Groups
Creating a Group
(See Figure 9)
After clicking the + Create New Group button the group details section appears. It contains the following information:
- Group Name (1).
- Description (2).
- Business Groups (3).
- Role (4):
- Super Admin - manages users and groups, edits permissions, and has full access to all builder and monitoring capabilities.
- Admin - manages users and groups, edits permissions, and has integration permissions with SSO configuration.
- Super Builder - manages, edits, and deploys all builder modules (processes, themes, validations, and integrations) and has limited access to monitoring capabilities.
- Builder - manages basic builder modules (not process deployment).
- Business Manager - has full access to the platform business and insights applications (Reports, Analytics, Transaction Tracking).
- Agent - initiates EasySend processes and EasySign forms and accesses full monitoring capabilities.
- Save (5) - creates a new group.
- Cancel (6) - cancels and closes the section.
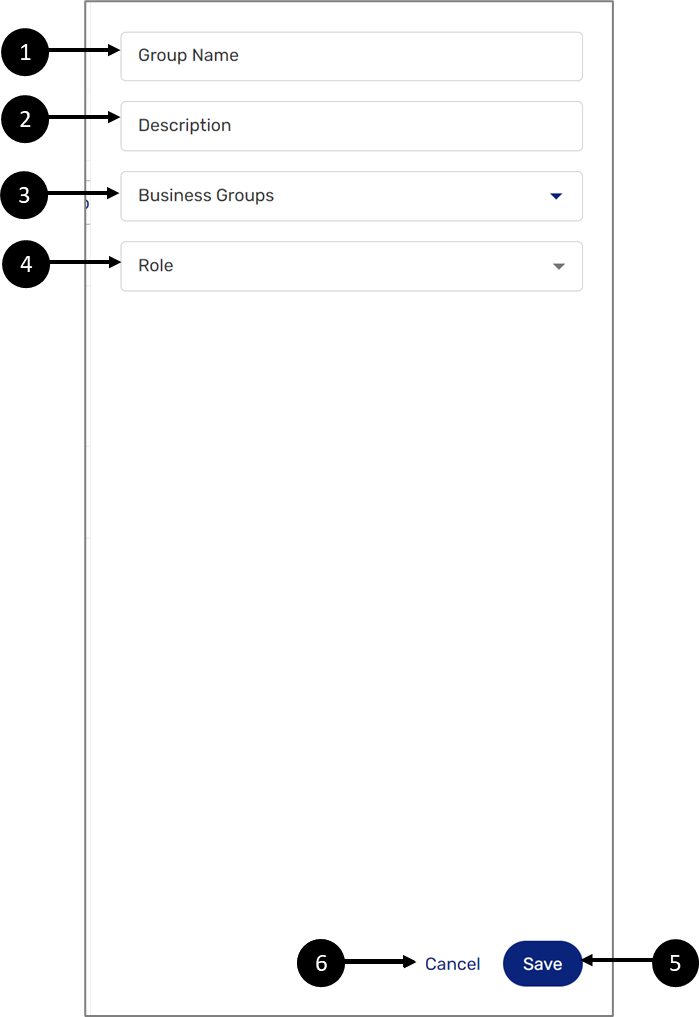
Figure 9: Creating a New Group
Edit Group Details
(See Figure 10)
When clicking the  icon the group details section appears allowing you to edit the details of the group and perform additional actions:
- View group members (1).
- Delete the group (2).
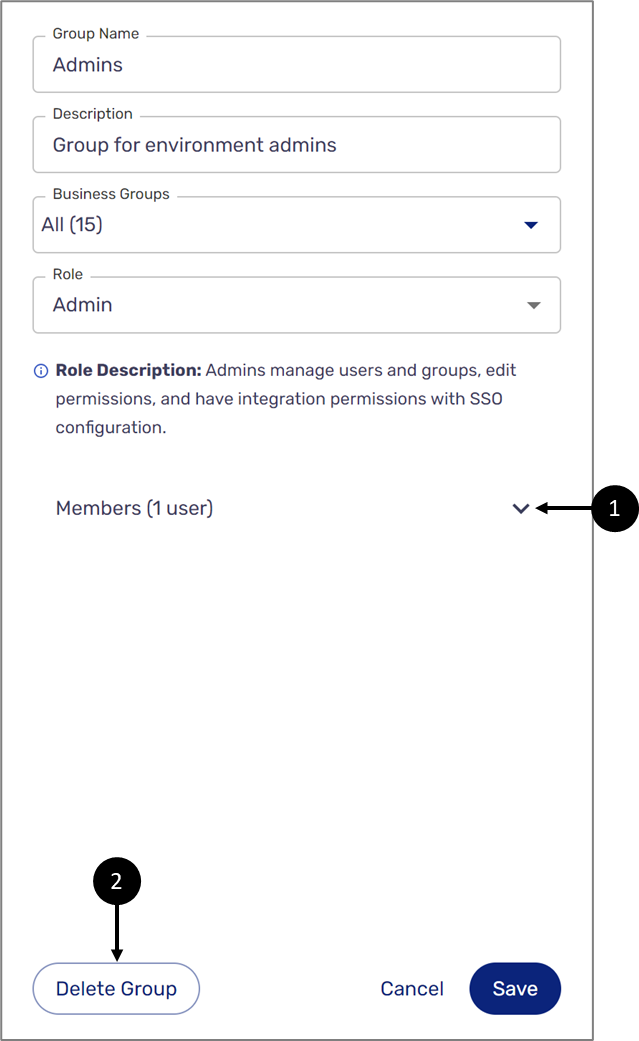
Figure 10: Editing a Group
Using Groups with Single Sign-On (SSO)
(See Figure 11)
When SSO is enabled in your Builder environment you cannot manually assign permissions to a user directly or by using a group. With SSO, the way to assign permissions is by providing a group ID that is identical to the group ID that appears in your active directory.
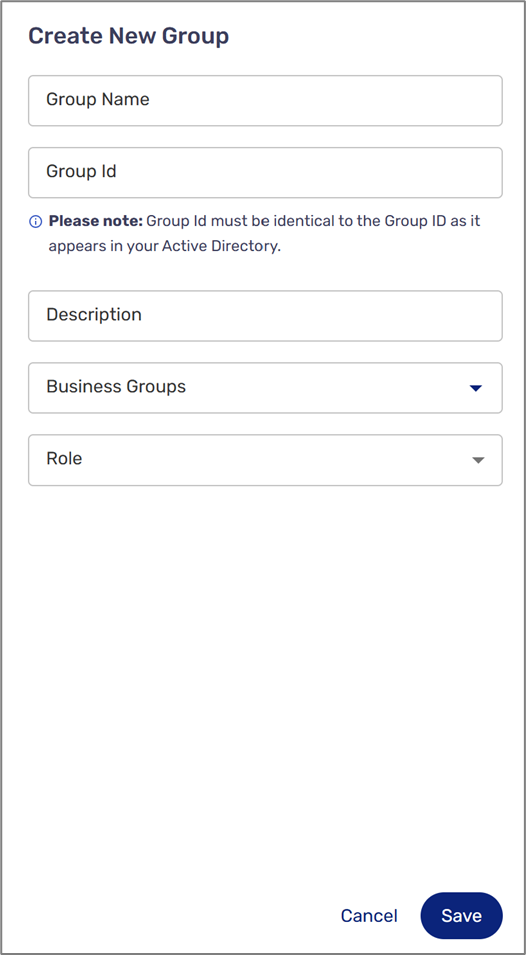
Figure 11: Create New Group with SSO
When there's a match between the group IDs the user will receive Builder permissions. If a user is assigned to multiple groups in your Active Directory, we support multiple group assignments as long as each group exists with the same ID in the EasySend Builder.

