Article Overview
The following article describes the Language Selector feature.
Language Selector Overview
Using this feature, end users can change their display language at any time during a process.
Business Value
Increased completion rates / reduced drop-off
If a customer starts a process in a language they're not fully comfortable with, confusion or mistrust can lead to abandonment. Letting them switch removes that friction point mid-journey, which directly protects conversion.
Expanded market reach
For customers with multiple official languages or diverse immigrant populations. A language selector allows a single digital process to serve multiple customer segments without building separate journeys for each language.
Compliance and accessibility
In some jurisdictions, offering financial or insurance documentation in a customer's preferred language isn't just nice-to-have - it can be a regulatory expectation, particularly for consumer protection or accessibility standards.
Trust and brand perception
For sensitive financial transactions (loan applications, claims, KYC), customers are more likely to trust and accurately complete a process when they can read it fluently. This reduces errors, which reduces costly rework, support tickets, or compliance issues from misunderstood terms.
Reduced support burden
Fewer customers calling in confused or needing an agent to walk them through a form in their language means lower operational cost.
Getting Access
(See Figure 1)
The Language Selector is only available in Builder environments configured with more than one language. Additional languages are added using the Customer Settings.
Once additional languages are added, perform the following steps to display the language selector:
- Navigate to the desired digital process.
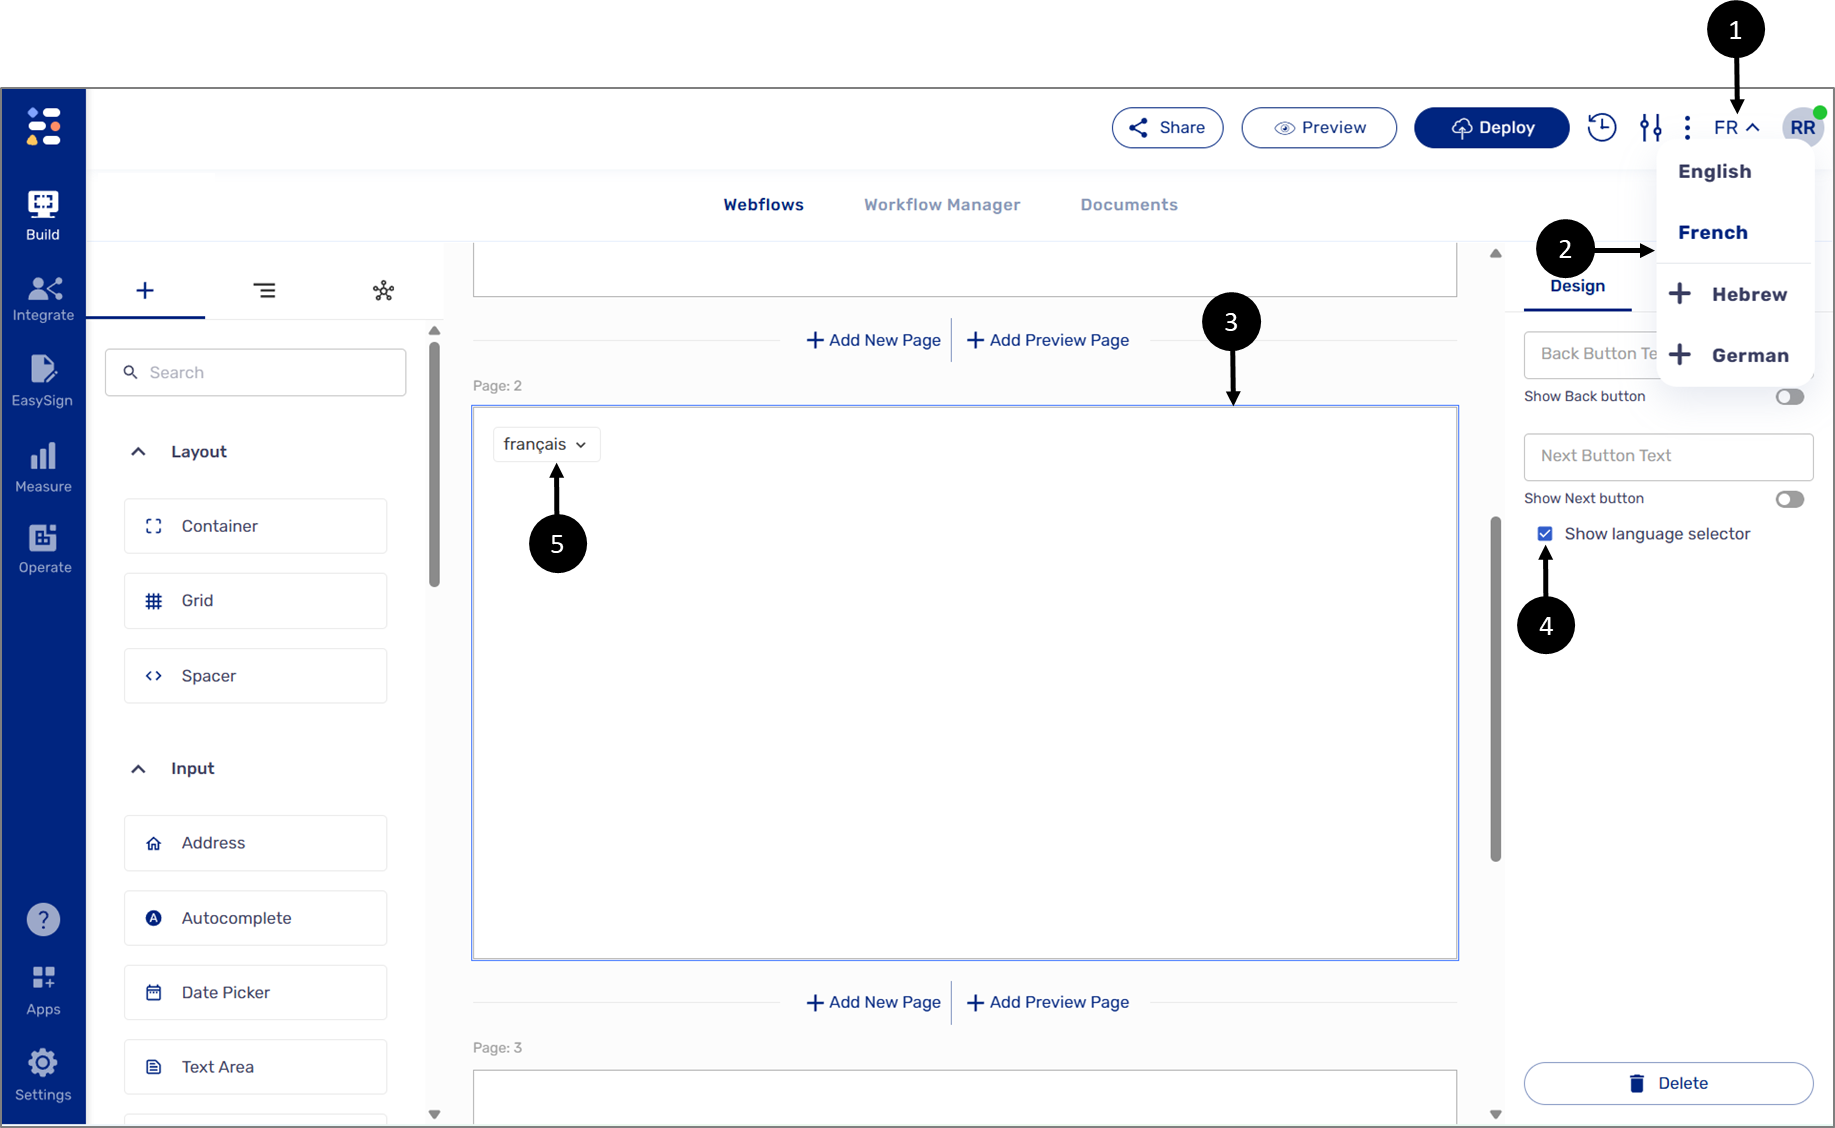
Figure 1: Enabling the Language Selector
- Using the language display (1), add additional languages. When done, select the desired language (2).
- Click a Main Page component (3).
- Check the Show language selector checkbox (4).
Result:
A language selector will appear on the Main Page component (5).
- Repeat steps 2 and 3 for additional Main Page Components.
Designing the Language Selector
(See Figure 2)
To design the Language Selector component, navigate to the relevant Theme. The component will be available for design under the Single Select category.
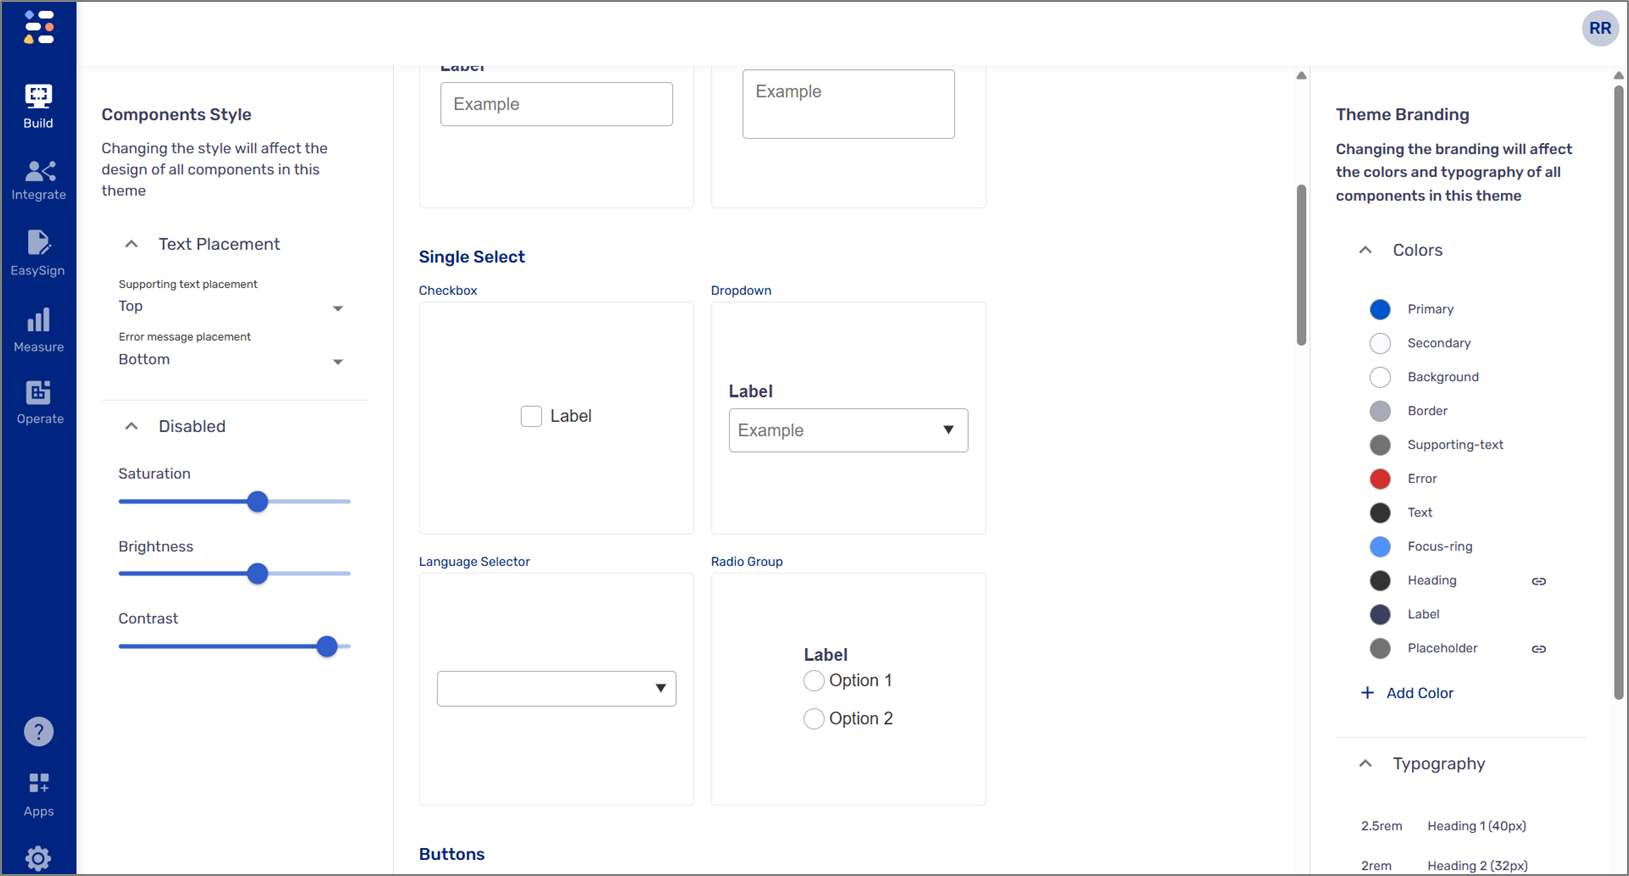
Figure 2: Language Selector Design