Text Components Properties
The following sections detail the properties of the Text section components:
- Rich Text
- Tooltip
- Validation Message
Based on the Theme you are using, some of the components may appear under a different name or be found under an Advanced category different category, for additional information, see the Theme Overview article.
Rich Text Properties
After adding the component to the canvas, configure its properties and design its look, Figure 1 and
Table 1 describe the properties of the Rich Text component:
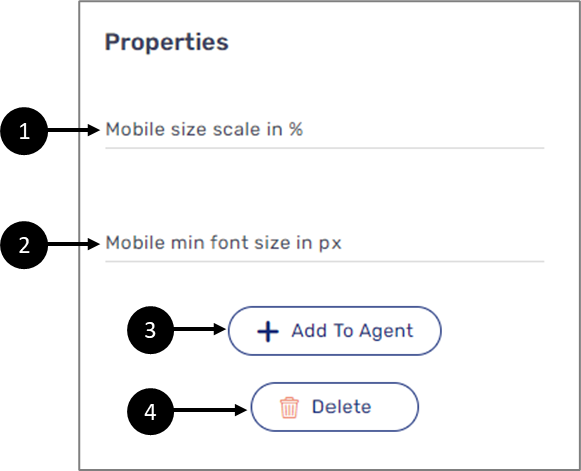
Figure 2: Rich Text Properties Section
Table 2: Rich Text Properties Section
Number | Name | Description |
1 | Mobile size scale in % | Enables to set the mobile size scale display of the component in percentages |
2 | Mobile min font size in pixels (px) | Enables to set the minimum mobile font size of the component in pixels |
3 | + Add to Agent | Enables to add the component to the Agent screen NOTE This button will only appear if the Journey Sender feature is enabled, for additional information, see the Journey Sender article |
4 | Delete | Enables to delete the component from the canvas |
- For a detailed description of the Rich text design tools, see the Webflow Components article.
- For a detailed description of the Tooltip component, click here.
- For a detailed description of the Validation message component, click here.
Using Rich Text with Variables and Embedded Links
(See Figure 3 to Figure 7)
A Rich Text component can contain:
- Static text
- Dynamic text (variables)
- Embedded links
Dynamic text is comprised of variables that are Model data items. For example, we want to display a message with the full name of the end-user along the digital process. To do so we will add Rich Text components to the desired main pages, add static text, and also add a variable. The variable will be added by clicking the Rich text right after the static and then by clicking {m} (1):

Figure 3: Adding a Variable
The variable is placed inside the Rich text but it is currently empty. The next step is to add the Model data item. To do so, we will click the variable and start typing the name of the data item (3). (We of course have to make sure the data item exists in the Model). When the desired data item appears, we will click it (4):
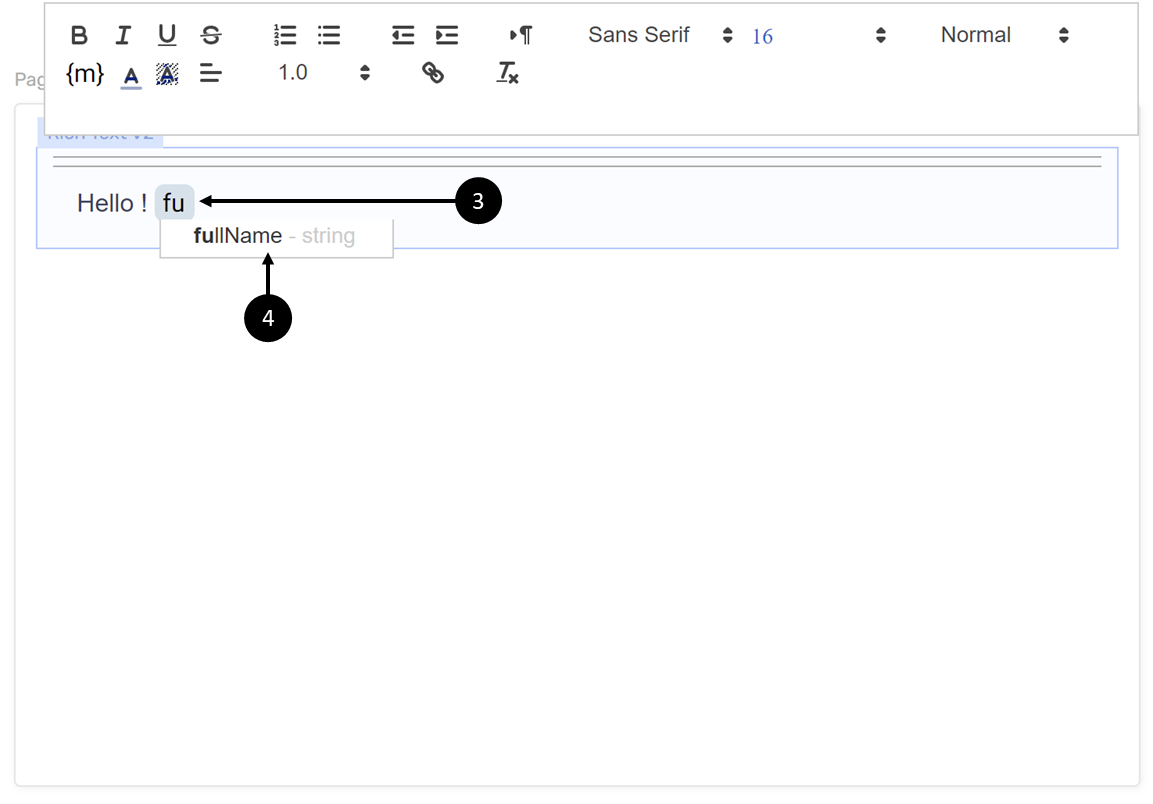
Figure 4: Adding a Data Item
Our Rich Text component now contains static text and dynamic text with a variable:
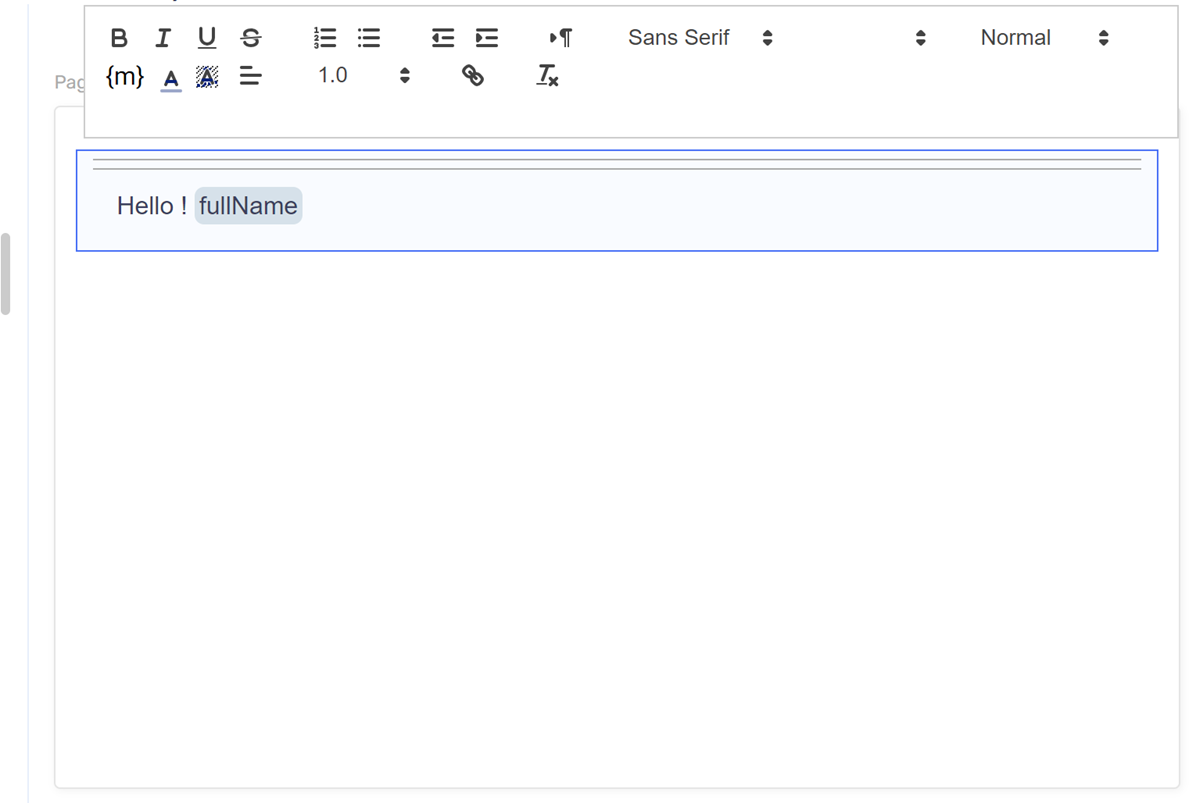
Figure 5: Rich Text with Static Text and a Variable
To add an embedded link, all we have to do is write some static text, mark it, click the link icon (5), add the URL (6) and click Save (7):
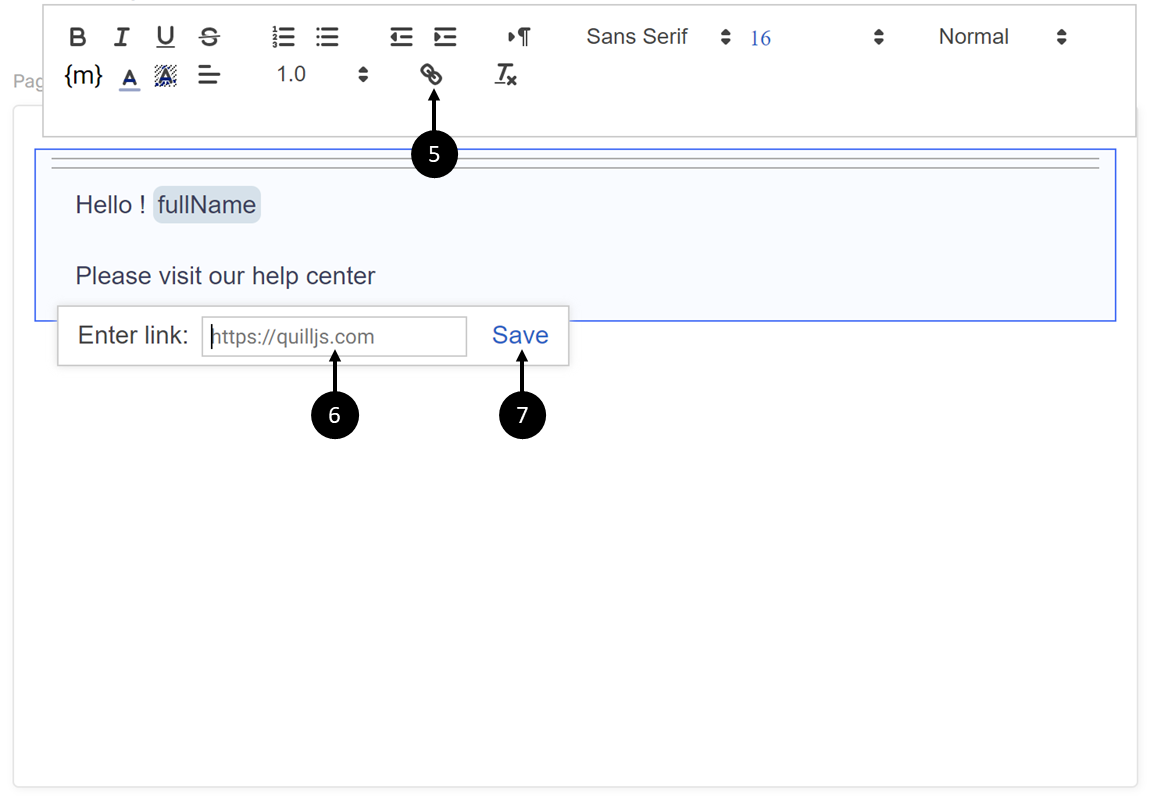
Figure 6: Creating a Link
The link will be written in blue: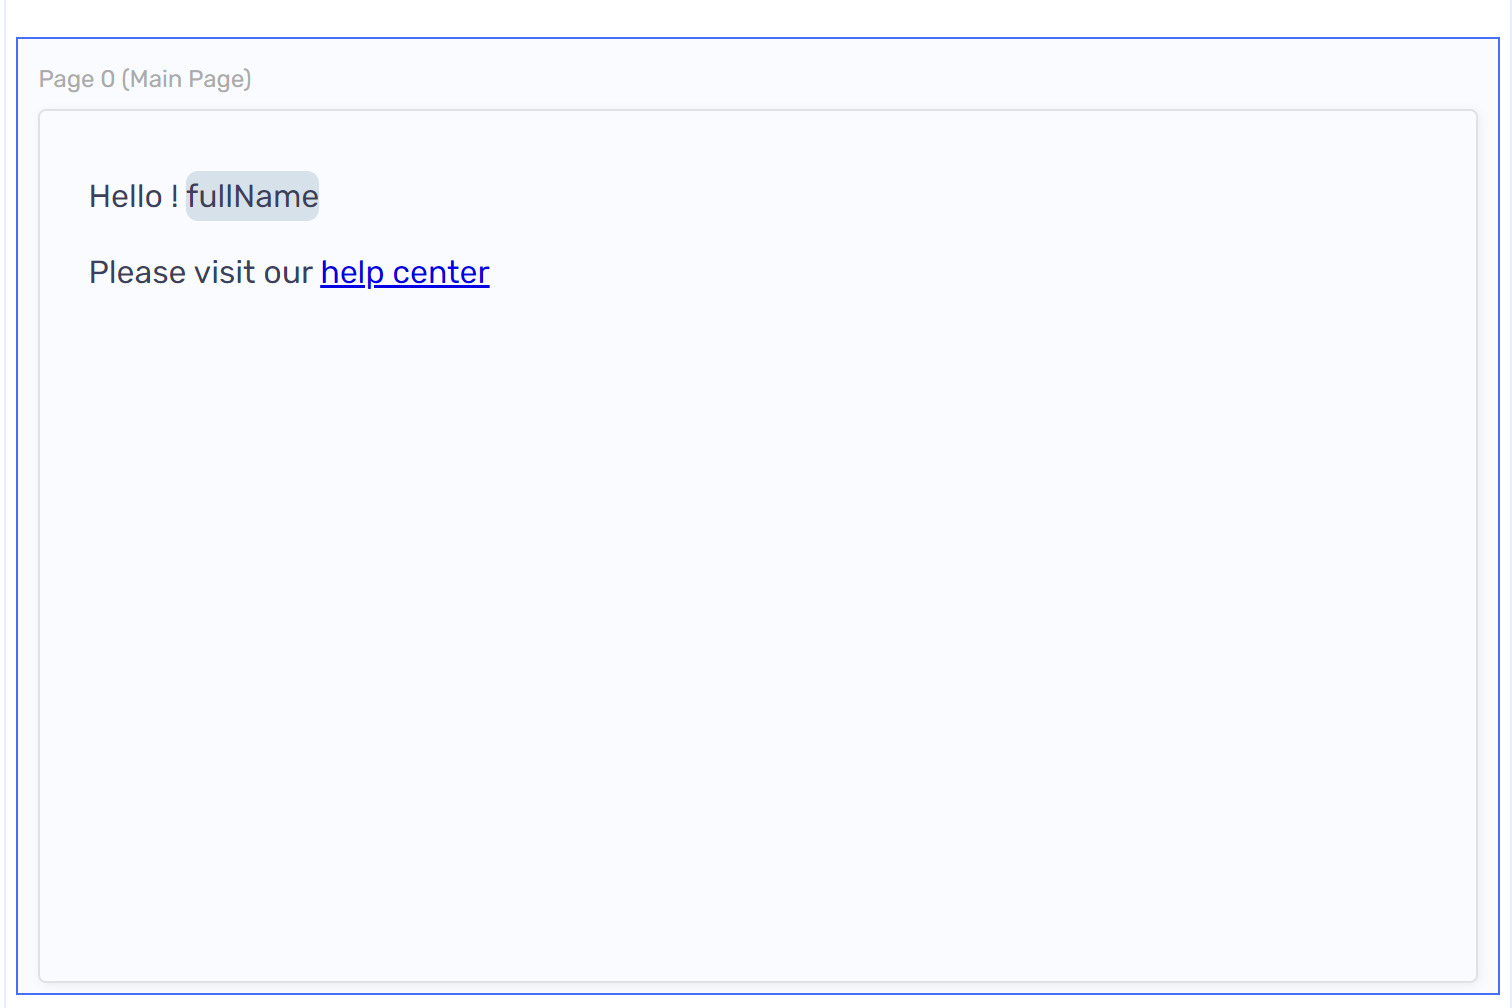
Figure 7: Added Link
How to Videos
To quickly learn how to use Labels and Nun Input components, watch the following videos.
- Preview:
- Rich Text: