How To Use the Campaign Launcher
- PDF
How To Use the Campaign Launcher
- PDF
Article summary
Did you find this summary helpful?
Thank you for your feedback!
Article Overview
The article describes how to access the Campaign Launcher, its structure, and how to use it.
How To Access
(See Figure 1)
To access the Campaign Launcher, click the Operate tab (1).
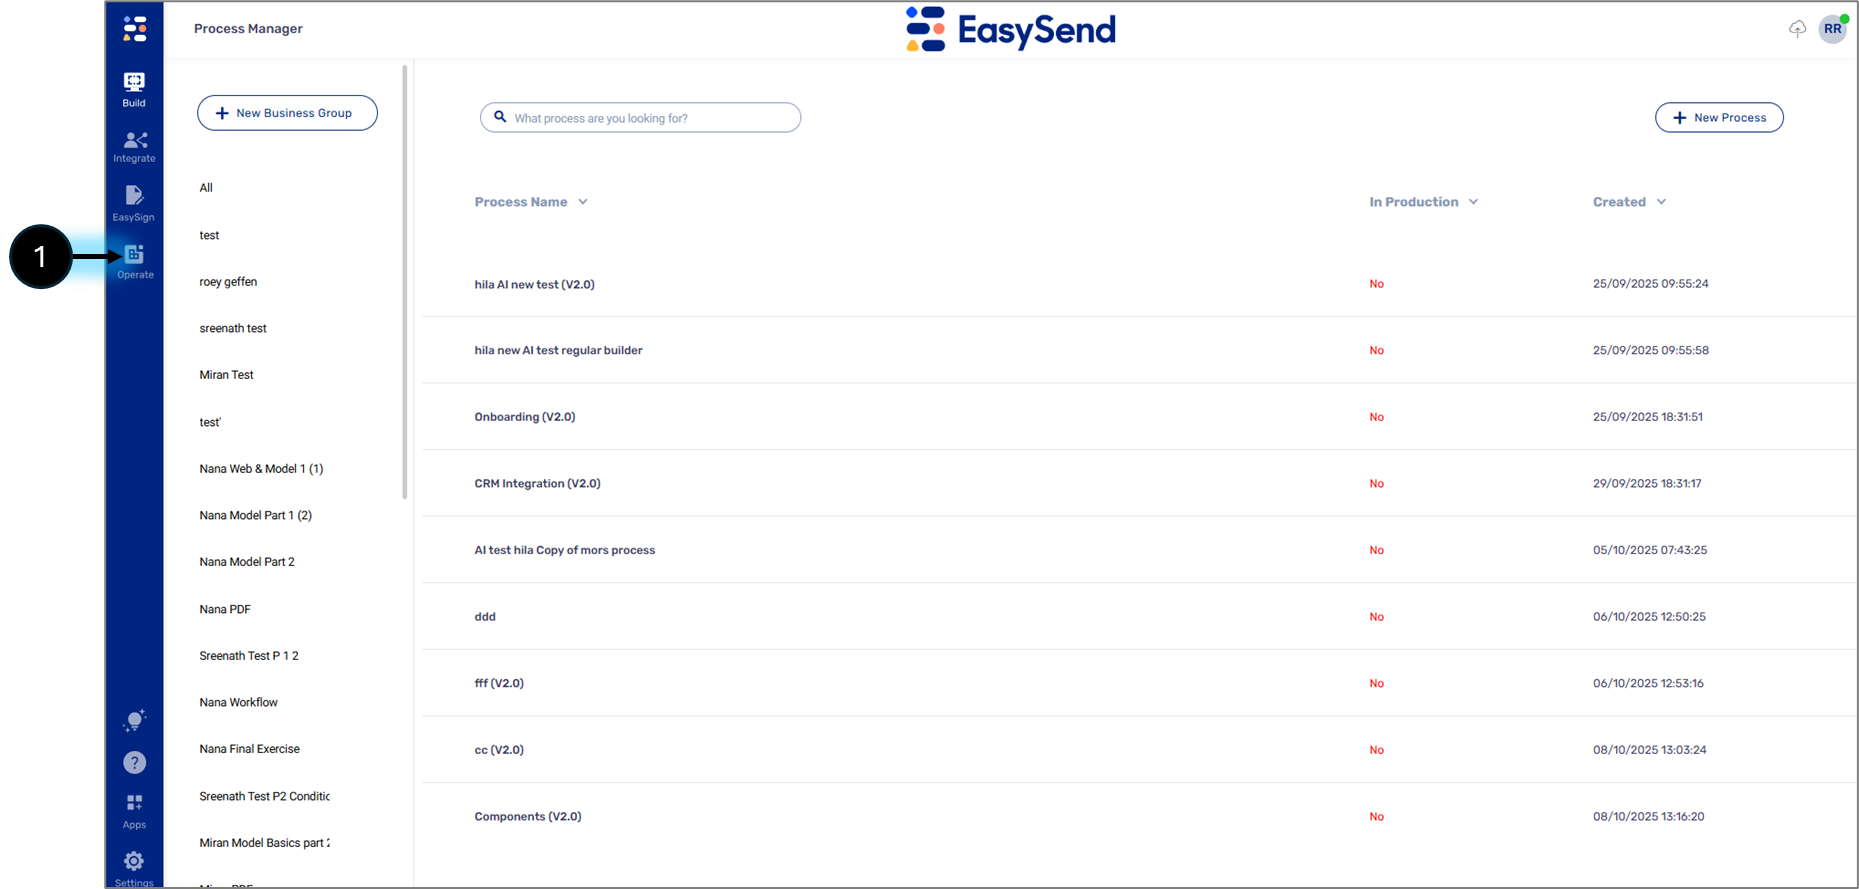
Figure 1: Operate Tab
Campaign Launcher Structure
(See Figure 2)
The Campaign Launcher is divided into three main sections:
- Process & Server Selection
- Email Setup
- SMS Setup

Figure 2: Campaign Launcher Structure
Process & Server Selection
(See Figure 3)
This section allows you to choose which process to launch and the server on which it is deployed.

Figure 3: Process & Server Selection
Email Setup
(See Figure 4 to Figure 6)
This section allows you to add the recipients and edit the content of the email. Recipients can be added manually or by pasting a list. The email content must contain a link to the process.

Figure 4: Email Setup
To get the process's link, deploy it from the Webflow. Once the deployment is complete, copy it (1).
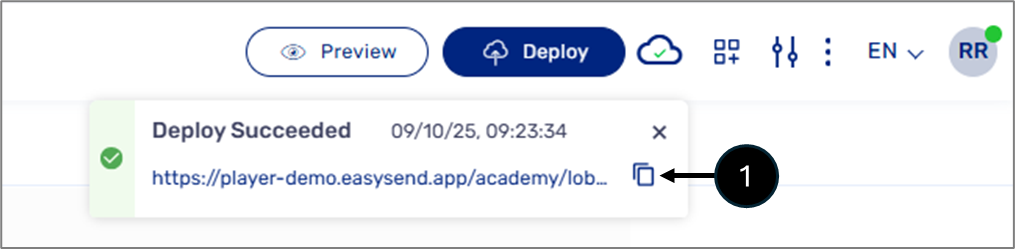
Figure 5: Copy Process Link
On the Campaign Launcher, edit the content of the email and paste the link of the process instead of the [PROCESS_LINK], for example:
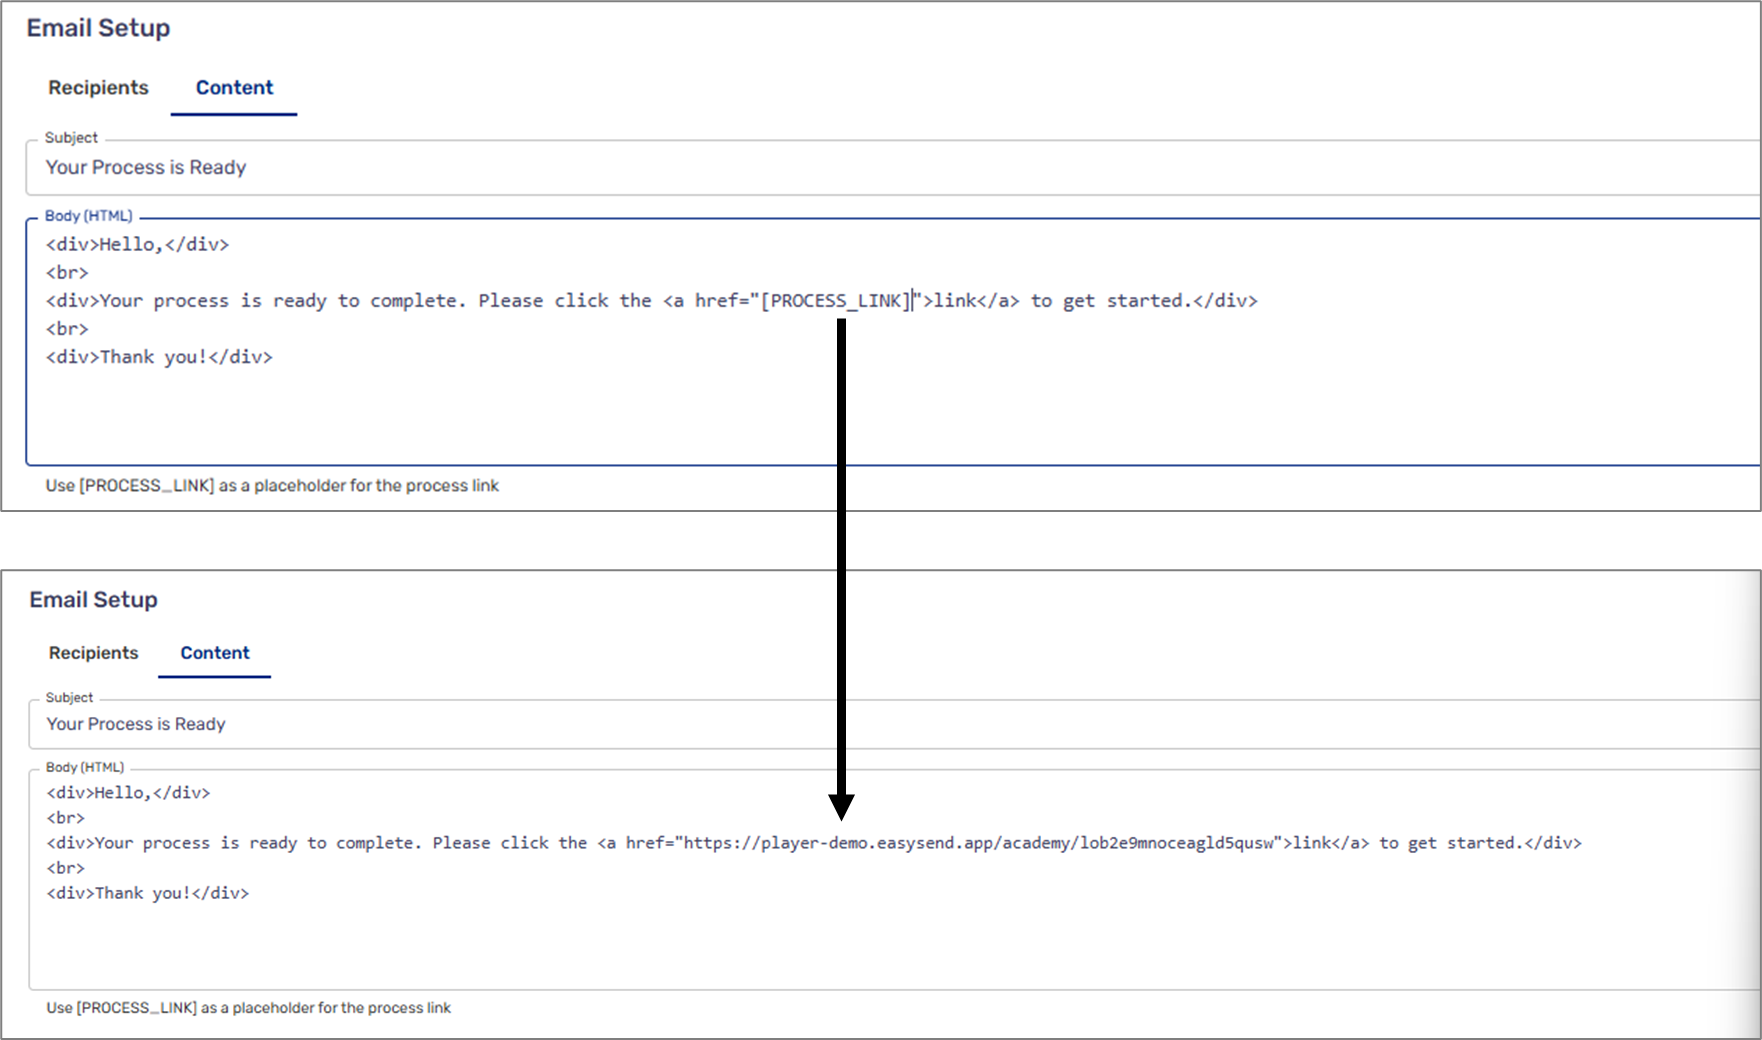
Figure 6: Process Link in Email Content
NOTE
You can send up to 100 emails at once.
SMS Setup
(See Figure 7 to Figure 9)
This section allows you to add the recipients and edit the content of the SMS. Recipients can be added manually or by pasting a list. The SMS content must contain a link to the process.

Figure 7: SMS Setup
To get the process's link, deploy it from the Webflow. Once the deployment is complete, copy it (1).
Figure 8: Copy Process Link
On the Campaign Launcher, edit the content of the SMS and paste the link of the process instead of the [PROCESS_LINK], for example:
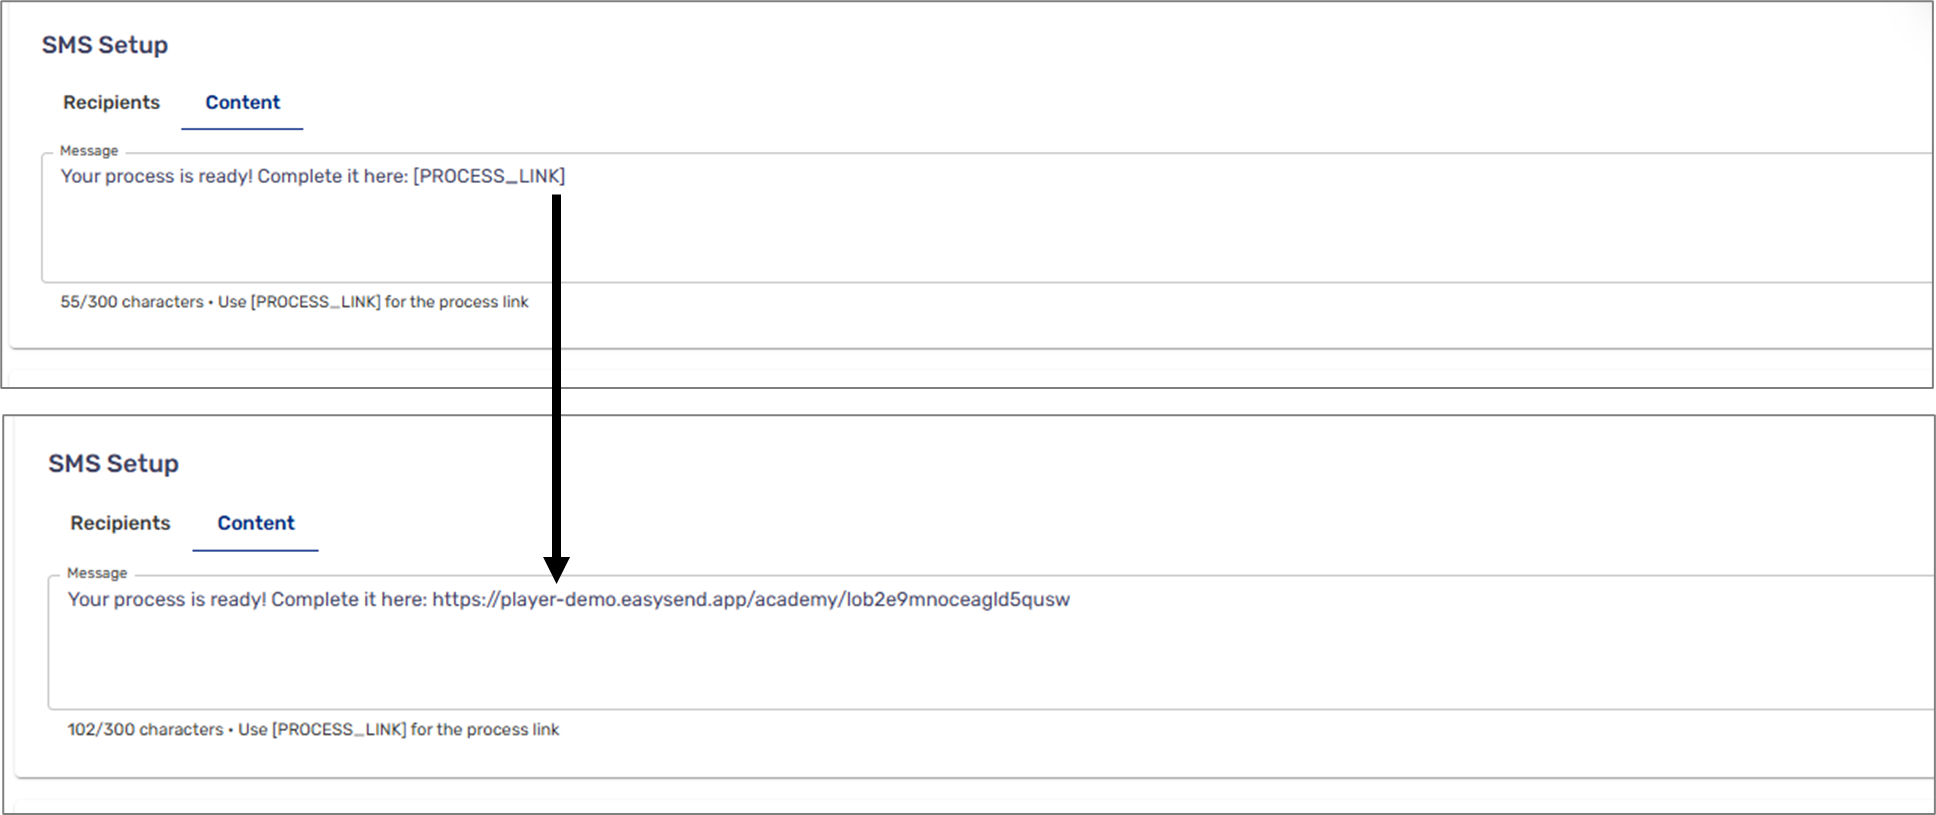
Figure 9: Process Link in SMS Content
NOTE
You can send up to 100 SMS at once.
Using the Campaign Launcher
To use the Campaign Launcher, perform the following steps:
- Select the desired process and server
- Add recipients - email, SMS, or both
- Edit the content of the email/SMS - do not forget to include the link to the process
- Click Send Campaign.
Was this article helpful?