Article Overview
The following article describes how to store Model data items for EasySend Analytics.
What is a Dataset
(See Figure 1)
A dataset is a collection of related data that may be accessed individually, in combination, or managed as a whole entity. A dataset is usually organized in table form to help understand the information better.
In EasySend Analytics, data from your digital processes is prepared and stored to create datasets that are then shared with an analysis.
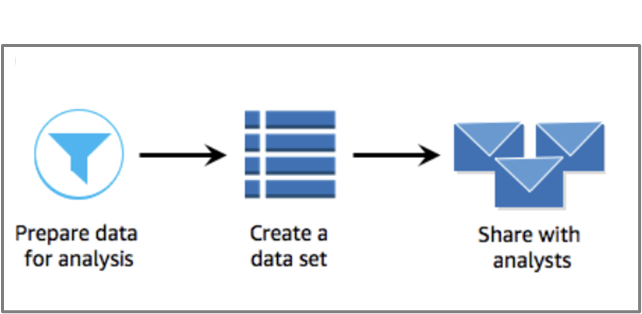
Figure 1: EasySend Analytics Dataset
How to Store Model Data Items
Datasets are created first by selecting and storing Model data items from your processes and then by using them in EasySend Analytics. The following sections describe how to store data items.
Navigating to the Model Screen
(See Figure 2 to Figure 4)
To navigate to the Model screen of a process, perform the following steps:
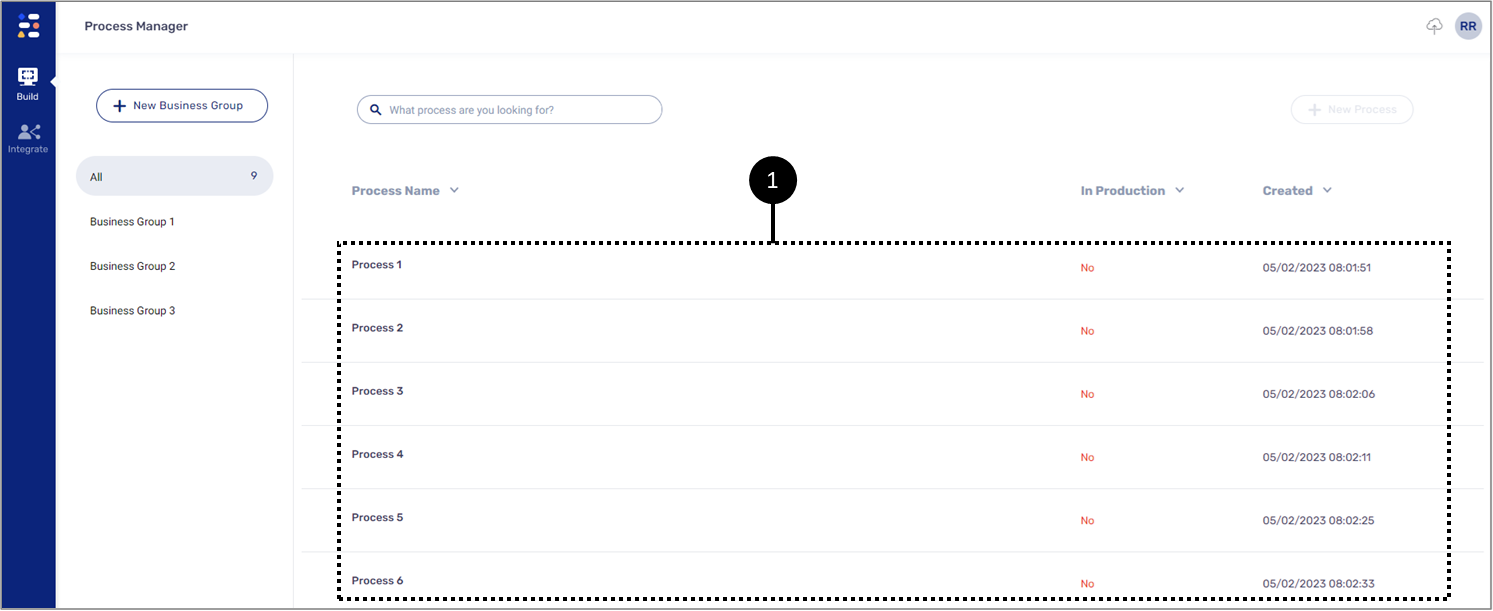
Figure 2: Process Manager Screen
- Access the Process Settings screen
- Select the desired process (1).
Result:
The Webflow screen appears:
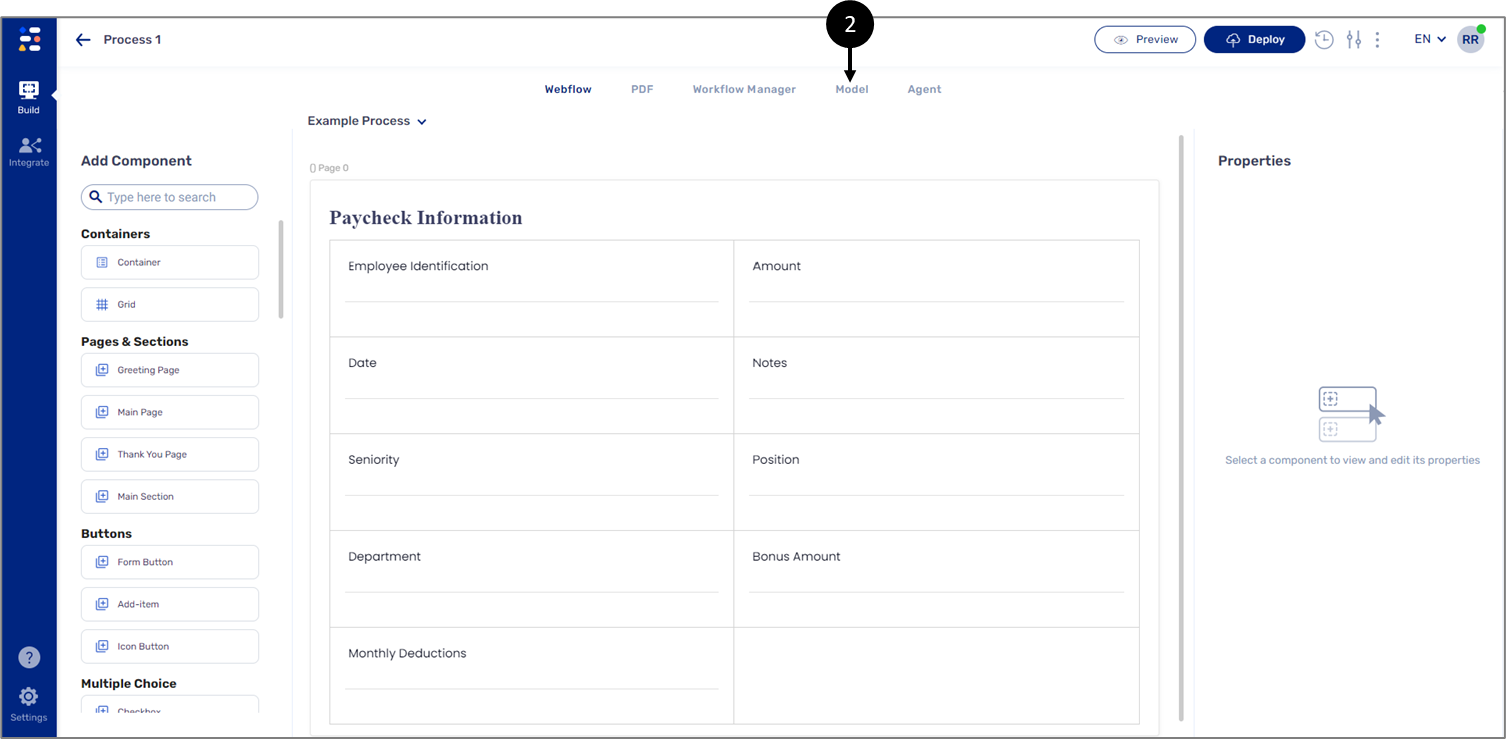
Figure 3: Webflow Screen
- Click the Model (3).
Result:
The Model screen appears:
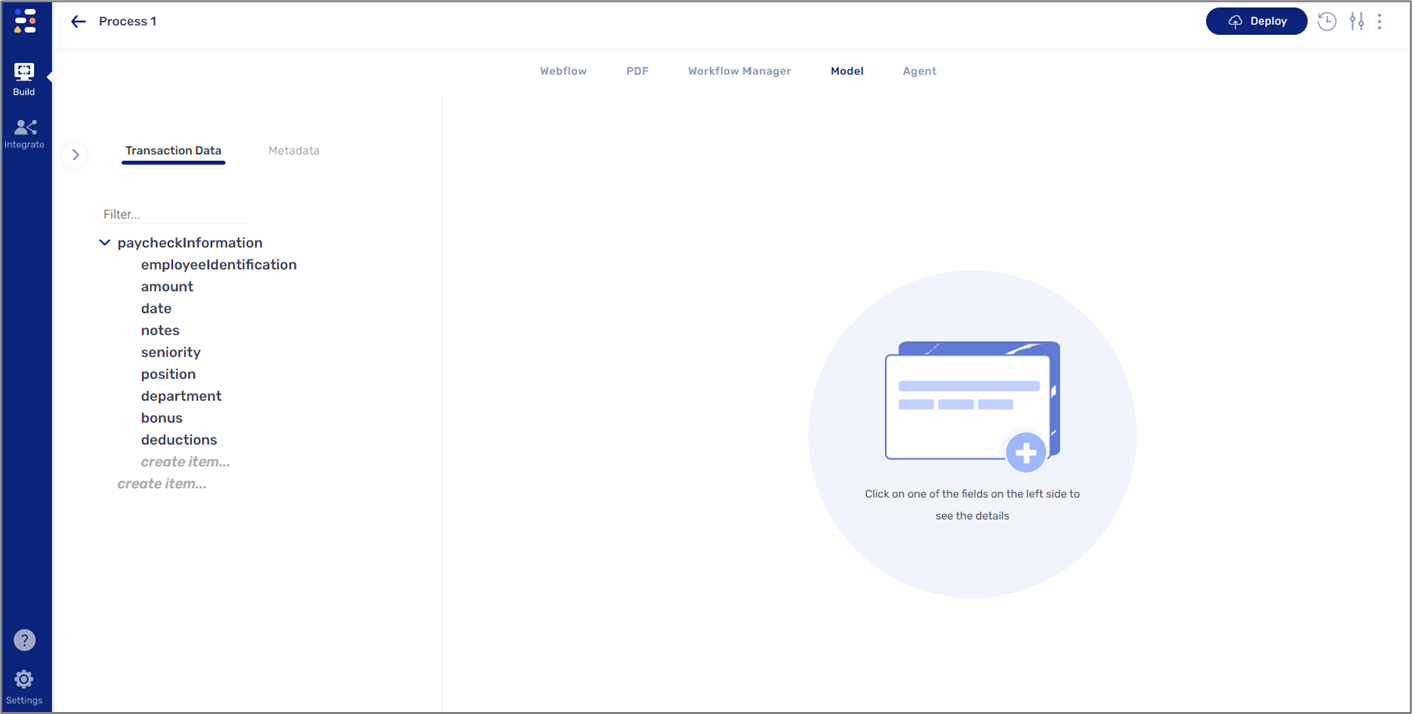
Figure 4: Model Screen
Selecting and Storing Data Items
(See Figure 5 to Figure 7)
To select and store data items for a dataset, perform the following steps:
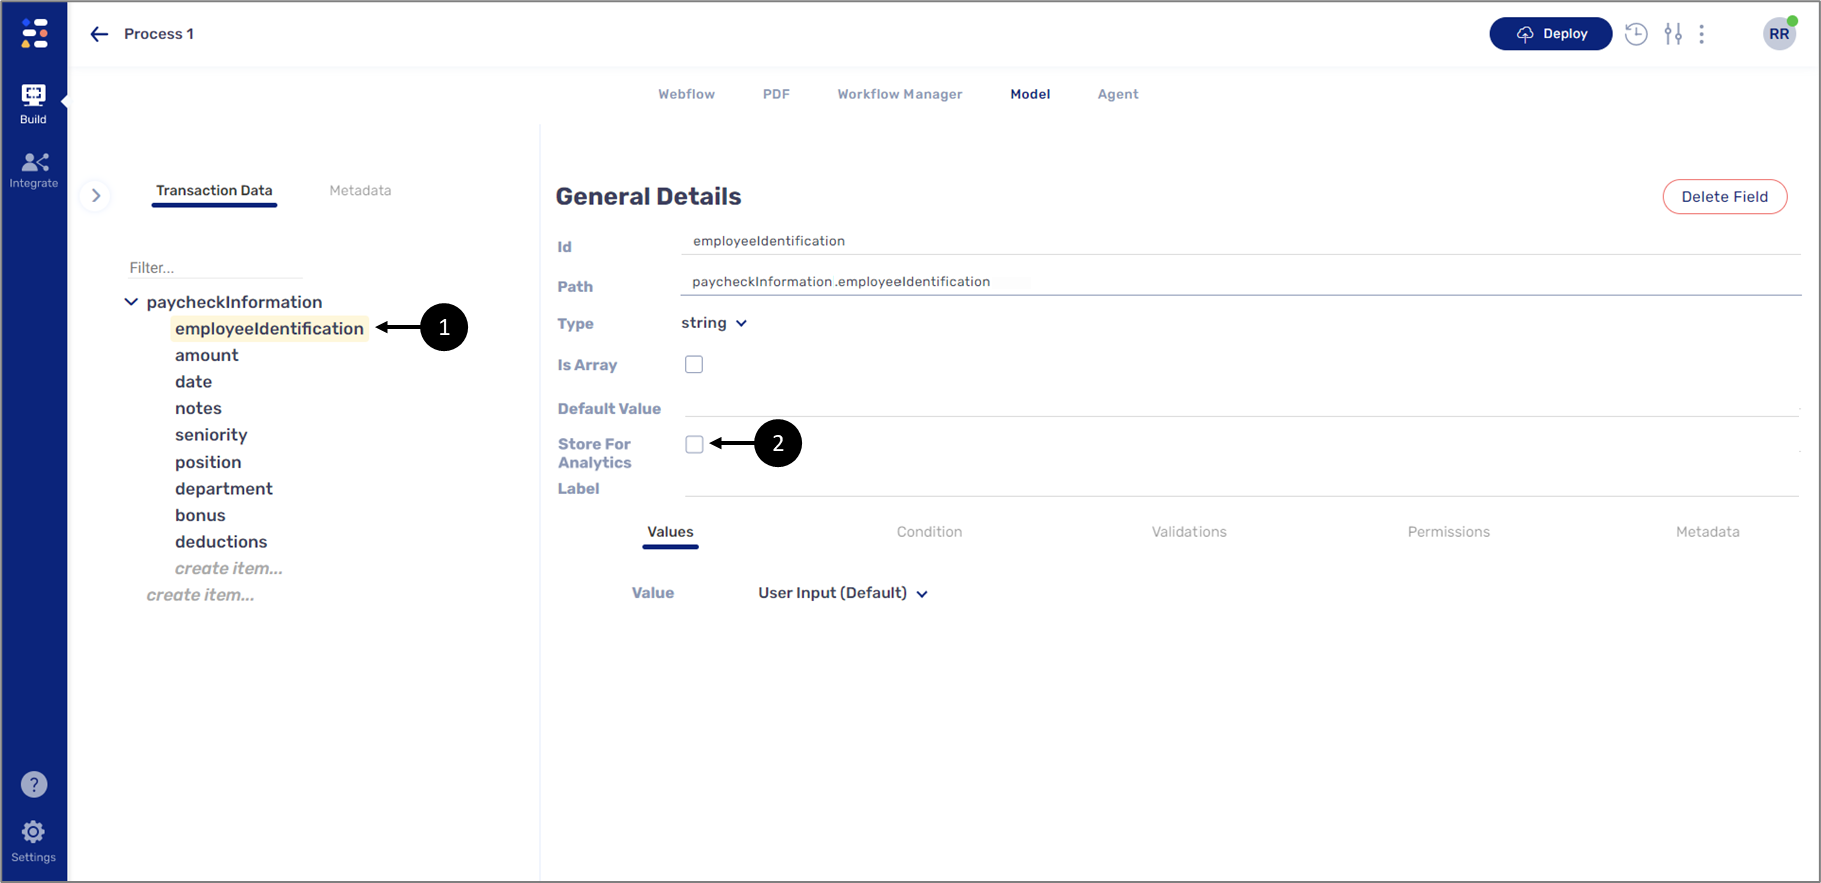
Figure 5: Store For Analytics
- Click a data item (1).
- Only string or boolean-type data items can be stored for analytics. Object, file, and signature are not supported.
- Array data items can be stored but cannot be used for analytics.
- Check the Store For Analytics checkbox (2).
Result:
The Store For Analytics window appears:
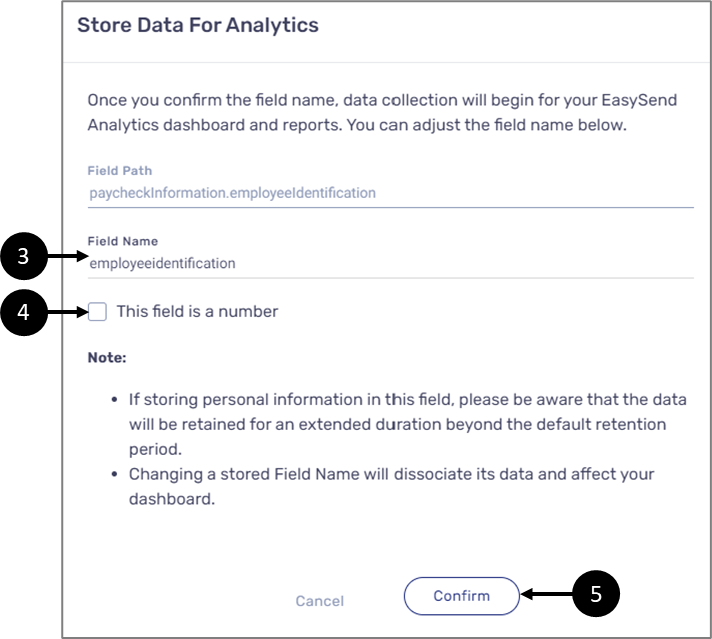
Figure 6: Store For Analytics
- If required, edit the name of the data item (3).
- Filed names must be unique.
- Field names cannot include spaces, upper case, or special characters.
- Filed names must start with a letter (no numbers and no underscore).
- If storing data items that contain Personally identifiable information, or PII, the data will be retained for an extended duration beyond the default retention period.
- If the data item contains numeric information and not text, check the This field is a number checkbox (4).

- Click Confirm (5).
- Repeat steps 1 to 4 as required.
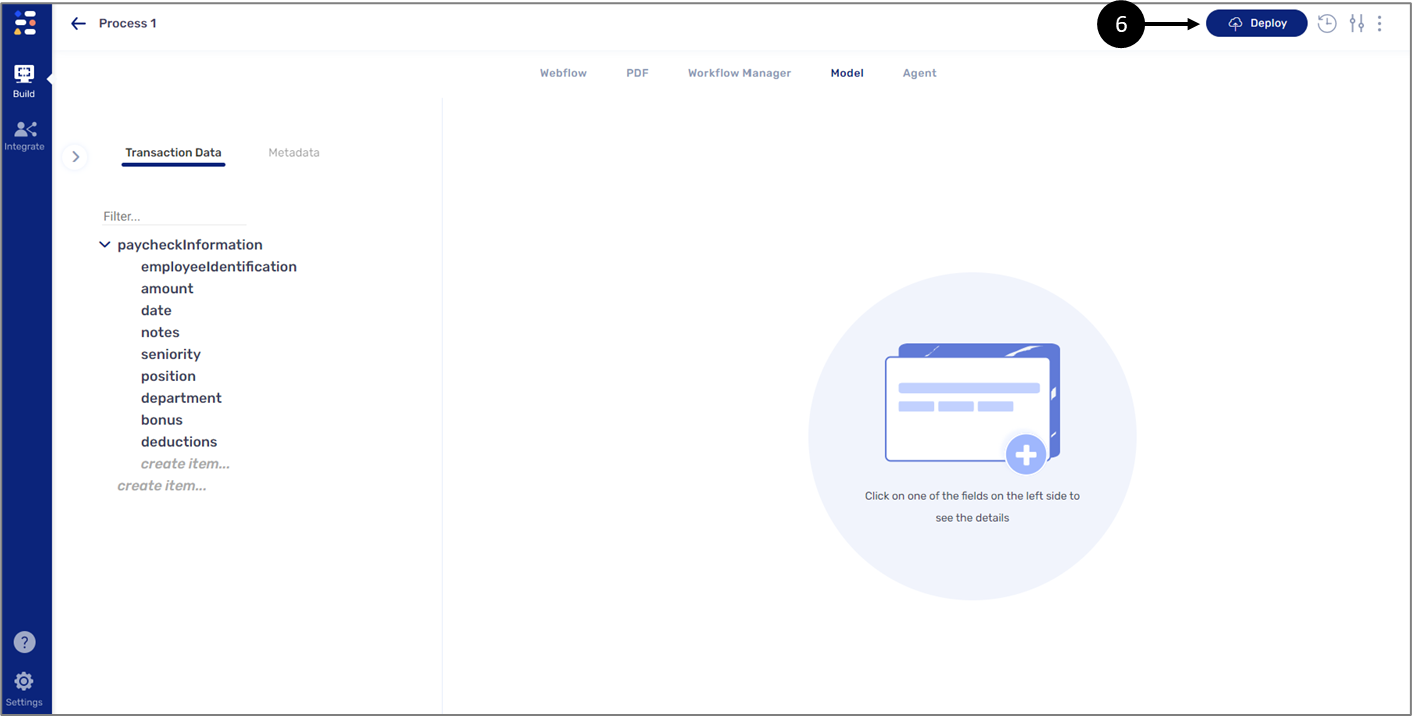
Figure 7: Deploy Button
- Deploy the process to a production server (6).
Editing Stored Data
(See Figure 8 to Figure 11)
Once a data item has been stored for analytics it is possible to edit its name:
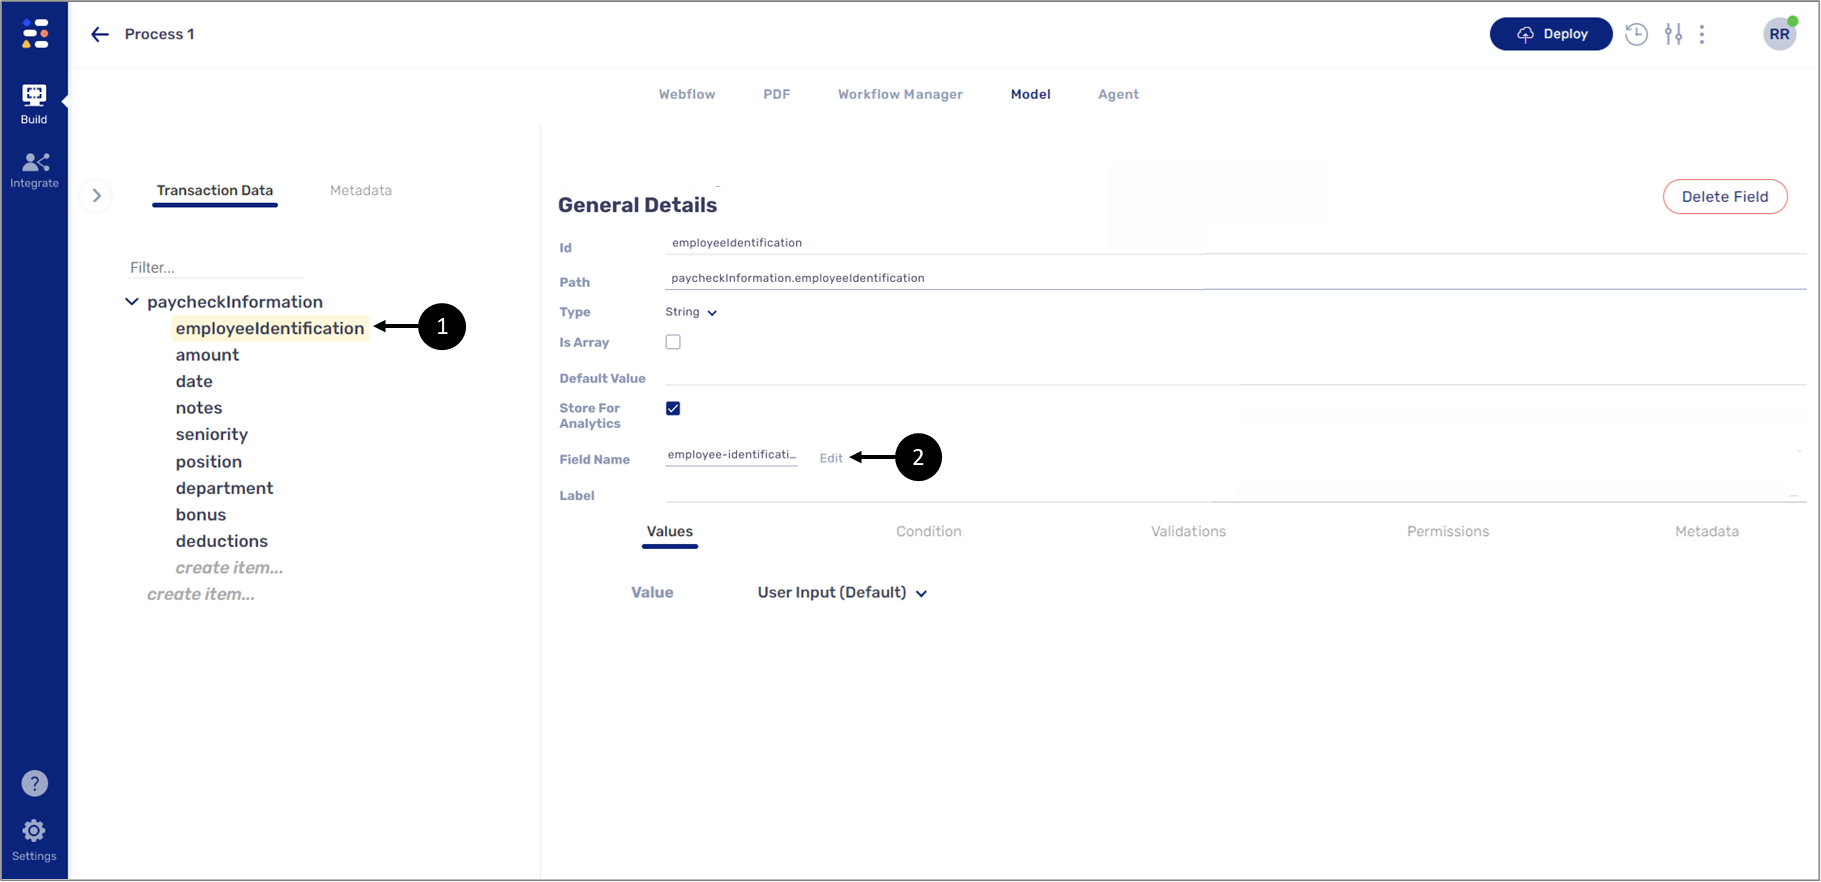
Figure 8: Store For Analytics
- Click the data item that was stored for analytics (1).
- Click the Edit option (2).
Result:
The following warning message appears:
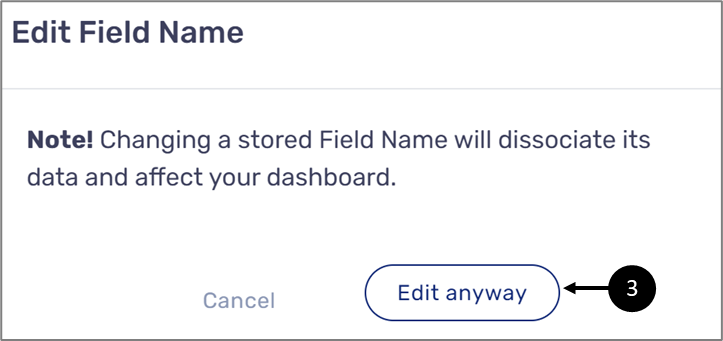
Figure 9: Warning Message
- If you wish to continue, click Edit anyway (3).
Result:
The Edit Field Name window appears:
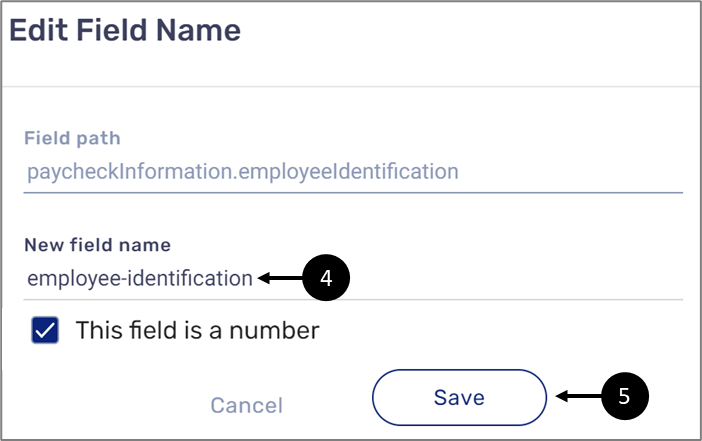
Figure 10: Edit Field Name Window
- Provide a New field name (4).
- Filed names must be unique.
- Field names cannot include spaces, upper case, or special characters.
- Filed names must start with a letter (no numbers and no underscore).
- If storing data items that contain Personally identifiable information, or PII, the data will be retained for an extended duration beyond the default retention period.
- Click Save (5).
Result:
The name is updated (6):
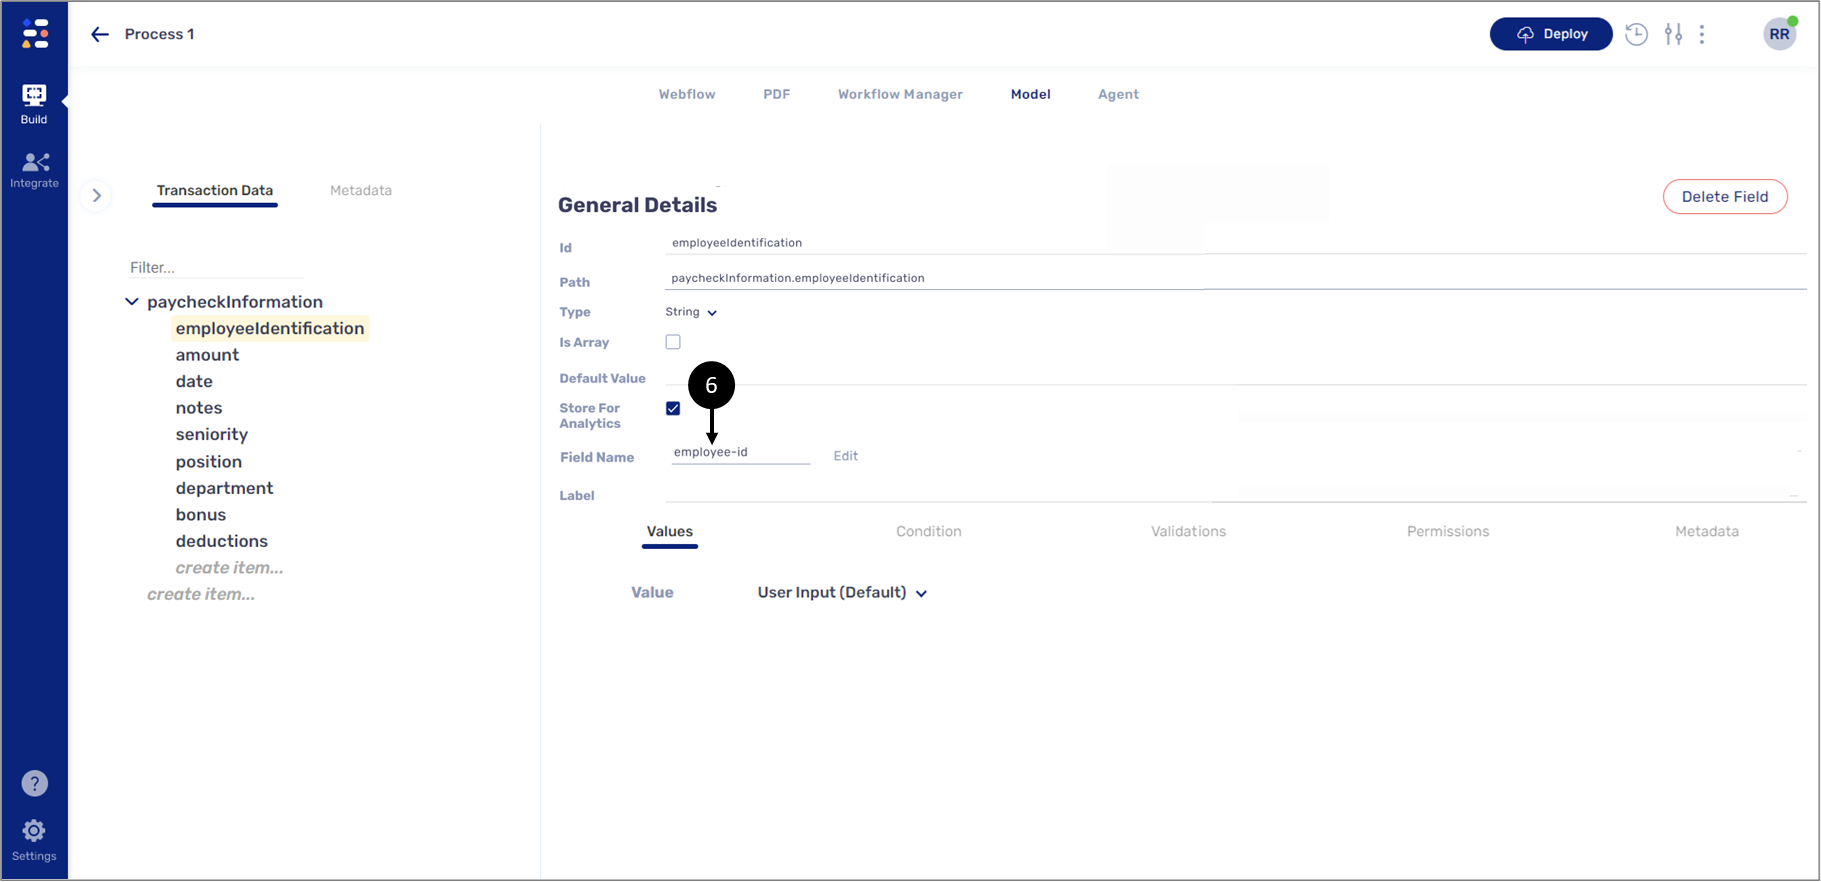
Figure 11: Updated Name
For the changes to take effect you must deploy the process to a production server.
Removing Data Items From Analytics
(See Figure 12 and Figure 13)
It is possible to remove data items from analytics storage by unchecking the Store For Analytics checkbox (1):
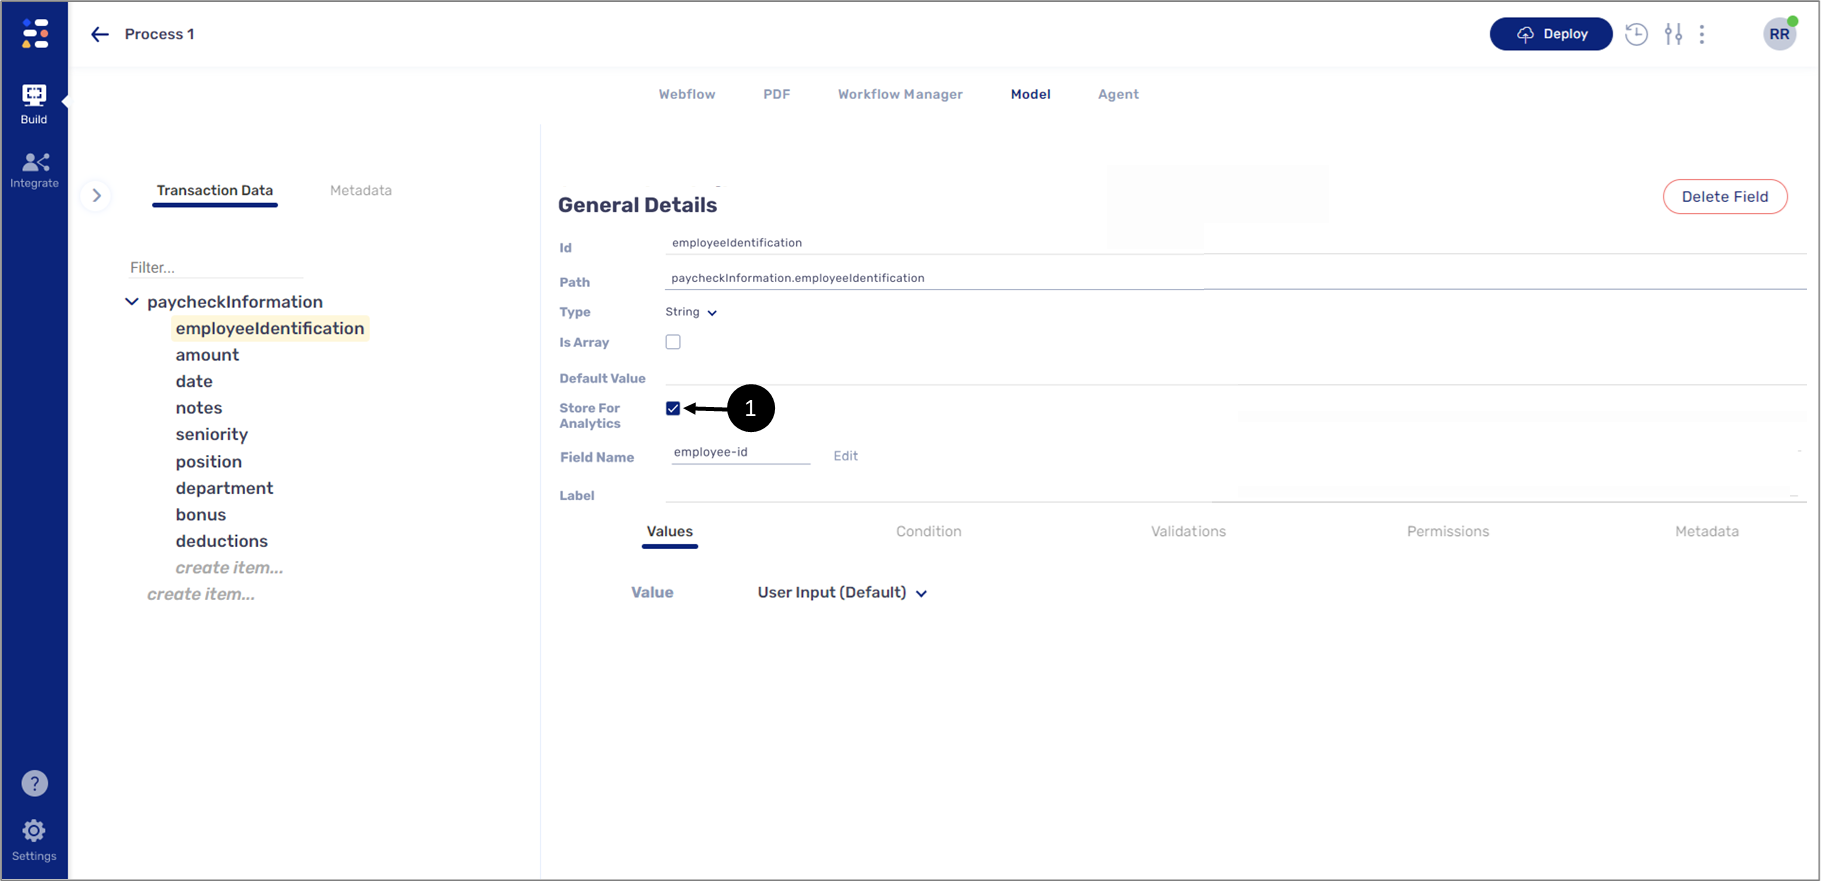
Figure 12: Store For Analytics Checkbox
After unchecking the checkbox, the following warning message appears:
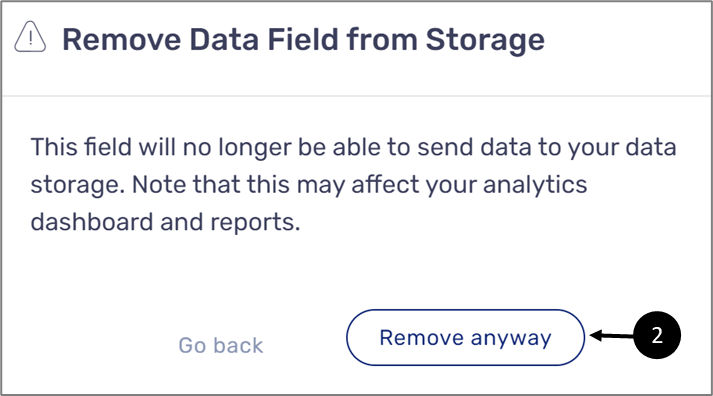
Figure 13: Remove Data Field from Storage
Clicking Remove anyway (2) will remove the data item from analytics storage.
For the changes to take effect you must deploy the process to a production server.
Your Datasets
(See Figure 14)
After deploying the process to a production environment and accessing Edit Mode, The data items that were stored will be found in the Datasets screen.
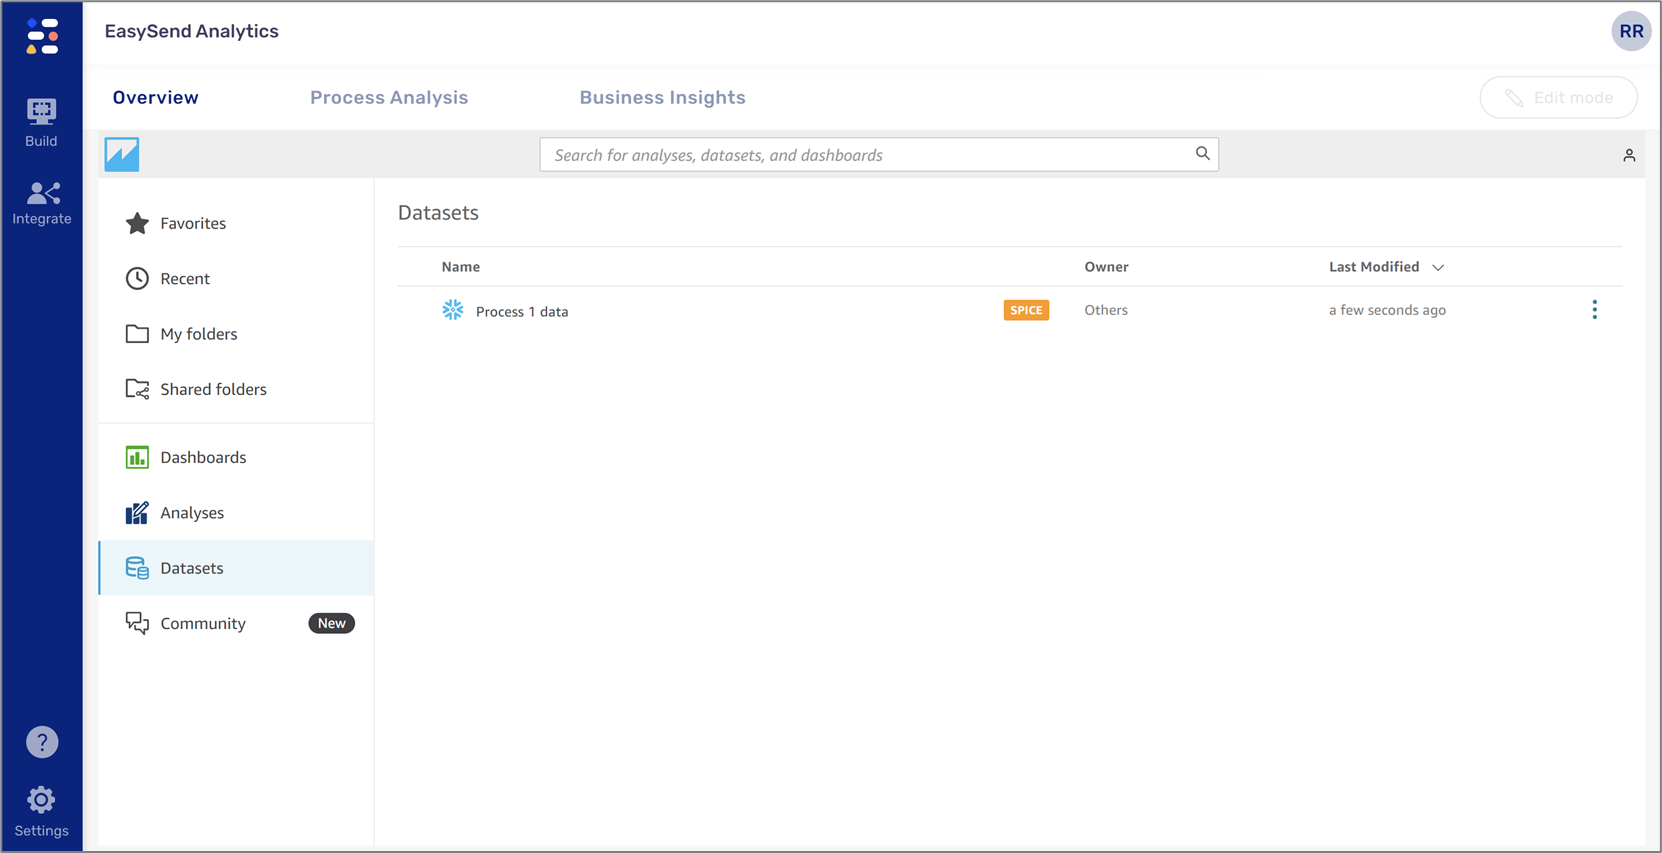
Figure 14: Datasets
This screen contains datasets you created and built-in EasySend Analytics dashboards used for the Overview and Process Analysis tabs.
Transaction Metadata
(See Figure 15)
Process data items must be selected and stored to create a dataset. Once a dataset has been created it will automatically contain transaction metadata that can be used for analytics.
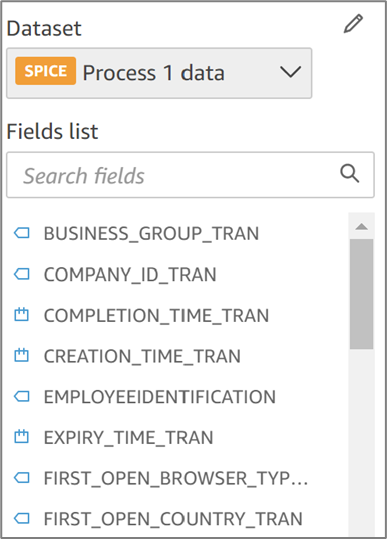
Figure 15: Datasets
Transaction metadata will always be written with an underscore TRAN (_TRAN) and will never contain PII such as:
- Customer name
- Customer phone number
- Customer email