Article Overview
The article describes the integration between Guidewire and EasySend. It details the different stages of the accelerator, how to send an EasySend digital process link using Guidewire’s New Claim Wizard, and how and where information from EasySend’s digital processes appears on Guidewire’s ClaimCenter.
Introduction - EasySend and Guidewire
EasySend and Guidewire created a new accelerator for customer service/support representatives of joint Guidewire and EasySend customers that enables them to initiate link sending of EasySend’s digital processes directly from within Guidewire’s ClaimCenter.
The accelerator reduces the manual intake of information between the claimant and the customer service/support representative by enabling the claimant to independently submit claims information through a digital process, which upon completion will be integrated back into ClaimCenter to generate a Claim.
The Accelerator Overview
The accelerator includes four stages:
- Sending an EasySend link to claimants.
- Prefilling the EasySend digital process with customer-specific information.
- Claimant interaction with the digital process for inputting additional information.
- Creating and Updating claim files with information collected during EasySend’s digital process.
Figure 1 describes the four stages of the accelerator:
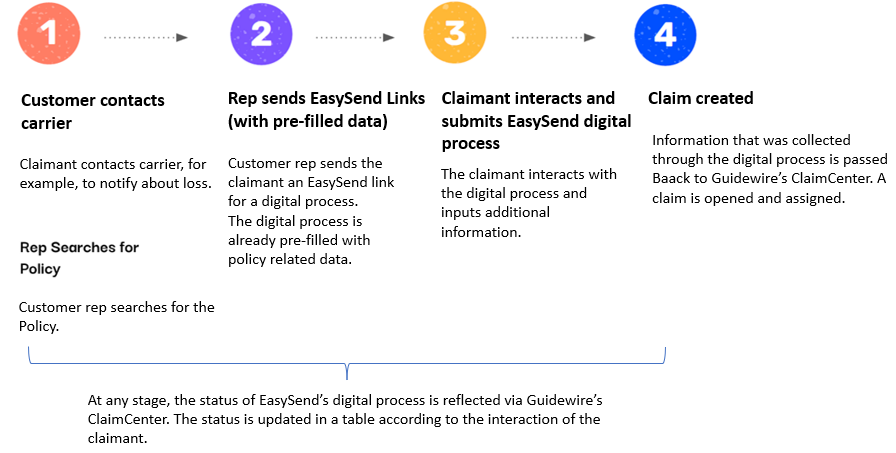
Figure 1: Four Stages of the Accelerator
The Accelerator Stages
The following sections detail the stages of the accelerator and display and describe all the EasySend relevant screens in Guidewire's ClaimCenter.
Stages 1 + 2: Sending EasySend Link with Pre-filled Information
(See Figure 2)
Guidewire’s ClaimCenter establishes a connection with EasySend through an API and shares the required policy details. EasySend sends the link to the claimant through an Email/SMS, which will open a digital form.
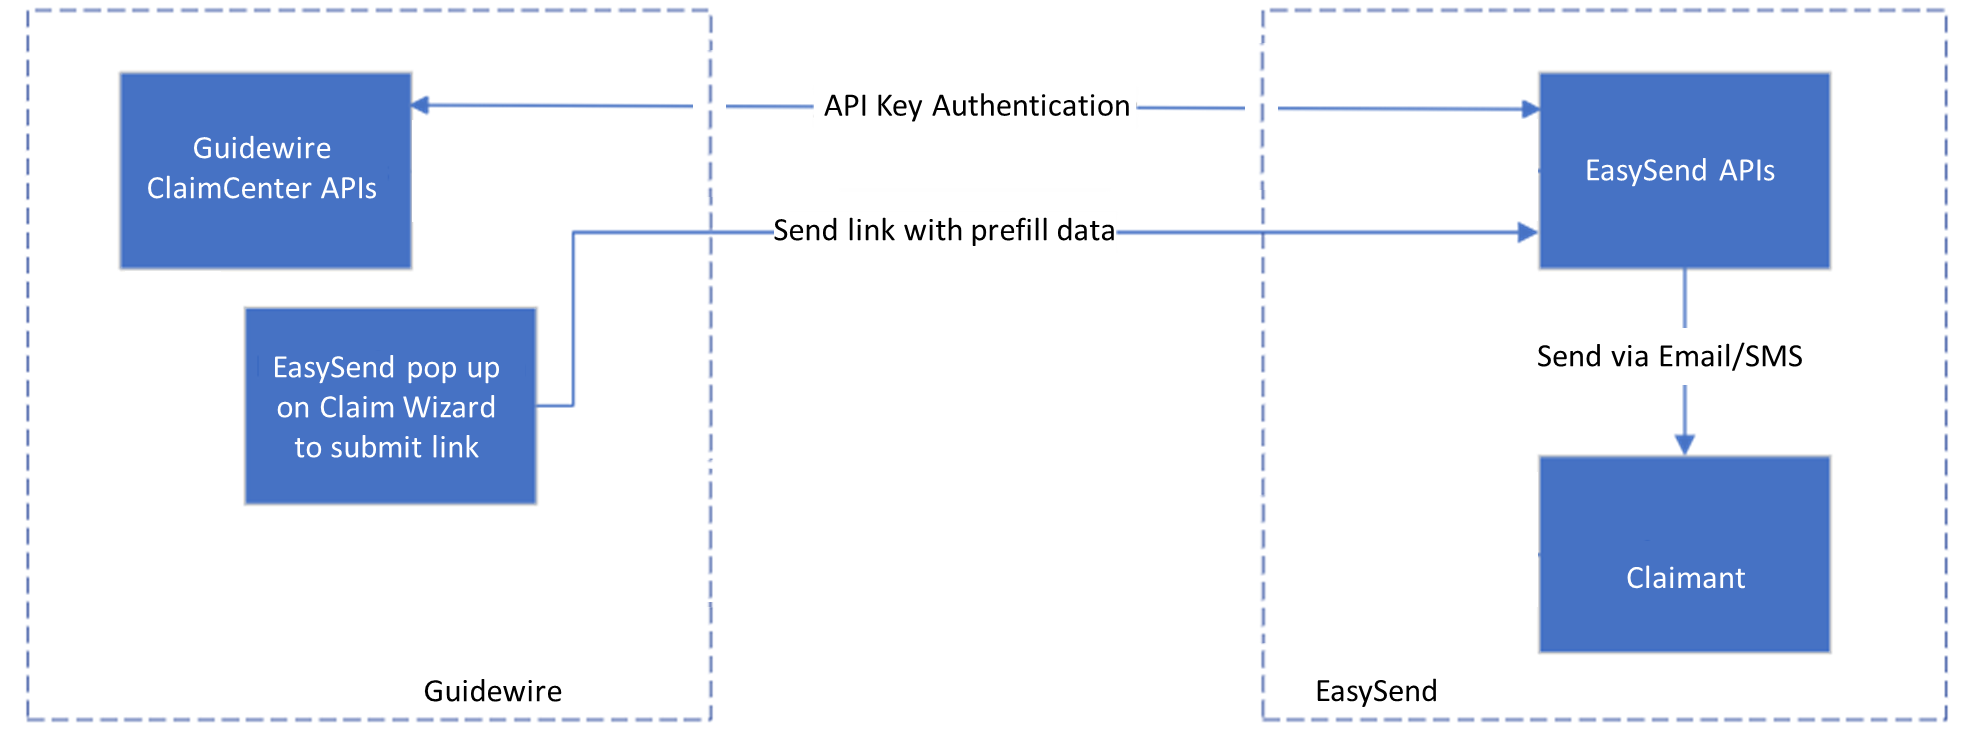
Figure 2: Stages 1 +2 - Sending EasySend Links with Pre-filled Information
Guidewire ClaimCenter Description
(See Figure 3 to Figure 10)
To perform the first stage, perform the following steps:
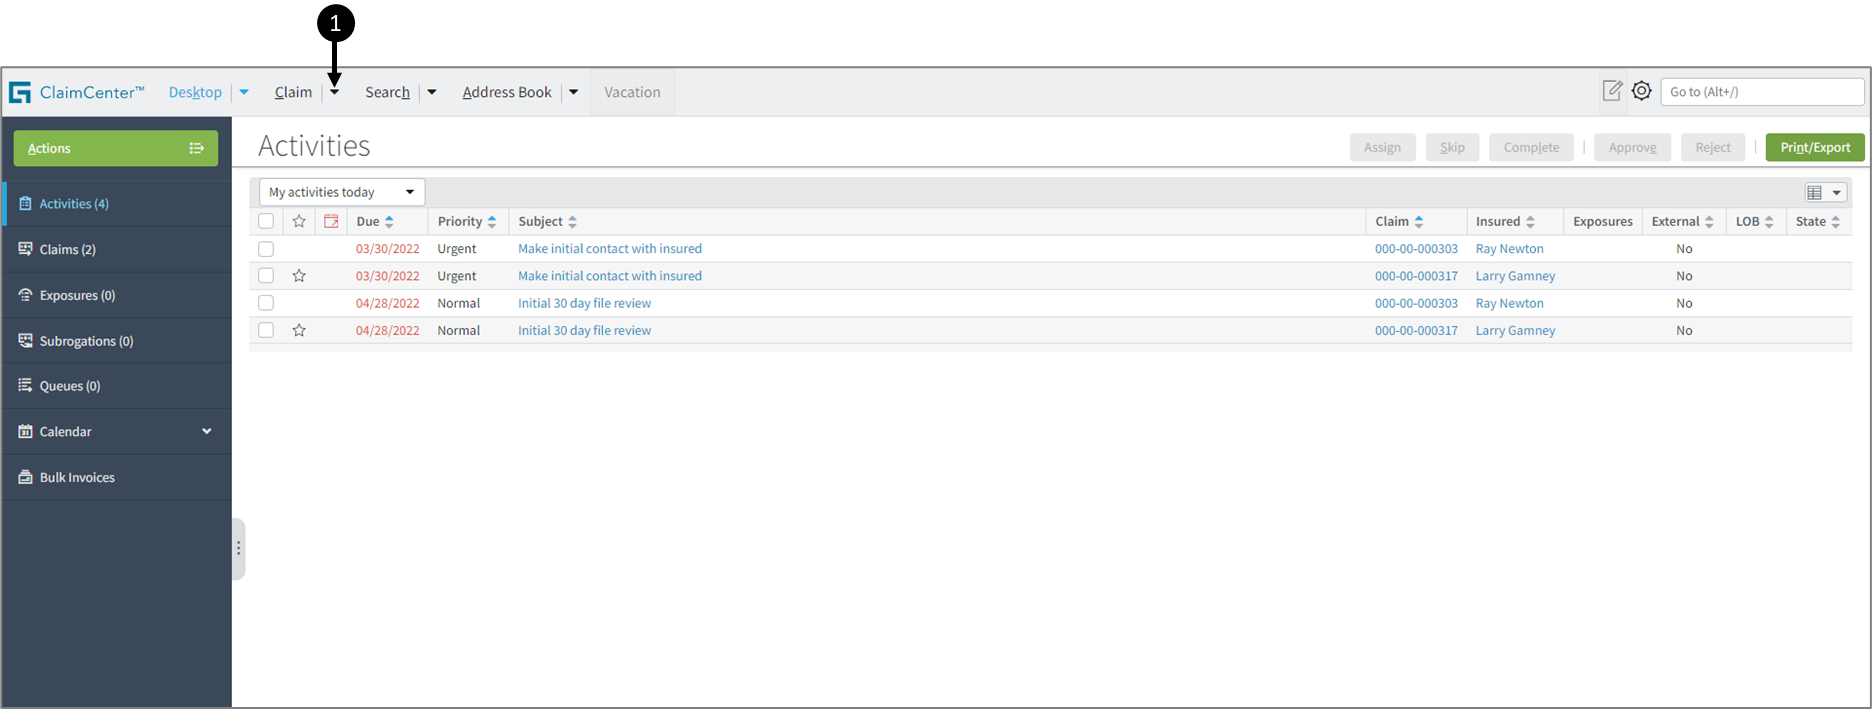
Figure 3: ClaimCenter
- Log into Guidewire’s ClaimCenter.
- Click the Claim dropdown (1).
Result:
The dropdown options appear:
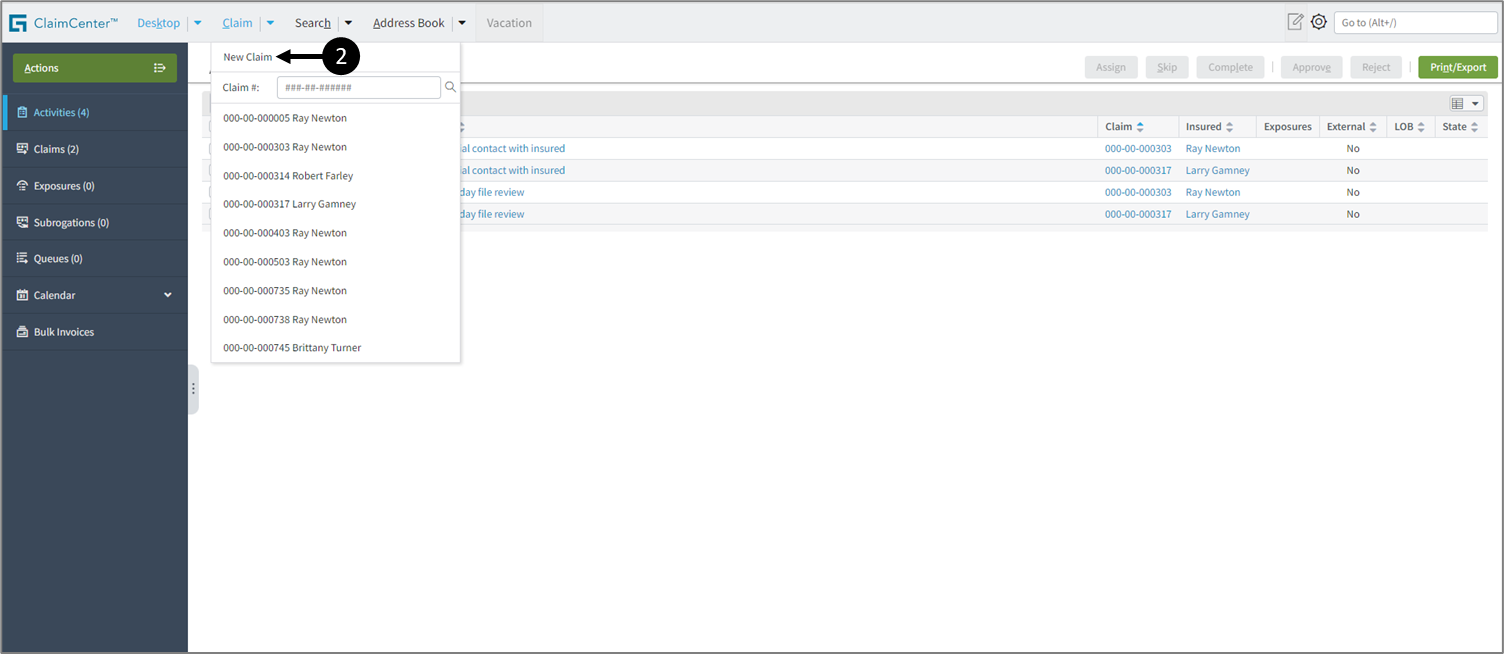
Figure 4: New Claim
- Click New Claim (2).
Result:
The New Claim Wizard screen appears:
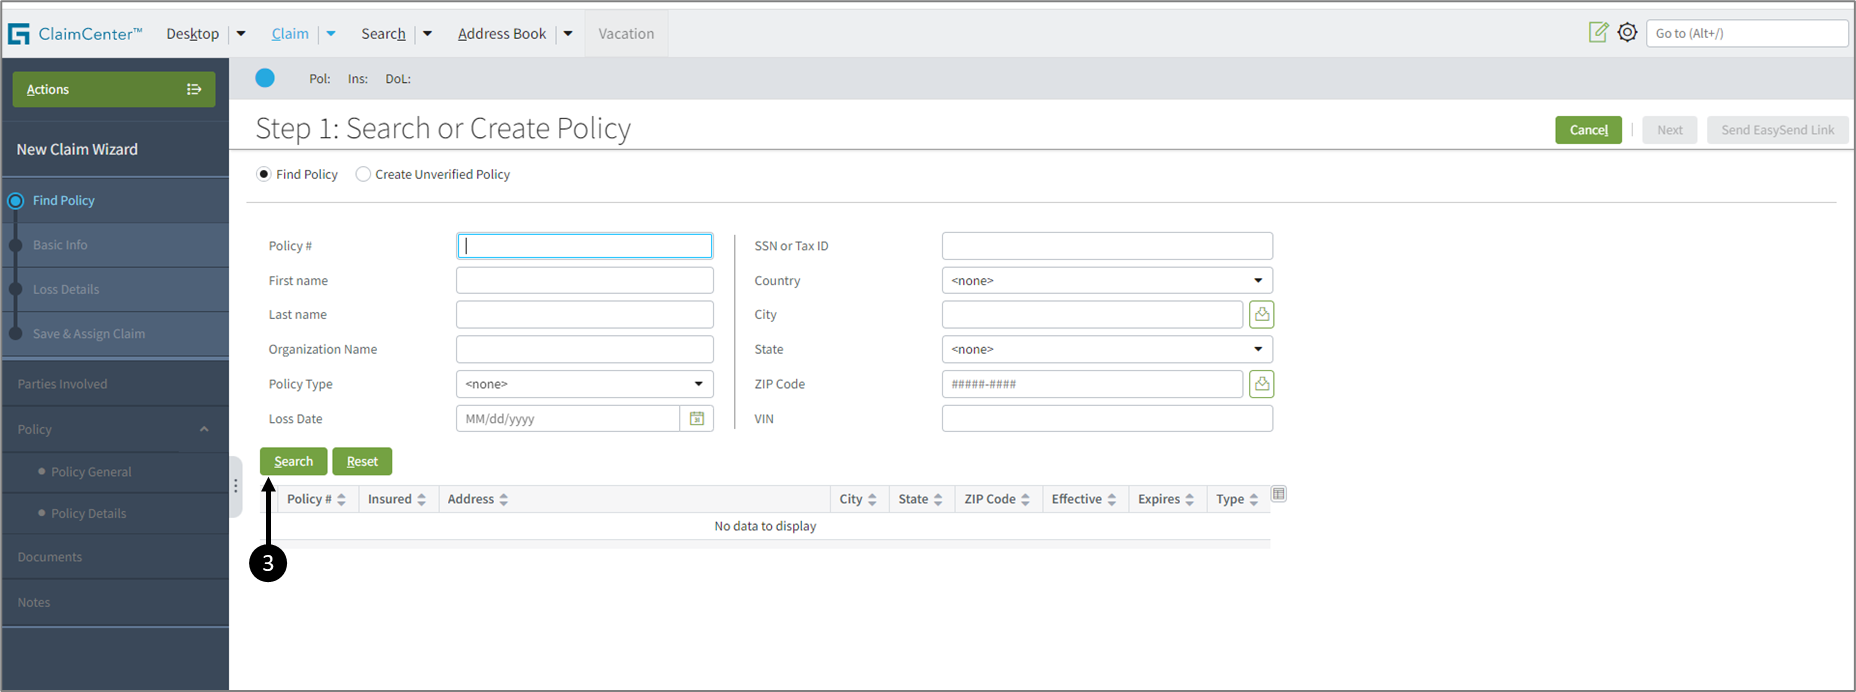
Figure 5: Search Button
- Search for a policy, enter details first to narrow to search, or click the Search button (3) to display all policies.
Result:
A list of policies appears:
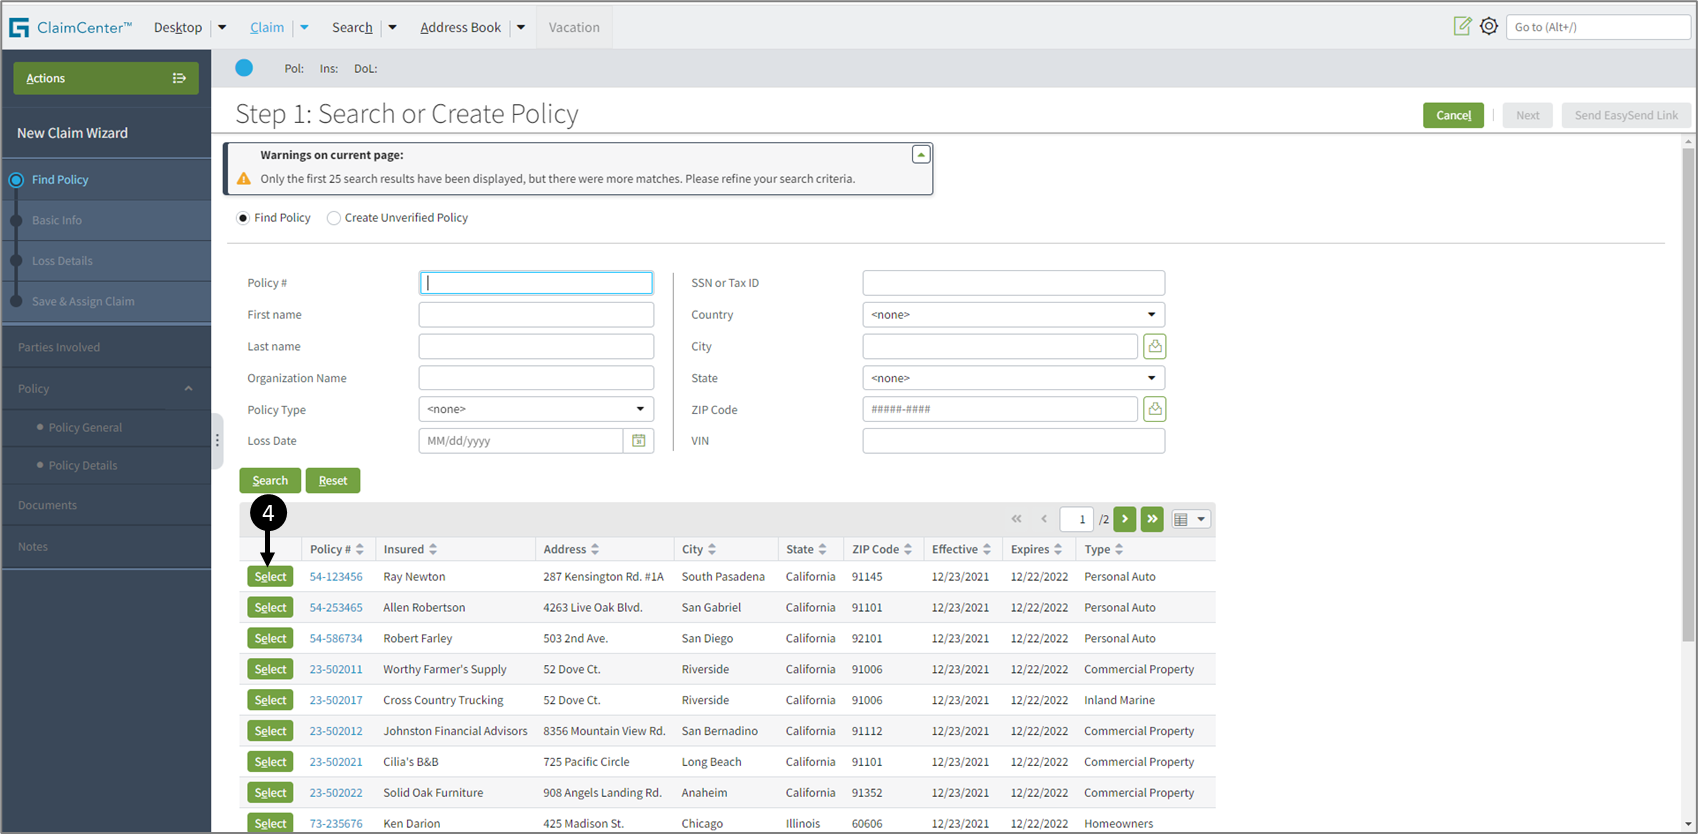
Figure 6: Select Button
- Locate the desired policy from the list and click the Select button (4).
Result:
Information about the policy appears:
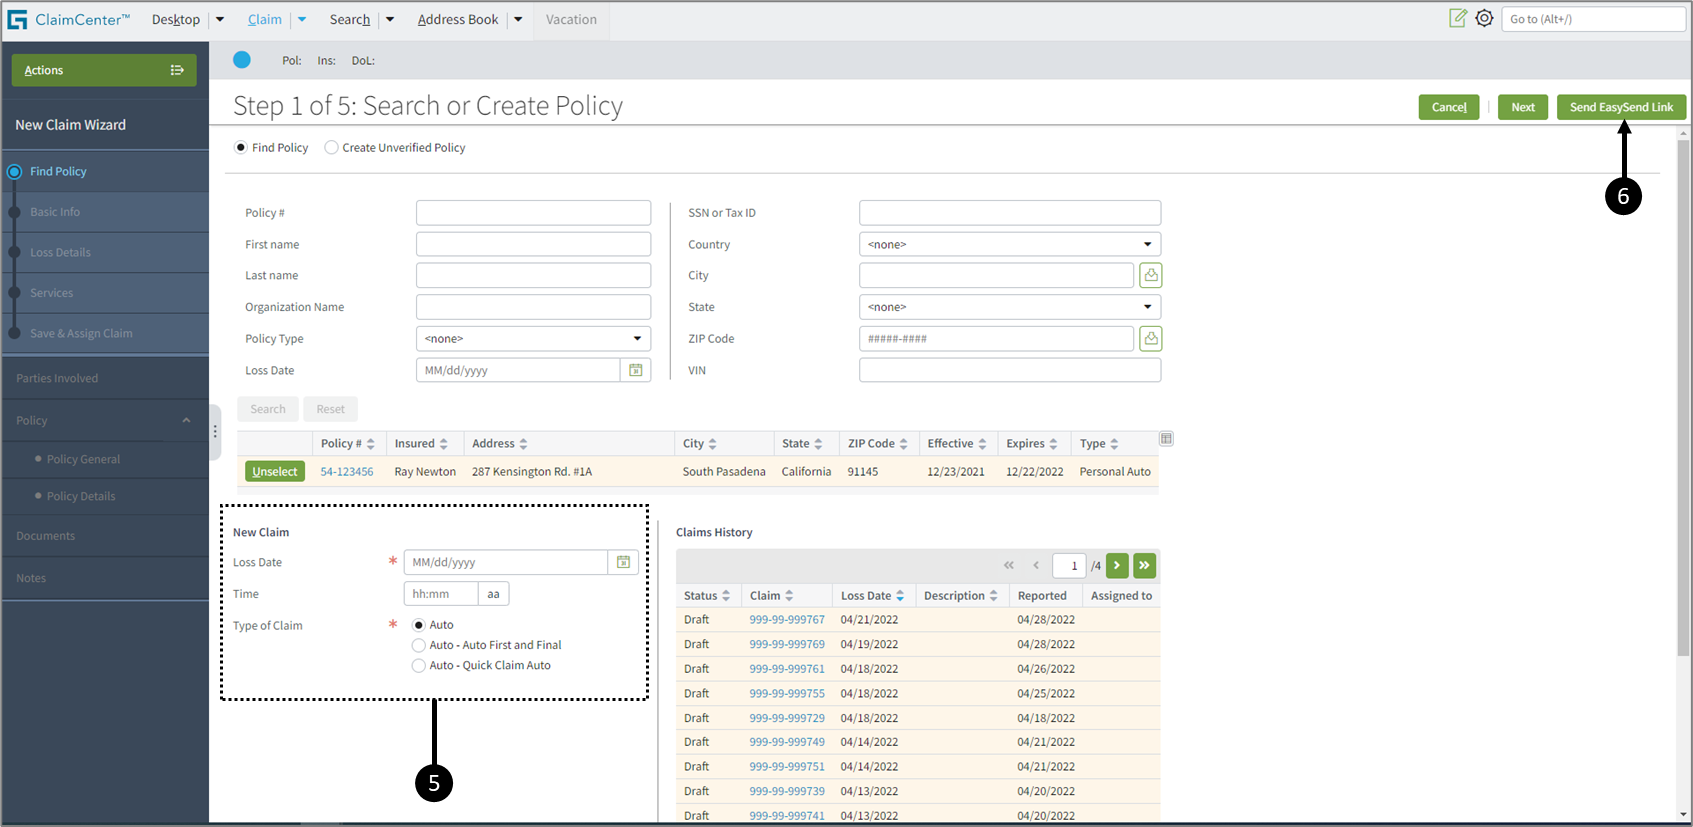
Figure 7: New Claim Information and Send EasySend Link Button
- On the New Claim section (5), fill in the required information (marked by
 ) and click the Send EasySend Link button (6).
Result:
The New Claim Wizard screen displays basic information about the policy, including the Prefilled Fields (7) that will appear on EasySend’s digital process:

Figure 8: Sending an EasySend Link
- Fill in Send Email/Phone information (8) as required.
- Click the Send button (9).
Result:
- A message indicating that the link was sent appears (10).
- An email/SMS was sent to the email address/phone number (see Figure 10 for an example).
- The EasySend Cobrowsing (11) button appears.
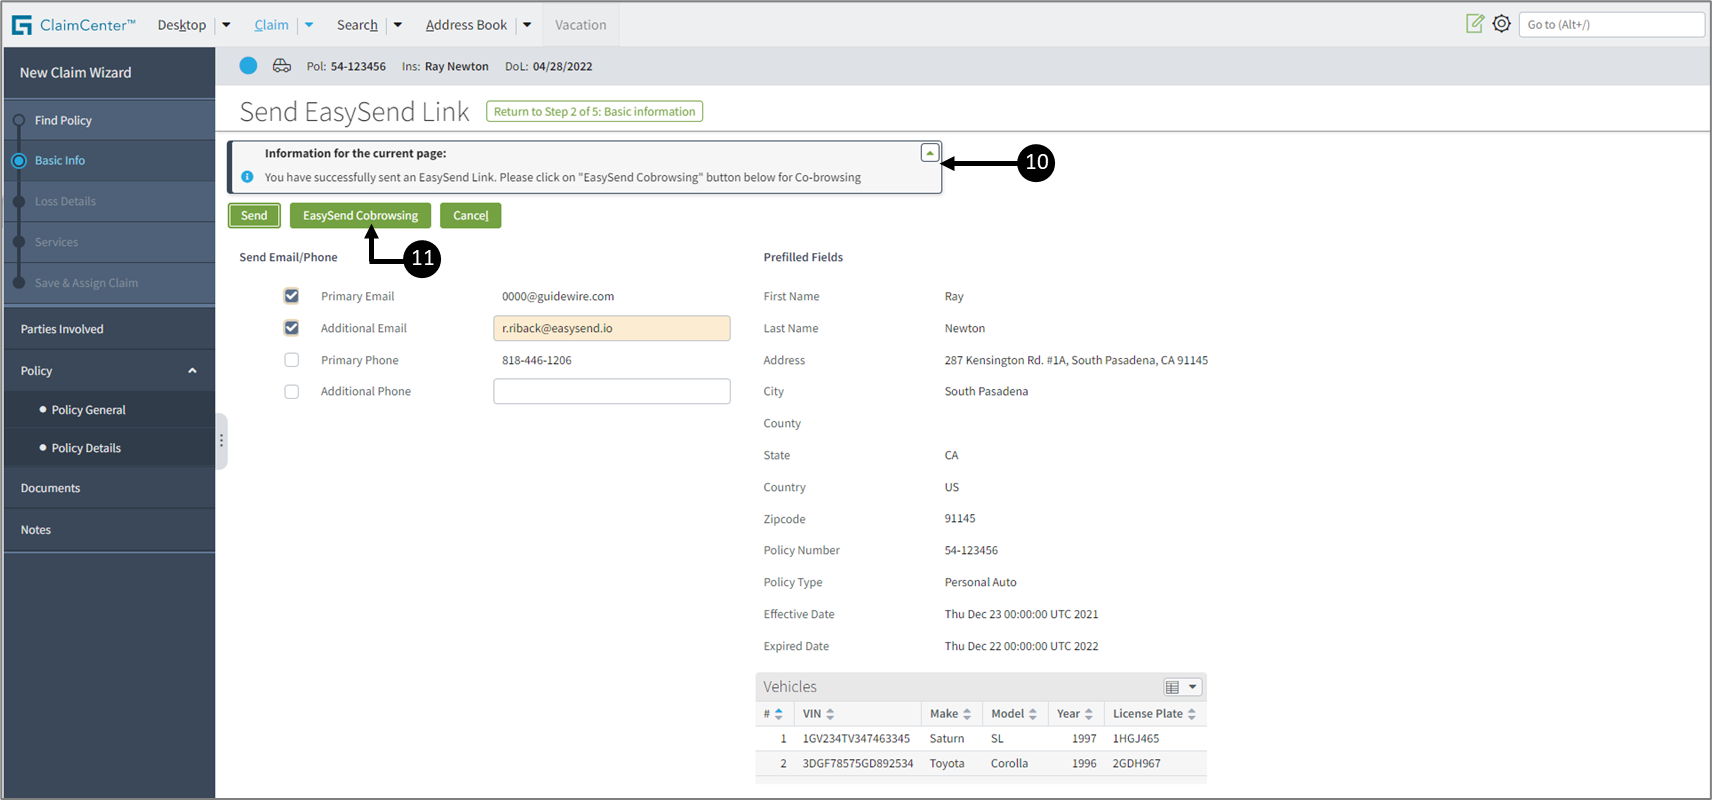
Figure 9: After sending an EasySend Link
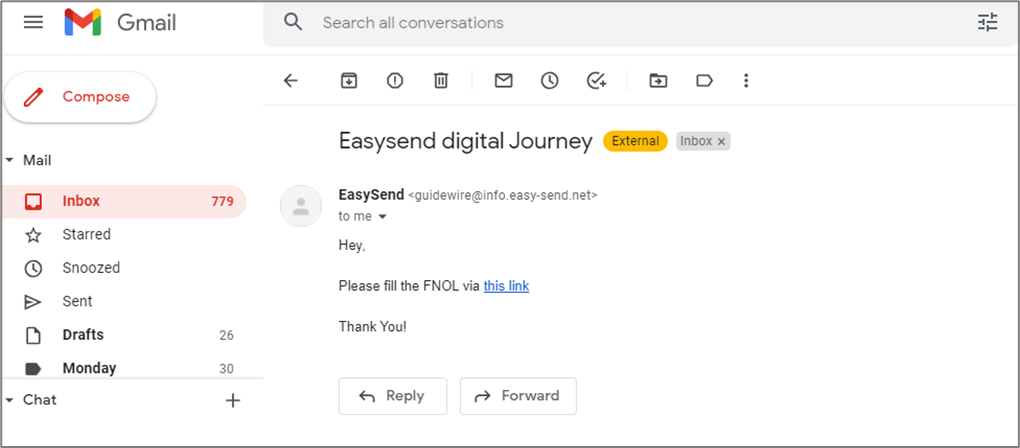
Figure 10: An Email with EasySend Digital Process Link
- If an error message is displayed after sending the link, please contact Guidewire’s support.
- The EasySend Cobrowsing button enables the customer rep to interact with EasySend’s digital process alongside the claimant.
Stages 3 + 4: Claimant interacts and submits EasySend digital process
(See Figure 11)
The Claimant interacts with EasySend’s digital process, fills in additional information, and submits it independently. Once the digital form is submitted, EasySend sends that information to Guidewire’s ClaimCenter to complete the process and generate the claim in ClaimCenter.
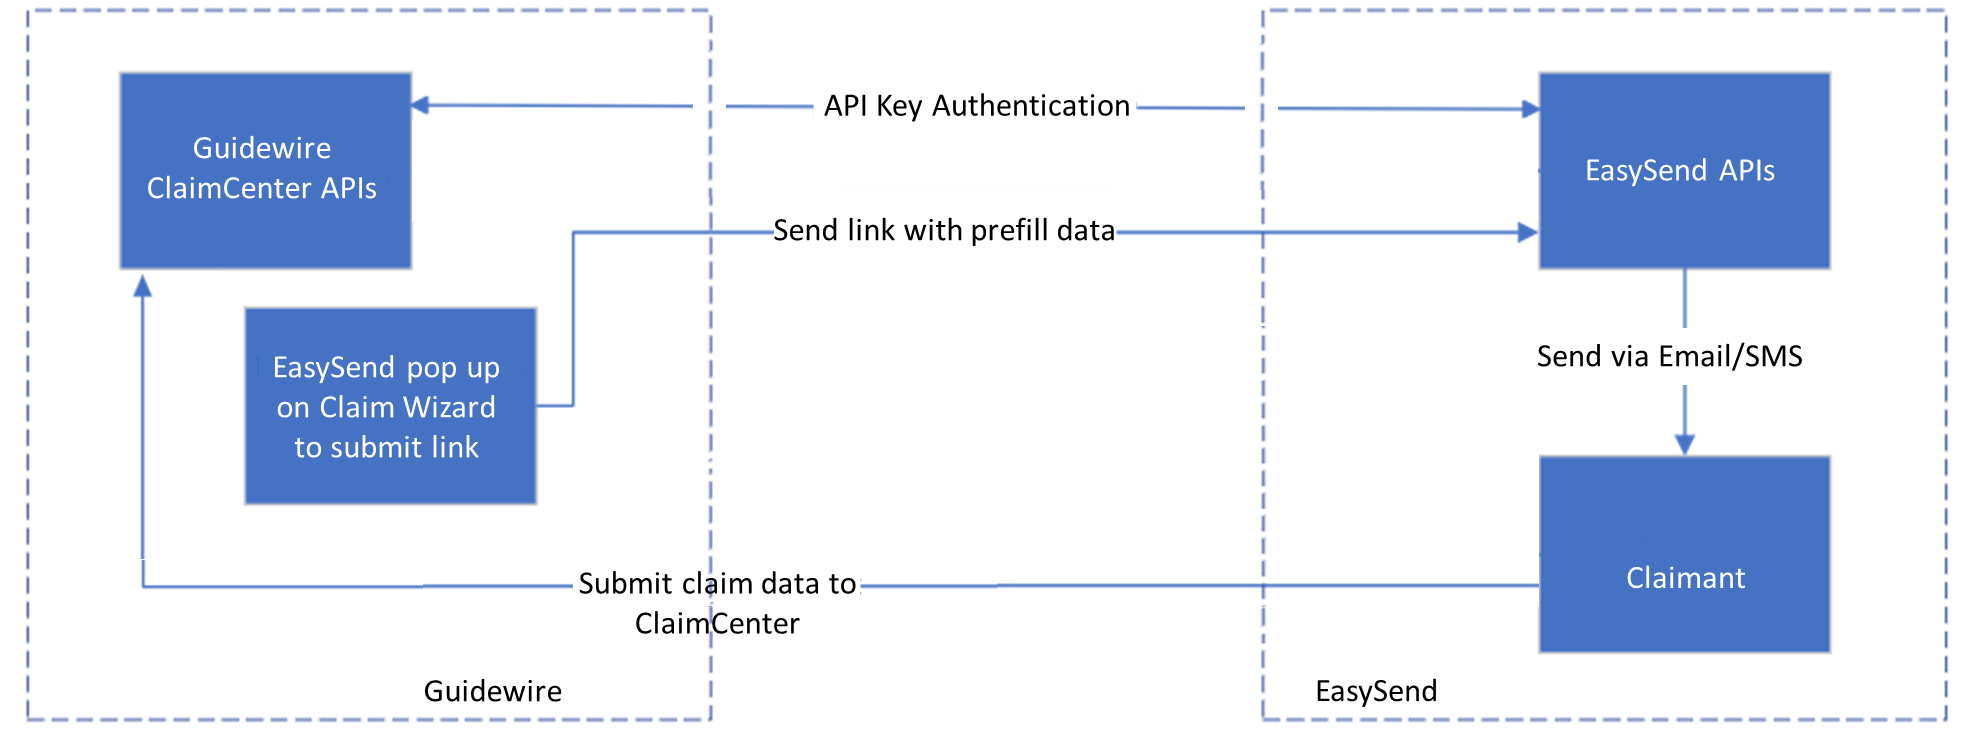
Figure 11: Stages 3 + 4 - Claimant Interacts and Submits EasySend Digital Process
EasySend Digital Process Description
The claimant receives the digital process with pre-filled information (see Figure 12), navigates through the digital process, inputs additional information (see Figure 13), and submits the digital form (see Figure 14).
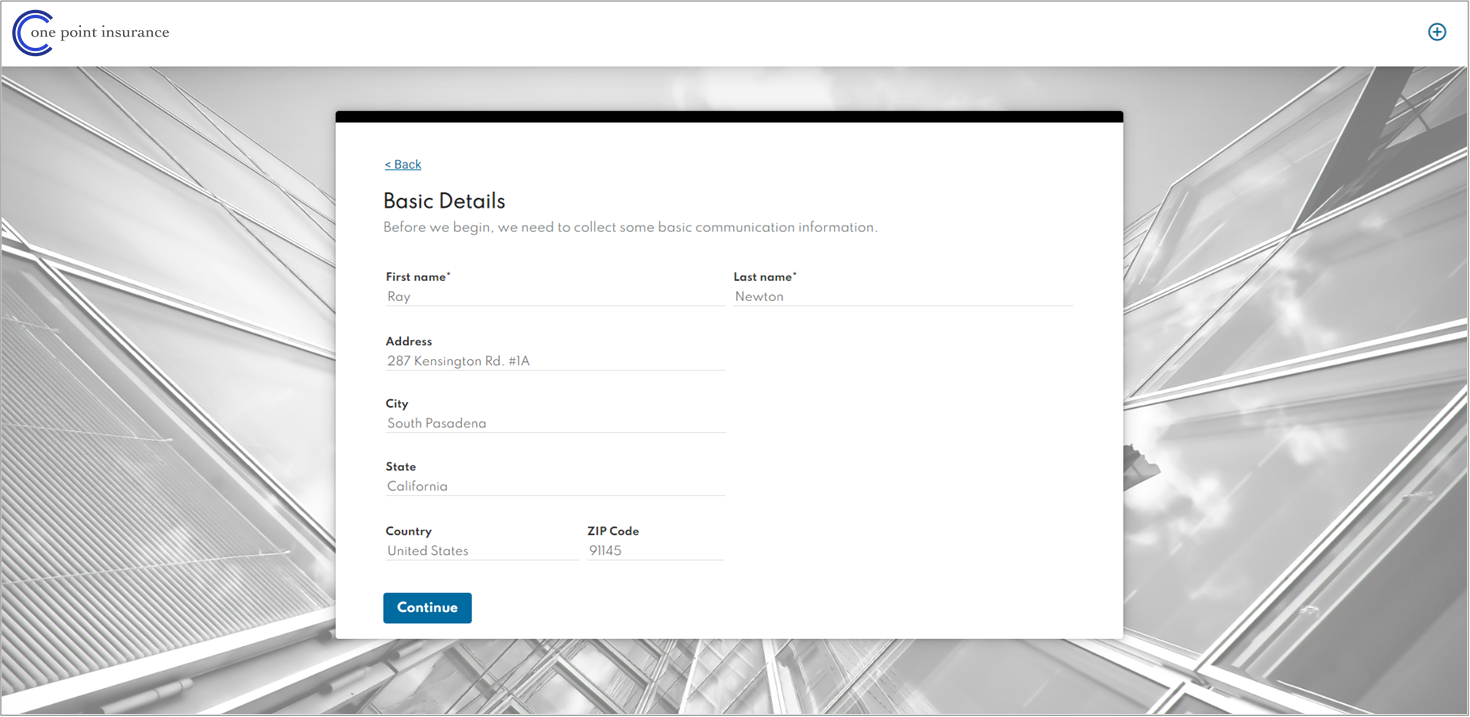
Figure 12: Pre-filled Information
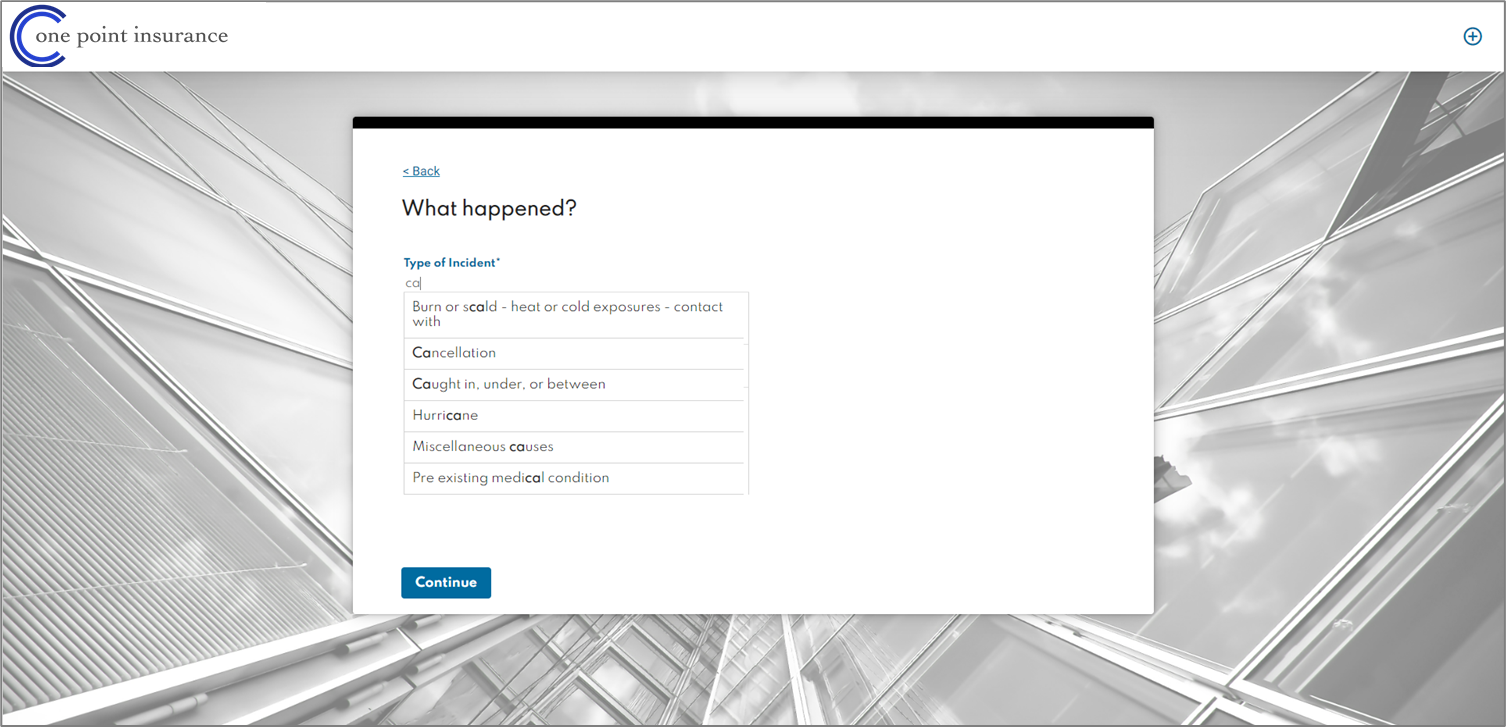
Figure 13: Additional Information

Figure 14: Submitted
Guidewire ClaimCenter Description
(See Figure 15 to Figure 17)
In the fourth stage, claim files are created and updated with information collected from EasySend’s digital process after the claimant submitted it. EasySend information can be found on the following screens:
- New Claim Wizard screen - Claims History section (1).
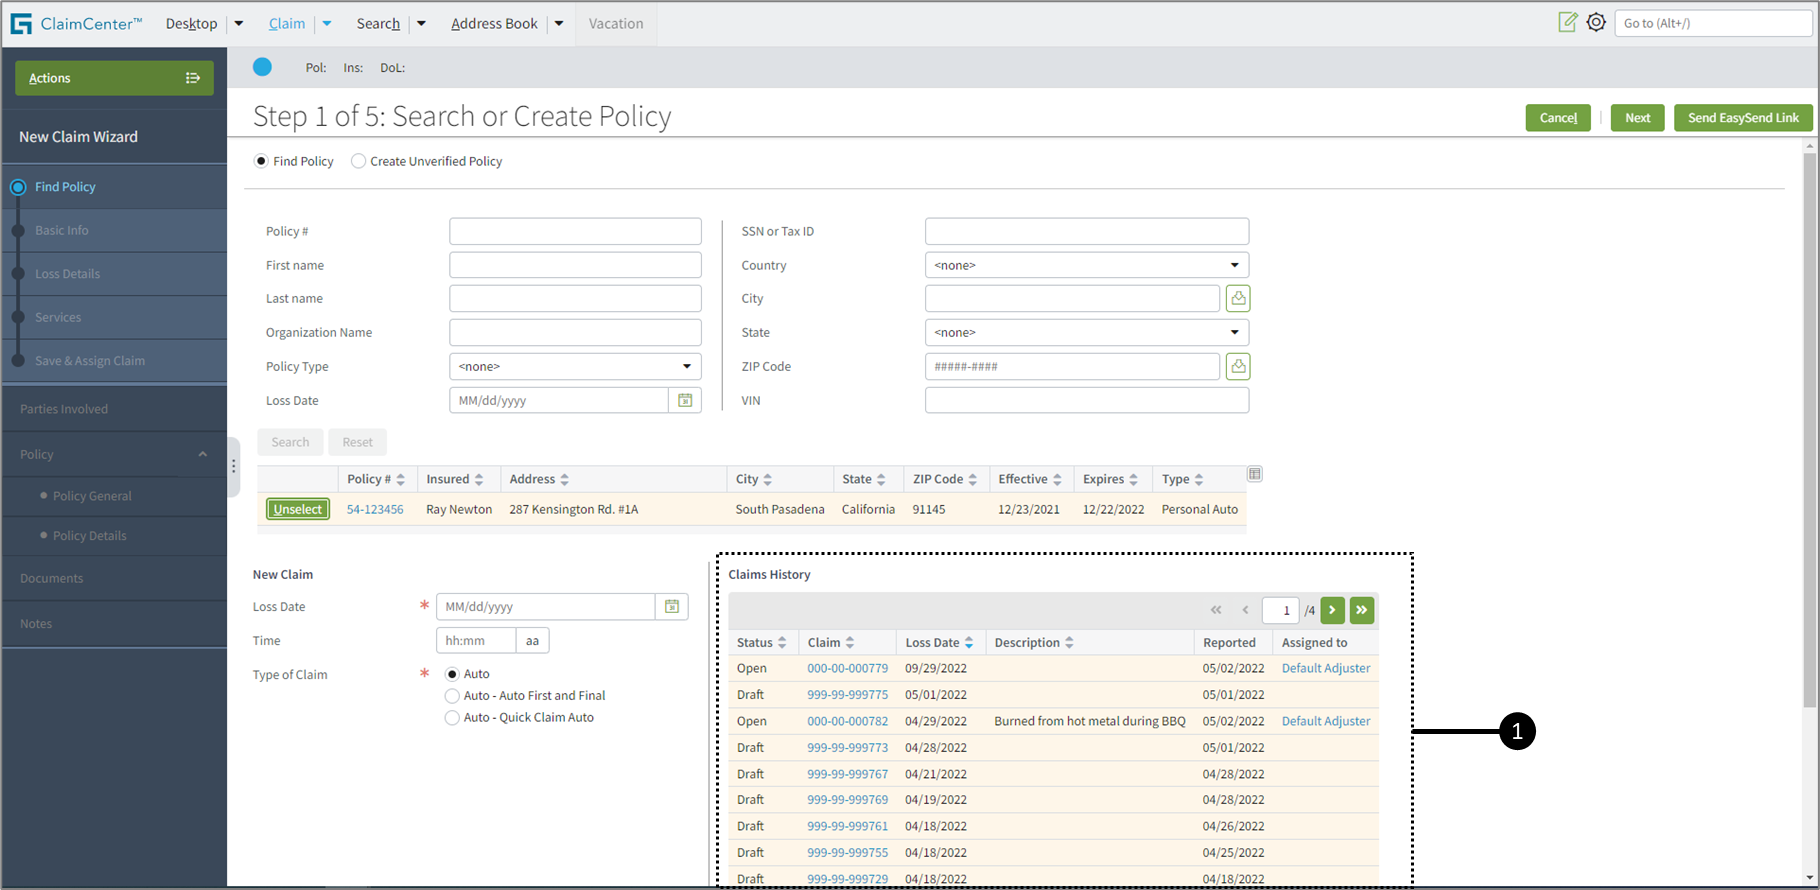
Figure 15: New Claim Wizard Screen - Claims History Section
- Claim screen - Summary section (1), under the Overview option (2).
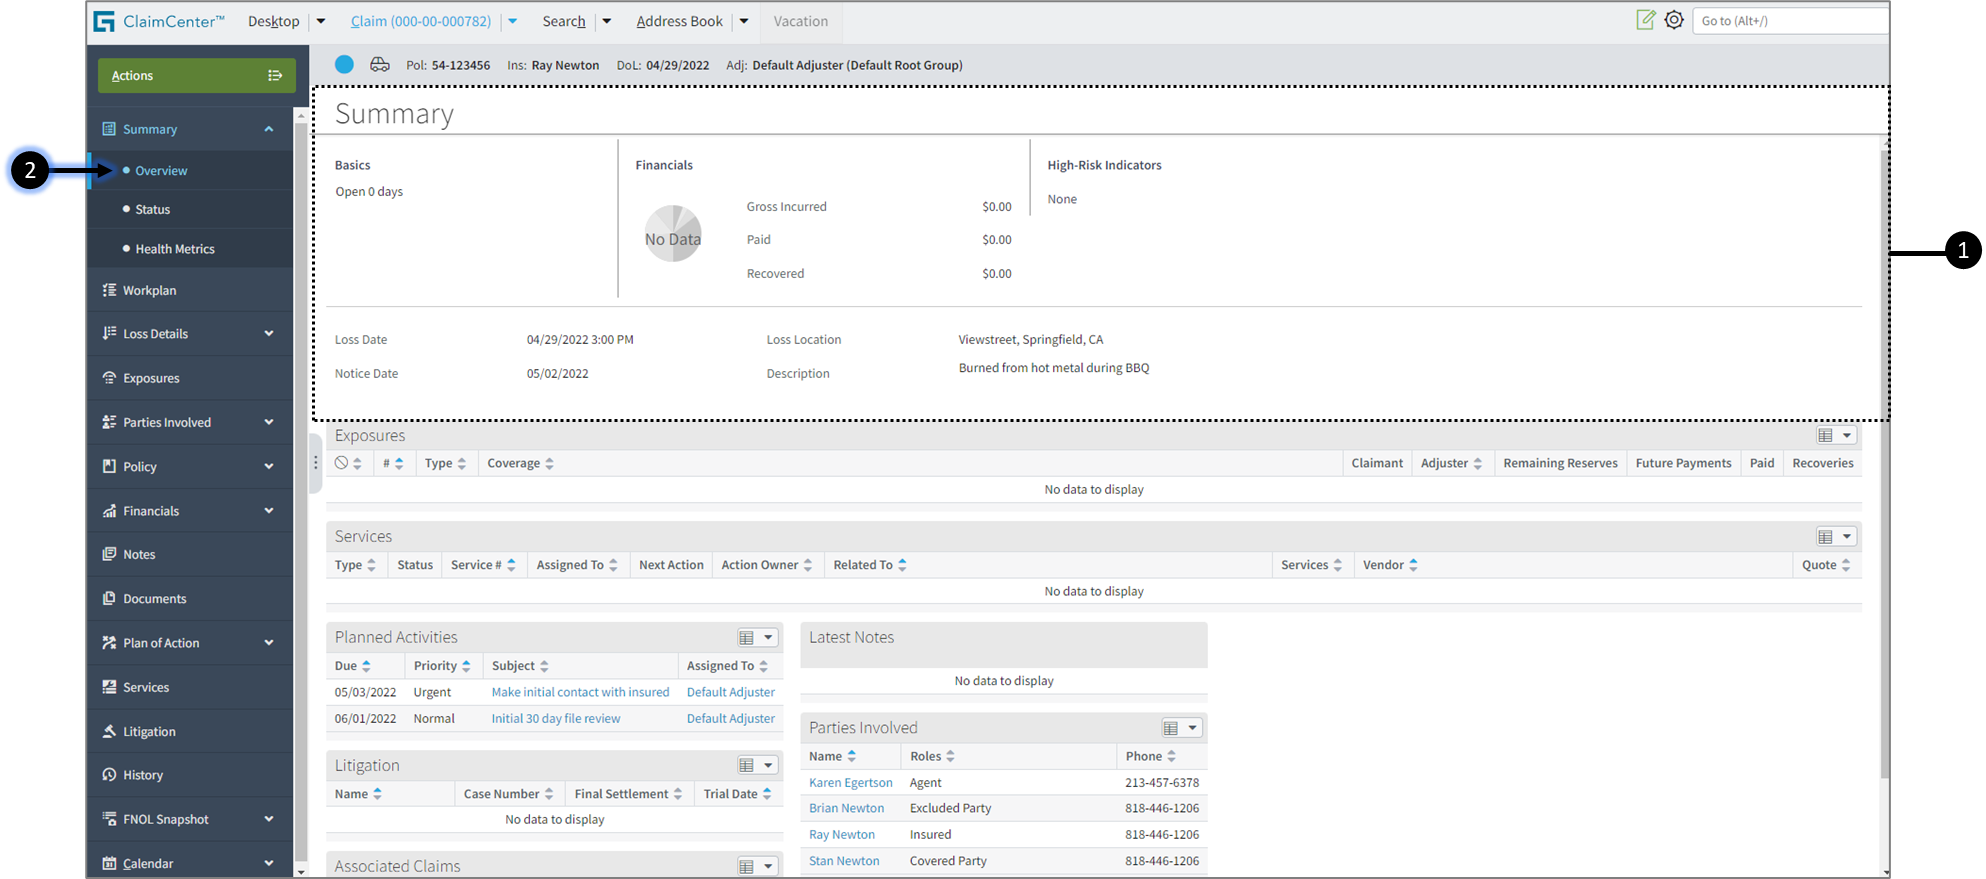
Figure 16: Claim Screen - Summary Section
- Claim screen - Loss Details section (1), under the General option (2).
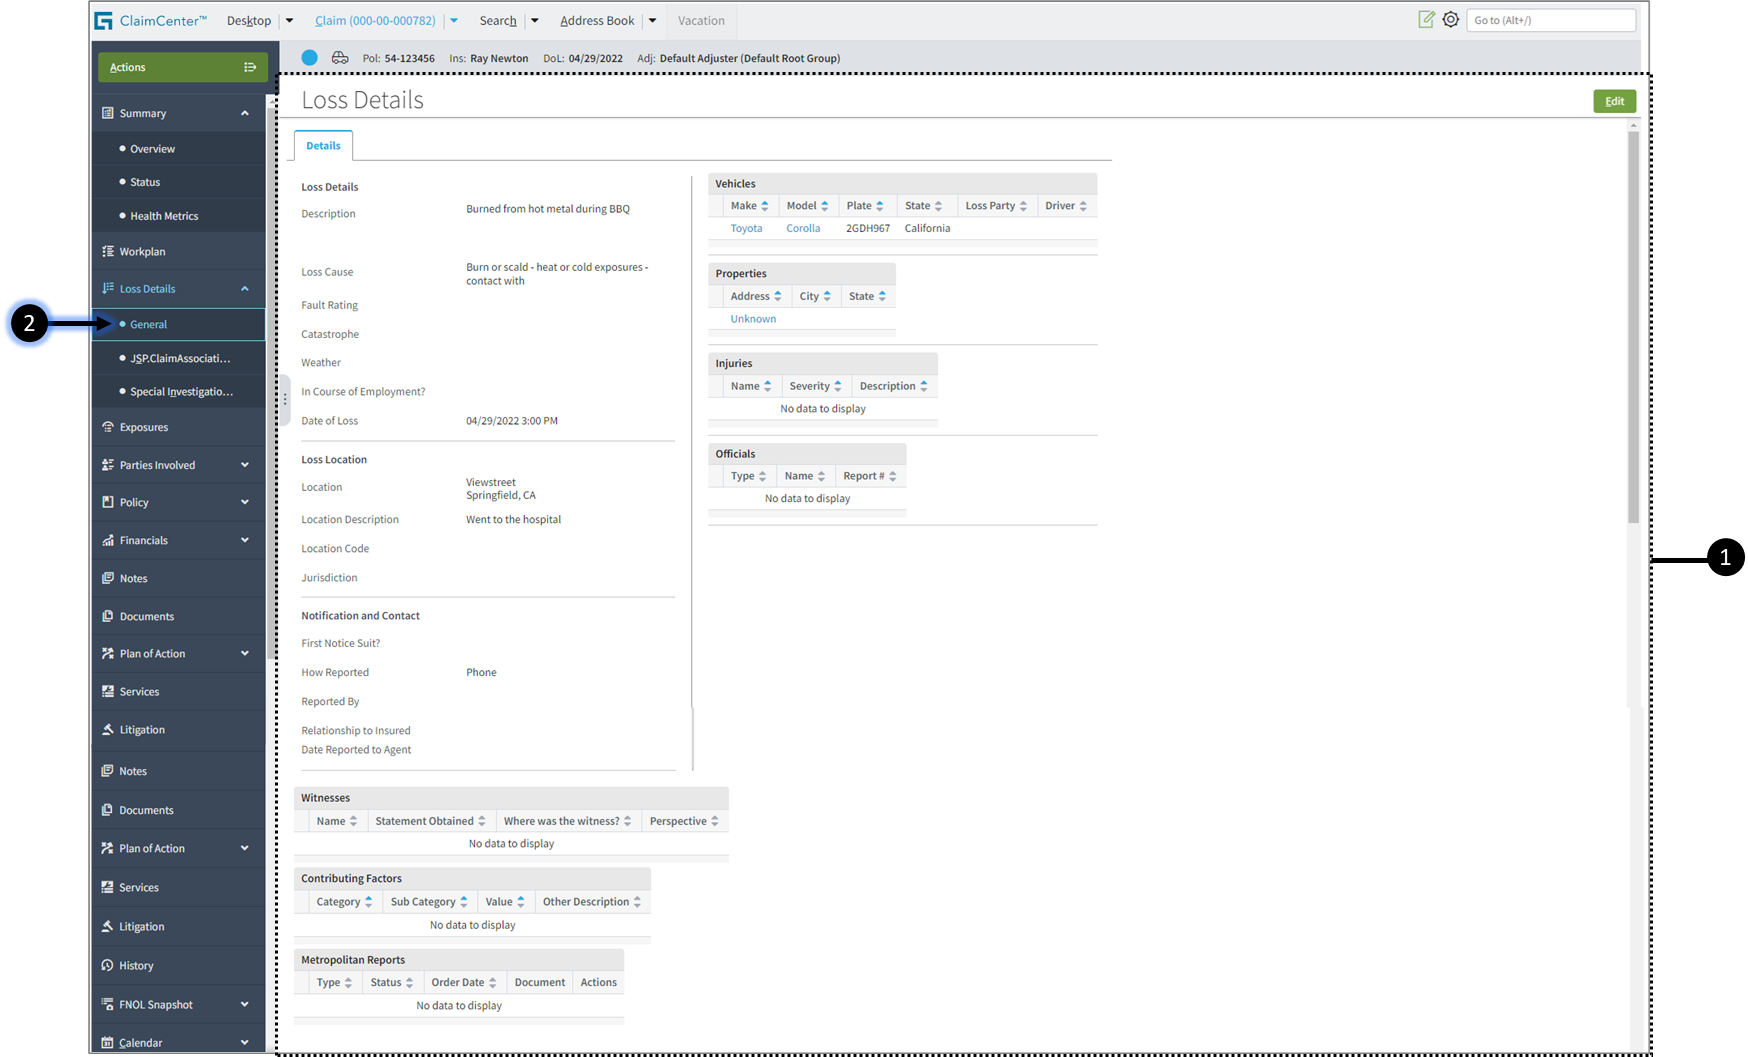
Figure 17: Claim Screen - Loss Details Section
EasySend Digital Process Status
(See Figure 18)
At any stage, the accelerator reflects the status of EasySend’s digital process via Guidewire’s ClaimCenter. The status is updated in a table according to the claimant’s interaction with the digital process.
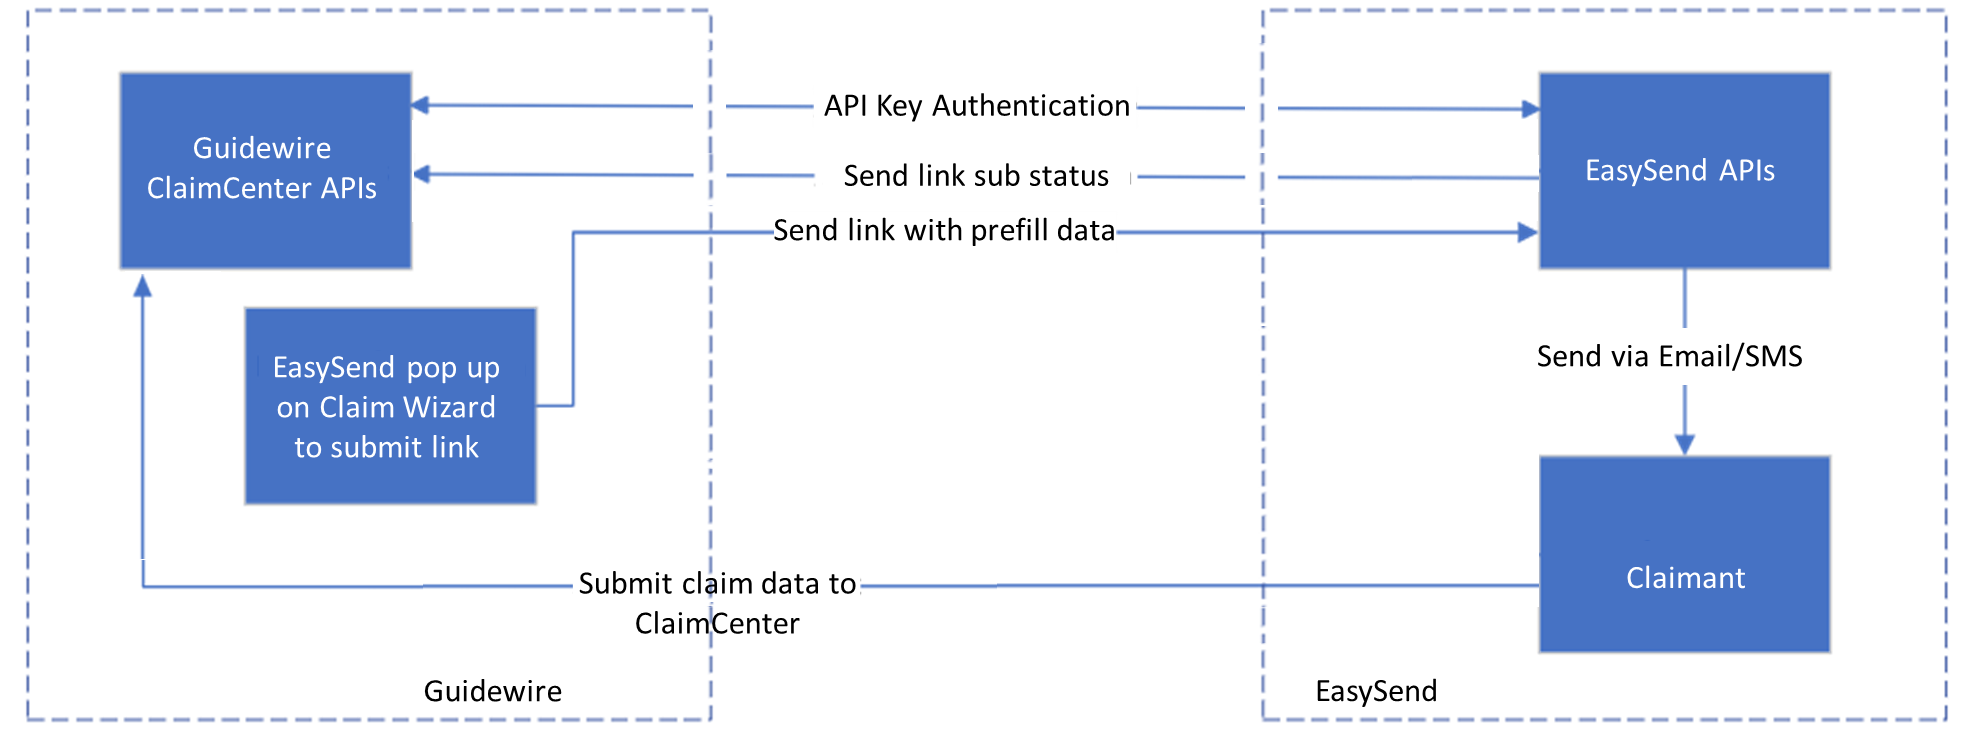
Figure 18: EasySend Links Status Updates
The updates are reflected on a table (1) located on the Desktop screen (2) under the Claims option (3).
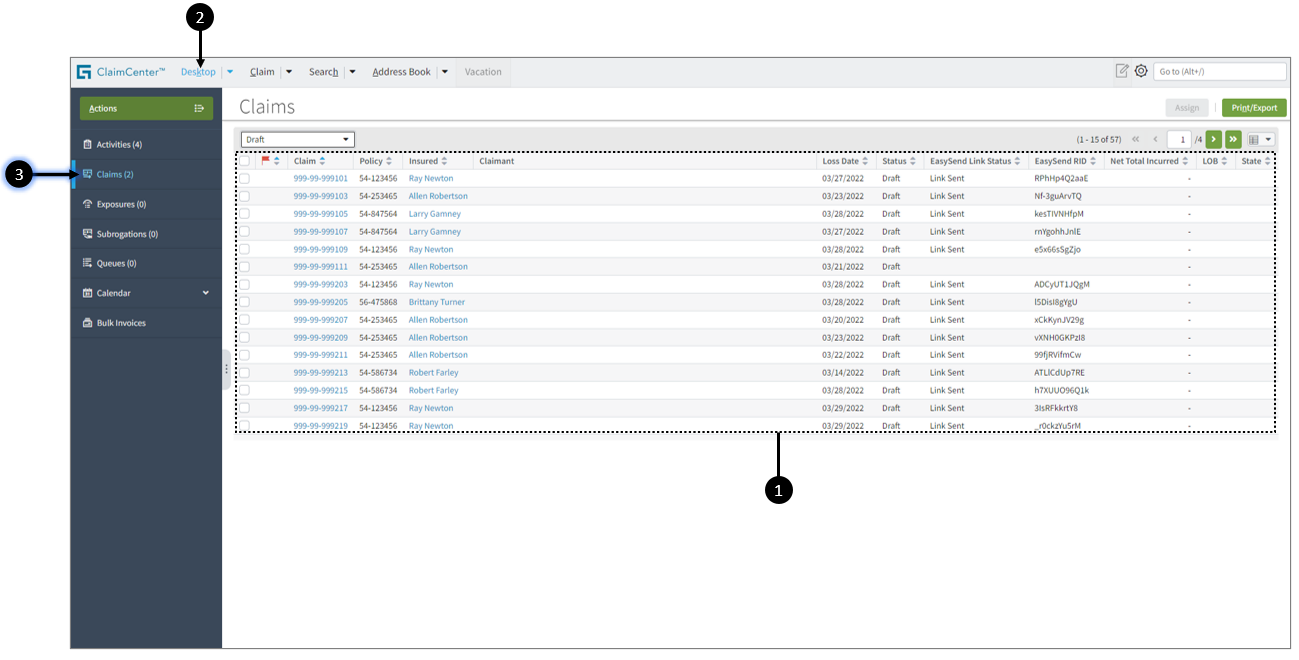
Figure 19: Claims Table
Claims Table Description
Figure 20 and Table 1 describe the structure of the claims table.

Figure 20: Claims Table Description
Table 1: Claims Table Description
Number | Name | Description |
| Claim Status Filter | Enables to filter the claims displayed on the table according to their status:
|
| Navigation | Enables to navigate within the claims table |
| Assign | Enables to assign a claim NOTE
|
| Print/Export | Enables to print or export the claims table:
|
| Columns Filter | Enables to add/remove columns from the claims table |
| List of Claims | Displays a list of claims with the following information:
|


Link Status and RID Information
(See Figure 21)
- EasySend Link Status - this field reflects the sub-status of the EasySend’s digital process. Upon the occurrence of one of the following events EasySend will call Guidewire’s ClaimCenter via API and update the EasySend Link Status field of the claim affiliated with the digital process:
- Link Sent - appears once an EasySend link is generated successfully and displayed on Guidewire’s ClaimCenter screen.
- Link Opened - appears once the link is opened by the claimant from an email or SMS.
- Completed - appears once a claim gets generated with the information passed from EasySend’s digital process.
- EasySend RID - The RID is a unique identifier of an EasySend digital process. A new RID is generated every time a digital process is previewed, and it is a part of its URL.
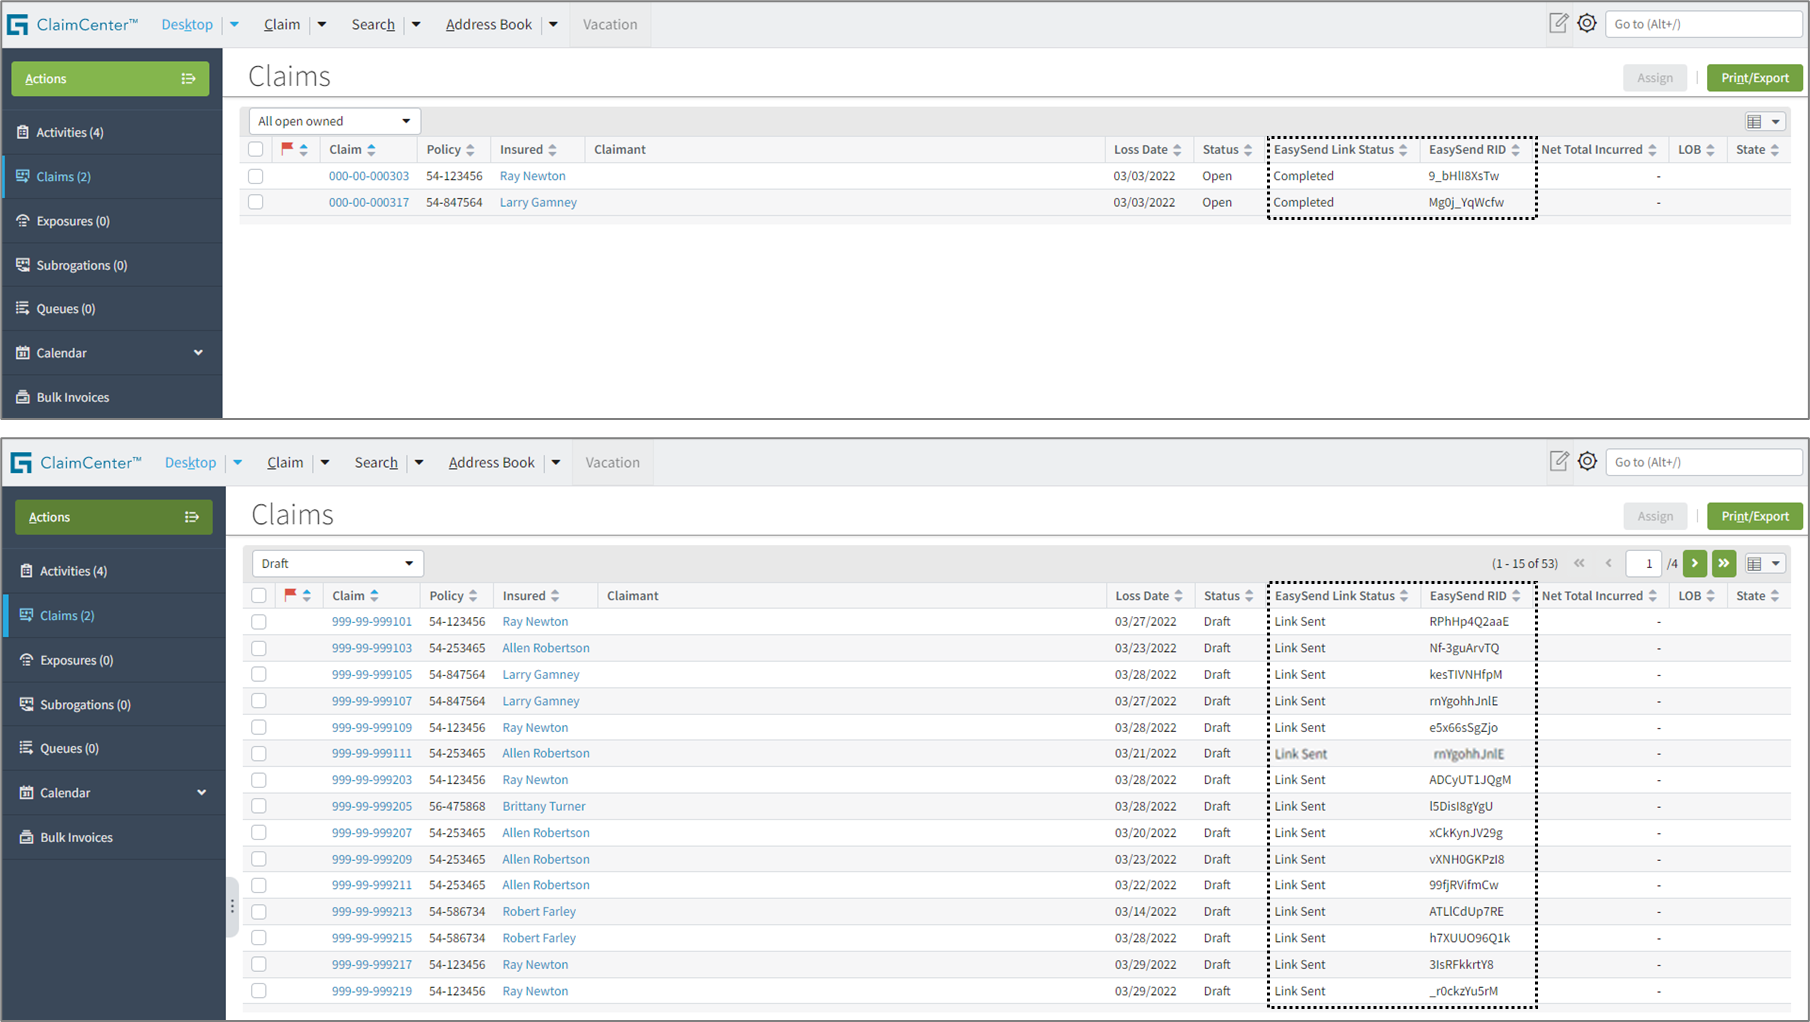
Figure 21: EasySend Link Status and RID