Article Overview
The following article describes how to add an EasySend sessions list for the first time.
Add the EasySend Sessions List (First Time)
(See Figure 1 to Figure 8)
To add the EasySend Sessions list to all relevant record pages for the first time, perform the following steps:
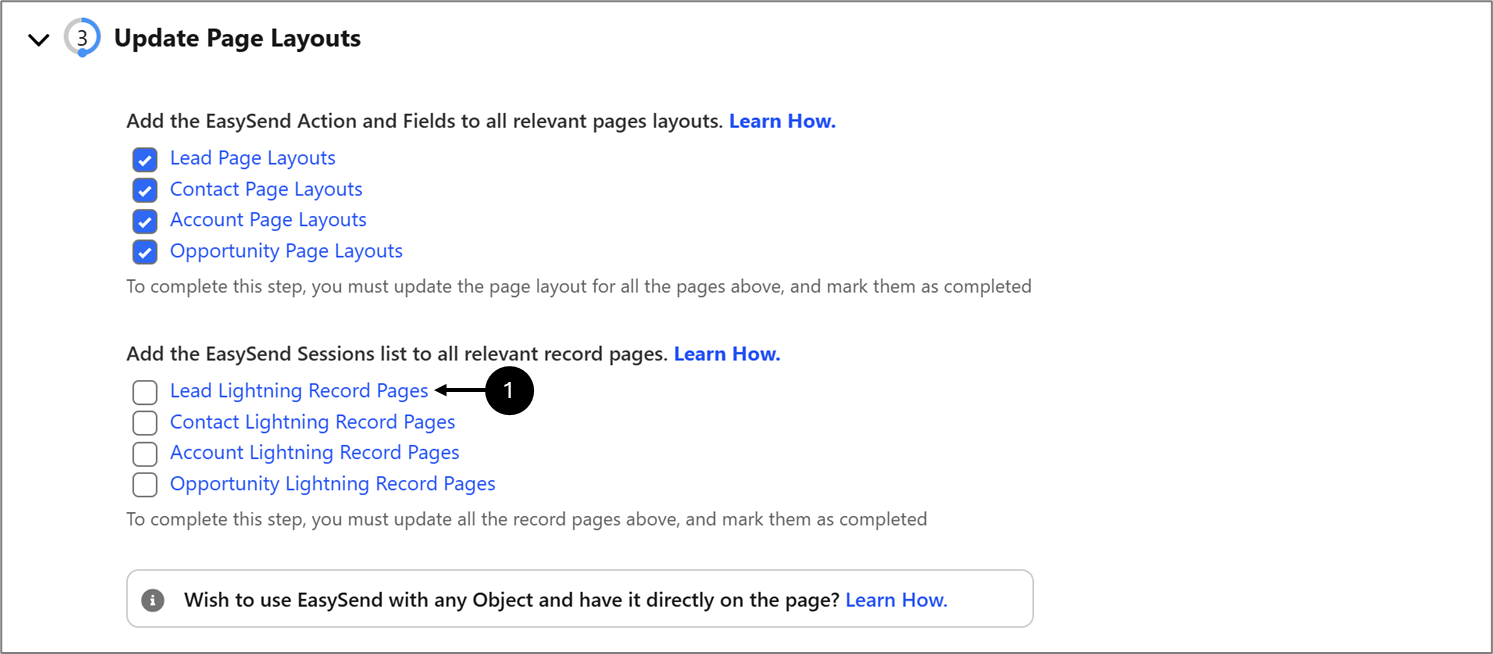
Figure 1: Lead Lightning Record Pages
- Click Lead Lightning Record Pages (1).
Result:
The Lighting Record Pages appears:
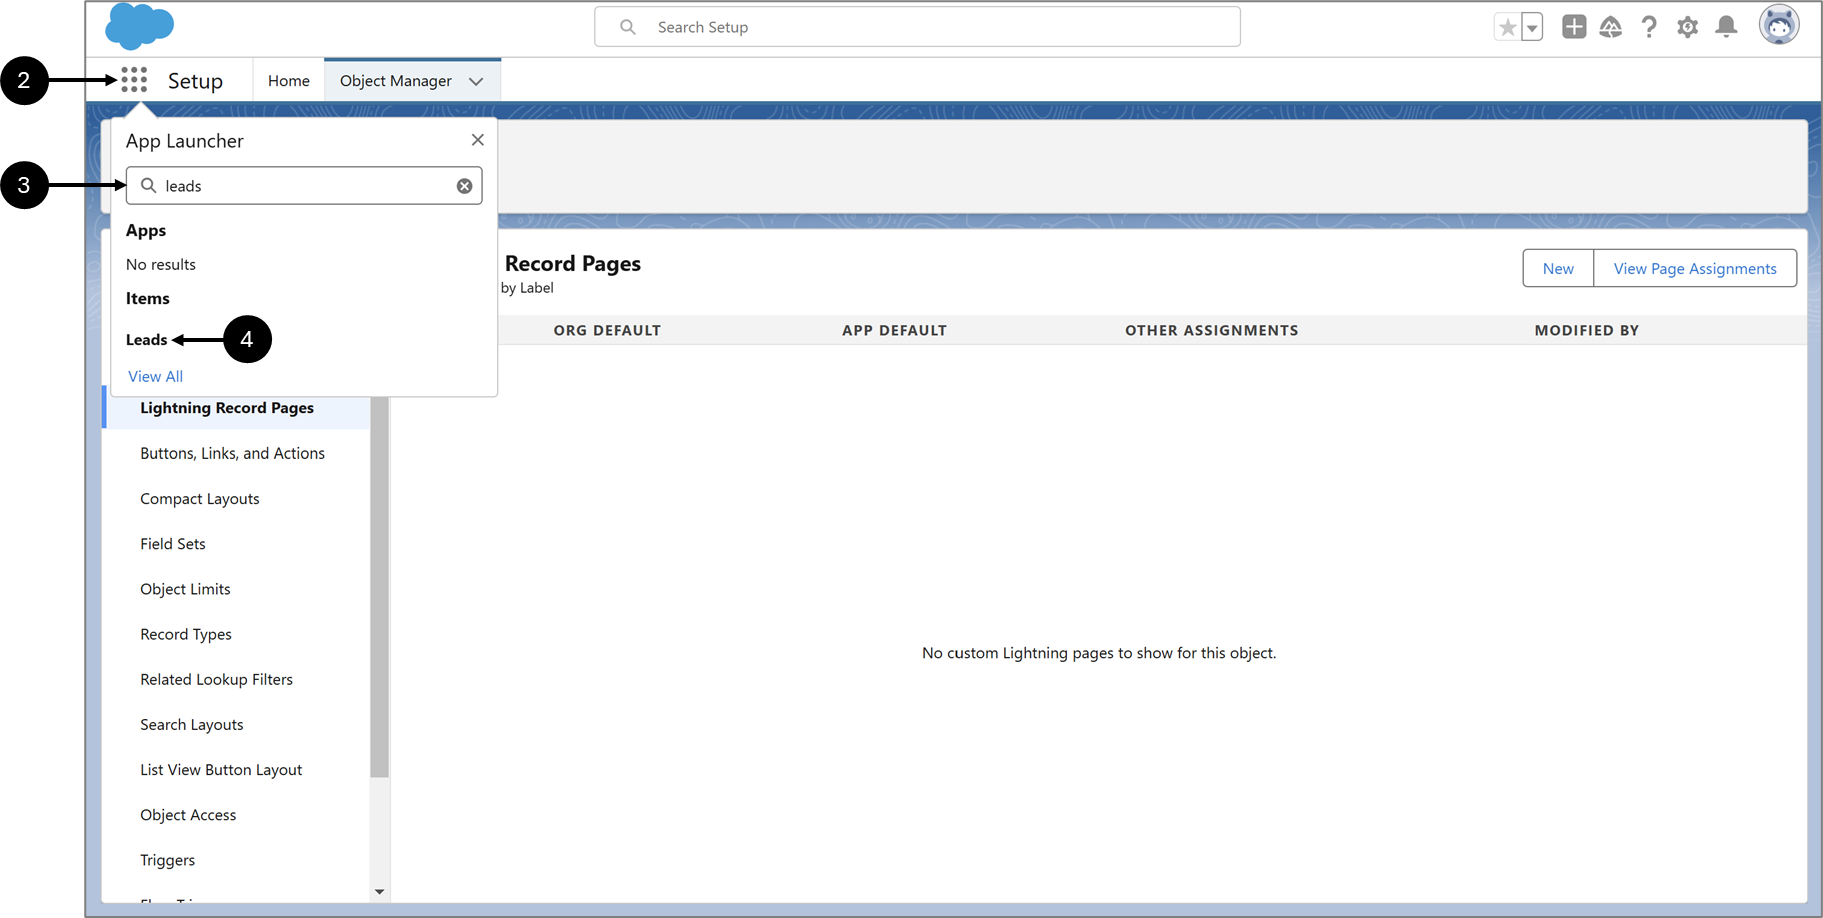
Figure 2: Empty Lightning Record Pages
- Click the icon (2).
- Search for leads (3).
- Click Leads (4).
Result:
The Leads page appears:

Figure 3: Leads Page
- Click the dropdown (5).
- Click a list view, for example, All Open Leads (6).
Result:
All open leads appear:
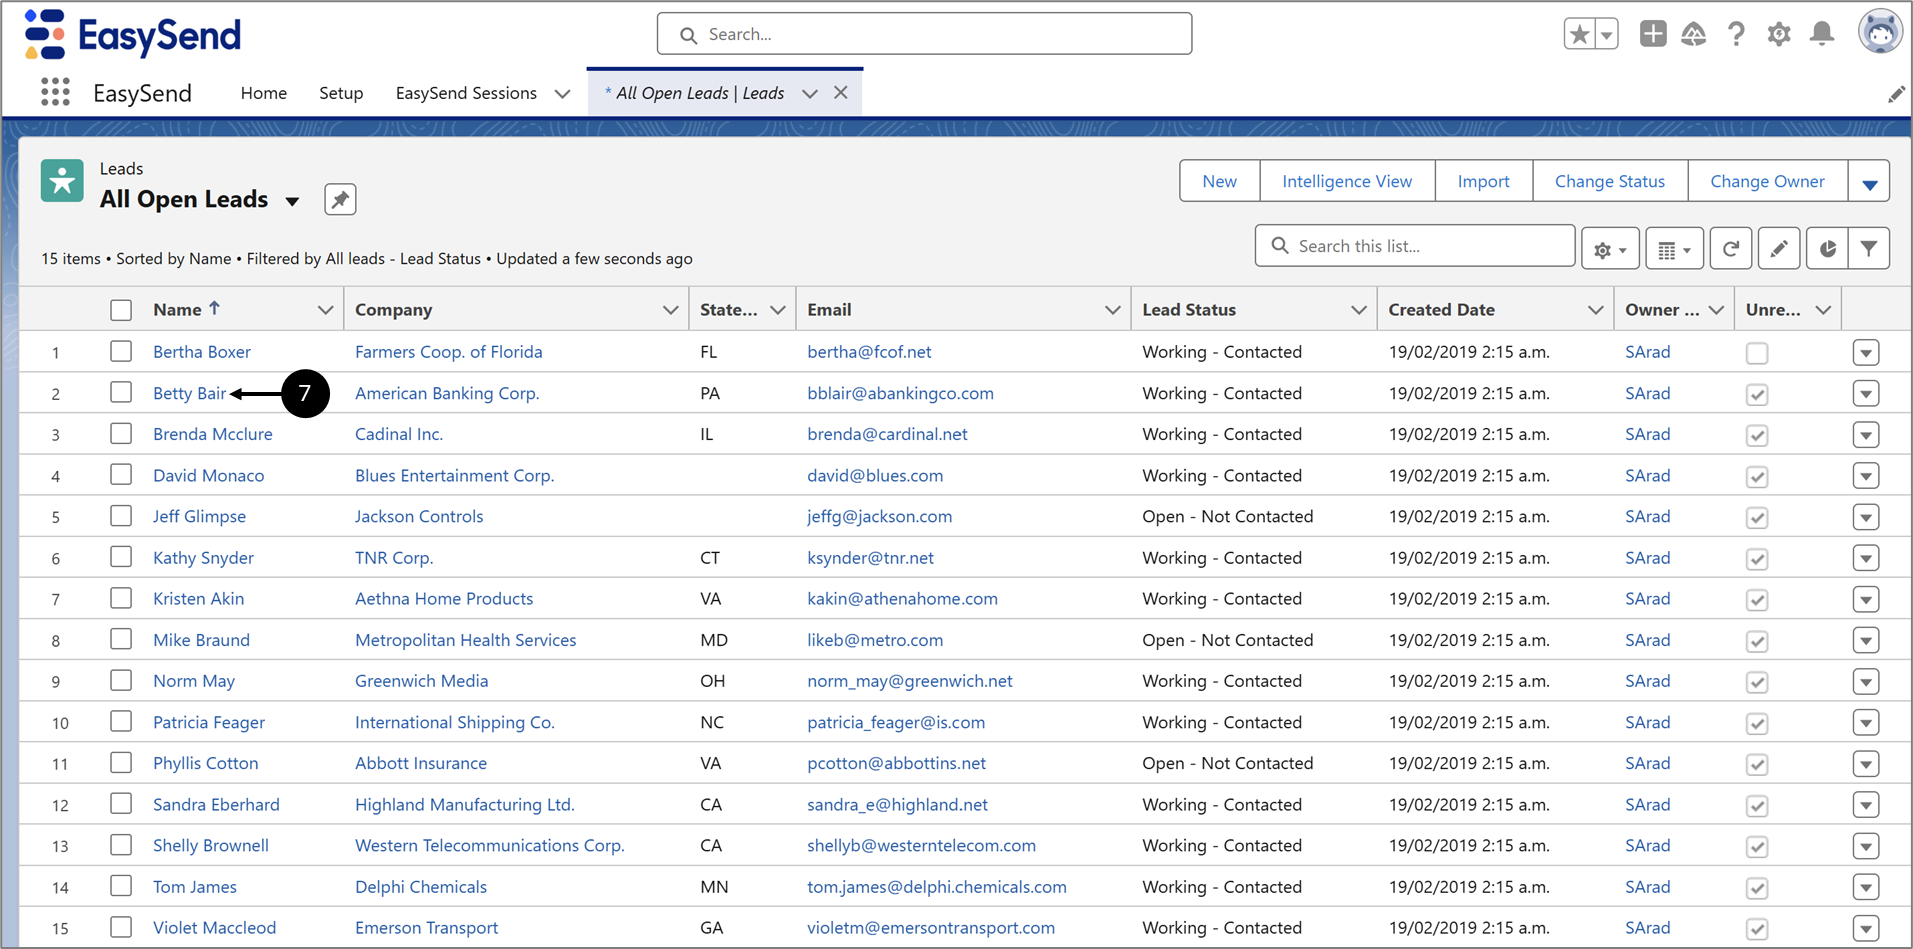
Figure 4: Leads
- Click the desired lead, for example (7).
Result:
The lead page appears:
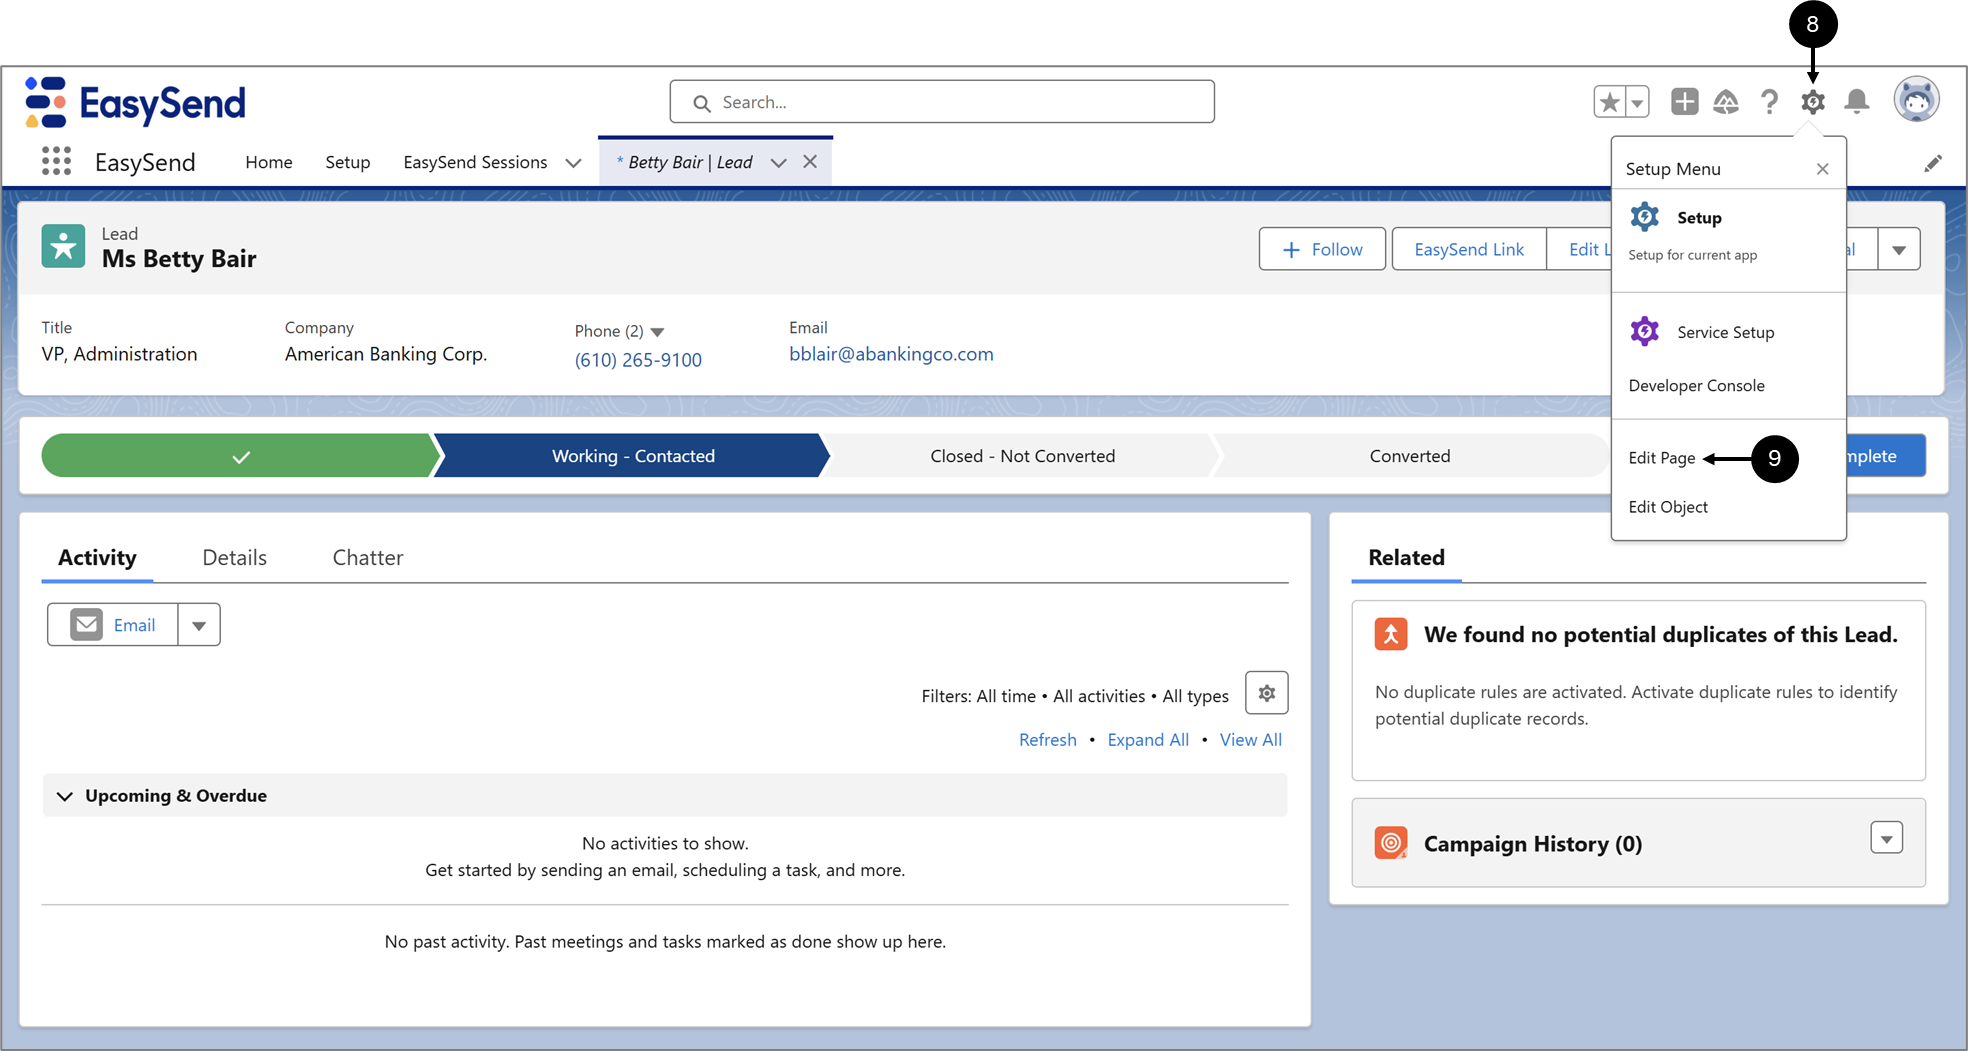
Figure 5: Lead Page
- Click the icon (8).
- Click Edit Page (9).
Result:
The Lightning App Builder appears:
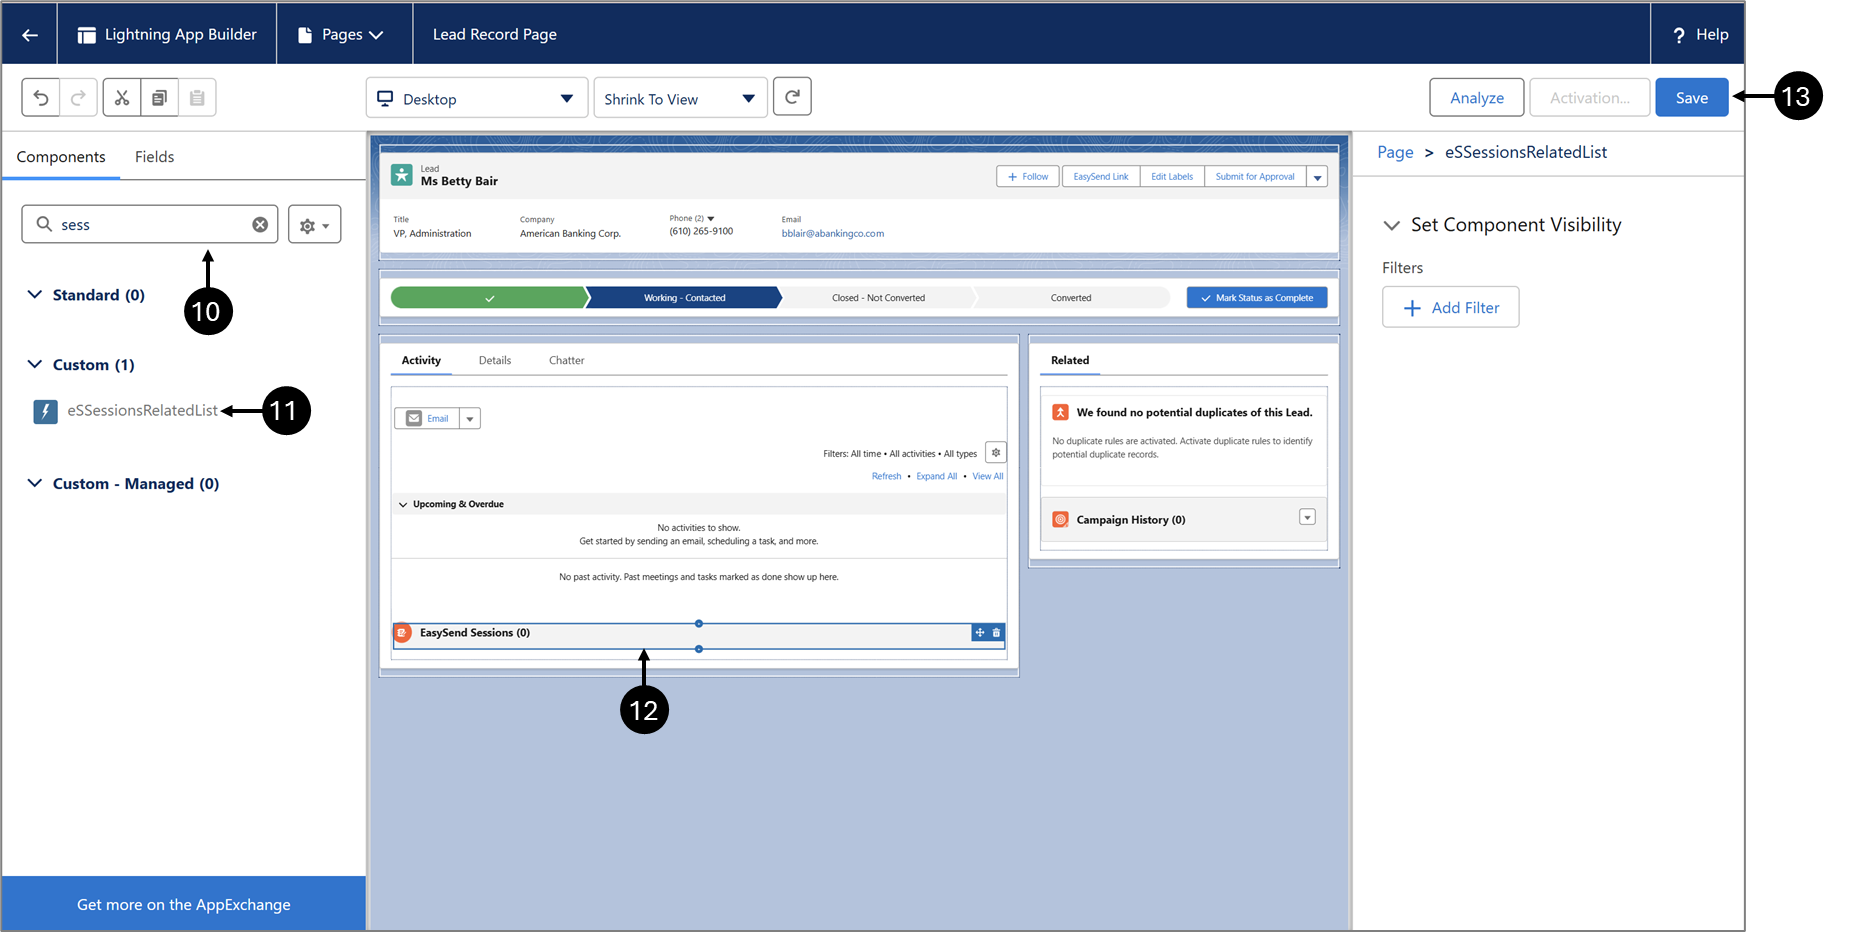
Figure 6: Lightning App Builder
- Search for sessions (10).
- Drag eSSessionsRelatedList (11).
- Drop eSSessionsRelatedList anywhere on the page (12).
- Click Save (13).
NOTE
If the following message appears:
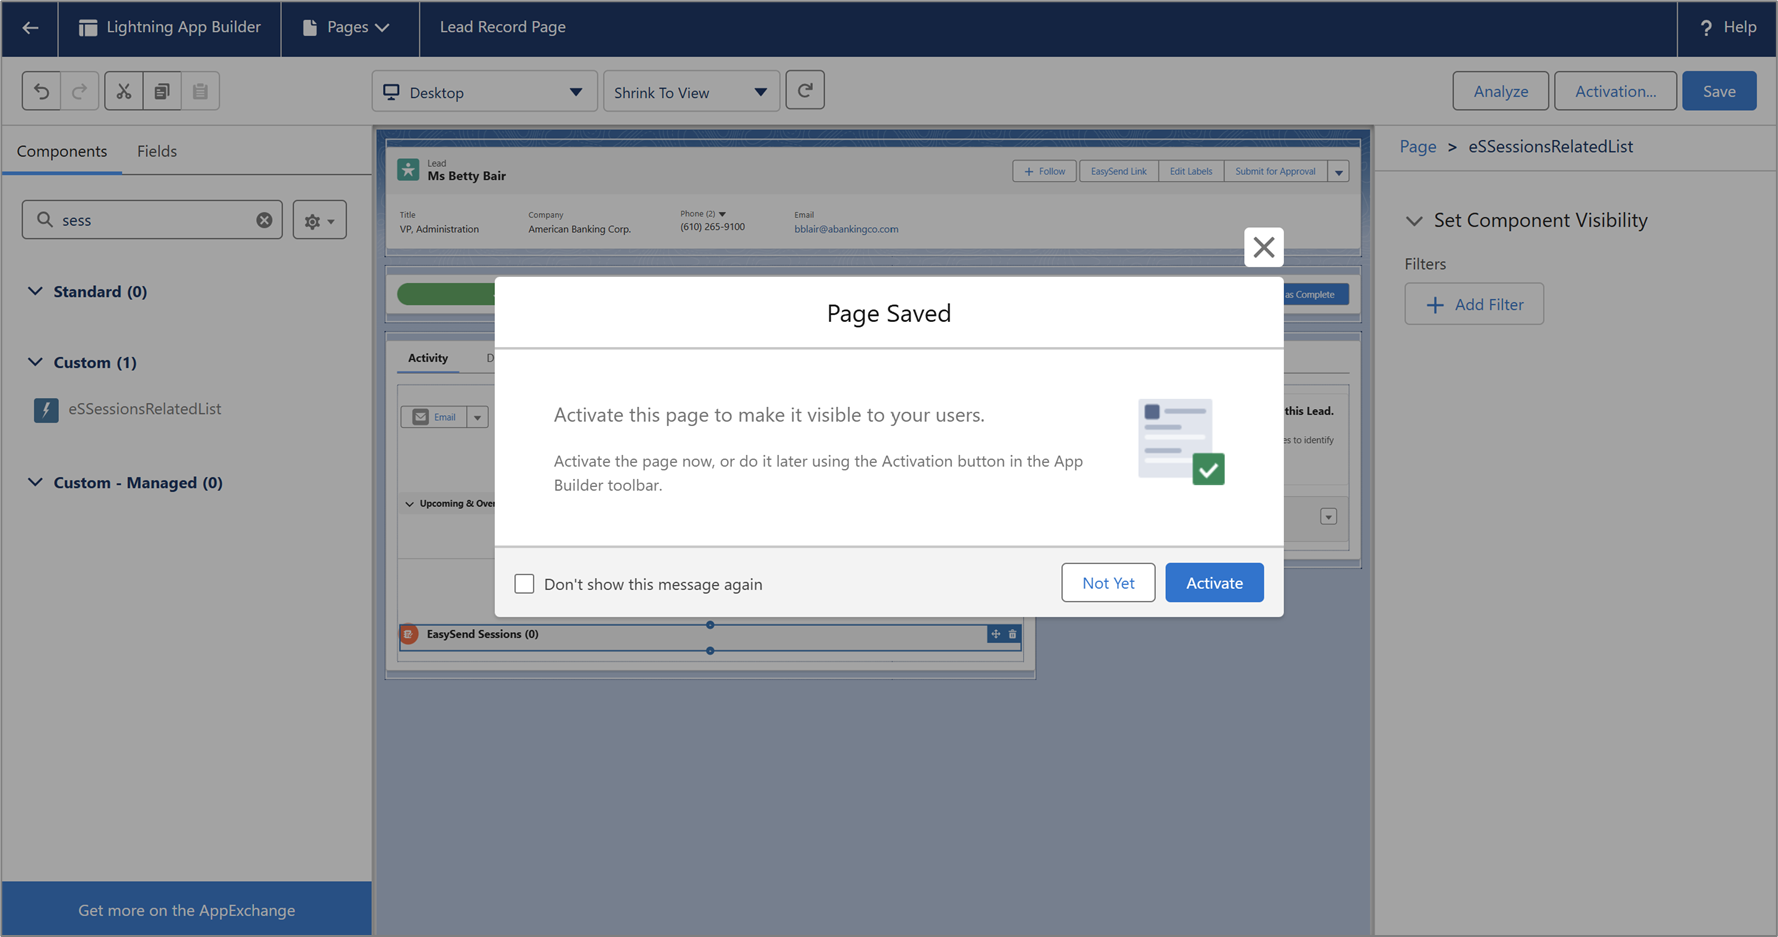
Click Activate and follow the instructions on the screen.
Click Activate and follow the instructions on the screen.
- Navigate back to Quick Setup and the Update Page Layouts section.
Result:
The Update Page Layouts section appears:
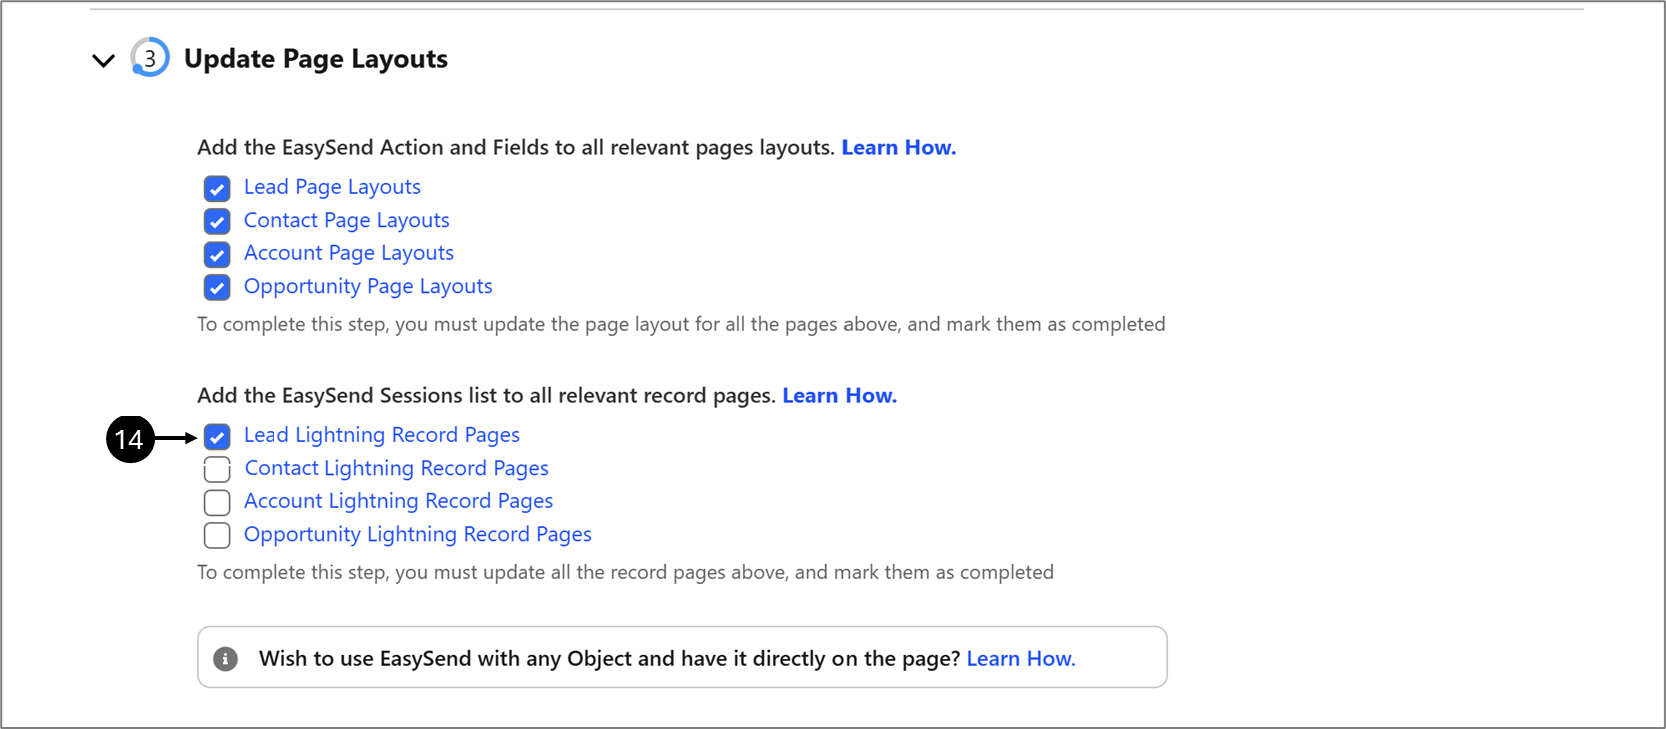
Figure 7: Lead Lightening Record Pages Checkbox
- Check the Lead Lightning Record Pages checkbox (14).
- Repeat Steps 1 to 15 for the Contact Lightning Record Page, Account Lightning Record Page, and Opportunity Lightning Record Page with the proper adjustments.
Result:
All the record pages are updated:
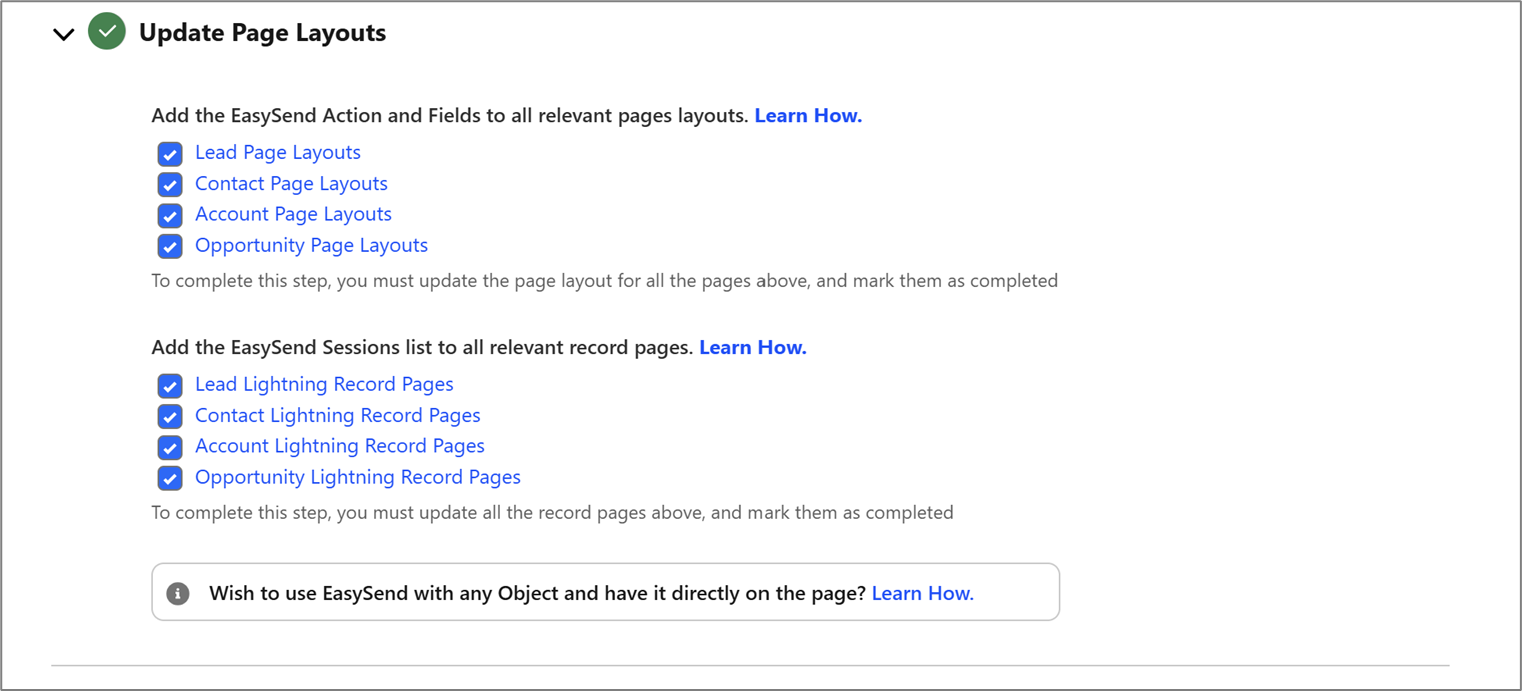
Figure 8: Updated Page Layouts