About this article
This article explains how to add EasySign signing to a Journey in the EasySend Builder. It covers:
- What EasySign for Journeys is and what the signer experiences
- The business value of building signing processes in Journeys
- Availability and prerequisites
- How to add EasySign to a Journey, step by step
- How to configure EasySign fields and the EasySign page
- What is planned next
Overview of EasySign for Journeys
(See Figure 1 and Figure 2)
EasySign is now part of Journeys. Builders can add a signing step to any Journey, so end users fill in and sign a document without leaving the Journey. In a Journey with EasySign, the end user:
- Completes the regular Webflow pages, for example, personal and employment details.
- Reaches the EasySign page, where the PDF opens with the data they already entered pre-filled.
- Fills in any remaining editable fields (text or checkbox) directly on the document.
- Taps the signature field and signs on the document.
- Submits and continues to the next page of the Journey.
EasySign is set up in two places in the Builder:
- Documents tab – upload the PDF and draw EasySign fields on it.
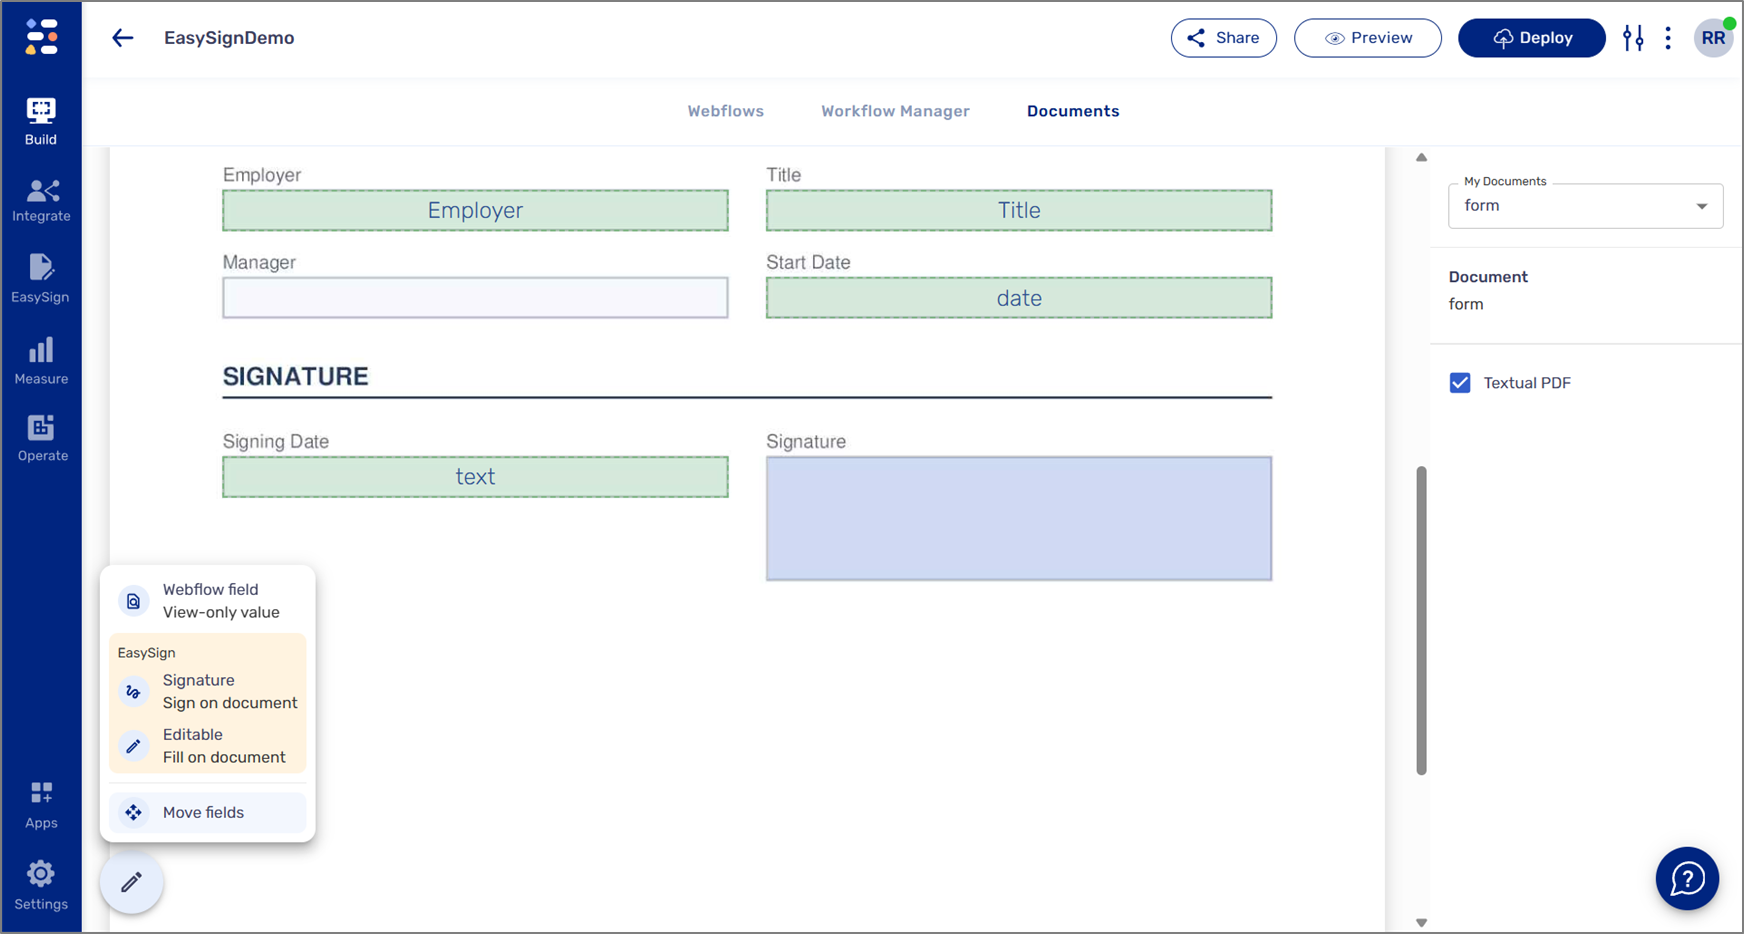
Figure 1: Documents Tab
- Webflows tab – add an EasySign page and connect the document to it.
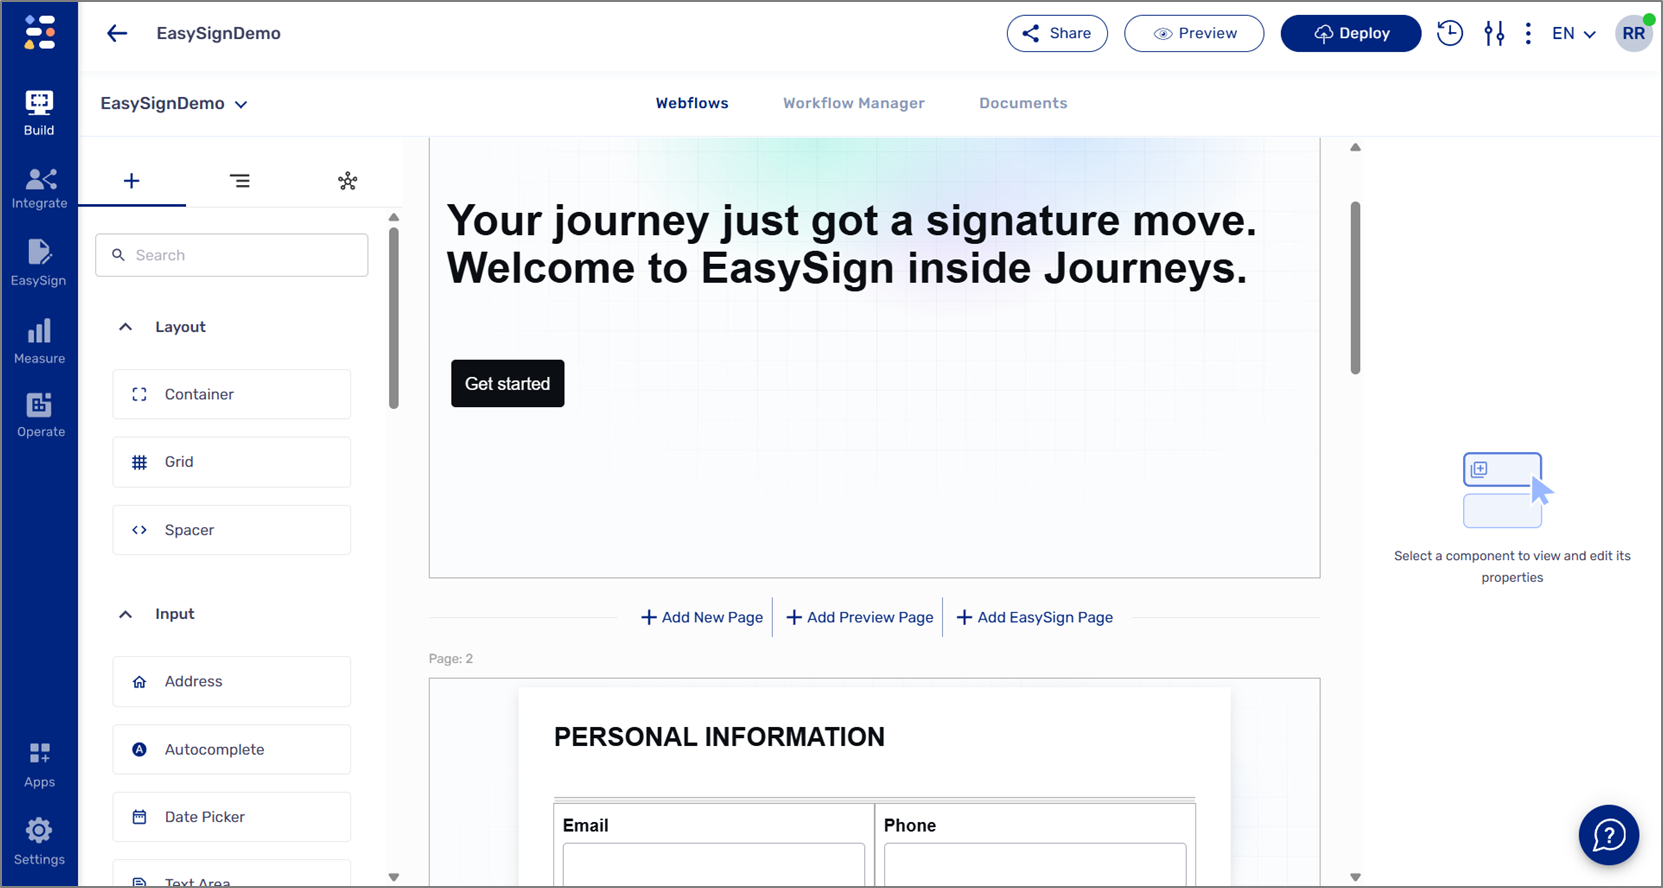
Figure 2: Webflow Tab
Business value
Building signing processes in Journeys gives EasySign everything Journeys already offers.
- Full Journeys capabilities – Use the advanced orchestration and configuration options available in Journeys around the signing step.
- DIM capabilities – Build and manage processes in a visual flow, with a clear overview of all steps and participants. Processes can be sent in parallel or sequentially.
- Validations – Apply different types of validations to text fields.
- Ops Portal – Get more visibility and information about EasySign processes.
- One continuous experience – End users fill in forms and sign in the same Journey, with their answers pre-filled on the document. There is no re-typing and no hand-off to a separate signing tool.
- Less manual mapping – Data collected in Webflow pages flows straight into document fields, which reduces errors.
Going forward, all new customers and existing customers creating new processes should use EasySign in Journeys.
Availability and prerequisites
EasySign for Journeys is available from Player version 59.6.3. Before you start, you need:
- A Journey (Webflow) in the Builder.
- The PDF document you want users to fill and sign.
How to add EasySign to a Journey
The following sections describe how to add EasySign to a Journey.
Step 1: Upload a PDF under Documents
(See Figure 3)
- Open your Journey in the Builder and go to Build.
- Select the Documents tab at the top of the screen.
- Upload your PDF.
- If the PDF contains selectable text, keep Textual PDF selected.
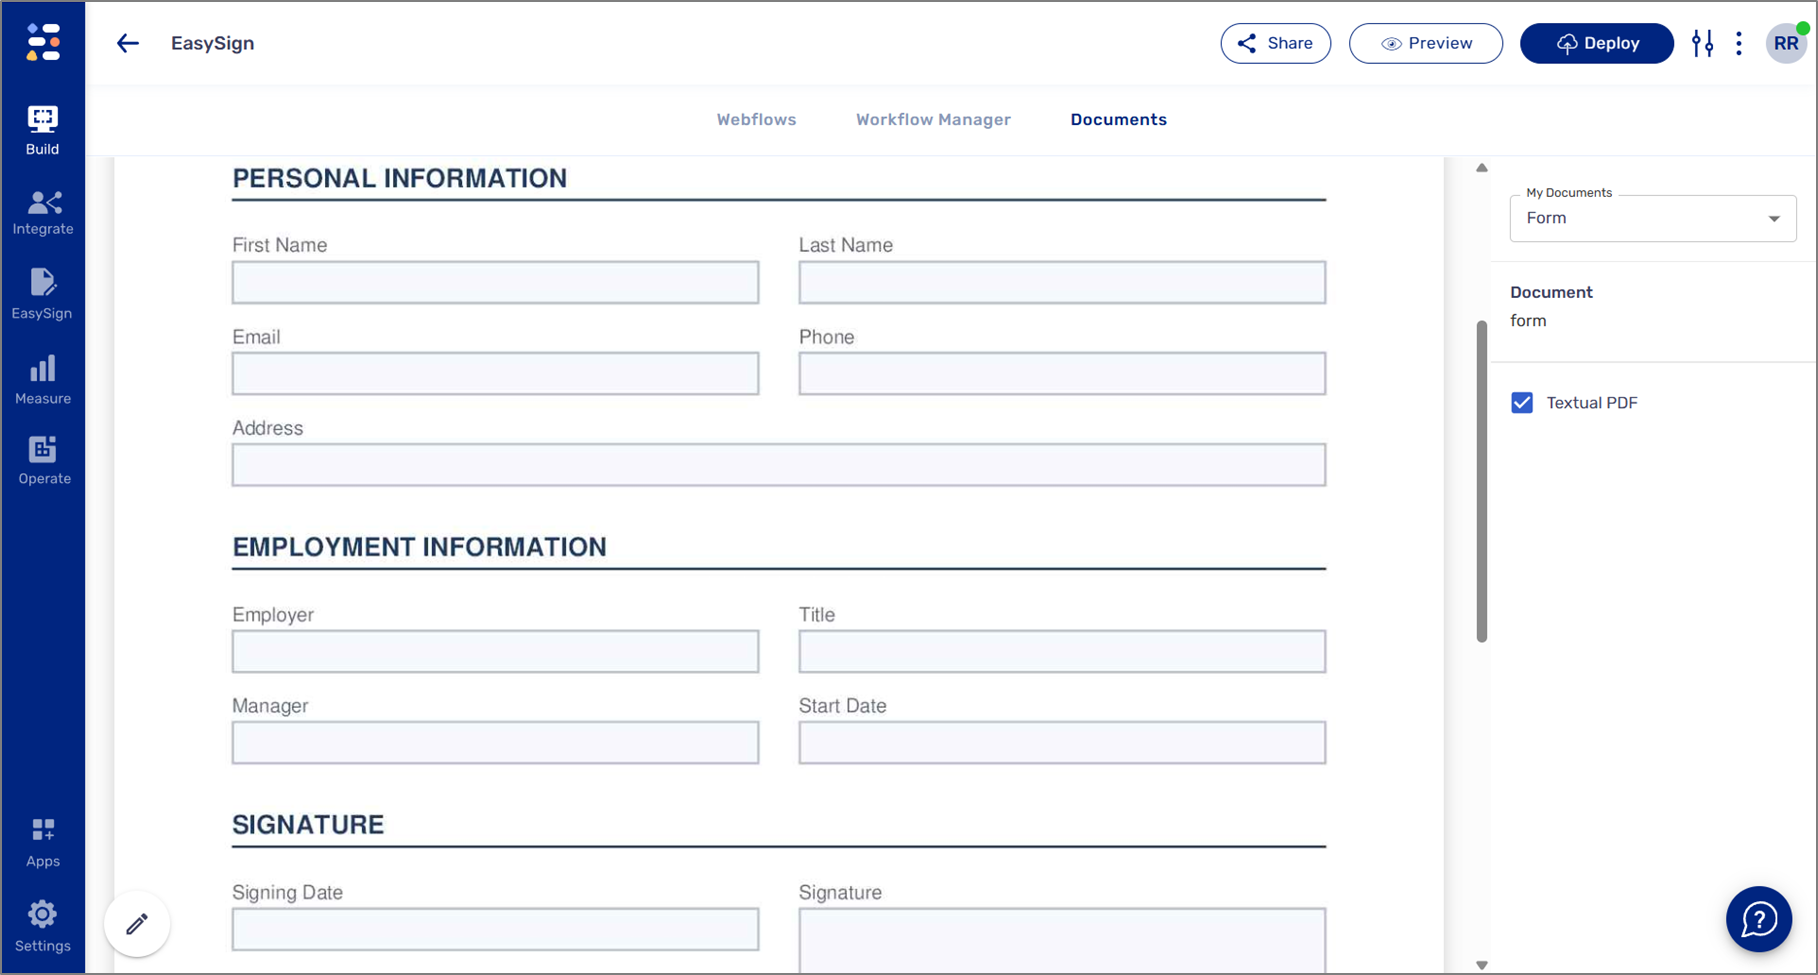
Figure 3: Upload a PDF
Step 2: Add EasySign fields to the document
(See Figure 4)
- In the Documents tab, select the document from My Documents.
- Click the pencil (edit) button at the bottom-left of the canvas to open the field menu.
- Choose an EasySign field type:
- Signature – Sign on document.
- Editable – Fill on document (Text or Checkbox).
- Drag on the document to draw the field where it should appear.
- Set the field properties in the right panel (see How to configure EasySign).
- To reposition fields, choose Move fields from the same menu.
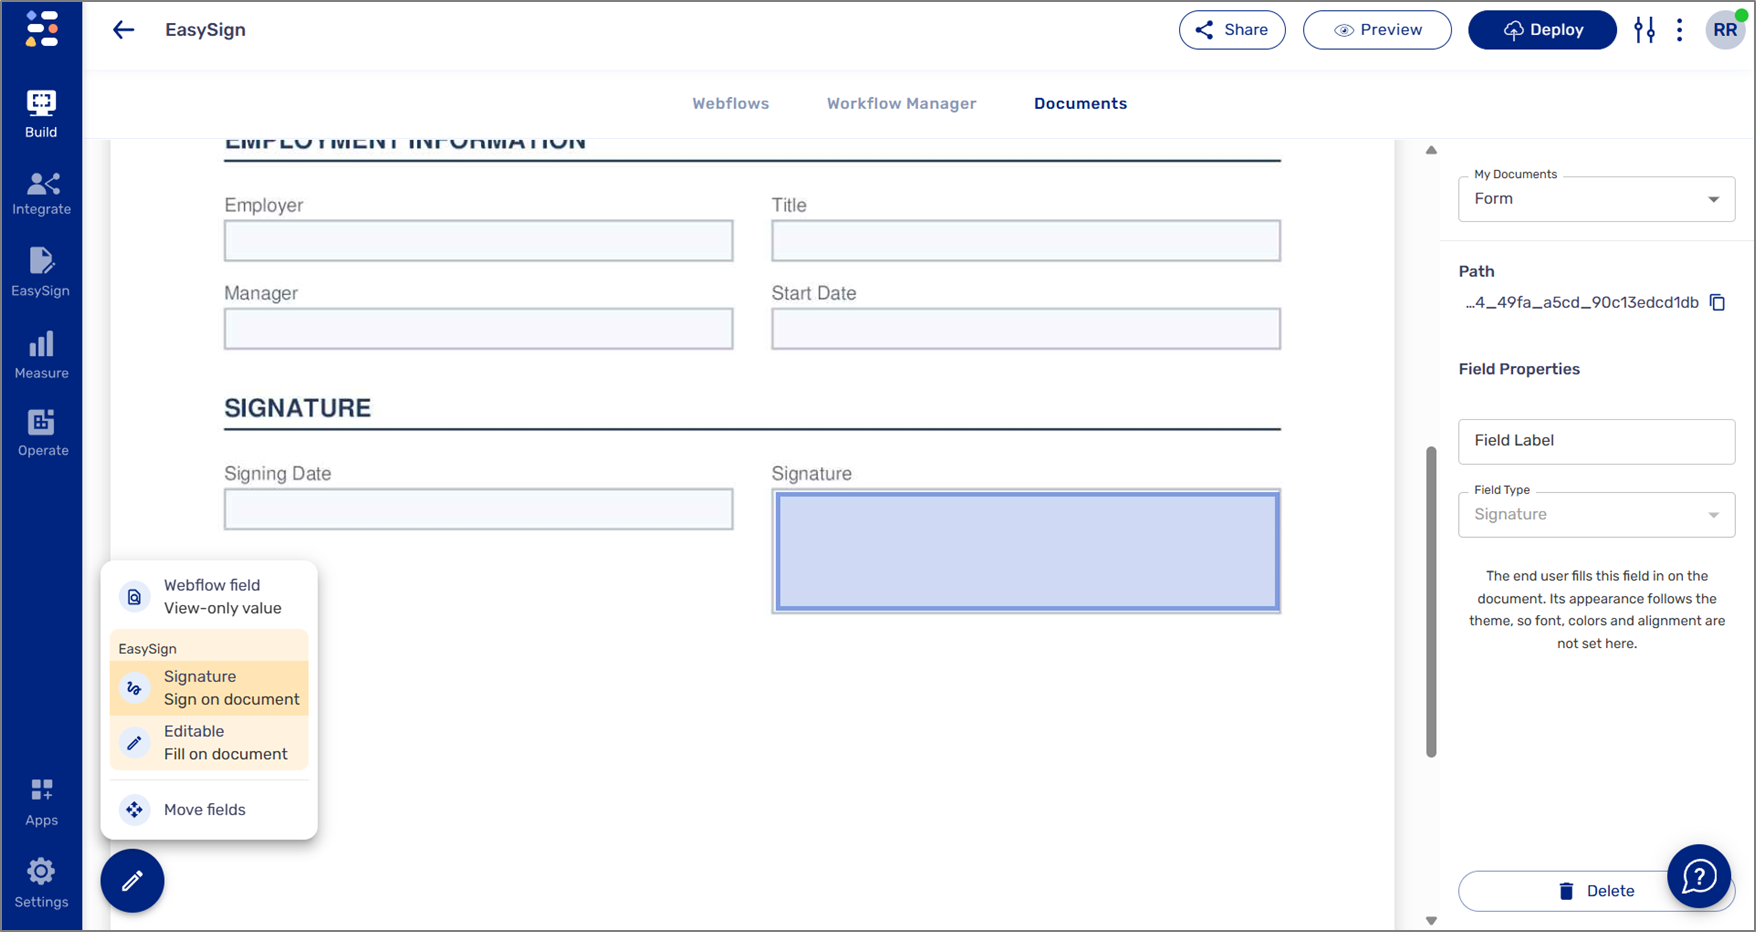
Figure 4: Add EasySign Fields
Step 3: Add an EasySign page in the Webflow
(See Figure 5)
- Go to the Webflows tab.
- Between two pages, click + Add EasySign Page.
- Select the new EasySign page. In the right panel, under Documents, click the edit (pencil) icon.
- In Edit Documents, choose your document.
- Click Save.
- Deploy and Preview the Journey.
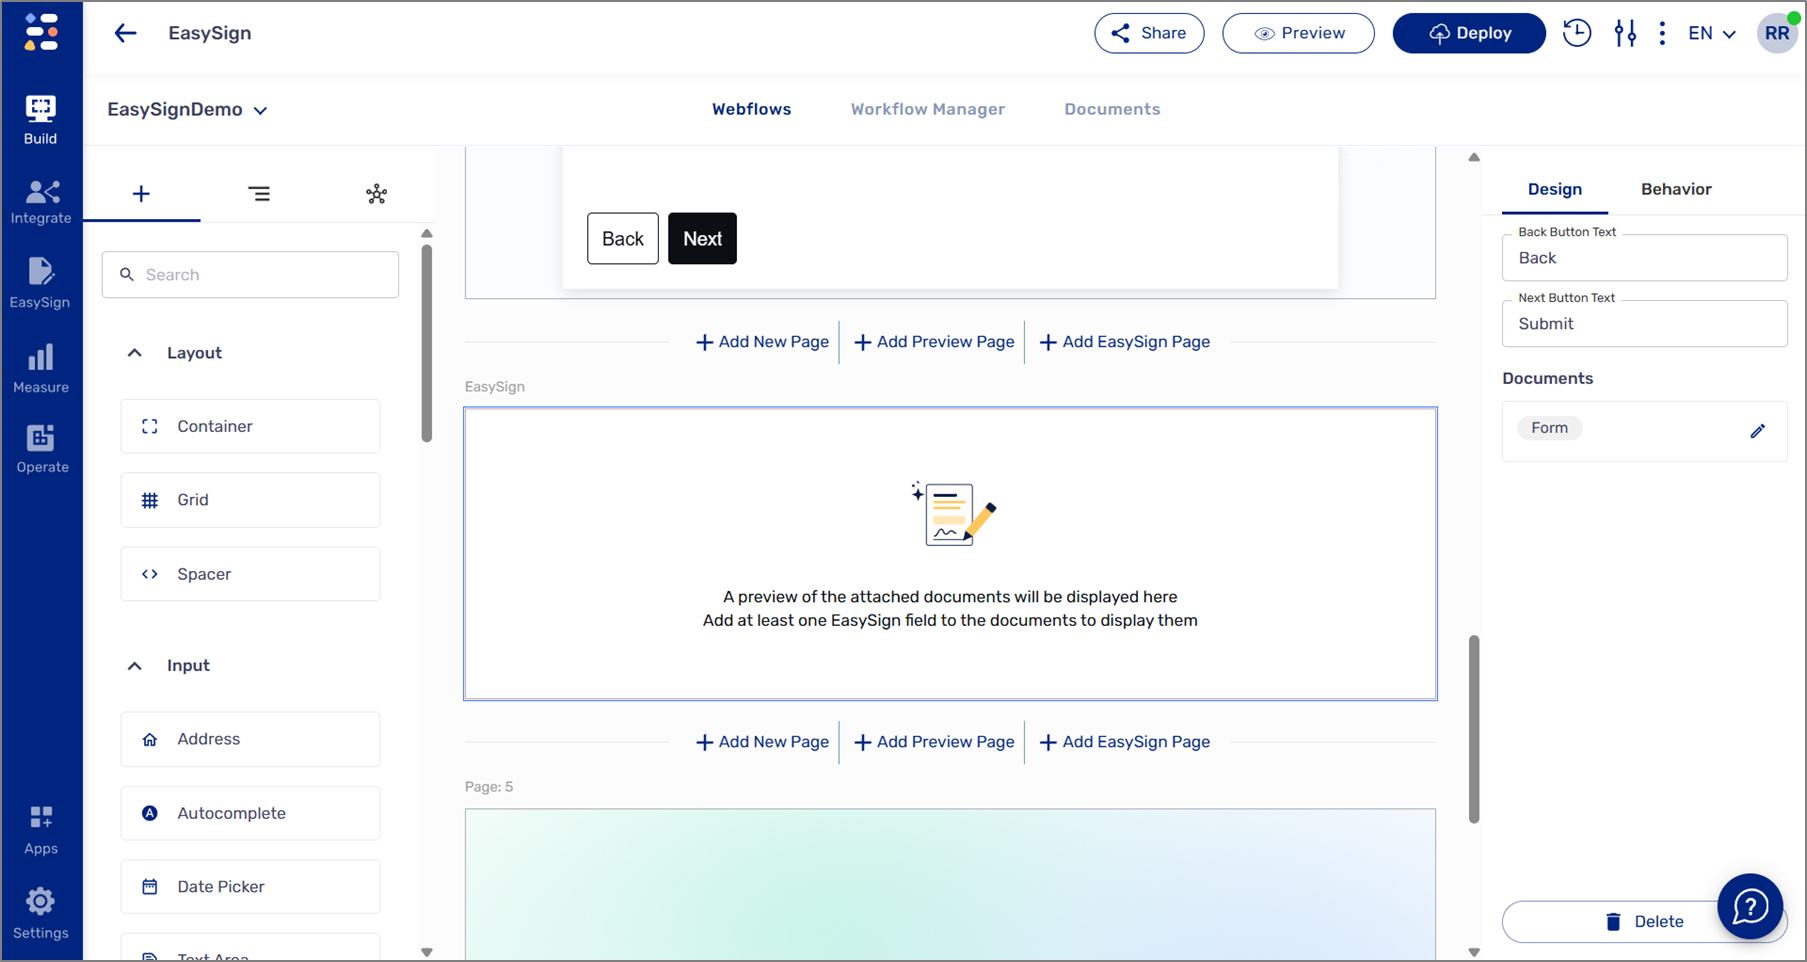
Figure 5: Add an EasySign Page
How to configure EasySign
Each field type has its own settings in the Field Properties panel. Select a field on the document to see them.
Field types
Field type | Who fills it | Where the value comes from | Settings |
|---|---|---|---|
Signature | End user, on the document | User signs on the EasySign page | Field Label |
Editable – Text | End user, on the document | User types on the EasySign page | Field Label, Field Type, validations |
Editable – Checkbox | End user, on the document | User checks on the EasySign page | Field Label, Field Type |
Webflow field | Pre-filled, view-only | Data collected in earlier Webflow pages | Field Label, Connect field, Font Size, Font Color, Background Color, alignment, Multi-line |
Configuring Signature and Editable fields
(See Figure 6)
- Path – A unique ID for the field, shown at the top of the panel. Use the copy icon to copy it.
- Field Label – A name for the field.
- Field Type – For Editable fields, choose Text or Checkbox. Signature fields are fixed as Signature.
- Appearance – These fields follow the Journey theme, so font, colors, and alignment are not set here.
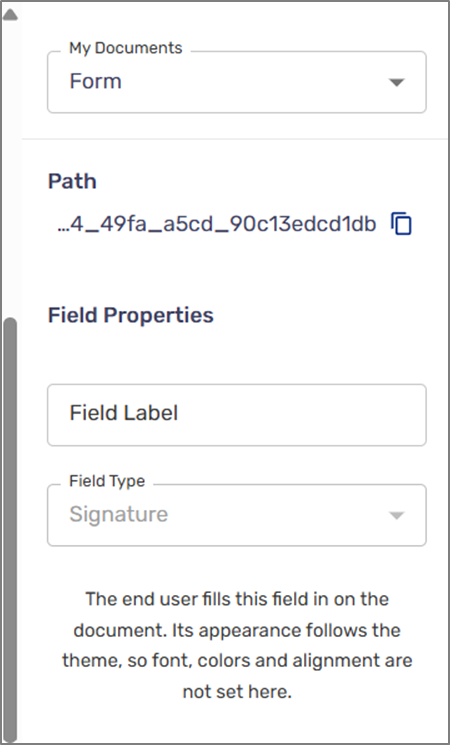
Figure 6: Configuring EasySign Fields
Configuring Webflow fields
(See Figure 7)
- Connect field – Search for and select the data field to display, for example
page_0.emailorpage_1.employer. Unconnected fields show in red on the document; connected fields show in green. - Font Size, Font Color and Background Color – Control how the value looks on the document.
- Alignment – Set horizontal (left, center, right) and vertical (top, middle, bottom) alignment.
- Multi-line – Allow the value to wrap across lines.
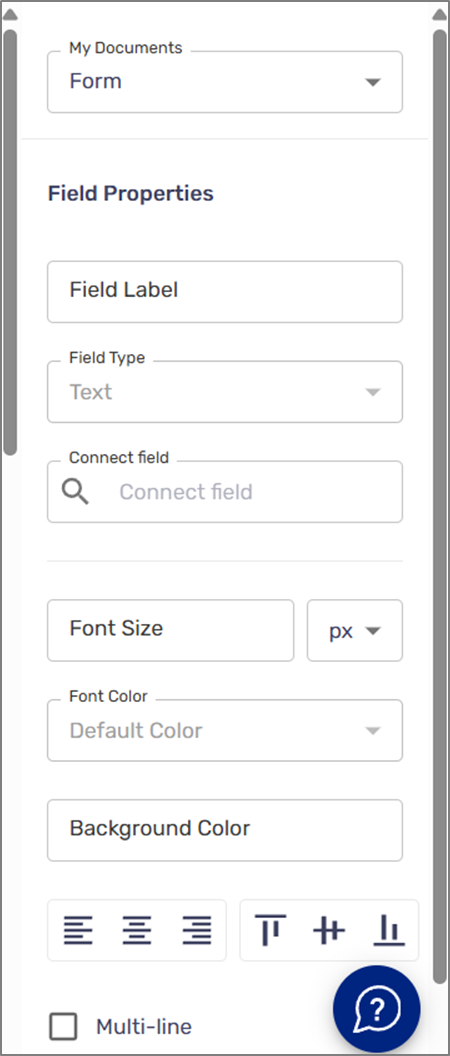
Figure 7: Configuring Webflow Fields
Configuring the EasySign page
(See Figure 8)
Select the EasySign page in the Webflows tab to edit its settings in the right panel.
- Design tab – Set Back Button Text and Next Button Text (for example, Submit), and manage the attached Documents.
- Behavior tab – Page behavior settings.
If the attached document has no EasySign fields, the panel shows a red message asking you to draw EasySign fields in the Documents tab first.
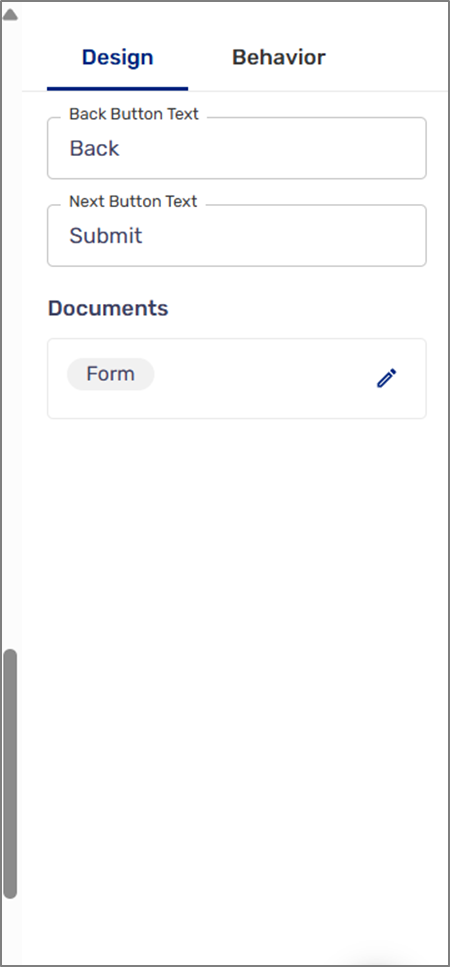
Figure 8: Configuring EasySign Page
What's coming next
We're continuing to expand the EasySign experience in Journeys. Planned improvements include:
- Roles – Define a role for each field.
- Field validations – More validation options and more control over fields.
- Placeholders and descriptions – Add a placeholder to each field and descriptions that guide signers.
- Player improvements – A more intuitive, user-friendly signing experience.
Bringing EasySign into Journeys also lays the foundation for future AI-powered capabilities.