- PDF
Digital Process - Deploy and Preview
- PDF
Article Overview
The following article provides information about deploying your digital processes. It describes the differences between a development environment and a production environment in your Builder platform.
What is a Digital Process Deployment?
Deployment is a process of publishing a digital process into a selected environment. A deployment process can be done during different stages of building a digital process, for example, the Builder platform user needs to test it for QA purposes or it is time to share the digital process with the world.
Deploying to Different Environments
(See Figure 1)
You will usually have two types of environments that you can use to deploy a digital process:
- Development (dev) - an environment for testing, QA
- Production (PROD) - an environment for live deployment
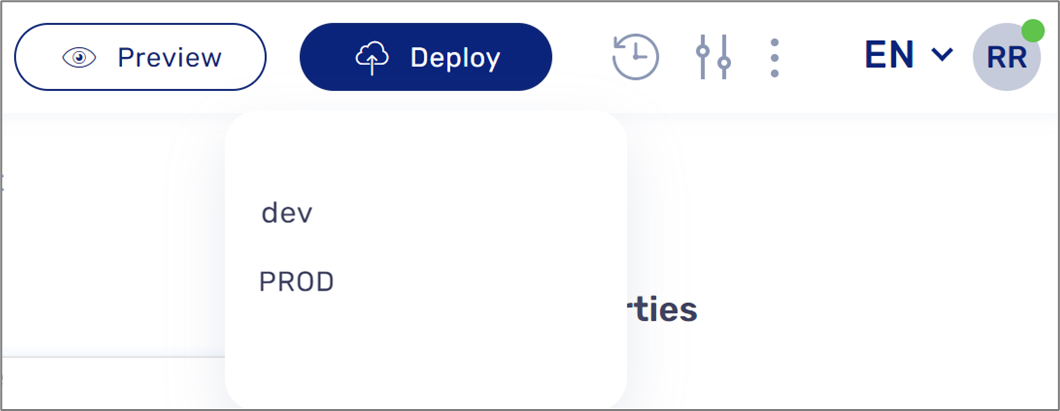
Figure 1: Deployment Environments
While a digital process is being built, tested, or examined internally within your organization it is mandatory to deploy it only to a dev environment. Once all QA testing is done and you are ready to publish and share the process with your external customers then deploy it to a PROD environment.
Deploying a digital process to a PROD environment while it is not done and ready, or if a previous version of it is already published, can damage it.
In some cases, multiple deployments to a PROD environment can result in you being financially charged by EasySend (according to your agreement).
How To Perform a Deployment
(See Figure 2 to Figure 7)
To deploy and view a digital process, perform the following steps:

Figure 2: Deploy Button
- Click the Deploy button (1).
Result:
A list of available environments (dev and PROD) (2) appears:
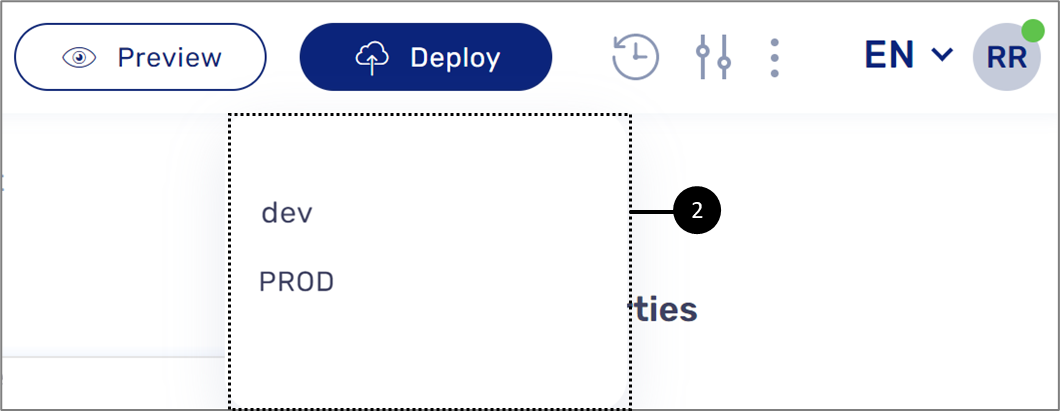
Figure 3: Available Environments
- Click the desired environment from the list (2).
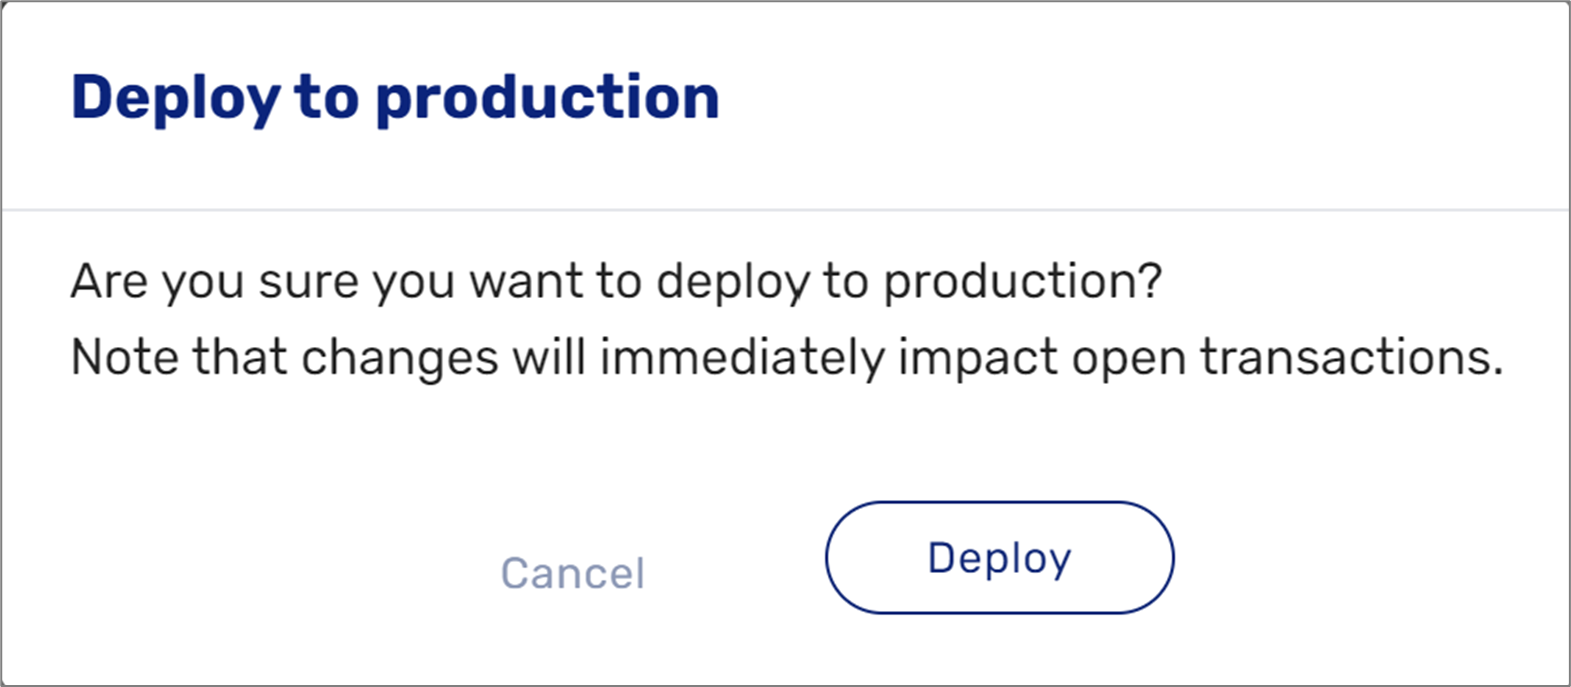
NOTE: When selecting to deploy to a PROD environment, the following message will appear:
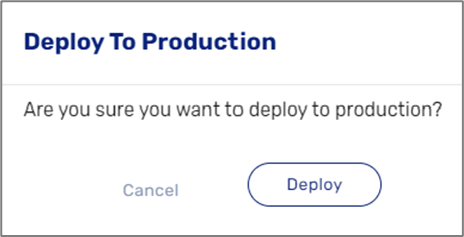
Figure 4: Deploy To Production
Result:
A popup window appears for a few seconds and then the deployment indicator appears (3):

Figure 5: Deployment Indicator
- Wait until the deployment indicator (3) disappears.
Result:
The deployment is finished, and the result indicator appears (4):

Figure 6: Result Indicator

Figure 7: Preview Button
- Click the Preview button (5).
Result:
The digital process is viewed.
How do I know if a Digital Process was Deployed to a PROD Environment?
(See Figure 8)
Under the Process Manager screen, select a desired Business Group (1) or locate your digital process by using the search bar (2). Once you locate your process, check its status under In Production (3).
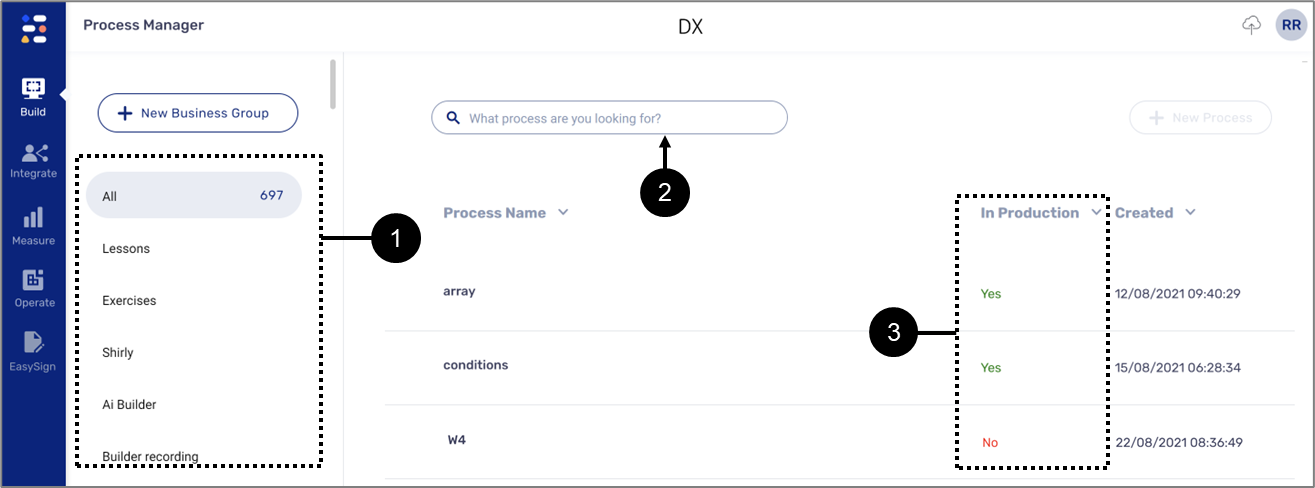
Figure 8: Process Manager Screen
Dev Vs PROD - Additional differences
There are a few more additional differences between a dev and a PROD environment:
- Warnings and Errors - when a deployment process encounters problems it may display warnings or error messages. Warnings do not prevent you from publishing your digital process but errors do. In some cases, a warning message that appeared while deploying to a dev environment can appear as an error message while deploying to a PROD environment. For additional information, click here.
- Analytics - only processes that were deployed to a PROD environment are eligible for analytics data. For additional information, click here.
- Bulk Sender - only processes that were deployed to a PROD environment can be used by the Bulk Sender. For additional information, click here.
- Journey Tracker - only processes that were deployed to a PROD environment can be tracked by the Journey Tracker. For additional information, click here.
- Reports - only processes that were deployed to a PROD environment can appear in reports. For additional information, click here.
Production Deployment - Required Steps
Once a process is ready for production deployment, perform the following steps:
- Add metadata tagging to the Journey Sender fields (for an example, click here)
- Full name
- Phone number
- Email address
- Check the process link in the DEV environment - check if everything works correctly:
- The validations are displayed
- The flow works properly
- The emails/SMS are sent as required
- Check if the email address/phone number fields in production recipients are correct
- Verify that the servers both DEV and Prod are up to date - if yes, continue to step 5. If no, perform the following:
- Contact your EasySend rep to update the DEV environment
- Run a second check on the DEV environment (as described in step 2)
- If the process was already deployed to PROD, run a check on the PROD environment
- Contact your EasySend rep to update the PROD environment
- If the process or your other processes were already deployed to PROD, run a check on the PROD environment without deploying the processes
- Start deploying all pages to production:
- Validations
- Services (if needed)
- Theme
- Journey Sender (if needed)
- The process
- Check the process in the production link
If you are deploying to a production server with version 36.4.0 or higher, you can choose whether the changes will affect live transactions. For more information, click here.

