Creating New monday Items from a Jounrey
- PDF
Creating New monday Items from a Jounrey
- PDF
Article summary
Did you find this summary helpful?
Thank you for your feedback!
Article Overview
The following article describes how to create a new monday item from an EasySend journey.
Step 1: Building the Process
- Drag and drop all the required components.
- Build the business logic (conditions and validations).
Step 2: Integrate your monday Environment with the Process
- Verify your EasySend monday app is configured as described in the EasySend App Configuration article.
- Connect your monday resources as described in the Connecting Your monday Resources article.
- Add all the required monday columns as described in the monday Columns article.
- Deploy and preview the journey.
Step 3: Interact with the Journey
(See Figure 1 and Figure 2)
As users interact with the journey, even before submission, the monday board will create a new item with the input information. For example:
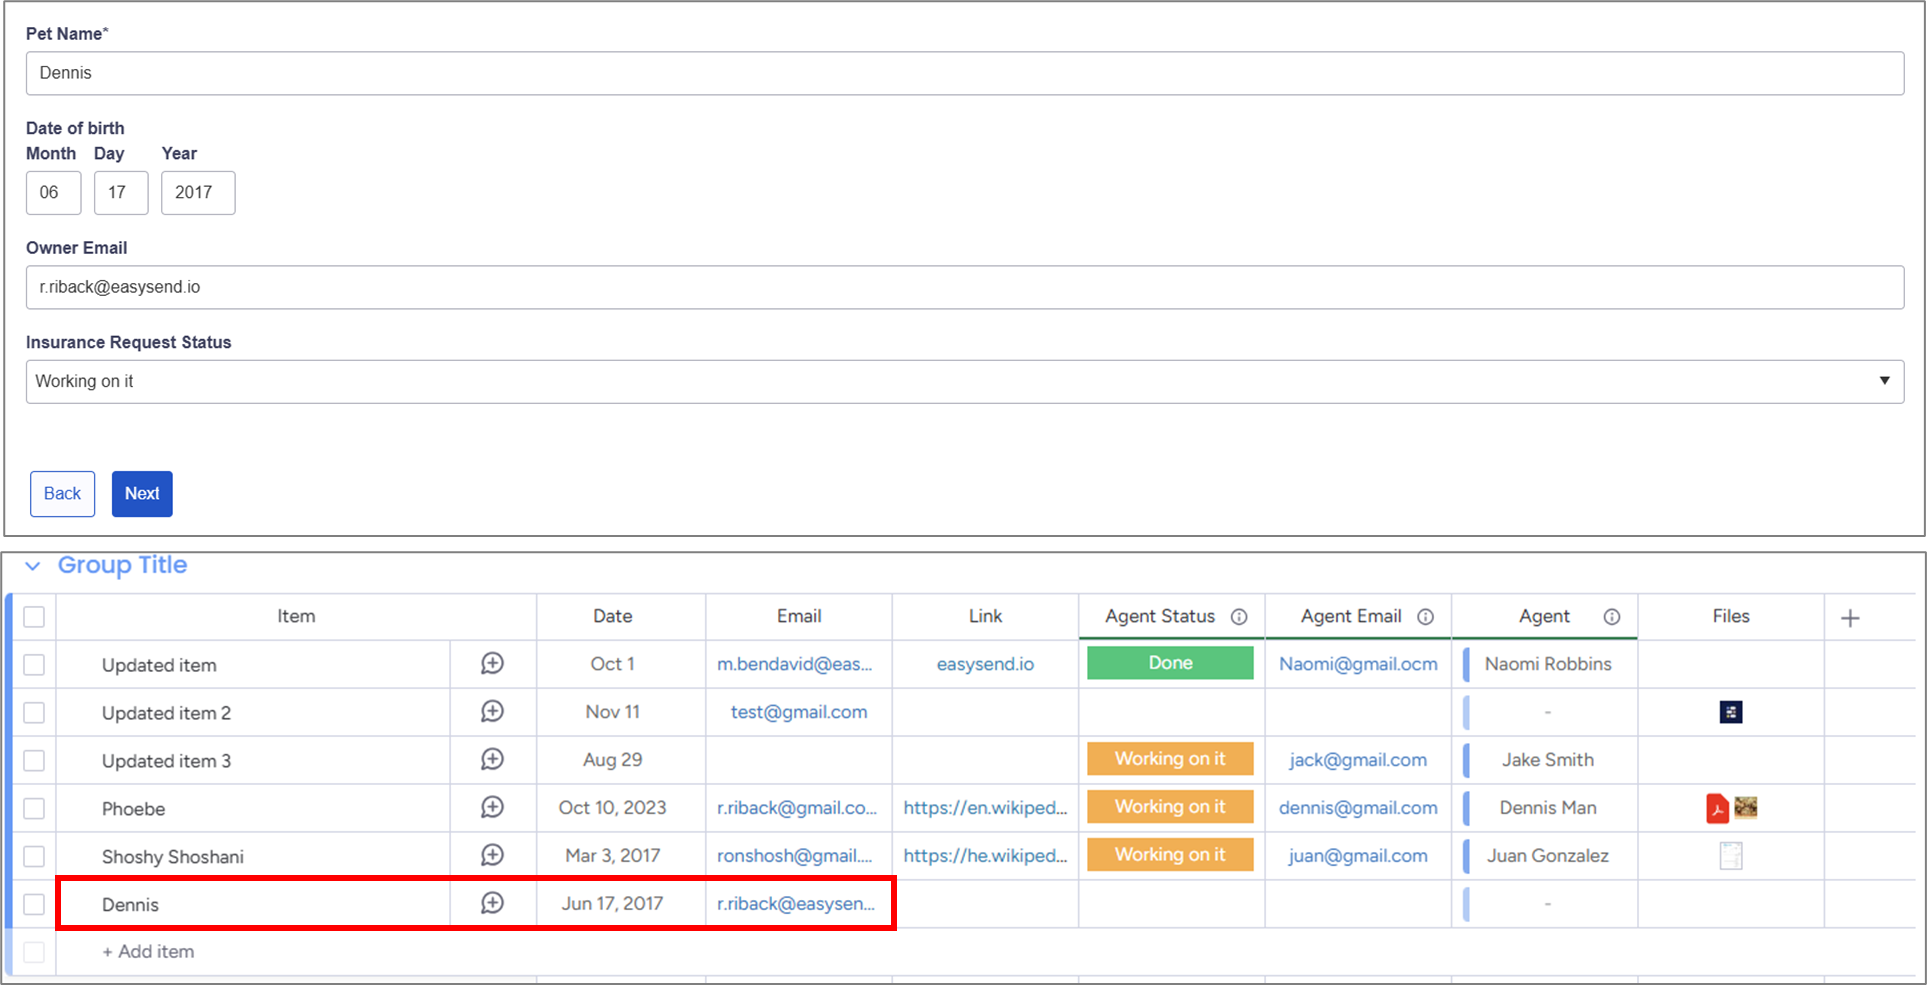
Figure 1: Creating a New Item
Files, however, will only appear after submission, for example:
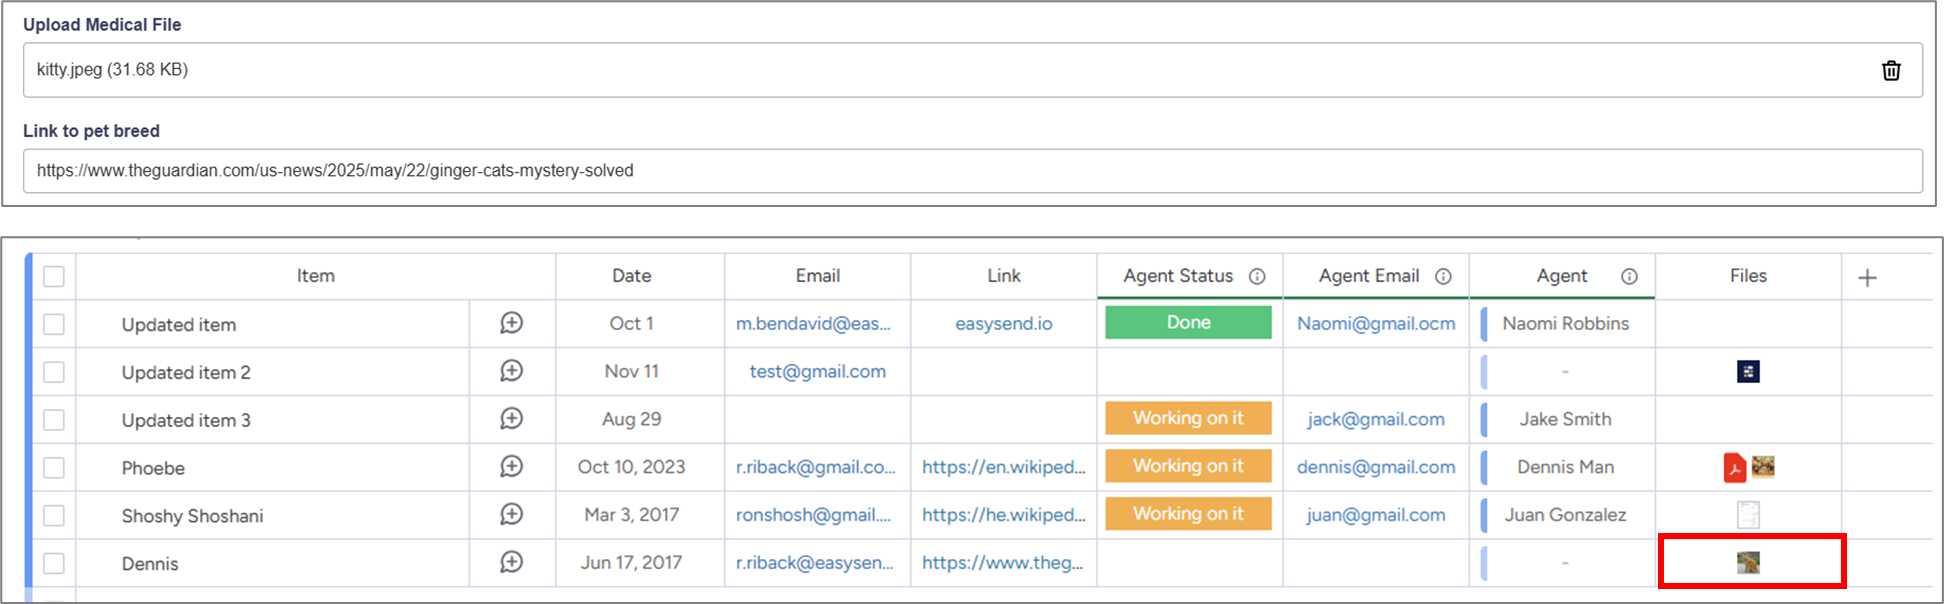
Figure 2: File Added After Submission
NOTE
- Allowed file types {".jpeg", ".jpg", ".pdf", ".docx", ".xlsx", ".gif", ".mp4", ".csv", ".svg", ".txt", ".ai"}
- Size <500MB
Was this article helpful?