Article Overview
The following article describes steps to create new records in Salesforce using an EasySend process and a use case.
Step 1: Building the Process
- Drag and drop all the required components.
- Build the business logic (conditions and validations).
Step 2: Integrate your Salesforce Environment with the Process
- Connect your Salesforce environment as described in the Connecting Your Salesforce Environment article.
- Add all the required Salesforce fields as described in the Adding Salesforce Fields article.
- If required, detach and map fields as described in the Detaching and Mapping Salesforce Fields article.
- Deploy the process.
Step 3: Map the Journey Steps Using the Workflow
(See Figure 1 and Figure 2)
- Add all the building blocks and connect them, for example:
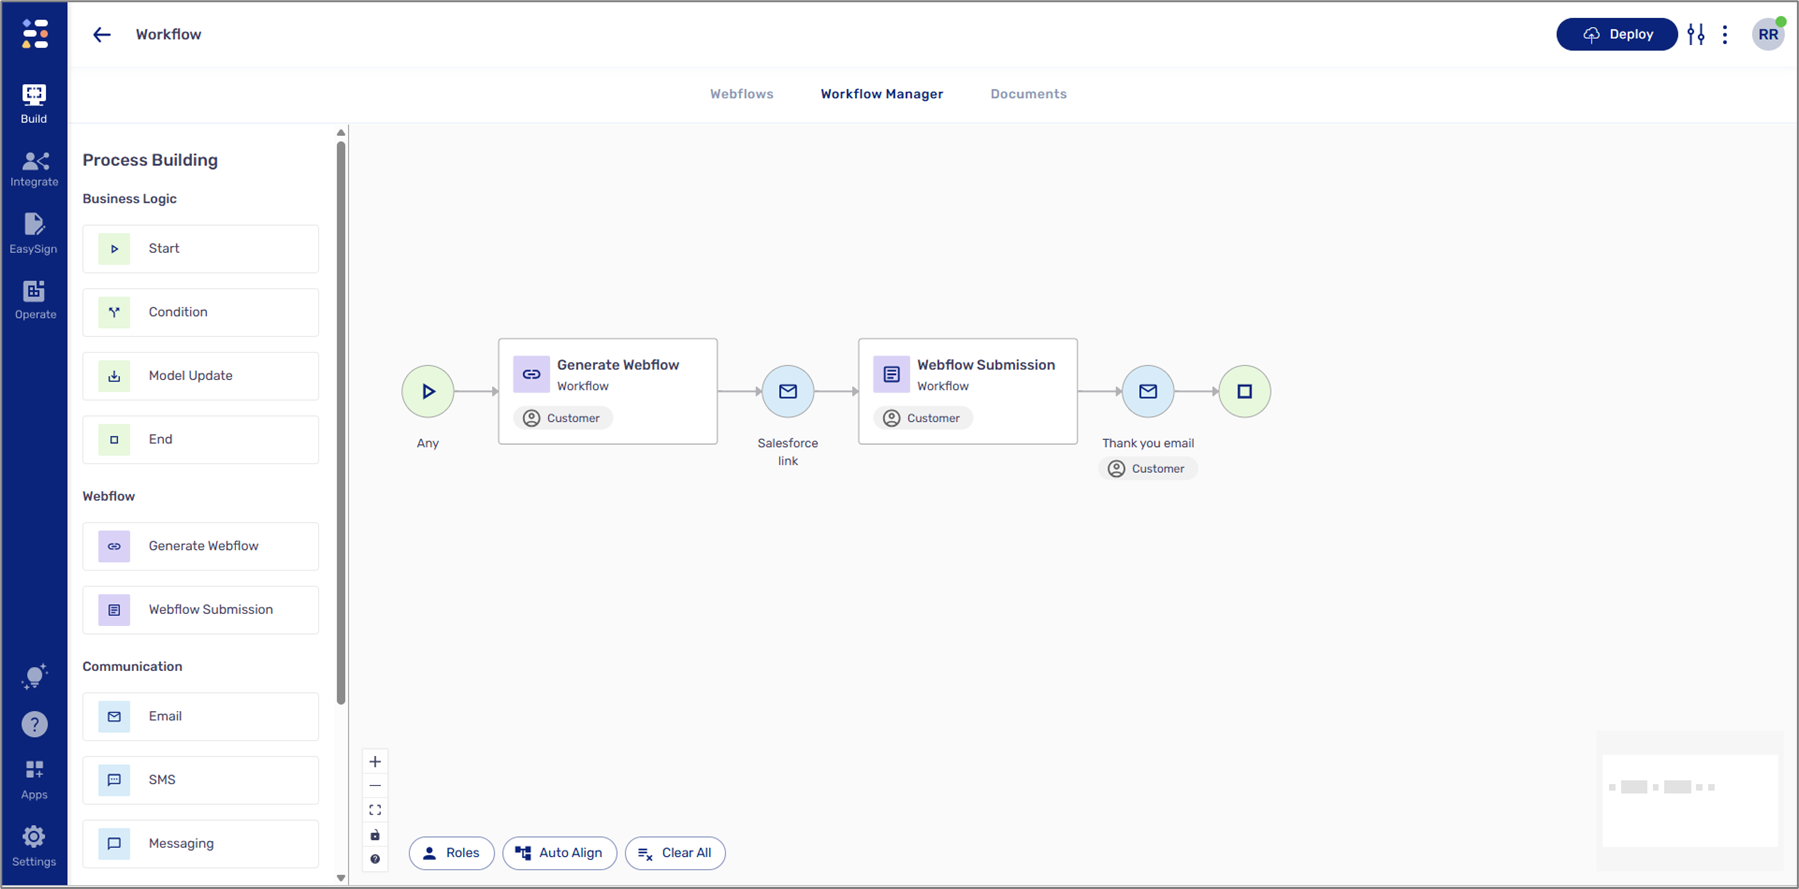
Figure 1: Building Blocks
- Configure the Communication building block, Email or SMS (the one connected between the Generate Webflow building block and the Webflow Submission building block):
- Add the following recipeint - metadata.salesforce.triggerEmail or metadata.salesforce.triggerPhone.
- Add the journey's link to the Message Body.
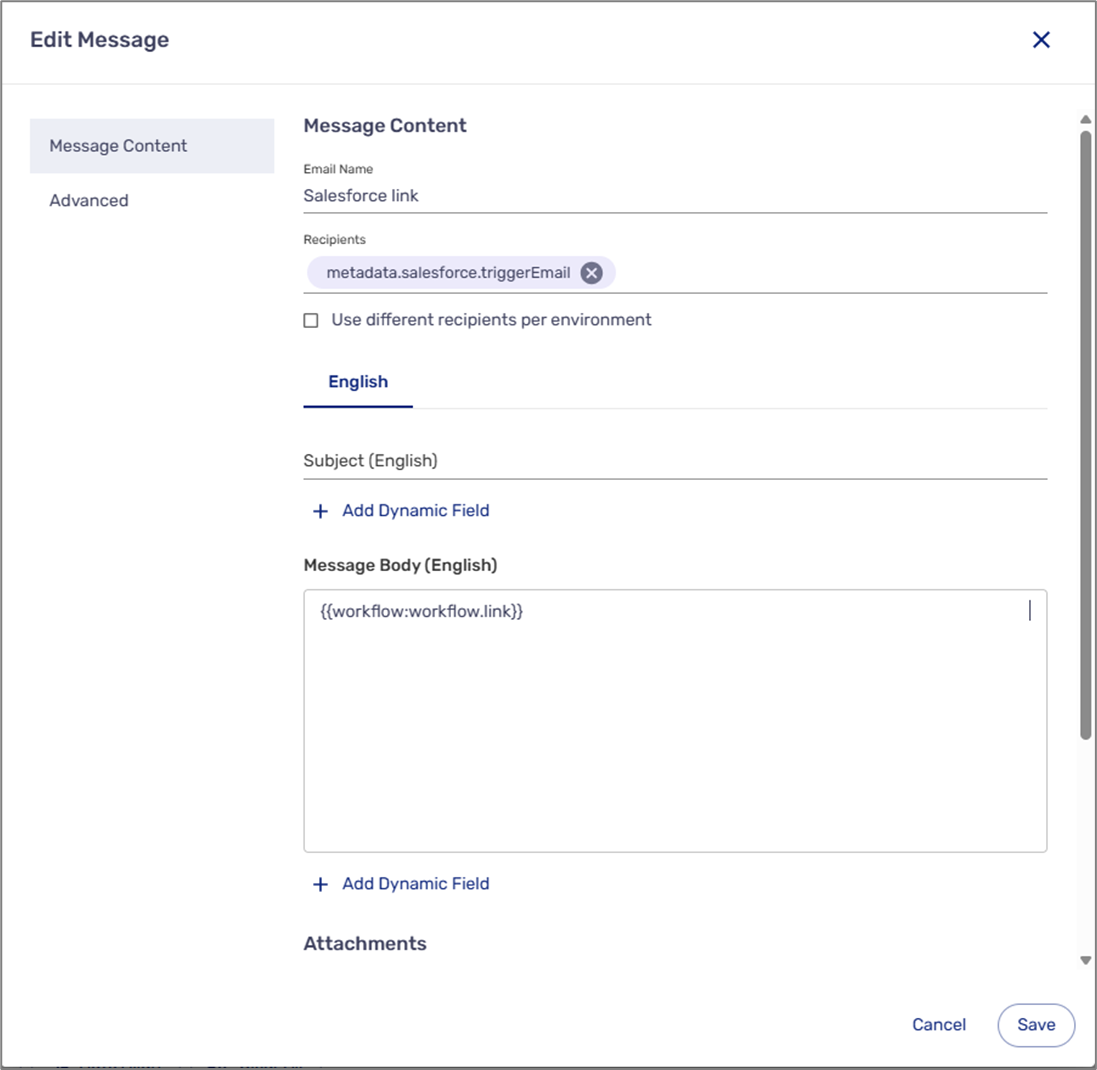
Figure 2: Edit Message Example
Step 4: Initiate the Process from Salesforce
- Access the relevant object in Salesforce.
- Locate the desired item.
- Initiate and send the process from Salesforce.
Step 5: Interact with the Process
- Click the link to access the process.
- Fill out the information.
- Submit the process.
- Navigate back to Salesforce and view the updated data.
Use Case - Creating New Contacts
(See Figure 3 to Figure 5)
This process is connected to a Salesforce environment and is designed to create new contacts in Salesforce. The agent initiates the process, fills out all the required information, and submits it. Upon submission, a new contact is created in Salesforce.

Figure 3: Process
When the process starts, the agent fills out all the information.
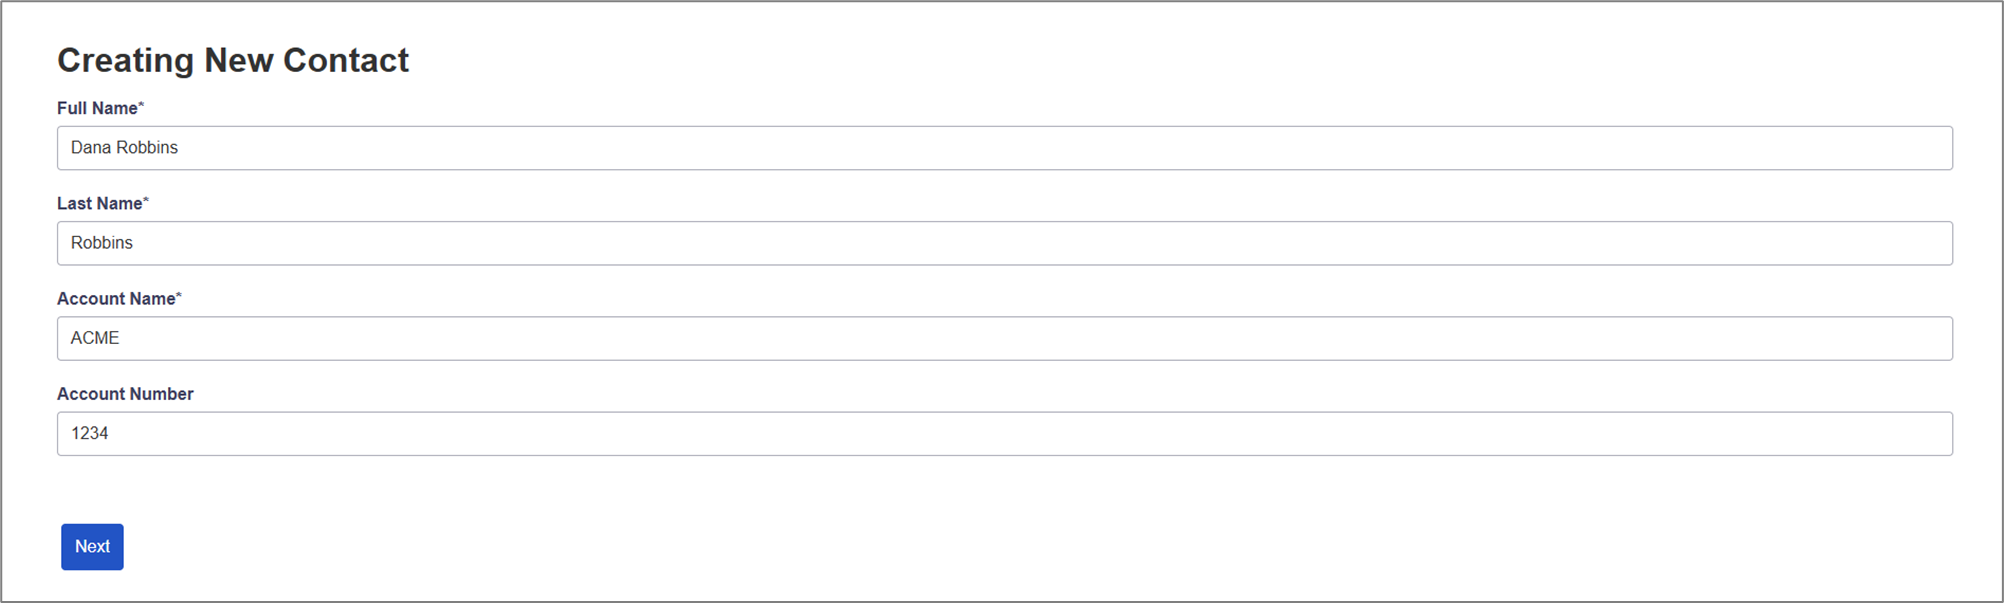
Figure 4: Updating Information
After the process is submitted, the contact and account are created in Salesforce.
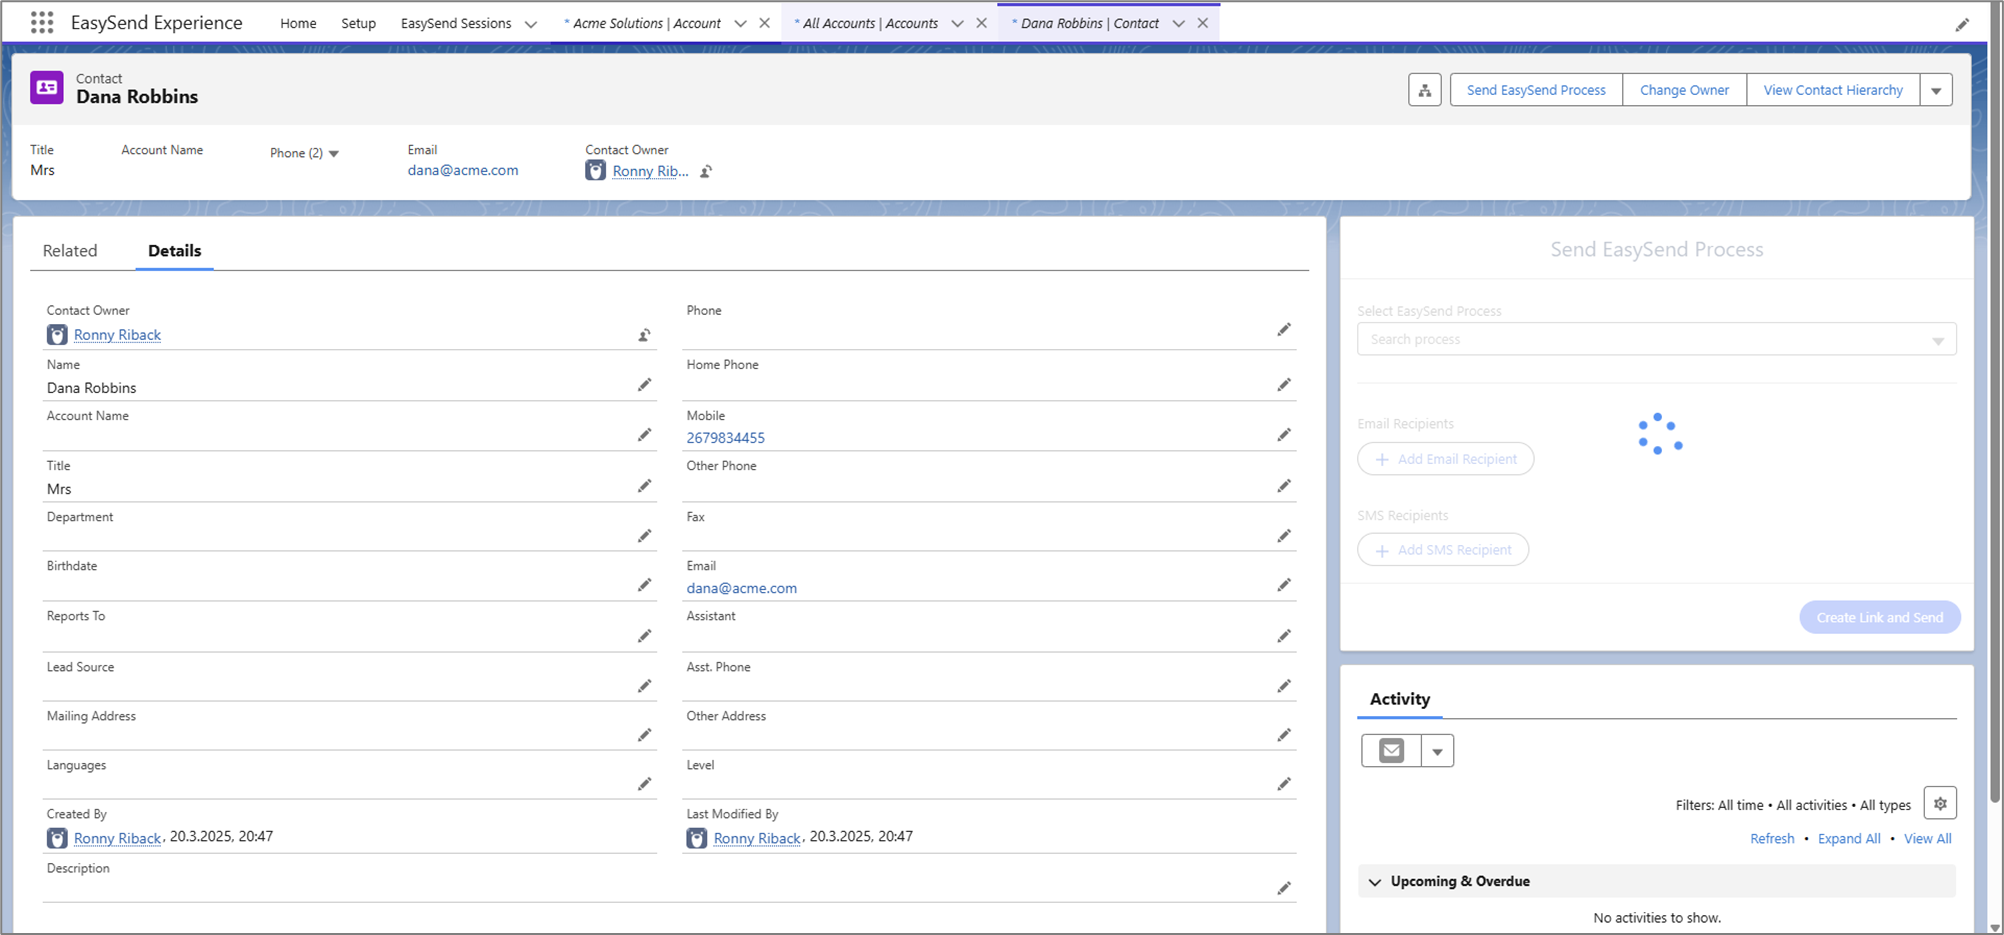
Figure 5: Salesforce