Creating New Records in Salesforce
- PDF
Creating New Records in Salesforce
- PDF
Article summary
Did you find this summary helpful?
Thank you for your feedback!
Article Overview
The following article describes steps to create new records in Salesforce using an EasySend process and a use case.
Step 1: Building the Process
(See Figure 1 to Figure 3)
- Drag and drop all the required components.
- Build the business logic (conditions and validations).
Step 2: Integrate your Salesforce Environment with the Process
- Connect your Salesforce environment as described in the Connecting Your Salesforce Environment article.
- Add all the required Salesforce fields as described in the Adding Salesforce Fields article.
- If required, detach and map fields as described in the Detaching and Mapping Salesforce Fields article.
- Deploy the process.
Step 3: Initiate the Process from Salesforce
- Access the relevant object in Salesforce.
- Locate the desired item.
- Initiate and send the process from Salesforce.
Step 4: Interact with the Process
- Click the link to access the process.
- Fill out the information.
- Submit the process.
- Navigate back to Salesforce and view the updated data.
Use Case - Creating New Contacts
(See Figure 1 to Figure 3)
This process is connected to a Salesforce environment and is designed to create new contacts in Salesforce. The agent initiates the process, fills out all the required information, and submits it. Upon submission, a new contact is created in Salesforce.
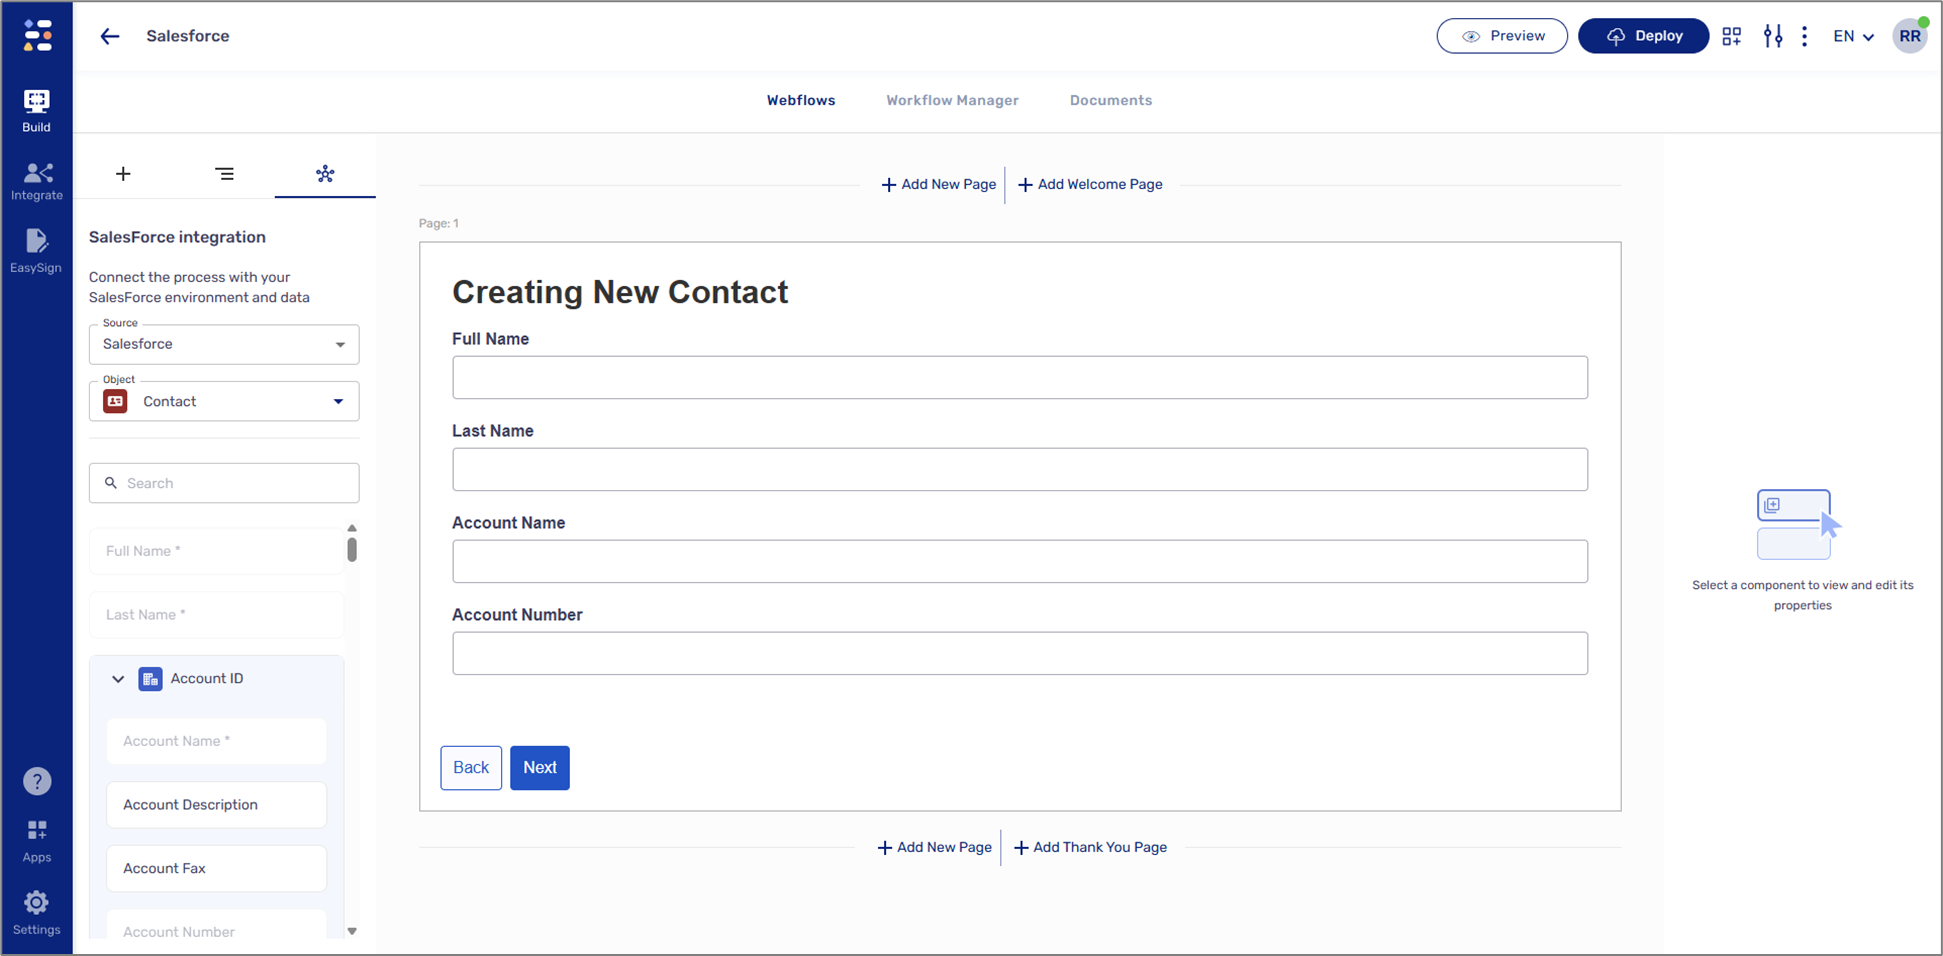
Figure 1: Process
When the process starts, the agent fills out all the information.
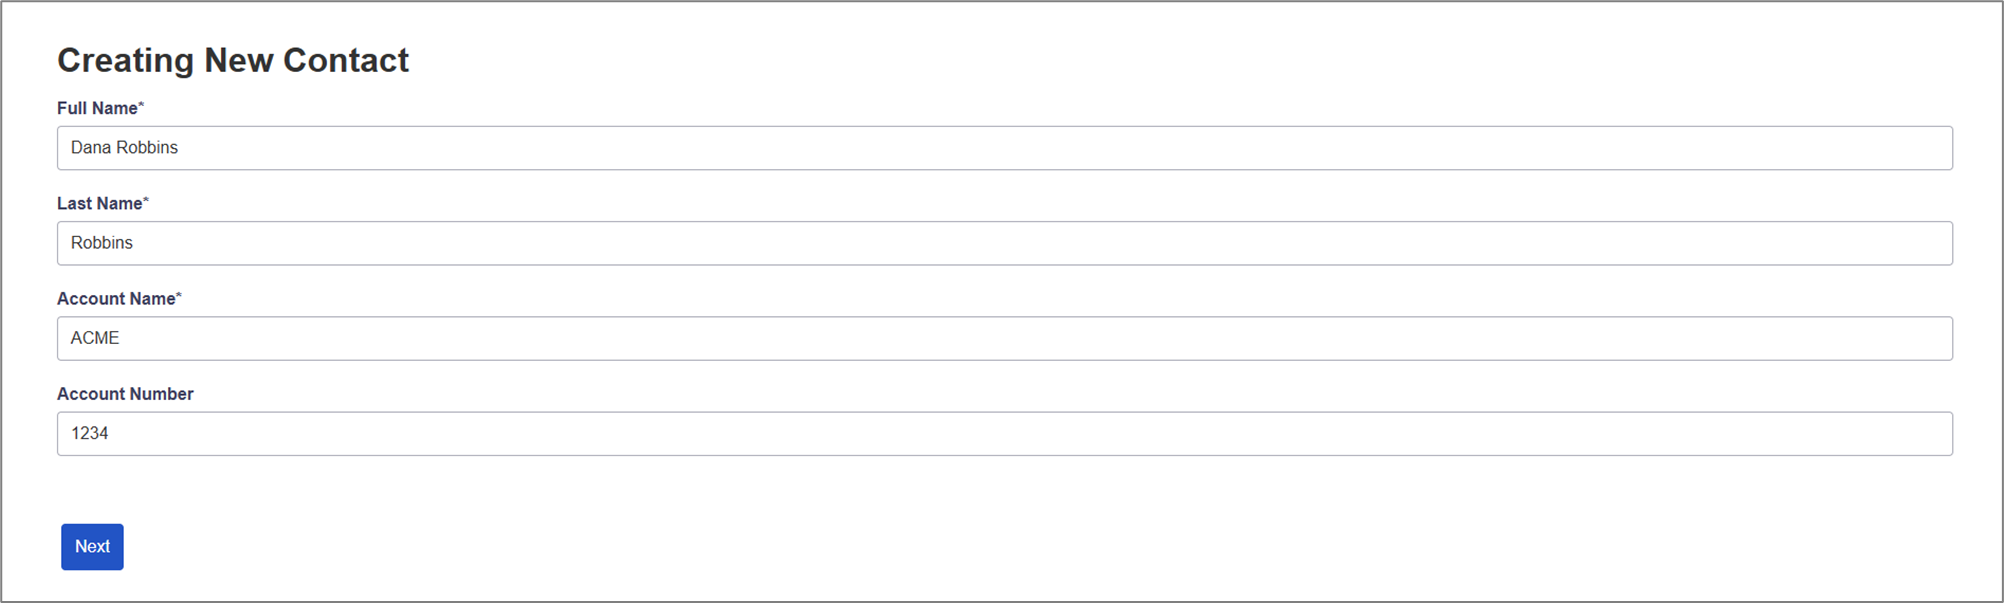
Figure 2: Updating Information
After the process is submitted, the contact and account are created in Salesforce.
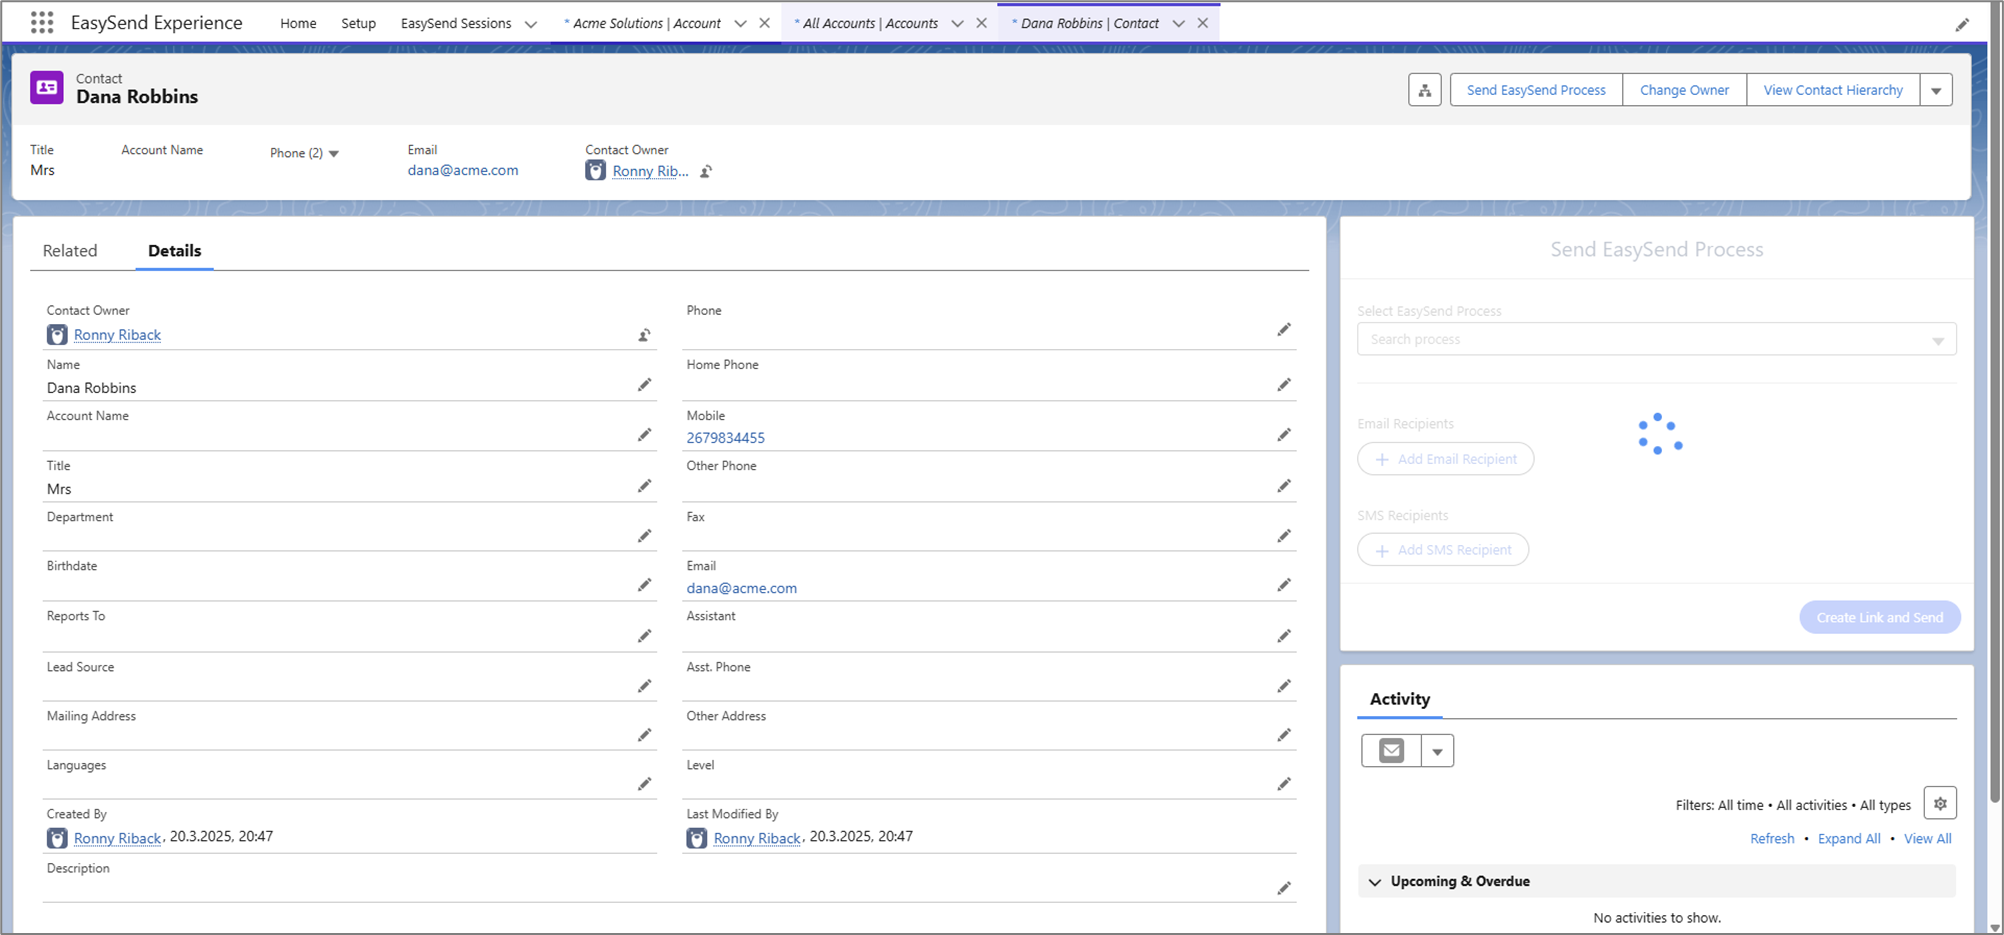
Figure 3: Salesforce
Was this article helpful?