Creating Data Items
- PDF
Creating Data Items
- PDF
Article summary
Did you find this summary helpful?
Thank you for your feedback!
Article Overview
The following article describes how to create data items for simple expressions and advanced formulas.
Creating Data Items
(See Figure 1)
Using the navigator you can create data items that are not attached to any component and can be used for:
- Creating simple expressions.
- Creating formulas for complex logical expressions, and calculations.
- Conditions.
NOTE
To learn more about conditions, click here.
Data items are created by clicking the + Create Data Item option (1) and editing the Create Data Item window
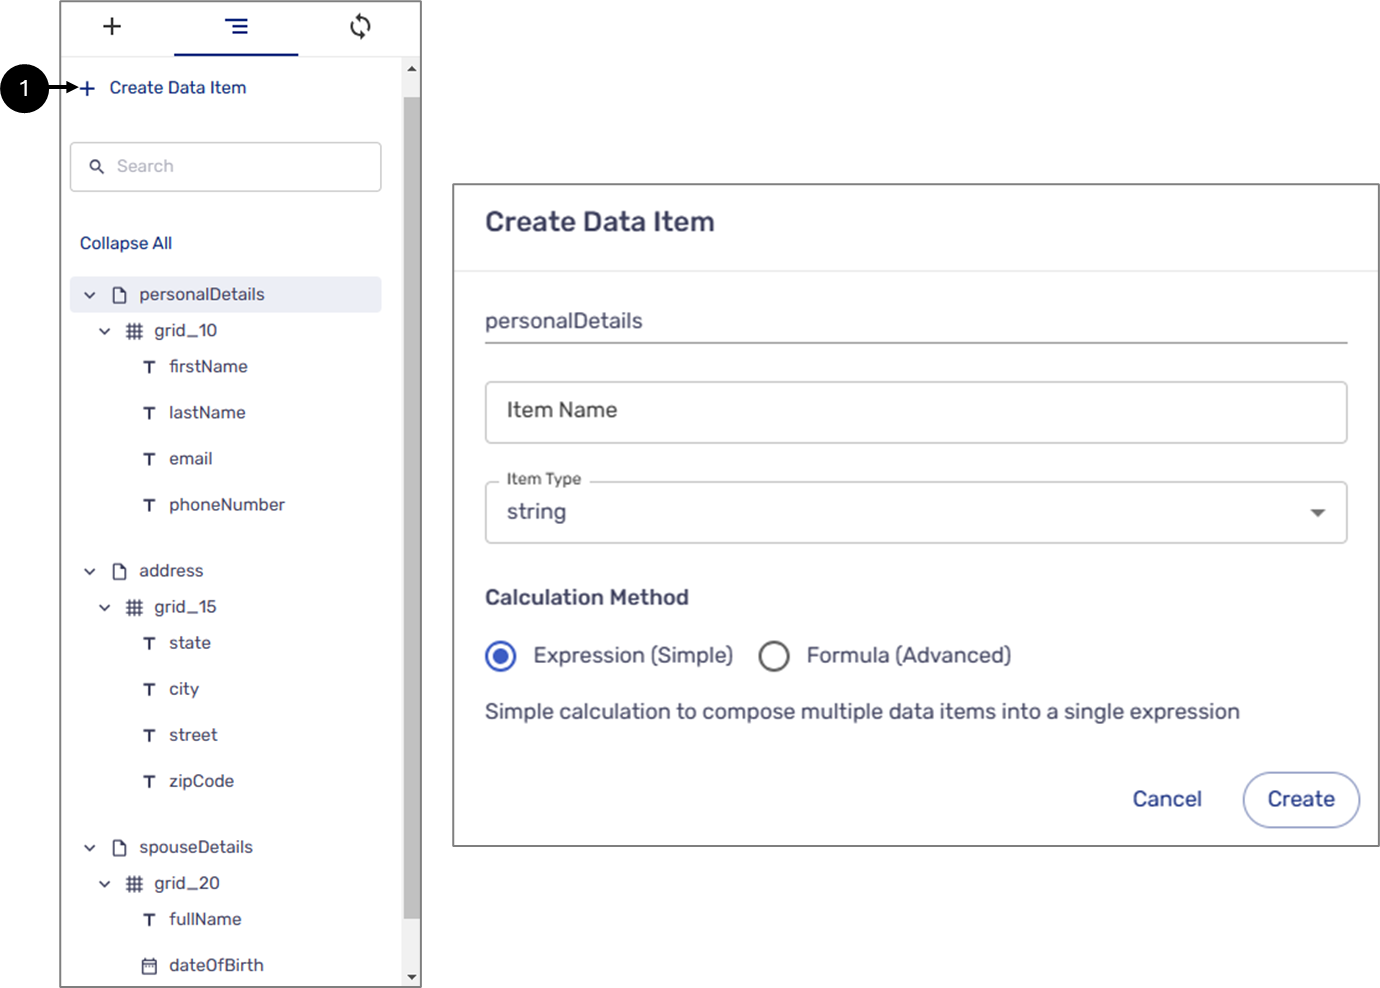
Figure 1: Create Data Item
Create Data Item Window
(See Figure 2)
The Create Data Item window contains the following fields and options:
- Logical hierarchy parent - enables you to set the parent of the data item within the navigator's logical hierarchy. You can set the parent by clicking the field and selecting an Object-type data item (Page, Container, and Array) (see Figure 3).
NOTE
You cannot create data items before adding a Page.
- The name of the data item.
- Item Type:
- string
- boolean - true or false
- Calculation Method:
- Simple expression
- Advanced Formula
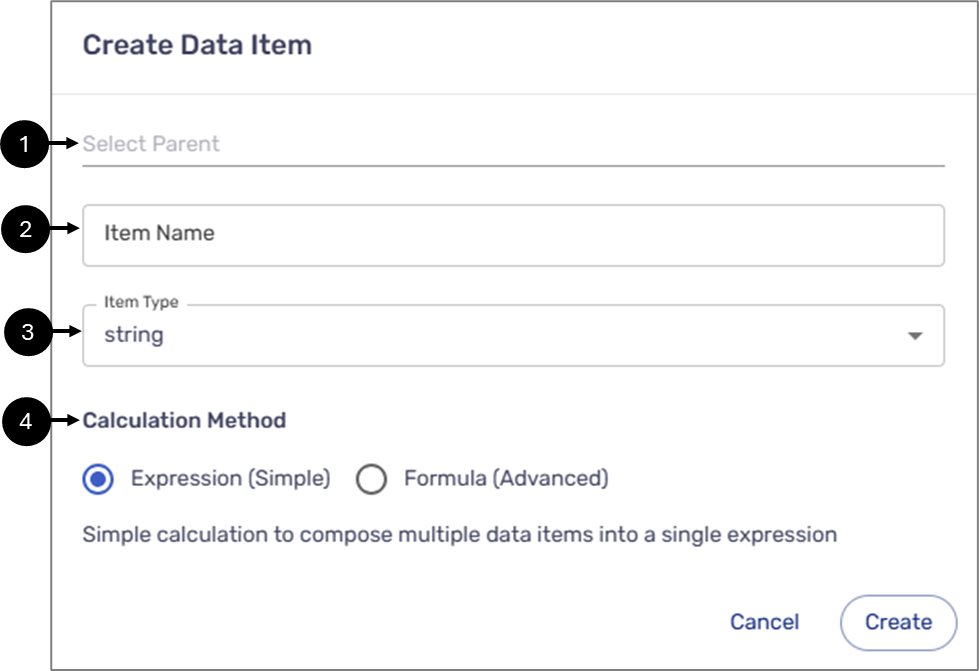
Figure 2: Create Data Item Window
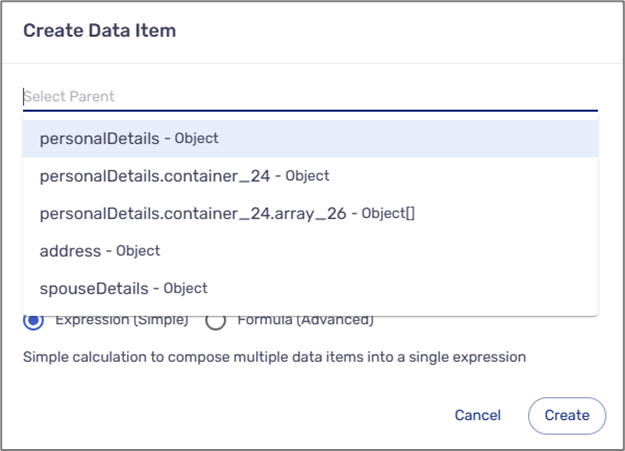
Figure 3: Selecting Location
Creating a Simple Expression
(See Figure 4)
When the selected calculation method is Expression (Simple), after clicking the Create button, the Edit Expression window appears. To create a simple expression, click the field and select string-type data items and/or metadata items.
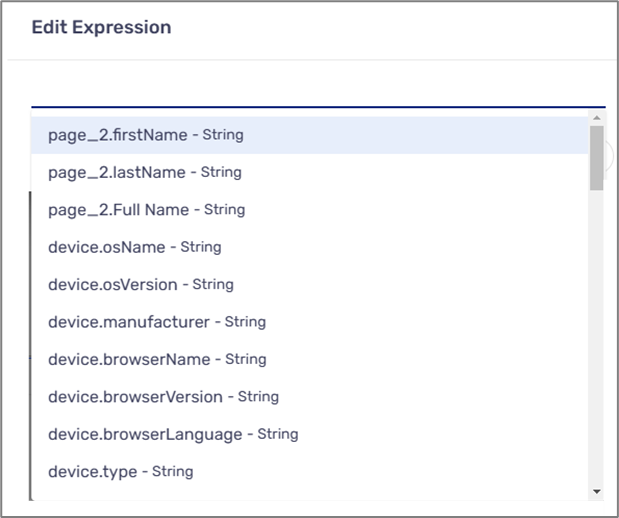
Figure 4: Edit Expression Window
Usage Example
(See Figure 5 to Figure 12)
You can use a simple expression to generate new data from existing data, such as combining a first and last name to create a full name:
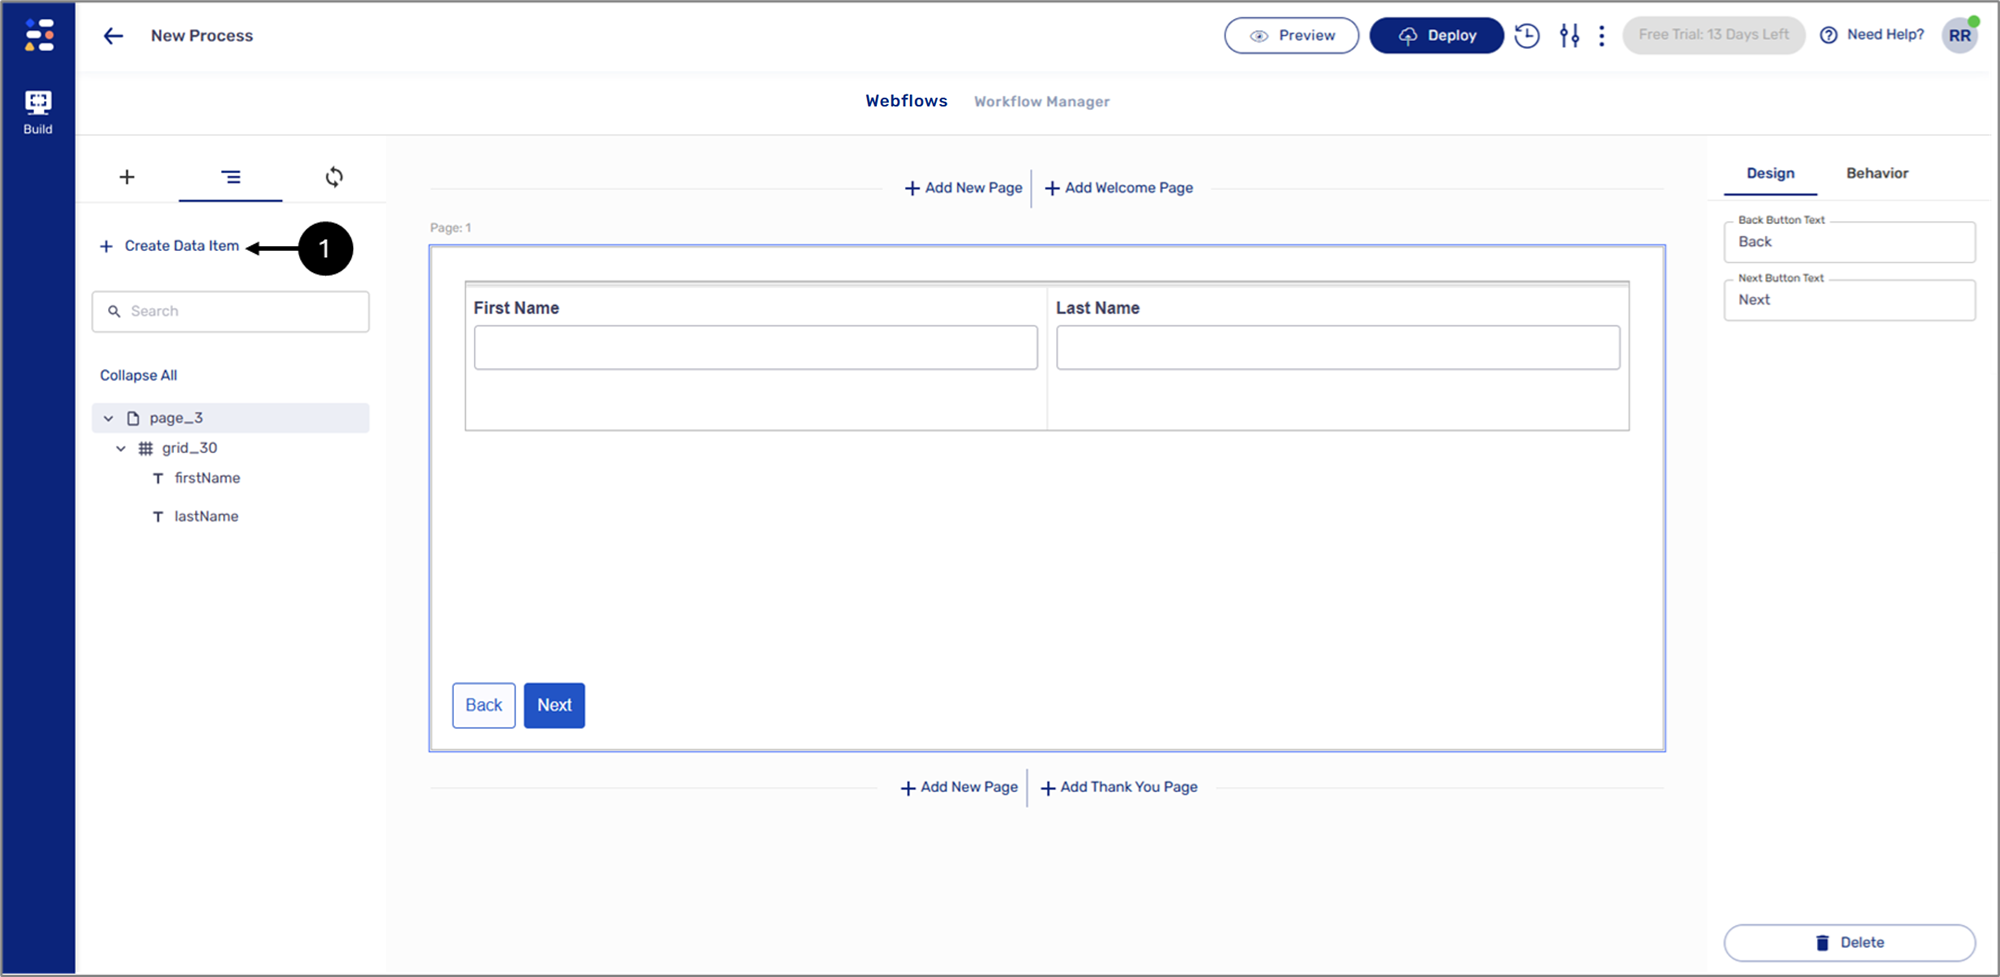
Figure 5: + Create Data Item
- Click + Create Data Item (1).
Result:
The Create Data Item window appears:
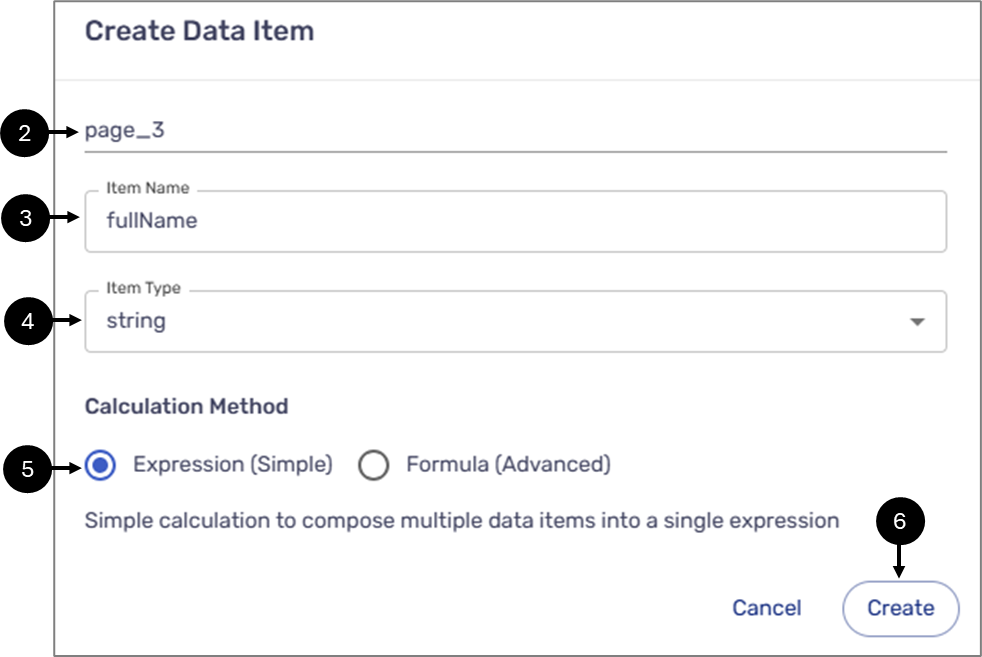
Figure 6: Create Data Item Window
- Verify the parent (2).
- Enter the Item Name (3).
- Select the Item Type (4).
- Select Expression (Simple) (5).
- Click Create (6).
Result:
The Edit Expression window appears:
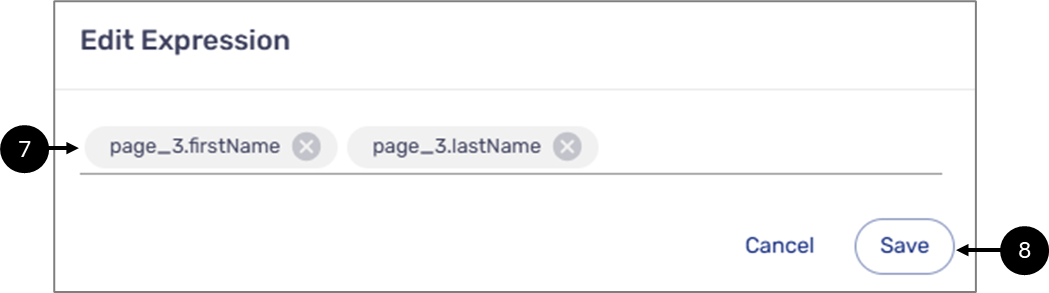
Figure 7: Edit Expression Window
- Add all the required items, for this example, the firstName and lastName data items (7).
- Click Save (8).
Result:
The data item is created (9):
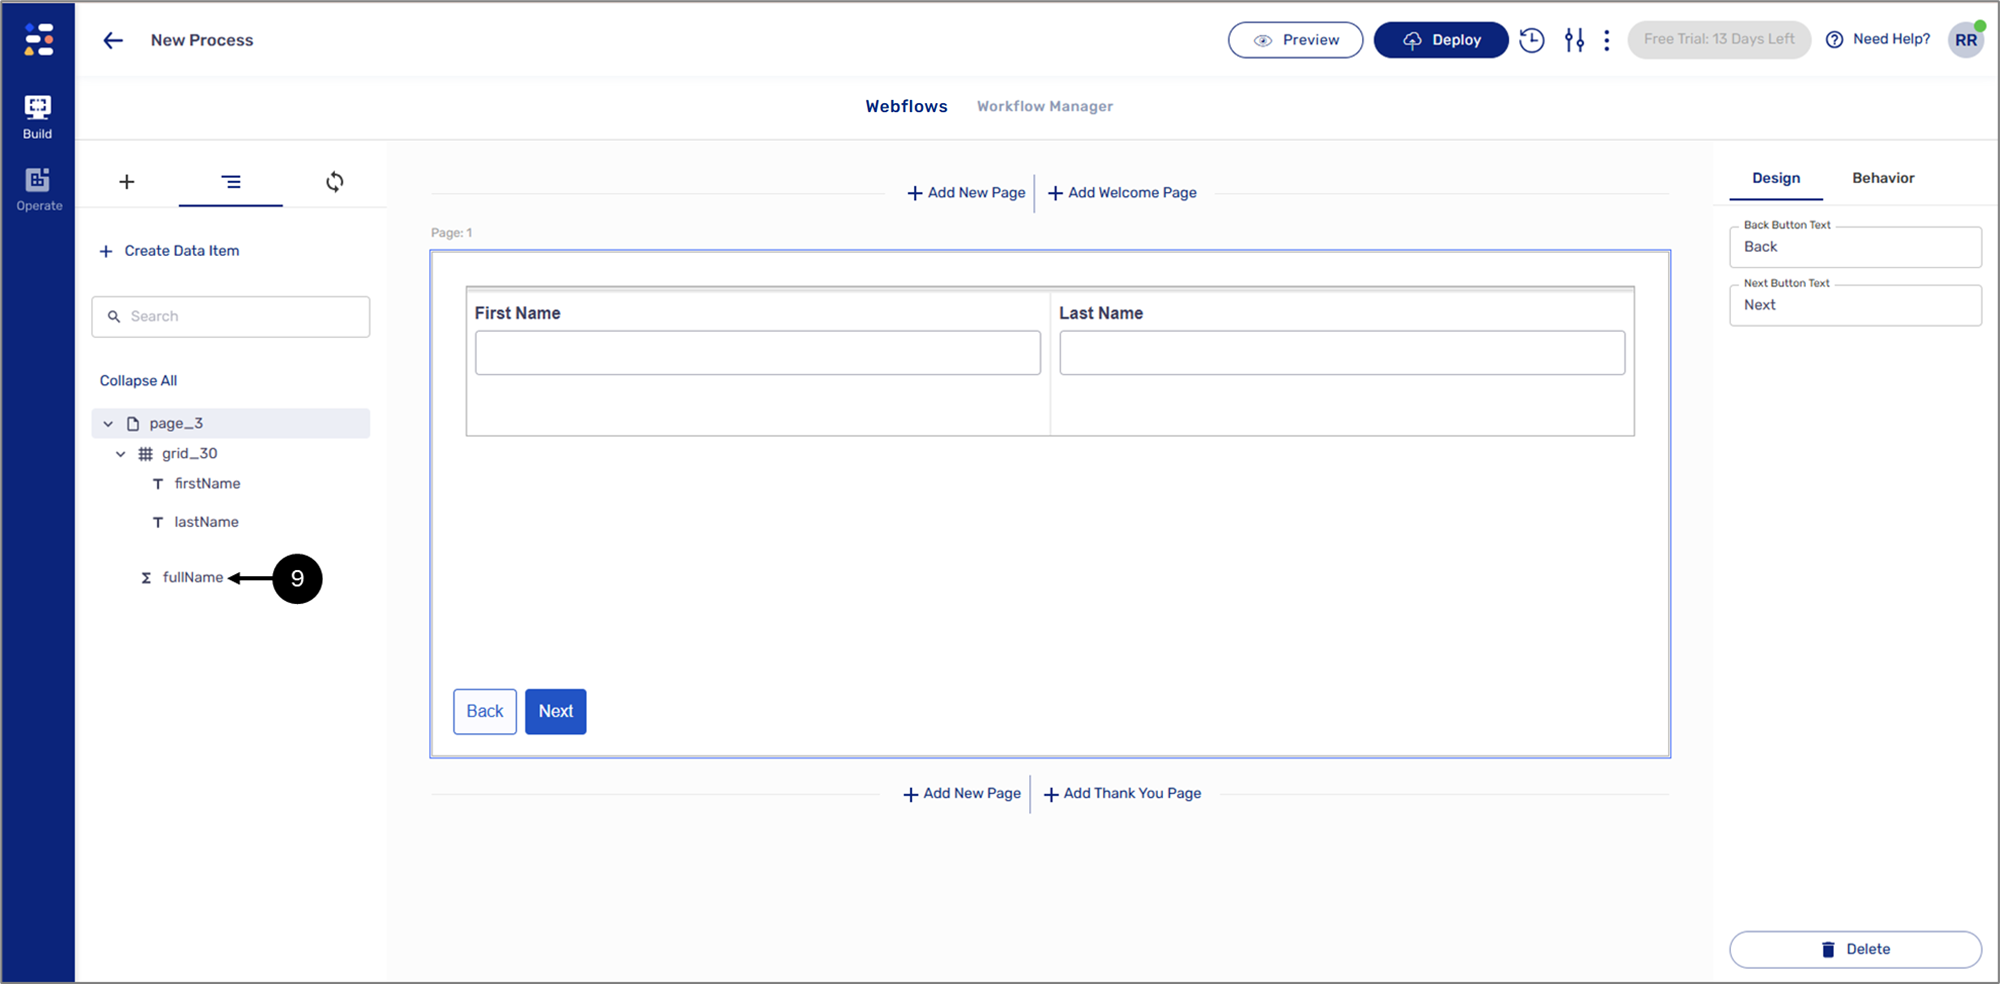
Figure 8: Created Data Item
NOTE
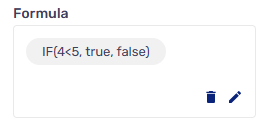
Once the expression is created, it can be edited under the Behavior tab, for example:
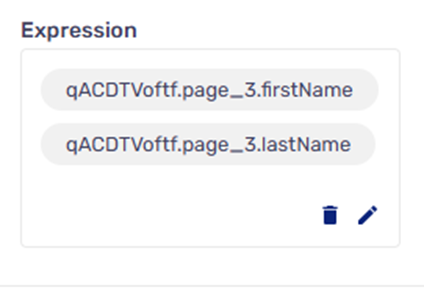
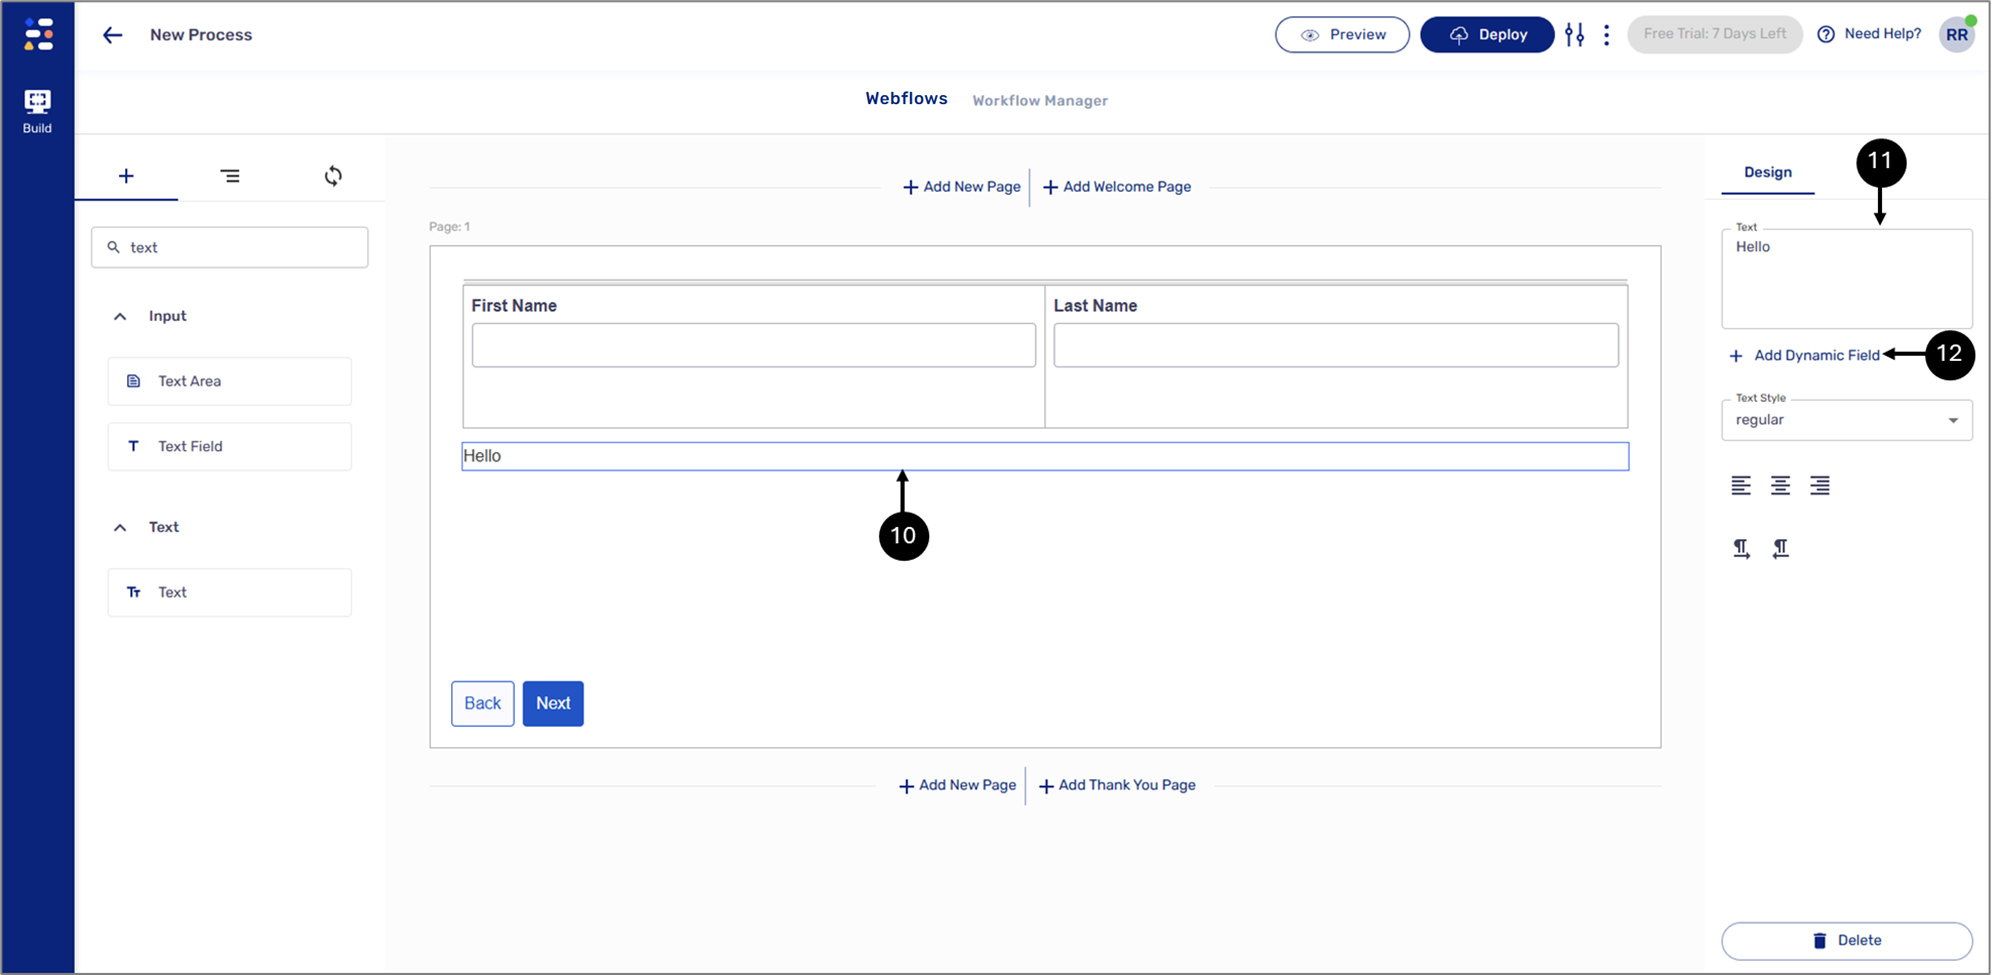
Figure 9: Adding Text Component
- Add a Text component (10).
- Write some text (11) and click the + Add Dynamic Field option (12).
Result:
The Add Dynamic Field window appears:
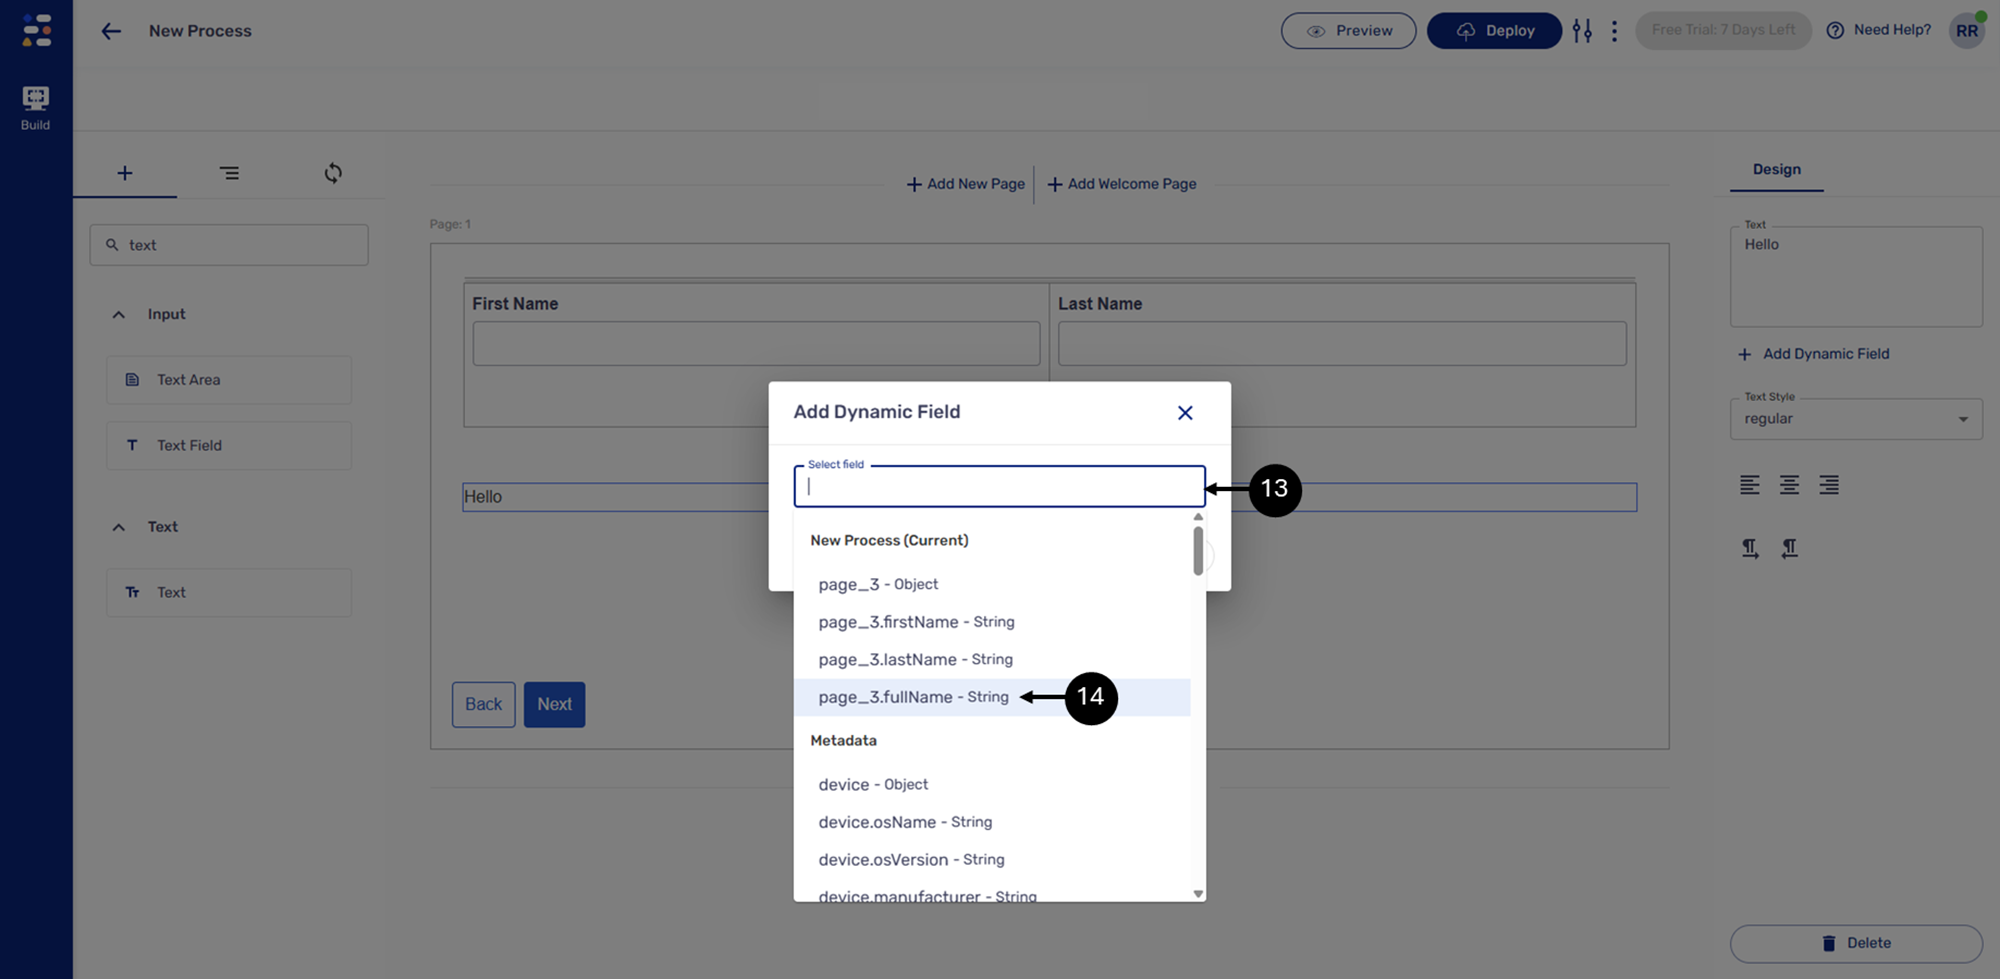
Figure 10: Add Dynamic Field Window
- Click Select field (13).
- Select the simple expression data item you previously created (14).
Result:
The field is selected:
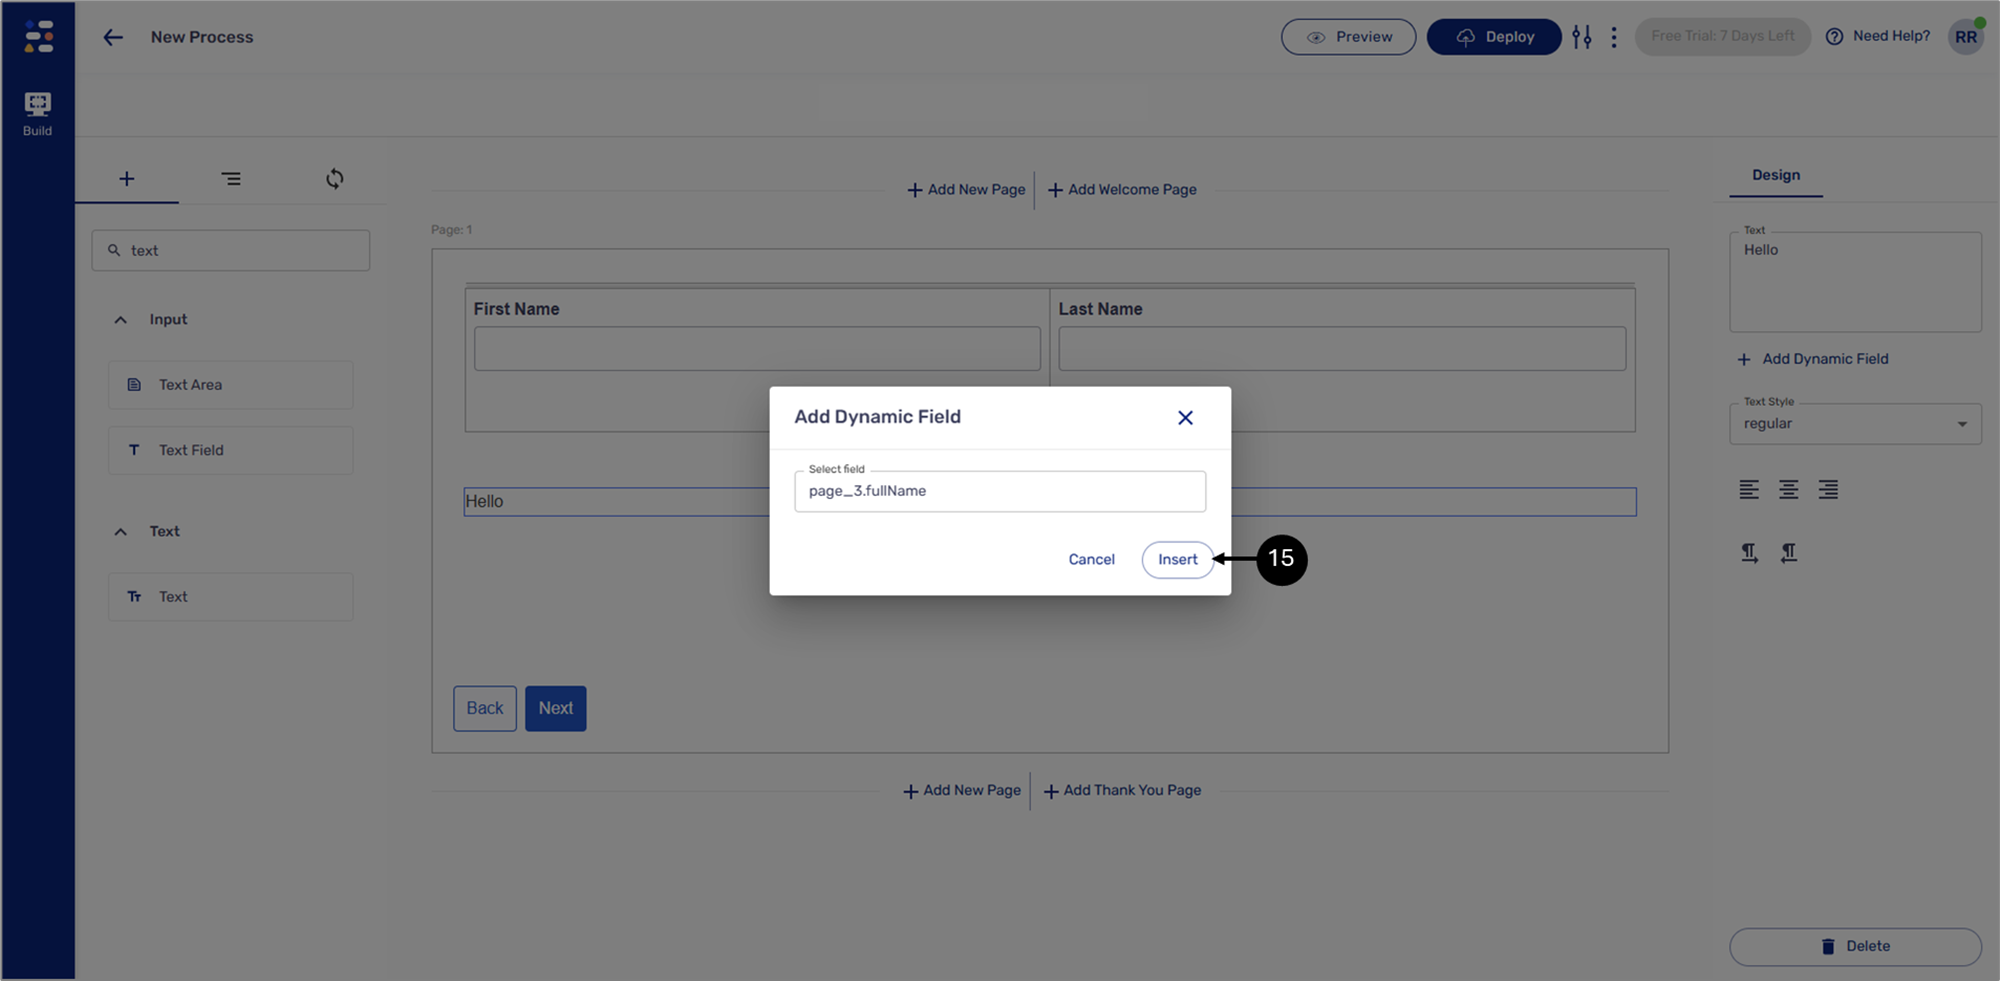
Figure 11: Selected Field
- Click Insert (15).
Result:
The text now contains a dynamic data item:
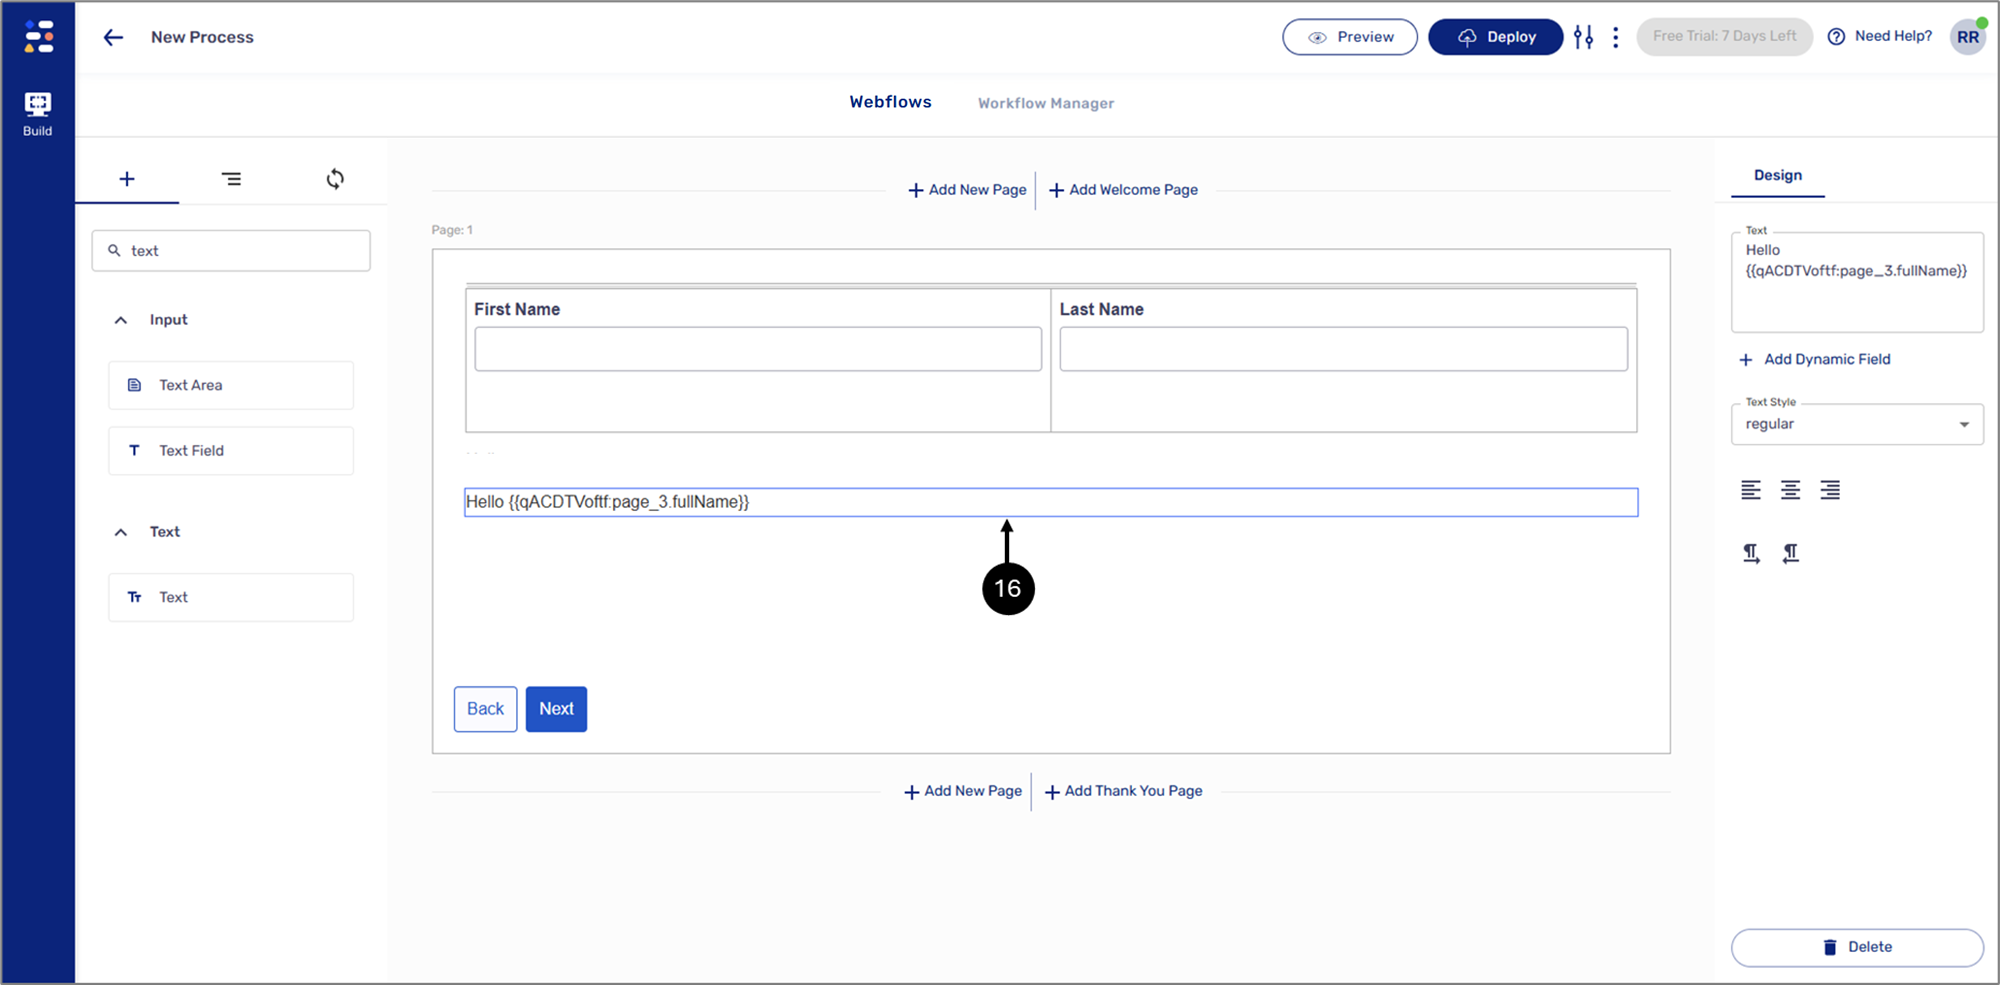
Figure 12: Dynamic Text
Creating a Formula (Advanced)
(See Figure 13)
When the selected calculation method is Formula (Advanced), after clicking the Create button, the Formula Editor window appears. The editor enables you to build formulas. It contains:
- Operators
- Functions
- Variables:
- Data items
- Metadata items
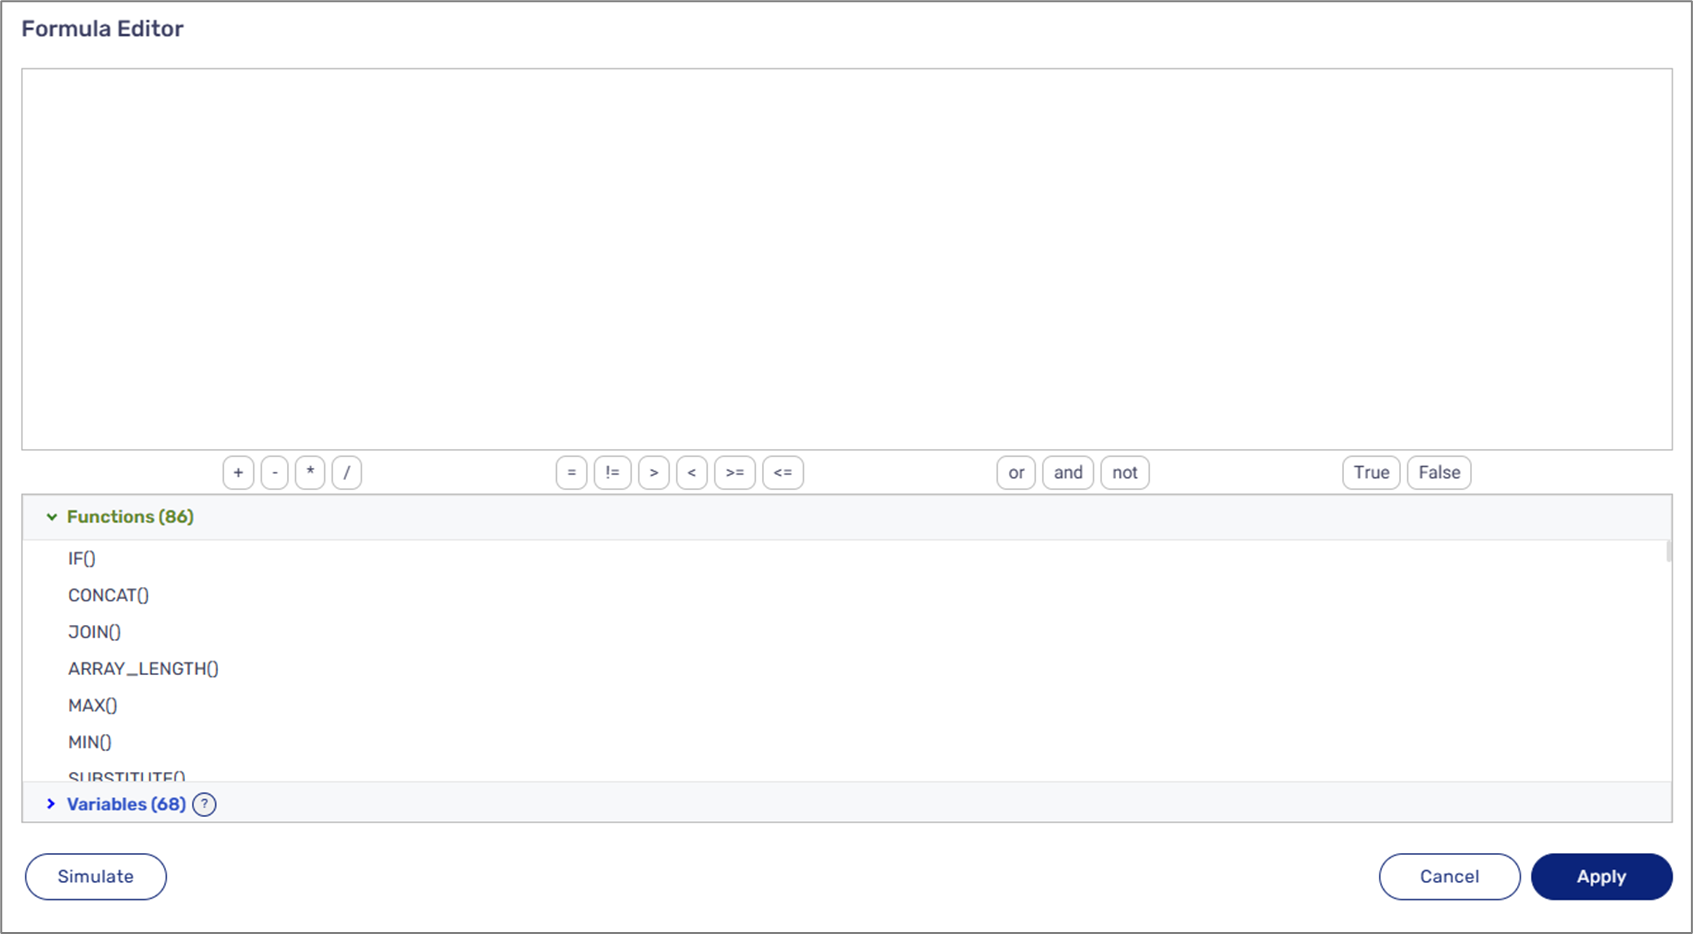
Figure 13: Formula Editor Window
Usage Example
(See Figure 14 to Figure 21)
You can use a formula that calculates the average amount of your monthly household income:
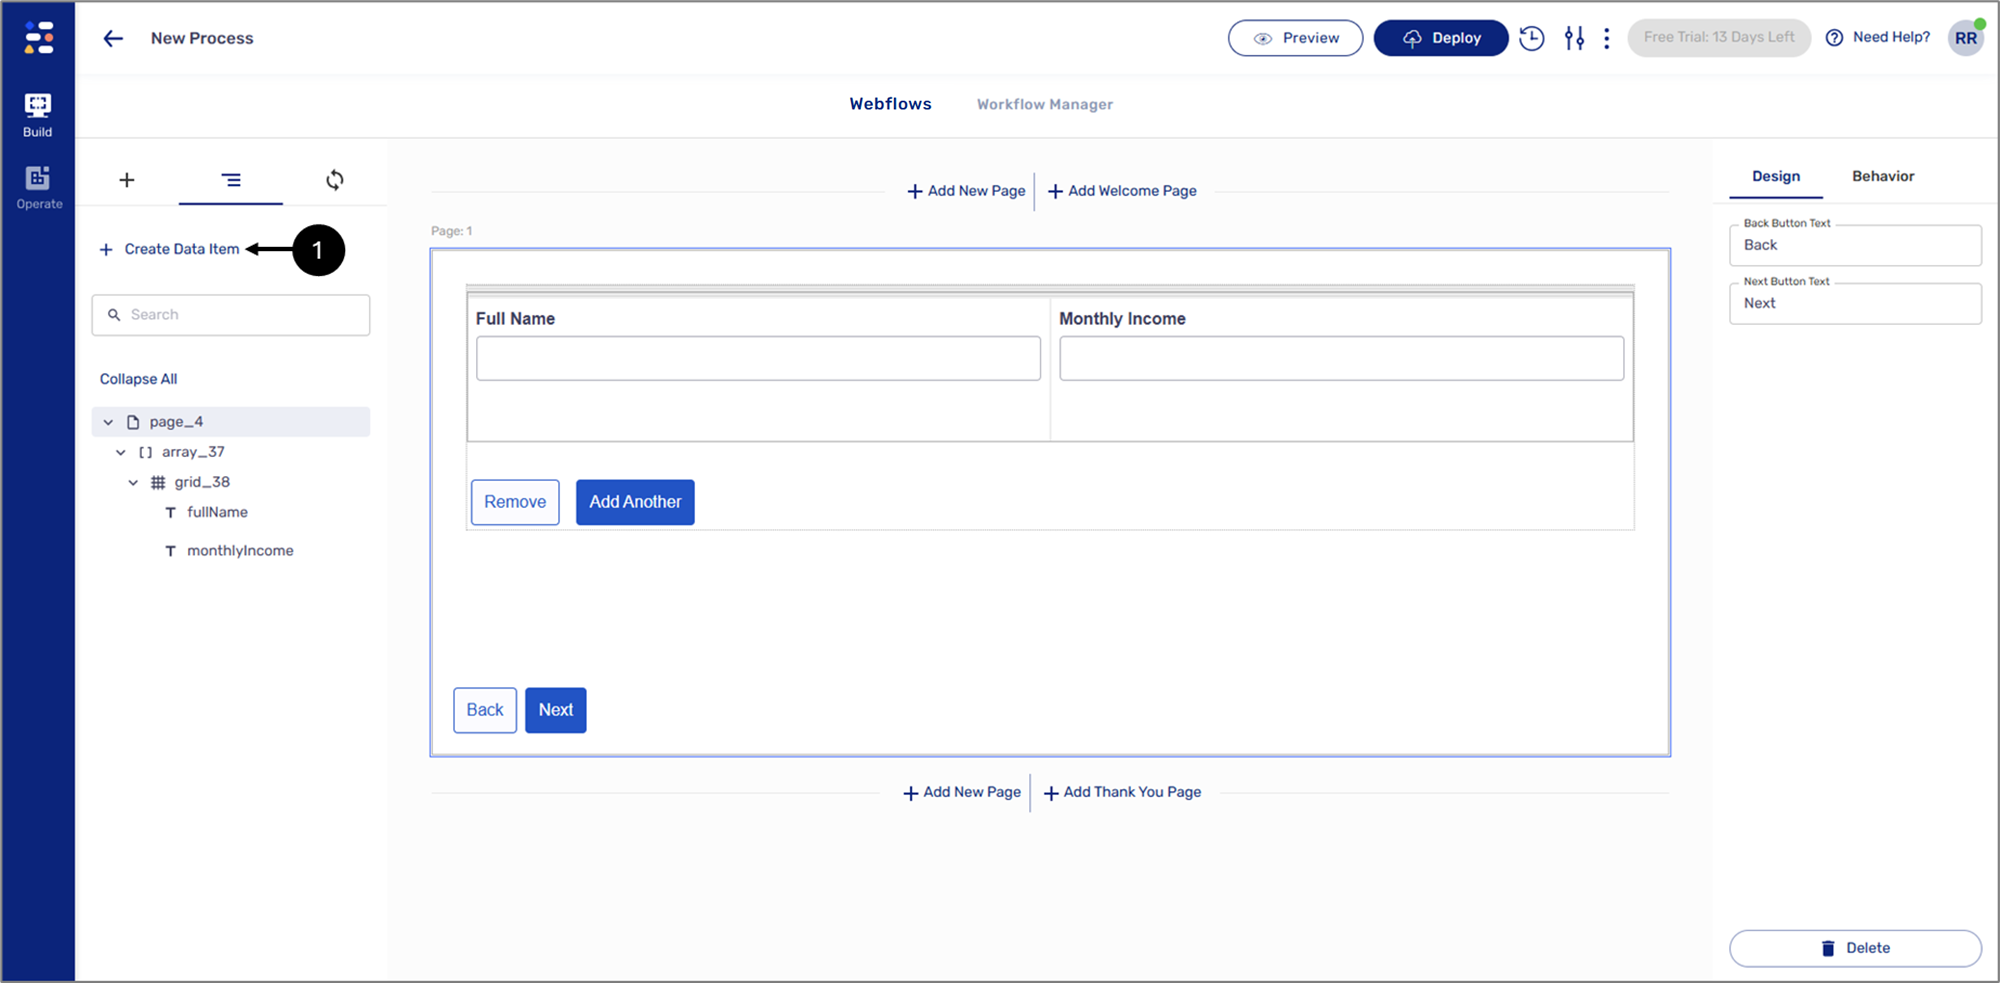
Figure 14: + Create Data Item
- Click + Create Data Item (1).
Result:
The Create Data Item window appears:
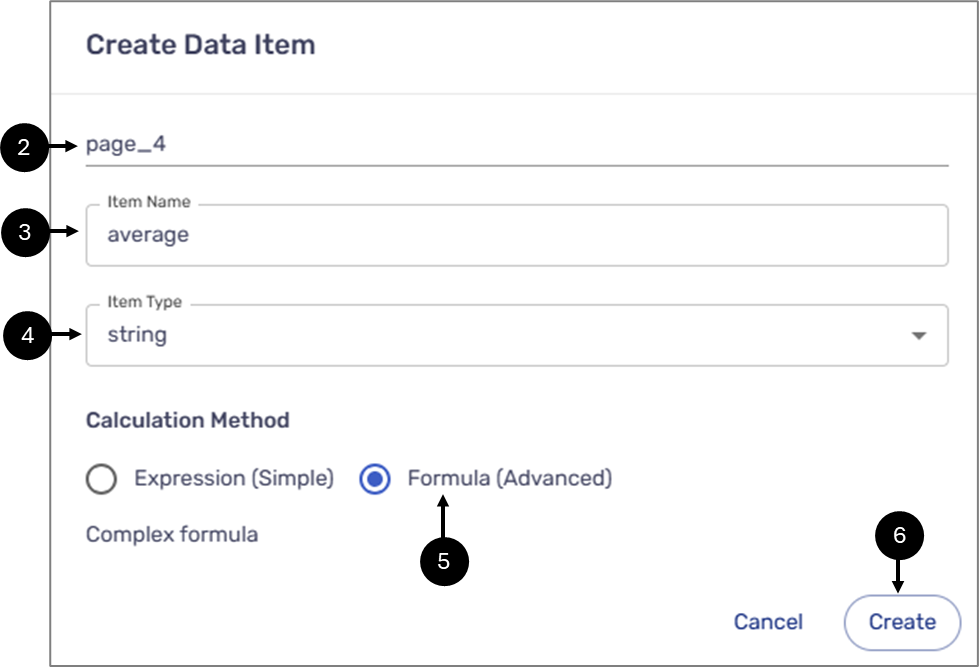
Figure 15: Create Data Item Window
- Verify the parent (2).
- Enter the Item Name (3).
- Select the Item Type (4).
- Select Formula (Advanced) (5).
- Click Create (6).
Result:
The Formula Editor window appears:
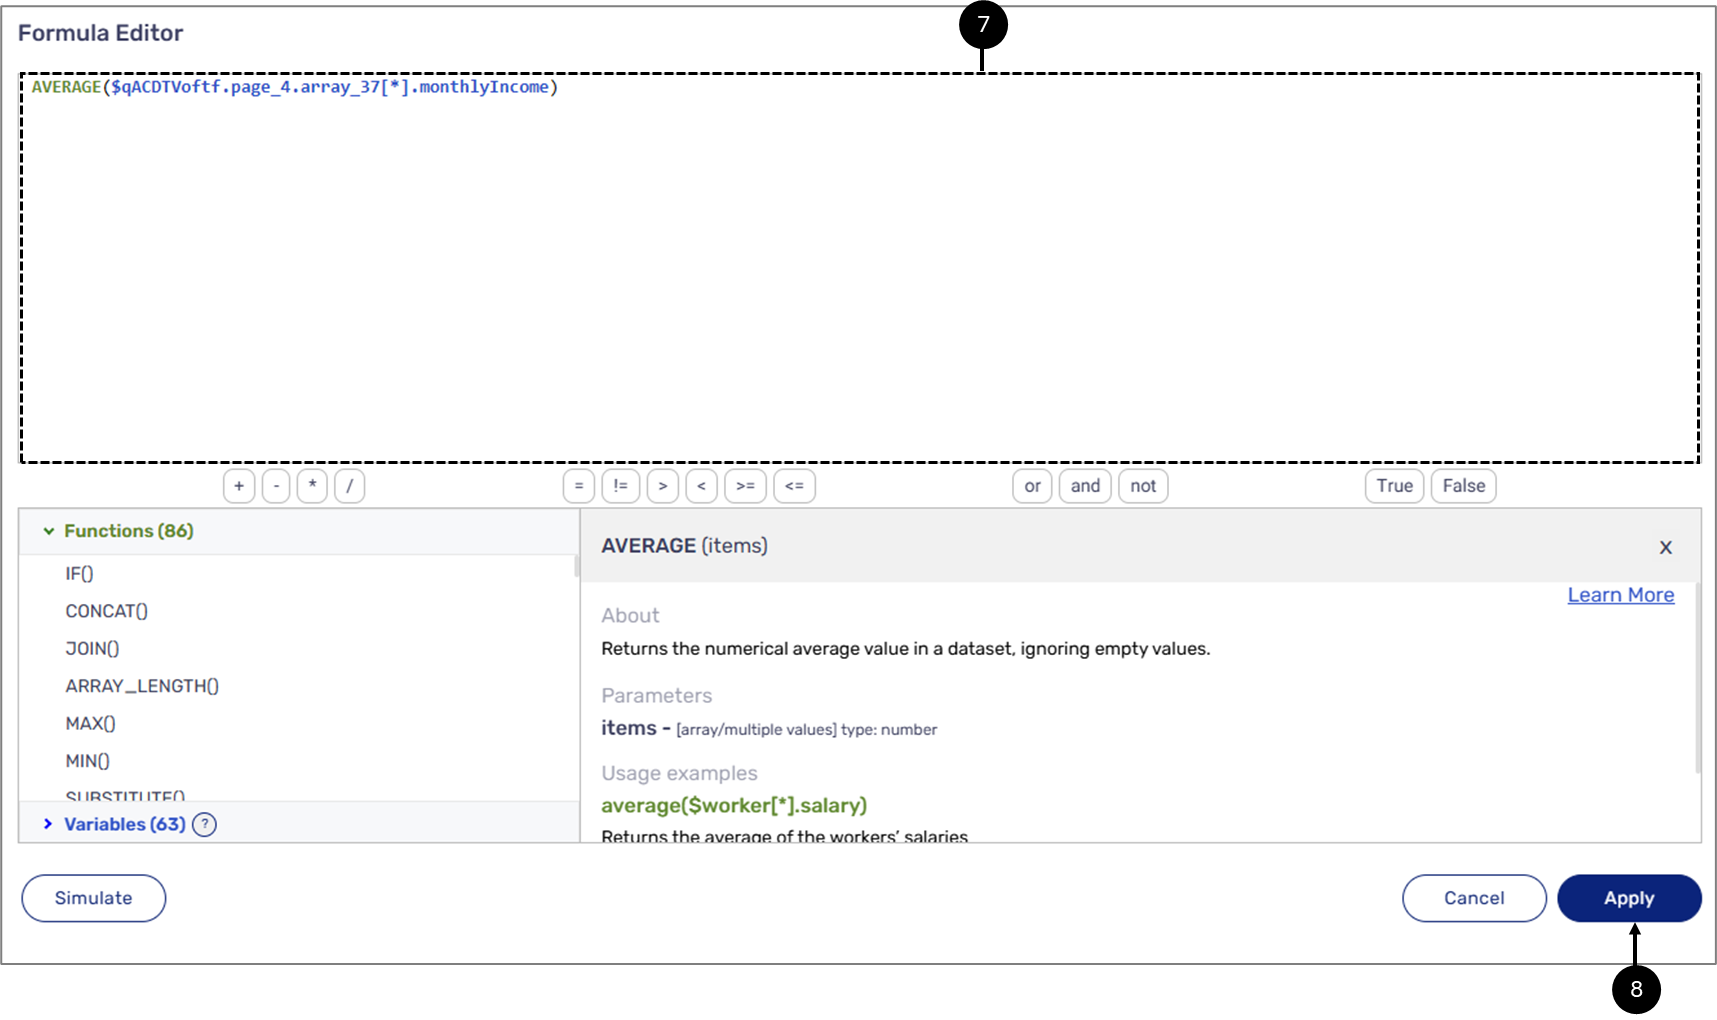
Figure 16: Formula Editor
- Build the formula using operators, functions, and variables, for this example, the function in use is AVERAGE and the variable to use is array's monthlyIncome (7).
- Click Apply (8).
Result:
The data item is created (9):

Figure 17: Created Data Item
NOTE
Once the formula is created, it can be edited under the Behavior tab, for example:
NOTE
For a detailed description of the Formula Editor and how to use it, click here.
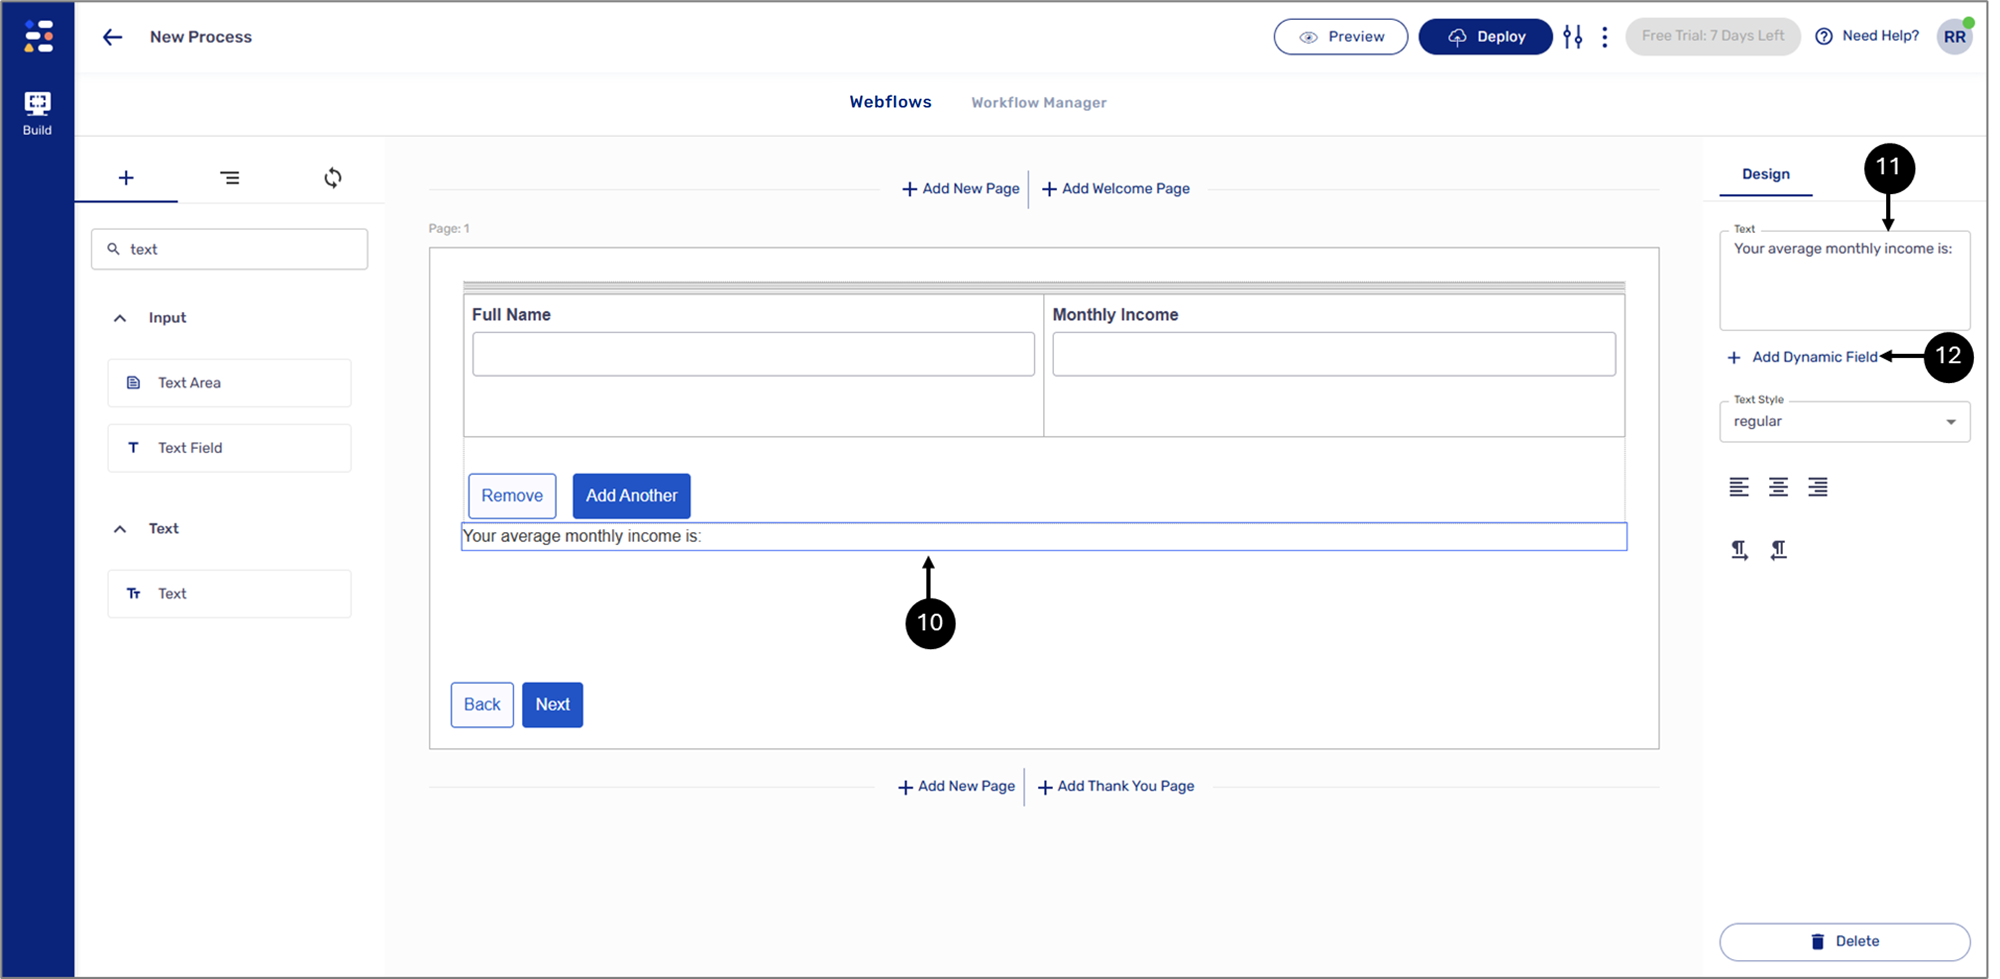
Figure 18: Adding Text Component
- Add a Text component (10).
- Write some text (11) and click the + Add Dynamic Field option (12).
Result:
The Add Dynamic Field window appears:
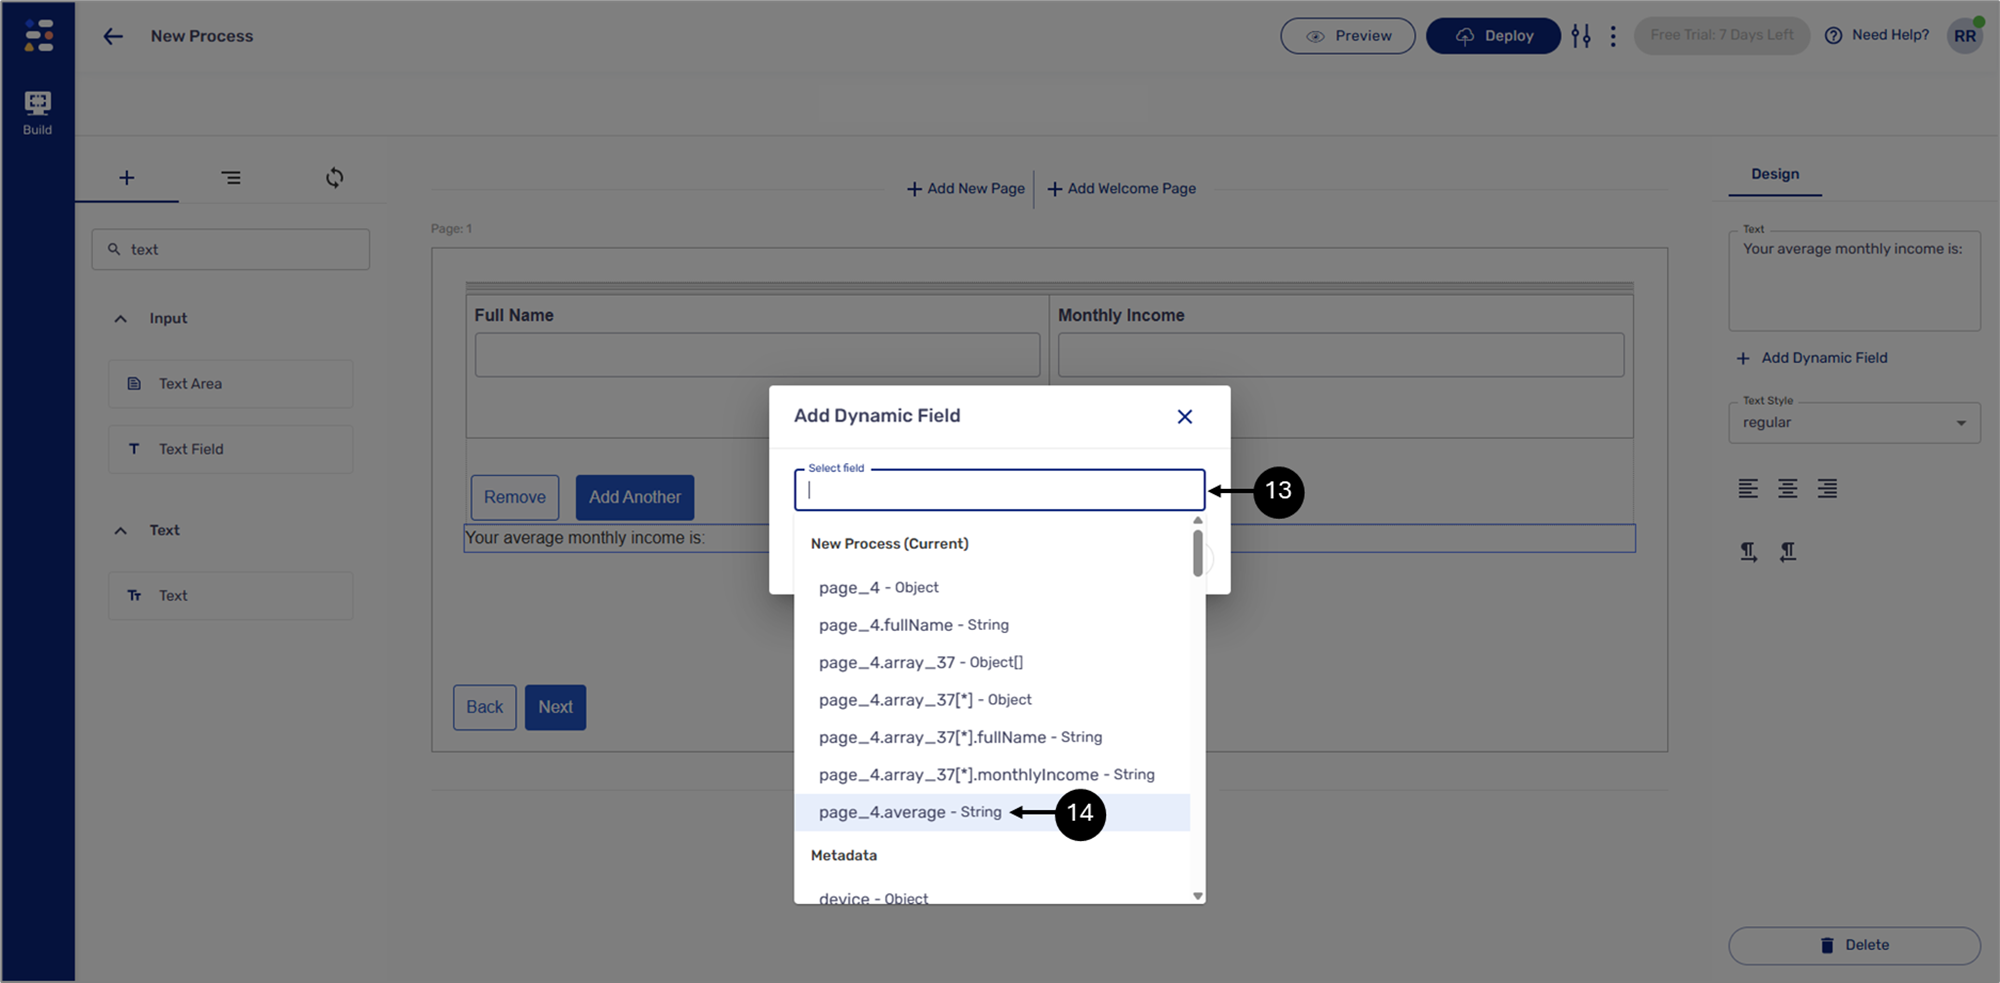
Figure 19: Add Dynamic Field Window
- Click Select field (13).
- Select the simple expression data item you previously created (14).
Result:
The field is selected:

Figure 20: Selected Field
- Click Insert (15).
Result:
The text now contains a dynamic data item:
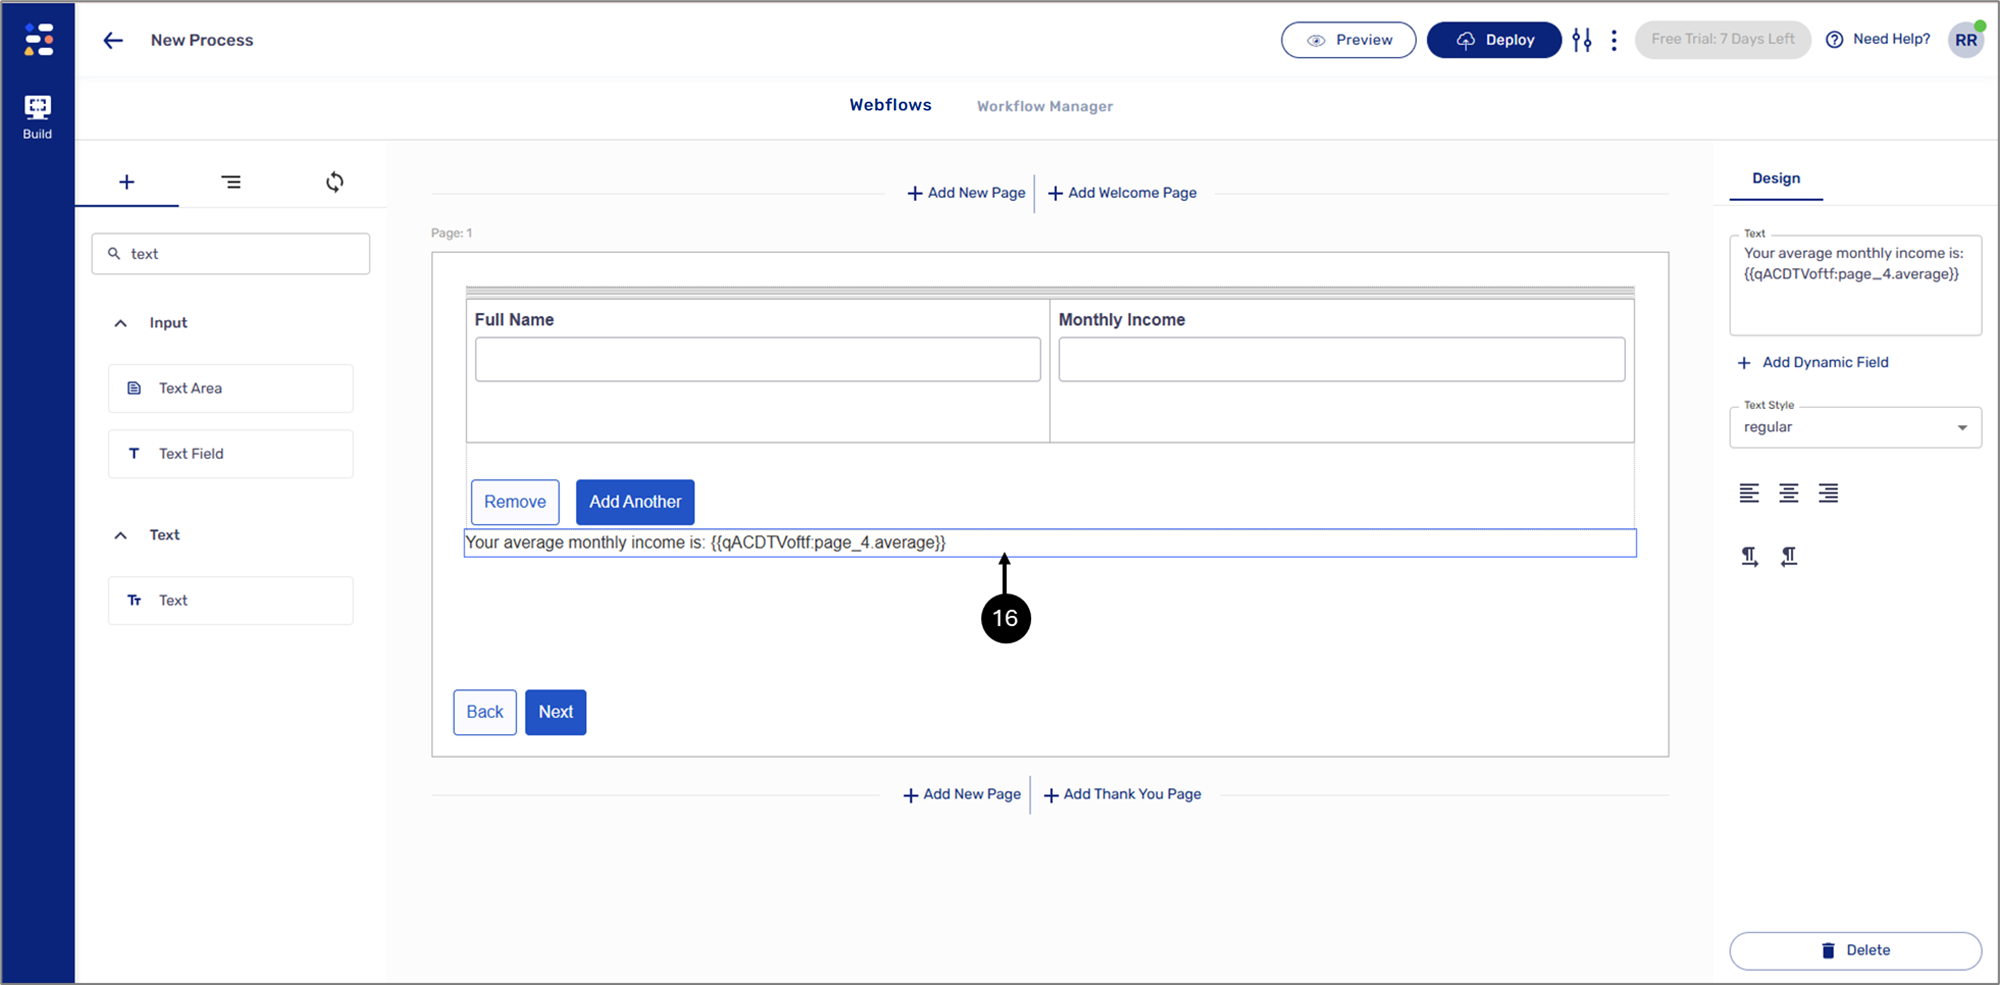
Figure 21: Dynamic Text
Usage Example - Condition
(See Figure 22 and Figure 23)
You can use a created data item as a selector in a condition. For example, the following fields will be visible only if the average calculated in the previous use case example is above 1000.
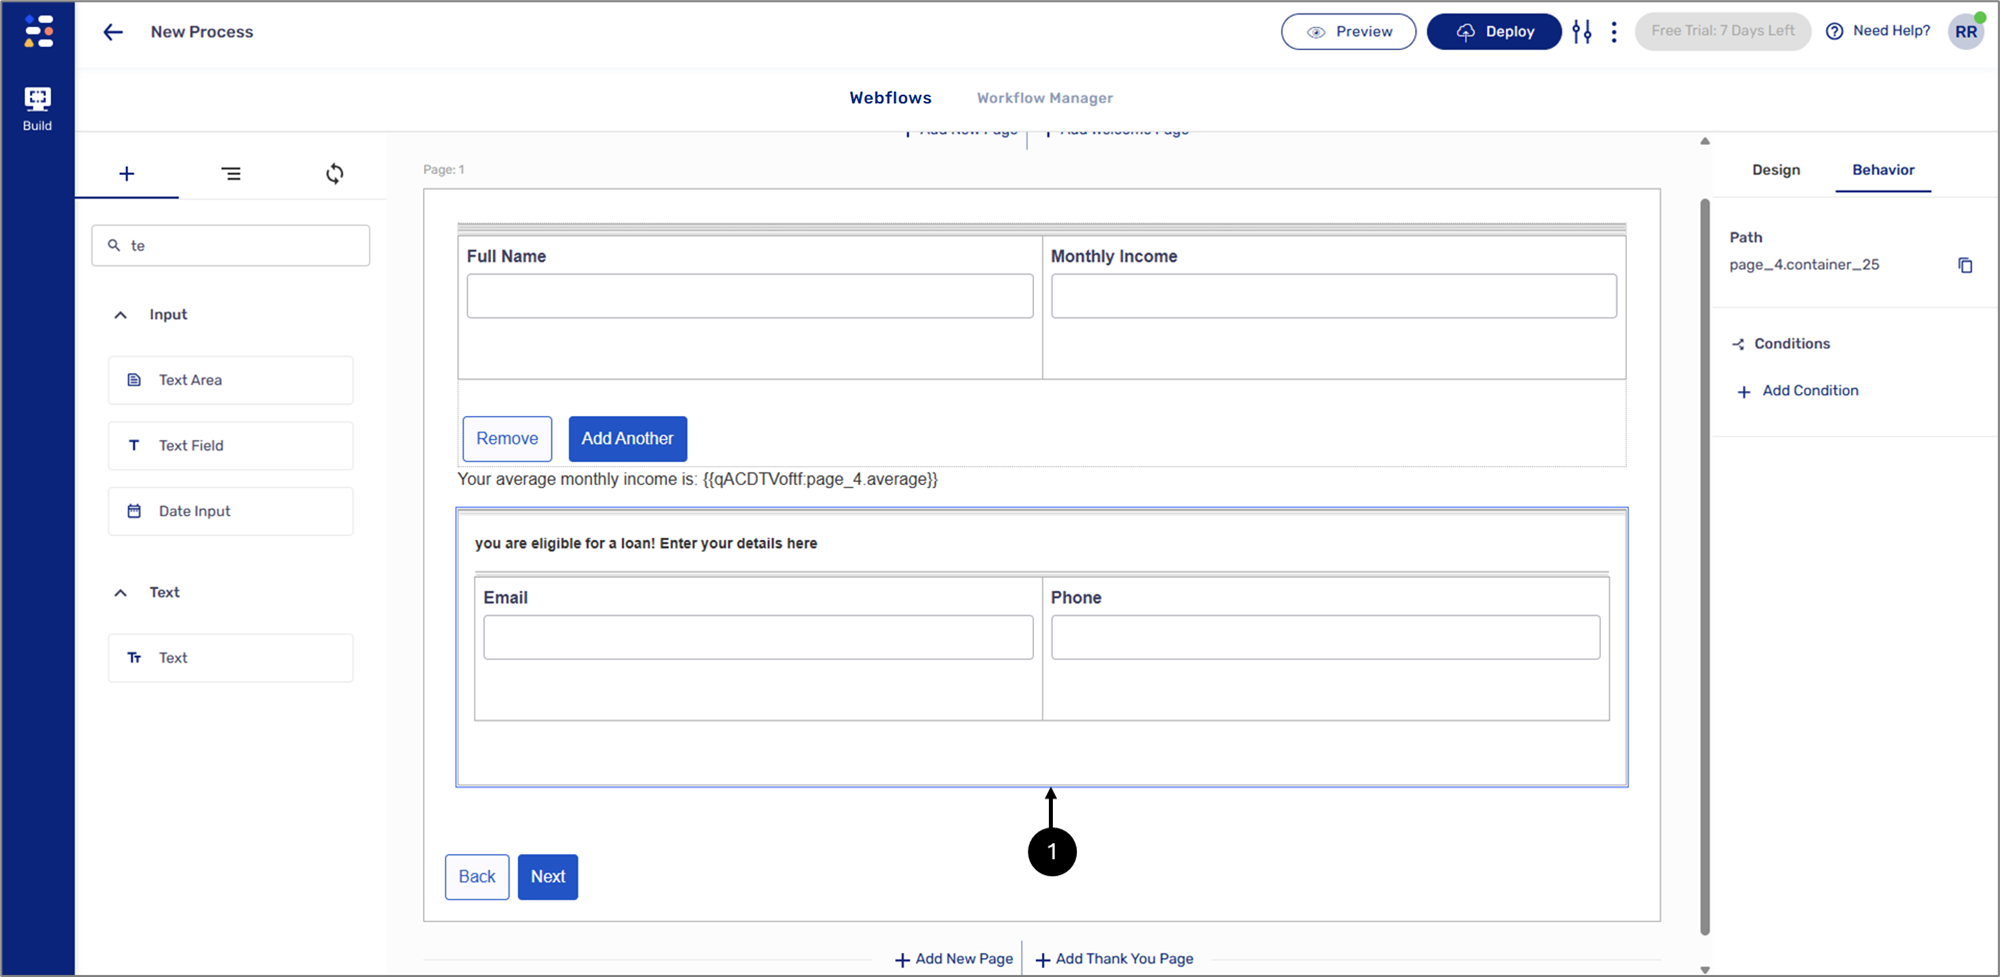
Figure 22: Fields for Condition
The condition will be applied to the Container, using the data item created in the previous use case example as its selector (2).
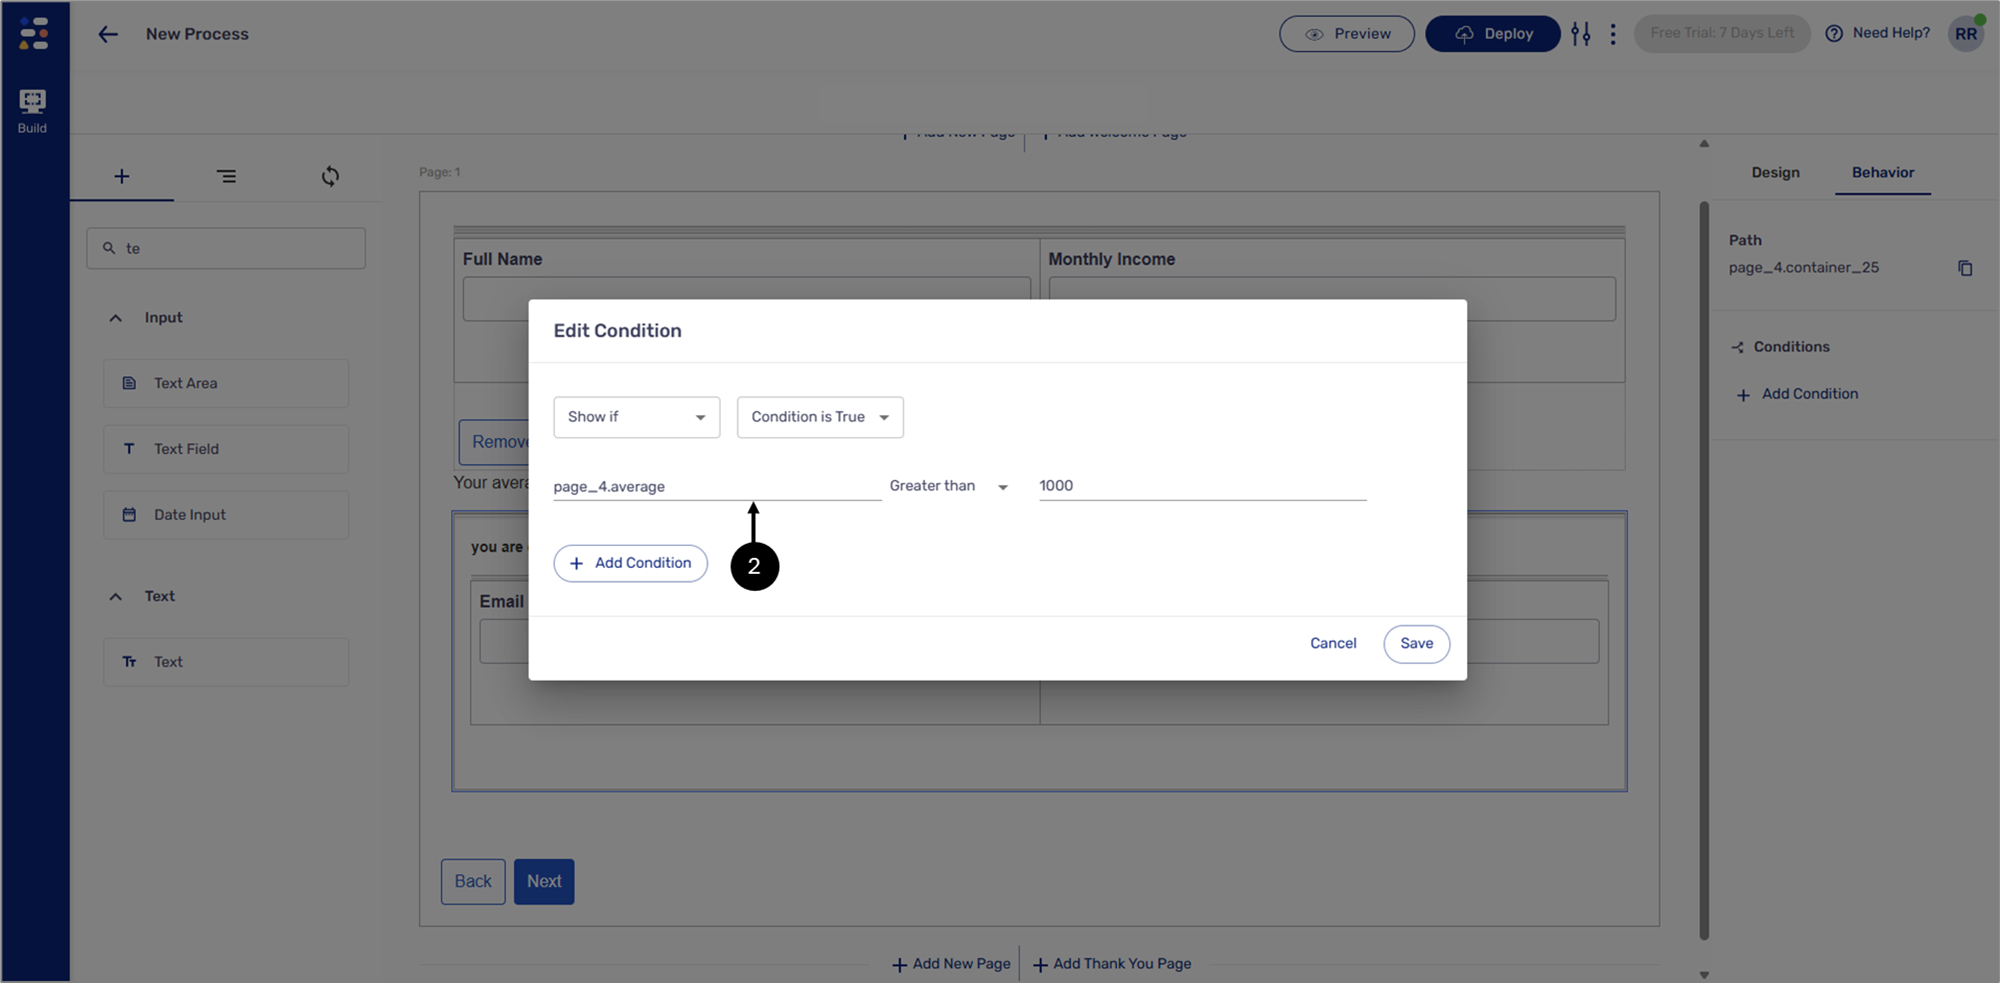
Figure 23: Condition
Was this article helpful?