Article Overview
This article describes how to manage arrays. Starting with how to create them, which components to drag and drop to the canvas, in which order, and how to connect them to the Model. The article also describes different methods for displaying array items on a PDF.
What is an Array?
An array is used to duplicate fields for data input by end-users while using a digital process. For example, if end-users need to input information about their kids, they can add the appropriate number of fields by themselves instead of using pre-created static fields that were created beforehand.
Array components
An array is created from the following components:
- Mandatory Components:
- Container
- Running Number Indicator
- Array Buttons
- Other components such as: Text Inputs, Checkboxes, and Radio Questions.
How to Build the Array Structure?
(See Figure 1 to Figure 6)
To build the array structure, perform the following steps:

Figure 1: Added Main Page Component
- Drag and drop a Main Page component (1) to the canvas of the Webflow.

Figure 2: Added Container Component
- Drag and drop a Container component (2) onto the Main Page component.

Figure 3: Added Running Number Indicator Component
- Drag and drop a Running Number Indicator component (3) onto the Container component.
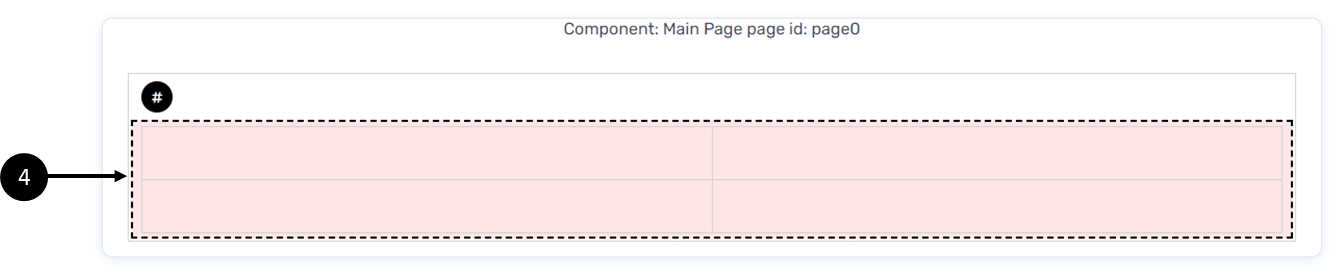
Figure 4: Added Grid Component
- Drag and drop a Grid component (4) onto the Container component.
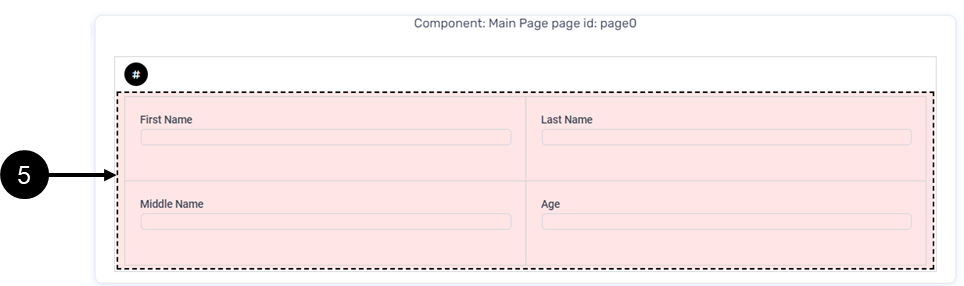
Figure 5: Added Text Input Components
- Drag and drop desired components such as Text Inputs (5) onto the Container component.
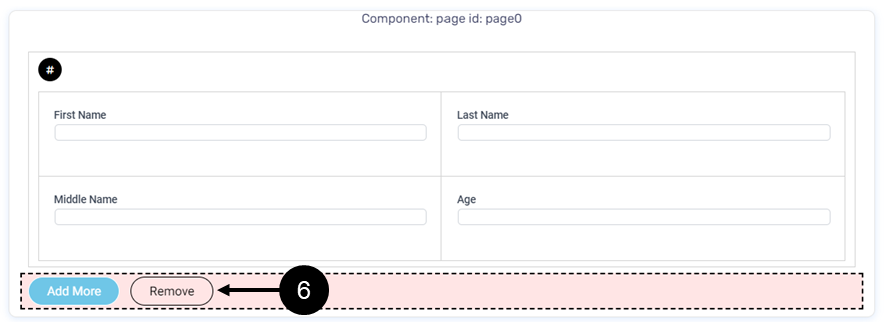
Figure 6: Added Array Buttons Components
- Drag and drop the Array Buttons component (6) onto the Main Page Component outside of the container.
How to Build the Array Model Data Structure?
(See Figure 7 and Figure 8)
To build the array structure, perform the following steps:
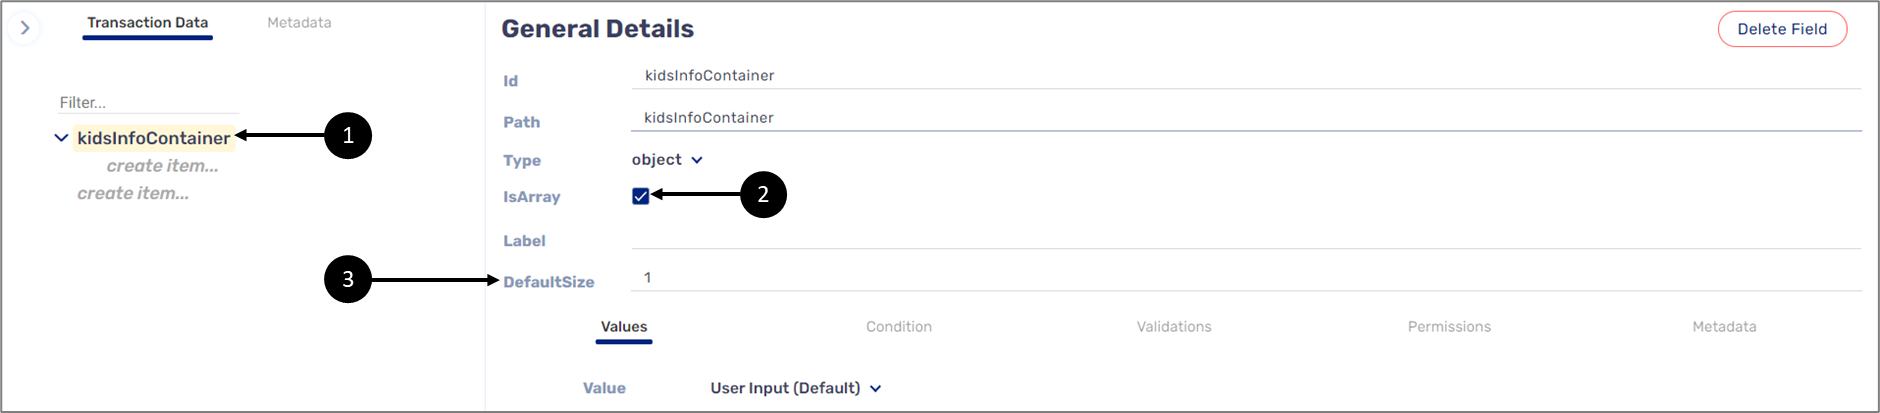
Figure 7: Transaction Data Item - object
- Create an object type transaction data item (1).
- Check the isArray checkbox (2).
- Set the DefaultSize field (3).
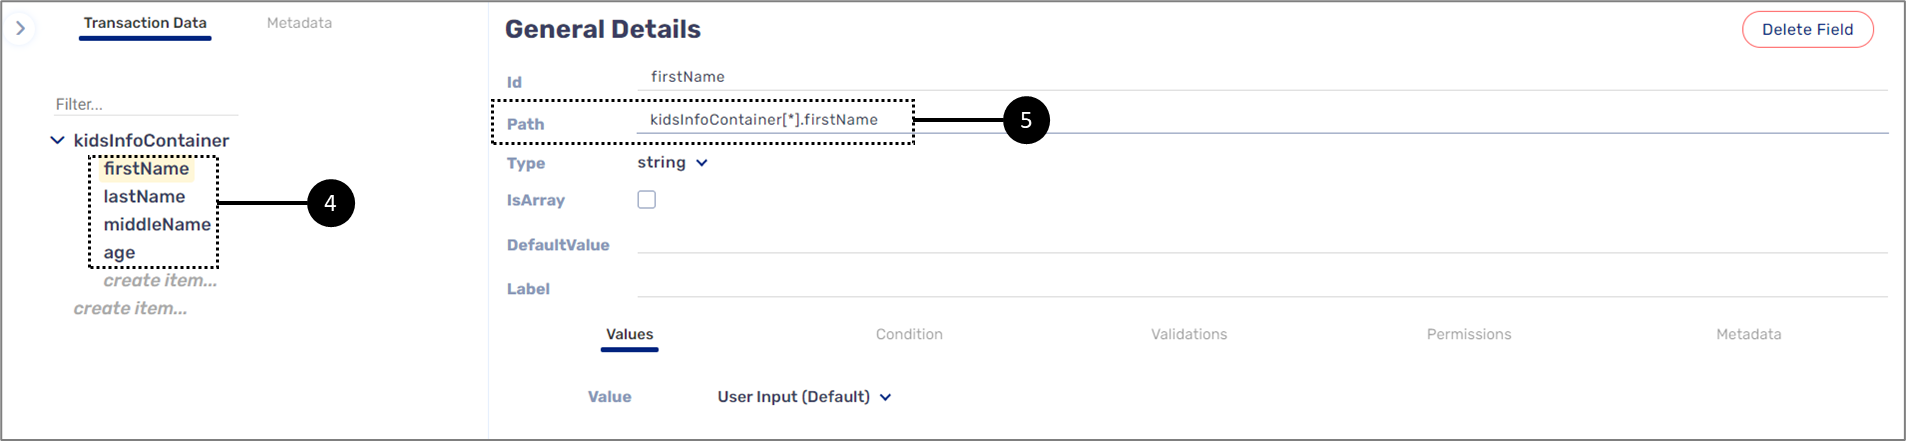
Figure 8: Transaction Data Item - object
- Create transaction data items under the object (4) created in step 1.
How to connect the Webflow Components to the Model?
(Figure 9 to Figure 22)
To connect the Webflow components with the Model, perform the following steps:
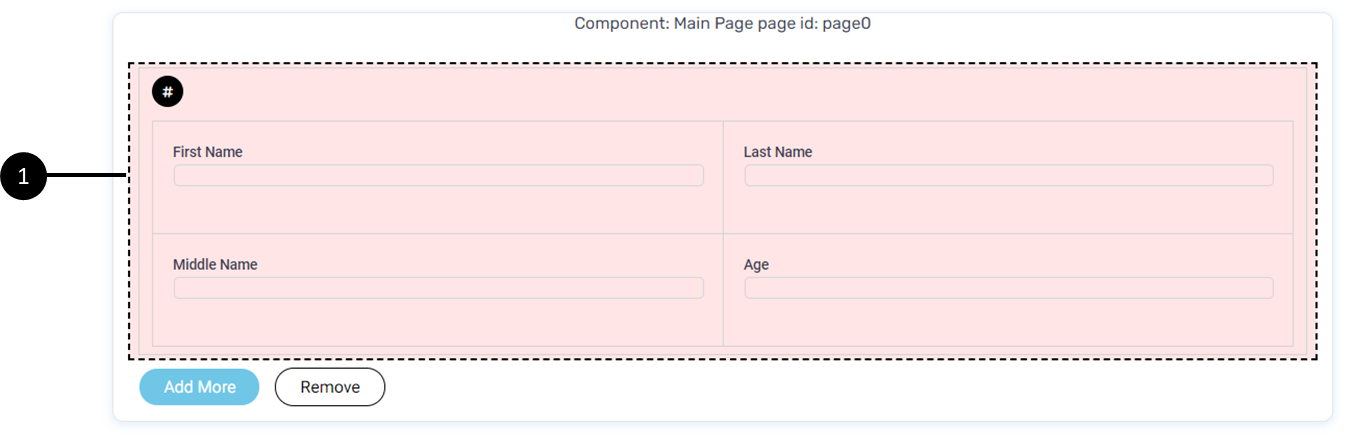
Figure 9: Container Component
- Click the Container component (1).
Result:
The Container component Properties section (2) appears:
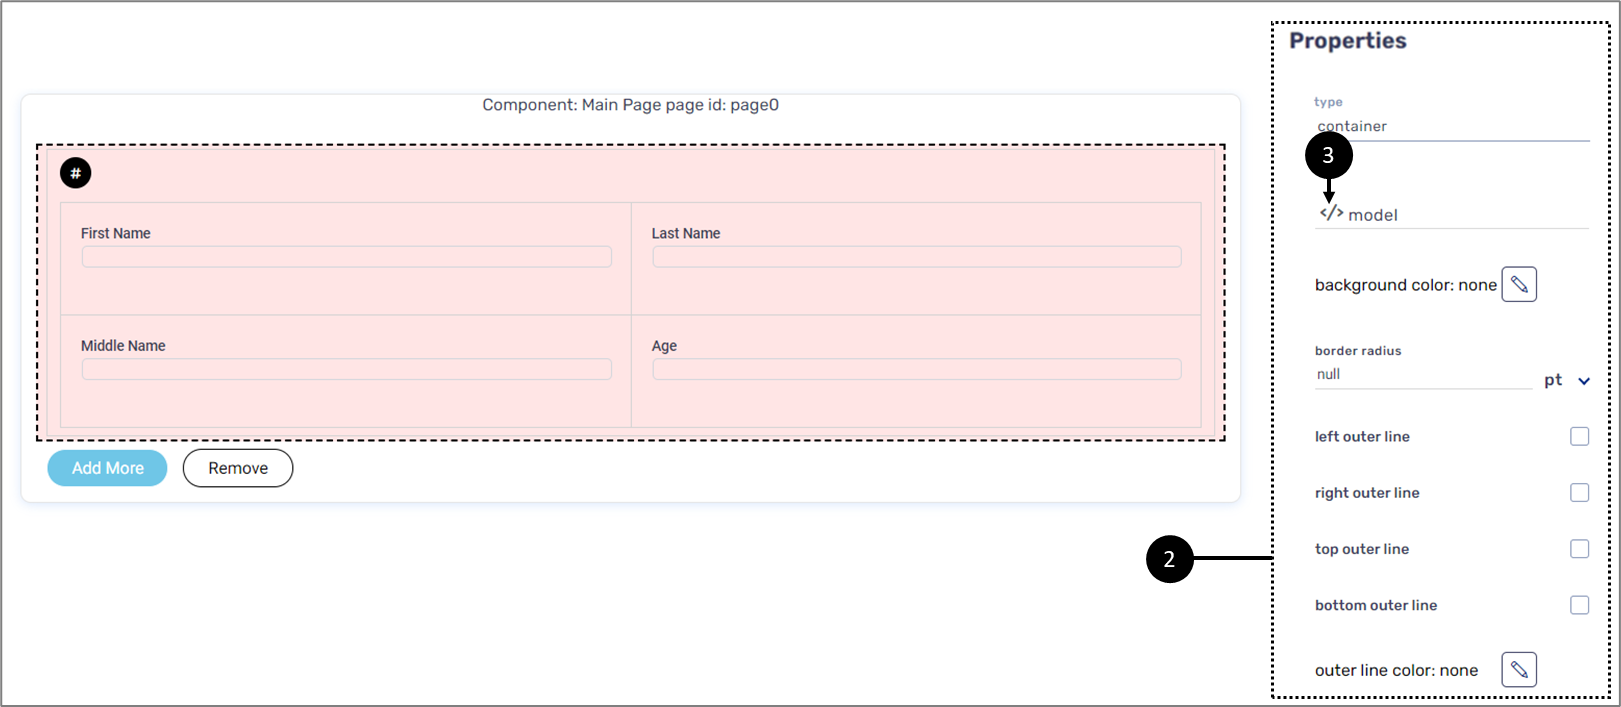
Figure 10: Container Component Properties Section
- Click the icon (3).
Result:
The Model main screen appears:

Figure 11: Connecting the Container Component
- Click the object type transaction data item (4).
- Click the OK button (5).
Result:
- The Container component is connected to the Model.
- The Webflow main screen appears:
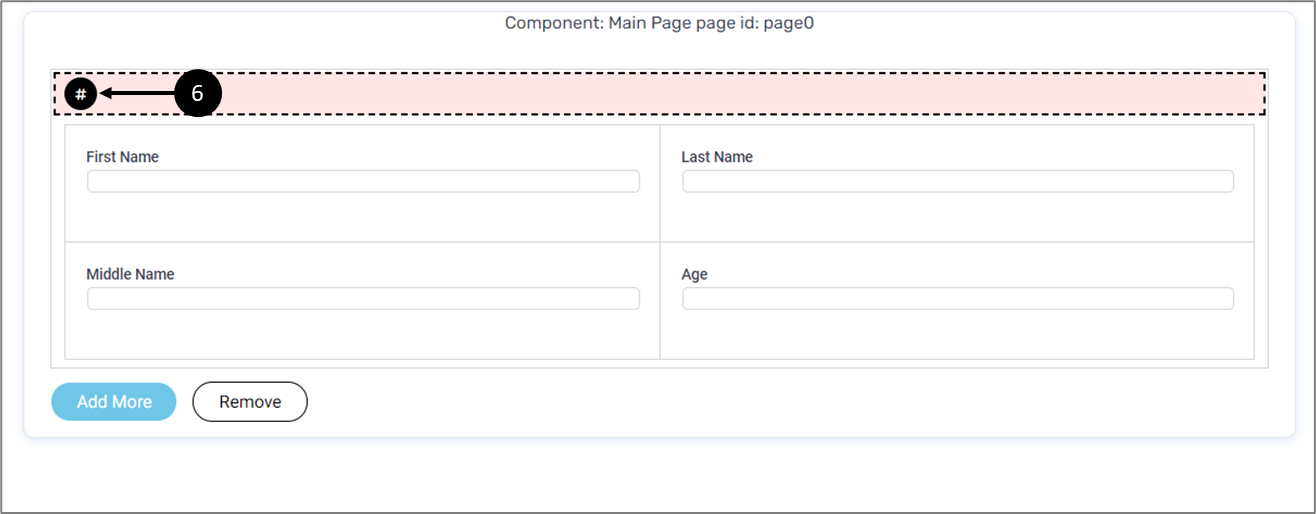
Figure 12: Running Number Indicator Component
- Click the Running Indicator Number component (6).
Result:
The Running Indicator Number component Properties section (7) appears:

Figure 13: Running Number Indicator Component Properties Section
- Click the model (8).
Result:
The model changes location:
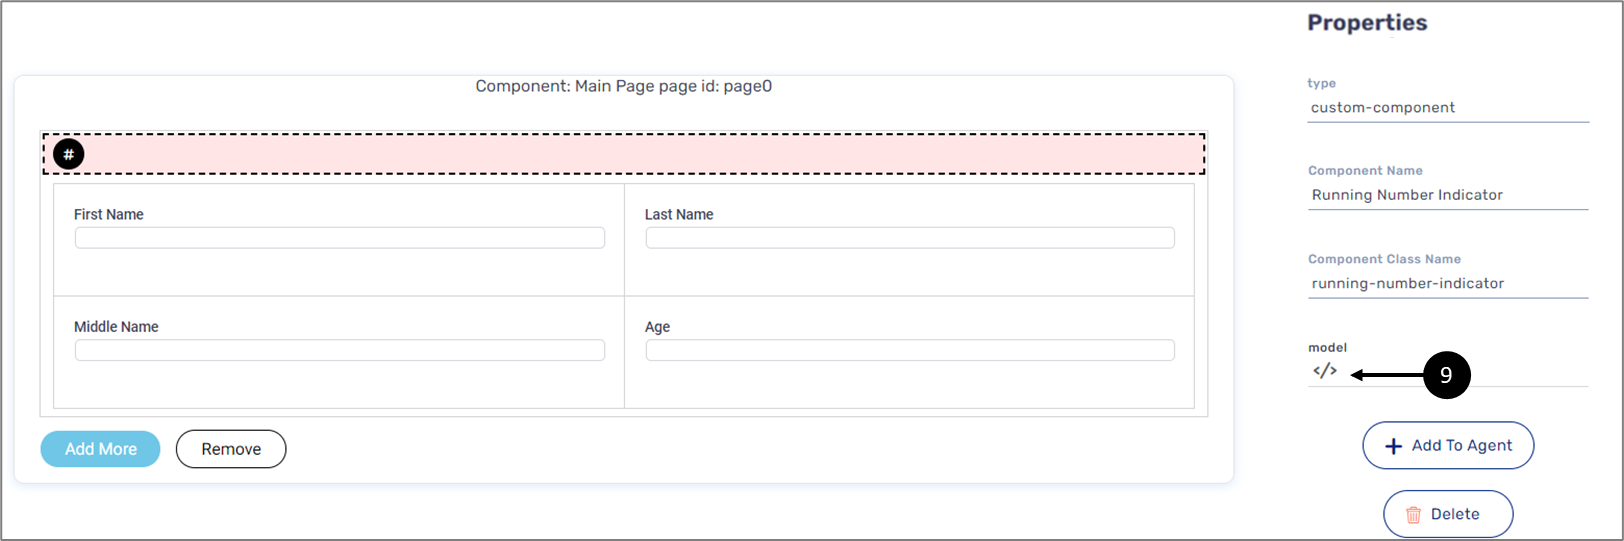
Figure 14: Connecting the Running Number Indicator to the Model
- Input a dot (.)(9).
Inputting a dot (.) is the only way to connect the Running Number Indicator to the Model.
- Connect the Text Input components to the Model:
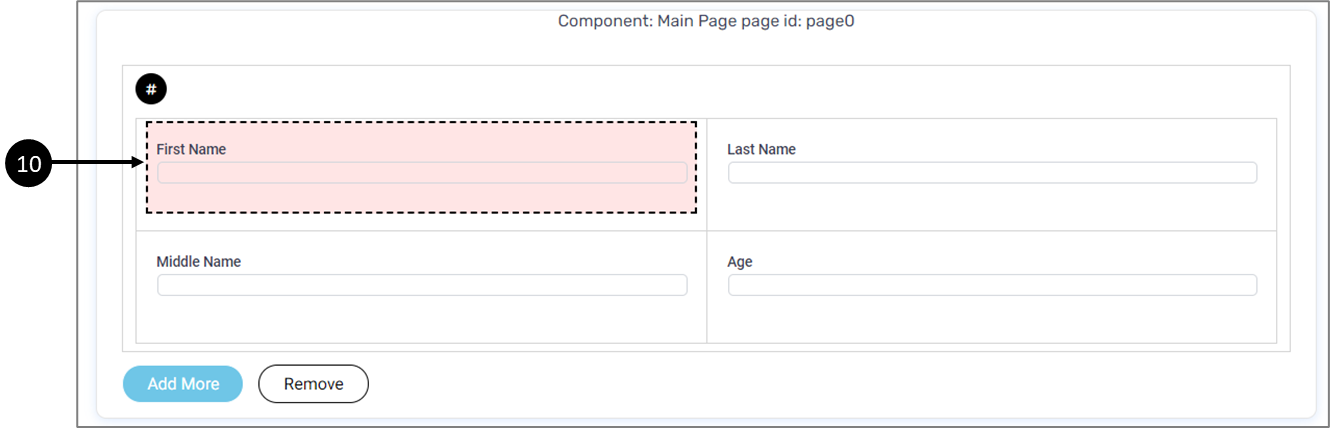
Figure 15: Text Input Component
- Click the Text Input component (10).
Result:
The Text Input Properties section (11) appears:
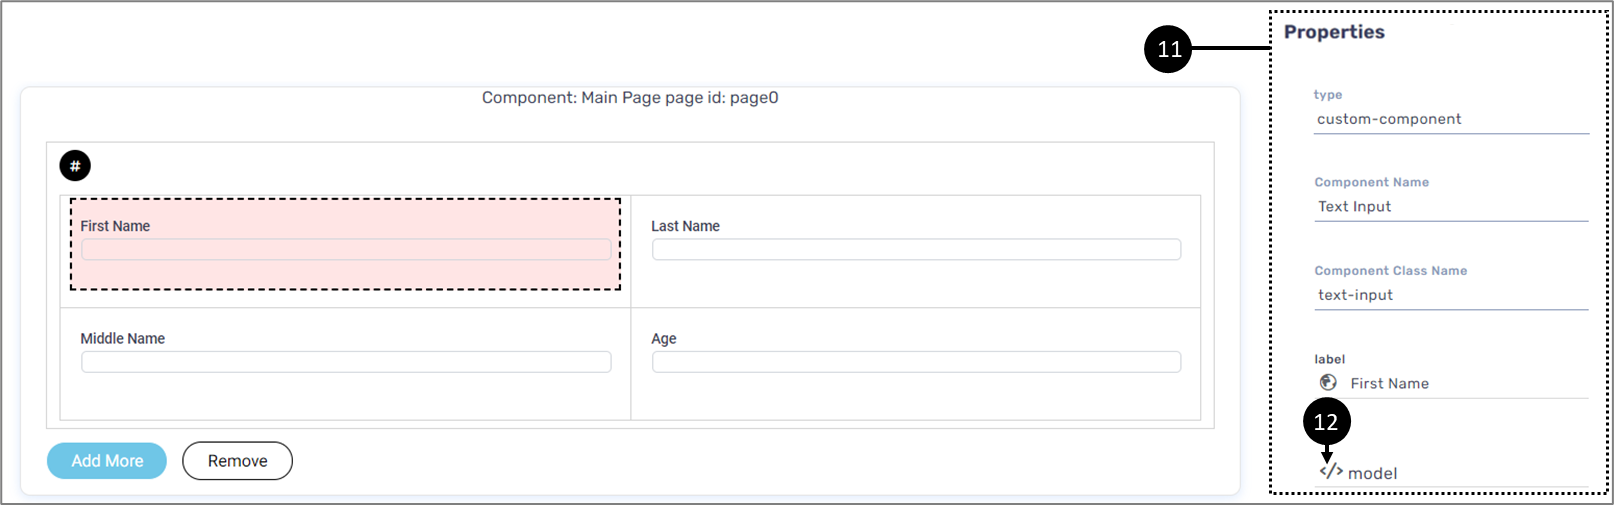
Figure 16: Text Input Properties Section
- Click the icon (12).
Result:
The Model main screen appears:

Figure 17: Connecting the Text Input Component
- Click the appropriate transaction data item (13).
- Click the OK button (14).
Result:
- The Webflow main screen appears.
- The Text Input component is connected to the Model (15):

Figure 18: Text Input Connected to the Model
- Repeat steps a to d to connect the rest of the Text Input components to the Model.
- Click the Array Buttons component (16).
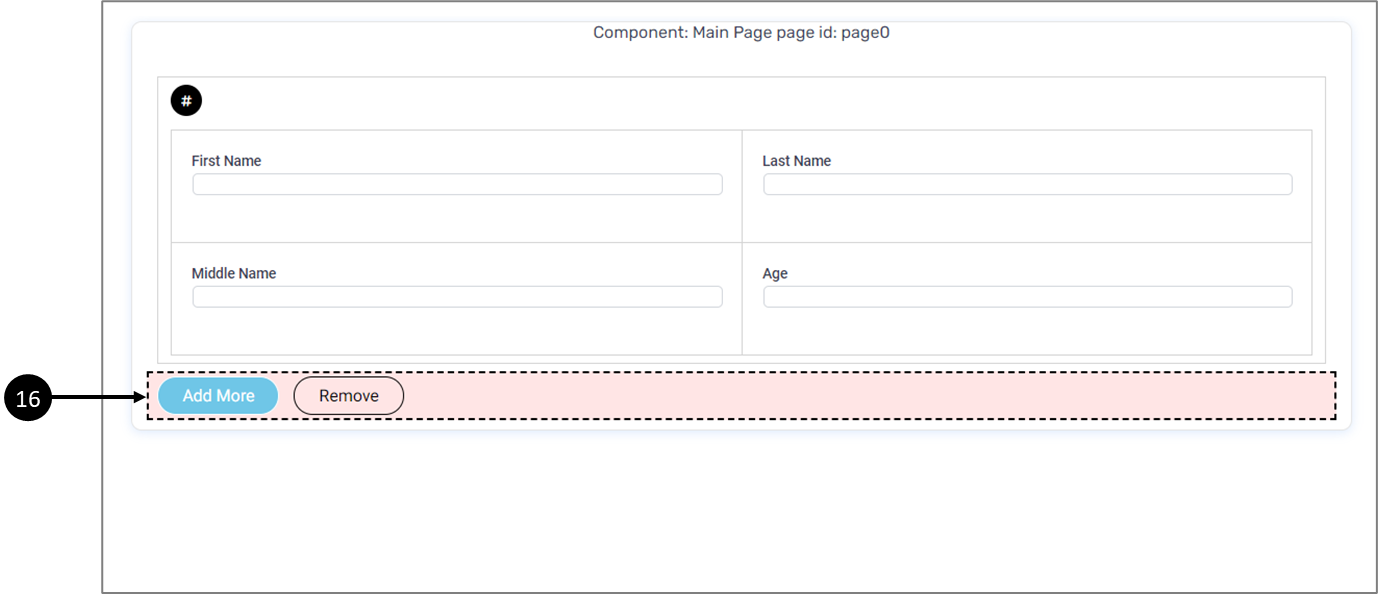
Figure 19: Array Buttons component
Result:
The Array Buttons Properties section (17) appears:
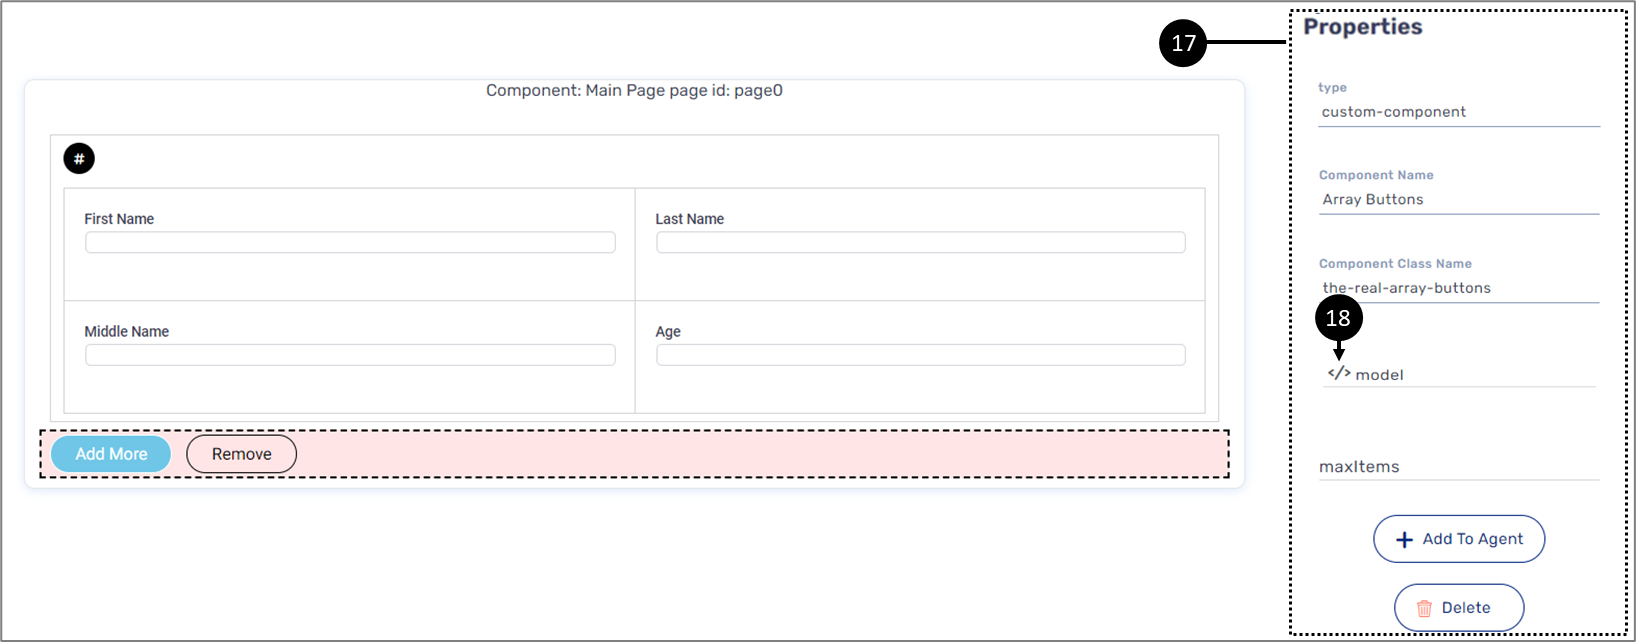
Figure 20: Array Buttons Properties Section
- Click the icon (18).
Result:
The Model main screen appears:
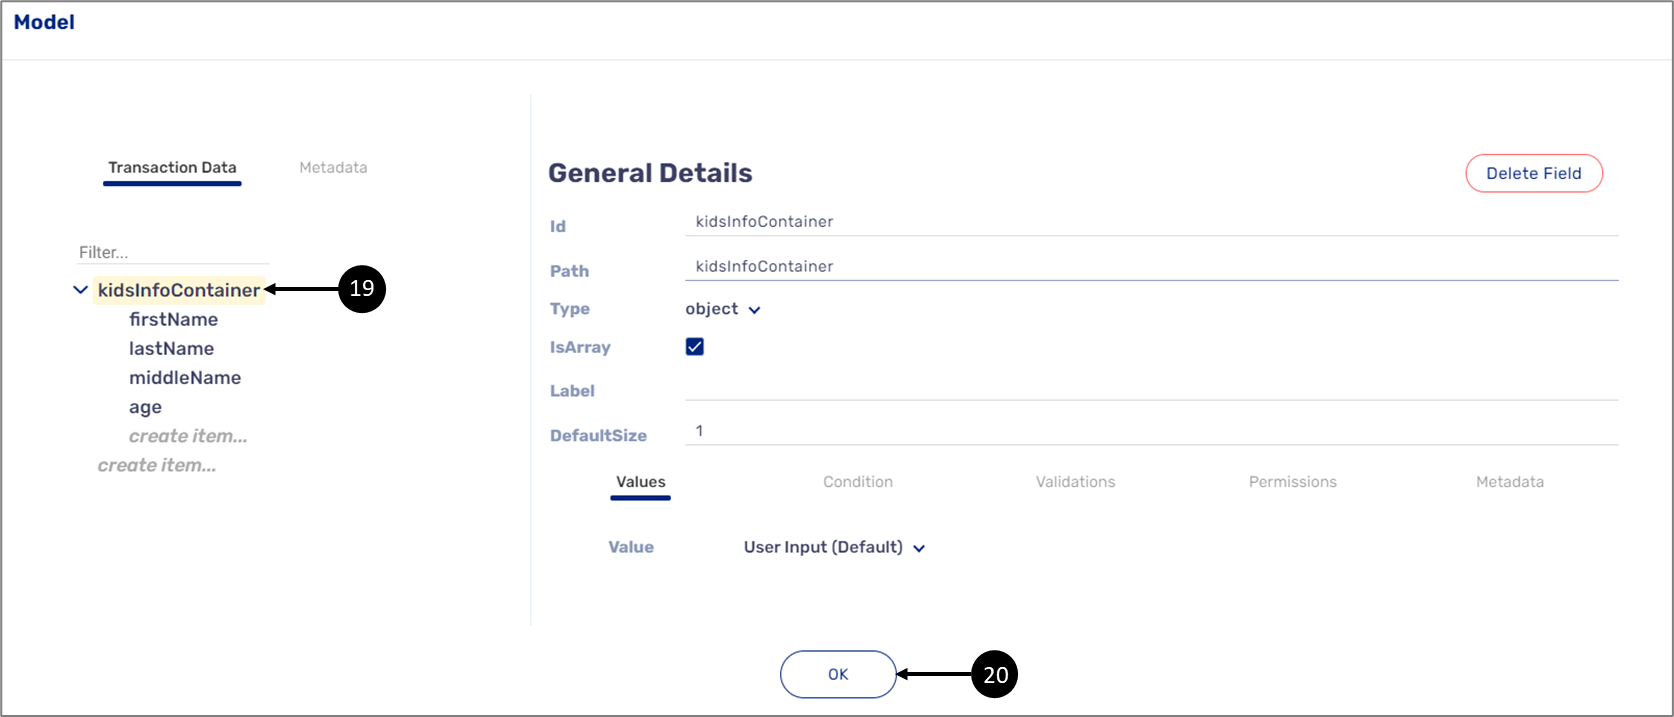
Figure 21: Connecting the Array Buttons Component
- Click the object type transaction data item (19).
- Click the OK button (20).
Result:
- The Array Buttons component is connected to the Model.
- The Webflow main screen appears:
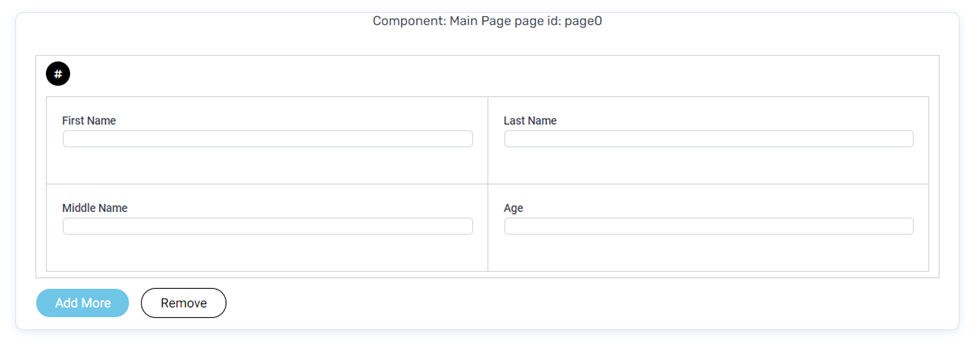
Figure 22: Connected Webflow Components
Array Example
Figure 23 displays a live digital process with the array created in the previous sections. It contains the fields that will be duplicated (1) and the Add More button (2):
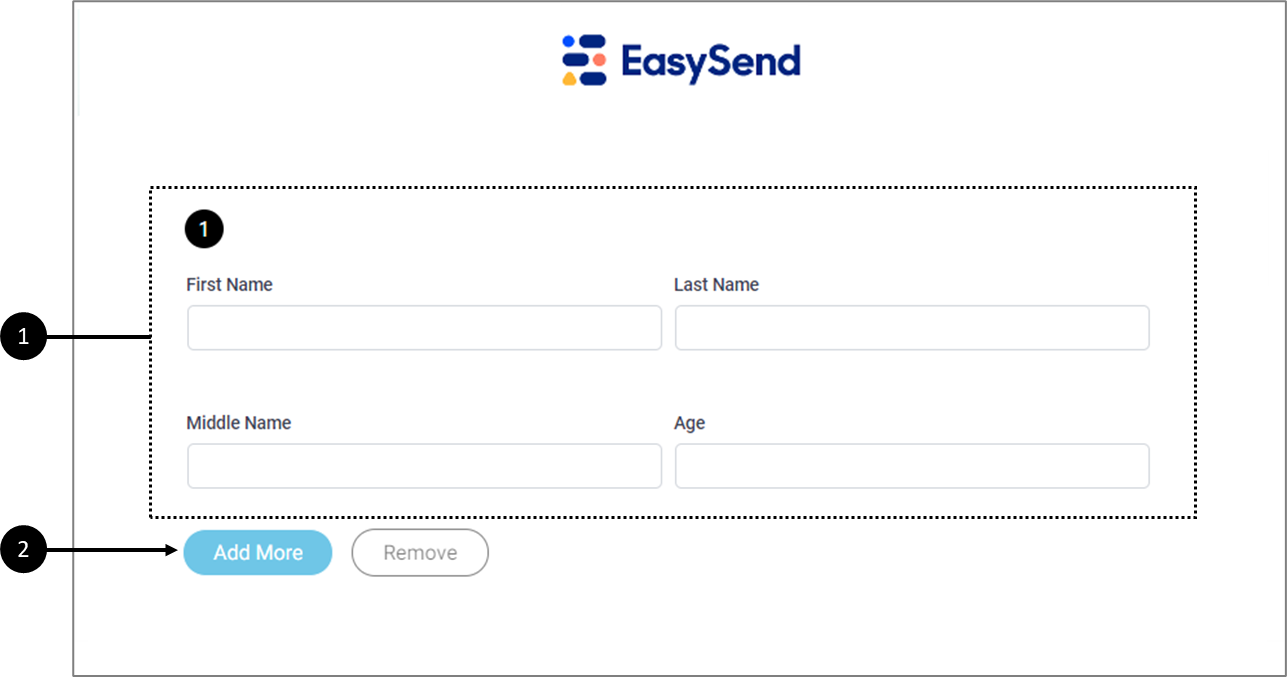
Figure 23: Live Digital Process with an Array 1 of 2
Once the Add More button is clicked, the fields are duplicated (see Figure 24):
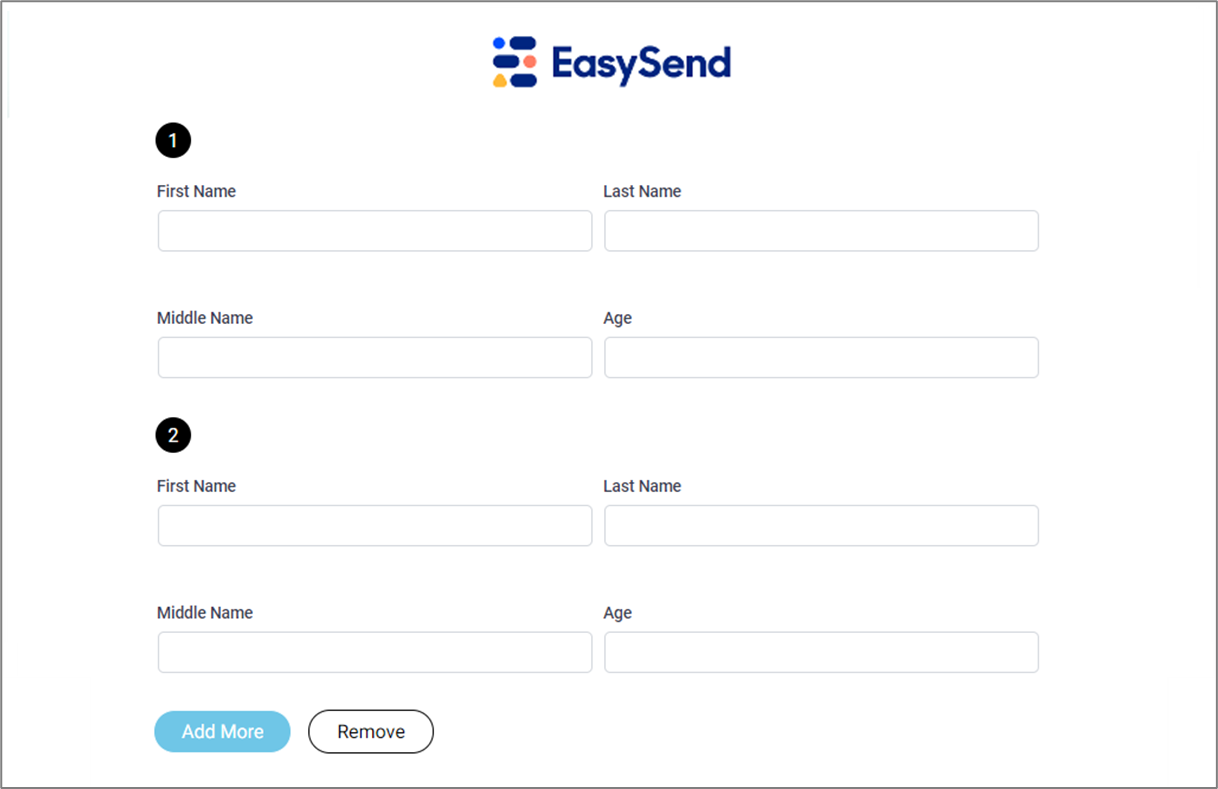
Figure 24: Live Digital Process with an Array 2 of 2
Array and PDF Pages
The following sections describe different methods of connecting PDF pages to the Model to display array items.
Displaying Array Information on a PDF Page
When displaying array information on a PDF page the relevant fields must be defined and connected to the Model while specifying their array index. For example, to display information a customer inputs about their children you will define the PDF and connect its fields to the Model as follows:
- Each field on the first row (1) is defined according to its type (in this example the field type is text).
- Each defined field is connected to the appropriate transaction data item in the Model while the array index is set to 0, for example:
children[0].firstName (2). For every additional row, the index offset will be +1.
![Each field on the first row is defined according to its type (in this example the field type is text). Each defined field is connected to the appropriate transaction data item in the Model while the array index is set to 0, for example: children[0].firstName. For every additional row, the index offset will be +1.](https://cdn.document360.io/45e1a1b1-1964-46f1-939e-f40bde9b50fa/Images/Documentation/image-1655817919448.png)
Figure 25: Displaying Array on a PDF
Displaying Array Items on Separate PDF Pages
(See Figure 26 to Figure 28)
It is possible to connect PDF pages to an array so each page will display one array item. For example, for a school onboarding digital process, end-users with a multiple number of children create an array item per child:
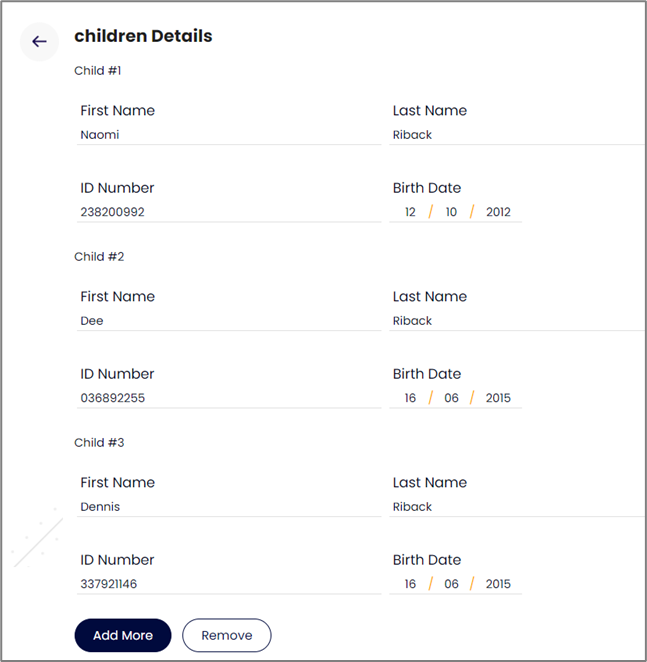
Figure 26: Array Items on Digital Process
On the Preview page, the PDF displays an array item per page:
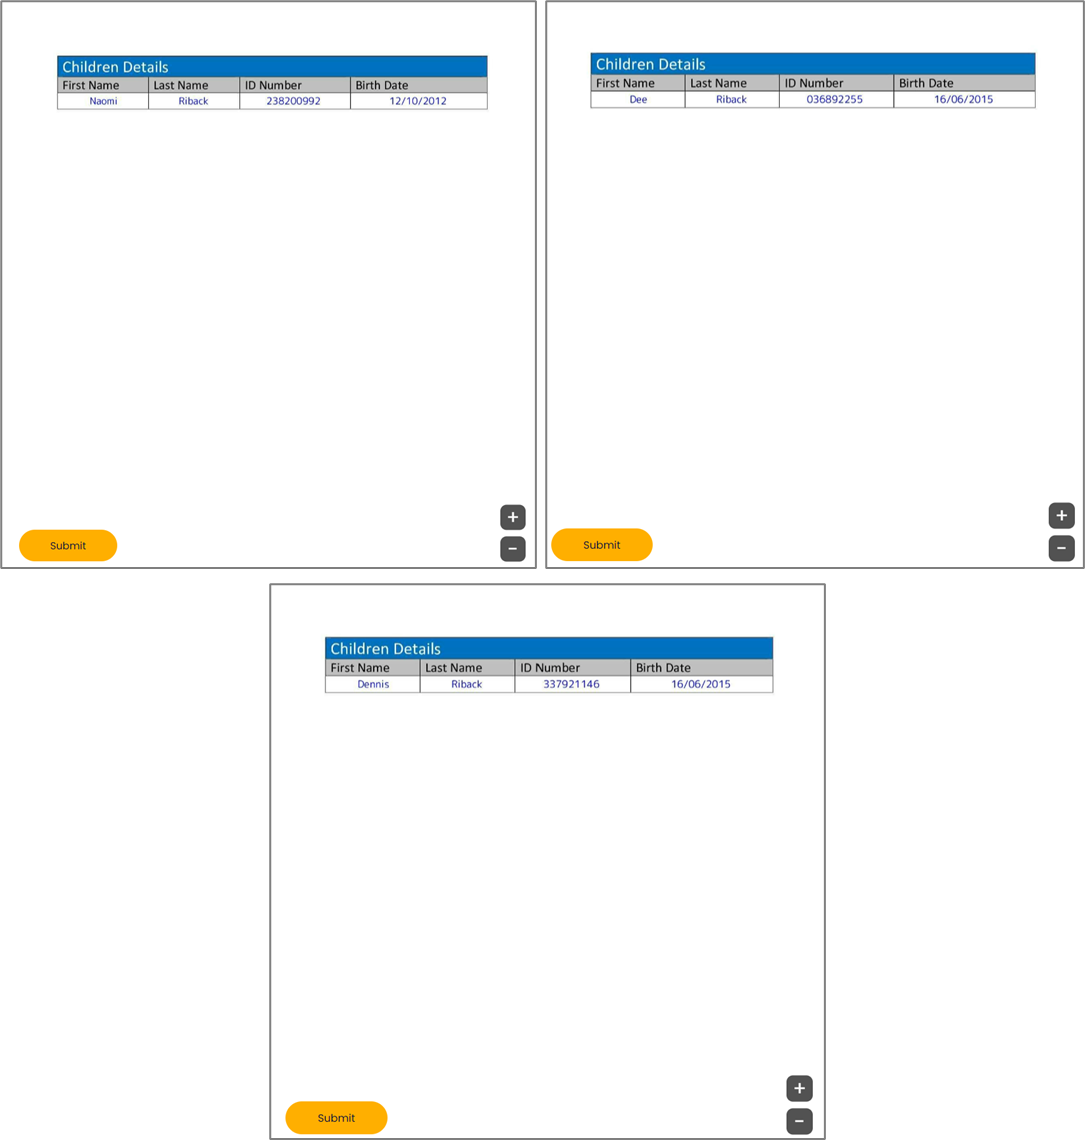
Figure 27: Array Items per PDF Page
When sending the PDF form as an attachment as part of the complete stage output email, each array item will appear on a different page:
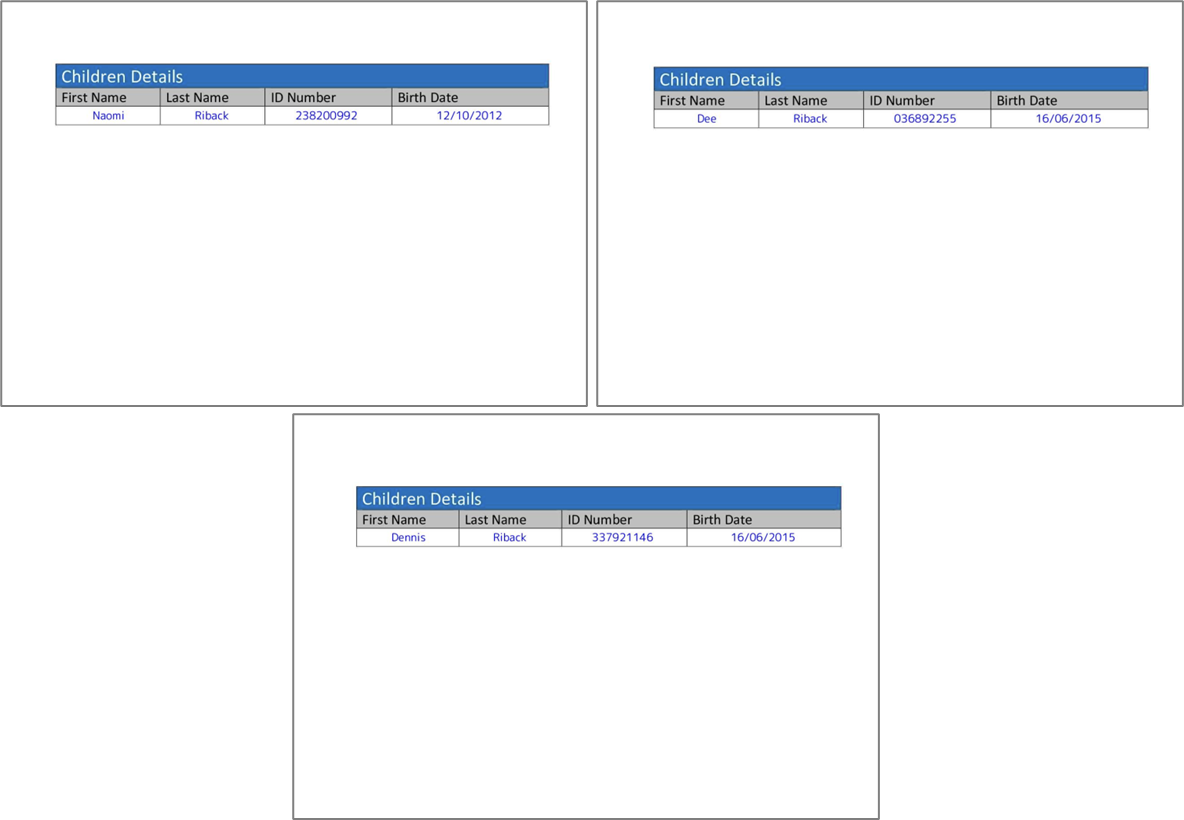
Figure 28: Array Items per PDF Page (Attachment)
How to Display Array Items per PDF Page?
(See Figure 29 to Figure 33)
To display array items per PDF page, perform the following steps:
- On the PDF screen, locate the page that contains the array output fields.
- Check the page number checkbox (1).

Figure 29: Page Number Checkbox
Result:
The Page Properties section appears:
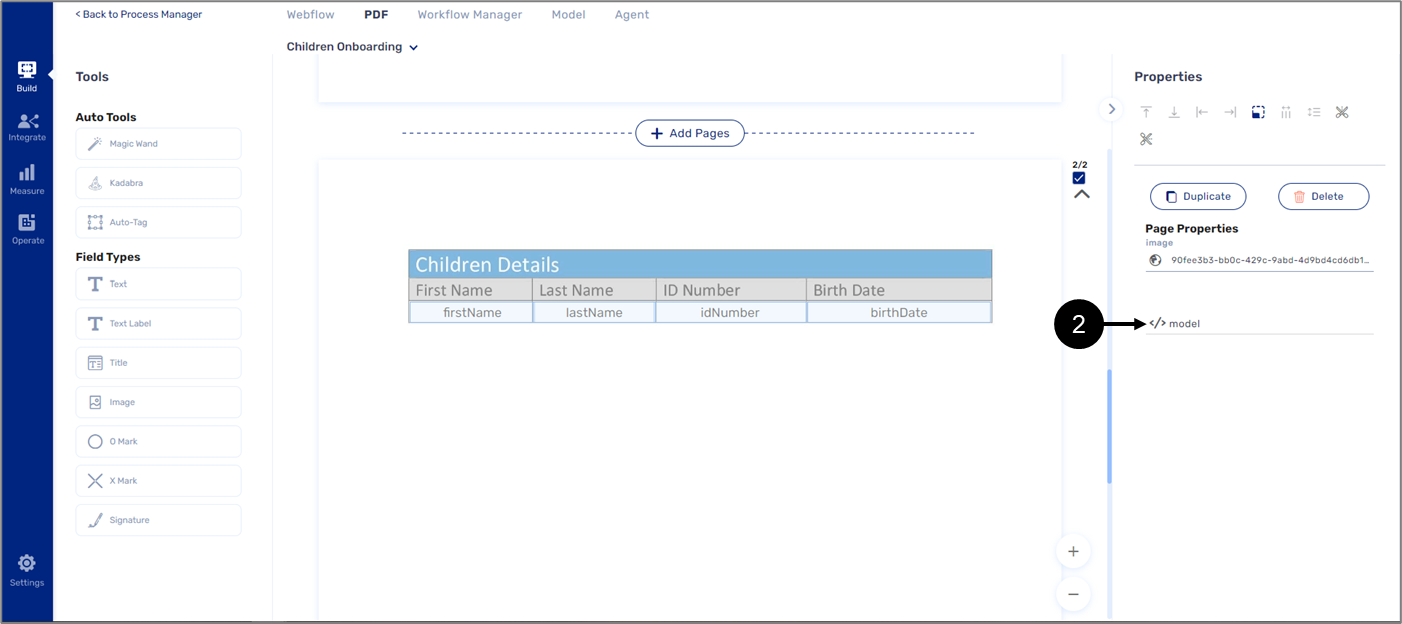
Figure 30: Page Properties Section
- Click the model icon (2).
Result:
The Model screen appears:
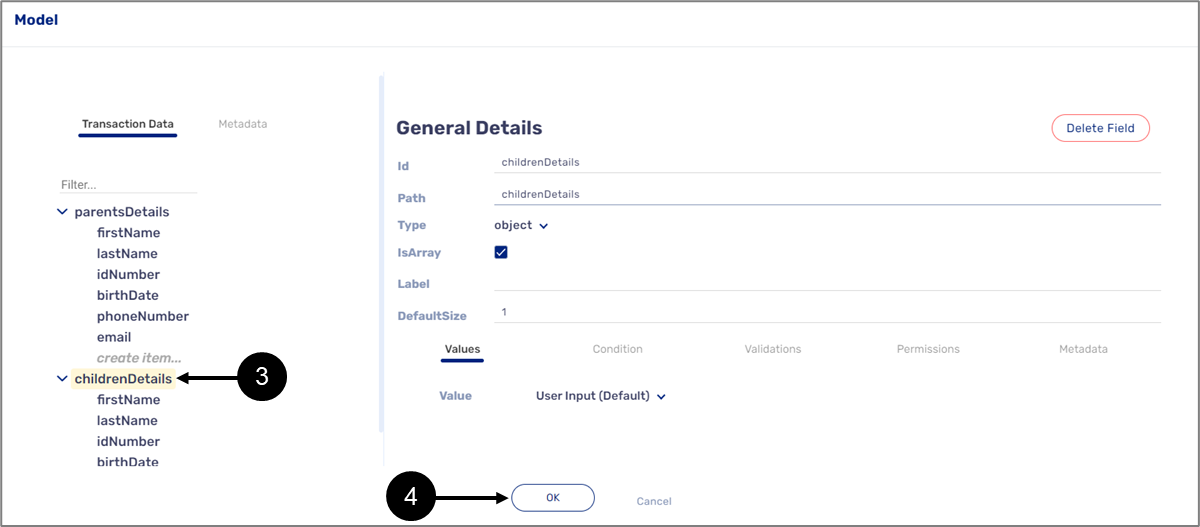
Figure 31: Model Screen
- Click the object type data item set as an array (3).
- Click OK (4).
Result:
The PDF screen appears:
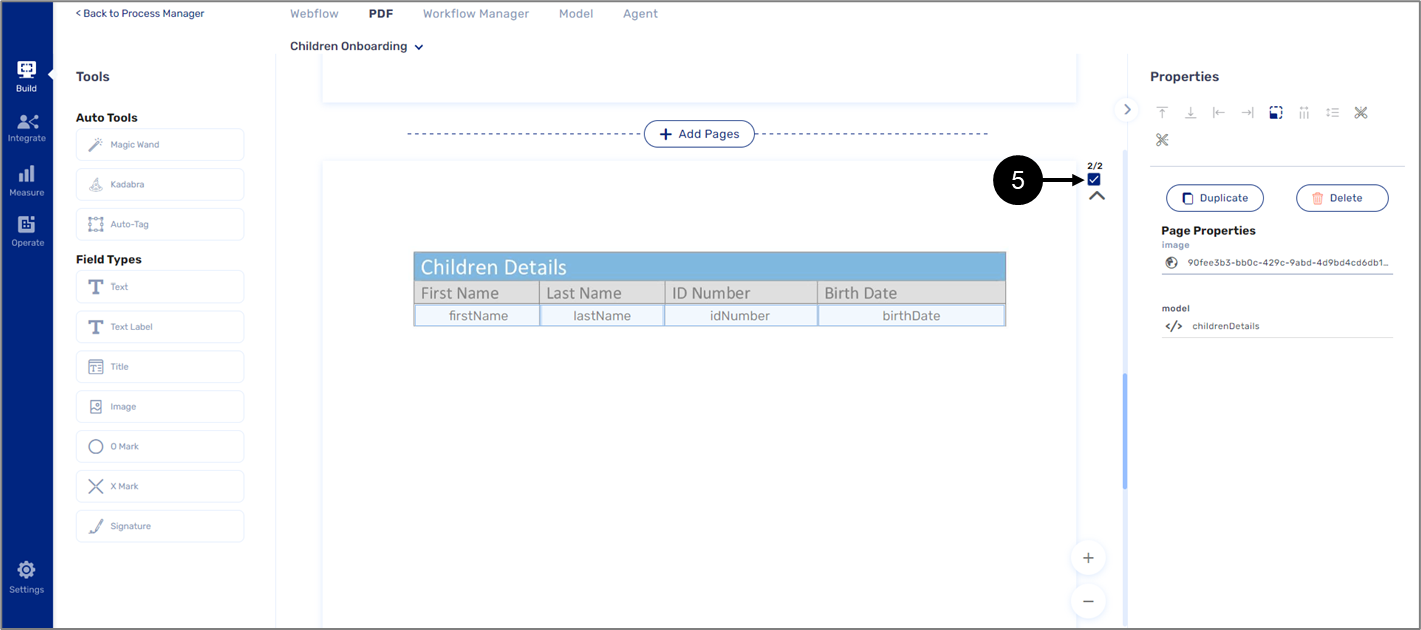
Figure 32: Page Number Checkbox
- Uncheck the page number checkbox (5).
- Connect the defined PDF fields to the Model, for example (6):
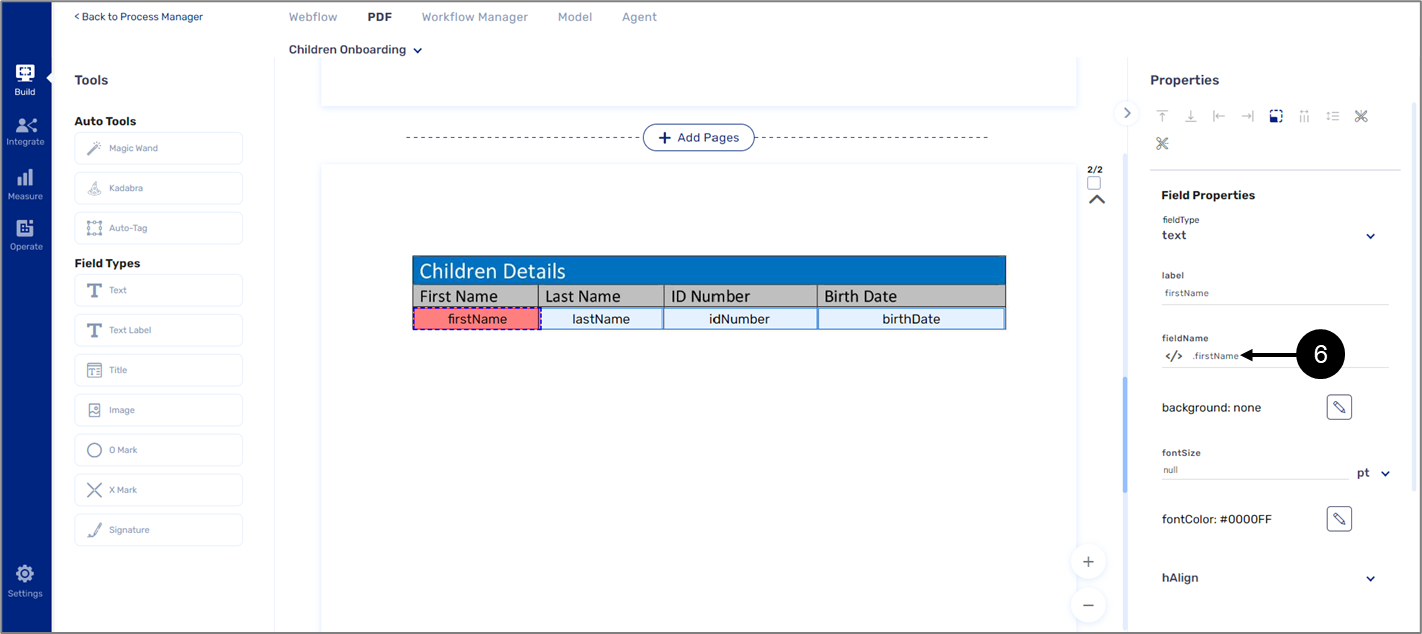
Figure 33: Field Connected to the Model
- Repeat step 7 as necessary.
Receiving the PDF as an Attachment
(See Figure 34 to Figure 36)
To receive the PDF as an attachment, perform the following steps:
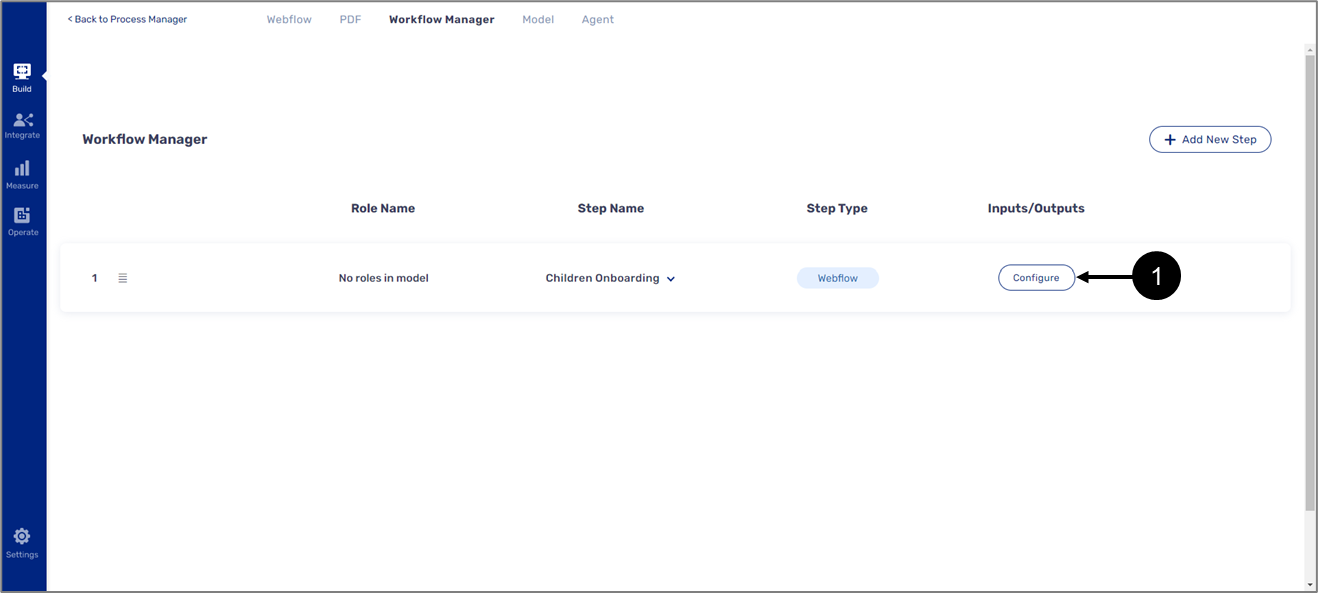
Figure 34: Workflow Manager Screen
- On the Workflow Manager screen, Click the Configure button (1) of the relevant step.
Result:
The following screen appears:
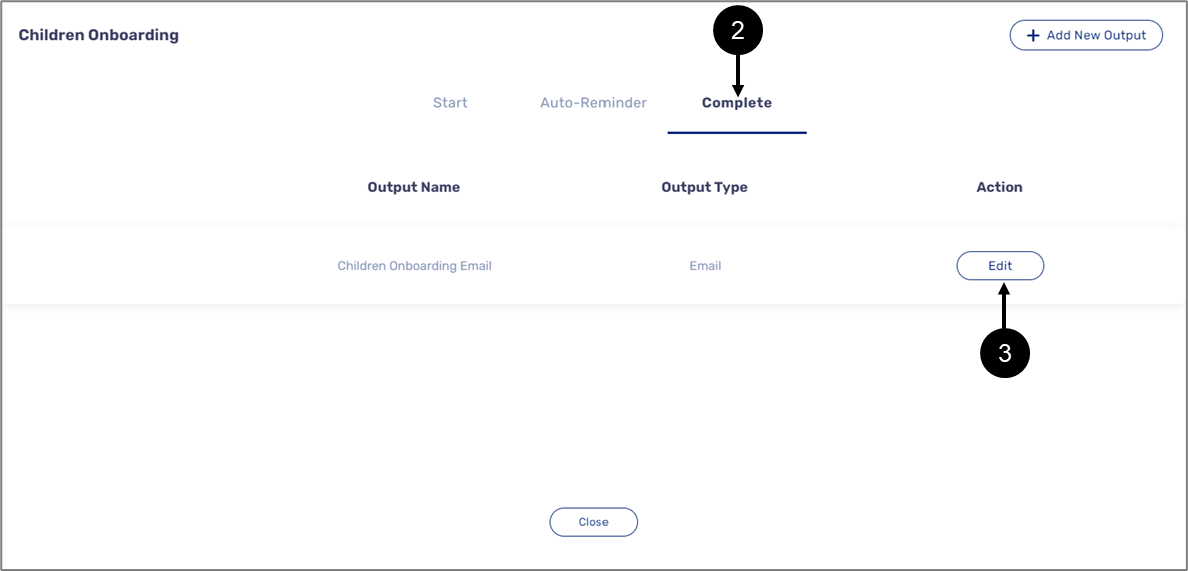
Figure 35: Complete and Email
- Click Complete (2).
- Add a new email or click the Edit button (3) of an existing email.
Result:
The Email Details window appears:
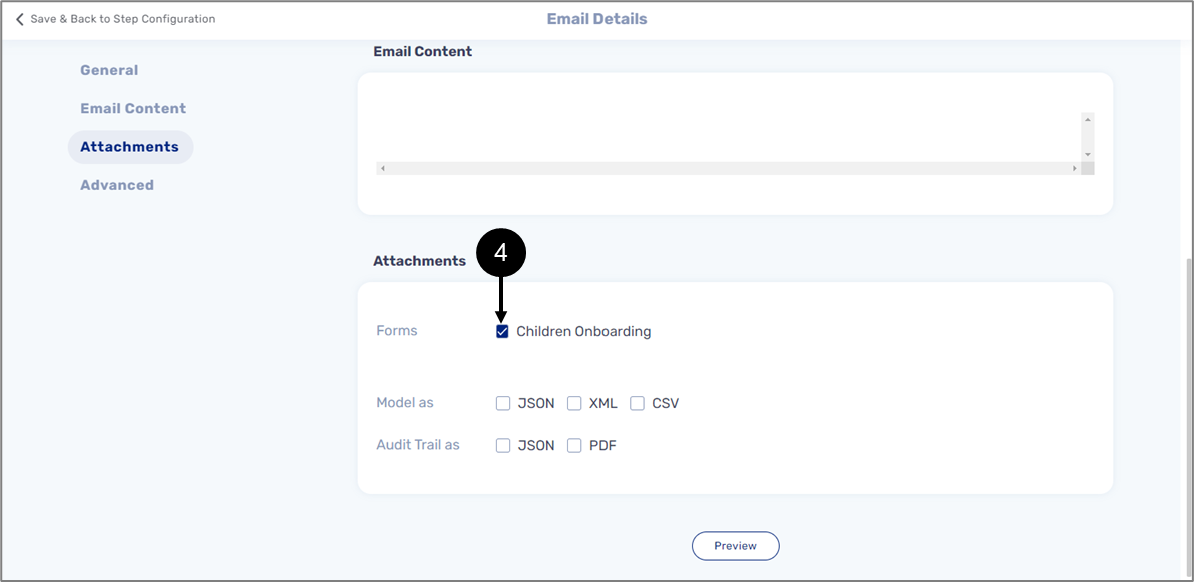
Figure 36: Attachments
- Enter the content of the email.
- Under Attachments, click the checkbox (4) of the desired form.
When the email is sent the form will be received (see Figure 37):
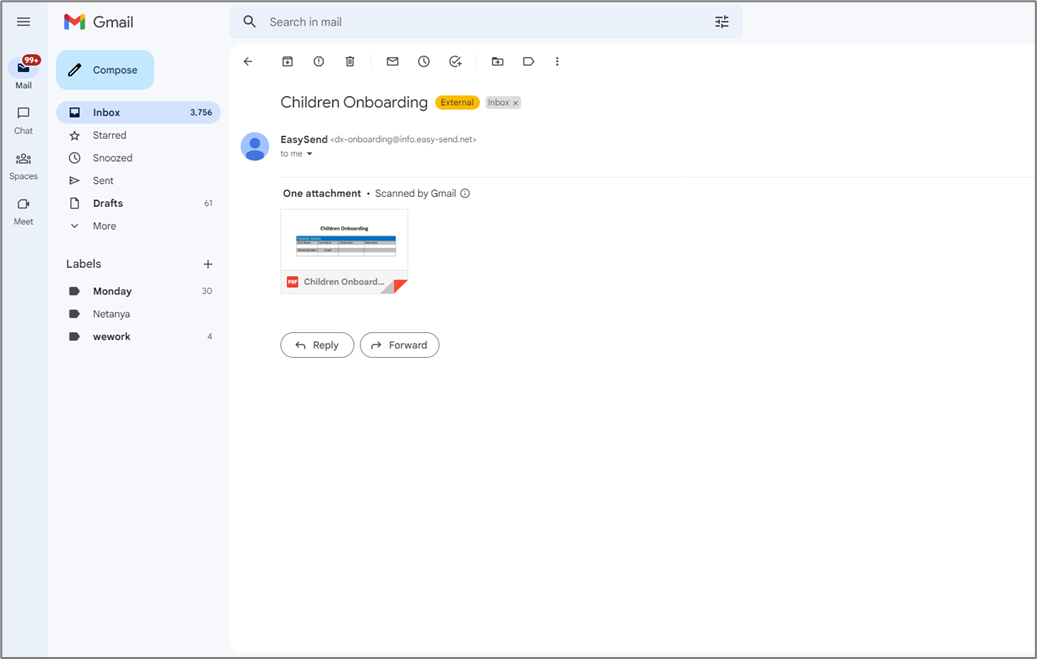
Figure 37: Email and Attachment
Troubleshooting
Table 1 describes malfunctions that may occur when trying to manage arrays. The table also describes the reason/s for the malfunctions and provides possible solutions.
Table 1: Troubleshooting
Number | Malfunction | Reason/s | Solution/s |
1 | Some Components are missing, or their design is incorrect | The wrong theme is selected | Select the appropriate theme according to the instructions described in the Building a Webflow article |
2 | The components in the grid displayed in the wrong direction | The properties of the Grid component are not set correctly | Set the properties of the Grid component. Read the details described in the Layout Components Properties article |
3 | The required Webflow components are not duplicating |
|
|
4 | When the digital process is live The Running Number Indicator component displays # instead of a number | The Running Number Indicator component is not connected to the Model | Connect the Running Number Indicator component to the Model by inputting a dot (.) as described in the How to connect the Webflow Components to the Model? section |
5 | The Array Button components are also duplicating | The Array Button components are also placed onto the Container | Place the Array buttons onto the Main Page component as described in the How to Build the Array Structure? section |
6 | Two or more array items initially appear when the digital process is live | The DefaultSize field of the transaction data item connected to the Container is not set correctly | Set the number of the DefaultSize field of the transaction data item connected to the Container as described in the How to Build the Array Model Data Structure? section |