Article Overview
The following article describes the Quick Setup tab and the Create the Integration section.
Quick Setup
(See Figure 1)
The quick setup includes three sections:
- Create the Integration (1)
- Assign Permissions (2)
- Update Page Layouts (3)
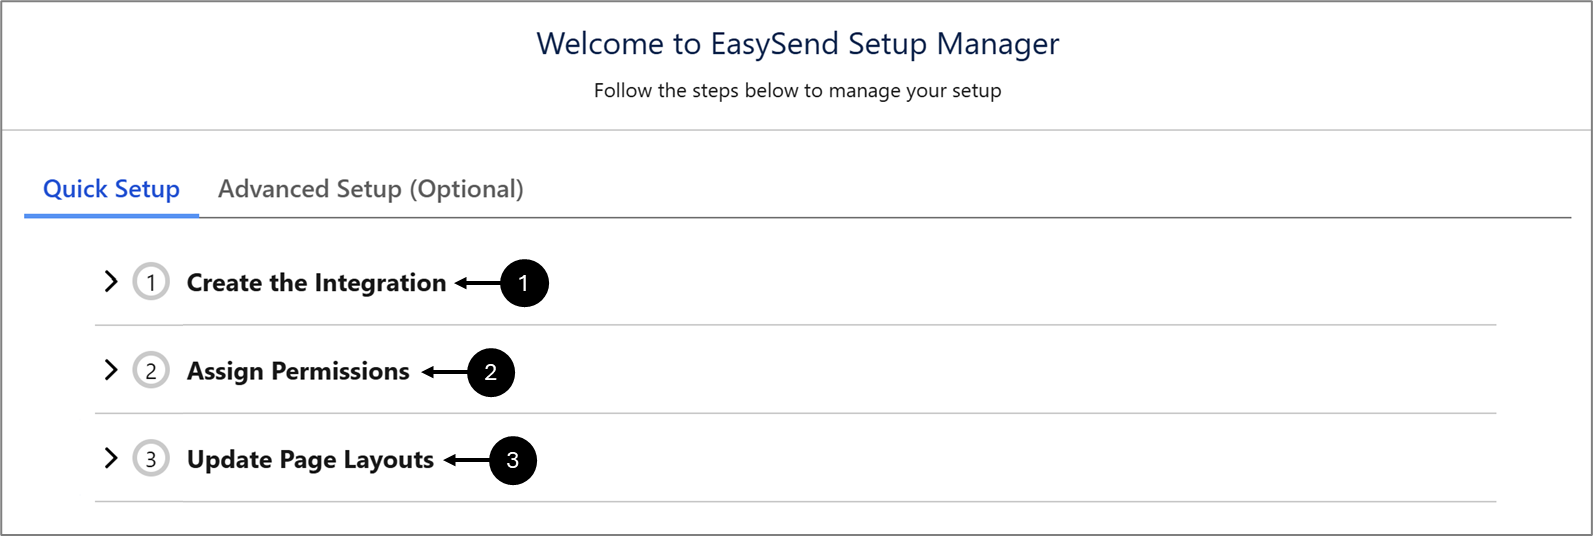
Figure 1: Quick Setup
Create the Integration
(See Figure 2 to Figure 8)
The first section requires you to input the following information:
- EasySend API Key
- Platform's Player URL
- Customer ID
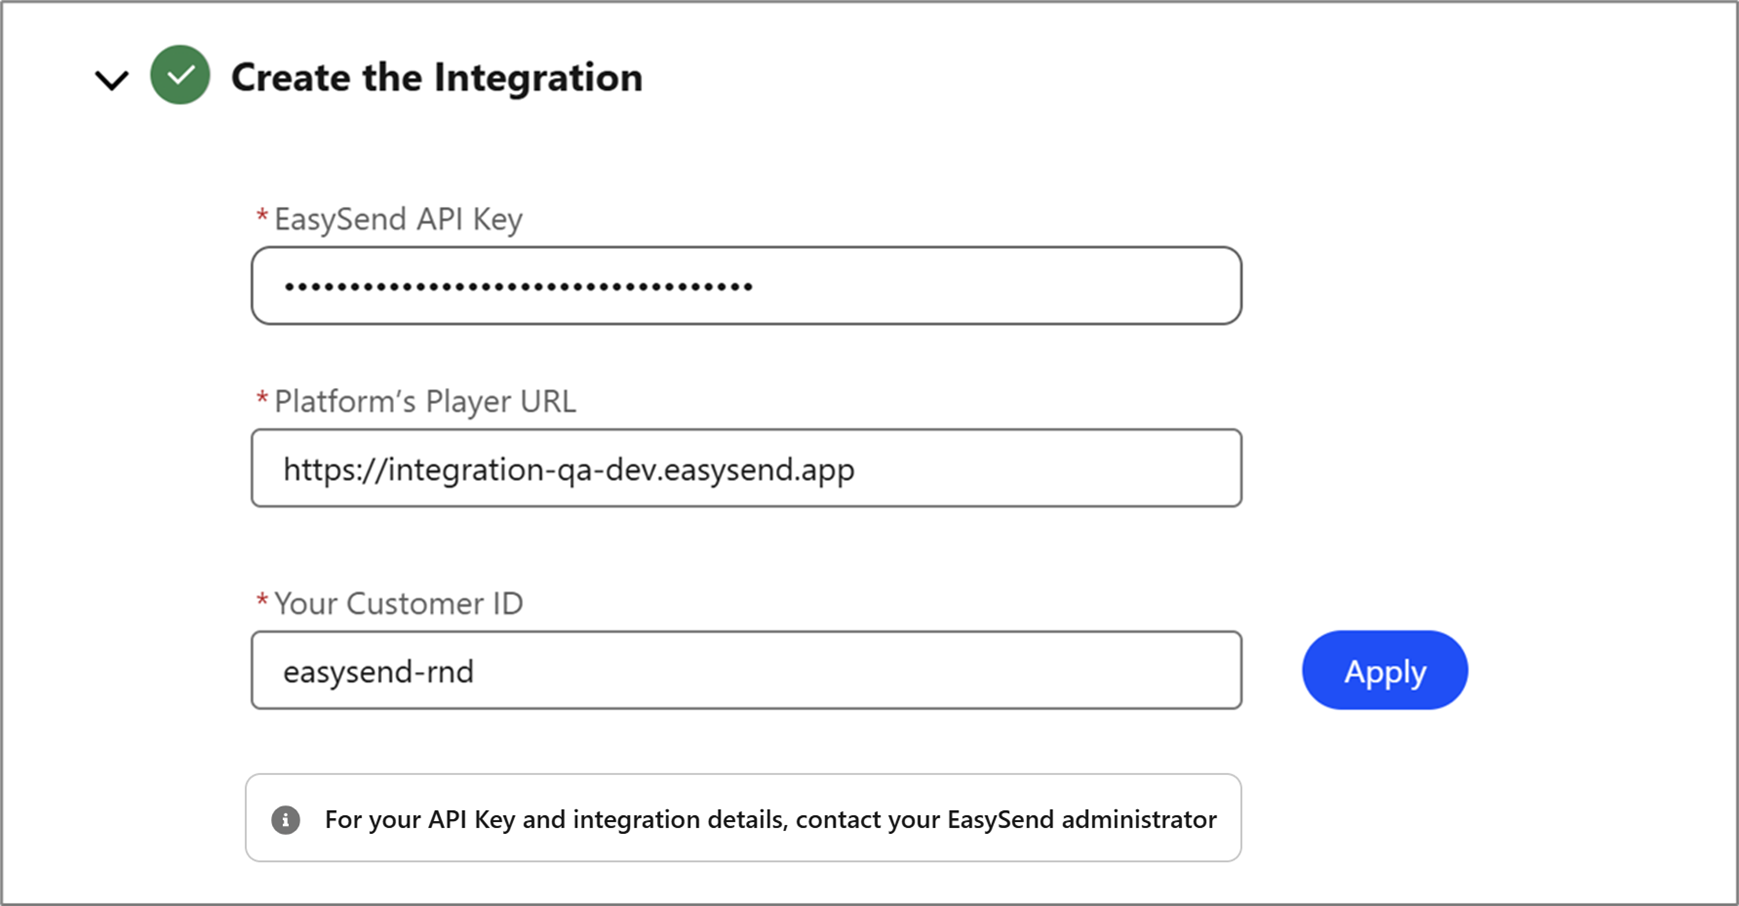
Figure 2: Quick Setup - Create the Integration
 button to validate the Integration data.
Your platform's Player URL can be found after deploying and previewing a digital process to a selected environment.

Figure 3: Platform's Player URL
Next, add the platform's player URL to the remote site settings.
Remote Site Settings
Before clicking Apply, or if after clicking Apply, the following error appears:

Add the Platform's Player URL as a remote site. Perform the following steps:
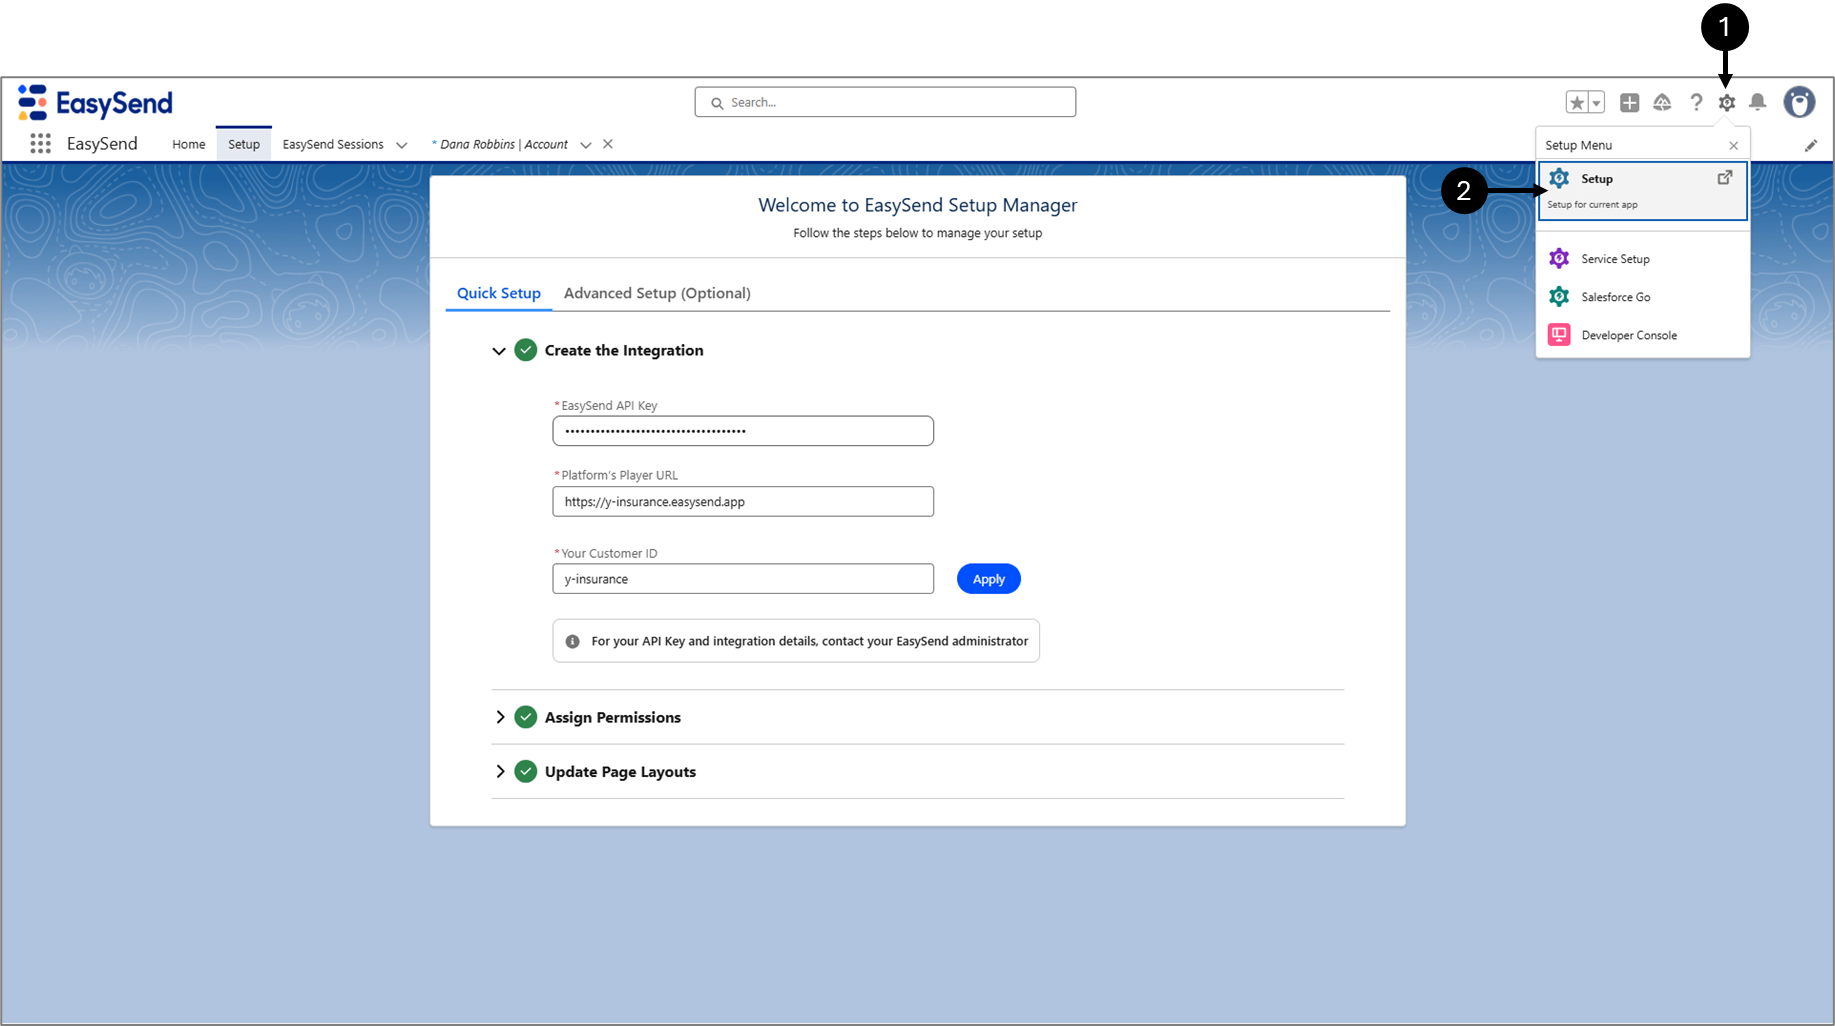
Figure 4: Settings and Setup
- Click the Settings icon (1).
- Click Setup (2).
Result:
The Setup screen appears:
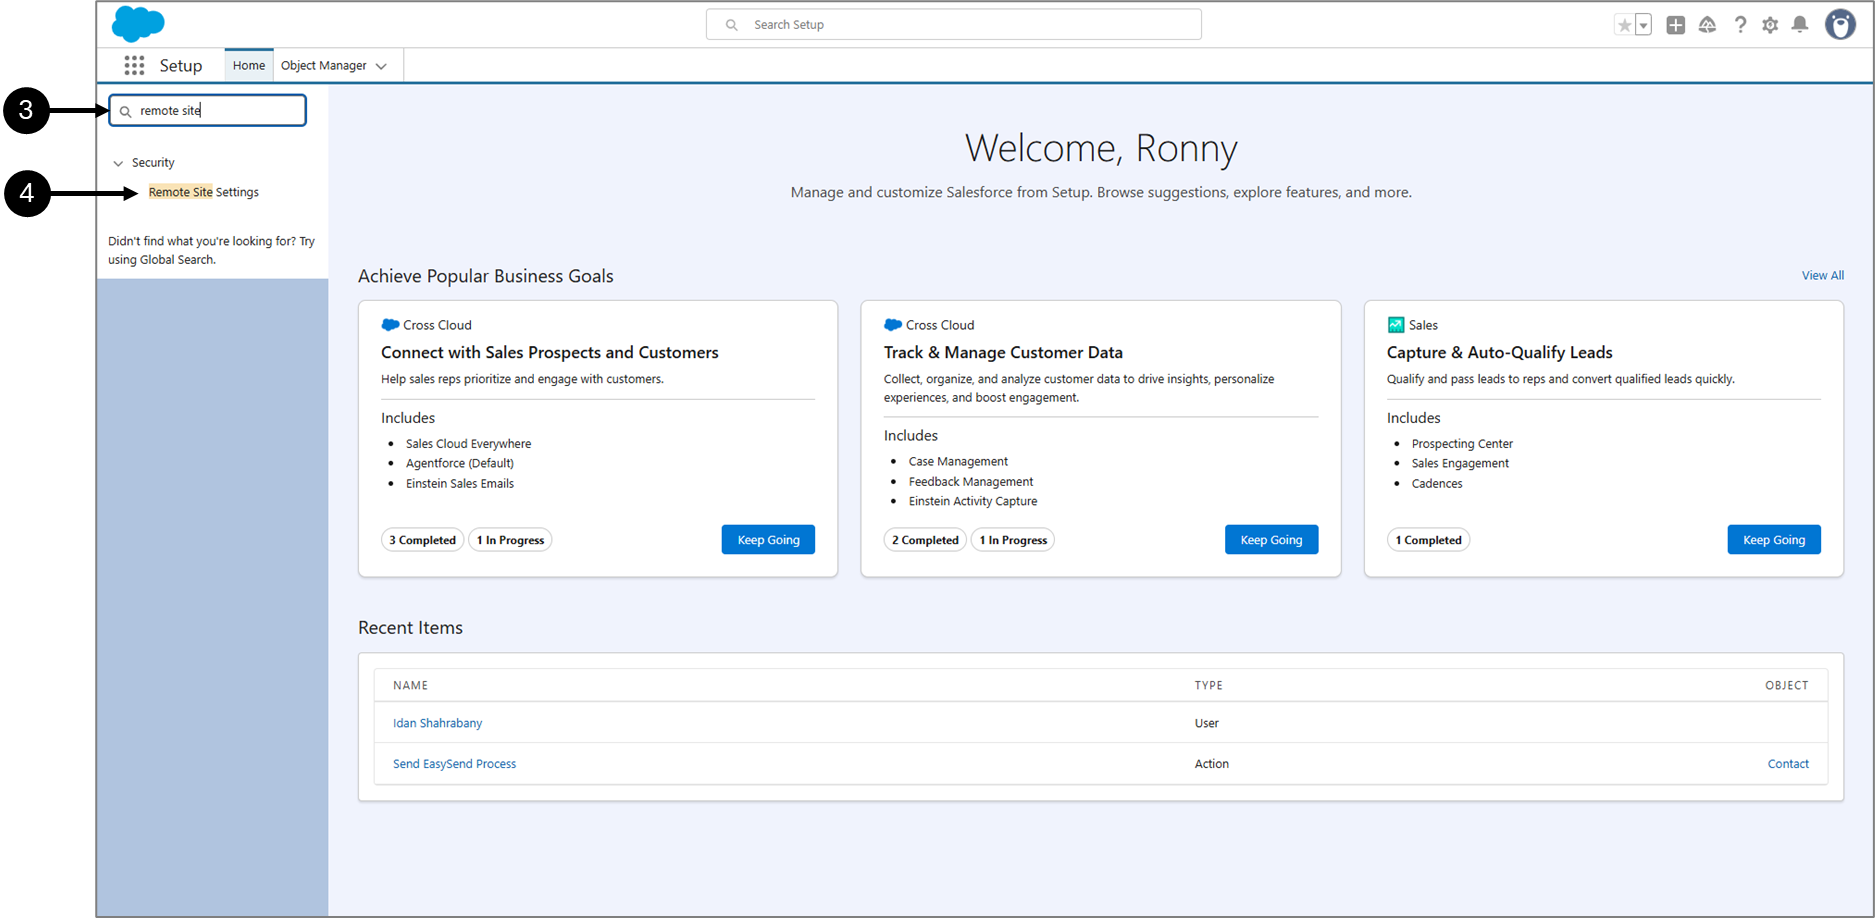
Figure 5: Setup Screen
- In the quick find search bar, type - remote site (3)
- Click Remote Site Settings (4)
Result:
The Remote Site Settings section appears:
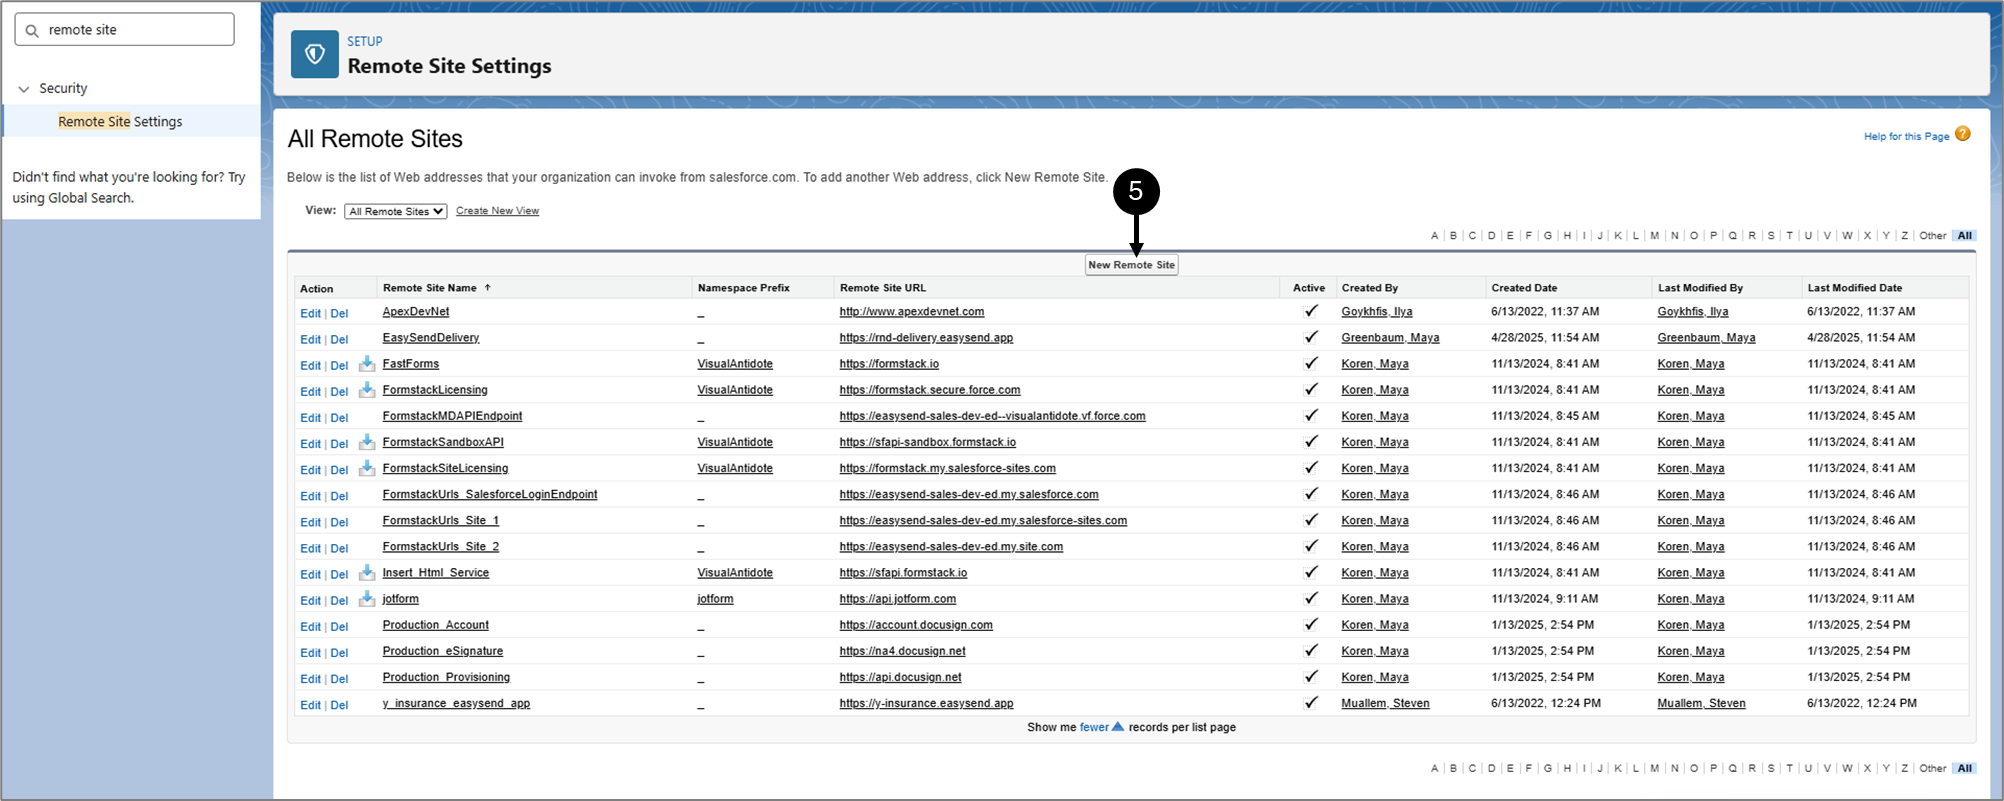
Figure 6: New Remote Site
- Click New Remote Site (5).
Result:
The Remote Site Settings section appears:
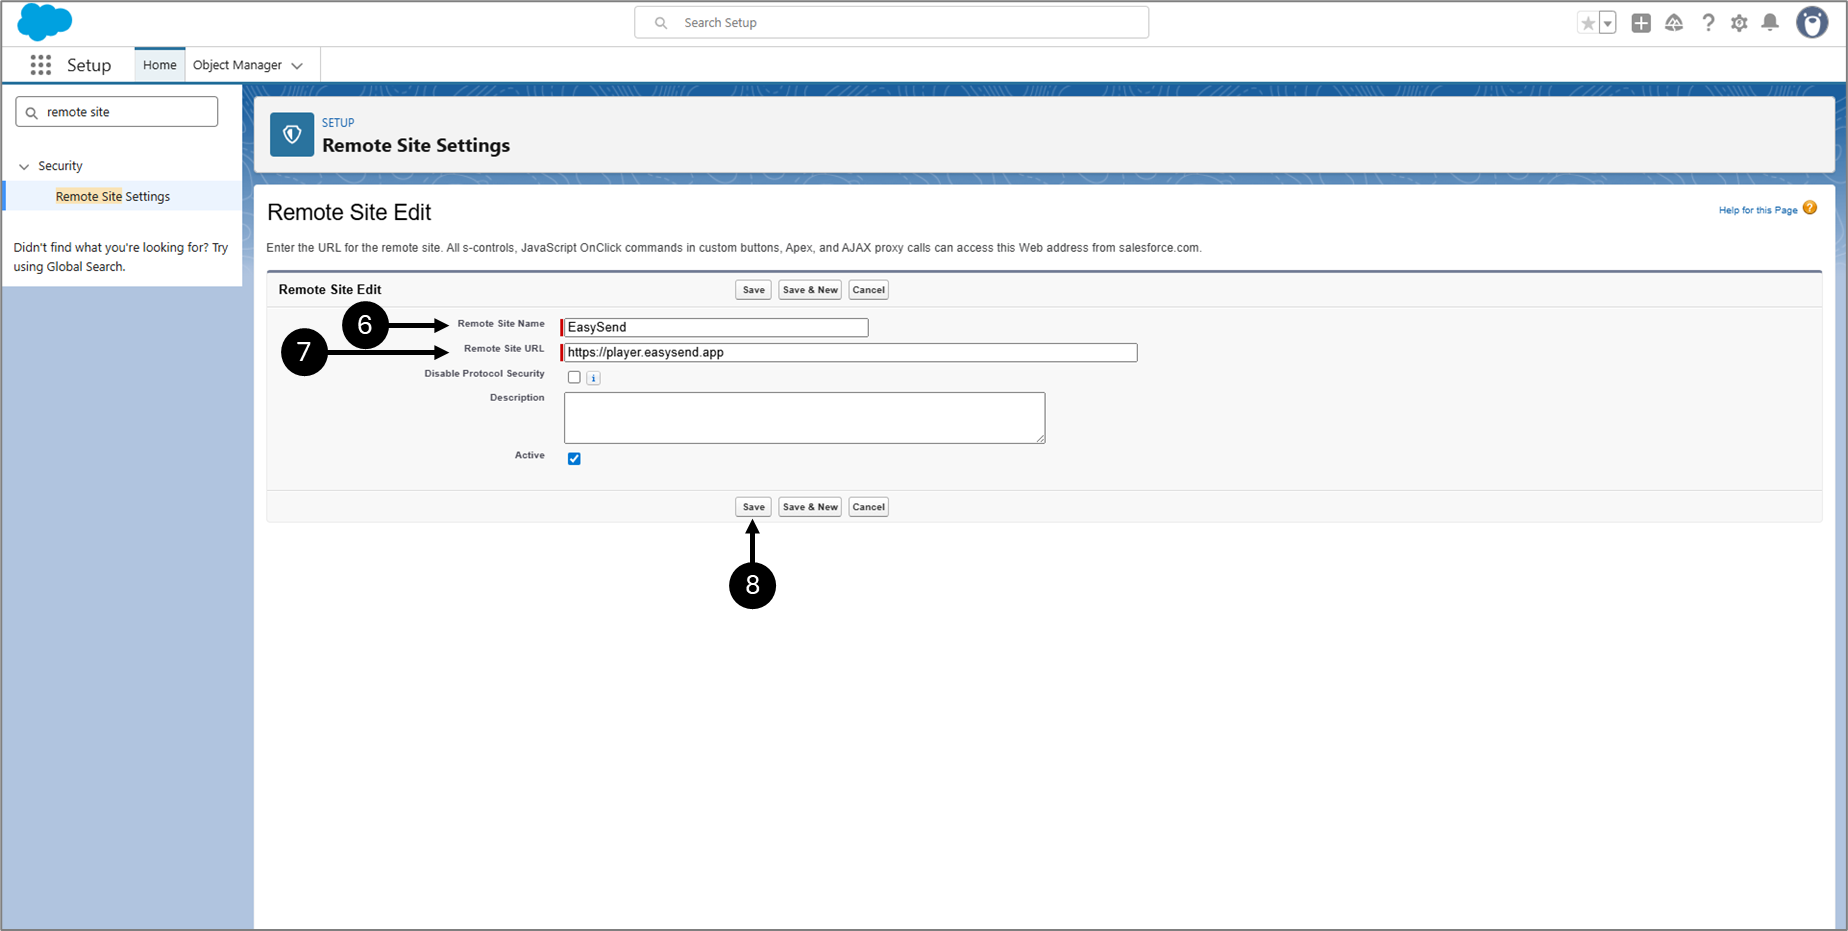
Figure 7: New Remote Site
- Add a Remote Site Name (6) - for example, EasySend.
- Add the Remote Site URL (7) - for example, https://player.easysend.app.
- Click Save (8).
Result:
The URL is saved.
Your EasySend customer ID. The customer ID can be found in your EasySend environment.
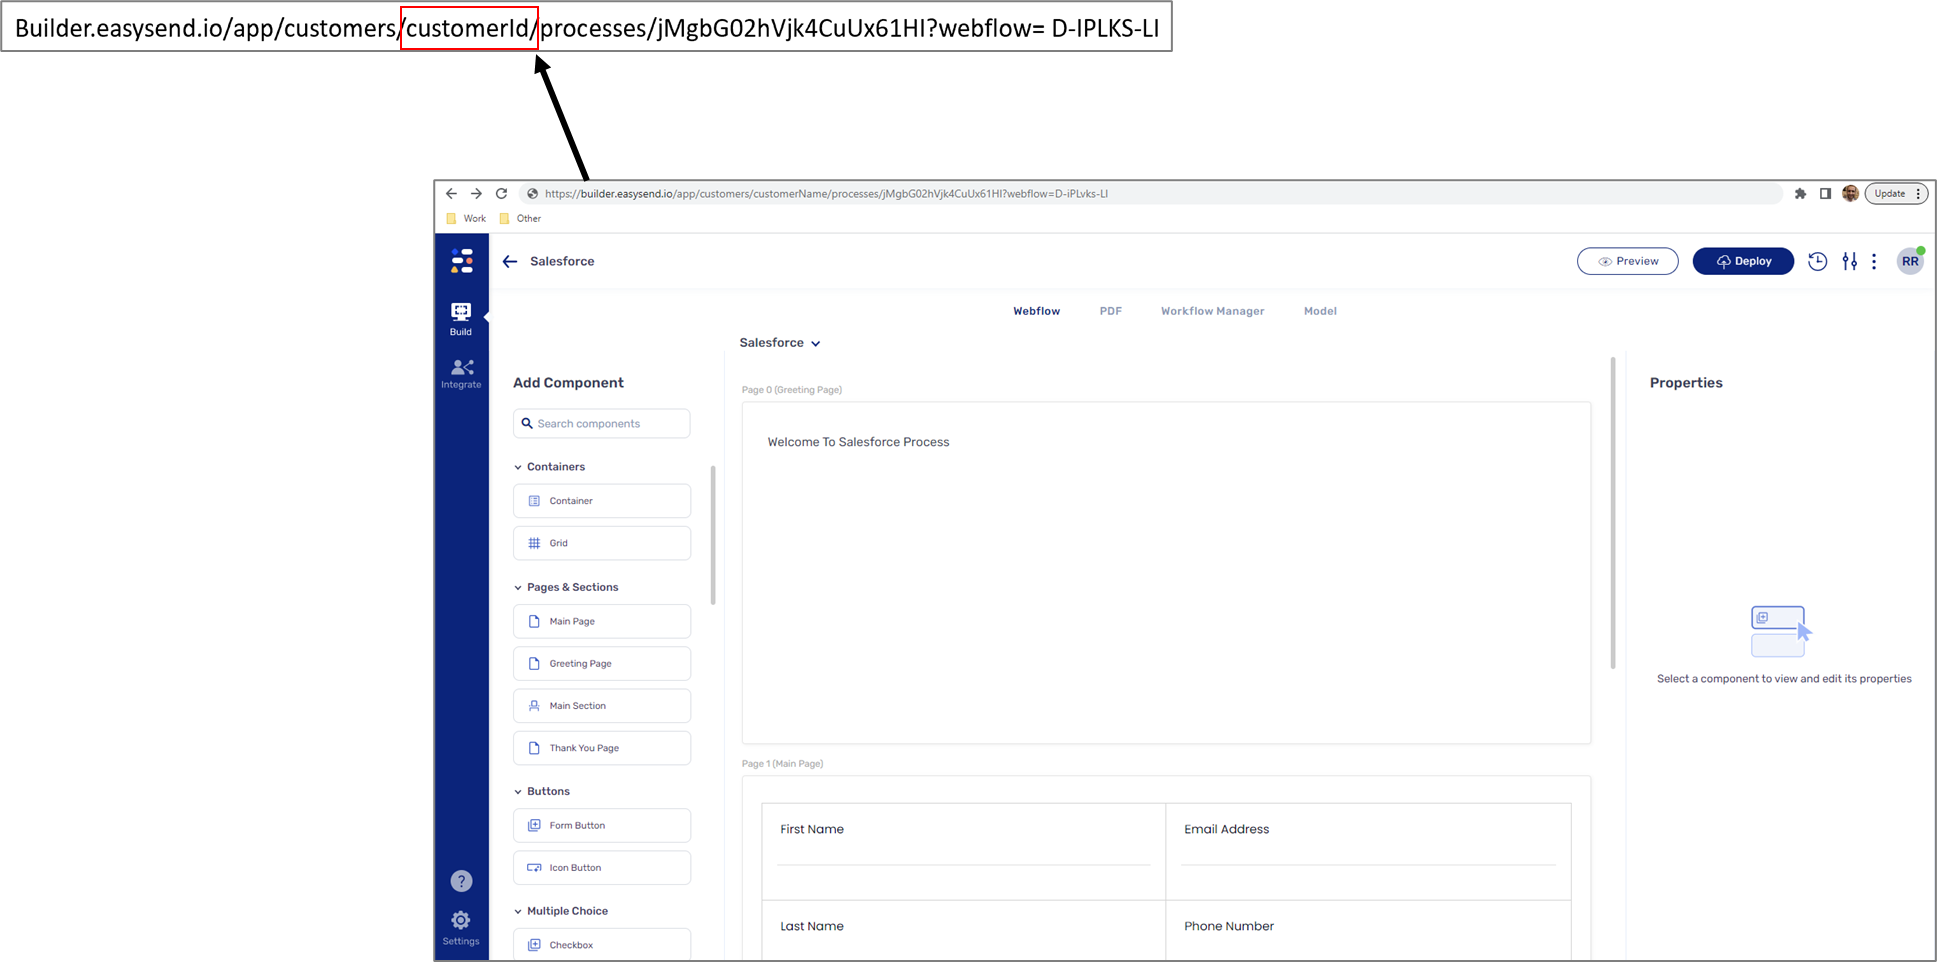
Figure 8: Customer ID
button to validate the Integration data.