Article Overview
The following article describes how to create a communication service integration for using an external email server.
Communication Service
A communication service allows EasySend customers to integrate external communication services, such as an email server or an SMS provider, with their digital processes.
Navigating to the Communication Service Tab
(See Figure 1 to Figure 3)
Communication services in your environment are accessible using the Integrate tab (1) and the Services screen (2).
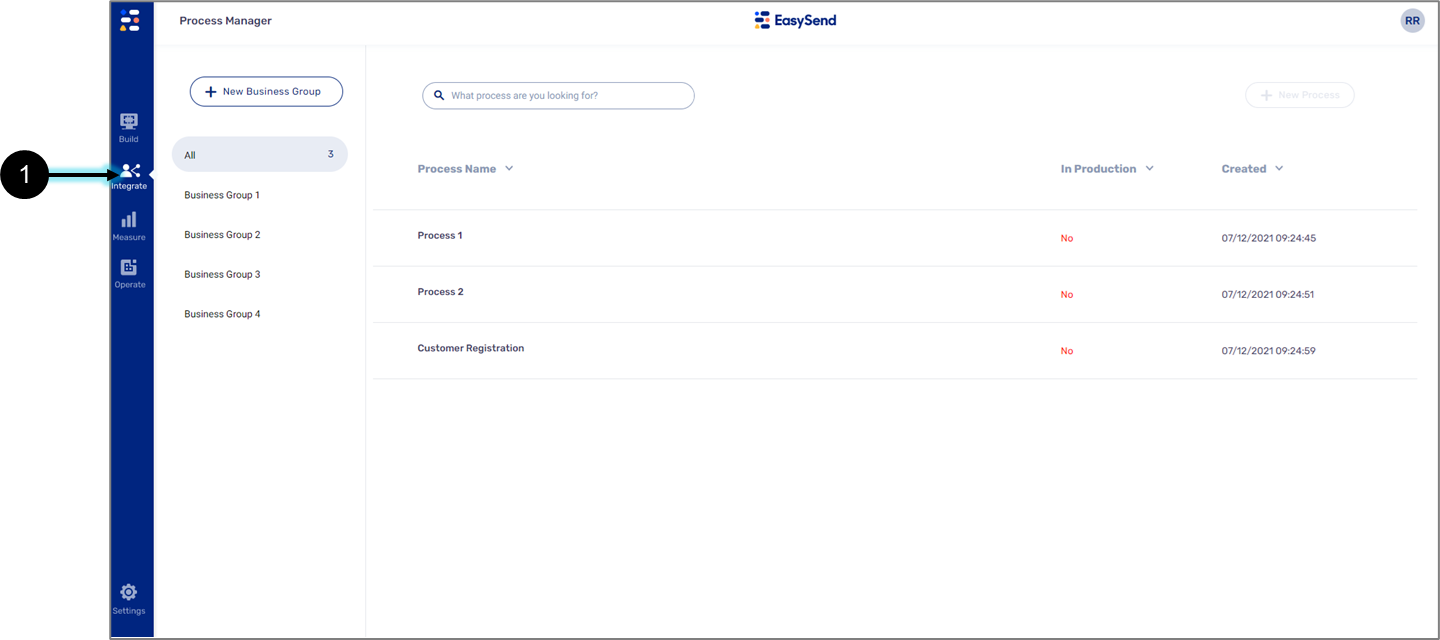
Figure 1: Integrate Tab
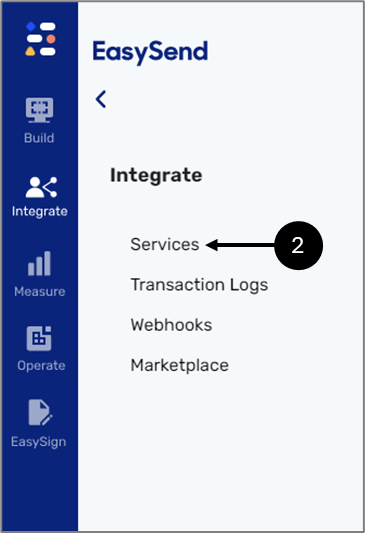
Figure 2: Services
The Services screen contains several tabs including the Communication tab (3).
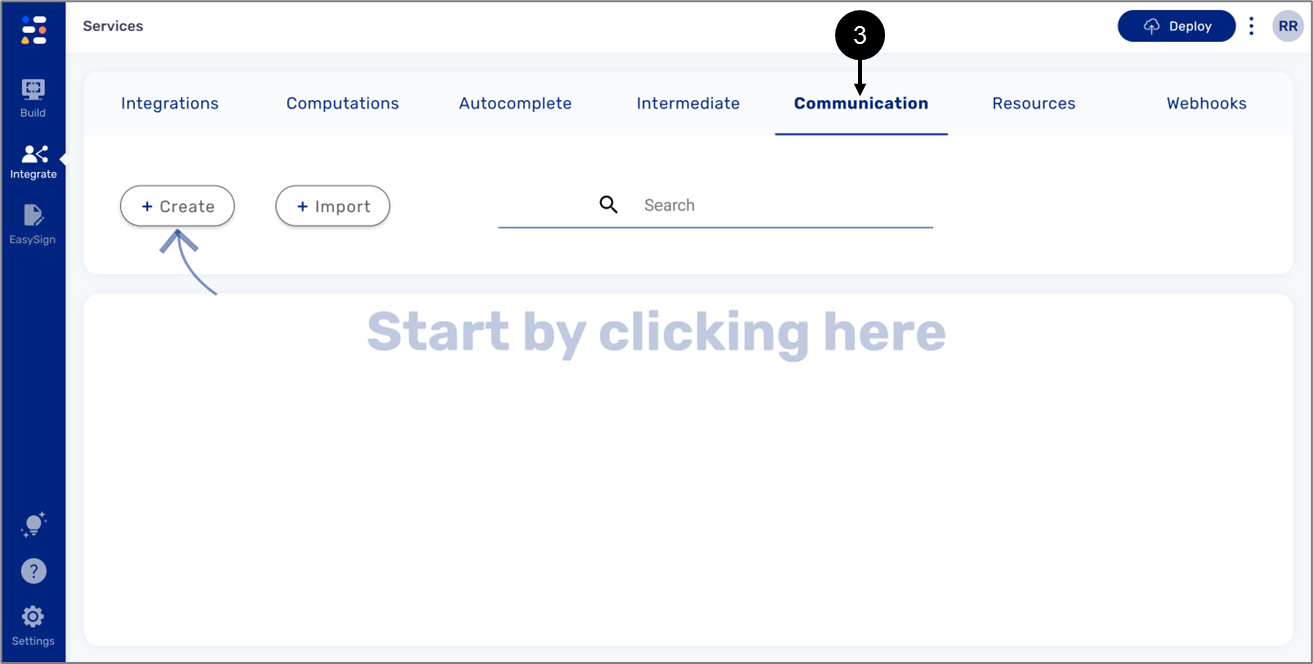
Figure 3: Communication Tab
Creating a Communication Service
(See Figure 4)
To create a new communication service, click the + Create button (1).
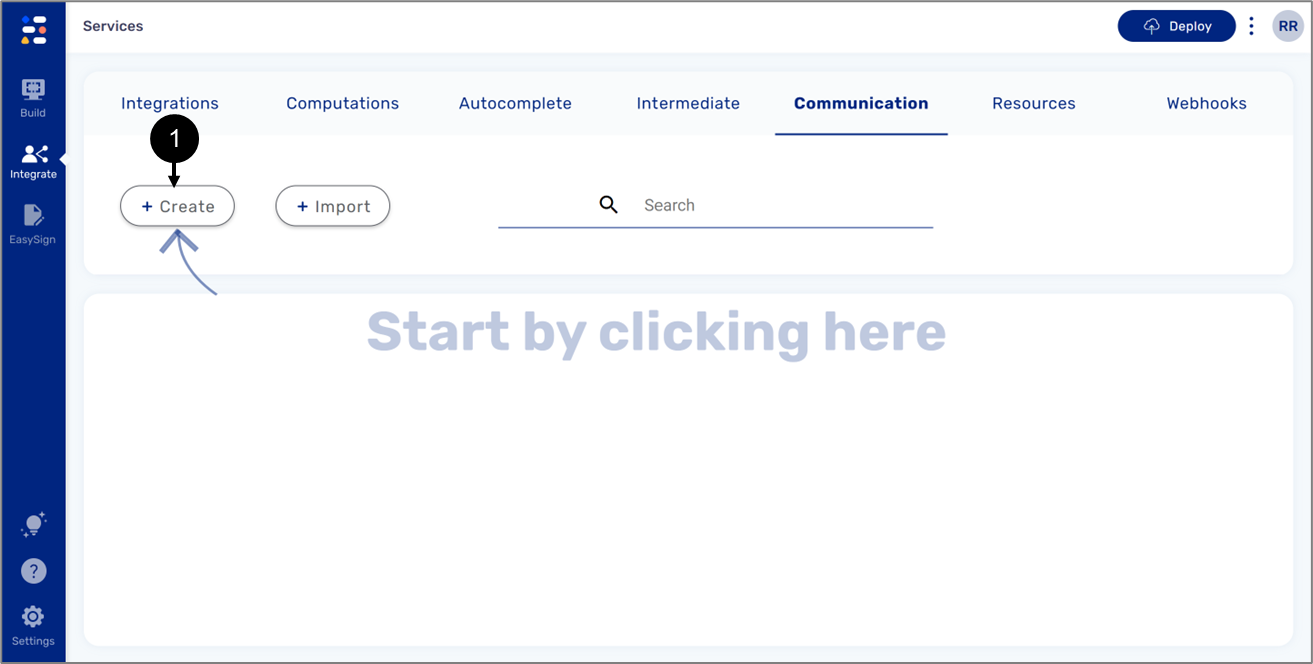
Figure 4: + Create Button
Communication Service Structure
(See Figure 5)
When creating a communication service, four sections appear:
- Inputs (1)
- Different steps (2)
- Outputs (3) (not in use)
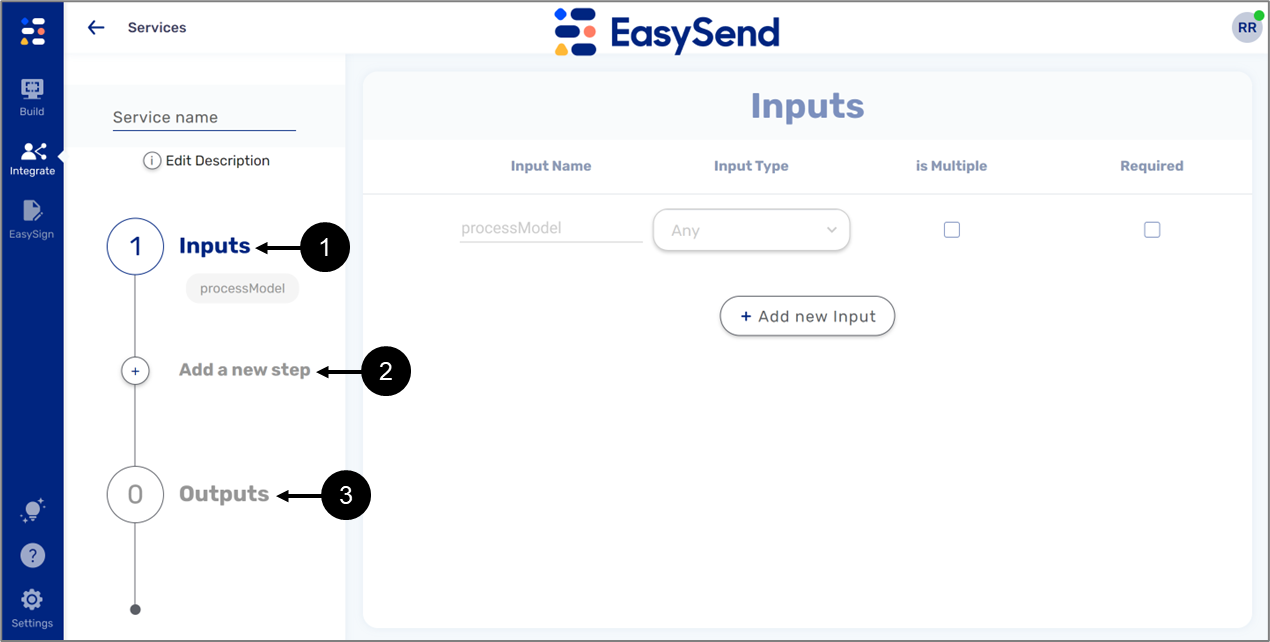
Figure 5: Communication Service Structure
Communication Service Sections
The following sections describe the sections of a communication service.
Inputs
(See Figure 6)
By default, this section contains the processModel input (1). This default value indicates that the input information will come from the Model, regardless of the process that is using the integration. Additional inputs are added by clicking the +Add new Input button (2).
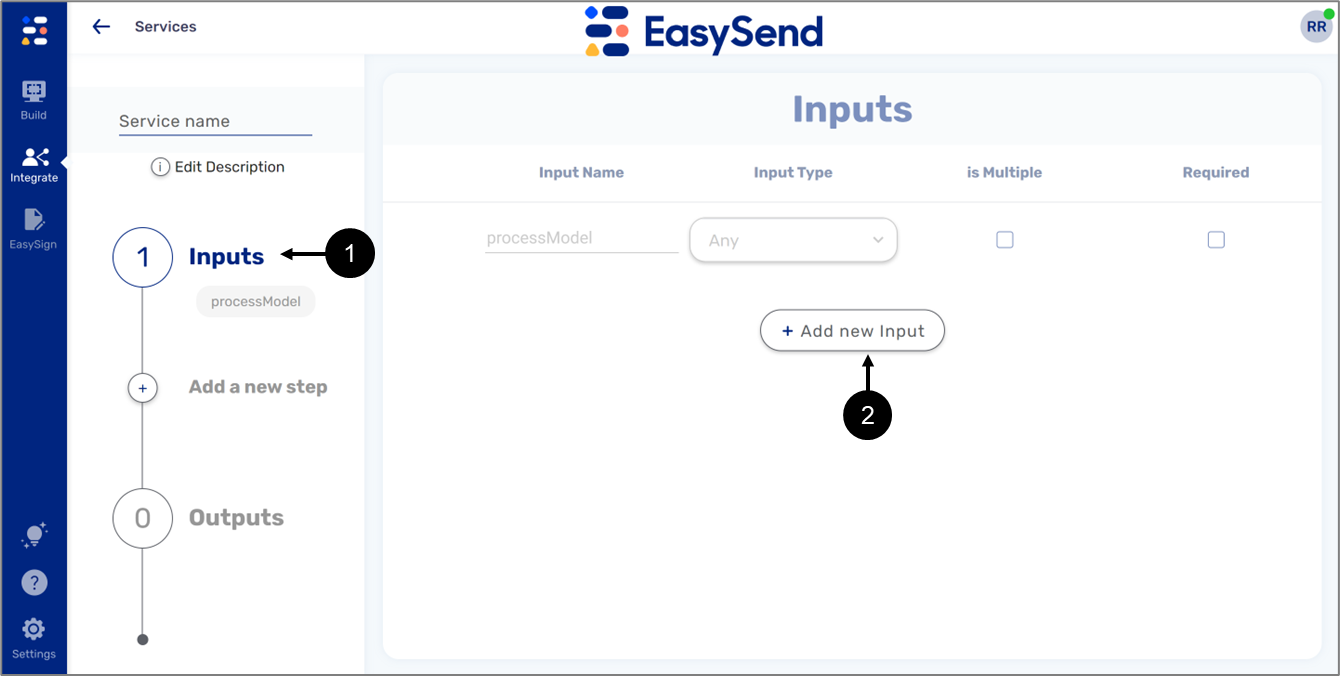
Figure 6: Inputs
Steps
The most common steps to use in a communication service are:
- Rest API Service
- Code Block
Rest API Service
(See Figure 7)
This step will be used to create the payload. The data or information that is sent in the request to the server, or the data that is returned by the server in response to a request.
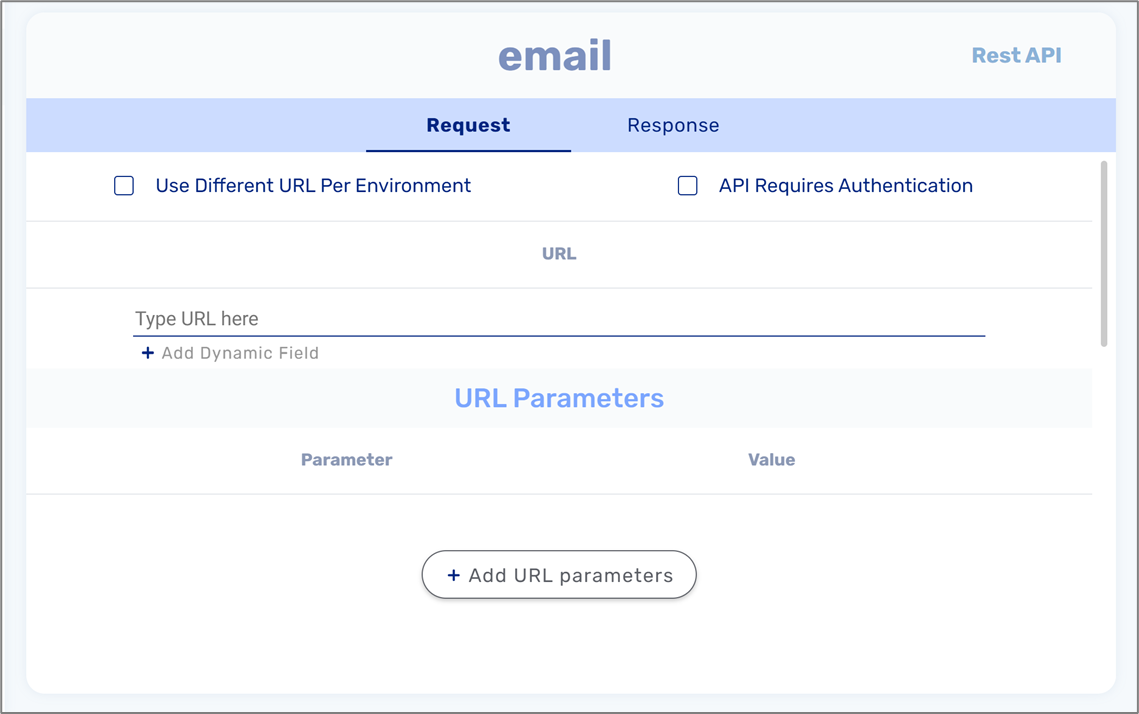
Figure 7: Rest API Step
Code Block
(See Figure 8)
This step will be used to manipulate service data using JavaScript:
- Code - for example, a code that builds the body of the email
- Inputs - an input specified in the Inputs section
- Outputs - the output that will be returned from the code
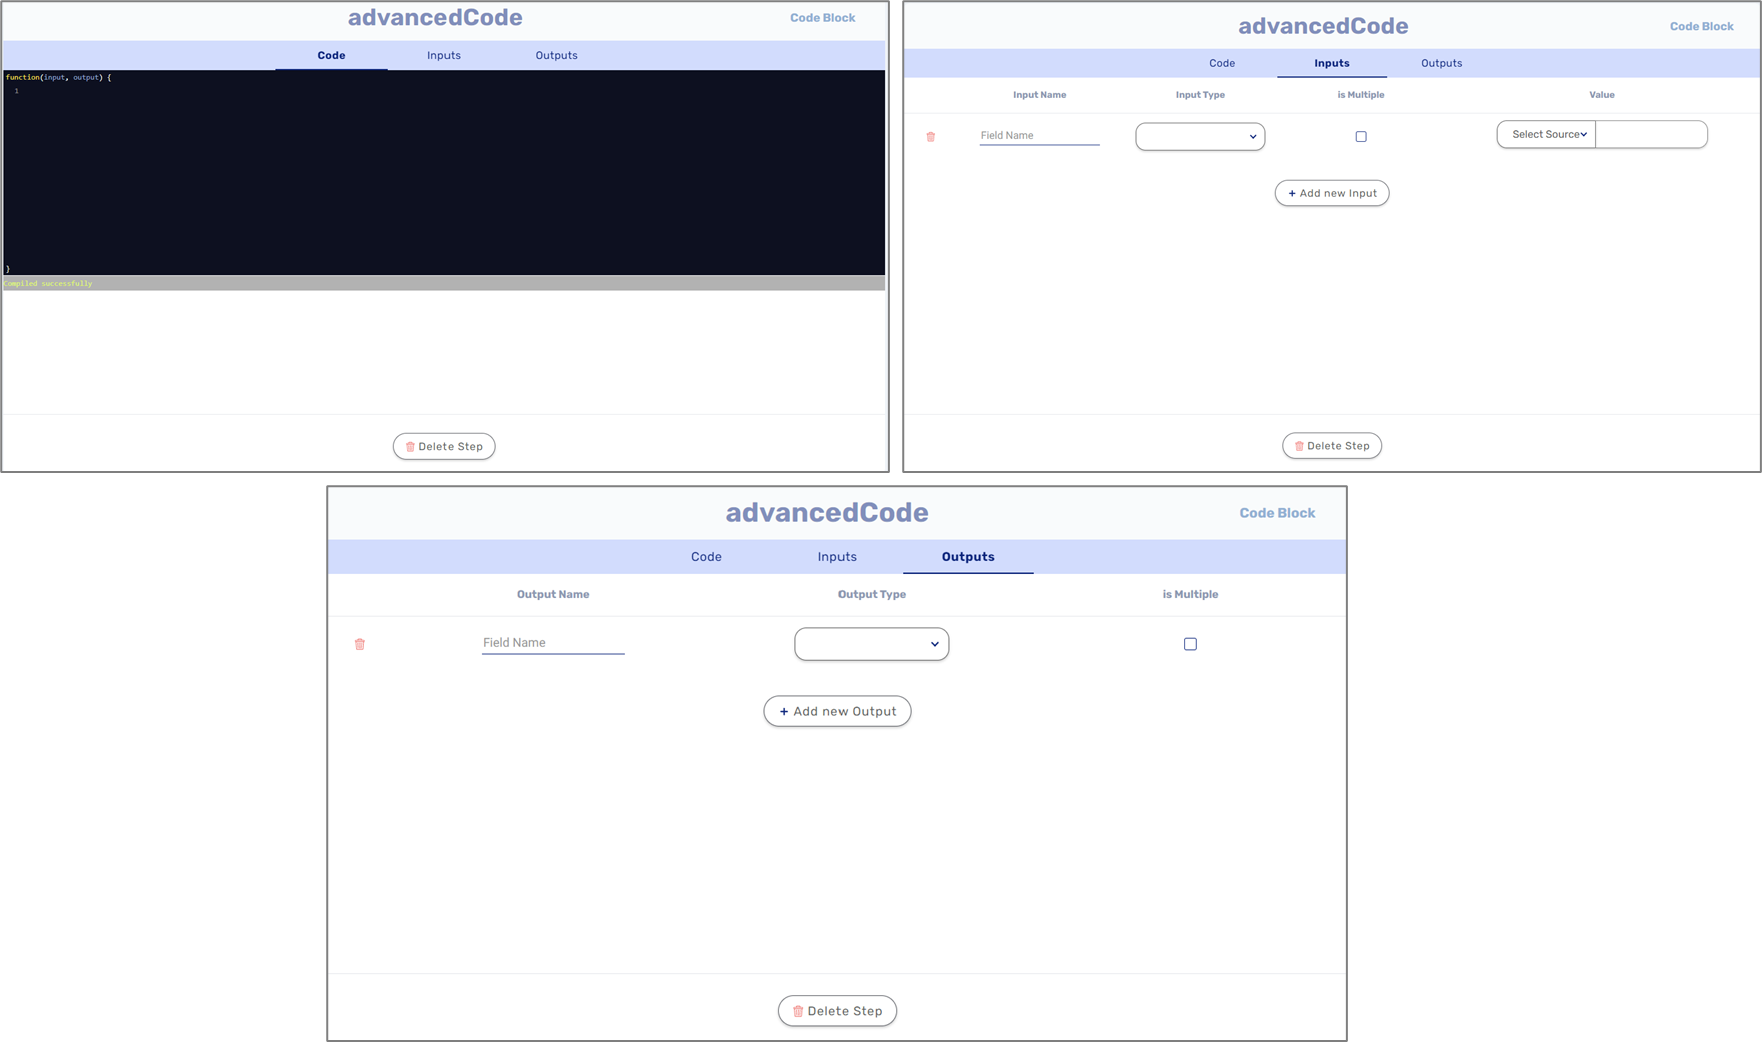
Figure 8: Code Block Step
Communication Service Example
(See Figure 9)
The following example is of a communication service that builds the body of an email according to information that was collected from a digital process end-user input. The email is sent from an external email server.
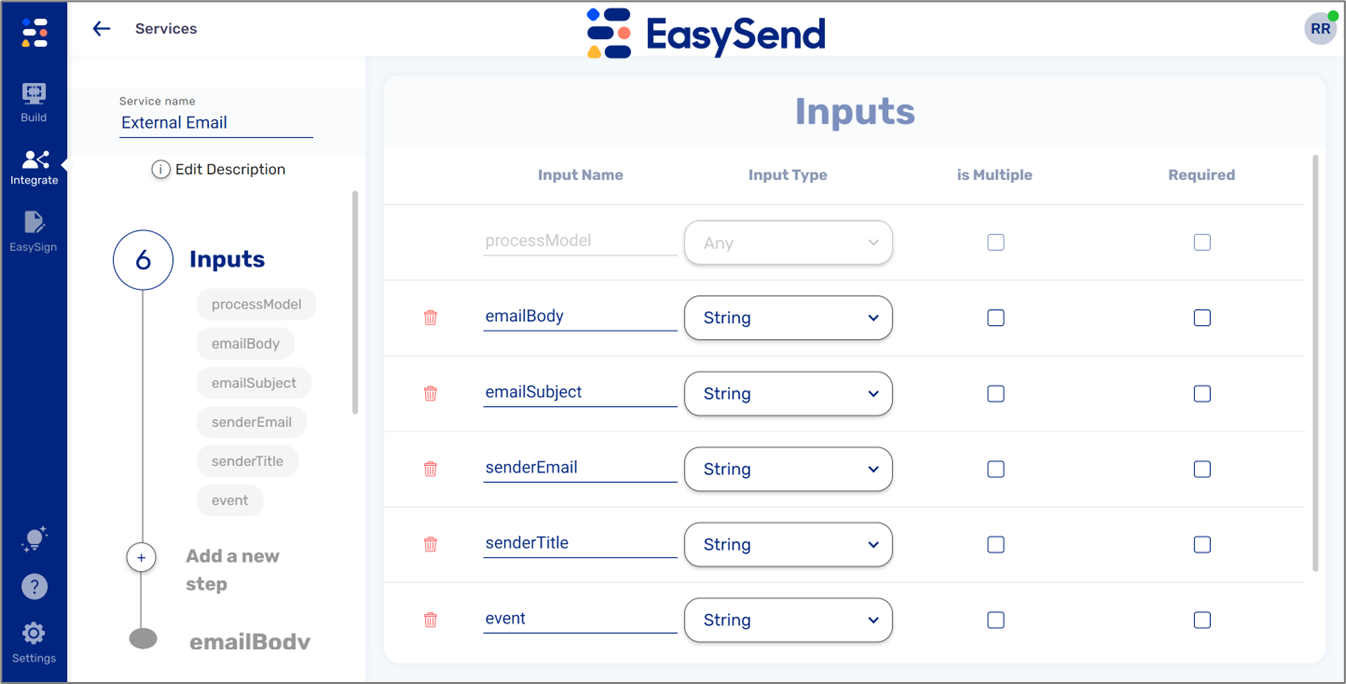
Figure 9: Communication Service Example
Inputs
(See Figure 10)
The default input, processModel, and the added inputs indicate that the communication service will receive the digital process's end-user input data.

Figure 10: Inputs Example
Steps
(See Figure 11 to Figure 15)
In this communication service, we will use two steps:
- Code - we will create a function that receives the input of the end-user and returns the email's body as an output.
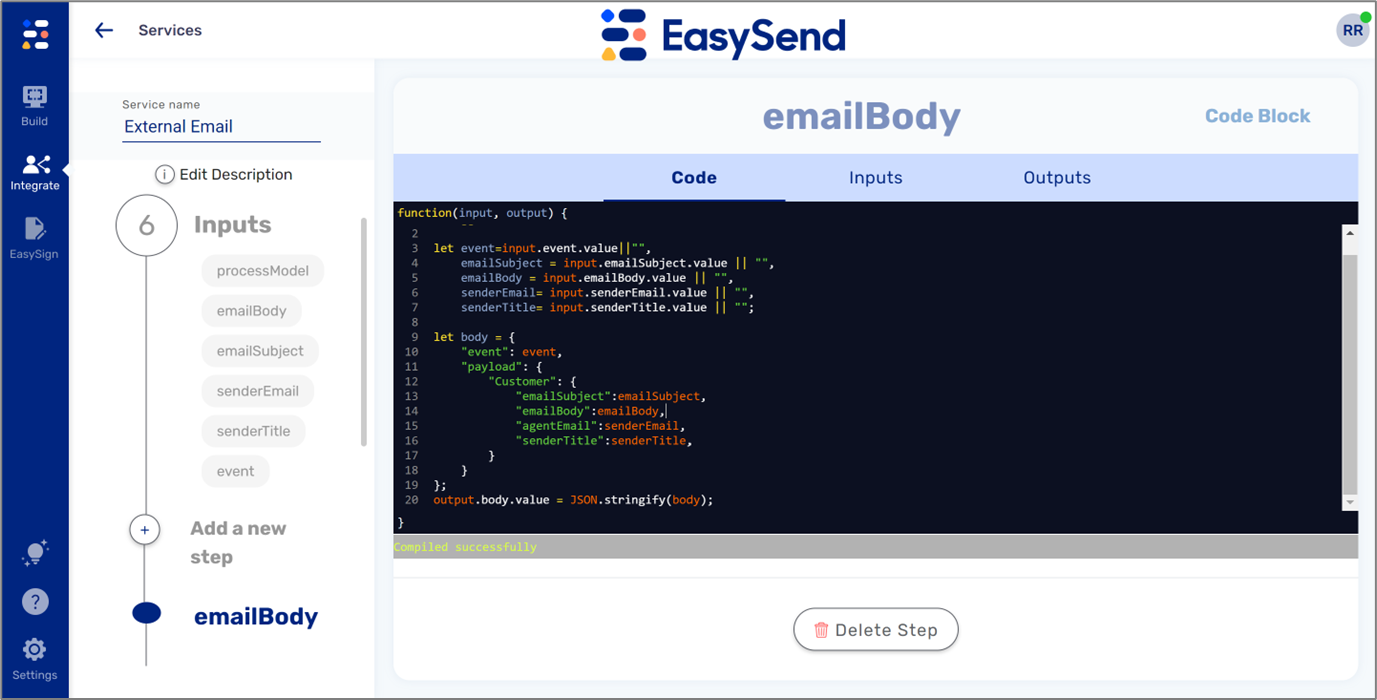
Figure 11: Code
- Inputs - contains all the items from the Inputs section of the communion service.
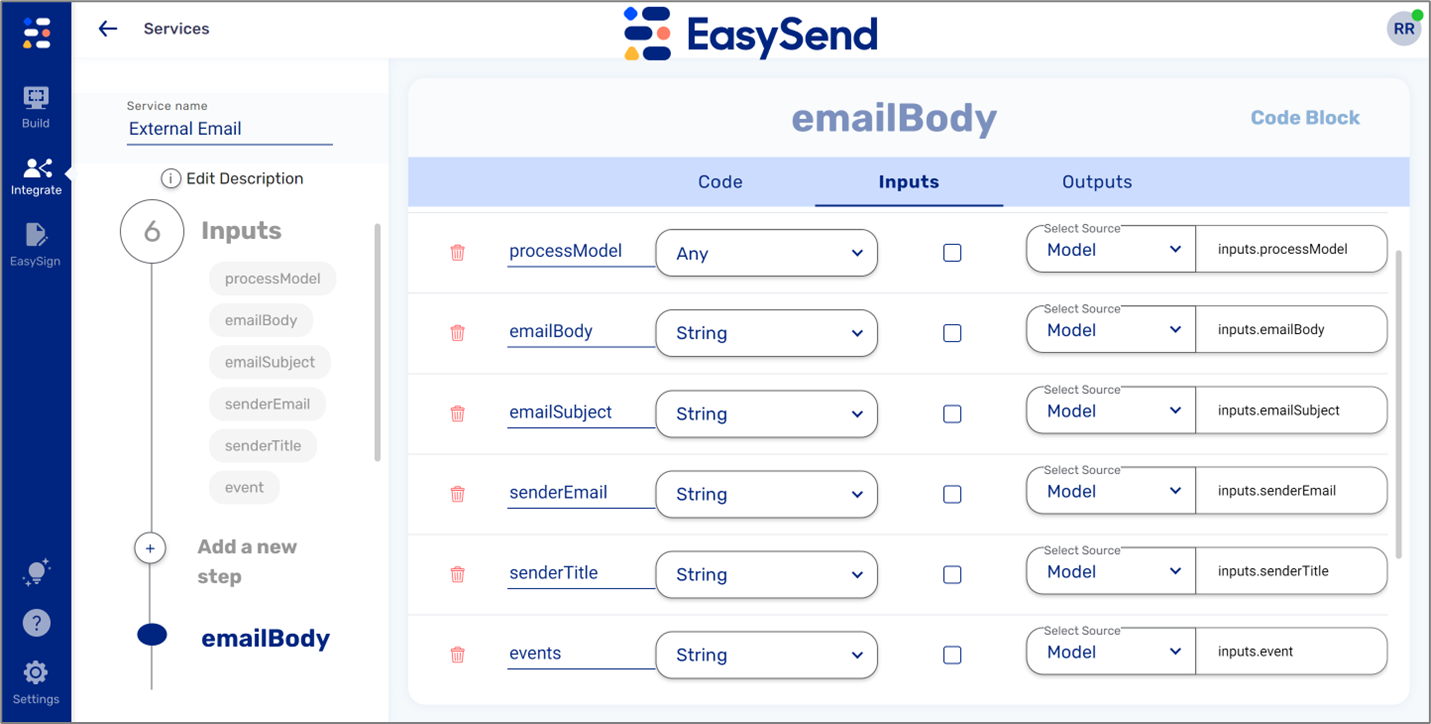
Figure 12: Inputs
- Outputs -contains the output that the code returns.
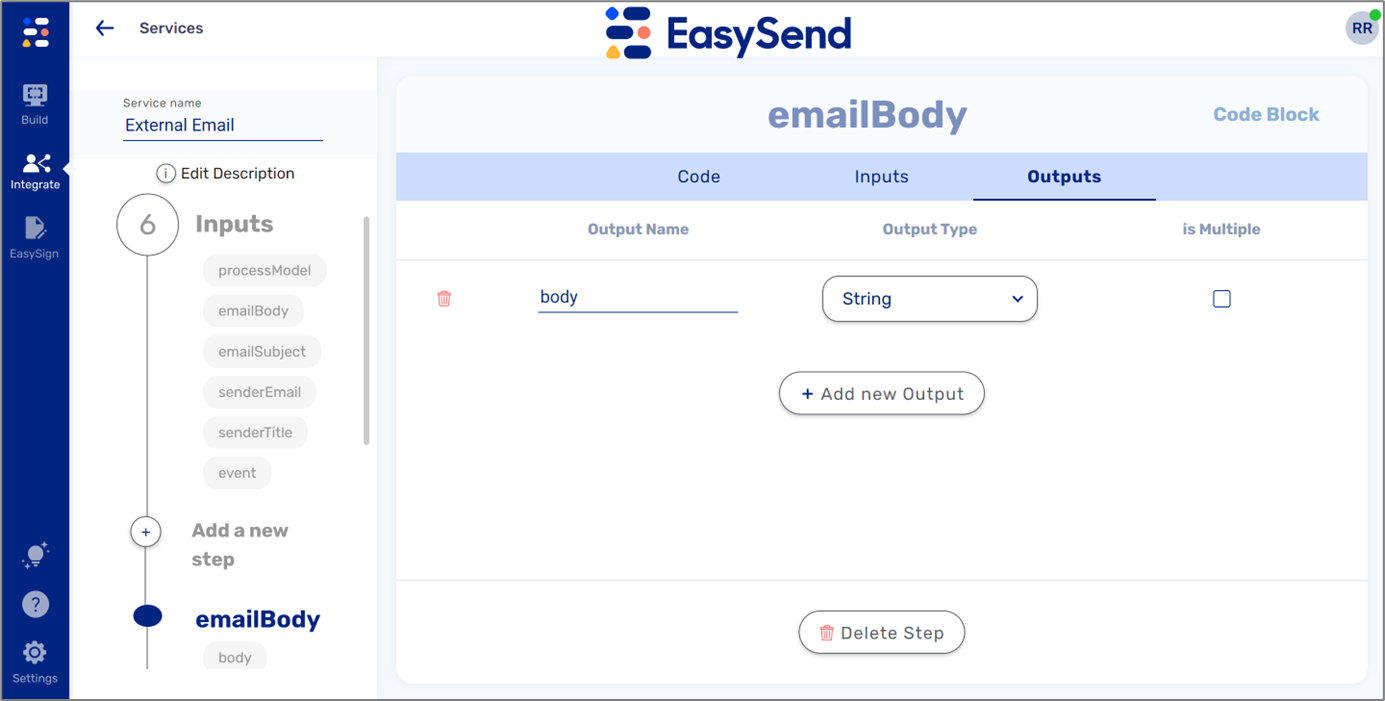
Figure 13: Outputs
- Rest API Service - Request - contains the URL of the API that contacts the external email server and authentication parameters if required.
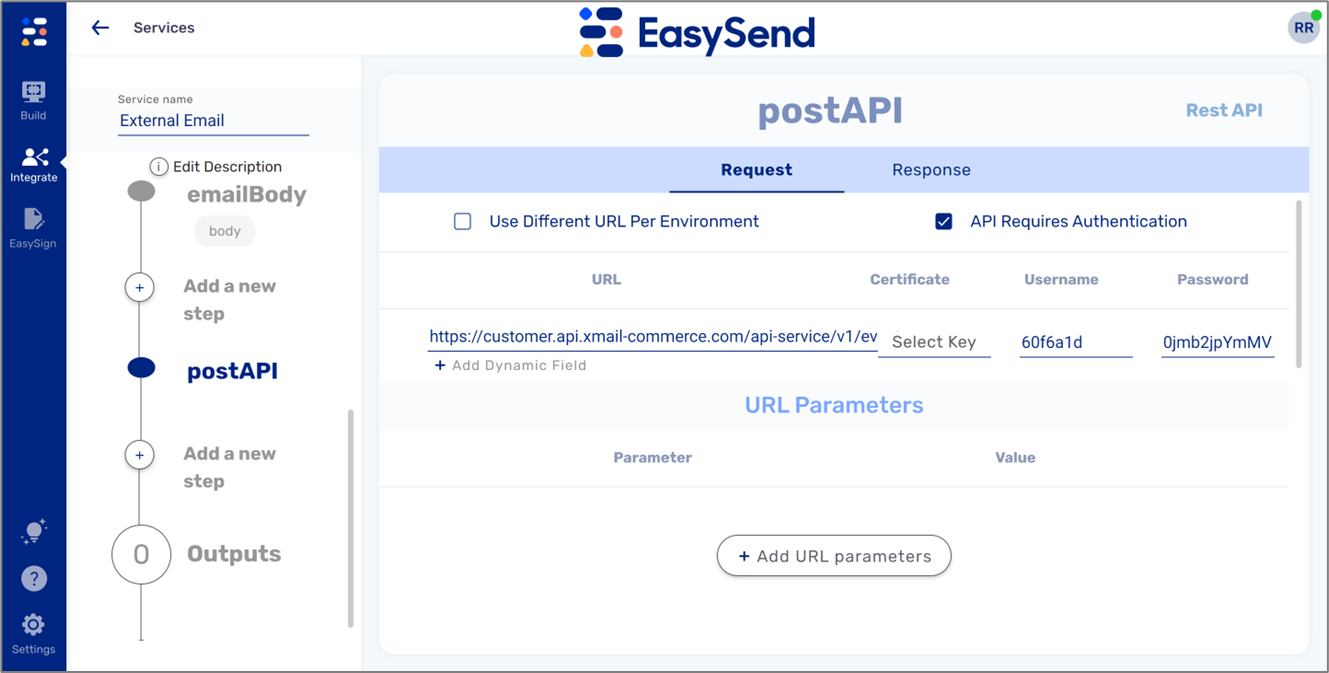
Figure 14: Rest API Request Part 1 of 2
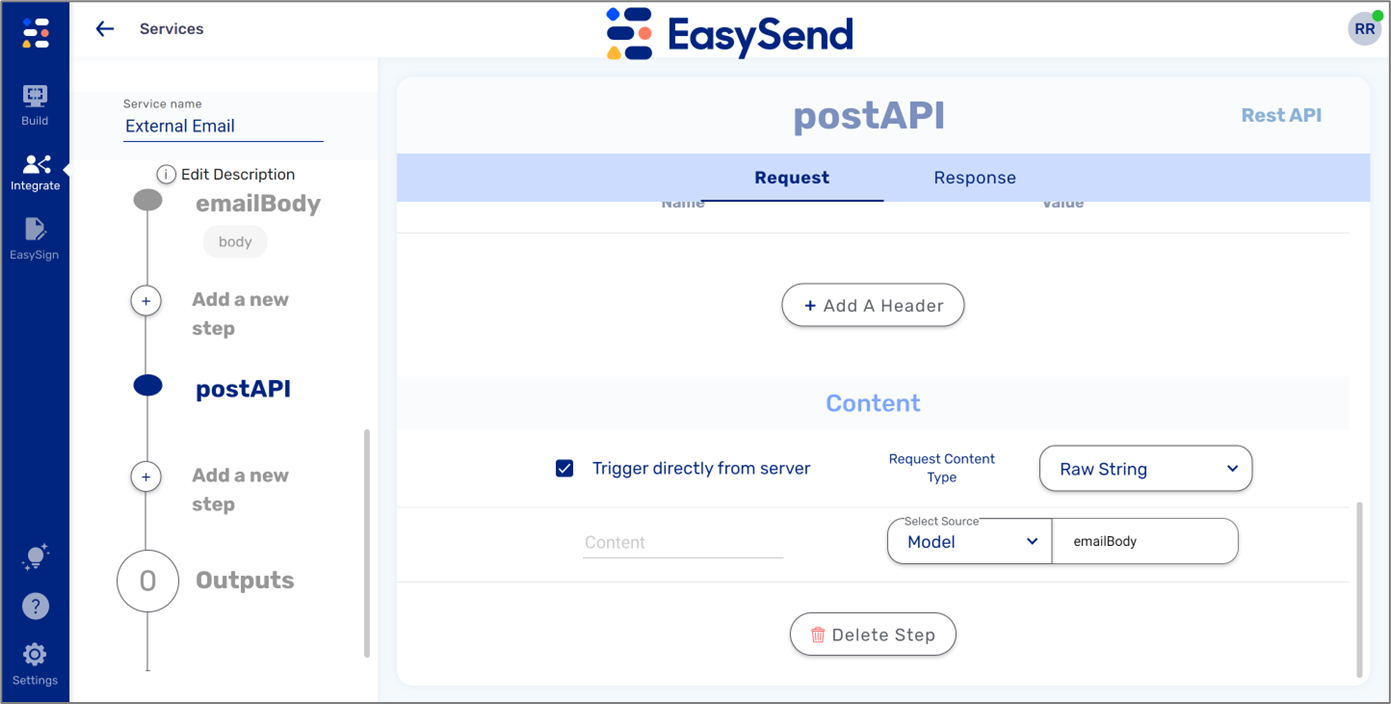
Figure 15: Rest API Request Part 2 of 2
Initiating the Communication Service
The following sections describe how to use the communication service in a digital process.
Webflow and Model
The Webflow and the Model will contain the components and the data items required for the communication service inputs.
Workflow Manager
(See Figure 16 to Figure 19)
The communication service will be added to the relevant Workflow manager step. In our example, the email will be sent at the end of the step, so we will add it to the complete phase.
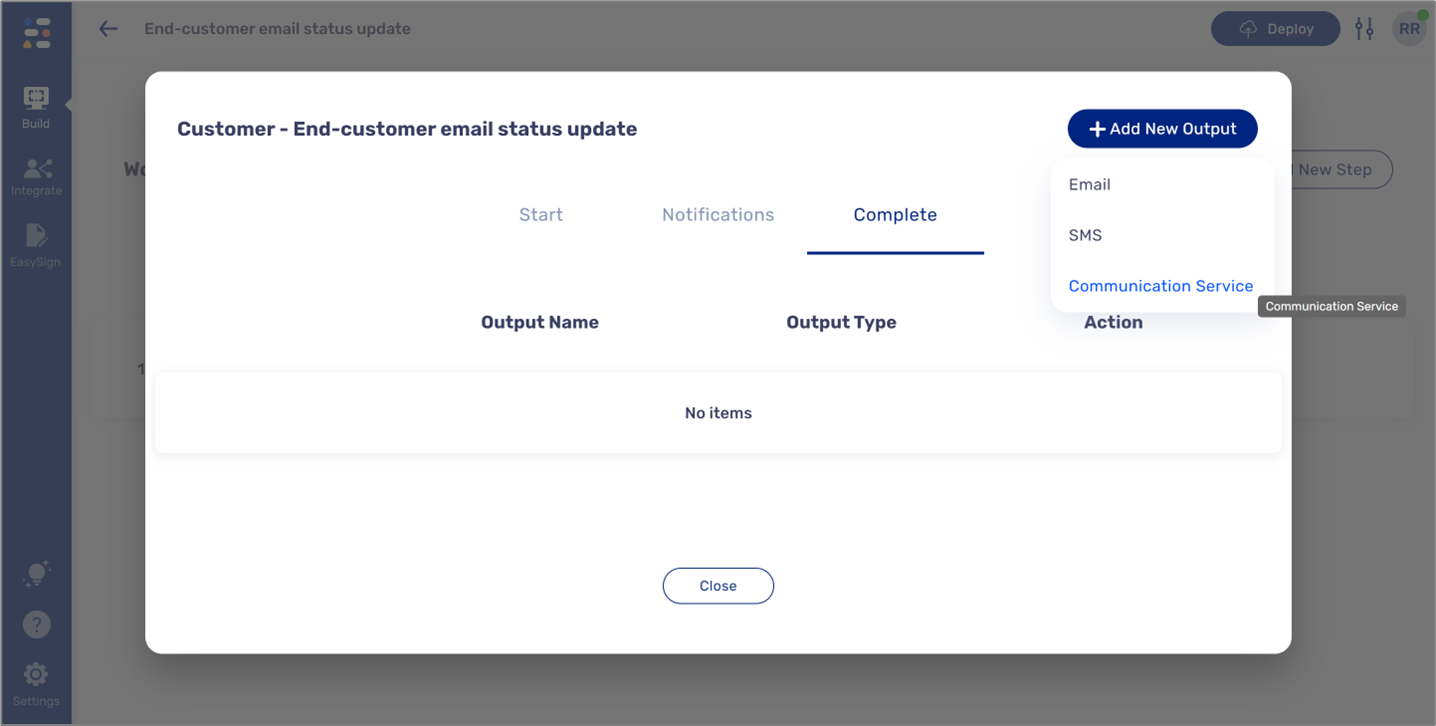
Figure 16: Adding Communication Service Part 1 of 4
To edit the communication service, click the Edit button (1).
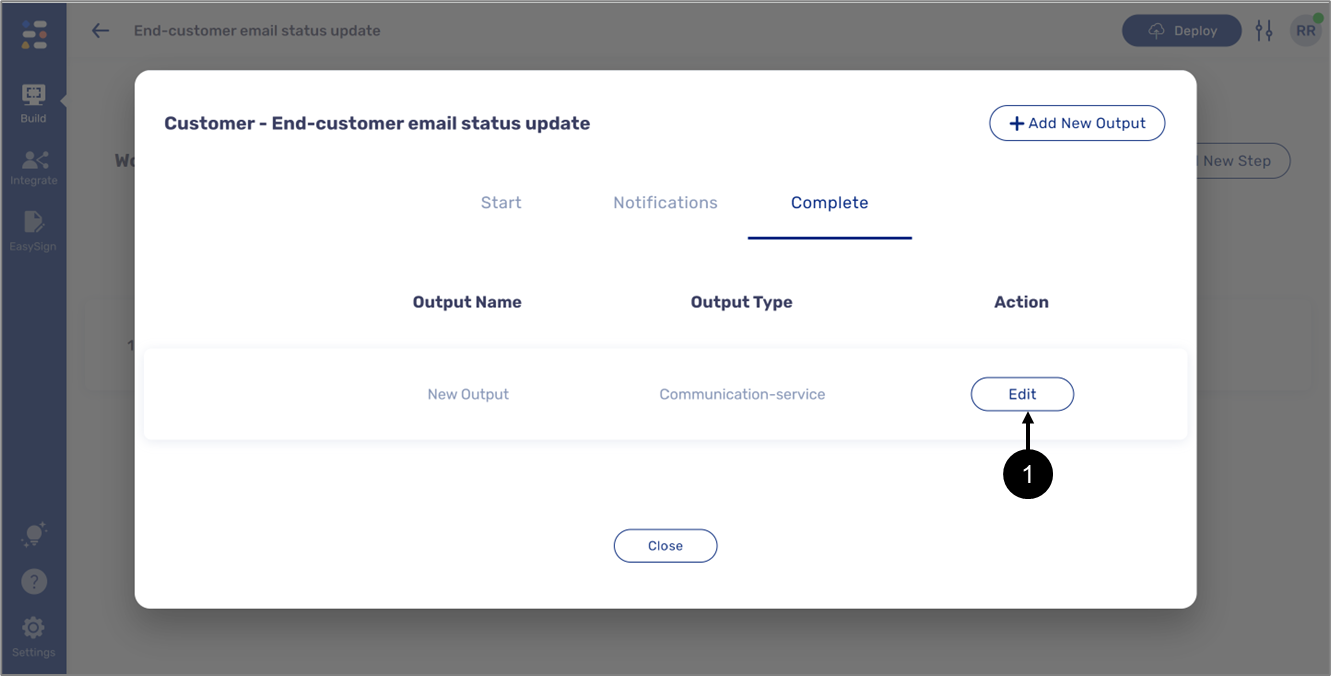
Figure 17: Adding Communication Service Part 2 of 4
Select the integration you created before (2).
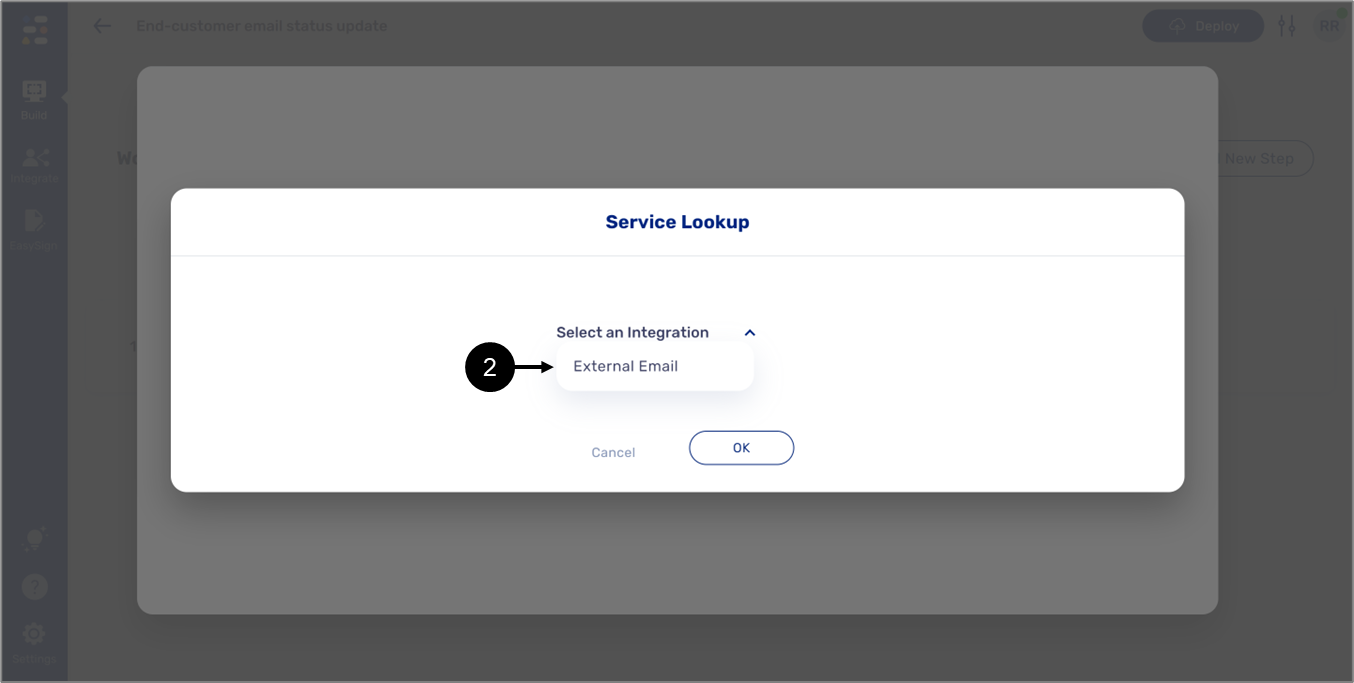
Figure 18: Adding Communication Service Part 3 of 4
Configure the inputs and click OK (3) to finish.
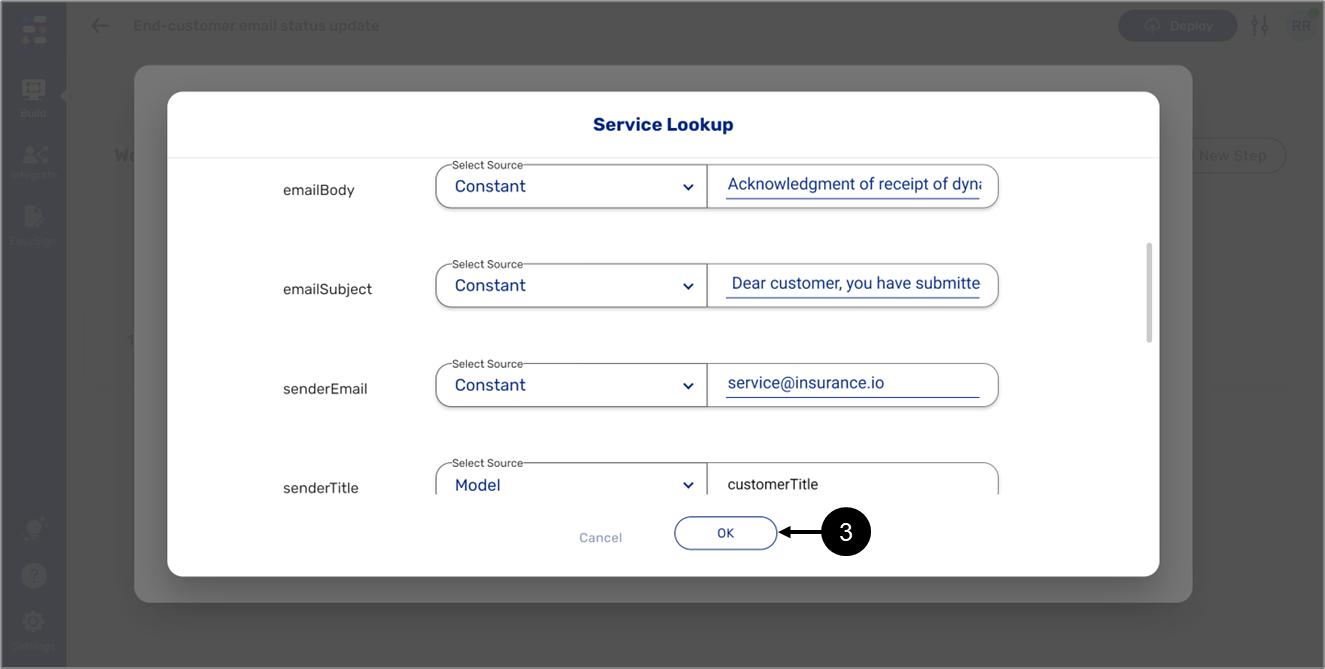
Figure 19: Adding Communication Service Part 4 of 4
Adding a Process Link to a Start Phase Communication Service Email
(See Figure 20)
The communication service can be added to the relevant Workflow manager step to be sent at the start of the process or the start of a specific step. If the email is sent at the start phase, it must contain the link to the digital process.
To add a digital process link to a communication service, perform the following steps:
- Add the processModel input to the Inputs section of the Code Block step.
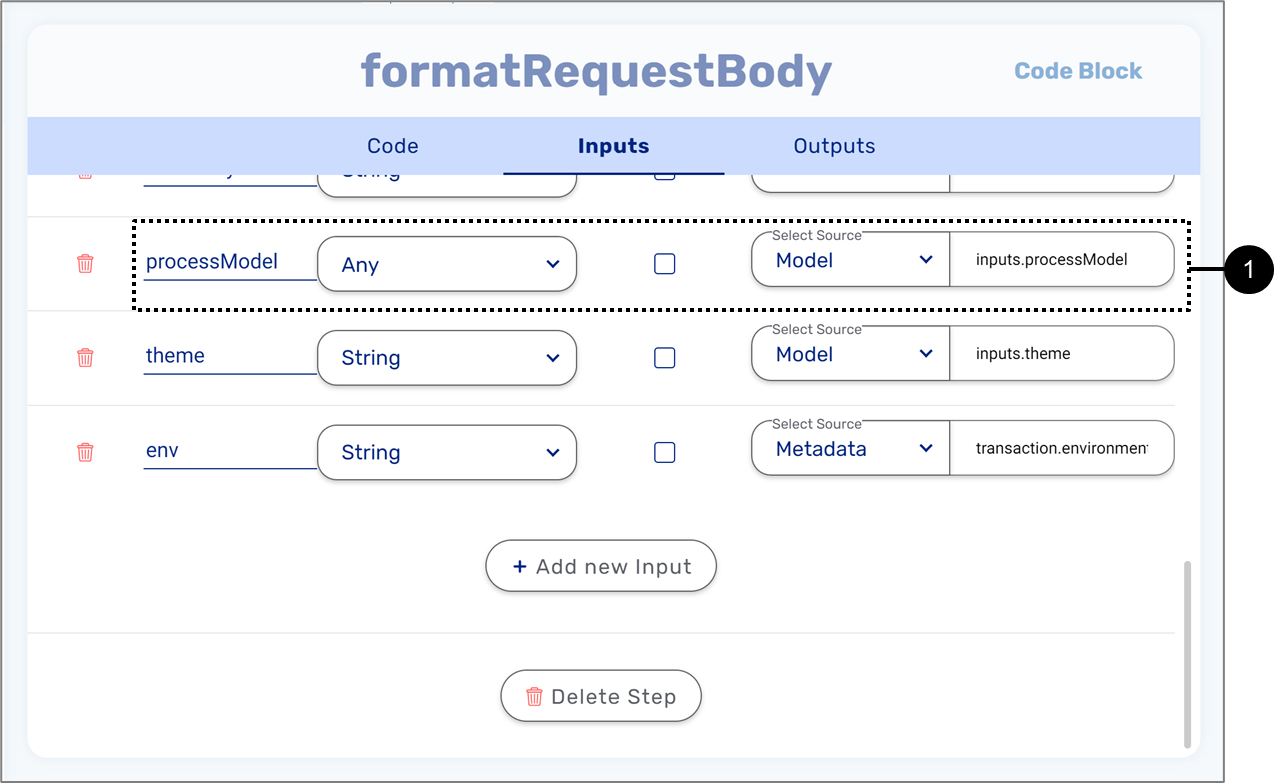
Figure 20: ProcessModel
- In the code section of the Code Block step, add the following code:
    let baseUrlWithProcessName = input.processModel.metadata.url.value.split("?")[0];
    let processName = baseUrlWithProcessName.split("/")[baseUrlWithProcessName.split("/").length - 1];
    return customDomain + "/" + processName + "?rid=" + input.processModel.metadata.rid.value