Article Overview
The following article describes EasySend's Co-browsing feature. It describes how to enable it and how to use it.
What is Co-browsing?
(See Figure 1)
Co-browsing enables digital process end-users to share the link of a digital process via email and invite other users such as agents or reps to provide real-time online support to quickly bring any processes to a close. With Co-browsing, agents or reps can guide end-users through any digital process whether they are connected through mobile, tablet, or desktop. Data input by the end-users immediately appears on the agent or rep screen and vice versa. When changing a page, the page simultaneously changes for all.
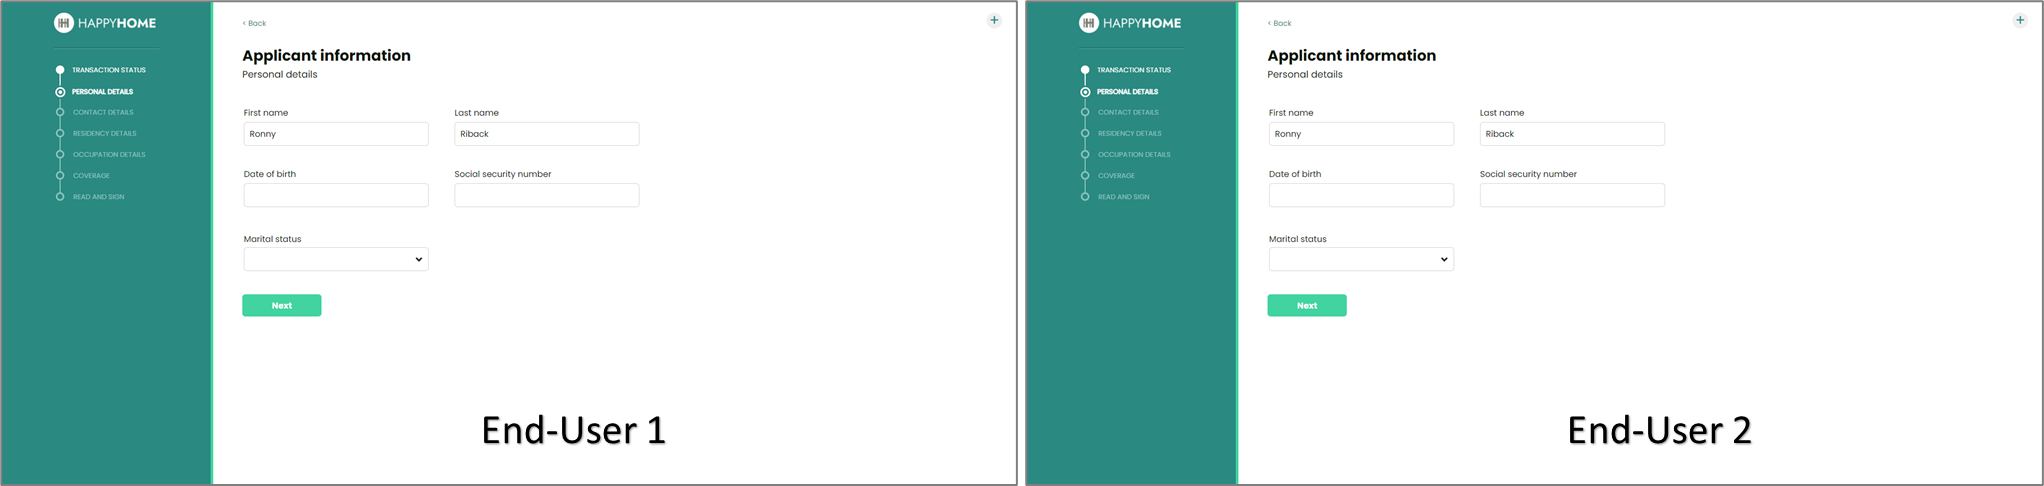
Figure 1: Co-browsing
How Co-browsing works
The following sections describe how the Co-browsing feature works.
Usage Examples
There are a lot of usage examples for the Co-browsing feature, the following two examples are very common:
- A customer is filling out information using a digital process and they require assistance. The agent can use the Co-browsing link, track what the customer is doing, and provide online guidance and assistance.
- A customer needs to upload a document that they do not have. They can send an invite to another end-user to upload the relevant file and continue with the process.
Enabling the Feature
(See Figure 2)
A Main Page component contains a built-in Co-browsing checkbox in its Properties section. Using the checkbox you can decide whether to enable or disable the feature. For example:

Figure 2: Main Page Properties Section
- The name of the enable/disable Co-browsing checkbox.
- The location of the checkbox (may appear under an Advanced dropdown).
- The default value of the checkbox (checked/unchecked by default).
Sending a Co-browsing Link
(See Figure 3 and Figure 4)
A Co-browsing link can be sent while interacting with the digital process. A digital process contains an icon for Co-browsing (1).
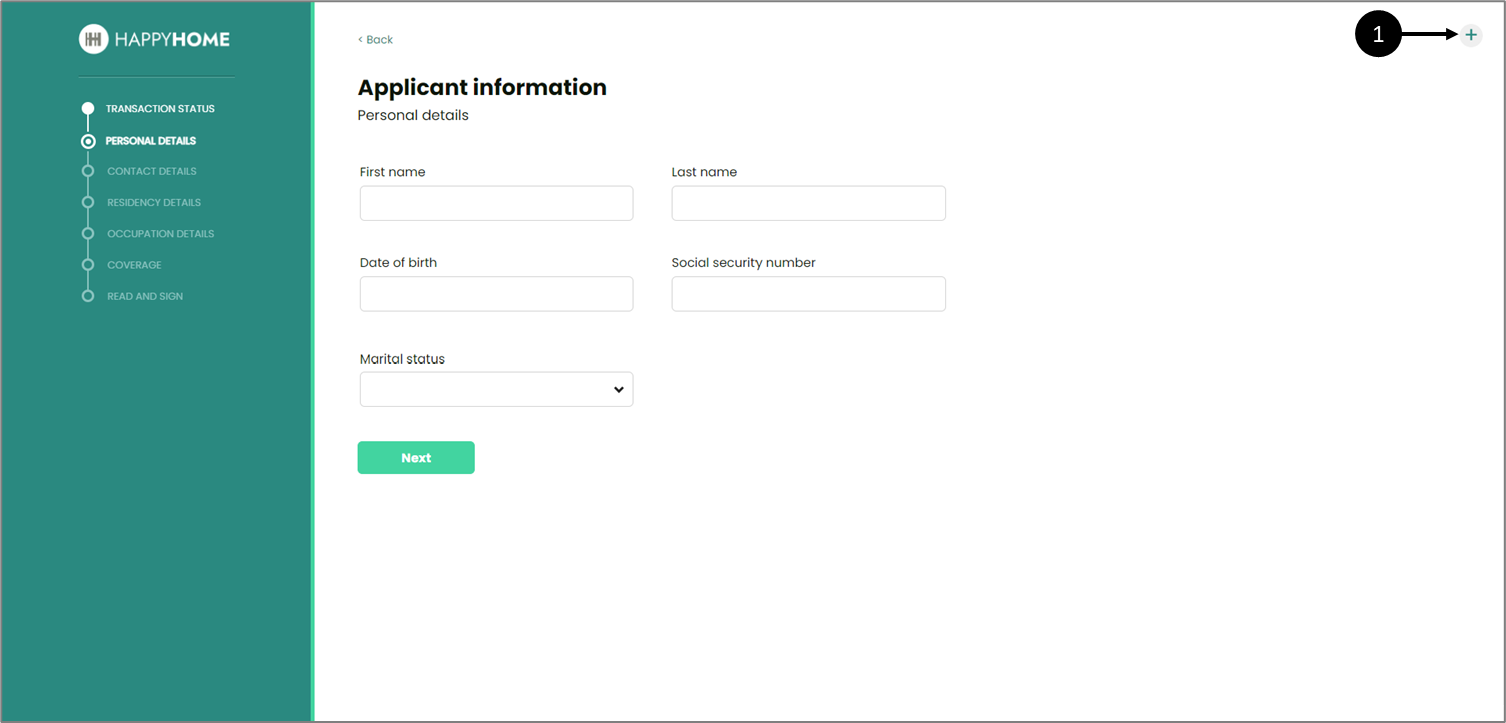
Figure 3: Co-browsing Icon
After clicking the icon, a window appears. Using the window an end-user will enter the email address (2) of a different end-user that will receive the link for Co-browsing. Clicking OK (3) will send the email.
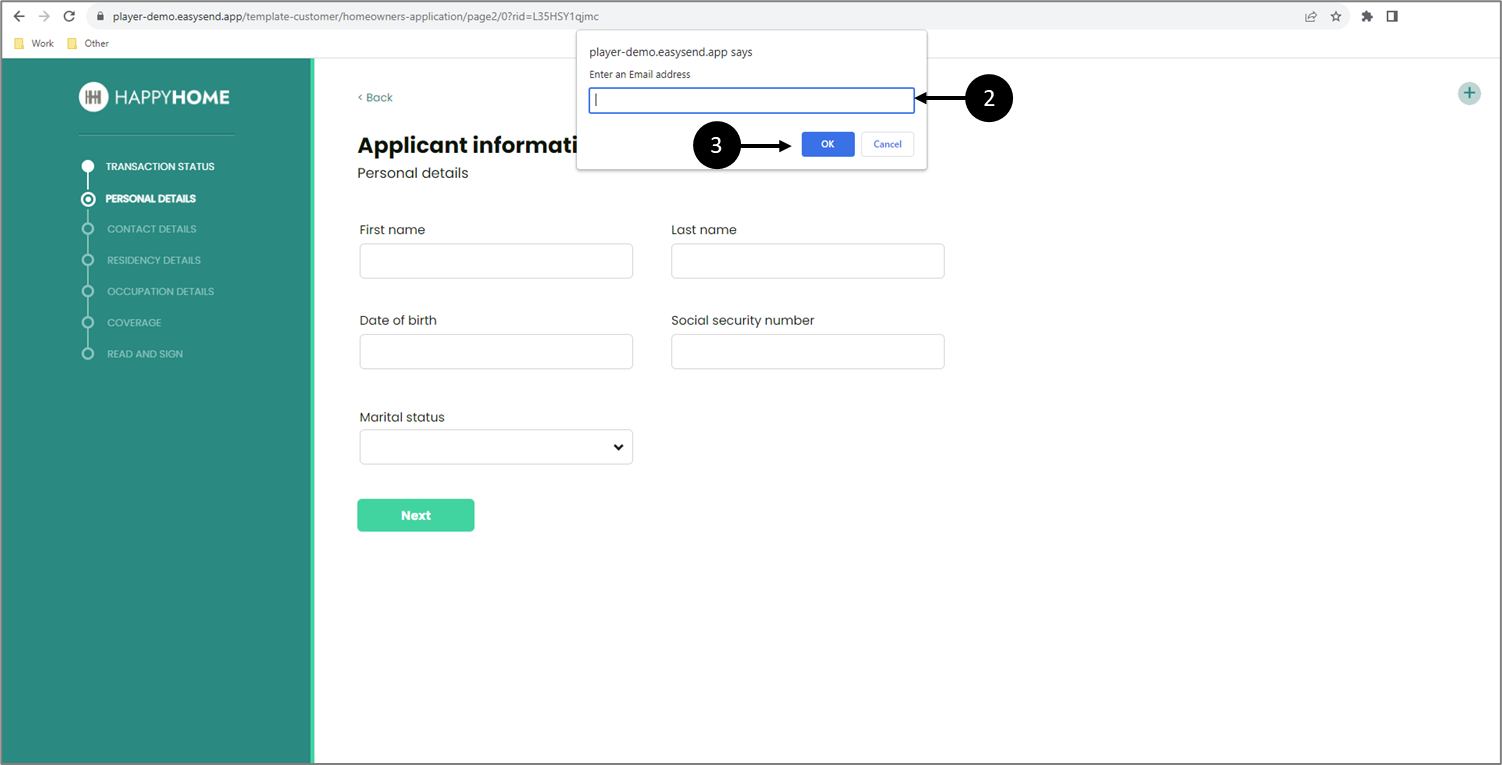
Figure 4: Email for Co-browsing
Co-browsing Email
(See Figure 5)
A Co-browsing invitation email contains a link (1) to the digital process.
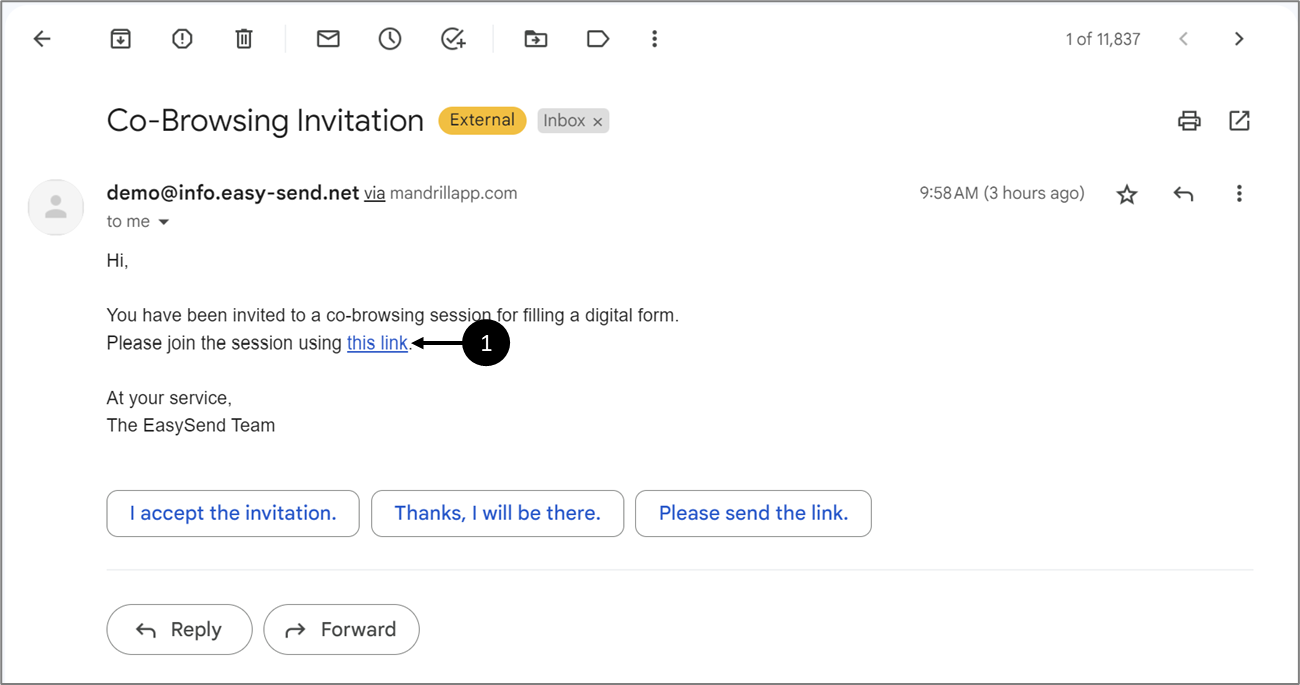
Figure 5: Co-browsing Invitation Email
The link will stay active as long as the process was not:
- Submitted
- Canceled
- Expired
Interacting with The Process
After clicking the link the process will open displaying the same page that a request for Co-browsing was initiated from.
Data input by one end-user will immediately appear on the screen of the other end-user. When navigating between pages, they simultaneously change for both end-users. Once the process is submitted, the link will no longer be valid for all end-users involved.
Co-browsing Permissions
The following sections describe Co-browsing permissions
Roles and Permissions in EasySend
(See Figure 6 and Figure 7)
In some cases, one digital process can be accessed by different end-users with specific roles, for example:
- Customer
- Spouse
- Agent

Figure 6: Roles
We can provide access permissions for each role:
- full
- readonly
- none
Access permissions allow us to manage how roles interact with the digital process, for example:
- A customer will receive full access permissions to all the pages that require them to input information
- A page that contains information just for the spouse will be hidden from the customer and the agent
- An agent that needs to review the information input by the customer and the spouse will receive readonly permissions for the relevant page pages
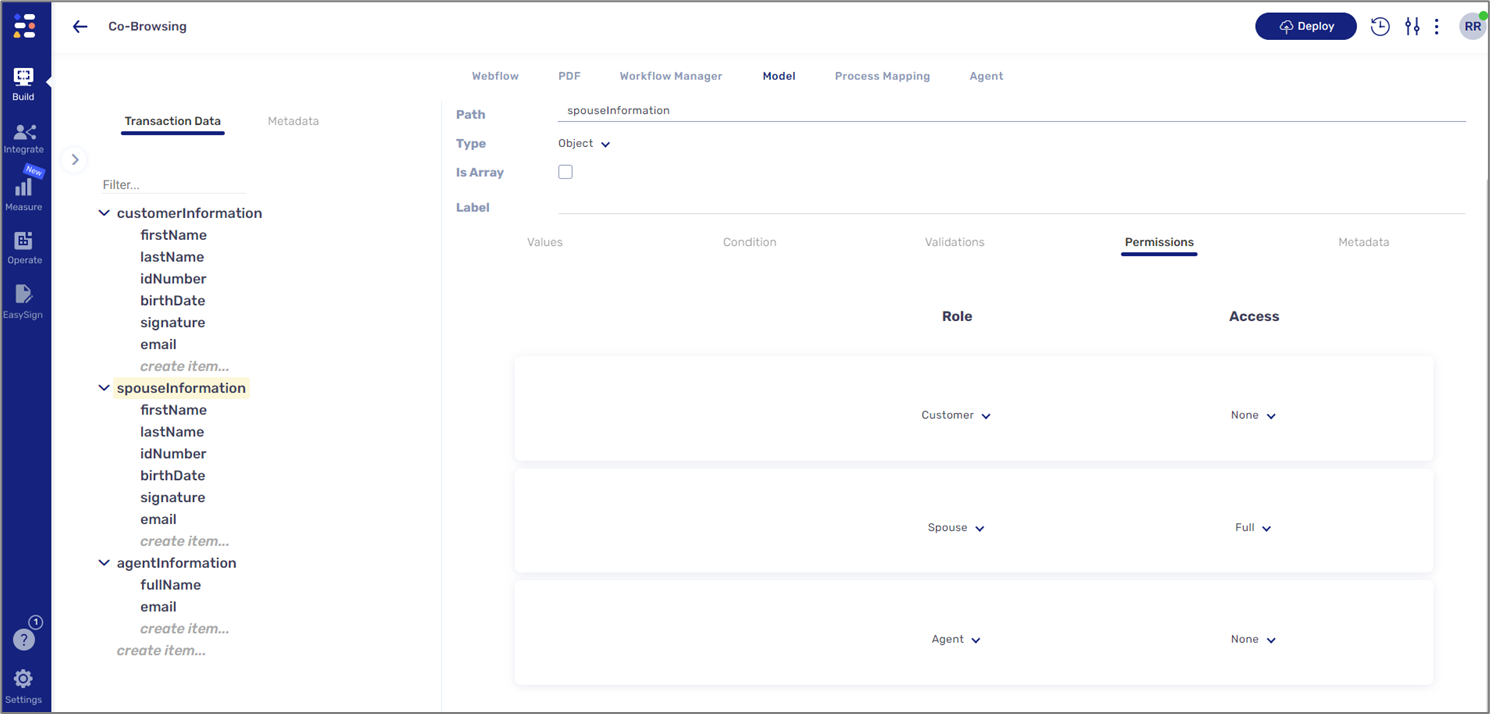
Figure 7: Access Permissions
Applying Role Permissions for Co-browsing
(See Figure 8)
We can apply the same principles of role permissions when using the Co-browsing feature. To do so, we need to create a new communication output, email, or SMS, click the Advanced dropdown (1) and then Conditions (2). Under Conditions, we will locate the Co-browsing dropdown (3).
The default value the dropdown displays is No Override (4) meaning that the end-user that accessed the digital process using a Co-browsing invitation will receive full access permissions. When clicking the dropdown a list of roles (5) appears. Choosing any one of the roles will override the full access permissions to those associated with the selected role.

Figure 8: Co-browsing permissions
Co-browsing and Continue & save later
(See Figure 15)
When using the Workflow Manager screen to configure a notification, the outputs options my include two additional options:
- Co-browsing invite email - sending a co-browsing invitation email.
- Save & continue later email - sending an email with a link to the process to continue at a later time.
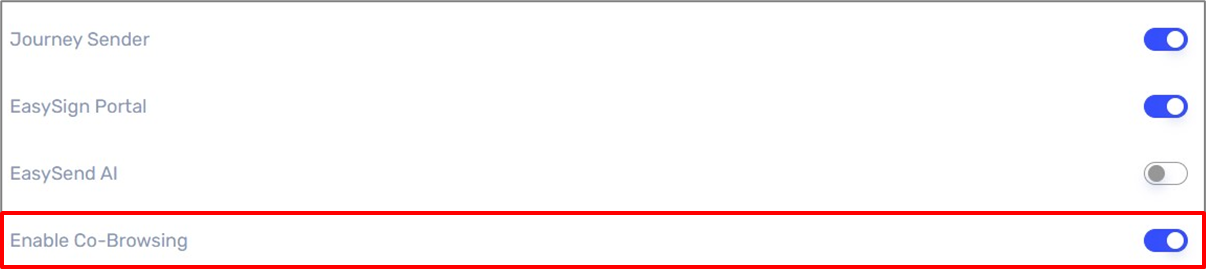
- The Co-browsing invite email and Save & continue later email options will become available only if the Enable Co-browsing option is enabled in the Customer Settings screen. For additional information, please contact our support team.
- To be able to send the Co-browsing invite email or the Save & continue later email your environment servers version must be 30.0.0 or above.
- You can only add one Co-browsing email and one Save & continue later email.
Co-browsing invite email
The following sections describe the Co-browsing invite email option.
What is Co-browsing?
Co-browsing enables digital process end-users to share the link of a digital process via email and invite other users such as agents or reps to provide real-time online support to quickly bring any processes to a close. With Co-browsing, agents or reps can guide end-users through any digital process whether they are connected through mobile, tablet, or desktop. Data input by the end-users immediately appears on the agent or rep screen and vice versa. When changing a page, the page simultaneously changes for all.
Co-browsing invite email Configuration
(See Figure 9 and Figure 10)
After adding the Co-browsing invite email as an output (1), clicking the Edit button (2) opens the Email Details window.
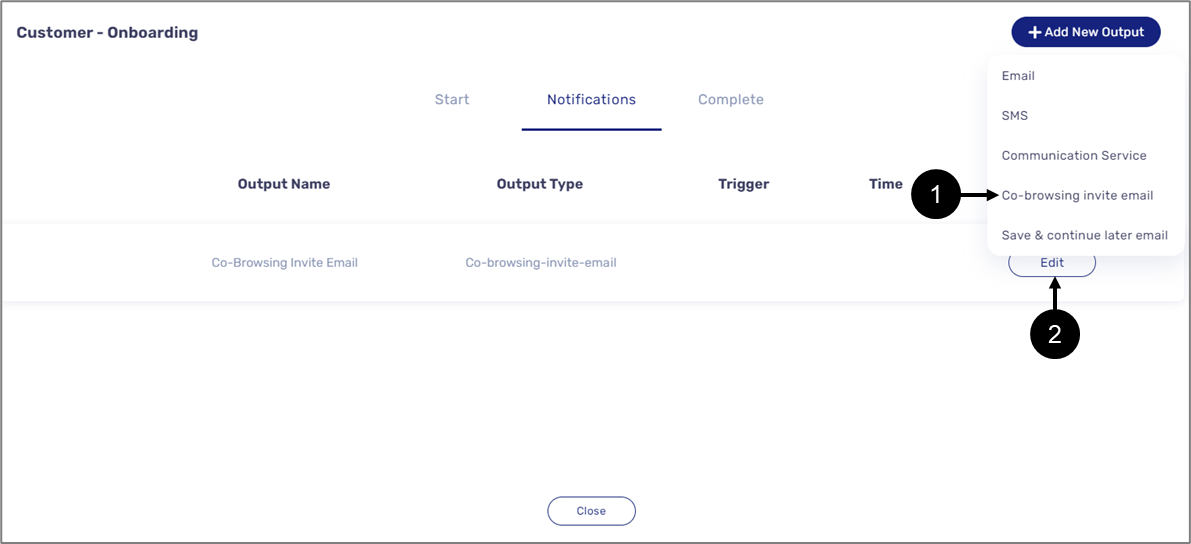
Figure 9: Co-browsing invite email
The Email Details window is divided into two sections:
- General (3) - contains the Email Name and Subject, both are editable.
- Email Content (4) - an HTML editor that contains the content of the email. The content must include a
link to the process - {{link}}. The content is editable.
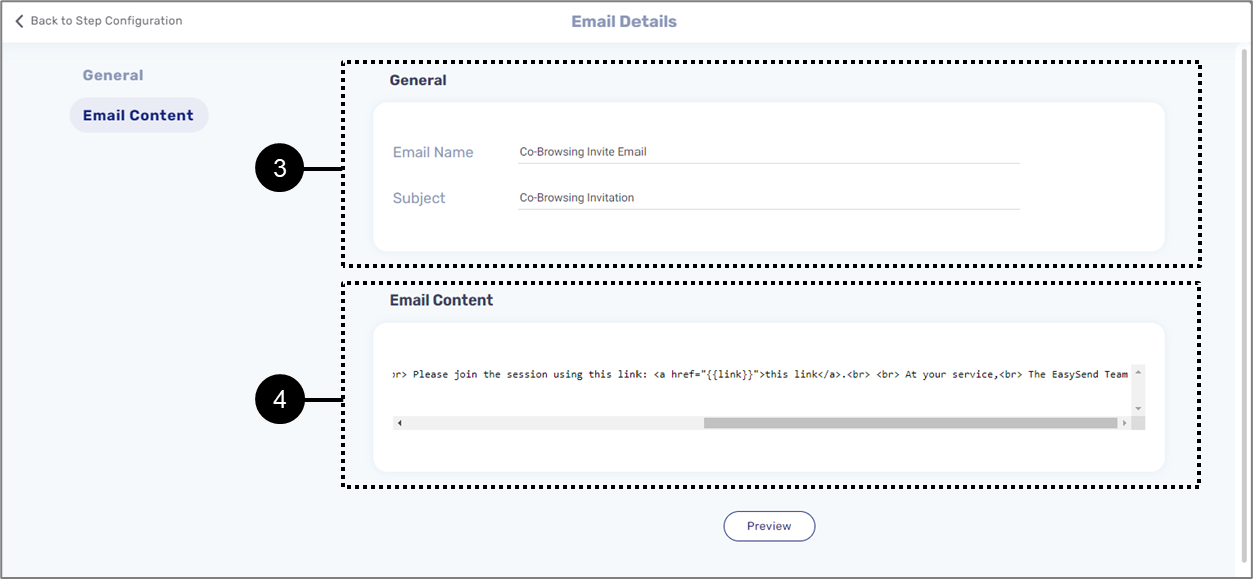
Figure 10: Email Details Window
How to Send the Co-browsing invite email
(See Figure 11 to Figure 13)
To send the Co-browsing invite email, make sure to locate the Co-browsing component (1) and to add it to the Webflow (2), for example:
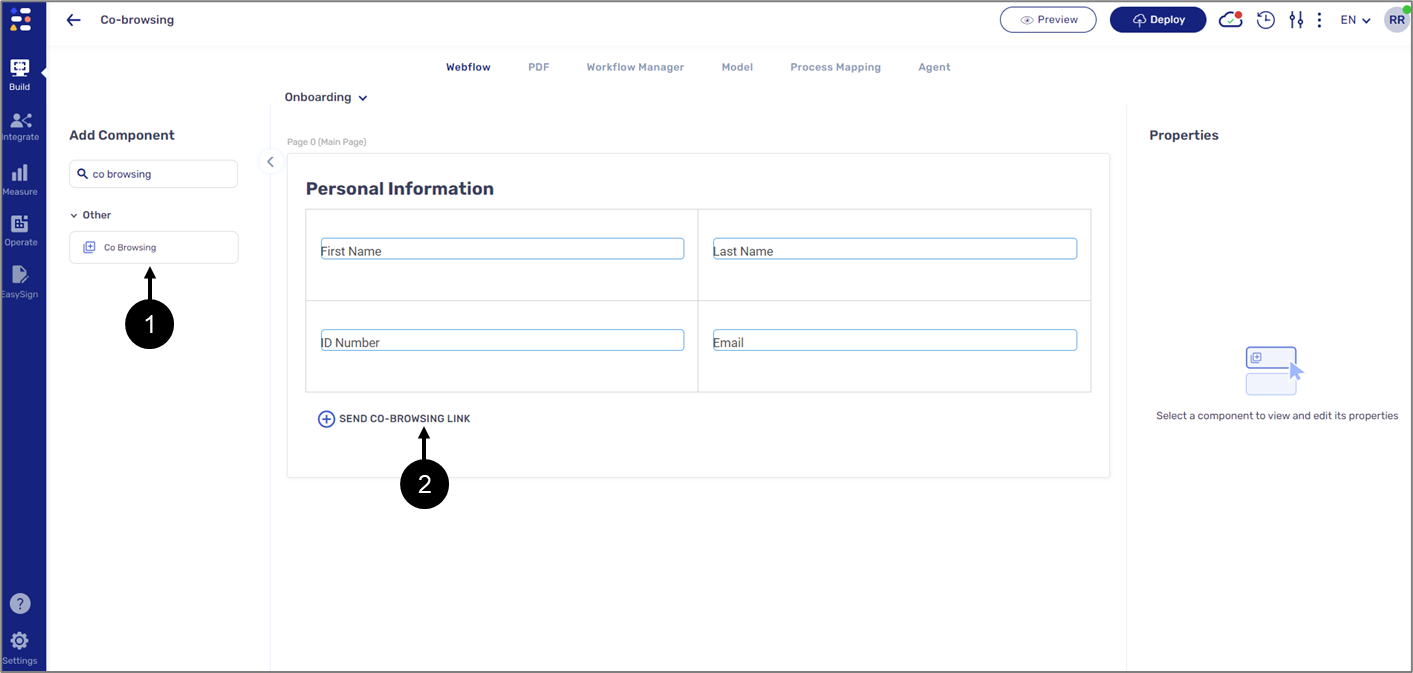
Figure 11: Co-browsing component
When the digital process is initiated and an end-user clicks the Co-browsing component (3) a window (4) to input a recipient email address appears, for example:
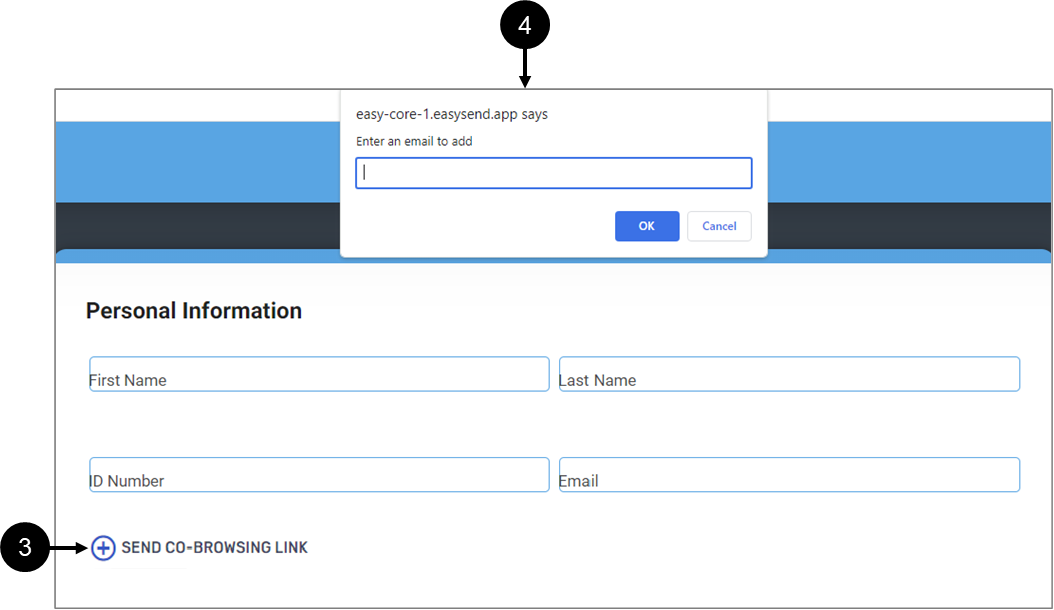
Figure 12: Initiating Co-browsing
The recipient will receive an email with a link to the digital process, for example:
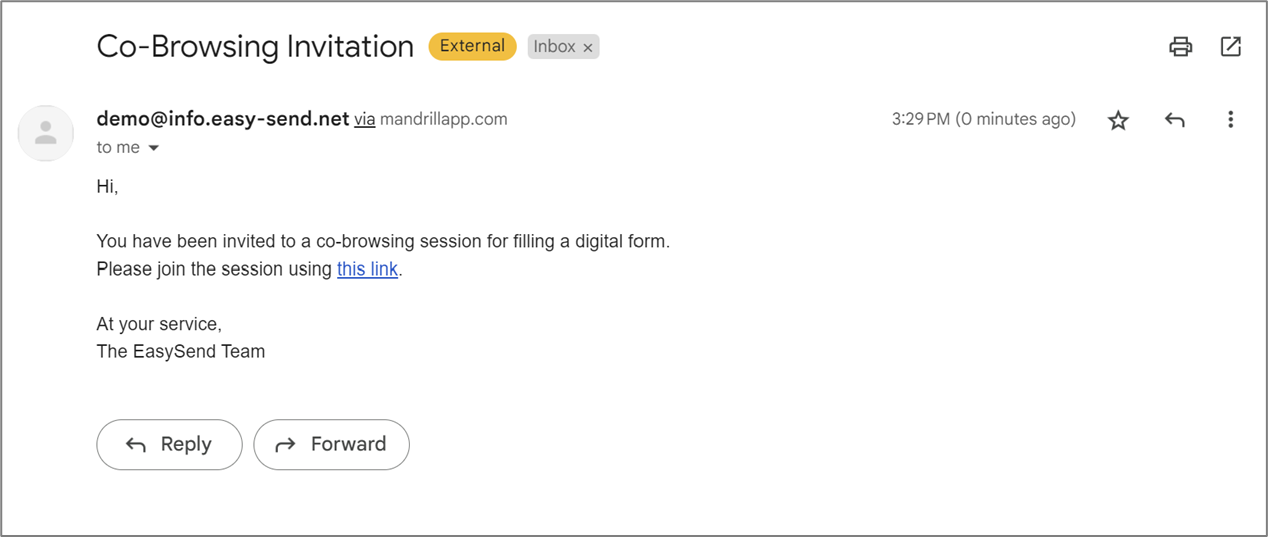
Figure 13: Co-browsing invite email
Co-browsing Component Properties
(See Figure 14)
The properties of the Co-browsing component (component name, version, title, color, action (Co-browsing or Save & continue later)) are configured using your Theme. For additional information please contact our support team.
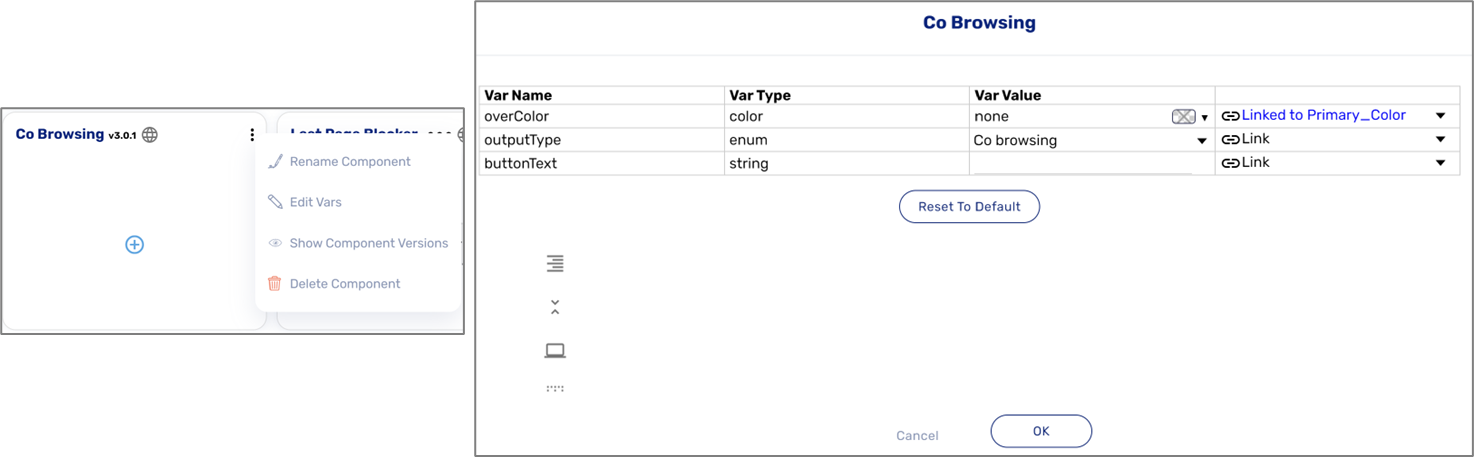
Figure 14: Co-browsing Component Properties
Save & continue later email
The following sections describe the Save & continue later email option.
What is Save & continue later?
Save and continue later enables end-users to save their digital process progress at any stage, close it, and use the link they receive via email to complete it at a later time.
Save & continue later email Configuration
(See Figure 15 and Figure 16)
After adding the Save & continue later email as an output (1), clicking the Edit button (2) opens the Email Details window.
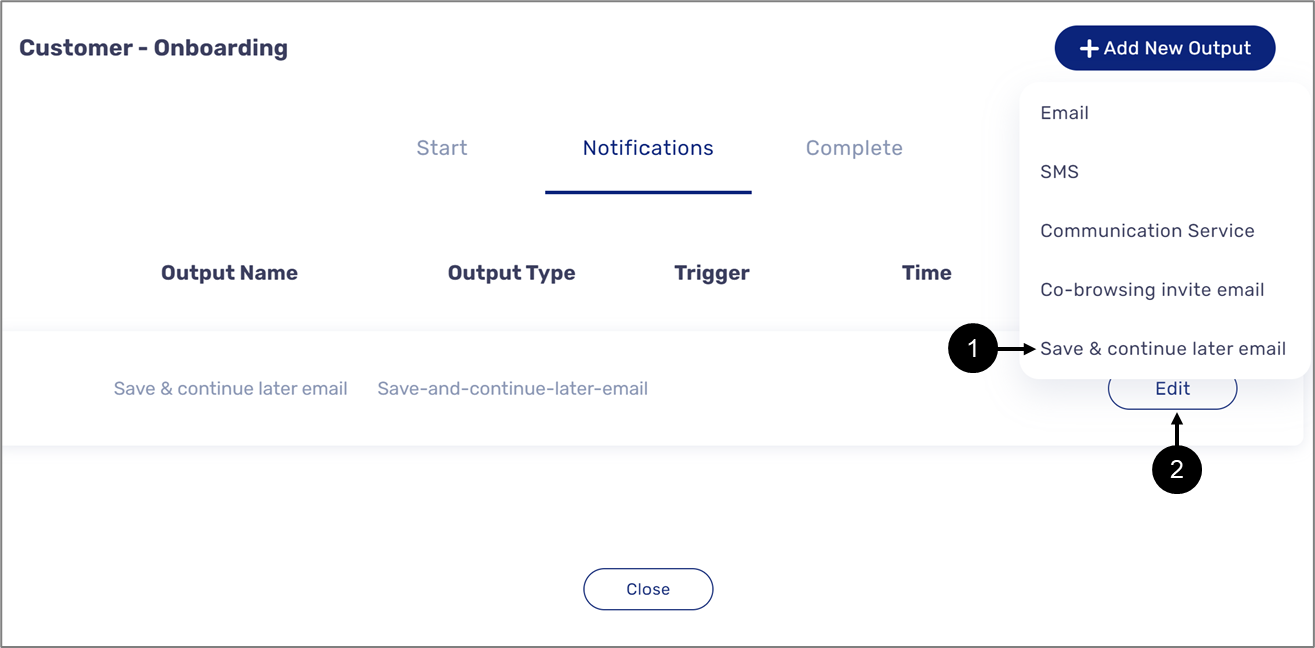
Figure 15: Save & continue later email
The Email Details window is divided into two sections:
- General (3) - contains the Email Name and Subject, both are editable.
- Email Content (4) - an HTML editor that contains the content of the email. The content must include a
link to the process - {{link}}. The content is editable.
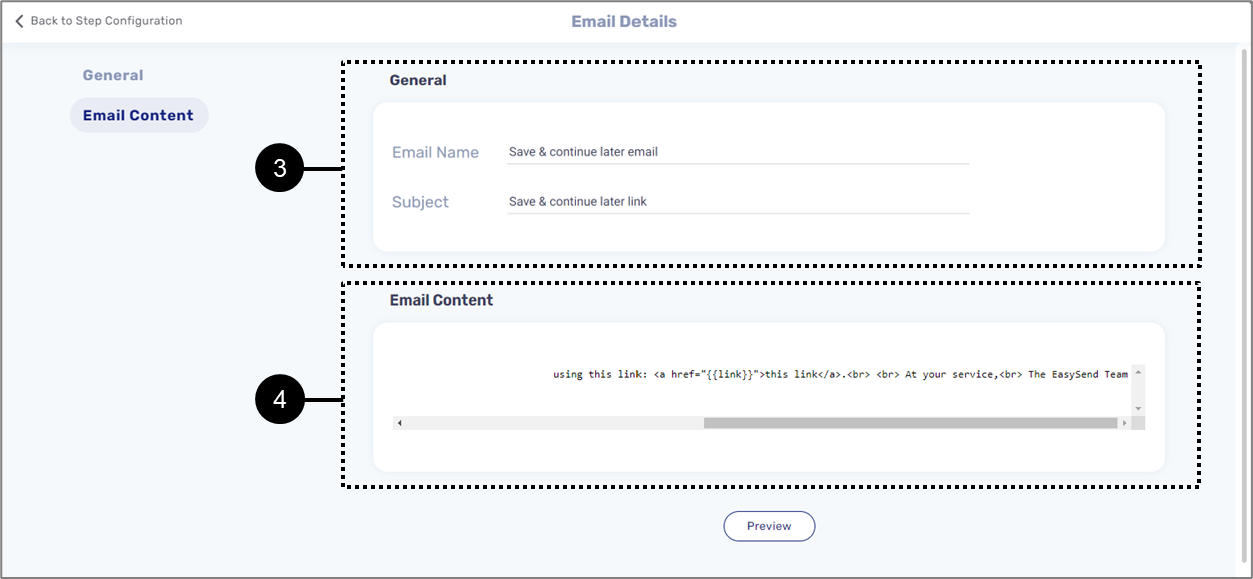
Figure 16: Email Details Window
How to Send the Sand & continue later email
(See Figure 17 to Figure 19)
To send the Save & continue later email, make sure to locate the Co-browsing component (1) and to add it to the Webflow (2), for example:
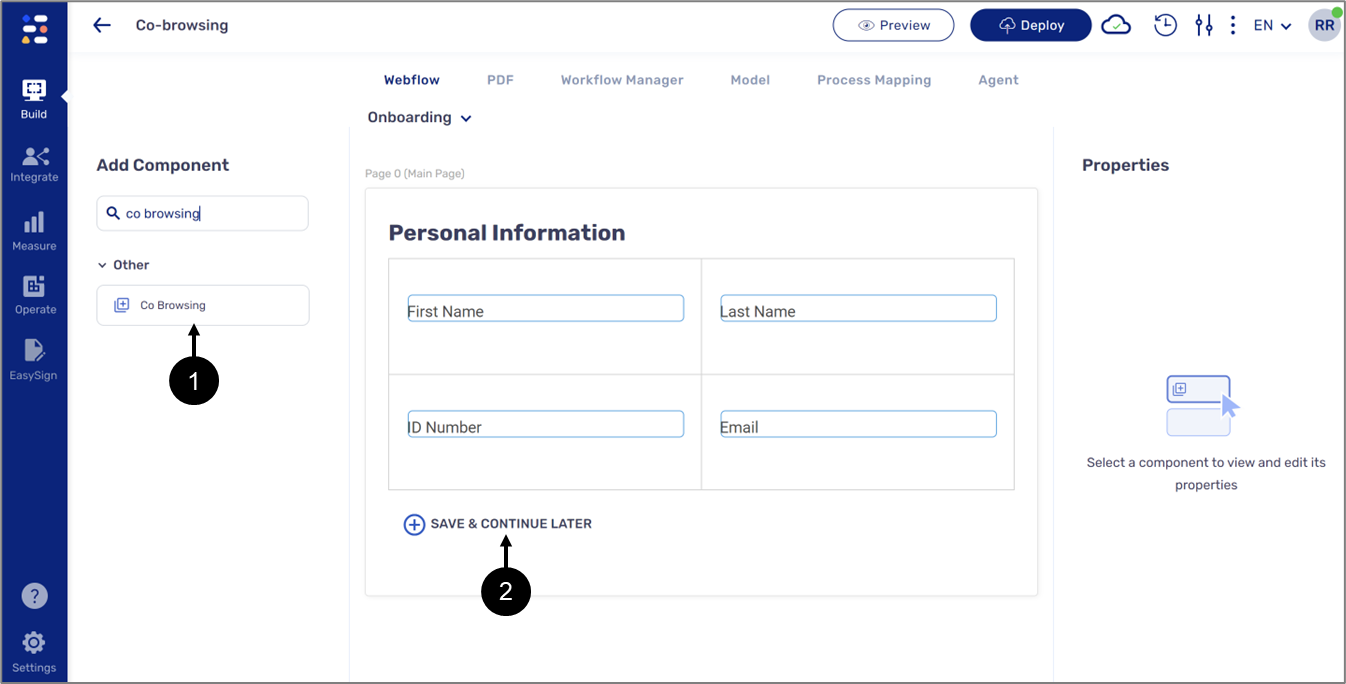
Figure 17: Co-browsing component
When the digital process is initiated and an end-user clicks the Co-browsing component (3) a window (4) to input a recipient email address appears, for example:
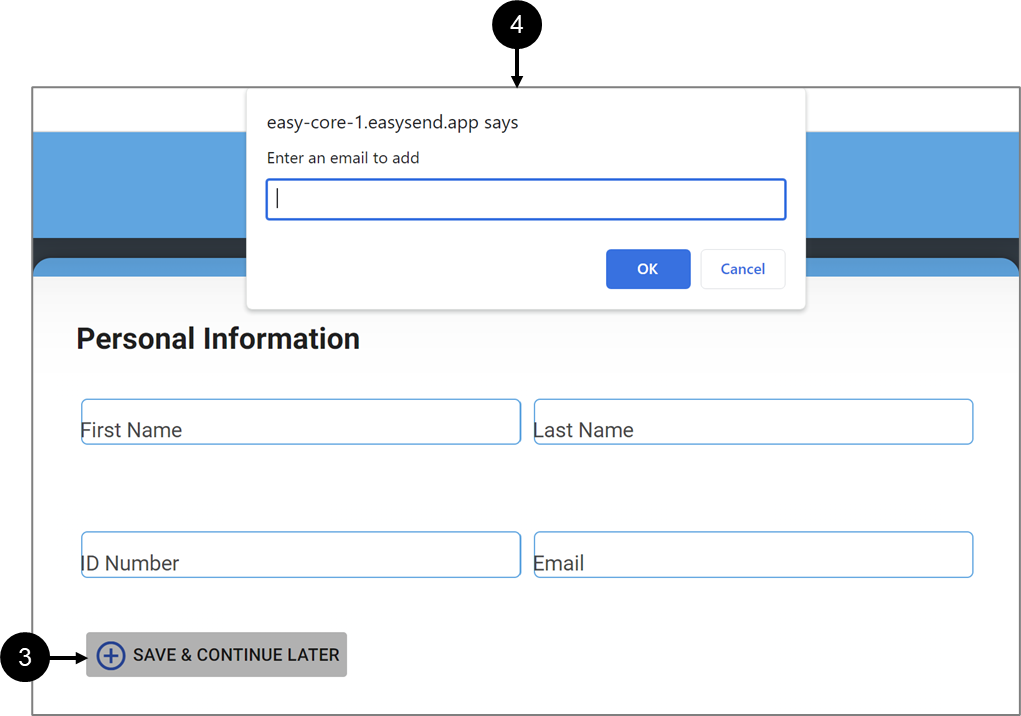
Figure 18: Initiating Co-browsing
The recipient will receive an email with a link to the digital process, for example:
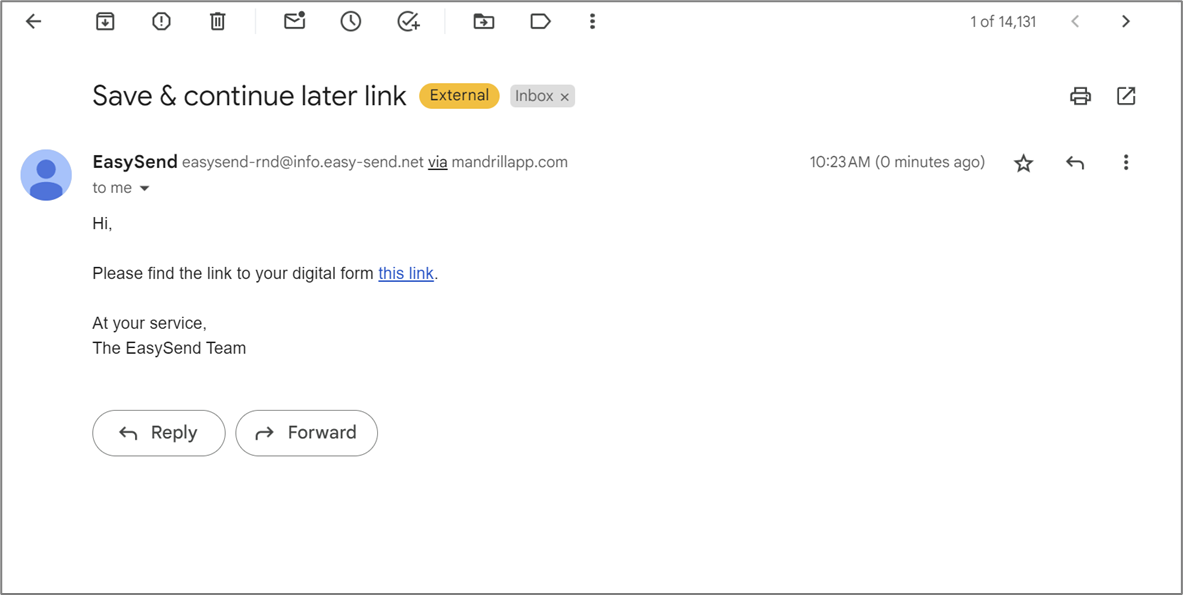
Figure 19: Co-browsing Invite Email
Co-browsing Component Properties
(See Figure 20)
The properties of the Co-browsing component (component name, version, title, color, action (Co-browsing or Save & continue later)) are configured using your Theme. For additional information please contact our support team.
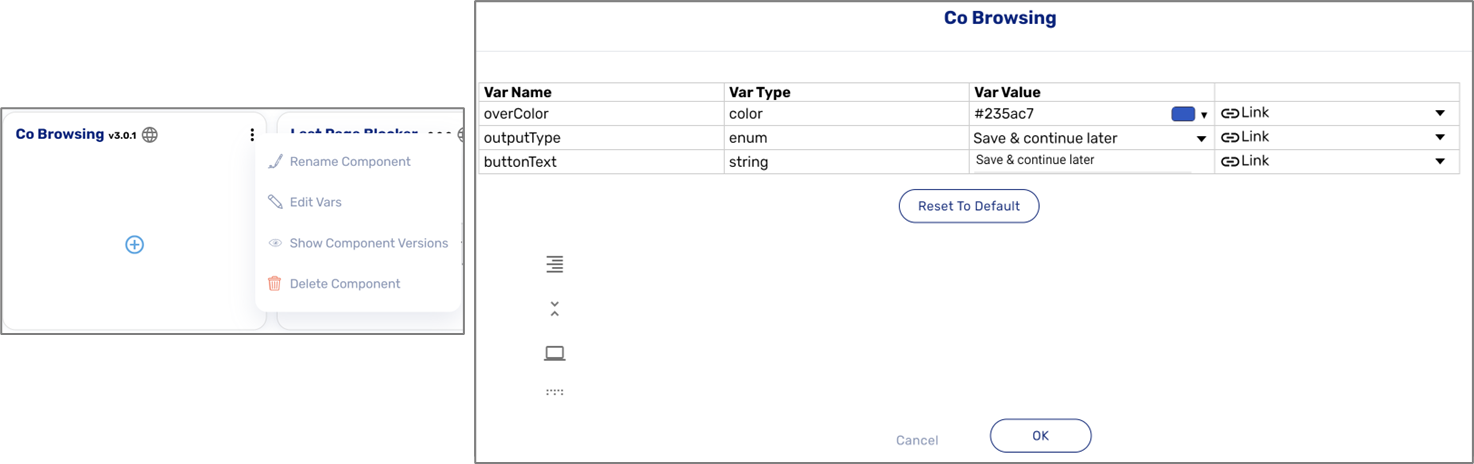
Figure 20: Co-browsing Component Properties