Article Overview
The following article describes how to set up postman environment to query D365 CE data and how to created an application user.
Step 1: Create Azure App
(See Figure 1 to Figure 10)
To create a new Azure App, perform the following steps:
- Create a new App registration in Azure, under Azure Active Directory:
- Click Azure Active Directory (1).
- Click App registrations (2).
- Click New registration (3).
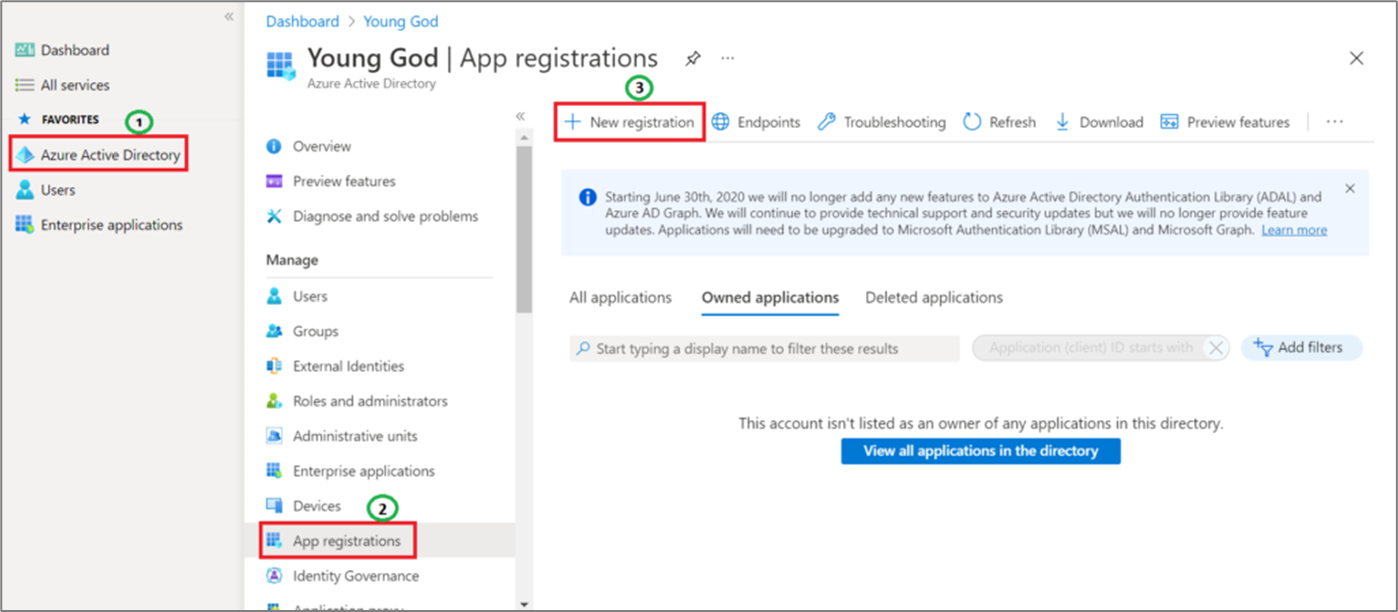
Figure 1: New Registration
- Enter an EasySend Application Name.
- Select Supported account types - Accounts in any organizational directory (any Azura AD directory - Multitenant).
- Click Register.
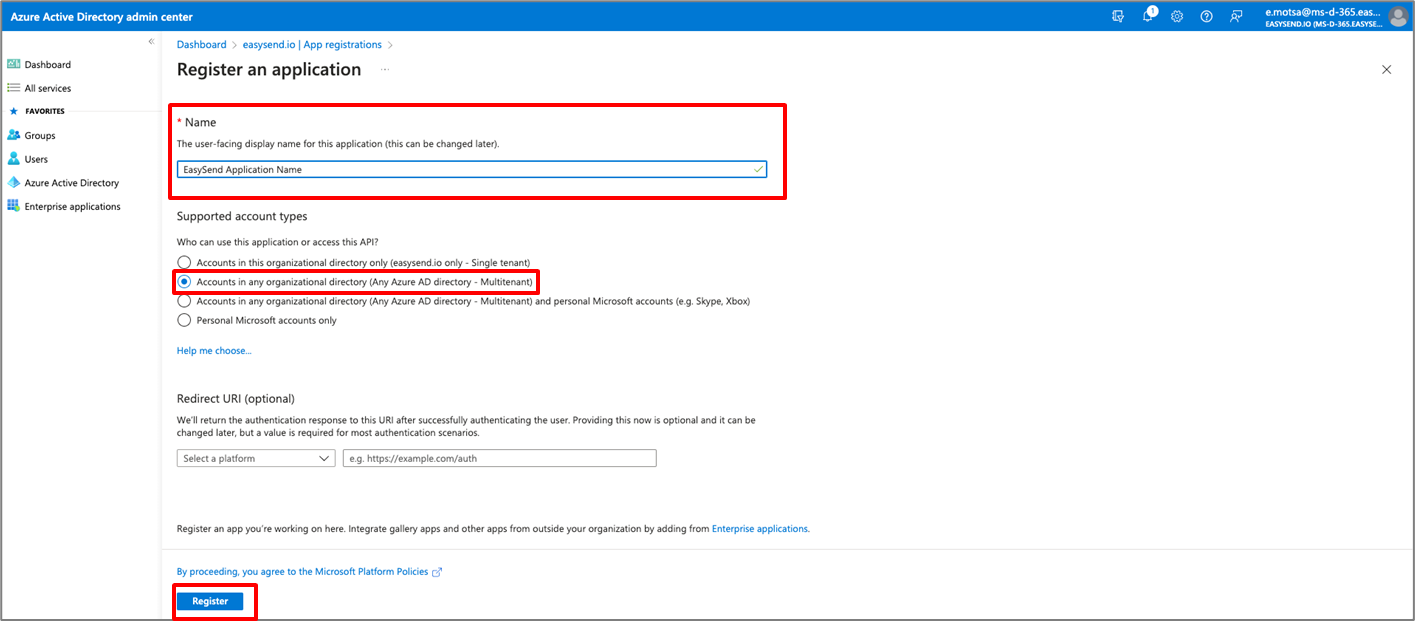
Figure 2: Register An Application
Result:
A new application is created with an Application (client) ID and Directory (tenant) ID:
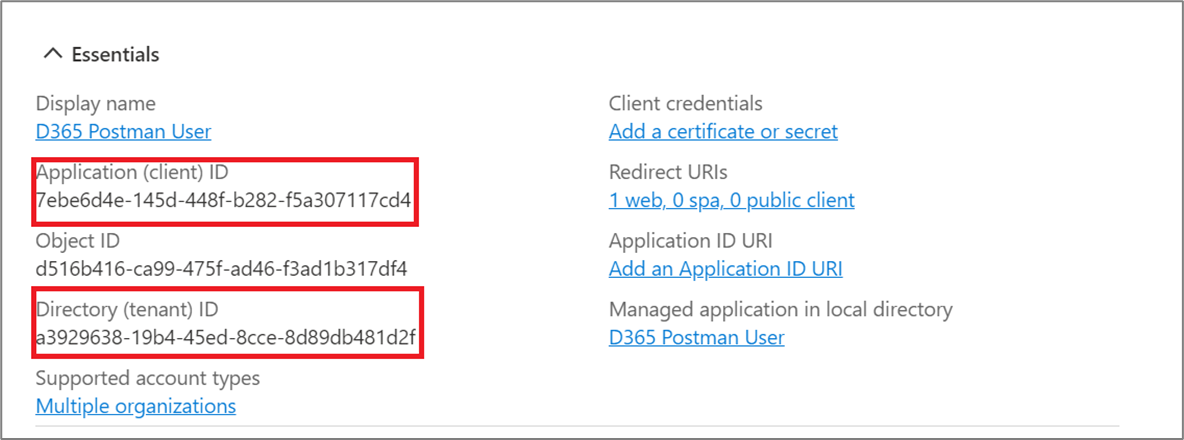
Figure 3: Created Application
- Copy and save the Application (client) ID and the Directory (tenant) ID. You will use them for creating a Dynamic 365 resource in your EasySend environment.
- Create a New Client Secret under Client Secrets from Certifications & secrets:
- Click Certifications & secrets (1):
- Click New client secret (2).
- Click Add (3).
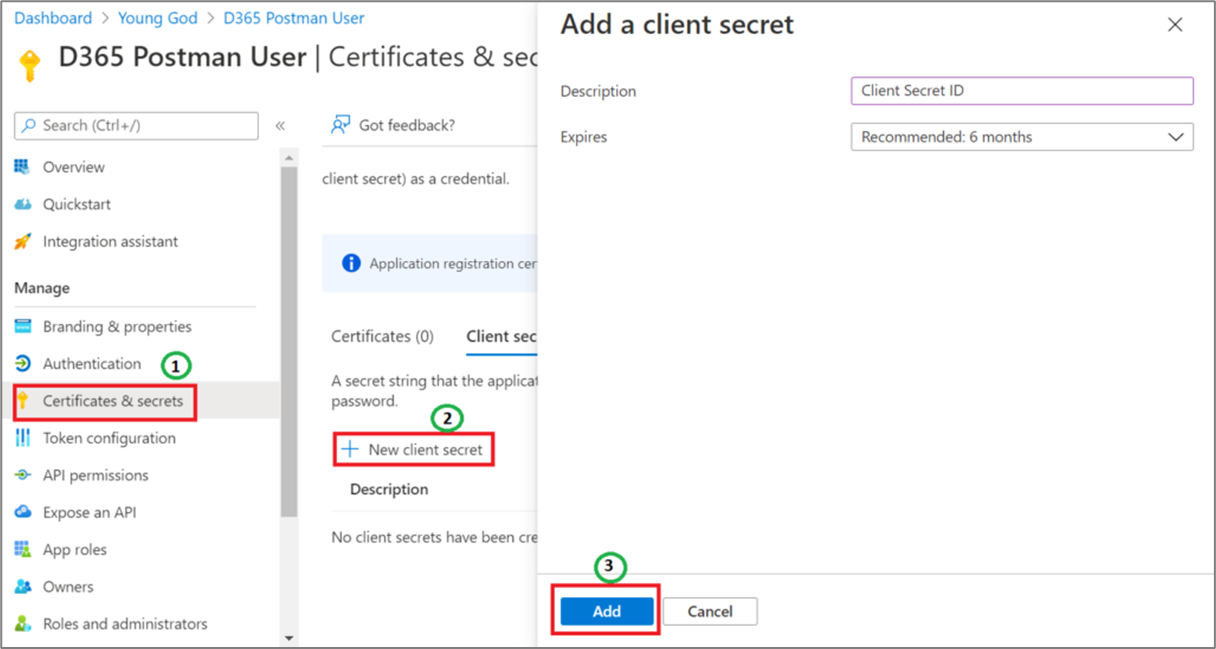
Figure 4: Certifications and Secrets
Result:
New client secret is created:
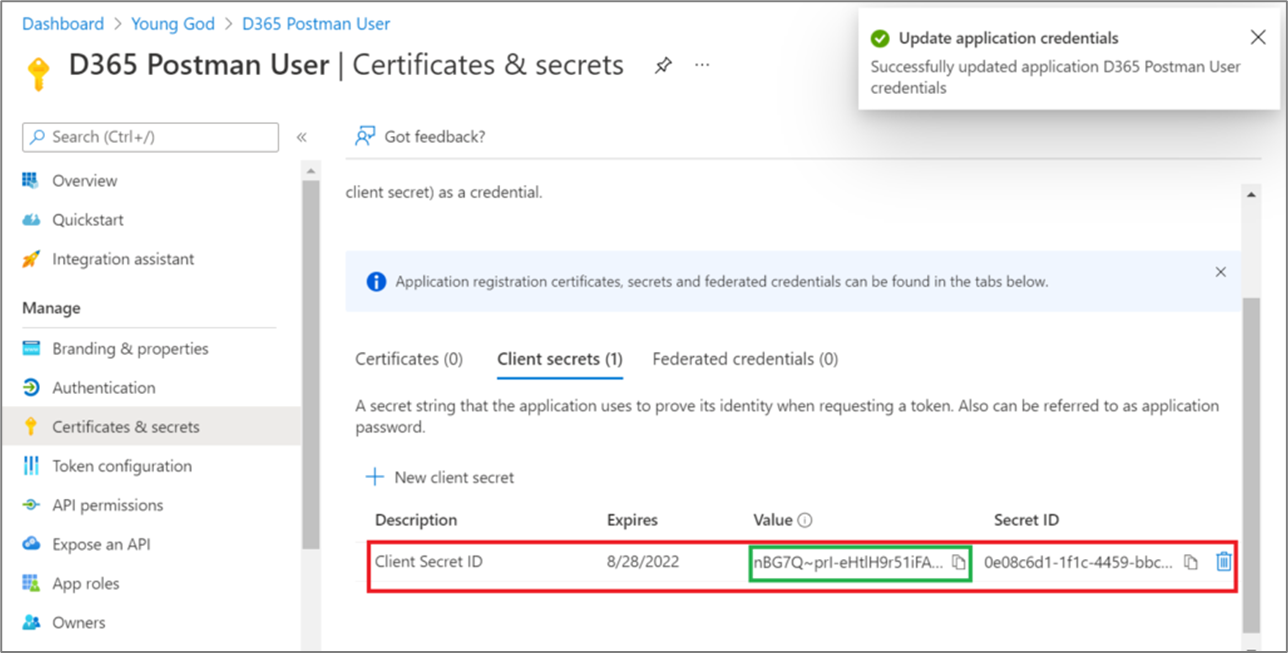
Figure 5: New client secret
- Copy the secret Value (marked in green) and perform the following steps: Important!You can only copy and save the Value once.
- Click API permissions (1).
- Click Add a permission (2).
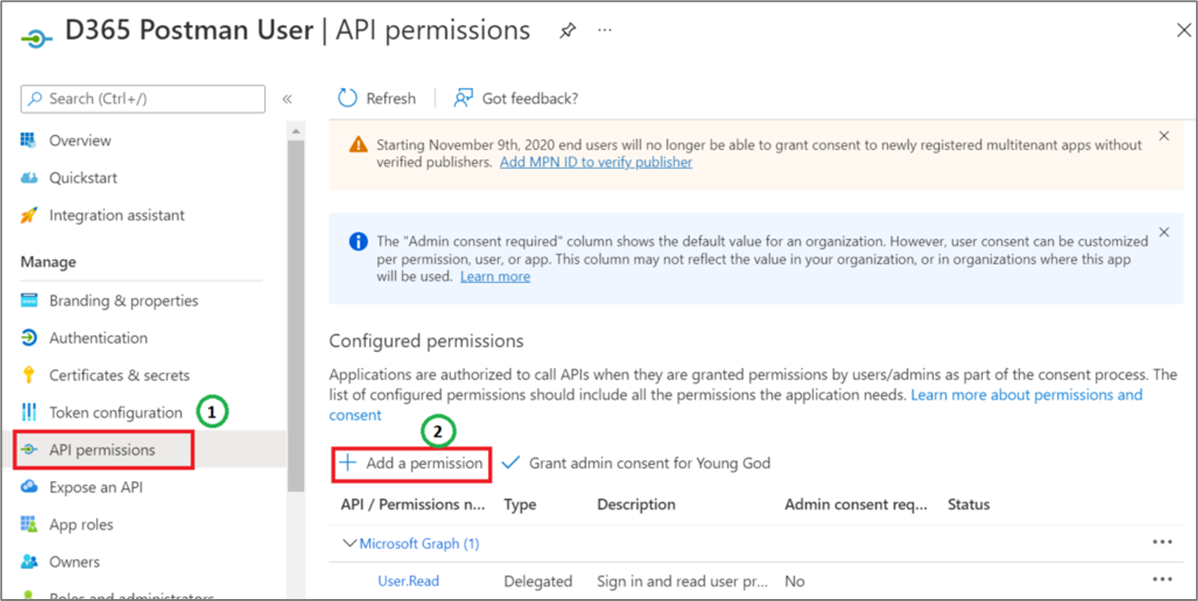
Figure 6: API permissions
Result:
The following window appears:
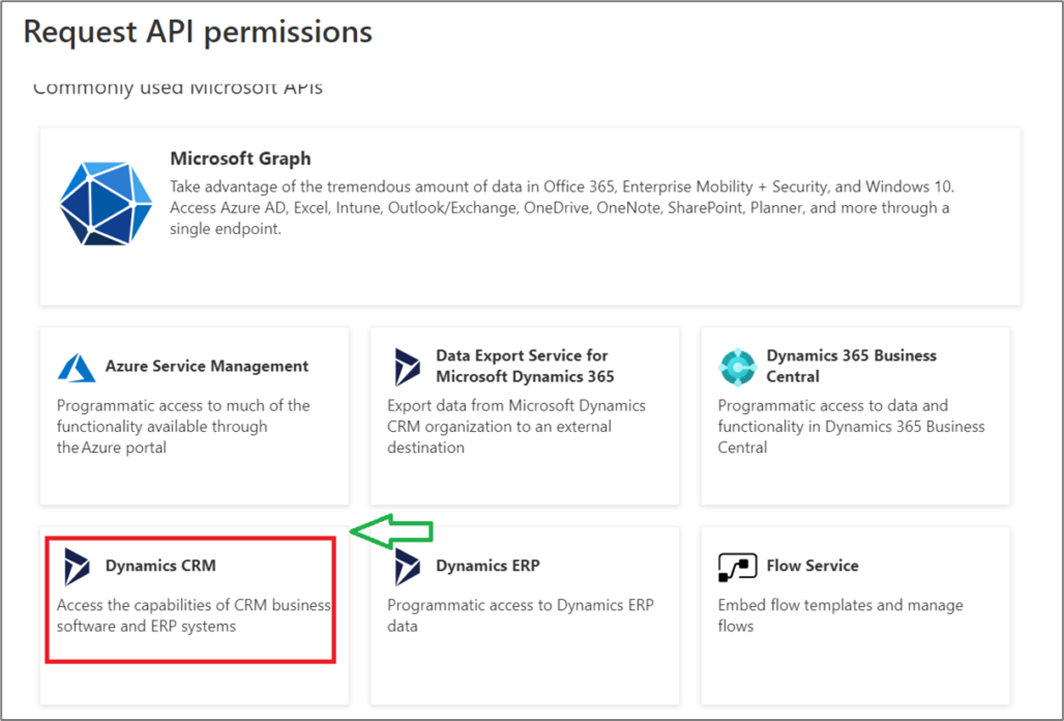
Figure 7: Request API Permissions
- Click Dynamics CRM.
- Check the User impersonation checkbox.
- Click Add permissions.
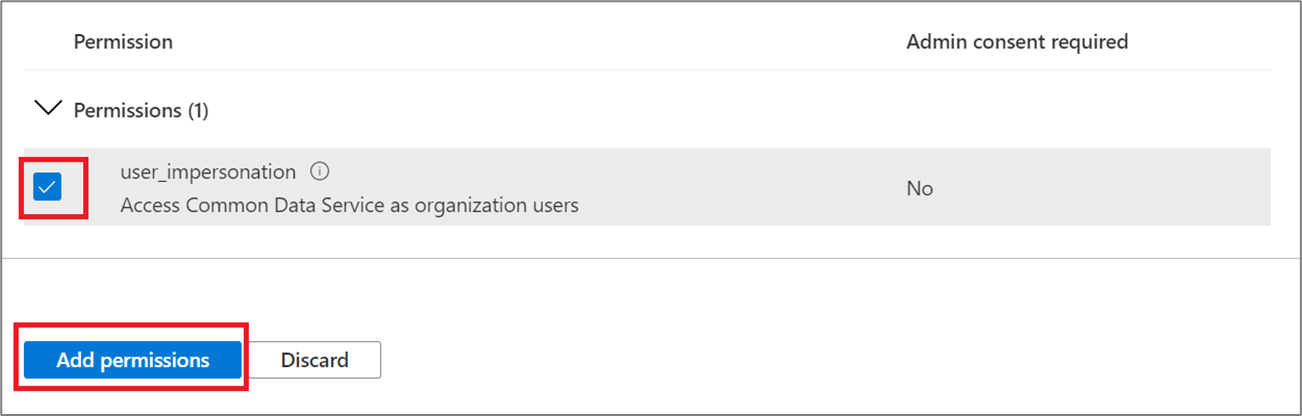
Figure 8: Permission
- Perform the following steps:
- Click Grant admin consent (1).
- Click Yes (2).

Figure 9: Grant Admin Consent
- Click Manifest.
- Change the allowPublicClient flag to true and click the Save button.

Figure 10: allowPublicClient Flag
Step 2: Add Application User in Dynamics 365
(See Figure 11 to Figure 13)
To add an Application user in Dynamics 365, perform the following steps:
- Select the required Environment and click Settings.
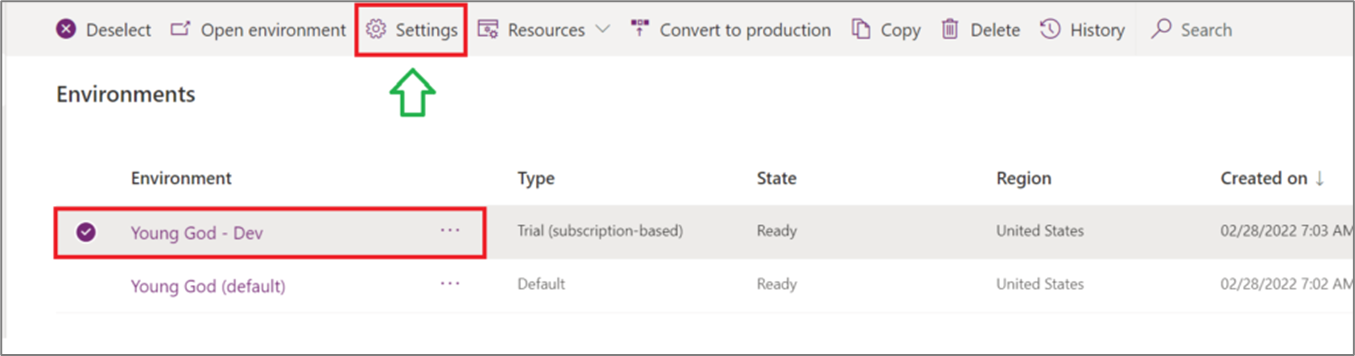
Figure 11: Apps Screen
- Under Users + Permissions section, click Application Users.
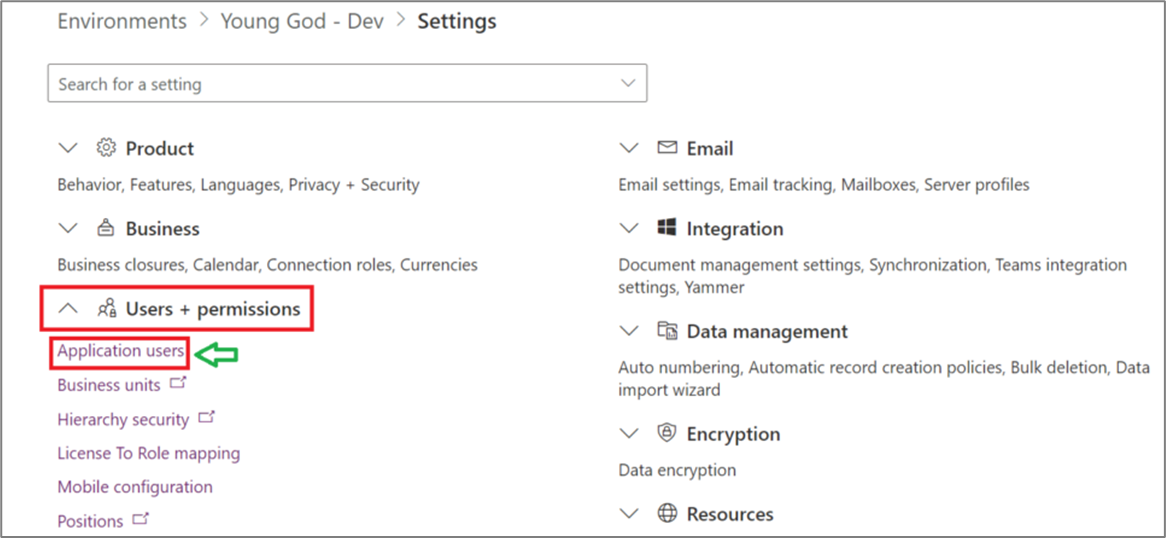
Figure 12: Users + permissions
- Click New app user.
- Click Add an app.
- Select the App created in Step 1: Create Azura App.
- Select the Business unit.
- Select the Security roles.
- click Create.
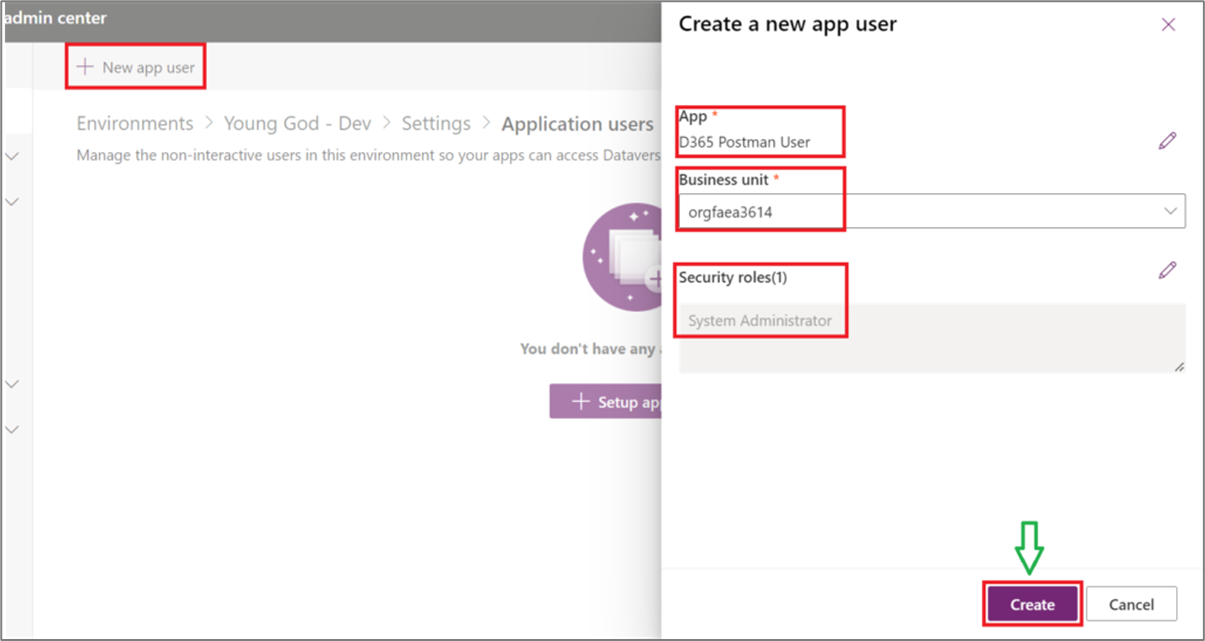
Figure 13: Create a new app user