Article Overview
The following article describes how to add Salesforce fields to the Webflow.
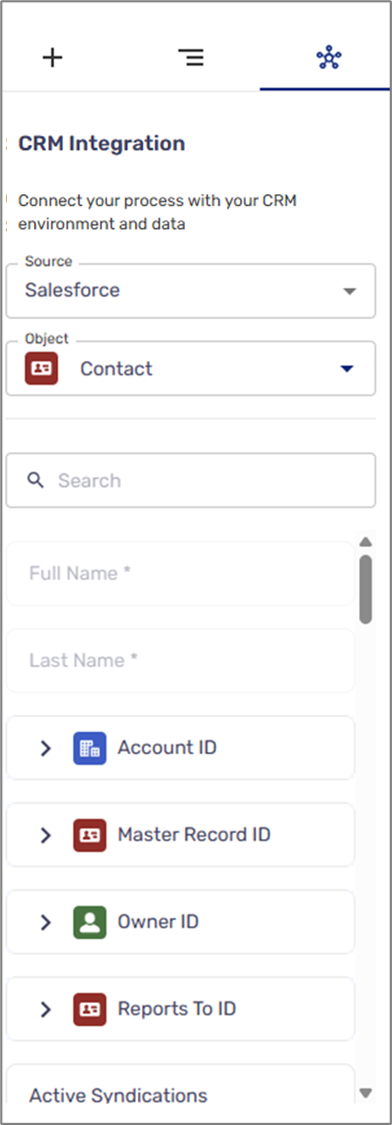
Salesforce Fields Description
(See Figure 1)
After connecting a Salesforce environment and selecting an object, Salesforce fields appear (1):
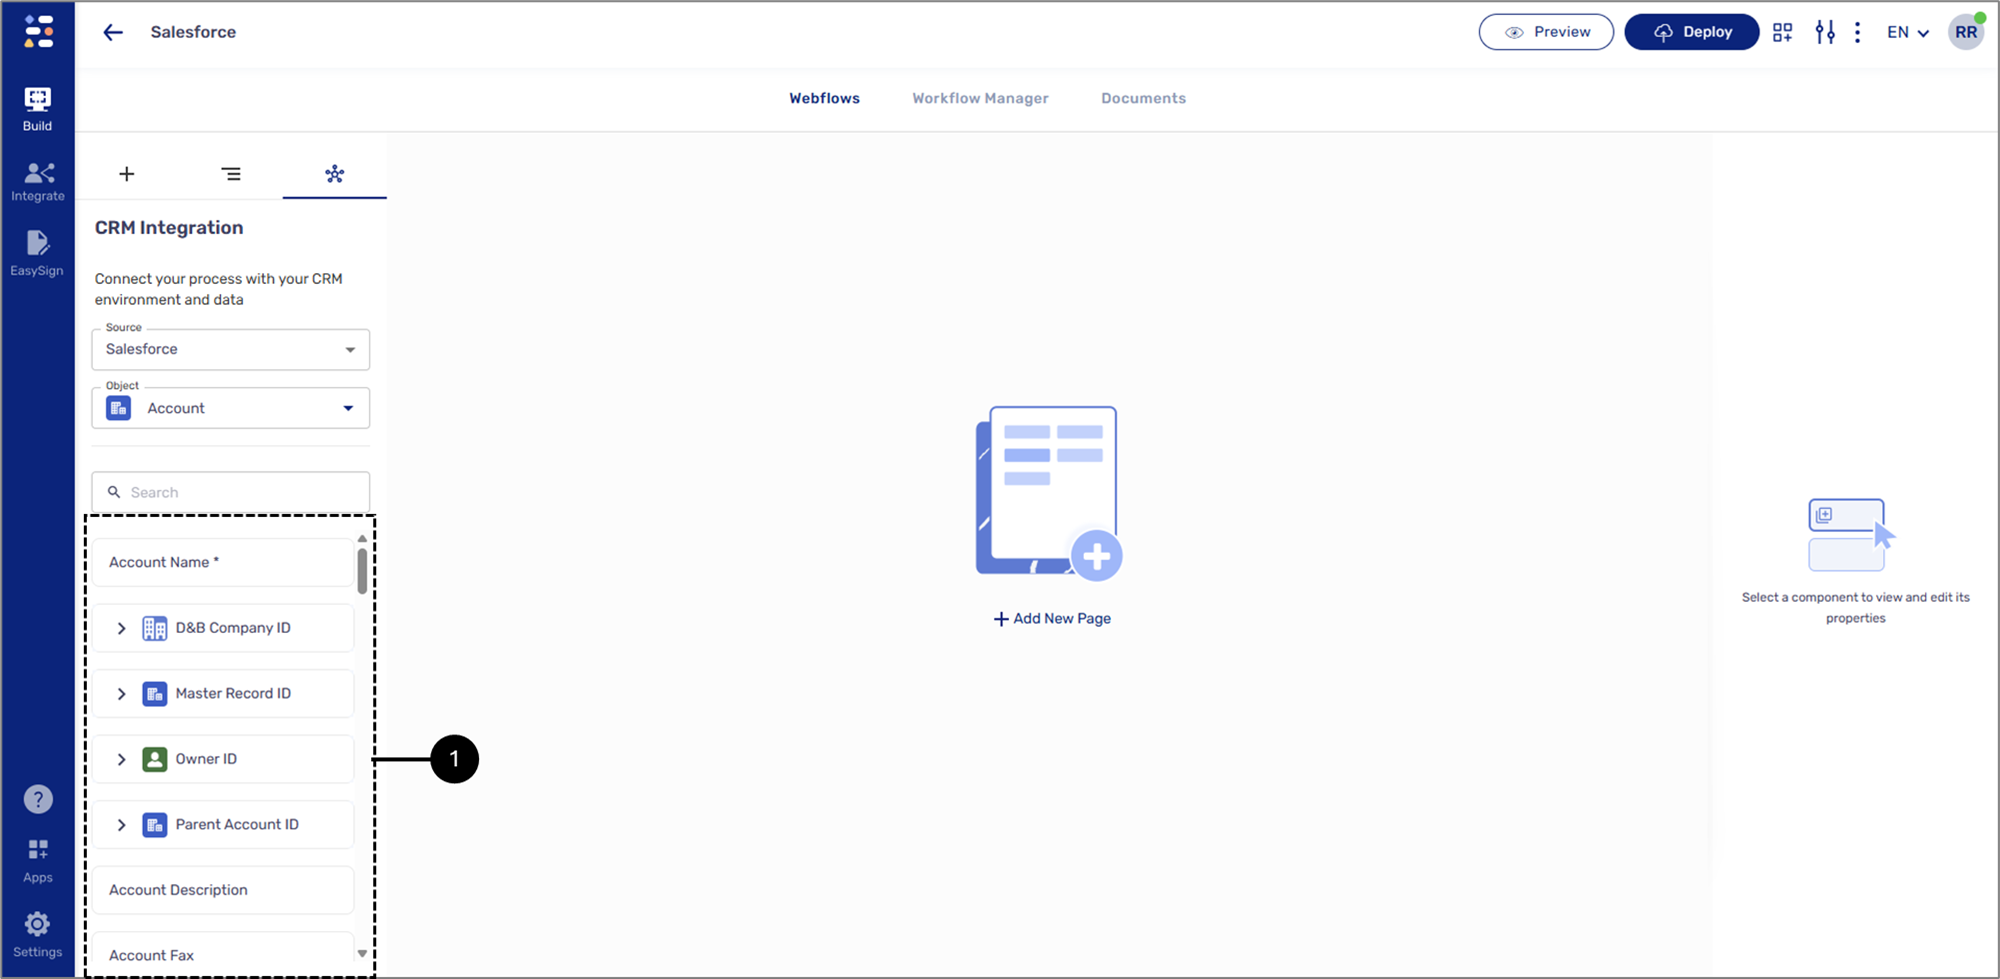
Figure 1: Salesforce Fields
There are two types of Salesforce fields:
- Regular
- Lookup
Salesforce Lookup Fields
(See Figure 2)
A lookup field is like a link between two records in Salesforce. For example, between two Salesforce objects, Contact and Account, a lookup field on the Contact record can connect it to the Account. A lookup field enables you to:
- Choose a record from another object.
- Connect related records.
- Click a link and go directly to a connected record.
In EasySend, lookup fields are distinguished from regular fields by appearing within a dropdown menu and having a light blue background.
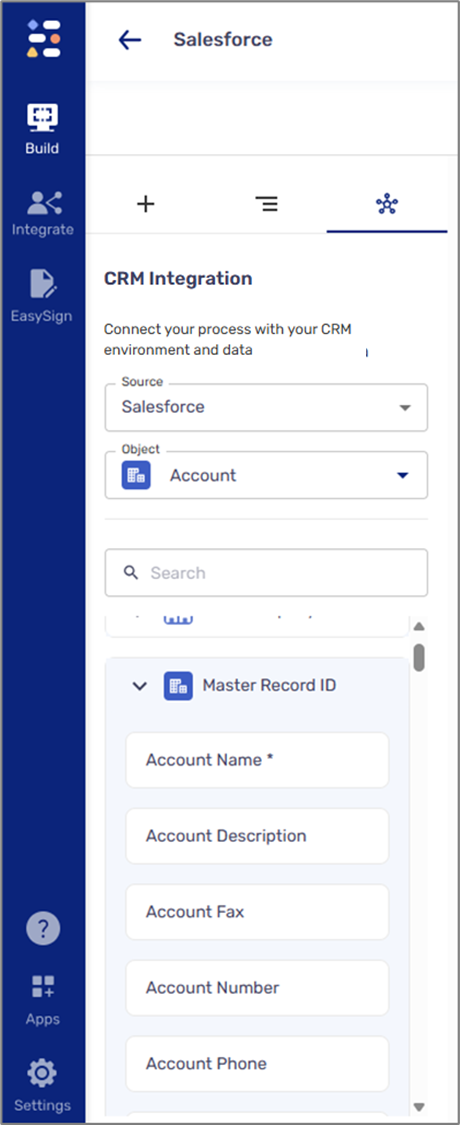
Figure 2: Salesforce Lookup Fields
Adding Salesforce Fields
(See Figure 3)
To add Salesforce fields to the Webflow, perform the following steps:
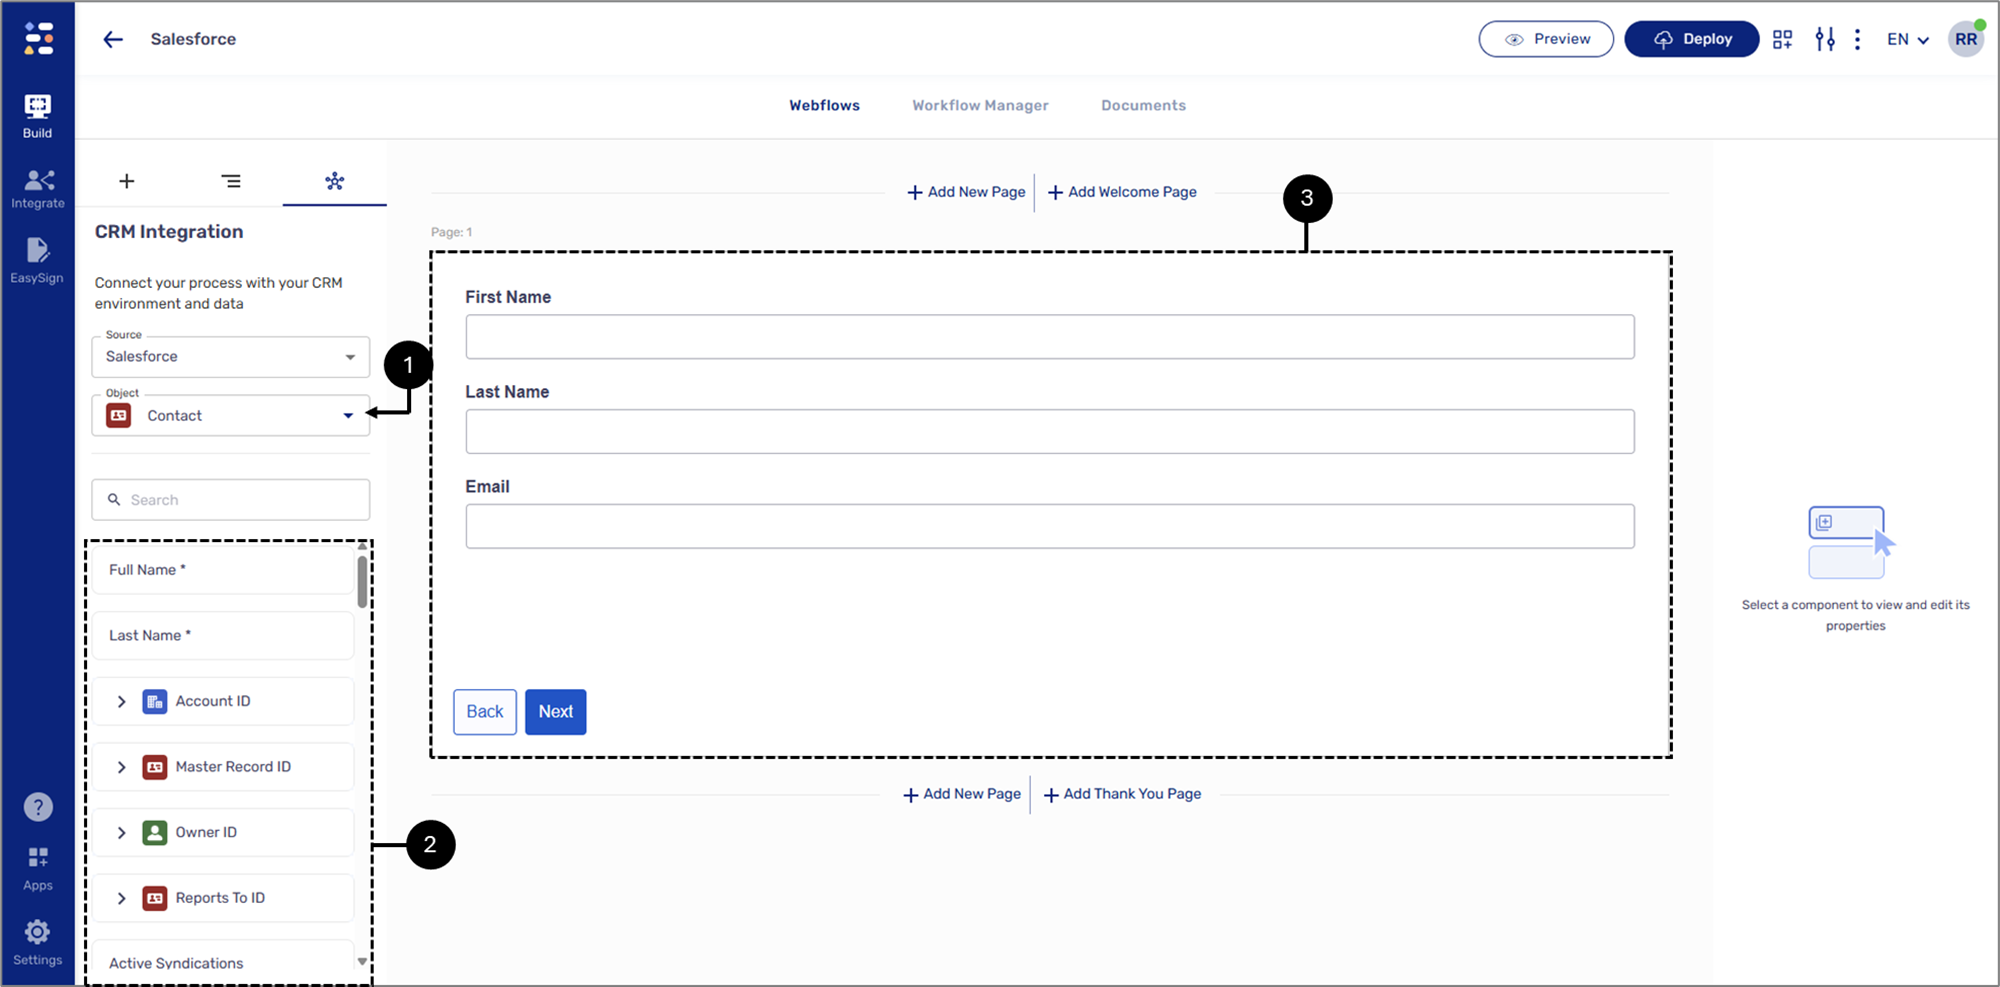
Figure 3: Adding Salesforce Fields
- Click the Object dropdown and select an object (1).
- Locate the desired fields (2).
- Drag and drop them onto a Page component (3).
- When a Salesforce field is added to the canvas, it appears in the navigator in blue, following the physical layout and logical hierarchy. For example:
- To avoid duplication, you can only add each Salesforce field once. An added field will become disabled until it is deleted.
Salesforce Fields Behavior Tab
(See Figure 4)
The Behavior tab of a Salesforce field in EasySend allows you to either map the field to Salesforce or detach it. Additionally, each field includes a Pre-fill Data checkbox, which controls whether the field is automatically populated with data when the process is launched from Salesforce.

Figure 4: Behavior Tab
Salesforce Required Fields
(See Figure 5)
When selecting a Salesforce object, some fields will be required. These required fields are marked with an asterisk (*) and are automatically set as required under the Behavior tab.
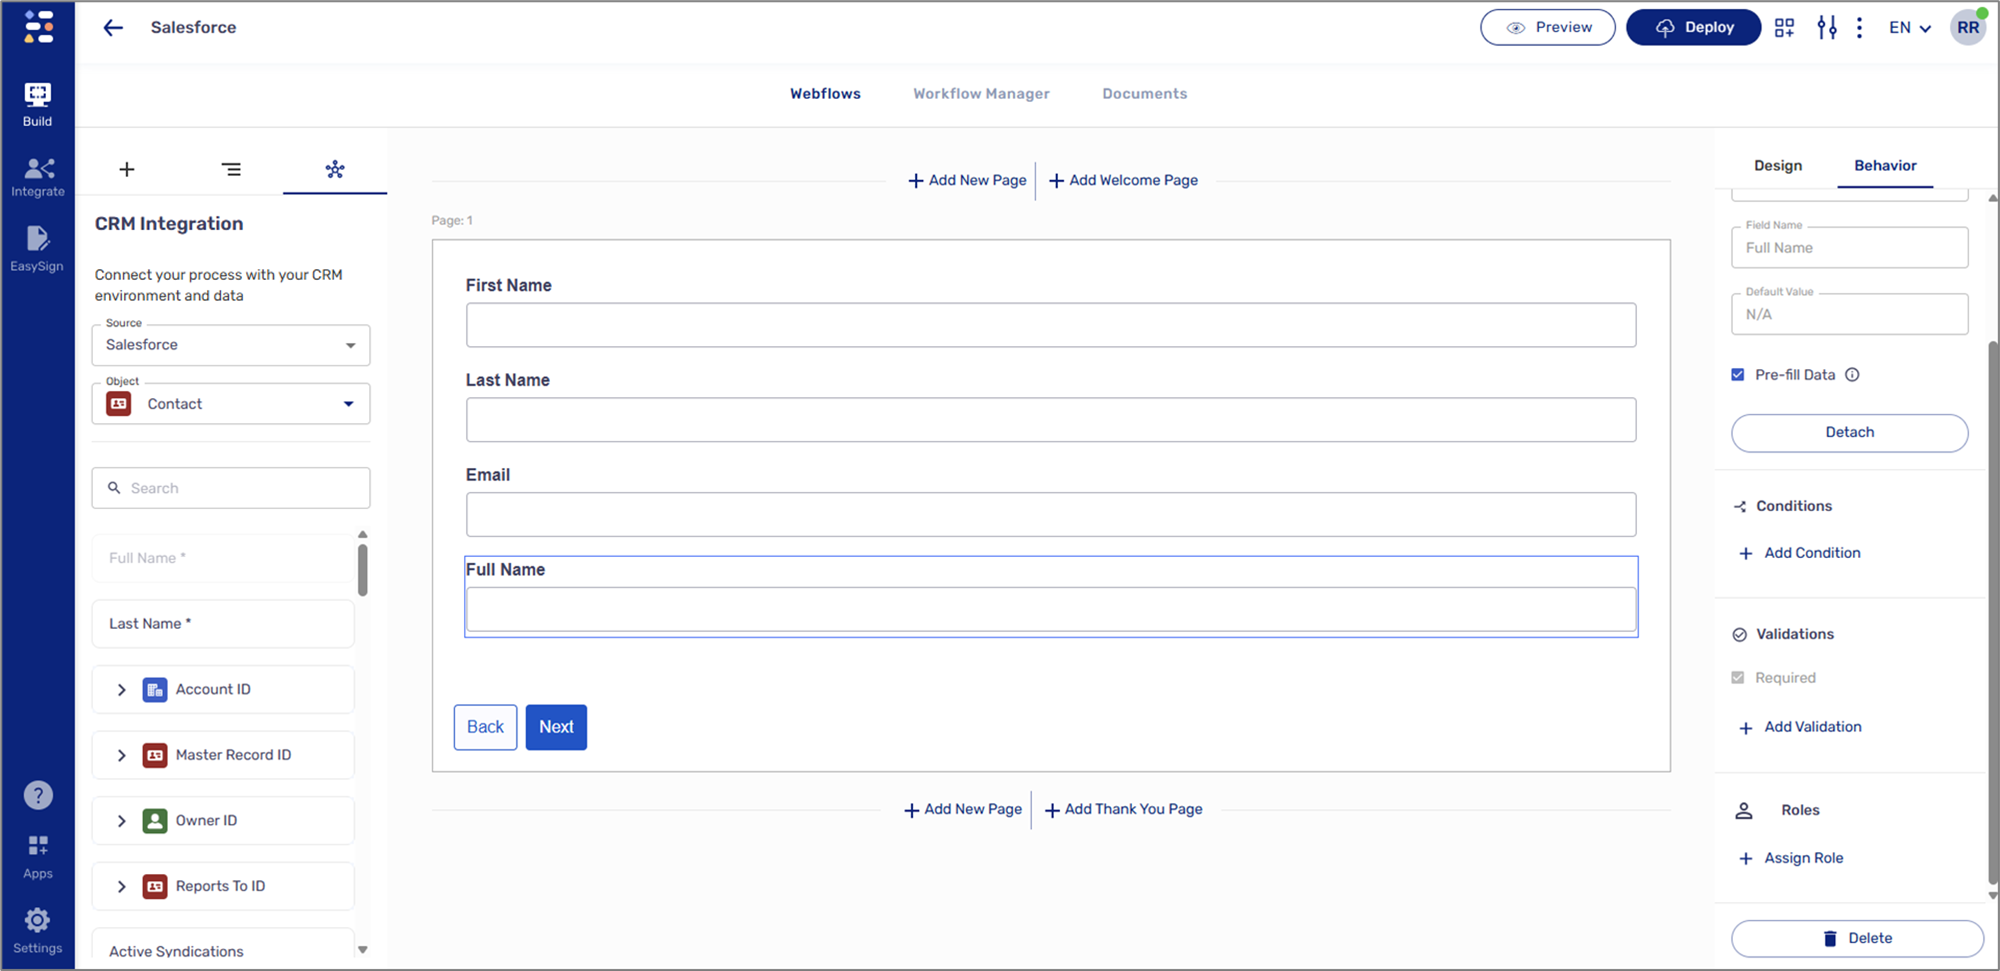
Figure 5: Required Field Example
Replacing Salesforce Resources
(See Figure 6)
- Detach Fields and Keep Components
- Delete Components
- Switch resources and attach to the new environment
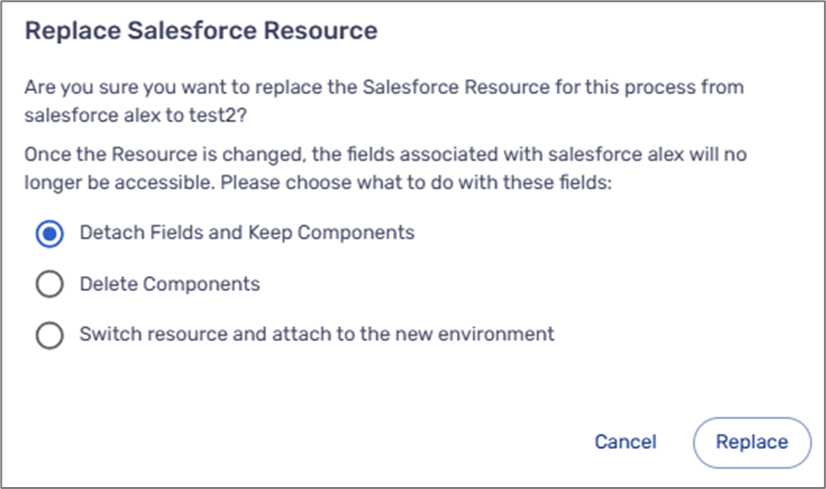
Figure 6: Replace Salesforce Resource Message
Select the desired option and click Replace.
Attaching Uploaded Files to Salesforce
(See Figure 7)
You can integrate files that were uploaded during the journey into your Salesforce environment. To do so, perform the following steps:
- Add a File Upload component (1).
- Click the Behavior tab (2).
- Check the Attach to root record checkbox (3).
- If required, select additional lookup records to attach the file to (4).
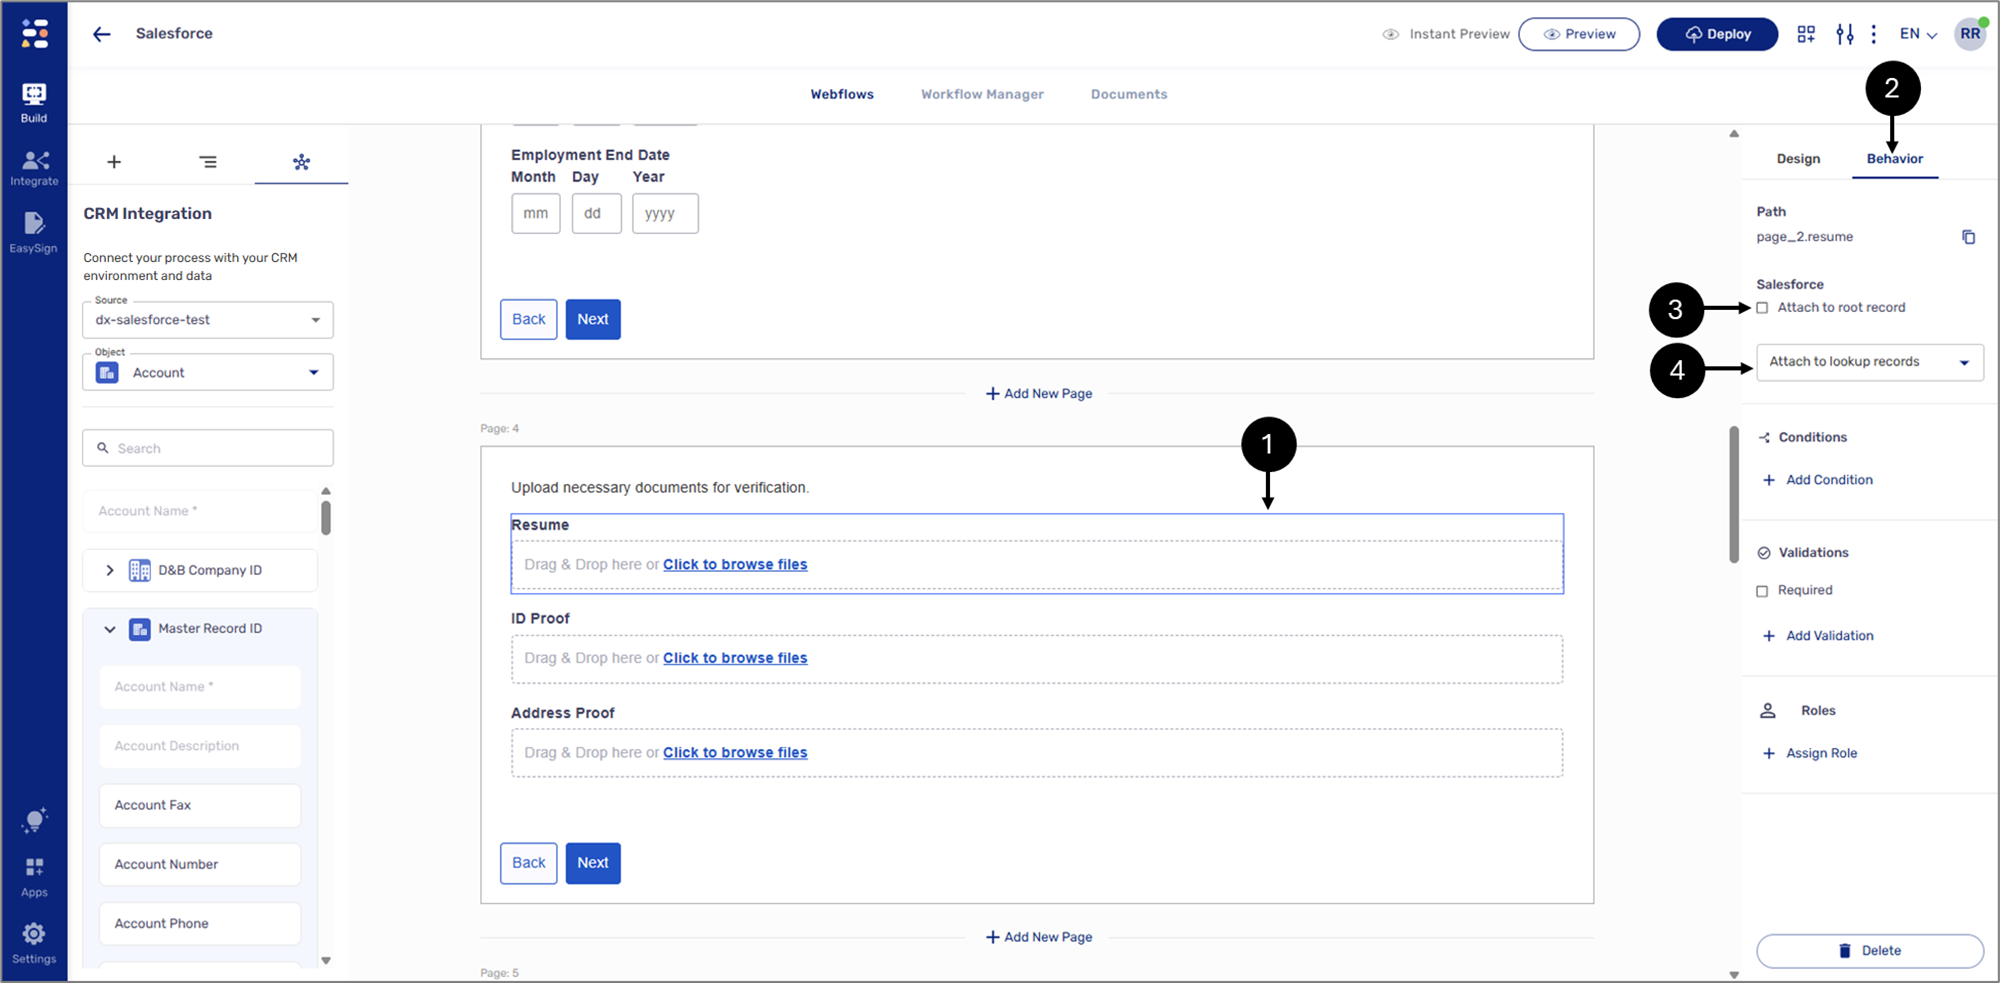
Figure 7: Required Field Example