January 2023 - PDF Accessibility and Duplicating a PDF
- PDF
January 2023 - PDF Accessibility and Duplicating a PDF
- PDF
Article Summary
Share feedback
Thanks for sharing your feedback!
Article Overview
The following article describe the PDF accessibility and the PDF duplicate features.
NOTE
- The PDF accessibility feature is available on environments with version 20.12.0 and above.
- The PDF duplicate feature is available on environments with version 20.11.0 and above.
What is an Accessible PDF?
A PDF document is considered accessible if it can be used/accessed by all users, including users with disabilities. For a PDF to be considered accessible, it should be compliant to different accessibility standards.
PDF Characteristics
PDFs are typically created from a source document such as a Microsoft Word and are then exported into the PDF format. However, many PDF files are created by scanning hard copy documents and are simply images of text. Unfortunately, image-based PDFs are completely inaccessible as they are and require conversion into readable text using an Optical Character Recognition (OCR) software before they become accessible.
How to Create an Accessible PDF Using EasySend's Platform?
(See Figure 1 to Figure 3)
To create PDFs with accessible PDF-fillings, perform the following steps:
- Create markers for the Accessibly Tree that works with screen readers.
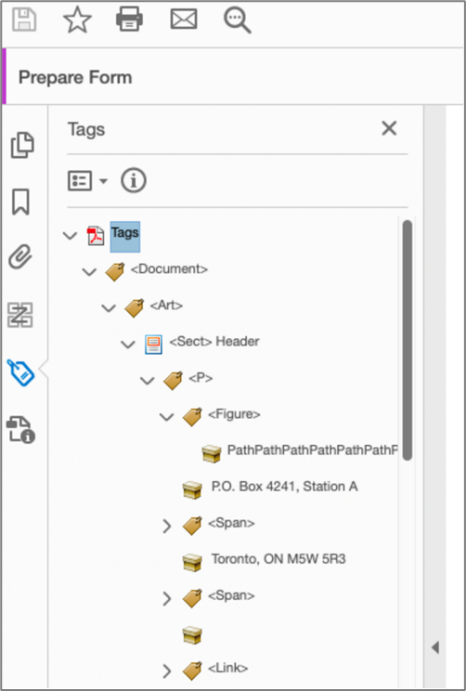
Figure 1: Accessibility Tree
- Create input fields (AcroForms) that work together with the accessibility tree you created.
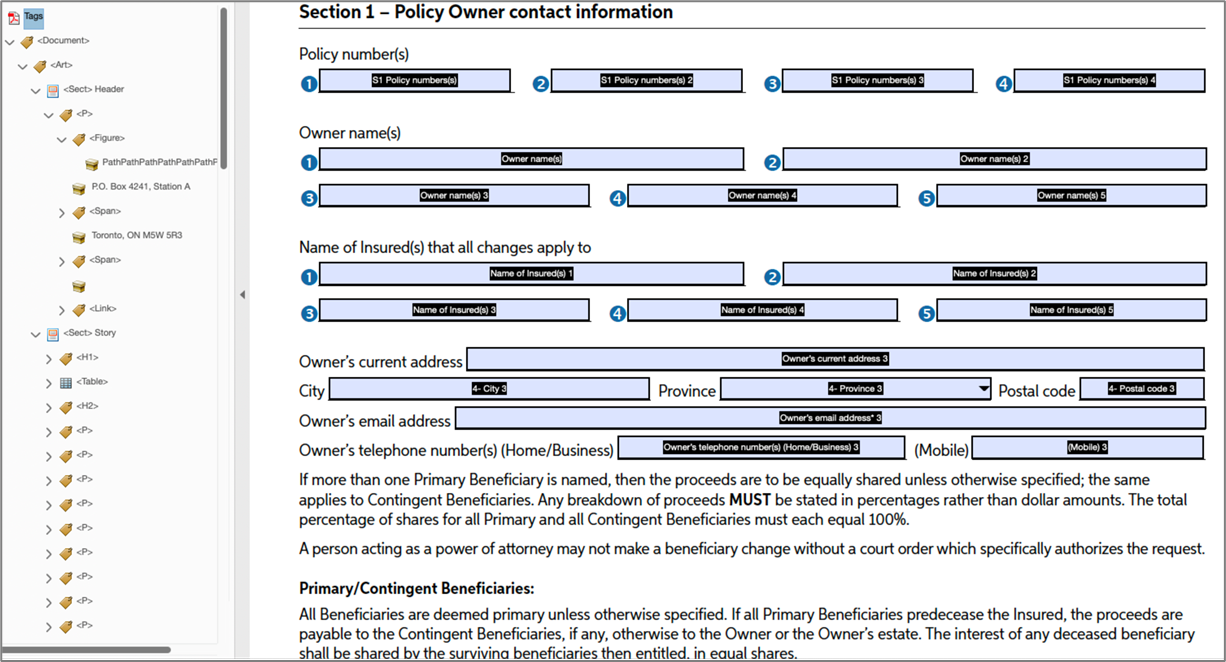
Figure 2: Fields
NOTE
Each field must be defined with an appropriate type before the file is uploaded to EasySend's platform so it will be recognized by it correctly. The available types of fields are:
- Text input
- Checkbox
- Figure (for an image)
- signature
- Radio button
- Upload the PDF to EasySend's platform.
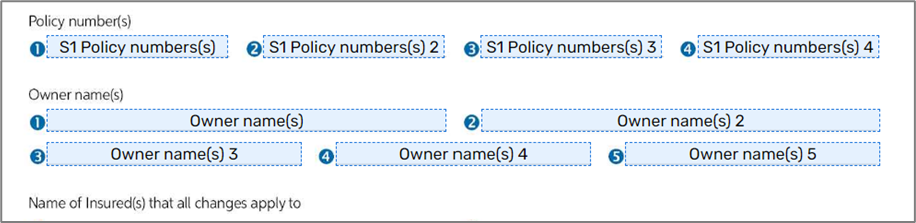
Figure 3: Uploaded Accessible PDF
NOTE
The platform will recognize the combination of the markers and the input fields (from steps 1 and 2) and preserve them.
NOTE
The EasySend's platform also preserves fields' alternative text. When an alternative text is set for a field, before the file is uploaded to the platform, it will be the text read by a screen reader. This is relevant mostly for figures (images) and signatures field types but not just. For example, if the alterative text of a figure is "customer's ID attachment", this will be the text read by a screen reader.
Uploaded Accessible PDF
(See Figure 4 to Figure 6)
When an accessible PDF was uploaded to the platform, the following message appears:
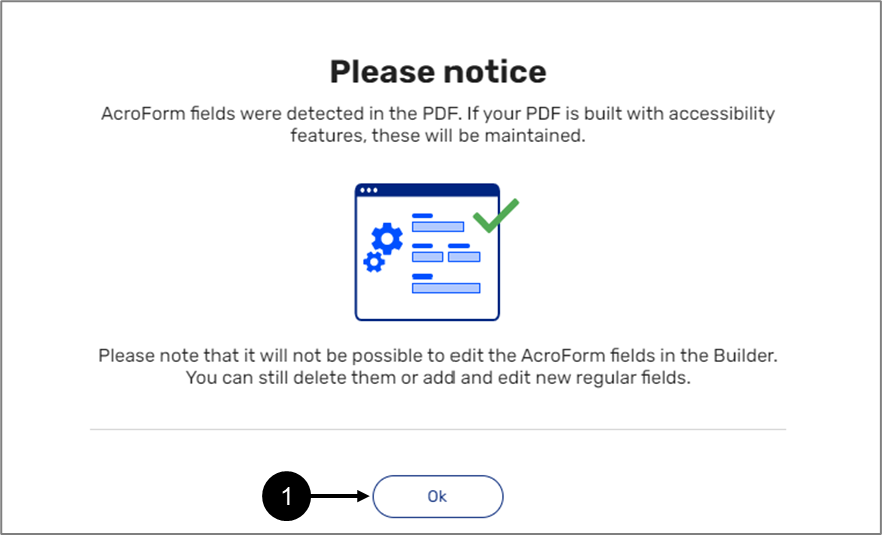
Figure 4: Uploaded Accessible PDF Example
After clicking Ok, to preserve the original PDF accessibility format, the Textual PDF (2) checkbox must be checked in PDF properties:
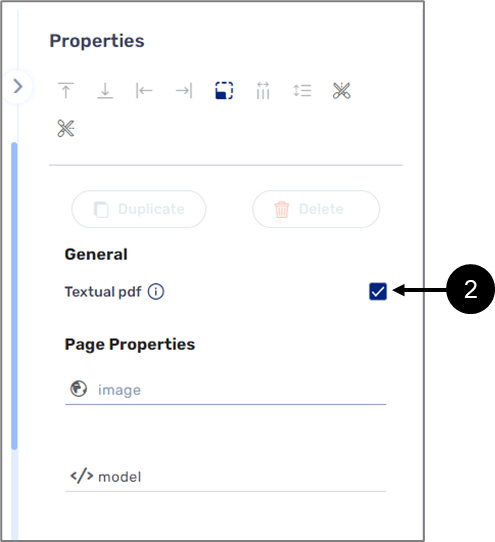
Figure 5: Textual PDF
The PDF will be displayed with marked fields with a dashed border (3). The Field Properties section will be locked for editing (4) except for the label (5) which is used internally for organizing the marked fields and the fieldName (6) which enables the marked fields to be connected to the Model.
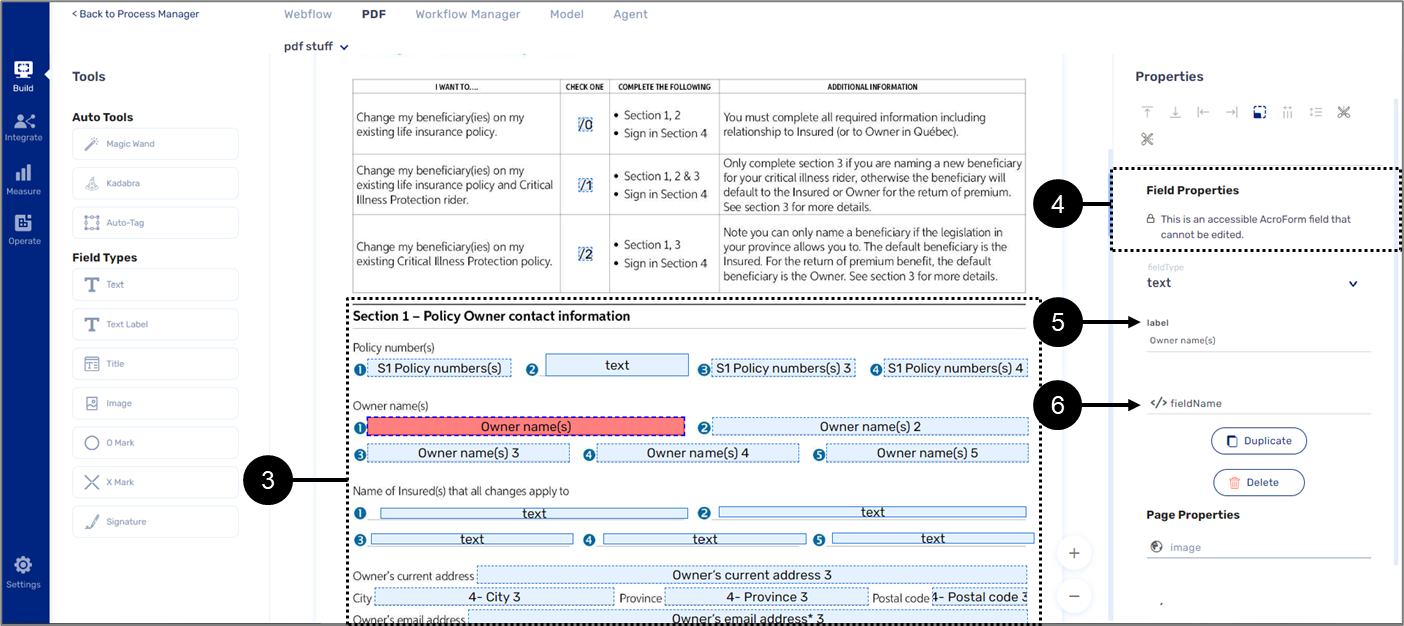
Figure 6: Uploaded Accessible PDF Example
NOTE
After connecting a field to the model, it is also possible to set a groupValue property in case of a radio question. For additional information about the groupValue property, see the Creating and Defining a PDF article.
Combining Accessible and Inaccessible Fields
A document with a combination of accessible and inaccessible fields that will not be read by a screen reader is allowed. When manually adding inaccessible fields, their border will be solid and not dashed. In addition, all the properties of an inaccessible field are editable.
Accessible PDF Troubleshooting
(See Figure 7)
In some cases, an accessible PDF is uploaded to the platform and some of the fields are left unmarked (1):
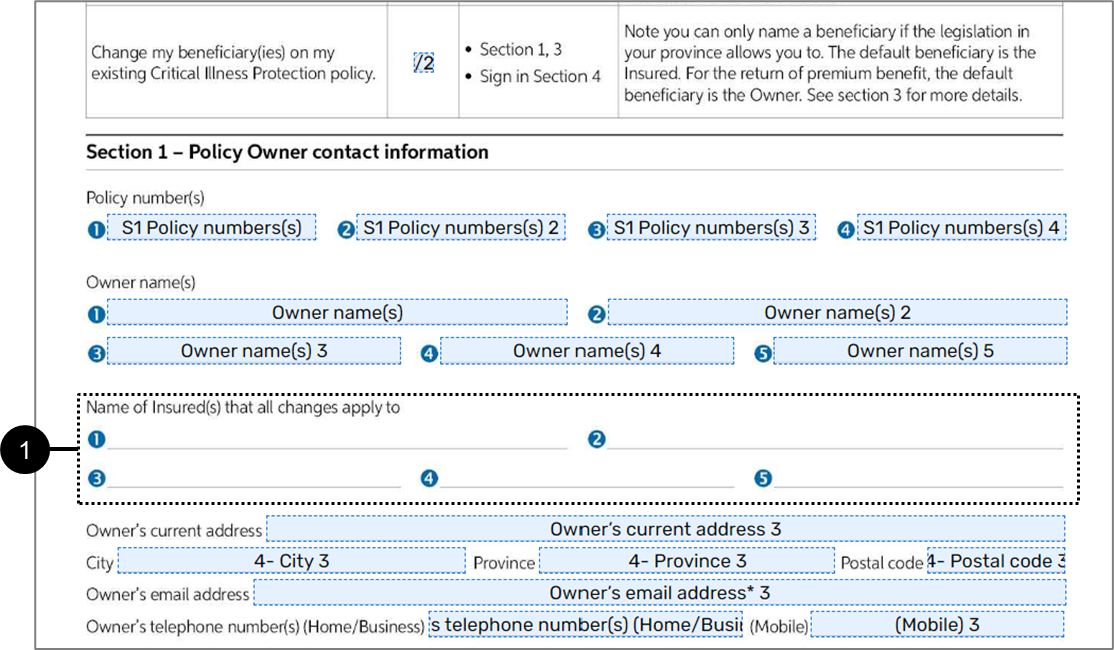
Figure 7: Uploaded Accessible PDF Example
To troubleshoot this issue, On the original PDF, verify that:
- Each field was defined with a field type supported by EasySend's platform:
- Text input
- Checkbox
- Figure (for an Image)
- Signature
- Radio button
- Each Input field has a unique name - no duplication is allowed.
- An input field name does not contain the following words:
- undefined
- null
- none
- Upload the accessible PDF to the platform again.
Duplicating a PDF
(See Figure 1 to Figure 4)
Using EasySend's platform it is possible to duplicate PDF pages displaying array items and to send each page as an attachment to relevant end-users. For example, a school onboarding digital process requires both parents to input personal details:
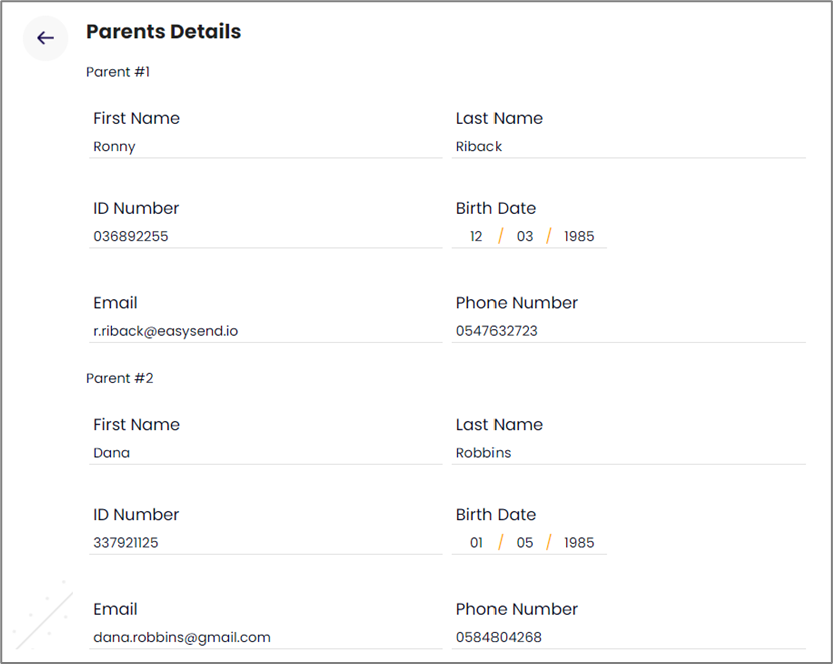
Figure 1: Array Items on Digital Process (Parents)
And when that part is done, to input children details:
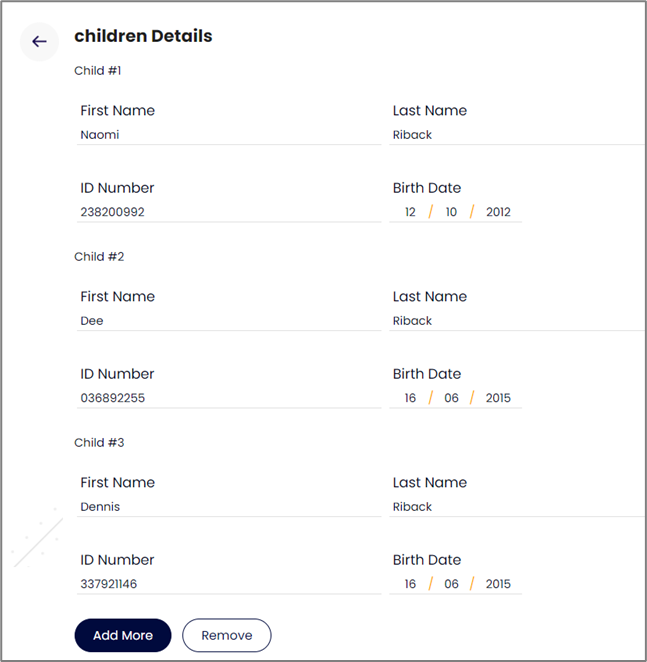
Figure 2: Array Items on Digital Process (children)
On the Preview page, the PDF displays the array items per page in a sequence - the first parent followed by the children and the second parent followed by the children:
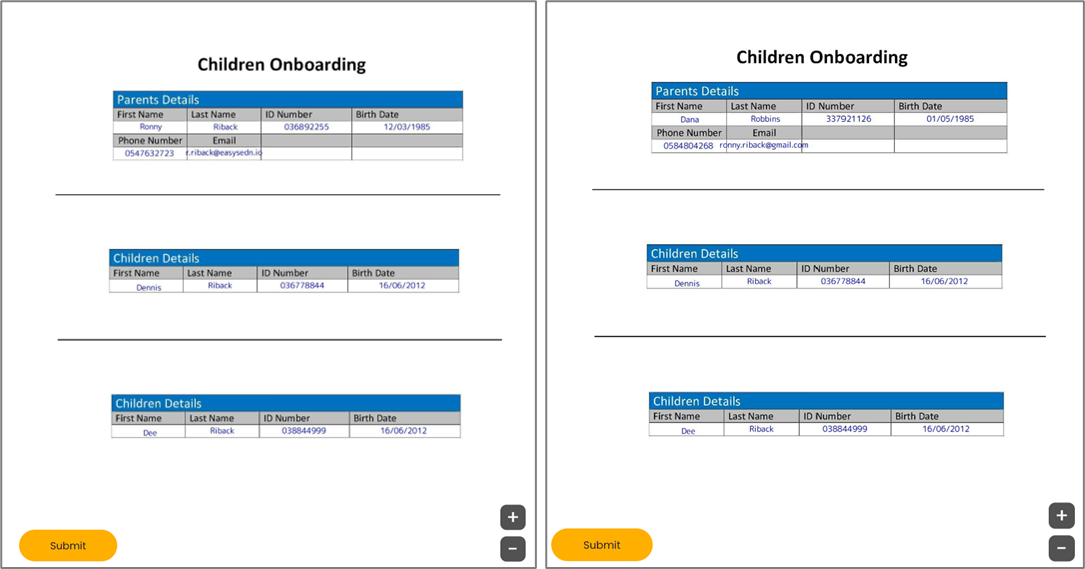
Figure 3: Array Items per PDF Page
When sending the PDF forms as attachments as part of the complete stage output email, the parents array items will appear on different forms while the children information will appear on each form:
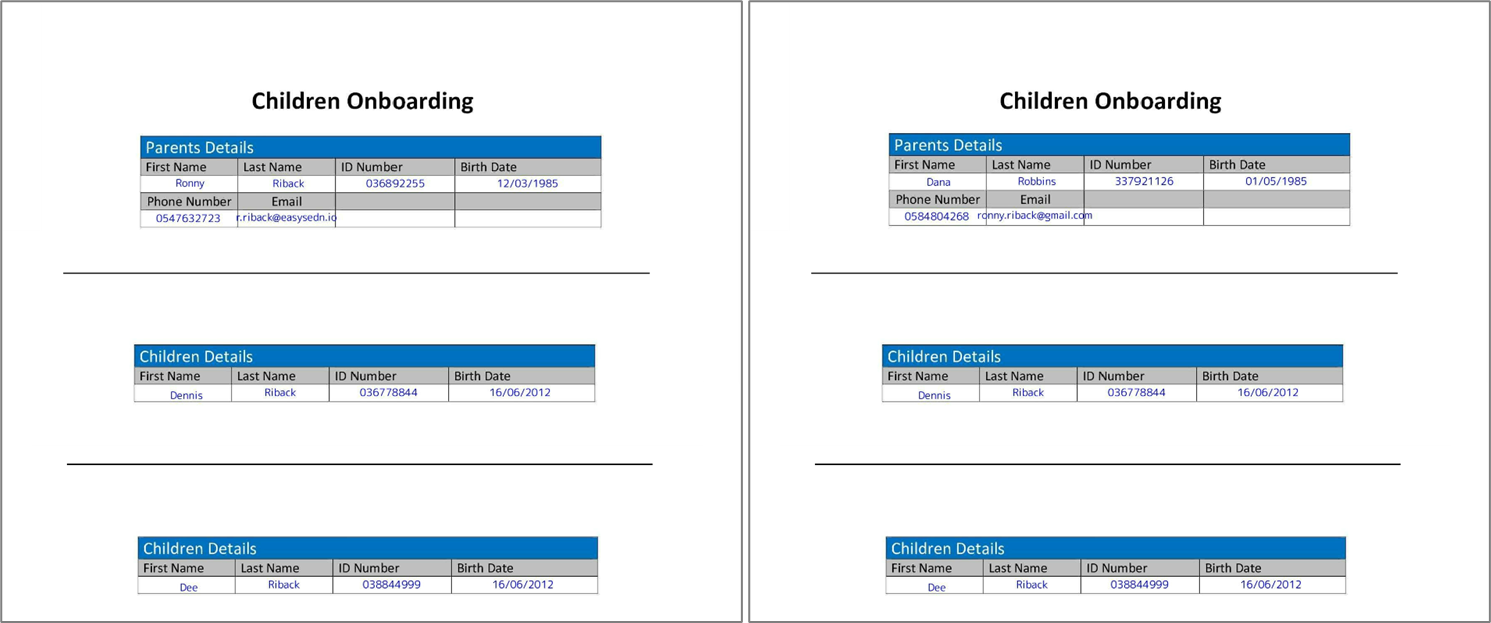
Figure 4: Array Items per PDF Page (Attachment)
How to Duplicate PDF Pages?
(See Figure 5 to Figure 8)
To duplicate PDF pages, perform the following steps:
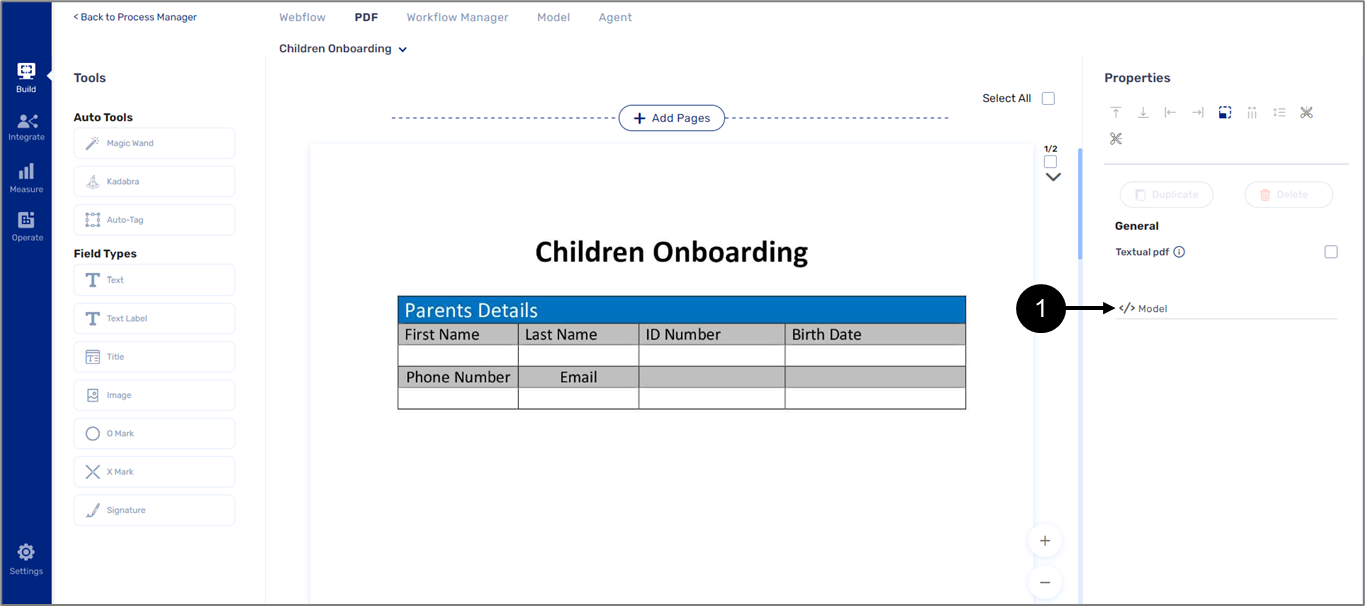
Figure 5: Model Icon
- Enter the PDF screen.
- Click the Model icon (1).
Result:
The Model screen appears:
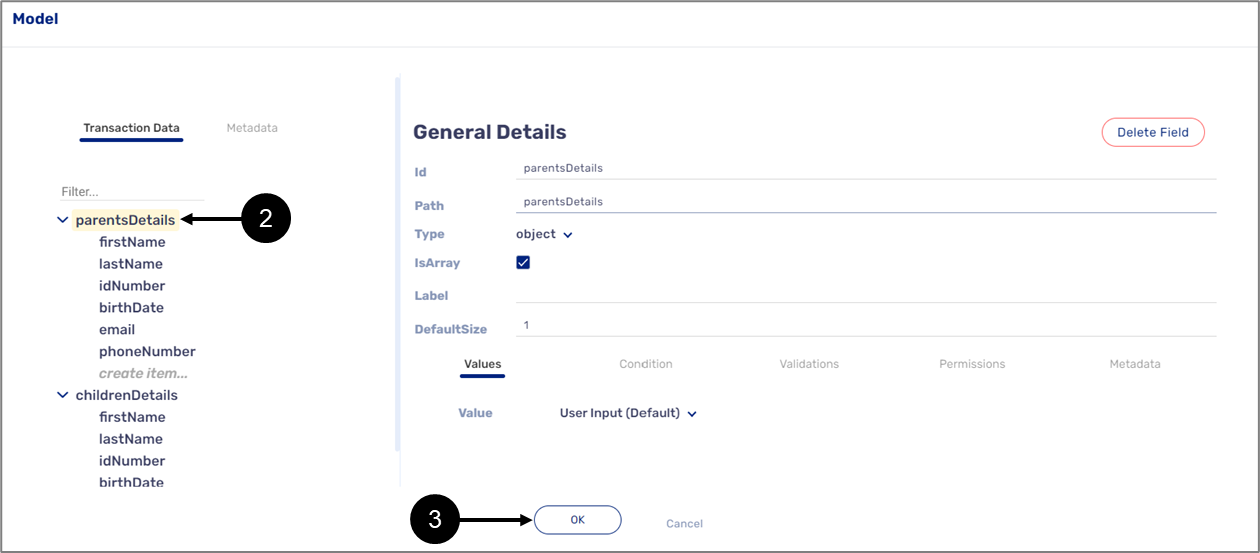
Figure 6: Model Screen
- Click the desired object type data item set as an array (2).
- Click OK (3).
Result:
The PDF screen appears and the form is connected to the Model (4):
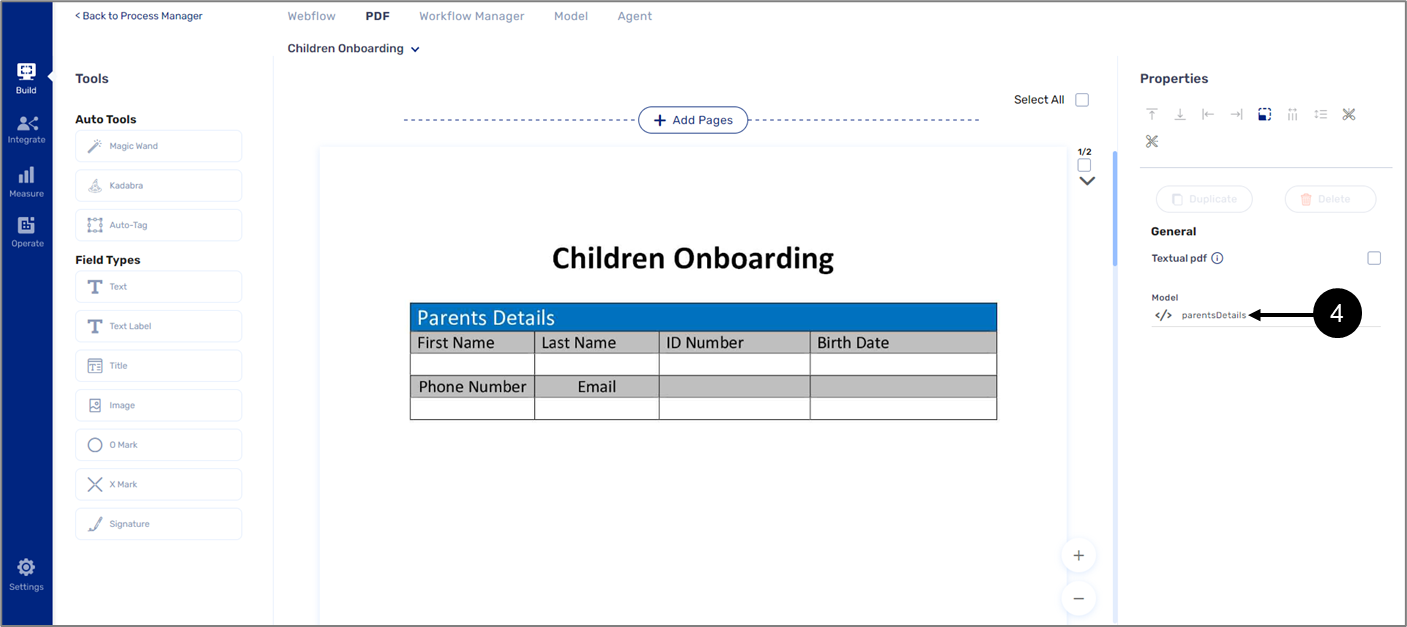
Figure 7: Form Connected to the Model
- Define and connect PDF fields to the Model, for example (5):
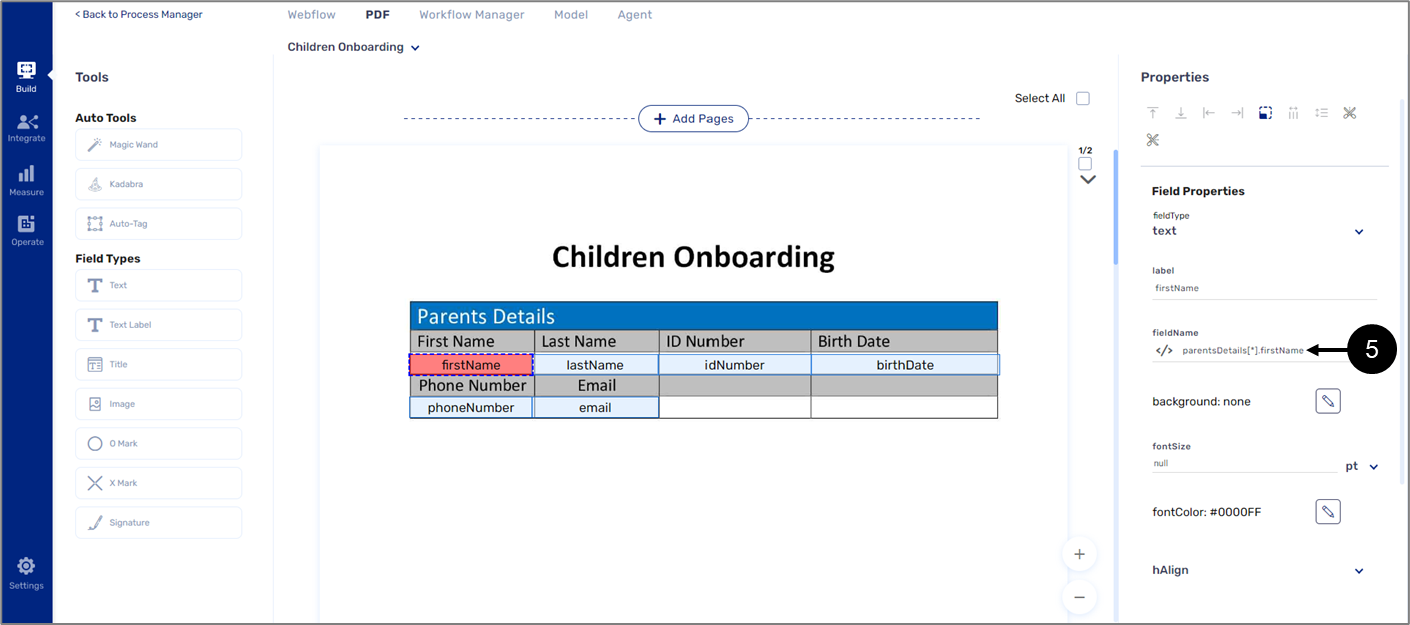
Figure 8: Field Connected to the Model
NOTE
Notice that after connecting a defined field to the Model, the full path is displayed, for example: parentsDetails[*].firstName.
- Repeat step 5 necessary.
NOTE
In our example, to display the children array items per PDF page, connect the relevant page to the Model as described in the Displaying Array Items on Separate PDF Pages section in the Managing Arrays article.
Receiving PDFs as Attachments
(See Figure 9 to Figure 13)
To receive the PDF as attachments, perform the following steps:
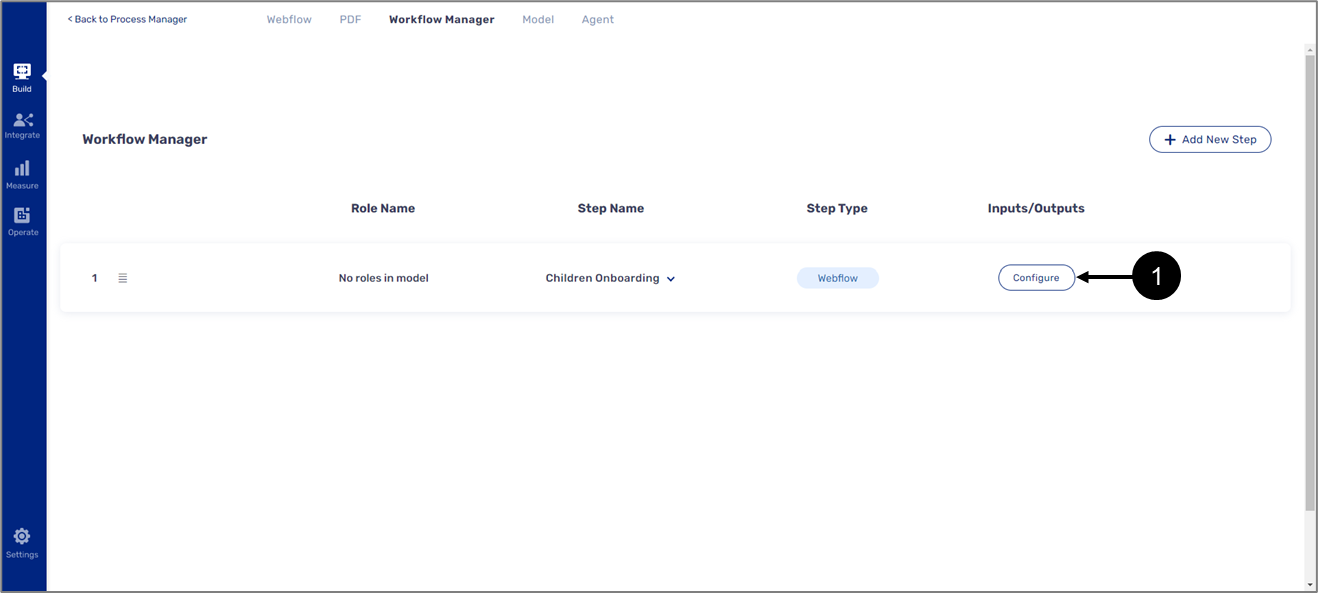
Figure 9: Workflow Manager Screen
- On the Workflow Manager screen, Click the Configure button (1) of the relevant step.
Result:
The following screen appears:
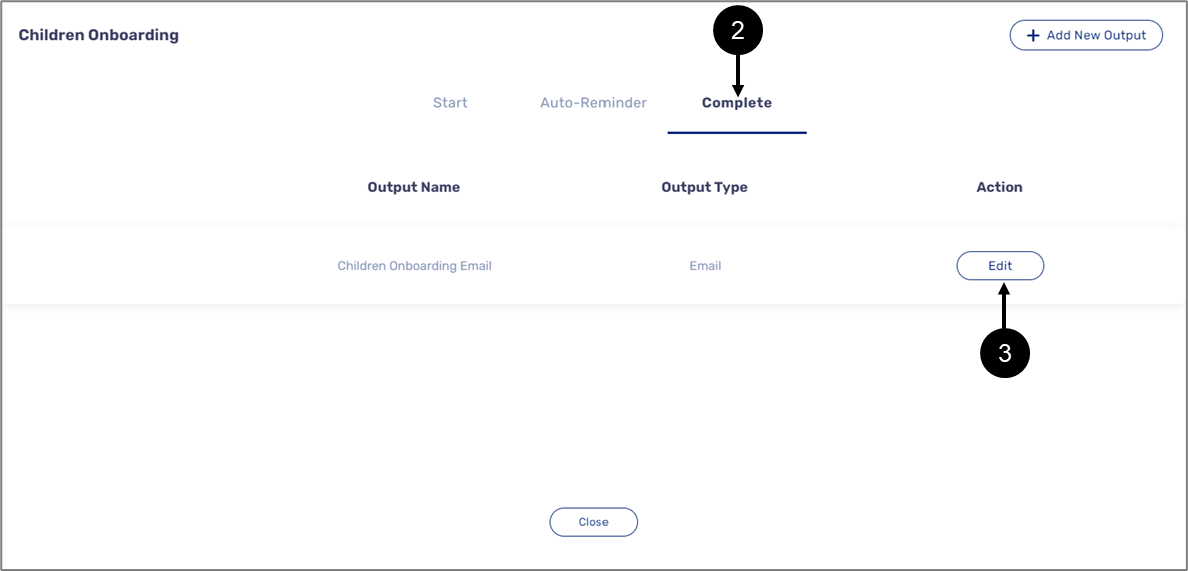
Figure 10: Complete and Email
- Click Complete (2).
- Add a new email or click the Edit button (3) of an existing email.
Result:
The Email Details window appears:
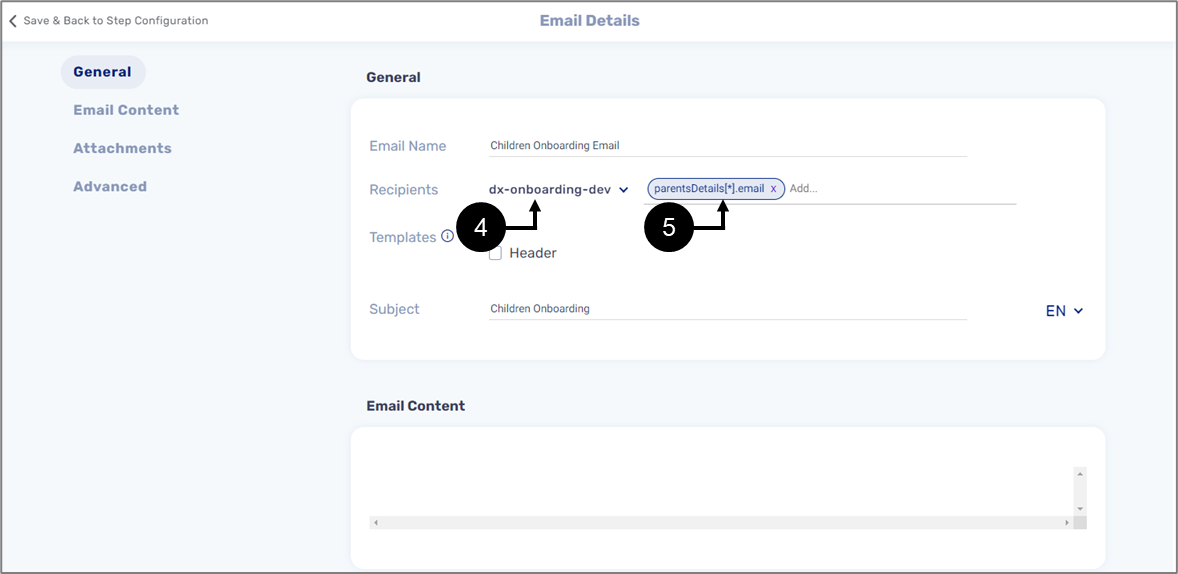
Figure 11: Recipients
- Under General, select the desired Deploy/Preview environment (4) and enter the mail recipient (5)
NOTE
To be able to send the email with the attachments to multiple recipients, use the full path of the data item: for example: parentsDetails[*].email.
- Enter the content of the email.
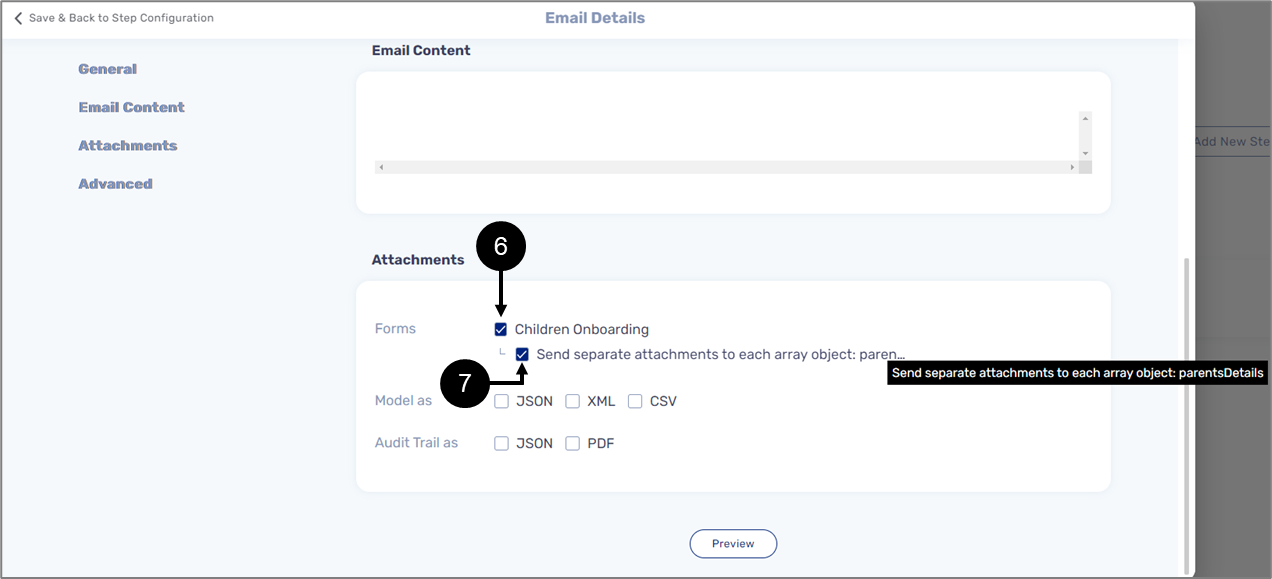
Figure 12: Attachments
- Under Attachments, click the checkbox (6) of the desired form and click the checkbox that indicates that each recipient will receive a separate attachment (7).
Each receipt will receive an email with a copy of the PDF form:
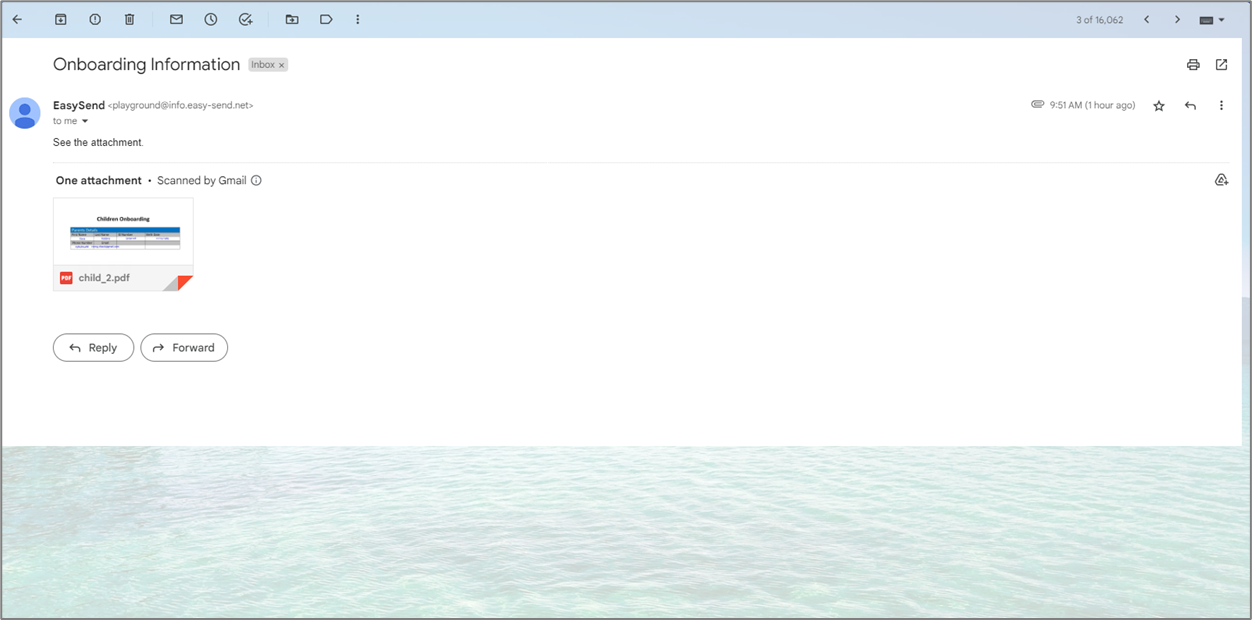
Figure 13: Email and Attachment
Was this article helpful?